
우주 맵 스타크래프트 맵 모음
'우주 맵' 태그가 등록된 맵을 모았습니다. 장르 하나로 찾기 어려운 플레이 방식, 난이도와 특징을 중심으로 인기 맵과 최신 맵을 비교해 보세요.
- 등록 맵
- 11개
- 누적 다운로드
- 3
- 누적 조회
- 440
인기 맵
다운로드와 조회 반응이 높은 맵입니다.
5V3C Kill4Minerals
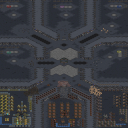
'5V3C Kill4Minerals'는 미네랄과 기본 유닛이 무료로 제공되고 적 처치 시 미네랄을 획득하는 블러드 스타일 유즈맵이다. 128×128 크기의 우주 타일셋 위에서 최대 5인(제목상 5대3 컴까기 구도)이 플레이하며, 시작 시 50 미네랄과 함께 일꾼, 관문/부화장/스포닝풀, 병영이 무료로 주어진다. 마린, 저글링, 질럿 등 1티어 유닛 또한 비용 없이 생산 가능해 초반부터 대규모 난전이 벌어진다. 유일한 자원 채취 대상은 가스이며, 이를 소모해 공격/방어 업그레이드와 테크 업그레이드를 진행하는 것이 핵심 전략이다. 적 유닛을 처치할 때마다 미네랄이 쌓여 추가 병력 생산이나 확장에 재투자되므로, 교전 승리가 곧 경제적 우위로 직결되는 스노우볼 구조다. 맵 크기가 작고 유닛 공급이 자유로워 게임 템포가 매우 빠르며, 업그레이드 타이밍과 병력 조합만 잘 맞추면 초보자도 부담 없이 즐길 수 있다. '5V3C Kill4Minerals3' 같은 후속 버전이 존재하는 것으로 보아 밸런스 조정이나 맵 확장이 지속된 것으로 보인다. 컴퓨터 상대 협동전이나 지인들과의 가벼운 난전용으로 적합하며, 플레이 전 버전 차이와 팀 구성(인간 대 컴퓨터 비율)을 확인하는 것이 좋다. '5V3C Kill4Minerals' is a blood-style UMS map where minerals and basic units are free, and killing enemies grants minerals. On a 128×128 space tileset, up to 5 players (configured as 5 vs 3 computers per the title) start with 50 minerals, free workers, gateways/hatcheries/spawning pools, barracks, and free Tier 1 units (Marines, Zerglings, Zealots). This enables massive battles from the early game. The only resource to mine is vespene gas, which funds attack/defense upgrades and tech research. Each kill adds minerals, creating a snowball economy where combat success directly fuels further production. The small map and free supply accelerate the pace, making upgrade timing and unit composition the decisive factors. It is accessible for beginners who grasp the upgrade cycle. The existence of a '5V3C Kill4Minerals3' version suggests ongoing balance tweaks. Recommended for co-op comp stomps or casual skirmishes with friends; verify the version and human-vs-computer team setup before starting.
마린 D 22웨이 (Marine D. 22-way)
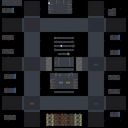
스타크래프트 브루드워 유즈맵 '마린 D 22웨이 버전 3.4'는 마린 컨트롤 극한을 시험하는 피하기 장르의 대표적인 맵이다. 원작자 Fart[smurf]부터 [ncm]LJ, blastyo-a, Nebby를 거쳐 팀 SoC의 SoC_SetApt가 22방향으로 대폭 개조한 버전으로, 기존 18웨이에서 더 촘촘한 탄막 패턴을 구현해 난이도와 완성도를 높였다. 우주 타일셋의 128x128 타일 맵 위에서 최대 6인이 협동하거나 경쟁하며, 마린 한 기씩을 조작해 사방에서 날아드는 투사체를 피하는 순수 컨트롤 승부가 핵심이다. 별도의 자원 관리나 유닛 생산 없이 시작부터 마린만 주어지며, 키보드 방향키 또는 마우스 이동으로 좁은 간격을 파고들어 생존 시간을 늘리는 방식이다. 22방향이라는 명칭답게 360도 전방위에서 예측 불가능한 궤적으로 포탄, 미사일, 레이저 등이 쏟아지며, 버전이 거듭될수록 패턴 속도와 밀도가 조절되어 숙련자도 긴장감을 늦출 수 없다. 협동 모드에서는 아군의 생존 여부가 전체 클리어에 영향을 주므로 서로의 위치를 살피며 회피 루트를 공유하는 팀워크가 중요하다. 맵 크기는 4096x4096으로 넓지 않지만 시야 제한과 투사체 밀집도로 체감 난이도가 높으며, 단판 10~20분 내외로 짧고 강렬한 플레이가 가능하다. 마린 컨트롤 연습용으로 입문하기 좋으나 후반 패턴은 반사 신경과 패턴 암기가 필수라 초보자는 반복 학습이 필요하다. 팀 SoC 아카이브를 따라온 올드 유저라면 버전별 변화상을 비교 플레이하기에도 의미 있는 자료다. 플레이 전에는 키보드 반응 속도와 마우스 감도를 본인 손에 맞춰 두고, 6인 풀방 기준 난이도 스케일링이 어떻게 적용되는지 확인하는 것이 좋다. StarCraft Brood War UMS map 'Marine D 22-way ver 3.4' is a representative dodge genre map that tests the limits of marine control. Starting from original author Fart[smurf], through [ncm]LJ, blastyo-a, Nebby, to Team SoC's SoC_SetApt who majorly modified it to 22 directions, this version implements denser bullet patterns than the previous 18-way, raising difficulty and completeness. On a 128x128 tile space tileset map, up to 6 players cooperate or compete, each controlling a single marine to dodge projectiles flying from all directions. With no resource management or unit production, only a marine is given from the start; the core is pure control survival using keyboard arrows or mouse movement to thread through narrow gaps. True to its 22-direction name, shells, missiles, and lasers pour in unpredictable trajectories from 360 degrees, and as versions progressed pattern speed and density have been tuned so even veterans cannot relax. In co-op mode, ally survival affects overall clear, making teamwork crucial to watch each other's positions and share dodge routes. The map size is 4096x4096, not large, but limited vision and projectile density create high perceived difficulty; a single round lasts 10-20 minutes for short, intense play. Good for marine control practice entry, but late patterns require reflexes and pattern memorization so beginners need repeated learning. For old users following Team SoC archives, it is meaningful material to compare version changes. Before play, adjust keyboard response and mouse sensitivity to your hand, and check how difficulty scaling applies at 6-player full house.
채팅방 스페이스 1.0 (Chatroom Space 1.0)
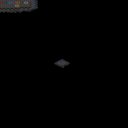
스타크래프트 브루드워의 우주 맵에서 영감을 받은 ‘Chatroom Space 1.0’은 8인용 멀티플레이를 위한 디자인을 갖춘 유즈맵으로, 우주 공간을 배경으로 한 넓은 필드에서 펼쳐지는 전투가 특징이다. 이 맵은 내부 설명에 따르면 ‘모든 적 건물 파괴’를 승리 조건으로 삼아, 플레이어는 각자의 기지 건설과 자원 관리, 그리고 전투력 증강을 통해 상대방을 제압해야 한다. 맵의 전체 크기는 4096×4096으로 매우 넓고, 우주 타일셋을 활용하여 시야가 제한적이며 전략적 깊이가 요구되는 환경을 제공한다. 특히, 우주 공간의 특성상 미네랄과 가스 분포가 넓게 흩어져 있어 자원 확보 경쟁이 치열해질 수 있으며, 이로 인해 초반 자원 확보와 멀티태스킹 능력이 중요해진다. 또한, 맵의 넓은 공간은 기동성과 병력 운용의 중요성을 부각시키며, 플레이어는 초반부터 전략적 움직임을 계획해야 한다. 맵의 난이도는 별도로 명시되지 않았지만, 넓은 공간과 우주 타일셋을 고려했을 때 초보보다는 중간 이상의 숙련자를 겨냥한 것으로 추정된다. 이 맵은 넓은 공간을 활용한 전투와 자원 관리, 기지 방어와 공격의 균형을 요구하는 ‘컴퓨터 상대 유즈맵’으로 분류된다. 초보 플레이어는 넓은 공간과 우주 맵의 특성상 입문하기 어려울 수 있으므로, 맵에 익숙해질 때까지는 싱글 플레이나 연습 모드를 추천한다. 또한, 건물을 파괴하는 목표 때문에 ‘디펜스’보다는 ‘밀리’에 가까운 플레이 스타일을 지향하며, 다수의 플레이어가 동시에 전투를 펼치는 경우가 많아 팀워크도 중요하다. 플레이 전에는 맵의 자원 분포와 주요 길목, 그리고 상대방의 움직임을 예의주시할 필요가 있다. 이 맵은 넓은 우주 공간에서 펼치는 전략적 전투를 즐기고자 하는 유저들에게 적합하며, 특히 멀티플레이에서 팀원과의 소통과 전략적 협력이 중요한 요소로 작용할 것이다. 멀티플레이를 즐기는 유저라면 이 맵의 넓은 공간을 활용한 다양한 전략을 시도해 볼 수 있을 것이다. 또한, 우주 타일셋의 어두운 배경은 플레이어의 시야를 제한하여 예측치 못한 전투가 자주 발생할 수 있으므로, 항상 맵의 전체 상황을 확인하는 습관을 기르는 것이 좋다. Chatroom Space 1.0 is a custom map inspired by the classic Brood War space maps, designed for 8-player multiplayer. Set in a vast cosmic battlefield, the map features large-scale combat where players must destroy all enemy structures to win. With a massive 4096×4096 grid, the map utilizes a space-themed tileset that restricts visibility, demanding strategic depth and careful planning. Mineral and gas deposits are spread widely across the map, intensifying early-game resource competition and making efficient gathering and multitasking essential. The expansive layout emphasizes mobility and troop deployment, forcing players to adopt forward-thinking strategies from the start. While difficulty isn’t officially specified, the map’s scale and space-themed design suggest it’s better suited for intermediate or advanced players rather than beginners. It falls under the category of AI-based custom maps, requiring a balance of combat, resource management, base defense, and offensive play. Novice players may struggle with the open space and space map mechanics, so practicing in single-player or custom modes before jumping into multiplayer is recommended. Since the objective revolves around destroying buildings, the gameplay leans more toward aggressive "melee" combat than passive defense. With multiple players engaging simultaneously, teamwork and coordination are crucial. Before diving in, study the resource distribution, key pathways, and opponent movements to stay ahead. Ideal for those who enjoy strategic battles in vast cosmic arenas, this map highlights the importance of communication and tactical cooperation in multiplayer matches. Players who thrive in multiplayer will find plenty of room to experiment with diverse strategies. The dark space-themed background limits visibility, often leading to unexpected encounters, so always keep an eye on the broader battlefield to avoid surprises.
Untitled Scenario
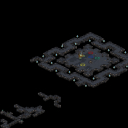
스타크래프트 브루드워의 유즈맵인 〈Untitled Scenario〉는 우주 테마의 광활한 맵에서 적 건물 파괴를 목표로 하는 UMS(Use Map Settings) 장르의 맵이다. 내부 설명에서도 확인할 수 있듯이 '모든 적 건물 파괴'가 승리 조건으로, 기본적인 디펜스와 밀리 요소가 혼합된 구조를 보인다. 3072x3072의 넓은 우주 맵에서 펼쳐지는 전투는 플레이어가 전략적으로 건물을 보호하고 공격로를 선택해야 한다는 점에서 긴장감을 유발한다. 맵의 특징은 넓은 맵 크기만큼이나 복잡한 지형과 요새화된 적 기지 배치에 있다. 중앙을 가로지르는 협곡이나 소규모 언덕, 우주 잔해 등이 자연 장애물로 작용해 진격로를 방해한다. 적 건물은 산개되어 있어 한 번의 공격으로 모든 목표를 소탕하기 어렵고, 방어 타워나 가드 건물도 곳곳에 배치되어 있어 초보 플레이어에게는 다소 까다로운 요소로 작용할 수 있다. 반대로 숙련자는 이러한 구조를 활용해 기습 공격이나 다중 공격로를 설계할 수 있어 전략의 깊이를 느낄 수 있다. 플레이 방식은 대체로 싱글 플레이어 기반의 컴까기(컴퓨터 상대하기) 형식을 띄며, AI가 조종하는 적 건물과 유닛을 상대로 전투를 벌인다. 맵 자체가 방어와 공격의 균형을 맞추도록 설계되어 있어, 단순히 무작정 돌진하는 것보다 적절한 자원 관리와 유닛 조합, 건물 배치 전략이 중요하다. 특히 우주 테마답게 중립 건물이 scarce하여 자원 확보가 어렵다는 점을 고려해야 한다. 또한, 넓은 맵을 효율적으로 활용하지 못하면 적의 반격에 무너질 위험이 크므로 맵 전체를 빠르게 스캔하고 주요 거점을 선점하는 것이 관건이다. 이 맵은 우주 배경의 웅장한 그래픽과 함께 넓은 시야를 제공하는 특성을 살려 긴장감 넘치는 전투를 즐기기에 최적화되어 있다. 초보자는 어려움을 느낄 수 있지만, 적 건물의 배치와 맵의 지형을 익히면 점차 전략적 사고가 요구되는 재미를 느낄 수 있을 것이다. 넓은 맵에서 펼쳐지는 대규모 전투를 즐기고 싶거나, 컴까기 장르의 기본기를 다지고 싶은 플레이어에게 추천할 만하다. 다만 한 번의 실수로 모든 것이 무너질 수 있는 높은 난이도와 좁은 길목에서의 치열한 전투를 감안해야 한다. This Brood War custom map, Untitled Scenario, is a UMS (Use Map Settings) map set in a vast space-themed 3072x3072 battlefield where the core objective is to destroy all enemy buildings. As indicated in the internal description, the victory condition is straightforward—eliminate every enemy structure—yet the execution demands strategic depth due to the map's sprawling design and fortified enemy base layouts. The map's defining feature is its expansive cosmic terrain, featuring canyons, elevated plateaus, and scattered space debris that serve as natural obstacles. Enemy buildings are strategically dispersed, making it nearly impossible to clear all targets in a single push. Additionally, defensive towers and guard structures are interspersed throughout the map, posing significant challenges for inexperienced players. For seasoned players, however, these elements offer opportunities to craft intricate multi-pronged assaults or leverage ambush tactics. Gameplay revolves around a single-player vs. AI format, commonly referred to as "compkagi" (fighting against computer-controlled opponents) in the Korean Brood War community. The map's design emphasizes a balance between defense and offense, rewarding players who manage resources wisely, deploy units effectively, and position buildings strategically. The scarcity of neutral buildings in this space-themed setting further intensifies the challenge, as securing resources becomes a critical early-game priority. Efficient scanning of the entire map and early control of key locations are essential to avoid falling victim to enemy counterattacks. Untitled Scenario excels in delivering an immersive, large-scale combat experience thanks to its grand space-themed visuals and wide field of view. While beginners may find the map daunting, mastering the enemy's building placements and terrain nuances will gradually unveil the deeper strategic layers that make this map engaging. It is particularly recommended for players seeking intense large-scale battles or aiming to hone their skills in the compkagi genre. However, be prepared for high-stakes gameplay where a single mistake can lead to a swift and irreversible defeat, especially in tight choke points.
플랫폼 E57IW (Platform E57IW)
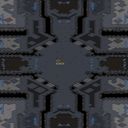
‘Platform E57IW’는 스타크래프트 브루드워의 UMS 맵으로, 8명의 플레이어가 우주 맵에서 펼쳐지는 전투에 참여하는 디펜스 장르의 유즈맵이다. 맵의 중앙에는 거대한 플랫폼 구조물이 자리 잡고 있으며, 각 플레이어는 이 플랫폼을 중심으로 배치된 건물을 보호하거나 공격해야 한다. 맵의 특징은 네모난 플랫폼들이 계층적으로 배치되어 있어, 각 층마다 적의 공격 루트가 나뉘어지는 구조다. 특히 플랫폼 간의 연결 통로가 좁고, 각 층 사이에 높이 차이가 있어 유닛의 이동 경로가 제한된다. 이 때문에 전략적인 시야 확보와 병력 배치, 그리고 빠른 반응이 필수적이다. 플레이어는 초반에 자원을 확보한 뒤, 적의 건물을 파괴하거나 방어선을 구축하는 데 집중해야 하며, 맵의 지형을 활용한 방어 태세나 기습 공격이 승패를 좌우할 수 있다. 또한, 플랫폼 간의 고저차가 있기 때문에 공중 유닛의 활용도 중요해진다. 초보자의 경우, 맵의 구조를 충분히 숙지하지 못해 적의 공격 루트를 틀어막지 못하는 경우가 많으므로, 맵을 여러 번 플레이해보면서 플랫폼 간의 연결 구조와 각 층의 중요 위치를 파악하는 것이 좋다. 이 맵은 주로 디펜스와 공격 전술을 동시에 요구하는 만큼, 팀워크와 전략적 사고가 중요한 유즈맵으로, 스타크래프트의 다양한 유즈맵 중에서도 독특한 구조와 긴장감을 제공한다. 특히 우주 맵의 배경과 조화된 플랫폼 디자인이 시각적으로도 흥미를 더한다. 이 맵은 디펜스와 공격 전술을 연마하고자 하는 플레이어들에게 추천할 만한 작품이다. 또한, 맵의 구조상 긴장감이 지속되기 때문에 플레이 시간이 상당히 긴 편이며, 한 번의 실수가 승패를 가를 수 있어 집중력을 요구하는 맵으로도 손꼽힌다. 이 맵을 즐기기 위해서는 빠른 미네랄 수급과 테란의 경우 벙커링, 저그의 경우 뮤탈리스크 활용, 프로토스의 경우 질럿과 드라군의 조합을 고려해보는 것이 좋다. 맵의 플랫폼 구조는 각 플레이어의 시작 위치와도 밀접한 관련이 있으므로, 시작 위치를 잘 활용하는 것도 승리의 핵심 요소다. 이 맵은 스타크래프트 유즈맵 커뮤니티에서 인기 있는 디펜스 장르의 대표작 중 하나로, 특히 우주 맵의 특성을 살린 디자인과 긴장감 있는 진행이 특징이다. 플레이 전에는 맵의 구조와 각 플랫폼의 연결 방식을 미리 확인해보는 것이 좋다. 또한, 팀 플레이를 중시하는 맵이므로, 팀원과의 원활한 소통도 필수적이다. 이 맵은 스타크래프트의 유즈맵답게 자유로운 플레이 스타일을 요구하지만, 기본적인 빌드와 전략이 없으면 쉽게 무너질 수 있으므로, 초보자는 보수적인 플레이를 추천한다. 맵의 난이도는 보통 수준으로, 초보자와 숙련자 모두 즐길 수 있지만, 숙련자들은 더욱 전략적인 플레이를 요구받는다. 이 맵은 스타크래프트의 유즈맵 among the most unique defense maps due to its tiered platform structure and constrained movement paths. Players must balance between resource gathering and aggressive expansion while keeping an eye on enemy advances through narrow corridors. The varying heights between platforms make air units essential, adding a dynamic layer to both offense and defense. For beginners, mastering the map’s layout is critical, as poor positioning can lead to quick defeats. The map rewards those who can adapt their strategies mid-game, whether through defensive fortifications or calculated rushes. The visual design, with its sci-fi platform aesthetic, enhances the immersive experience, making it a standout in the UMS genre. Team coordination is highly recommended, as miscommunication can lead to critical vulnerabilities. Players should prioritize early scouting to identify enemy strategies and adjust their defenses accordingly. The map’s difficulty lies in its depth rather than raw complexity, appealing to both casual and competitive players. Overall, Platform E57IW is a must-try for fans of strategic defense maps, offering a blend of tension, creativity, and tactical depth that keeps matches engaging from start to finish.
KILL the flag
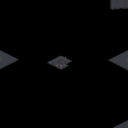
KILL the flag는 6인용 우주 테마 맵으로, 파일명에 표기된 '3x3' 구성에서 알 수 있듯 3대3 팀전 구도를 기본으로 한다. 맵 크기는 256×256 타일로 표준 밀리 맵과 동일한 규격이며, 우주 타일셋 특유의 어두운 배경과 플랫폼 지형이 전투 공간을 형성한다. 내부 설명인 'Destroy an enemy power generator to eliminate them'에 따라 각 진영의 핵심 구조물인 파워 제너레이터를 파괴하면 해당 플레이어 또는 팀이 탈락하는 승리 조건을 가진다. 이는 넥서스 부수기류 맵의 변형으로 볼 수 있으며, 자원 채취와 병력 생산을 병행하면서 상대 본진의 핵심 시설을 노리는 전략적 판단이 승부를 가른다. 진행 방식은 밀리 베이스에 가깝다. 미네랄과 가스 지분이 고르게 분포돼 있어 초반 확장 타이밍과 멀티태스킹 능력이 중요하고, 우주 맵 특성상 공중 유닛과 드랍십·셔틀 운용이 지상 루트보다 자유롭다. 3인 팀 단위로 움직이기 때문에 아군과의 병력 합류, 수비 라인 공유, 공동 드랍 등 협력 플레이가 필수적이다. 파워 제너레이터는 일반적인 넥서스나 커맨드 센터보다 체력·방어력 수치가 다르게 설정돼 있을 가능성이 높으므로, 공격 조합을 짜기 전 정찰로 내구도를 확인하는 습관이 필요하다. 추천 대상은 밀리 기본기가 갖춰진 중급 이상 유저, 그리고 팀원 간 음성·핑 소통이 원활한 3인 파티다. 초보자는 자원 관리와 다중 전선 대응이 버거울 수 있다. 플레이 전 확인 포인트는 △파워 제너레이터 정확한 위치와 스펙 △맵 중앙·코너 확장 기지 수와 수비 난이도 △공중·지상 밸런스를 고려한 종족별 유리도 등이다. 별도 트리거나 유닛 강화 시스템이 보이지 않으므로 순수한 밀리 실력과 팀워크로 승부하는 정통파 팀전 맵으로 즐기기 좋다. KILL the flag is a 6-player space-themed map. As the filename indicates a "3x3" setup, the default format is 3 versus 3 team play. The map size is 256×256 tiles, identical to standard melee maps, and the space tileset's dark background and platform terrain shape the battlefield. Following the internal description "Destroy an enemy power generator to eliminate them," destroying each faction's key structure—the power generator—eliminates that player or team, serving as the victory condition. This can be seen as a variant of Nexus-destroy maps, requiring strategic judgment to manage resource gathering and unit production while targeting the enemy's core facility. Gameplay resembles standard melee. Minerals and gas are evenly distributed, making early expansion timing and multitasking crucial. The space setting grants greater freedom for air units and drop ship/shuttle operations compared to ground routes. Since teams move in groups of three, cooperative play is essential: merging forces, sharing defensive lines, and coordinating joint drops. The power generator likely has different HP and armor values than a normal Nexus or Command Center, so scouting its durability before committing an attack composition is advisable. Recommended for intermediate-or-higher players with solid melee fundamentals and 3-person parties capable of smooth voice or ping communication. Beginners may find resource management and multi-front response overwhelming. Pre-play checkpoints include: exact generator location and stats, number and defensibility of central and corner expansions, and race-specific advantages considering air-ground balance. With no visible custom triggers or unit upgrade systems, this is a pure melee-skill-and-teamwork map for authentic team battle enjoyment.
던 오브 더 데드 2.1.3 (Dawn Of The Dead 2.1.3)
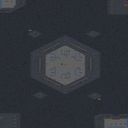
던 오브 더 데드 2.1.3(Dawn Of The Dead 2.1.3)은 스타크래프트 브루드워 유즈맵(UMS) 중 좀비 생존 디펜스 장르에 속하는 6인용 맵이다. 내부 맵 설명에 따르면 'NEED FULL HOUSE → Pick Your Units → Find Your Defensive Position → Kill The Zombies → Survive 60 Minutes' 순서로 진행되며, 6인 풀하우스가 필요하고 각자 유닛을 선택해 방어 위치를 잡은 뒤 몰려드는 좀비 웨이브를 막아내며 60분을 버티는 생존 디펜스 구조다. 맵 크기는 6144×6144 픽셀(192×192 타일)로 표준적인 중형 맵 크기이며, 타일셋은 우주(Space) 타일셋을 사용하여 우주 정거장이나 함선 내부를 연상시키는 어두운 분위기를 연출한다. cp949 인코딩 환경에서 제작되어 파일명에 '[)awn 0f The [)ead'와 같은 깨진 문자가 남아 있지만, 내부 맵 제목은 'Dawn Of The Dead 2.1.3'으로 정상 표기된다. 게임 플레이는 6인 풀하우스 기준 'Pick Your Units' 단계에서 각자 원하는 유닛을 선택한 뒤, 'Find Your Defensive Position' 단계에서 맵 곳곳의 방어 거점 중 하나를 선점한다. 이후 'Kill The Zombies → Survive 60 Minutes' 루프가 핵심 루프로, 웨이브가 지날수록 좀비의 수와 체력, 공격력이 상승해 중반 이후엔 업그레이드와 협동 공방이 필수적이다. 우주 타일셋 특유의 어두운 배경과 좁은 복도, 방어 타워 설치 가능 구역 등 지형지물을 활용한 입구 막기(입구막기) 플레이가 핵심 전략으로 작용한다. 6인 풀하우스 기준이라 인원이 모자라면 난이도가 급격히 상승하며, 솔로 또는 소수 인원으로는 60분 생존이 사실상 불가능에 가깝다. 난이도는 '보통~어려움' 사이로 추정되며, 초보자는 유닛 선택과 업그레이드 순서 숙지가 필요하다. 추천 플레이는 6인 풀하우스 협동 플레이며, 솔로나 2~3인으로는 클리어 난이도가 급격히 상승한다. 추천 태그로는 좀비 디펜스, 서바이벌, 좀비, 6인용, 우주 맵, 생존, 디펜스, 입구막기 등이 적절하다. Dawn Of The Dead 2.1.3 is a 6-player Use Map Settings (UMS) map belonging to the zombie survival defense genre. According to the internal description, the flow follows 'NEED FULL HOUSE → Pick Your Units → Find Your Defensive Position → Kill The Zombies → Survive 60 Minutes', requiring a full house of 6 players, each picking a unit, securing a defensive position, then holding out against zombie waves for 60 minutes. The map size is 6144×6144 pixels (192×192 tiles), a standard mid-size map, using the Space tileset to create a dark space station or starship interior atmosphere. The filename shows cp949 encoding corruption ('[)awn 0f The [)ead'), but the internal title reads correctly as 'Dawn Of The Dead 2.1.3'. Gameplay proceeds in phases: 'Pick Your Units' lets each player choose a hero or combat unit, 'Find Your Defensive Position' has players claim choke points or rooms across the map, then 'Kill The Zombies → Survive 60 Minutes' becomes the core loop. Zombie waves—Zerglings, Hydralisks, Ultralisks, and other Zerg units—spawn in increasing numbers and strength. Players must upgrade weapons, armor, and abilities, build defensive structures at choke points, and coordinate focus fire. The Space tileset provides dark corridors, narrow chokepoints, and turret-buildable areas, making choke-point defense (entrance blocking) the core strategy. A full house of 6 is practically mandatory; fewer players cause difficulty to spike sharply, making 60-minute survival nearly impossible solo or with 2–3 players. Difficulty is estimated at 'Normal to Hard'; beginners need to learn unit picks and upgrade paths. Recommended play is 6-player cooperative; solo or 2–3 player clears are extremely difficult. Recommended tags: Zombie Defense, Survival, Zombie, 6-Player, Space Map, Survival, Defense, Choke Point Defense.
토르의 대담함 (Thor's Audacity) Map 13b
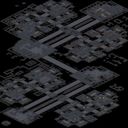
스타크래프트 브루드워 유즈맵 '토르의 대담함 Map 13b'는 우주 타일셋을 배경으로 펼쳐지는 싱글플레이 캠페인 미션으로, 파일명 Map13b.scx와 내부 브리핑에서 '맵 13b'라는 회차 정보가 확인된다. 플레이어는 저그 세력만이 가로막는 전장에서 별도의 영웅 유닛이나 특수 능력 없이 순수 병력 운용과 자원 관리만으로 세레브레이트를 제거하고 다음 거점인 듀라나로 진격해야 한다. 맵 크기는 256x256 타일로 표준적인 캠페인 미션 규모를 갖추고 있으며, 우주 지형 특유의 좁은 통로와 고립된 플랫폼 배치가 병력 이동 경로를 제한해 방어선 돌파의 긴장감을 자연스럽게 높인다. 진행 방식은 고전 캠페인처럼 목표 지점 파괴 후 다음 구역으로 이동하는 선형 구조로, 복잡한 트리거 이벤트나 돌발 보스전보다는 병력 구성과 업그레이드 타이밍, 멀티태스킹 능력이 승패를 가르는 정석적인 실력 승부다. 저그 특유의 점막 확산과 히드라리스크, 울트라리스크 조합이 주된 위협으로 등장하므로 공중 유닛과 범위 공격 병력을 적절히 섞어 대응하는 것이 핵심 공략 포인트다. 난이도는 초반 주어진 병력만으로 돌파하기엔 벅차 보이나, 자원 확보와 테크트리 올리기가 자유로워 숙련자라면 30분 내외로 클리어 가능하다. 캠페인 스토리 몰입감보다 순수한 미션 수행 재미와 브루드워 오리지널 미션 감성을 그리워하는 플레이어에게 적합하다. 플레이 전 한글 패치 적용 여부와 브리핑 텍스트 인코딩 깨짐 현상을 확인하고, 난이도 조절 트리거가 없는 순수 실력 승부임을 인지한 뒤 시작하는 것이 좋다. StarCraft Brood War UMS map 'Thor's Audacity Map 13b' is a single-player campaign mission set on the Space tileset, with the filename Map13b.scx and internal briefing confirming the episode number 'Map 13b'. The player must destroy a Cerebrate and advance to the next destination, Dyrana, on a battlefield where only Zerg forces stand in the way, relying purely on army control and resource management without any hero units or special abilities. The map size is 256x256 tiles, a standard campaign mission scale, and the Space terrain's characteristic narrow corridors and isolated platforms naturally restrict army movement paths, heightening the tension of breaking through defensive lines. The progression follows a classic linear campaign structure of destroying an objective and moving to the next zone, where victory depends on army composition, upgrade timing, and multitasking rather than complex trigger events or sudden boss fights. The main threats are typical Zerg creep spread, Hydralisk, and Ultralisk compositions, so mixing air units and splash damage units is the key strategy. Difficulty appears challenging with only starting forces, but free resource gathering and teching allow veterans to clear within 30 minutes. It suits players seeking pure mission gameplay and nostalgia for original Brood War missions rather than deep story immersion. Before playing, check for Korean patch application and briefing text encoding corruption, and be aware it is a pure skill test without difficulty adjustment triggers.
패스트 포서블 맵 (Fastest Possible Map)
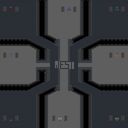
스타크래프트 브루드워 유즈맵으로 유명한 ‘•Fa§te§tPo§§ible Map• WesT©’는 밀리 기반 맵이지만, 이름과 달리 순수한 밀리가 아니라 특수한 구조와 룰이 적용된 컴까기 유즈맵으로 추정된다. 내부 맵 설명에 ‘Same Layout as Space but different Look’이 포함된 점과 파일명에 ‘$$Fastest WesT$$’가 명시된 점을 고려할 때, 기존의 스페이스맵 스타일을 재활용한 개선형 맵으로 보인다. 4인용 맵이며, 우주 타일셋을 기반으로 4096x4096의 넓은 공간을 활용한 디자인으로 보이며, minerals 채널이 50개씩 쌓여 있어 초반 자원 확보에 영향을 줄 수 있는 구조로 추정된다. 이 맵의 가장 큰 특징은 ‘Fastest’라는 이름에서 유추할 수 있듯, 빠른 진행과 전략적 선택을 요구하는 플레이 스타일로 보인다. 맵이 넓고 minerals 채널이 체계적으로 배치되어 있어, 플레이어는 초반 자원 확보와 병력의 배치, 그리고 적절한 타이밍에 공격을 감행해야 한다. 또한, ‘WesT©’라는 제작자 명과 ‘oP WesT’ 채널이 언급된 점을 보아, 이러한 빠른 진행과 전략적 깊이를 강조하는 맵으로 설계되었을 가능성이 크다. 맵의 이름과 구조상, 단순히 자원 확보와 테크 업그레이드만을 목표로 하는 것이 아니라, 상대방의 움직임을 예측하고 신속한 대응을 요구하는 플레이 경험을 제공할 것으로 예상된다. 이 맵의 추천 대상은 스타크래프트 브루드워의 밀리 경험이 어느 정도 있는 플레이어들로, 빠른 판단력과 전략적 사고가 요구되는 만큼 초보자보다는 숙련자나 중급 이상 플레이어에게 적합할 것이다. 또한, 넓은 맵과 minerals 채널의 배치가 자원 전쟁과 병력 운용의 중요성을 강조하기 때문에, 자원 관리와 스플릿 컨트롤에 자신 있는 플레이어에게도 추천할 만하다. 다만, 맵의 구조상 특정 위치에 minerals가 집중되어 있어, 자원 확보의 균형을 맞추는 것이 관건일 수 있다. 따라서, 이 맵을 플레이하기 전에는 minerals의 배치와 맵의 주요 길목을 미리 확인하고, 상대방의 전략에 따라 유동적으로 대응할 준비를 해두는 것이 중요하다. This StarCraft: Brood War custom map, famous as a *•Fa§te§tPo§§ible Map• WesT©*, is a mill-based map, but despite its name, it isn’t pure mill—it appears to be a unique custom map with special structures and rules. Given that the internal map description includes "Same Layout as Space but different Look" and the filename explicitly states "$$Fastest WesT$$," it seems to be an improved version of the classic Space map. Designed for four players, it likely utilizes a space-themed tileset and a large 4096x4096 playfield, with minerals arranged in stacks of 50, potentially impacting early resource gathering. The map’s defining feature, as suggested by its name "Fastest," is its emphasis on fast-paced gameplay and strategic decision-making. The spacious design and systematic mineral distribution require players to secure resources early, position their forces effectively, and strike at the right moment. Additionally, references to the creator "WesT©" and the "oP WesT" channel imply that the map is intentionally designed to highlight quick, dynamic play with strategic depth. Rather than focusing solely on resource accumulation and tech upgrades, it encourages predicting opponent movements and making swift responses. This map is best suited for players with some prior Brood War mill experience, as it demands quick judgment and strategic thinking—making it more appropriate for intermediate to advanced players rather than beginners. The wide playfield and mineral distribution also emphasize resource competition and unit control, so it’s highly recommended for players confident in resource management and split control. However, since minerals are concentrated in certain areas, balancing resource acquisition may be a key challenge. Before playing, it’s important to familiarize yourself with mineral layouts and key pathways, and to prepare flexible responses based on your opponent’s strategy.
2f - madness
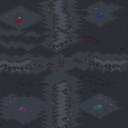
‘2f - madness’는 3인 협동으로 적 벙커를 공략하는 유즈맵이다. 우주 타일셋의 64×64 타일, 2048×2048 크기 전장에서 진행되며, 내부 설명 ‘Zniszcz bunkier przeciwnika(적 벙커 파괴)’가 핵심 목표임을 보여준다. 플레이어 3명이 한 팀을 이뤄 컴퓨터가 점거한 견고한 벙커 라인을 돌파해야 하므로, 전형적인 ‘컴까기’ 스타일의 협동 미션으로 보인다. 시작 지점은 분리되어 있으나 합류가 용이하고, 미네랄·가스 배치가 넉넉해 초반 빌드 자유도가 높다. 적 기지는 다층 벙커와 터렛, 유닛 생산 시설로 방어되어 있어 단일 병종으론 뚫기 어렵다. 공성 전차·수호자·리버 등 원거리 화력과 드랍십·셔틀을 활용한 우회 공략, 사이오닉 스톰·이레디에이트 같은 광역 기술 조합이 요구된다. 트리거로 웨이브가 추가되거나 시간 제한이 걸린 흔적은 이미지에서 확인되지 않으나, 벙커 밀집도와 적 유닛 구성을 볼 때 중반 이후 난이도 상승이 예상된다. 3인 고정 인원이라 인원 부족 시 난이도 급상승하므로, 음성 채팅 가능한 지인끼리 즐기기 적합하다. 플레이 전 체크포인트: ① 3인 풀파티 구성 ② 공성·공중·광역 기술 분담 ③ 초반 자원 확보 후 합류 타이밍 조율. 예상 소요 시간 20~30분 내외로, 가볍게 한 판 즐기기 좋은 협동 컴까기 맵이다. ‘2f - madness’ is a three-player cooperative UMS map focused on destroying an enemy bunker. Set on a 64×64 tile space tileset spanning 2048×2048, the internal description ‘Zniszcz bunkier przeciwnika’ (Destroy enemy bunker) reveals the core objective. Three players form a single team to breach a computer-held fortified bunker line, making it a classic ‘comp stomp’ style co-op mission. Starting locations are separated but easy to merge, and generous mineral/gas placement allows flexible early builds. The enemy base is defended by layered bunkers, turrets, and production facilities, so a single unit composition cannot break through. Long-range firepower such as siege tanks, guardians, and reavers, combined with dropship/shuttle flanking and area-of-effect spells like psionic storm and irradiate, are essential. While triggers for waves or time limits are not visible in the image, the bunker density and enemy composition suggest a difficulty spike in the mid-to-late game. Because the map is fixed at three players, missing members drastically raises difficulty, so it is best enjoyed with friends on voice chat. Pre-play checklist: ① assemble a full three-player party, ② assign siege, air, and AoE roles, ③ coordinate early resource gathering and merge timing. Expected playtime is around 20–30 minutes, making it a solid choice for a quick cooperative comp-stomp session.
로스트 인 스페이스 디렉터스 컷 (Lost In Space Directors Cut)
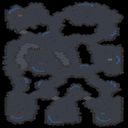
스타크래프트 브루드워의 우주 맵으로 유명한 ‘Lost In Space Directors Cut’는 넓은 우주 공간과 섬세한 지형 디자인으로 플레이어들에게 낯선 공간에서의 긴장감을 선사하는 밀리 유즈맵이다. 이 맵은 이름 그대로 우주 공간을 배경으로 펼쳐지며, 거대한 우주 정거장이나 행성 파편들이 흩어져 있는 독특한 맵 구조를 자랑한다. 맵 중앙에는 거대한 우주 정거장이 자리 잡고 있으며, 이곳을 중심으로 플레이어들은 자원을 채취하고, 건물을 건설하며, 적진을 공격하거나 방어해야 한다. 넓은 맵 크기와 복잡한 지형은 전략적 깊이를 더해주며, 특히 우주 공간의 개방감과 복잡한 통로들은 전투 시 유닛의 기동성과 시야를 제한하는 요소가 된다. 또한, 맵 곳곳에 scattered한 미네랄과 베스핀 가스가 배치되어 있어 자원 전쟁도 치열하게 전개된다. 전투는 주로 우주 정거장 주변에서 벌어지며, 좁은 통로나 함정 구간을 활용한 기습 공격이 빈번히 일어난다. 맵의 특징상 초반 자원 확보가 중요하며, 초반 러시나 테란의Siege Tank, 프로토스의 High Templar, 저그의 Ultralisks 등 강력한 유닛들이 전략의 핵심으로 작용한다. 이 맵은 일반적으로 7명의 플레이어가 참여하며, 밀리 맵 특성상 팀플레이보다는 개인전이나 자유-for-all(FFA) 형태로 진행된다. 넓은 맵과 복잡한 지형으로 인해 플레이어들은 끊임없이 위치를 변경해야 하며, 시야 확보와 자원 관리, 유닛 컨트롤이 요구된다. 초보자보다는 경험이 있는 플레이어들에게 적합한 맵으로, 우주 공간의 분위기와 전략적 깊이가 조화를 이룬佳作이라 할 수 있다. 특히, 우주 맵 특유의 고립감과 불안정한 지형은 전투의 긴장감을 한층 높여준다. 플레이 전에는 맵의 주요 지점과 자원 분포를 숙지하는 것이 중요하며, 통로와 장애물 위치를 미리 파악해 두면 전투에서 유리한 위치를 점할 수 있다. 또한, 초반 자원 확보를 위해 미네랄과 베스핀 가스가 많은 곳을 먼저 점령하는 전략이 유효하다. 이 맵은 스타크래프트 유즈맵의 대표격으로 손꼽히며, 우주를 배경으로 한 전략적 전투를 즐기고 싶은 플레이어들에게Strong 추천할 만한 작품이다. Lost In Space Directors Cut is a popular StarCraft: Brood War custom map set in outer space, offering players a tense experience in unfamiliar territory through its vast cosmic spaces and intricate terrain design. As the name suggests, the map unfolds against the backdrop of space, featuring a unique layout with massive space stations and scattered planetary debris. At the center lies a colossal space station, around which players gather resources, construct buildings, attack enemy bases, and defend their own. The expansive map size and complex terrain add strategic depth, while the open expanse of space and convoluted pathways restrict unit mobility and visibility during battles. Scattered mineral patches and vespene geysers throughout the map intensify resource competition. Battles primarily unfold around the space station, where narrow corridors and trap zones make ambushes a common tactic. Given the map’s nature, securing early resources is crucial, and early rushes or powerful units like Terran Siege Tanks, Protoss High Templars, and Zerg Ultralisks play pivotal roles in strategy. The map typically accommodates seven players and is played in free-for-all (FFA) or solo formats rather than team-based play. Due to its vastness and intricate terrain, players must constantly reposition, manage resources, and control units effectively. This makes it a map better suited for experienced players rather than beginners, though its blend of cosmic atmosphere and deep strategy makes it a masterpiece. The map’s unique sense of isolation and unstable terrain heightens the tension of battles. Before playing, it’s important to familiarize yourself with key locations and resource distribution, as knowing the pathways and obstacles in advance can give you a strategic advantage. A strong early-game strategy involves securing high-mineral and vespene-rich areas first. As a quintessential StarCraft custom map, Lost In Space Directors Cut comes highly recommended for players seeking strategic combat set against the backdrop of space.
최근 등록된 맵
새로 추가된 파일과 버전을 확인하세요.
로스트 인 스페이스 디렉터스 컷 (Lost In Space Directors Cut)
스타크래프트 브루드워의 우주 맵으로 유명한 ‘Lost In Space Directors Cut’는 넓은 우주 공간과 섬세한 지형 디자인으로 플레이어들에게 낯선 공간에서의 긴장감을 선사하는 밀리 유즈맵이다. 이 맵은 이름 그대로 우주 공간을 배경으로 펼쳐지며, 거대한 우주 정거장이나 행성 파편들이 흩어져 있는 독특한 맵 구조를 자랑한다. 맵 중앙에는 거대한 우주 정거장이 자리 잡고 있으며, 이곳을 중심으로 플레이어들은 자원을 채취하고, 건물을 건설하며, 적진을 공격하거나 방어해야 한다. 넓은 맵 크기와 복잡한 지형은 전략적 깊이를 더해주며, 특히 우주 공간의 개방감과 복잡한 통로들은 전투 시 유닛의 기동성과 시야를 제한하는 요소가 된다. 또한, 맵 곳곳에 scattered한 미네랄과 베스핀 가스가 배치되어 있어 자원 전쟁도 치열하게 전개된다. 전투는 주로 우주 정거장 주변에서 벌어지며, 좁은 통로나 함정 구간을 활용한 기습 공격이 빈번히 일어난다. 맵의 특징상 초반 자원 확보가 중요하며, 초반 러시나 테란의Siege Tank, 프로토스의 High Templar, 저그의 Ultralisks 등 강력한 유닛들이 전략의 핵심으로 작용한다. 이 맵은 일반적으로 7명의 플레이어가 참여하며, 밀리 맵 특성상 팀플레이보다는 개인전이나 자유-for-all(FFA) 형태로 진행된다. 넓은 맵과 복잡한 지형으로 인해 플레이어들은 끊임없이 위치를 변경해야 하며, 시야 확보와 자원 관리, 유닛 컨트롤이 요구된다. 초보자보다는 경험이 있는 플레이어들에게 적합한 맵으로, 우주 공간의 분위기와 전략적 깊이가 조화를 이룬佳作이라 할 수 있다. 특히, 우주 맵 특유의 고립감과 불안정한 지형은 전투의 긴장감을 한층 높여준다. 플레이 전에는 맵의 주요 지점과 자원 분포를 숙지하는 것이 중요하며, 통로와 장애물 위치를 미리 파악해 두면 전투에서 유리한 위치를 점할 수 있다. 또한, 초반 자원 확보를 위해 미네랄과 베스핀 가스가 많은 곳을 먼저 점령하는 전략이 유효하다. 이 맵은 스타크래프트 유즈맵의 대표격으로 손꼽히며, 우주를 배경으로 한 전략적 전투를 즐기고 싶은 플레이어들에게Strong 추천할 만한 작품이다. Lost In Space Directors Cut is a popular StarCraft: Brood War custom map set in outer space, offering players a tense experience in unfamiliar territory through its vast cosmic spaces and intricate terrain design. As the name suggests, the map unfolds against the backdrop of space, featuring a unique layout with massive space stations and scattered planetary debris. At the center lies a colossal space station, around which players gather resources, construct buildings, attack enemy bases, and defend their own. The expansive map size and complex terrain add strategic depth, while the open expanse of space and convoluted pathways restrict unit mobility and visibility during battles. Scattered mineral patches and vespene geysers throughout the map intensify resource competition. Battles primarily unfold around the space station, where narrow corridors and trap zones make ambushes a common tactic. Given the map’s nature, securing early resources is crucial, and early rushes or powerful units like Terran Siege Tanks, Protoss High Templars, and Zerg Ultralisks play pivotal roles in strategy. The map typically accommodates seven players and is played in free-for-all (FFA) or solo formats rather than team-based play. Due to its vastness and intricate terrain, players must constantly reposition, manage resources, and control units effectively. This makes it a map better suited for experienced players rather than beginners, though its blend of cosmic atmosphere and deep strategy makes it a masterpiece. The map’s unique sense of isolation and unstable terrain heightens the tension of battles. Before playing, it’s important to familiarize yourself with key locations and resource distribution, as knowing the pathways and obstacles in advance can give you a strategic advantage. A strong early-game strategy involves securing high-mineral and vespene-rich areas first. As a quintessential StarCraft custom map, Lost In Space Directors Cut comes highly recommended for players seeking strategic combat set against the backdrop of space.
토르의 대담함 (Thor's Audacity) Map 13b
스타크래프트 브루드워 유즈맵 '토르의 대담함 Map 13b'는 우주 타일셋을 배경으로 펼쳐지는 싱글플레이 캠페인 미션으로, 파일명 Map13b.scx와 내부 브리핑에서 '맵 13b'라는 회차 정보가 확인된다. 플레이어는 저그 세력만이 가로막는 전장에서 별도의 영웅 유닛이나 특수 능력 없이 순수 병력 운용과 자원 관리만으로 세레브레이트를 제거하고 다음 거점인 듀라나로 진격해야 한다. 맵 크기는 256x256 타일로 표준적인 캠페인 미션 규모를 갖추고 있으며, 우주 지형 특유의 좁은 통로와 고립된 플랫폼 배치가 병력 이동 경로를 제한해 방어선 돌파의 긴장감을 자연스럽게 높인다. 진행 방식은 고전 캠페인처럼 목표 지점 파괴 후 다음 구역으로 이동하는 선형 구조로, 복잡한 트리거 이벤트나 돌발 보스전보다는 병력 구성과 업그레이드 타이밍, 멀티태스킹 능력이 승패를 가르는 정석적인 실력 승부다. 저그 특유의 점막 확산과 히드라리스크, 울트라리스크 조합이 주된 위협으로 등장하므로 공중 유닛과 범위 공격 병력을 적절히 섞어 대응하는 것이 핵심 공략 포인트다. 난이도는 초반 주어진 병력만으로 돌파하기엔 벅차 보이나, 자원 확보와 테크트리 올리기가 자유로워 숙련자라면 30분 내외로 클리어 가능하다. 캠페인 스토리 몰입감보다 순수한 미션 수행 재미와 브루드워 오리지널 미션 감성을 그리워하는 플레이어에게 적합하다. 플레이 전 한글 패치 적용 여부와 브리핑 텍스트 인코딩 깨짐 현상을 확인하고, 난이도 조절 트리거가 없는 순수 실력 승부임을 인지한 뒤 시작하는 것이 좋다. StarCraft Brood War UMS map 'Thor's Audacity Map 13b' is a single-player campaign mission set on the Space tileset, with the filename Map13b.scx and internal briefing confirming the episode number 'Map 13b'. The player must destroy a Cerebrate and advance to the next destination, Dyrana, on a battlefield where only Zerg forces stand in the way, relying purely on army control and resource management without any hero units or special abilities. The map size is 256x256 tiles, a standard campaign mission scale, and the Space terrain's characteristic narrow corridors and isolated platforms naturally restrict army movement paths, heightening the tension of breaking through defensive lines. The progression follows a classic linear campaign structure of destroying an objective and moving to the next zone, where victory depends on army composition, upgrade timing, and multitasking rather than complex trigger events or sudden boss fights. The main threats are typical Zerg creep spread, Hydralisk, and Ultralisk compositions, so mixing air units and splash damage units is the key strategy. Difficulty appears challenging with only starting forces, but free resource gathering and teching allow veterans to clear within 30 minutes. It suits players seeking pure mission gameplay and nostalgia for original Brood War missions rather than deep story immersion. Before playing, check for Korean patch application and briefing text encoding corruption, and be aware it is a pure skill test without difficulty adjustment triggers.
던 오브 더 데드 2.1.3 (Dawn Of The Dead 2.1.3)
던 오브 더 데드 2.1.3(Dawn Of The Dead 2.1.3)은 스타크래프트 브루드워 유즈맵(UMS) 중 좀비 생존 디펜스 장르에 속하는 6인용 맵이다. 내부 맵 설명에 따르면 'NEED FULL HOUSE → Pick Your Units → Find Your Defensive Position → Kill The Zombies → Survive 60 Minutes' 순서로 진행되며, 6인 풀하우스가 필요하고 각자 유닛을 선택해 방어 위치를 잡은 뒤 몰려드는 좀비 웨이브를 막아내며 60분을 버티는 생존 디펜스 구조다. 맵 크기는 6144×6144 픽셀(192×192 타일)로 표준적인 중형 맵 크기이며, 타일셋은 우주(Space) 타일셋을 사용하여 우주 정거장이나 함선 내부를 연상시키는 어두운 분위기를 연출한다. cp949 인코딩 환경에서 제작되어 파일명에 '[)awn 0f The [)ead'와 같은 깨진 문자가 남아 있지만, 내부 맵 제목은 'Dawn Of The Dead 2.1.3'으로 정상 표기된다. 게임 플레이는 6인 풀하우스 기준 'Pick Your Units' 단계에서 각자 원하는 유닛을 선택한 뒤, 'Find Your Defensive Position' 단계에서 맵 곳곳의 방어 거점 중 하나를 선점한다. 이후 'Kill The Zombies → Survive 60 Minutes' 루프가 핵심 루프로, 웨이브가 지날수록 좀비의 수와 체력, 공격력이 상승해 중반 이후엔 업그레이드와 협동 공방이 필수적이다. 우주 타일셋 특유의 어두운 배경과 좁은 복도, 방어 타워 설치 가능 구역 등 지형지물을 활용한 입구 막기(입구막기) 플레이가 핵심 전략으로 작용한다. 6인 풀하우스 기준이라 인원이 모자라면 난이도가 급격히 상승하며, 솔로 또는 소수 인원으로는 60분 생존이 사실상 불가능에 가깝다. 난이도는 '보통~어려움' 사이로 추정되며, 초보자는 유닛 선택과 업그레이드 순서 숙지가 필요하다. 추천 플레이는 6인 풀하우스 협동 플레이며, 솔로나 2~3인으로는 클리어 난이도가 급격히 상승한다. 추천 태그로는 좀비 디펜스, 서바이벌, 좀비, 6인용, 우주 맵, 생존, 디펜스, 입구막기 등이 적절하다. Dawn Of The Dead 2.1.3 is a 6-player Use Map Settings (UMS) map belonging to the zombie survival defense genre. According to the internal description, the flow follows 'NEED FULL HOUSE → Pick Your Units → Find Your Defensive Position → Kill The Zombies → Survive 60 Minutes', requiring a full house of 6 players, each picking a unit, securing a defensive position, then holding out against zombie waves for 60 minutes. The map size is 6144×6144 pixels (192×192 tiles), a standard mid-size map, using the Space tileset to create a dark space station or starship interior atmosphere. The filename shows cp949 encoding corruption ('[)awn 0f The [)ead'), but the internal title reads correctly as 'Dawn Of The Dead 2.1.3'. Gameplay proceeds in phases: 'Pick Your Units' lets each player choose a hero or combat unit, 'Find Your Defensive Position' has players claim choke points or rooms across the map, then 'Kill The Zombies → Survive 60 Minutes' becomes the core loop. Zombie waves—Zerglings, Hydralisks, Ultralisks, and other Zerg units—spawn in increasing numbers and strength. Players must upgrade weapons, armor, and abilities, build defensive structures at choke points, and coordinate focus fire. The Space tileset provides dark corridors, narrow chokepoints, and turret-buildable areas, making choke-point defense (entrance blocking) the core strategy. A full house of 6 is practically mandatory; fewer players cause difficulty to spike sharply, making 60-minute survival nearly impossible solo or with 2–3 players. Difficulty is estimated at 'Normal to Hard'; beginners need to learn unit picks and upgrade paths. Recommended play is 6-player cooperative; solo or 2–3 player clears are extremely difficult. Recommended tags: Zombie Defense, Survival, Zombie, 6-Player, Space Map, Survival, Defense, Choke Point Defense.
패스트 포서블 맵 (Fastest Possible Map)
스타크래프트 브루드워 유즈맵으로 유명한 ‘•Fa§te§tPo§§ible Map• WesT©’는 밀리 기반 맵이지만, 이름과 달리 순수한 밀리가 아니라 특수한 구조와 룰이 적용된 컴까기 유즈맵으로 추정된다. 내부 맵 설명에 ‘Same Layout as Space but different Look’이 포함된 점과 파일명에 ‘$$Fastest WesT$$’가 명시된 점을 고려할 때, 기존의 스페이스맵 스타일을 재활용한 개선형 맵으로 보인다. 4인용 맵이며, 우주 타일셋을 기반으로 4096x4096의 넓은 공간을 활용한 디자인으로 보이며, minerals 채널이 50개씩 쌓여 있어 초반 자원 확보에 영향을 줄 수 있는 구조로 추정된다. 이 맵의 가장 큰 특징은 ‘Fastest’라는 이름에서 유추할 수 있듯, 빠른 진행과 전략적 선택을 요구하는 플레이 스타일로 보인다. 맵이 넓고 minerals 채널이 체계적으로 배치되어 있어, 플레이어는 초반 자원 확보와 병력의 배치, 그리고 적절한 타이밍에 공격을 감행해야 한다. 또한, ‘WesT©’라는 제작자 명과 ‘oP WesT’ 채널이 언급된 점을 보아, 이러한 빠른 진행과 전략적 깊이를 강조하는 맵으로 설계되었을 가능성이 크다. 맵의 이름과 구조상, 단순히 자원 확보와 테크 업그레이드만을 목표로 하는 것이 아니라, 상대방의 움직임을 예측하고 신속한 대응을 요구하는 플레이 경험을 제공할 것으로 예상된다. 이 맵의 추천 대상은 스타크래프트 브루드워의 밀리 경험이 어느 정도 있는 플레이어들로, 빠른 판단력과 전략적 사고가 요구되는 만큼 초보자보다는 숙련자나 중급 이상 플레이어에게 적합할 것이다. 또한, 넓은 맵과 minerals 채널의 배치가 자원 전쟁과 병력 운용의 중요성을 강조하기 때문에, 자원 관리와 스플릿 컨트롤에 자신 있는 플레이어에게도 추천할 만하다. 다만, 맵의 구조상 특정 위치에 minerals가 집중되어 있어, 자원 확보의 균형을 맞추는 것이 관건일 수 있다. 따라서, 이 맵을 플레이하기 전에는 minerals의 배치와 맵의 주요 길목을 미리 확인하고, 상대방의 전략에 따라 유동적으로 대응할 준비를 해두는 것이 중요하다. This StarCraft: Brood War custom map, famous as a *•Fa§te§tPo§§ible Map• WesT©*, is a mill-based map, but despite its name, it isn’t pure mill—it appears to be a unique custom map with special structures and rules. Given that the internal map description includes "Same Layout as Space but different Look" and the filename explicitly states "$$Fastest WesT$$," it seems to be an improved version of the classic Space map. Designed for four players, it likely utilizes a space-themed tileset and a large 4096x4096 playfield, with minerals arranged in stacks of 50, potentially impacting early resource gathering. The map’s defining feature, as suggested by its name "Fastest," is its emphasis on fast-paced gameplay and strategic decision-making. The spacious design and systematic mineral distribution require players to secure resources early, position their forces effectively, and strike at the right moment. Additionally, references to the creator "WesT©" and the "oP WesT" channel imply that the map is intentionally designed to highlight quick, dynamic play with strategic depth. Rather than focusing solely on resource accumulation and tech upgrades, it encourages predicting opponent movements and making swift responses. This map is best suited for players with some prior Brood War mill experience, as it demands quick judgment and strategic thinking—making it more appropriate for intermediate to advanced players rather than beginners. The wide playfield and mineral distribution also emphasize resource competition and unit control, so it’s highly recommended for players confident in resource management and split control. However, since minerals are concentrated in certain areas, balancing resource acquisition may be a key challenge. Before playing, it’s important to familiarize yourself with mineral layouts and key pathways, and to prepare flexible responses based on your opponent’s strategy.
플랫폼 E57IW (Platform E57IW)
‘Platform E57IW’는 스타크래프트 브루드워의 UMS 맵으로, 8명의 플레이어가 우주 맵에서 펼쳐지는 전투에 참여하는 디펜스 장르의 유즈맵이다. 맵의 중앙에는 거대한 플랫폼 구조물이 자리 잡고 있으며, 각 플레이어는 이 플랫폼을 중심으로 배치된 건물을 보호하거나 공격해야 한다. 맵의 특징은 네모난 플랫폼들이 계층적으로 배치되어 있어, 각 층마다 적의 공격 루트가 나뉘어지는 구조다. 특히 플랫폼 간의 연결 통로가 좁고, 각 층 사이에 높이 차이가 있어 유닛의 이동 경로가 제한된다. 이 때문에 전략적인 시야 확보와 병력 배치, 그리고 빠른 반응이 필수적이다. 플레이어는 초반에 자원을 확보한 뒤, 적의 건물을 파괴하거나 방어선을 구축하는 데 집중해야 하며, 맵의 지형을 활용한 방어 태세나 기습 공격이 승패를 좌우할 수 있다. 또한, 플랫폼 간의 고저차가 있기 때문에 공중 유닛의 활용도 중요해진다. 초보자의 경우, 맵의 구조를 충분히 숙지하지 못해 적의 공격 루트를 틀어막지 못하는 경우가 많으므로, 맵을 여러 번 플레이해보면서 플랫폼 간의 연결 구조와 각 층의 중요 위치를 파악하는 것이 좋다. 이 맵은 주로 디펜스와 공격 전술을 동시에 요구하는 만큼, 팀워크와 전략적 사고가 중요한 유즈맵으로, 스타크래프트의 다양한 유즈맵 중에서도 독특한 구조와 긴장감을 제공한다. 특히 우주 맵의 배경과 조화된 플랫폼 디자인이 시각적으로도 흥미를 더한다. 이 맵은 디펜스와 공격 전술을 연마하고자 하는 플레이어들에게 추천할 만한 작품이다. 또한, 맵의 구조상 긴장감이 지속되기 때문에 플레이 시간이 상당히 긴 편이며, 한 번의 실수가 승패를 가를 수 있어 집중력을 요구하는 맵으로도 손꼽힌다. 이 맵을 즐기기 위해서는 빠른 미네랄 수급과 테란의 경우 벙커링, 저그의 경우 뮤탈리스크 활용, 프로토스의 경우 질럿과 드라군의 조합을 고려해보는 것이 좋다. 맵의 플랫폼 구조는 각 플레이어의 시작 위치와도 밀접한 관련이 있으므로, 시작 위치를 잘 활용하는 것도 승리의 핵심 요소다. 이 맵은 스타크래프트 유즈맵 커뮤니티에서 인기 있는 디펜스 장르의 대표작 중 하나로, 특히 우주 맵의 특성을 살린 디자인과 긴장감 있는 진행이 특징이다. 플레이 전에는 맵의 구조와 각 플랫폼의 연결 방식을 미리 확인해보는 것이 좋다. 또한, 팀 플레이를 중시하는 맵이므로, 팀원과의 원활한 소통도 필수적이다. 이 맵은 스타크래프트의 유즈맵답게 자유로운 플레이 스타일을 요구하지만, 기본적인 빌드와 전략이 없으면 쉽게 무너질 수 있으므로, 초보자는 보수적인 플레이를 추천한다. 맵의 난이도는 보통 수준으로, 초보자와 숙련자 모두 즐길 수 있지만, 숙련자들은 더욱 전략적인 플레이를 요구받는다. 이 맵은 스타크래프트의 유즈맵 among the most unique defense maps due to its tiered platform structure and constrained movement paths. Players must balance between resource gathering and aggressive expansion while keeping an eye on enemy advances through narrow corridors. The varying heights between platforms make air units essential, adding a dynamic layer to both offense and defense. For beginners, mastering the map’s layout is critical, as poor positioning can lead to quick defeats. The map rewards those who can adapt their strategies mid-game, whether through defensive fortifications or calculated rushes. The visual design, with its sci-fi platform aesthetic, enhances the immersive experience, making it a standout in the UMS genre. Team coordination is highly recommended, as miscommunication can lead to critical vulnerabilities. Players should prioritize early scouting to identify enemy strategies and adjust their defenses accordingly. The map’s difficulty lies in its depth rather than raw complexity, appealing to both casual and competitive players. Overall, Platform E57IW is a must-try for fans of strategic defense maps, offering a blend of tension, creativity, and tactical depth that keeps matches engaging from start to finish.
마린 D 22웨이 (Marine D. 22-way)
스타크래프트 브루드워 유즈맵 '마린 D 22웨이 버전 3.4'는 마린 컨트롤 극한을 시험하는 피하기 장르의 대표적인 맵이다. 원작자 Fart[smurf]부터 [ncm]LJ, blastyo-a, Nebby를 거쳐 팀 SoC의 SoC_SetApt가 22방향으로 대폭 개조한 버전으로, 기존 18웨이에서 더 촘촘한 탄막 패턴을 구현해 난이도와 완성도를 높였다. 우주 타일셋의 128x128 타일 맵 위에서 최대 6인이 협동하거나 경쟁하며, 마린 한 기씩을 조작해 사방에서 날아드는 투사체를 피하는 순수 컨트롤 승부가 핵심이다. 별도의 자원 관리나 유닛 생산 없이 시작부터 마린만 주어지며, 키보드 방향키 또는 마우스 이동으로 좁은 간격을 파고들어 생존 시간을 늘리는 방식이다. 22방향이라는 명칭답게 360도 전방위에서 예측 불가능한 궤적으로 포탄, 미사일, 레이저 등이 쏟아지며, 버전이 거듭될수록 패턴 속도와 밀도가 조절되어 숙련자도 긴장감을 늦출 수 없다. 협동 모드에서는 아군의 생존 여부가 전체 클리어에 영향을 주므로 서로의 위치를 살피며 회피 루트를 공유하는 팀워크가 중요하다. 맵 크기는 4096x4096으로 넓지 않지만 시야 제한과 투사체 밀집도로 체감 난이도가 높으며, 단판 10~20분 내외로 짧고 강렬한 플레이가 가능하다. 마린 컨트롤 연습용으로 입문하기 좋으나 후반 패턴은 반사 신경과 패턴 암기가 필수라 초보자는 반복 학습이 필요하다. 팀 SoC 아카이브를 따라온 올드 유저라면 버전별 변화상을 비교 플레이하기에도 의미 있는 자료다. 플레이 전에는 키보드 반응 속도와 마우스 감도를 본인 손에 맞춰 두고, 6인 풀방 기준 난이도 스케일링이 어떻게 적용되는지 확인하는 것이 좋다. StarCraft Brood War UMS map 'Marine D 22-way ver 3.4' is a representative dodge genre map that tests the limits of marine control. Starting from original author Fart[smurf], through [ncm]LJ, blastyo-a, Nebby, to Team SoC's SoC_SetApt who majorly modified it to 22 directions, this version implements denser bullet patterns than the previous 18-way, raising difficulty and completeness. On a 128x128 tile space tileset map, up to 6 players cooperate or compete, each controlling a single marine to dodge projectiles flying from all directions. With no resource management or unit production, only a marine is given from the start; the core is pure control survival using keyboard arrows or mouse movement to thread through narrow gaps. True to its 22-direction name, shells, missiles, and lasers pour in unpredictable trajectories from 360 degrees, and as versions progressed pattern speed and density have been tuned so even veterans cannot relax. In co-op mode, ally survival affects overall clear, making teamwork crucial to watch each other's positions and share dodge routes. The map size is 4096x4096, not large, but limited vision and projectile density create high perceived difficulty; a single round lasts 10-20 minutes for short, intense play. Good for marine control practice entry, but late patterns require reflexes and pattern memorization so beginners need repeated learning. For old users following Team SoC archives, it is meaningful material to compare version changes. Before play, adjust keyboard response and mouse sensitivity to your hand, and check how difficulty scaling applies at 6-player full house.
Untitled Scenario
스타크래프트 브루드워의 유즈맵인 〈Untitled Scenario〉는 우주 테마의 광활한 맵에서 적 건물 파괴를 목표로 하는 UMS(Use Map Settings) 장르의 맵이다. 내부 설명에서도 확인할 수 있듯이 '모든 적 건물 파괴'가 승리 조건으로, 기본적인 디펜스와 밀리 요소가 혼합된 구조를 보인다. 3072x3072의 넓은 우주 맵에서 펼쳐지는 전투는 플레이어가 전략적으로 건물을 보호하고 공격로를 선택해야 한다는 점에서 긴장감을 유발한다. 맵의 특징은 넓은 맵 크기만큼이나 복잡한 지형과 요새화된 적 기지 배치에 있다. 중앙을 가로지르는 협곡이나 소규모 언덕, 우주 잔해 등이 자연 장애물로 작용해 진격로를 방해한다. 적 건물은 산개되어 있어 한 번의 공격으로 모든 목표를 소탕하기 어렵고, 방어 타워나 가드 건물도 곳곳에 배치되어 있어 초보 플레이어에게는 다소 까다로운 요소로 작용할 수 있다. 반대로 숙련자는 이러한 구조를 활용해 기습 공격이나 다중 공격로를 설계할 수 있어 전략의 깊이를 느낄 수 있다. 플레이 방식은 대체로 싱글 플레이어 기반의 컴까기(컴퓨터 상대하기) 형식을 띄며, AI가 조종하는 적 건물과 유닛을 상대로 전투를 벌인다. 맵 자체가 방어와 공격의 균형을 맞추도록 설계되어 있어, 단순히 무작정 돌진하는 것보다 적절한 자원 관리와 유닛 조합, 건물 배치 전략이 중요하다. 특히 우주 테마답게 중립 건물이 scarce하여 자원 확보가 어렵다는 점을 고려해야 한다. 또한, 넓은 맵을 효율적으로 활용하지 못하면 적의 반격에 무너질 위험이 크므로 맵 전체를 빠르게 스캔하고 주요 거점을 선점하는 것이 관건이다. 이 맵은 우주 배경의 웅장한 그래픽과 함께 넓은 시야를 제공하는 특성을 살려 긴장감 넘치는 전투를 즐기기에 최적화되어 있다. 초보자는 어려움을 느낄 수 있지만, 적 건물의 배치와 맵의 지형을 익히면 점차 전략적 사고가 요구되는 재미를 느낄 수 있을 것이다. 넓은 맵에서 펼쳐지는 대규모 전투를 즐기고 싶거나, 컴까기 장르의 기본기를 다지고 싶은 플레이어에게 추천할 만하다. 다만 한 번의 실수로 모든 것이 무너질 수 있는 높은 난이도와 좁은 길목에서의 치열한 전투를 감안해야 한다. This Brood War custom map, Untitled Scenario, is a UMS (Use Map Settings) map set in a vast space-themed 3072x3072 battlefield where the core objective is to destroy all enemy buildings. As indicated in the internal description, the victory condition is straightforward—eliminate every enemy structure—yet the execution demands strategic depth due to the map's sprawling design and fortified enemy base layouts. The map's defining feature is its expansive cosmic terrain, featuring canyons, elevated plateaus, and scattered space debris that serve as natural obstacles. Enemy buildings are strategically dispersed, making it nearly impossible to clear all targets in a single push. Additionally, defensive towers and guard structures are interspersed throughout the map, posing significant challenges for inexperienced players. For seasoned players, however, these elements offer opportunities to craft intricate multi-pronged assaults or leverage ambush tactics. Gameplay revolves around a single-player vs. AI format, commonly referred to as "compkagi" (fighting against computer-controlled opponents) in the Korean Brood War community. The map's design emphasizes a balance between defense and offense, rewarding players who manage resources wisely, deploy units effectively, and position buildings strategically. The scarcity of neutral buildings in this space-themed setting further intensifies the challenge, as securing resources becomes a critical early-game priority. Efficient scanning of the entire map and early control of key locations are essential to avoid falling victim to enemy counterattacks. Untitled Scenario excels in delivering an immersive, large-scale combat experience thanks to its grand space-themed visuals and wide field of view. While beginners may find the map daunting, mastering the enemy's building placements and terrain nuances will gradually unveil the deeper strategic layers that make this map engaging. It is particularly recommended for players seeking intense large-scale battles or aiming to hone their skills in the compkagi genre. However, be prepared for high-stakes gameplay where a single mistake can lead to a swift and irreversible defeat, especially in tight choke points.
채팅방 스페이스 1.0 (Chatroom Space 1.0)
스타크래프트 브루드워의 우주 맵에서 영감을 받은 ‘Chatroom Space 1.0’은 8인용 멀티플레이를 위한 디자인을 갖춘 유즈맵으로, 우주 공간을 배경으로 한 넓은 필드에서 펼쳐지는 전투가 특징이다. 이 맵은 내부 설명에 따르면 ‘모든 적 건물 파괴’를 승리 조건으로 삼아, 플레이어는 각자의 기지 건설과 자원 관리, 그리고 전투력 증강을 통해 상대방을 제압해야 한다. 맵의 전체 크기는 4096×4096으로 매우 넓고, 우주 타일셋을 활용하여 시야가 제한적이며 전략적 깊이가 요구되는 환경을 제공한다. 특히, 우주 공간의 특성상 미네랄과 가스 분포가 넓게 흩어져 있어 자원 확보 경쟁이 치열해질 수 있으며, 이로 인해 초반 자원 확보와 멀티태스킹 능력이 중요해진다. 또한, 맵의 넓은 공간은 기동성과 병력 운용의 중요성을 부각시키며, 플레이어는 초반부터 전략적 움직임을 계획해야 한다. 맵의 난이도는 별도로 명시되지 않았지만, 넓은 공간과 우주 타일셋을 고려했을 때 초보보다는 중간 이상의 숙련자를 겨냥한 것으로 추정된다. 이 맵은 넓은 공간을 활용한 전투와 자원 관리, 기지 방어와 공격의 균형을 요구하는 ‘컴퓨터 상대 유즈맵’으로 분류된다. 초보 플레이어는 넓은 공간과 우주 맵의 특성상 입문하기 어려울 수 있으므로, 맵에 익숙해질 때까지는 싱글 플레이나 연습 모드를 추천한다. 또한, 건물을 파괴하는 목표 때문에 ‘디펜스’보다는 ‘밀리’에 가까운 플레이 스타일을 지향하며, 다수의 플레이어가 동시에 전투를 펼치는 경우가 많아 팀워크도 중요하다. 플레이 전에는 맵의 자원 분포와 주요 길목, 그리고 상대방의 움직임을 예의주시할 필요가 있다. 이 맵은 넓은 우주 공간에서 펼치는 전략적 전투를 즐기고자 하는 유저들에게 적합하며, 특히 멀티플레이에서 팀원과의 소통과 전략적 협력이 중요한 요소로 작용할 것이다. 멀티플레이를 즐기는 유저라면 이 맵의 넓은 공간을 활용한 다양한 전략을 시도해 볼 수 있을 것이다. 또한, 우주 타일셋의 어두운 배경은 플레이어의 시야를 제한하여 예측치 못한 전투가 자주 발생할 수 있으므로, 항상 맵의 전체 상황을 확인하는 습관을 기르는 것이 좋다. Chatroom Space 1.0 is a custom map inspired by the classic Brood War space maps, designed for 8-player multiplayer. Set in a vast cosmic battlefield, the map features large-scale combat where players must destroy all enemy structures to win. With a massive 4096×4096 grid, the map utilizes a space-themed tileset that restricts visibility, demanding strategic depth and careful planning. Mineral and gas deposits are spread widely across the map, intensifying early-game resource competition and making efficient gathering and multitasking essential. The expansive layout emphasizes mobility and troop deployment, forcing players to adopt forward-thinking strategies from the start. While difficulty isn’t officially specified, the map’s scale and space-themed design suggest it’s better suited for intermediate or advanced players rather than beginners. It falls under the category of AI-based custom maps, requiring a balance of combat, resource management, base defense, and offensive play. Novice players may struggle with the open space and space map mechanics, so practicing in single-player or custom modes before jumping into multiplayer is recommended. Since the objective revolves around destroying buildings, the gameplay leans more toward aggressive "melee" combat than passive defense. With multiple players engaging simultaneously, teamwork and coordination are crucial. Before diving in, study the resource distribution, key pathways, and opponent movements to stay ahead. Ideal for those who enjoy strategic battles in vast cosmic arenas, this map highlights the importance of communication and tactical cooperation in multiplayer matches. Players who thrive in multiplayer will find plenty of room to experiment with diverse strategies. The dark space-themed background limits visibility, often leading to unexpected encounters, so always keep an eye on the broader battlefield to avoid surprises.
맵 선택 가이드
태그는 맵의 핵심 특징을 빠르게 설명하지만 제작 버전마다 규칙이 다를 수 있습니다. 상세 설명에서 권장 인원, 난이도, 플레이 시간과 버전을 함께 확인한 뒤 다운로드하세요.