
1v1 스타크래프트 맵 모음
'1v1' 태그가 등록된 맵을 모았습니다. 장르 하나로 찾기 어려운 플레이 방식, 난이도와 특징을 중심으로 인기 맵과 최신 맵을 비교해 보세요.
- 등록 맵
- 13개
- 누적 다운로드
- 0
- 누적 조회
- 573
인기 맵
다운로드와 조회 반응이 높은 맵입니다.
Overwatch
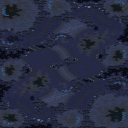
스타크래프트 브루드워 유즈맵 '오버워치(Overwatch)'는 BSL에서 배포한 2인용 대전 맵으로, 파일명과 내부 설명에 따르면 네거티브제로(NegativeZero) 제작, 프릭링(Freakling) 에디팅, 버전 2.3이다. 화산 타일셋의 112×128 타일(3584×4096 해상도) 크기로, 일반적인 밀리 맵보다 훨씬 좁은 전장에서 펼쳐지는 속도감 있는 승부가 특징으로 보인다. 양 플레이어는 대칭형 기지에서 시작해 제한된 자원과 공간 안에서 병력을 운용하며, 장시간 운영보다는 초반 빌드 오더와 마이크로 컨트롤, 심리전이 승부를 가르는 전형적인 아레나·미니게임 양상을 띨 것으로 추정된다. BSL이라는 대회·커뮤니티 브랜드가 붙은 점과 버전 관리가 이루어진 점으로 미루어 밸런스 검증이 어느 정도 완료된 경쟁전용 맵일 가능성이 높다. 추천 대상은 1대1 실력 대결을 선호하거나 마이크로 연습이 필요한 유저, 짧은 시간 안에 승부를 보고 싶은 플레이어다. 플레이 전에는 버전 2.3이 최신인지 확인하고, 관전자 슬롯이나 옵션 트리거가 있는지 로비에서 살펴보는 것이 좋다. StarCraft Brood War UMS map 'Overwatch' is a 2-player duel map distributed by BSL. According to the filename and internal description, it was created by NegativeZero, edited by Freakling, version 2.3. With a Volcano tileset at 112×128 tiles (3584×4096 resolution), the battlefield is much smaller than standard melee maps, featuring fast-paced engagements. Both players start at symmetrical bases, managing limited resources and space. Rather than long macro games, early build orders, micro control, and mind games likely decide the outcome, typical of an arena or mini-game style. The BSL branding and version history suggest balance testing for competitive play. Recommended for players who enjoy 1v1 skill duels, need micro practice, or want quick matches. Before playing, verify version 2.3 is latest and check lobby for observer slots or option triggers.
The Desolate Platform
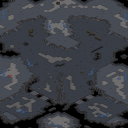
스타크래프트 브루드워 맵 'The Desolate Platform'은 2인용 밀리 대전 맵으로, 파일명 '(2)Desolate Platform.scm'과 내부 설명 'Mystery-Map Invitational: Europe vs. Asia'에서 알 수 있듯 과거 유럽 대 아시아 초청전 대회에서 사용된 경쟁전용 맵이다. 우주 타일셋을 기반으로 128x128 타일(4096x4096 픽셀) 크기의 표준적인 대형 맵이며, 양 플레이어가 대칭 구조로 배치되어 공정한 1대1 승부가 가능하다. 메인 기지 앞뒤로 확장 기지 후보지가 분포하고, 중앙을 가로지르는 플랫폼 형태의 지형이 특징적으로 보여진다. 우주 배경 특유의 진공 지대와 플랫폼 연결부가 공중 유닛 활용과 드랍십·셔틀 견제 루트를 자연스럽게 유도하며, 지상 병력 이동 경로가 제한되어 초반 빌드 오더 싸움과 중반 확장 타이밍이 승부를 가르는 전형적인 밀리 흐름이 예상된다. 대회용 맵인 만큼 밸런스 검증이 어느 정도 이루어진 상태로, 래더 연습이나 친선전, 소규모 토너먼트용으로 적합하다. 플레이 전에는 본진 미네랄 라인 뒤쪽 공간과 앞마당 입구 너비, 세 번째 기지 확보 난이도 등을 직접 확인해 빌드 오더를 짜는 것이 좋다. 별도 트리거나 유즈맵 요소 없이 순수한 밀리 규칙으로 진행되며, 게임 시간은 실력에 따라 15~30분 내외로 형성된다. The Desolate Platform is a two-player melee map for StarCraft: Brood War. As indicated by the filename '(2)Desolate Platform.scm' and the internal description 'Mystery-Map Invitational: Europe vs. Asia,' this map was used in a past invitational tournament pitting Europe against Asia. Built on the space tileset at a standard 128x128 tile size (4096x4096 pixels), it features a symmetrical layout for fair 1v1 competition. Expandable base locations sit behind and in front of each main base, while a distinctive platform-like terrain crosses the center. The vacuum zones and platform connections typical of the space tileset naturally encourage air play and drop harassment, and restricted ground paths make early build-order execution and mid-game expansion timing decisive. Having been vetted for tournament play, the balance is reasonably proven, making it suitable for ladder practice, friendlies, or small tournaments. Before playing, check the space behind the main mineral line, the natural choke width, and the difficulty of securing a third base to refine your build order. No custom triggers or UMS elements exist; the match runs on pure melee rules, with games typically lasting 15 to 30 minutes depending on skill level.
아발론 ((2)Avalon)
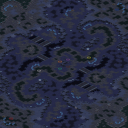
(2)아발론은 2인용 1v1 대전을 위해 제작된 커스텀 밀리 맵이다. 표준 밀리 규격인 128×128 타일 크기에 화산 타일셋을 적용해 고전적인 밀리 분위기를 살렸으며, 맵 제목의 '(2)' 표기와 내부 설명의 'Suggested Players: 2'가 1대1 대전을 염두에 두고 설계되었음을 보여준다. 'Obs Version'이라는 버전 표기는 옵저버 모드나 대회 관전 환경을 고려한 버전임을 시사한다. 맵 구조는 양 플레이어의 본진이 대칭에 가깝게 배치되고 중앙을 향해 확장 기지가 자연스럽게 이어지는 전형적인 밀리 레이아웃으로 보인다. 화산 지형의 특성상 용암 지대가 경로 제한 요소로 작용해 지상 병력 이동에 변수를 만들며, 멀티 기지 간의 거리와 공격 루트가 밸런스에 영향을 줄 것으로 추정된다. 일반적인 밀리 빌드 오더와 운영이 그대로 통용되지만, 커스텀 맵 특유의 미세한 거리 차이나 지형 지물이 타이밍 공격이나 수비 병력 배치에 영향을 줄 수 있다. 래더 밀리 연습용이나 친선 1v1, 소규모 대회용 맵으로 적합하며, 표준 밀리 감각을 유지하면서도 고정된 맵에서 반복 연습하려는 플레이어에게 추천된다. 플레이 전에는 옵저버 슬롯 여부와 시작 위치 고정 여부, 그리고 맵 전용 트리거가 없는 순수 밀리 규칙인지 확인하는 것이 좋다. (2)Avalon is a custom melee map designed for 2-player 1v1 matches. It adopts the standard melee specification of 128×128 tiles with the volcanic tileset, preserving the classic melee atmosphere. The '(2)' prefix in the map title and the internal description 'Suggested Players: 2' indicate it was designed for 1v1 duels. The 'Obs Version' label suggests a version prepared for observer mode or tournament spectating. The map structure appears to follow a typical melee layout with near-symmetrical main bases and natural expansions leading toward the center. The volcanic terrain's lava zones act as pathing constraints, creating variables for ground unit movement, while distances between expansions and attack routes likely influence balance. Standard melee build orders and management apply directly, though subtle distance differences or terrain features unique to custom maps may affect timing attacks and defensive positioning. It is suitable for ladder melee practice, friendly 1v1s, or small tournaments, and recommended for players who want to practice repeatedly on a fixed map while retaining standard melee feel. Before playing, it is advisable to check observer slot availability, fixed starting positions, and whether the map runs on pure melee rules without custom triggers.
에어 존 컨트롤 w/매스어택 (Air Zone Control w/MassAtt)
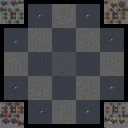
스타크래프트 브루드워의 ‘에어 존 컨트롤 w/매스어택(Air Zone Control w/MassAtt)’은 공중 유닛으로만 전투를 펼치는 독특한 미니게임 형식의 유즈맵입니다. 맵 중앙에는 거대한 격자형 구조물이 있으며, 각 플레이어는 시작 지점에서 공중 유닛을 생산해 이 격자 주변의 ‘존’들을 차지하는 방식으로 진행됩니다. 맵에는 다양한 경로와 장애물이 배치되어 있어 유닛의 기동성과 컨트롤이 중요하며, 특히 대각선으로 연결된 좁은 길이나 구불구불한 루트를 통해 적의 공격을 피해가며 진형을 형성해야 합니다. 이미지 하단의 좌우에 있는 붉은색과 푸른색의 유닛들은 각각의 플레이어 진영을 상징하며, 맵 곳곳에서 벌어지는 공중전은 마치 aerial dogfight를 연상시킬 만큼 박진감 넘칩니다. 이 맵은 단순히 유닛을 생산하고 싸우는 것뿐만 아니라, 맵 상단의 ‘Boosted ‘n Upgraded’ 표기처럼 유닛의 업그레이드와 특수 능력 활용이 핵심입니다. 예를 들어 공중 유닛의 방어력이나 공격력을 강화하거나, 특정 조건에서 강력한 스킬을 사용할 수 있는 등 전략의 깊이가 더해집니다. 또한, 맵의 구조상 중앙 격자 주변으로의 진출이 승패를 좌우할 수 있어, 초보자와 숙련자 모두에게 흥미로운 전투 경험을 제공합니다. 특히 공중 유닛의 특성을 극대화할 수 있는 맵 디자인 덕분에, 테란의 바이킹, 프로토스의 캐리어, 저그의 뮤탈리스크 등 각 종족의 공중 유닛을 다양하게 활용할 수 있습니다. 추천 대상은 공중 유닛의 컨트롤에 익숙한 플레이어나, 스타크래프트의 다양한 유닛을 실험해보고 싶은 유저입니다. 또한, 팀전보다는 1대1이나 2대2 같은 소규모 전투에서 그 진가가 발휘되며, 맵의 난이도는 유닛의 생산과 배치, 그리고 실시간 전투의 균형에 따라 조절할 수 있습니다. 플레이 전에는 반드시 공중 유닛의 스펙과 맵의 지형을 숙지하고, 업그레이드와 특수 능력을 어떻게 활용할지 미리 계획해두는 것이 좋습니다. 맵의 독특한 디자인과 전투 시스템은 공중전만을 즐기고 싶은 유저들에게 색다른 재미를 선사할 것입니다. Air Zone Control w/MassAtt from StarCraft: Brood War is a unique mini-game-style custom map where battles are fought exclusively with aerial units. The map features a massive grid-like structure at its center, and players must capture 'zones' around this grid by producing air units from their starting positions. The map is designed with various pathways and obstacles, requiring precise unit control and maneuvering. The units in red and blue at the bottom of the image represent the two player factions, and the aerial battles across the map evoke the intensity of aerial dogfights. This map goes beyond simple unit production and combat by incorporating unit upgrades and special abilities, as indicated by the 'Boosted ‘n Upgraded' label at the top. Players can enhance their air units' defense, attack power, or unlock powerful skills under specific conditions, adding depth to the strategy. The central grid structure plays a crucial role in determining victory, as controlling the zones around it can shift the tides of battle. The design allows for diverse use of air units from all three races—Terrans' Vikings, Protoss' Carriers, and Zerg's Mutalisks—making it appealing to players who enjoy experimenting with different units. This map is ideal for players who are familiar with air unit control or those looking to explore the strengths of various StarCraft units. It works best in 1v1 or 2v2 matches rather than larger team battles. The difficulty can be adjusted based on unit production, placement, and real-time combat balance. Before playing, it's essential to study the specs of air units and the map's terrain, and plan how to utilize upgrades and special abilities effectively. The unique design and combat system of this map offer a fresh and exciting experience for players who love aerial combat.
Challenger
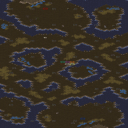
챌린저(Challenger)는 2인용 대전용으로 제작된 유즈맵으로, 파일명에 '(2)Bob'sObs'라는 표기가 있어 옵저버 슬롯을 포함한 1대1 밀리 대전을 염두에 둔 맵으로 보인다. 타일셋은 황무지(Badlands)이며, 맵 크기는 3072x4096으로 표준적인 2인용 밀리 맵과 유사한 비율을 갖는다. 내부 설명에 'Suggested Players: 2 You have been challenged. Will you accept?'라는 문구가 있어 도전적인 분위기를 연출하며, 별도의 트리거나 특수 규칙 없이 기본 밀리 규칙을 그대로 따르는 것으로 추정된다. 시작 지점은 두 곳으로 배치되어 있으며, 중앙 지역을 중심으로 자원 지대와 확장 기지가 대칭적으로 구성되어 있어 양 플레이어에게 공정한 기회를 제공하는 것으로 보인다. 별도의 승리 조건 변경이나 이벤트 트리거는 확인되지 않으며, 일반적인 본진 파괴 혹은 항복 조건으로 진행될 가능성이 높다. 이 맵은 밀리 실력 연습이나 친선 대전, 옵저버를 통한 관전용으로 적합하며, 복잡한 유즈맵 규칙에 익숙하지 않은 초보자도 부담 없이 즐길 수 있다. 플레이 전에는 옵저버 슬롯이 포함되어 있는지 확인하고, 2인 외 추가 인원이 접속하지 않도록 방 설정에 유의하는 것이 좋다. Challenger is a two-player custom map designed for 1v1 melee duels, as indicated by the '(2)Bob'sObs' prefix in the filename suggesting observer slots. The tileset is Badlands, and the map dimensions of 3072x4096 mirror standard two-player melee proportions. The internal description reads 'Suggested Players: 2 You have been challenged. Will you accept?' setting a competitive tone, while no special triggers or rule changes are apparent, meaning it likely follows standard melee rules. Two start locations are symmetrically placed with resource areas and expansions balanced around the center, offering fair play. Victory conditions are presumably standard base destruction or surrender. This map suits melee practice, friendly matches, or spectating via observer slots, and is accessible even to beginners unfamiliar with complex UMS mechanics. Before playing, verify observer slots are configured correctly and ensure only two players join the game.
매치포인트 (MatchPoint 1.1)
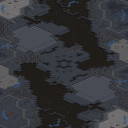
《MatchPoint 1.1》는 스타크래프트 브루드워의 밀리 맵으로, 2인용 1:1 전투에 특화된 구조를 자랑한다. 우주 테마의 타일셋을 사용한 맵의 중앙부는 비교적 평평한 지형으로 이루어져 있으며, 양측 본진은 각각의 멀티와 연결된 러시 거리가 적당히 확보되어 있다. 본진과 멀티 사이에 위치한 미네랄 멀티는 게임 초반 자원 확보에 영향을 미치는데, 이를 둘러싼 언덕 지형이 중립 건물을 배치하기에 적합한 구조로 보인다. 맵의 양쪽 가장자리는 방어하기 어려운 넓은 평지인데, 이는 빠른 러시나 포지션 싸움을 유도할 수 있는 요소로 작용할 수 있다. 또한, 맵 곳곳에 배치된 소규모 언덕과 언덕 건너편의 미네랄 멀티는 전략적 포지션 선정을 강요하며, 테란의 벙커링이나 저그의 러커 활용을 고려한 설계로 추정된다. 맵의 균형은 비교적 잘 맞는 편으로, 양측이 대등한 자원과 지형을 확보할 수 있도록 배치되어 있지만, 중앙 평지의 넓이와 언덕의 배치에 따라 초보자와 숙련자 간의 실력 격차가 드러날 수 있는 맵이다. 초보자에게는 자원 확보와 멀티 활용이 용이한 반면, 숙련자에게는 미묘한 언덕과 평지 간의 포지션 싸움에서 승부가 갈릴 가능성이 높다. 특히 우주 테마의 타일셋은 밋밋해 보일 수 있지만, 맵의 평탄한 구조는 빠른 전투와 스나이핑을 선호하는 플레이어들에게 적합하다. 플레이 전에는 중앙 평지의 넓이와 본진 멀티의 접근성을 미리 확인하고, 상대방의 전략에 따라Early 메카닉, 바이오닉, 또는 저글링-히드라 위주의 빌드를 구상하는 것이 좋다. 또한, 언덕을 활용한 시야 싸움과 멀티 방어 타이밍을 철저히 연습한다면 이 맵에서 우위를 점할 수 있을 것이다. MatchPoint 1.1 is a StarCraft: Brood War melee map designed for intense 1v1 battles. The central area features a relatively flat terrain, while the main bases are connected to smaller multi expansions with moderate rush distances. The mineral-only expansions near the bases play a key role in early-game resource control, and the surrounding cliff formations provide strategic positions for neutral buildings. The wide open edges on both sides of the map make them vulnerable to fast rushes or positional clashes, while scattered small cliffs and mineral expansions in the mid-game force players to make critical decisions on build orders and expansions. The map maintains a balanced design, offering equal resources and terrain control to both players, though the spacious central plains and cliff placements can amplify skill gaps between beginners and experts. New players will benefit from easier resource gathering and multi expansion control, while experienced players will thrive on micro-intensive positional battles and precise execution of strategies such as Terran bunker rushes or Zerg lurker setups. The space-themed tileset may seem plain, but the flat terrain structure favors quick engagements and sniping tactics. Before playing, it's crucial to assess the central open area's width and the accessibility of base expansions, then adapt your build—whether Early Mech, Bio, or Ling-Hydra—to counter your opponent's strategy. Mastering cliff-based sight control and multi-defense timing will give you a significant advantage in this map.
1vs1 마이크로 프론트 (1vs1 MicroFront)
1vs1 MicroFront는 스타크래프트 브루드워 유즈맵 중 마이크로 컨트롤 연습에 특화된 1대1 아레나 맵이다. 사막 타일셋을 기반으로 128×128 타일 크기의 비교적 좁은 전장이 펼쳐지며, 최대 8인까지 입장 가능하지만 제목과 구성상 1대1 대전용으로 설계된 것으로 보인다. 내부 설명인 'Destroy all enemy buildings'는 일반적인 밀리 승리 조건과 동일하나, 맵 이름에 'Micro'가 붙은 점과 아레나 장르로 분류된 점을 고려하면 초반 빌드 오더 싸움이나 소수 유닛 교전, 드랍십·셔틀 컨트롤 같은 세밀한 마이크로 운영을 집중적으로 겨루는 환경으로 추정된다. 타일셋이 사막인 만큼 모래 지형 특유의 시야 제한이나 언덕 배치가 교전 변수로 작용할 수 있으며, 미니맵상 대칭 구조로 보이는 지형은 양 진영 간 공정성을 확보하려는 의도로 읽힌다. 플레이 인원이 8명으로 표기된 것은 여러 쌍의 1대1 매치가 동시에 진행되거나 관전·대기 슬롯을 염두에 둔 구성일 가능성이 크다. 실제 플레이는 표준 밀리 유닛을 그대로 쓰되 자원·기지 배치가 단순화되어 있어, 빌드 암기보다 실시간 컨트롤 판단력과 멀티태스킹 능력을 시험하는 데 초점이 맞춰진 것으로 보인다. 추천 대상은 초보자가 기본 유닛 조작을 익히는 단계부터 고수가 특정 매치업 마이크로를 갈고닦는 용도까지 폭넓으며, 짧은 호흡으로 반복 연습하기 좋다. 플레이 전에는 맵 에디터나 프리뷰로 기지 위치·자원 분포·언덕 여부를 확인하고, 원하는 종족 매치업이 가능한지 옵션 트리거 유무를 점검하는 것이 바람직하다. 1vs1 MicroFront is a StarCraft Brood War custom map specialized for micro-control practice in a 1v1 arena format. Built on the desert tileset with a compact 128×128 tile layout, it supports up to eight players but the title and structure indicate it is designed for 1v1 duels. The internal description "Destroy all enemy buildings" mirrors the standard melee victory condition, yet the "Micro" prefix and arena classification suggest the focus lies on early build-order clashes, small-skirmish unit control, and precise dropship or shuttle micro. Desert terrain may introduce sight blockers and elevation changes that affect engagements, while the seemingly symmetrical minimap layout points to an intent for fair matchups. The eight-player capacity likely accommodates multiple simultaneous 1v1 pairs or spectator slots. Gameplay uses standard melee units with simplified base and resource placement, shifting emphasis from build memorization to real-time control judgment and multitasking. It suits a wide range of players, from beginners learning basic unit handling to veterans refining matchup-specific micro, and allows short, repeatable practice sessions. Before playing, check the map editor or preview for base locations, resource distribution, elevation, and whether trigger options allow the desired race matchups.
네오 버티고 (Neo Vertigo)
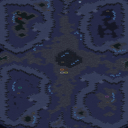
네오 버티고(Neo Vertigo)는 스타크래프트 브루드워 환경에서 제작된 4인용 밀리 맵으로, 화산 타일셋을 기반으로 한 독특한 지형 설계가 특징입니다. 파일명 '(4)Neo Vertigo v2.2-Ob.scx'와 내부 설명에 'Suggested Players: 2'가 명시되어 있어 1대1 또는 2대2 팀전 모두 소화 가능한 구조로 보입니다. 제작자 Um Jaekyeong이 버전 2.2까지 개선해온 맵으로, 맵 해시 f3fb0a64ac91c17을 통해 정식 배포본임을 확인할 수 있습니다. 맵 크기는 4096×4096 픽셀, 타일 단위 128×128로 표준적인 밀리 맵 규격을 따르며, 화산 지형의 고저차와 용암 지대가 자연스러운 방어선과 공격 루트를 형성합니다. 메인 기지마다 미네랄과 가스 배치가 균형 잡혀 있고, 중앙 지역과 멀티 기지 간의 거리감이 치열한 자원 쟁탈을 유도합니다. 램프와 초크 포인트 배치가 정교해 초반 빌드 오더 싸움부터 중반 병력 운용, 후반 멀티 관리까지 전 단계를 아우르는 밀리 본연의 재미를 제공합니다. 플레이 경험 측면에서는 정석적인 밀리 빌드 연습용으로 적합하며, 특히 저그와 프로토스의 지형 활용 능력이 승부를 가르는 경우가 많습니다. 화산 타일셋 특유의 시야 제한과 고지 이점을 활용한 드랍 플레이, 럴커·하이템플러 등 고급 유닛 운영 연습에도 유리합니다. 2인 권장인 만큼 1대1 래더 스타일 연습이나 친구와의 맞대결용으로 추천되며, 팀전 시에는 대각선 배치로 2대2 밸런스를 맞출 수 있습니다. 플레이 전 확인 포인트는 맵 버전 2.2 적용 여부와 옵저버 슬롯(Ob) 존재 여부입니다. 파일명에 'Ob'가 포함되어 있어 옵저버 모드 지원 가능성이 높으며, 최신 패치와의 호환성을 위해 브루드워 1.16.1 이상 환경에서 구동하는 것이 좋습니다. 밀리 맵 입문자부터 고급 유저까지 두루 즐길 수 있는 완성도 높은 클래식 밀리 맵입니다. Neo Vertigo is a 4-player melee map created for StarCraft: Brood War, featuring a distinctive terrain design based on the volcanic tileset. The filename '(4)Neo Vertigo v2.2-Ob.scx' and internal description stating 'Suggested Players: 2' indicate it supports both 1v1 and 2v2 team play. Developed by Um Jaekyeong and refined through version 2.2, the map hash f3fb0a64ac91c17 confirms it as an official release. The map dimensions are 4096×4096 pixels with 128×128 tiles, following standard melee map specifications. The volcanic terrain's elevation changes and lava zones create natural defensive lines and attack routes. Each main base has balanced mineral and gas placement, while distances between the central area and expansion bases encourage fierce resource contention. Ramp and choke point placement is precise, delivering authentic melee gameplay spanning early build-order battles, mid-game army control, and late-game expansion management. In terms of play experience, it serves well for practicing standard melee builds, with terrain utilization often deciding matches—especially for Zerg and Protoss. The volcanic tileset's sight restrictions and high-ground advantages facilitate drop play and advanced unit practice like Lurkers and High Templar. Recommended for 2 players, it suits 1v1 ladder-style practice or friendly duels, while diagonal positioning enables balanced 2v2 team games. Pre-play checkpoints include verifying version 2.2 application and observer slot (Ob) availability. The 'Ob' in the filename suggests observer mode support, and running on Brood War 1.16.1 or later ensures compatibility with recent patches. This is a well-crafted classic melee map enjoyable for everyone from beginners to advanced players.
디바이딩 라인 (Dividing Line)
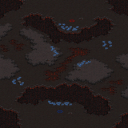
디바이딩 라인(Dividing Line)은 2인용 밀리 맵으로, 정글 타일셋을 배경으로 한다. 맵 제목과 내부 설명인 "Nothing can make it past the dividing line..."에서 알 수 있듯, 중앙을 가로지르는 명확한 분할선이 양 진영을 가르는 핵심 지형 요소로 보인다. 96×96 타일 크기의 표준적인 맵 사이즈로, 양 플레이어는 각자 기지를 두고 중앙 분할선을 사이에 둔 대치 구도를 형성한다. 정글 타일셋 특유의 울창한 수풀과 고저차 지형이 시야 차단과 병력 이동 경로에 변수를 주며, 중앙 분할선을 돌파하거나 우회하는 타이밍 싸움이 승부를 가를 것으로 추정된다. 일반적인 1:1 밀리 진행 방식을 따르며, 별도 트리거나 특수 승리 조건 없이 상대 본진 파괴 시 승리한다. 초반 빌드 오더 싸움, 멀티 기지 확보, 중앙 지역 장악을 위한 소규모 교전이 반복되는 전형적인 밀리 흐름을 경험할 수 있다. 정글 타일셋 밀리 맵을 연습하거나, 지형지물을 활용한 견제·수비 플레이를 익히고 싶은 입문~중급 유저에게 적합하다. 플레이 전에는 중앙 분할선의 정확한 형태(능선, 강, 중립 건물 등)와 양쪽 확장 기지와의 거리, 러시 거리 등을 직접 확인해 빌드 오더를 짜는 것이 좋다. Dividing Line is a 2-player melee map set on the Jungle tileset. As the map title and internal description "Nothing can make it past the dividing line..." suggest, a clear dividing line running through the center appears to be the key terrain feature separating the two bases. With a standard 96×96 tile size, each player establishes a base facing the other across this central divide. The Jungle tileset's characteristic dense foliage and elevation changes create vision blockers and variable unit paths, and the timing battle to break through or flank the central dividing line will likely decide the match. It follows standard 1v1 melee progression with no special triggers or victory conditions beyond destroying the opponent's main structures. Players can experience typical melee flow: early build-order contests, expansion securing, and repeated skirmishes for central map control. This map suits beginner to intermediate users wanting to practice Jungle tileset melee or learn harassment and defensive play using terrain features. Before playing, it is advisable to verify the exact form of the central divide (ridge, river, neutral buildings), distances to third bases, and rush distances to plan build orders accordingly.
해설 크래프트 _ Lost Temple
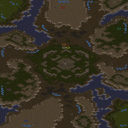
해설 크래프트 로스트 템플은 스타크래프트 브루드워 역사상 가장 상징적인 밀리 맵인 로스트 템플을 대회 해설 및 관전 환경에 맞춰 재구성한 버전이다. 원작 맵의 128x128 타일 크기와 사막 타일셋, 4인용 멀티플레이 구조를 그대로 유지하면서 8인 슬롯을 확보해 4명의 플레이어와 4명의 옵저버·해설자가 동시에 입장할 수 있도록 설계되었다. 내부 설명에 따르면 1대1은 물론 2대2 팀전도 지원하며, 해설 전용임을 명시해 별도 트리거나 자원 변조 없이 순수한 실력 대결이 이루어지도록 의도한 점이 돋보인다. 제작자 KTF_DarkNight는 일부 유저가 1번 플레이어에게 자금을 지급하는 식으로 맵을 변조해 배포하는 행위를 경계하며, 본 버전은 표준 밸런스를 지키는 정식 맵임을 강조한다. 게임 플레이는 클래식 로스트 템플과 동일하게 본진 앞마당 확장, 중앙 섬 멀티, 좁은 입구 지형 등 기존 빌드 오더와 타이밍 싸움이 그대로 통용되므로 밀리 유저라면 별도 적응 없이 즉시 플레이 가능하다. 다만 8인 슬롯 중 플레이어 슬롯과 옵저버 슬롯을 방장이 정확히 지정해야 원활한 진행이 가능하며, 팀전 시에는 1-2번, 3-4번 등 고정 팀 배치가 권장된다. 래더 맵 풀에 자주 오르던 원작의 검증된 밸런스를 해설·방송·관전 용도로 활용하고 싶은 클랜전, 대회 운영자, 밀리 연습생에게 최적화된 맵이다. 플레이 전에는 슬롯 설정과 승리 조건이 적 전부 섬멸로 잡혀 있는지 확인하면 된다. Commentary Craft Lost Temple is a version of Lost Temple, the most iconic melee map in StarCraft: Brood War history, restructured for tournament commentary and observation environments. It preserves the original map's 128x128 tile size, desert tileset, and 4-player multiplayer structure while securing 8 player slots so that 4 players and 4 observers/commentators can join simultaneously. According to the internal description, it supports both 1v1 and 2v2 team games, and its designation as commentary only highlights the intention to ensure pure skill-based confrontation without separate triggers or resource modifications. Creator KTF_DarkNight warns against users distributing modified versions that grant money to Player 1, emphasizing that this version maintains standard balance. Gameplay is identical to classic Lost Temple: natural expansion at the main base, central island bases, and narrow choke points mean existing build orders and timing attacks apply directly, allowing melee players to jump in without adaptation. However, the host must correctly assign player and observer slots among the 8 slots for smooth proceedings, and fixed team arrangements (e.g., slots 1-2 vs 3-4) are recommended for team games. Optimized for clan wars, tournament organizers, and melee trainees who want to utilize the original's proven balance—frequently featured in ladder map pools—for commentary, broadcasting, and observation purposes. Before playing, verify that slot settings are correct and the victory condition is set to Eliminate All Enemies.
1v1 Desert Rat
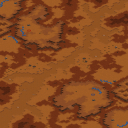
스타크래프트 브루드워의 1:1 대전 맵 '1v1 Desert Rat'은 황량한 사막 지형을 배경으로 펼쳐지는 밀리(Melee) 스타일 전투를 제공합니다. 맵의 가장 큰 특징은 중앙에 위치한 좁은 통로와 양쪽의 넓은 개활지인데, 이 지형은 플레이어 간의 전투가 어떻게 펼쳐질지를 결정짓는 핵심 요소입니다. 좁은 길목을 두고 벌어지는 근접 전투는 신속한 컨트롤과 전략적 판단이 요구되며, 반대로 넓은 공간에서는 치고 빠지는 플레이가 중요해집니다. 맵의 디자인상으로는 유닛 간의 이동 경로가 상대적으로 단순해 보이지만, 황혼 타일셋의 붉은 노을이 어우러진 배경은 시각적으로도 플레이어의 긴장감을 높이는 데 한몫합니다. 'Desert Rat'이라는 제목은 사막의 쥐를 뜻하는 것인데, 이는 perhaps 플레이어들이 쥐처럼 재빠르게 움직이며 상대방을 공격한다는 의미를 담고 있는 것 같습니다. 제작자 Desdichado는 이 맵을 2명의 플레이어에게 추천하며, 'Come and get it. Nuttin like gettin your rat cooked.'라는 독특한 설명문은 플레이어에게 도전적인 분위기를 조성합니다. 이 맵은 기본적인 밀리 전투를 즐기고자 하는 유저들에게 적합하며, 특히 1:1 전투의 짜릿함을 느끼고 싶은 플레이어들에게 추천할 만합니다. 다만, 맵의 밸런스나 디자인상 세부적인 요소는 개인의 플레이 스타일에 따라 체감 차이가 클 수 있으니, 여러 번 플레이해보며 자신의 전술에 맞게 활용하는 것이 중요합니다. 또한, 좁은 통로를 활용한 벙커링이나 러시 전략이 상대방의 유닛 생산 타이밍에 크게 좌우될 수 있으므로, 초보자는 난이도가 다소 높을 수 있습니다. 이 맵을 즐기기 위해서는 기본적인 테란, 프로토스, 저그의 유닛 컨트롤과 빌드 오더에 대한 이해가 필요합니다. This StarCraft: Brood War 1v1 map, 'Desert Rat,' delivers a classic Melee-style battle set against a desolate desert landscape. The map's defining feature is its central narrow corridor flanked by wide open areas, which dictates the flow of combat between players. Close-quarters battles through the tight passage demand quick reflexes and strategic foresight, while the expansive spaces favor hit-and-run tactics. Although the terrain appears straightforward, the twilight-themed tileset bathed in warm hues enhances the visual intensity, keeping players on edge. The title 'Desert Rat' likely symbolizes the agility and cunning required to outmaneuver opponents, much like a rat darting through the desert. Created by Desdichado, this map is recommended for two players, and its quirky description—'Come and get it. Nuttin like gettin your rat cooked.'—adds a playful yet challenging tone. Ideal for those seeking the thrill of 1v1 combat, this map offers a straightforward yet engaging experience for fans of basic Melee battles. However, due to its design, players may experience varying levels of challenge depending on their playstyle, with strategies like bunker rushes or early rushes heavily influenced by the opponent's unit production timing. Beginners might find the difficulty steep, so familiarity with unit control and build orders for Terran, Protoss, or Zerg is essential for an enjoyable experience.
콜로세움 오브 더 퓨처 (Colloseum of the Future)
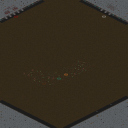
스타크래프트: 브루드워의 유즈맵이자 밀리 기반의 대결 맵인 'Colloseum of the Future'는 이름 그대로 미래의 콜로세움을 배경으로 한 전투 공간입니다. 맵의 중앙에는 거대한 원형 arena가 자리 잡고 있으며, 이 공간을 둘러싼 외곽 지역은 각 플레이어가 시작하는 기지 역할을 합니다. 맵의 구조는 심플하면서도 전략적인 선택을 강제하는데, 중앙 arena는 넓은 개활지이지만 외곽 기지는 좁고 방어에 유리한 지형을 갖추고 있습니다. 이는 초반Resources 확보 경쟁과 함께 중앙Battle의 주도권을 잡기 위한 치열한 전투를 유도합니다. 플레이 방식은 기본 밀리(MLEE) 규칙을 따르지만, 맵의 이름과 설명에서 유추할 수 있듯 '인간이 아닌 모든 것 파괴'라는 목표가 강조됩니다. 이는 일반적인 밀리 맵과는 다르게, 전투 중 파괴 가능한 오브젝트나 구조물이 존재할 가능성을 시사합니다. 또한, 맵의 이름은 '미래'를 테마로 하고 있어, 테크트리나 유닛 조합이 독특하거나 제한적일 수 있습니다. 예를 들어, 특정 유닛들이 강화되거나, 테크트리가 축소되어 빠른 전투가 펼쳐질 가능성이 있습니다. 이 맵의 가장 큰 특징은 바로 '원형 arena' 구조입니다. 중앙 Battlefield는 넓고 개방적이지만, 외곽 기지들은 좁고 방어에 유리한 구조로 되어 있어, 플레이어는 초반Resources 확보와 함께 중앙 Battle에 얼마나 빠르게 진입할지를 결정해야 합니다. 또한, 맵의 симметри性은 밸런스를 맞추는 데 큰 역할을 하며, 양 플레이어의 전략적 선택을 균형 있게 만듭니다. 다만, 맵의 설명이 다소 모호한 만큼, 대결의 승패 조건은 '모든 적 구조물 파괴'가 아닌 '적 유닛 전멸'일 수도 있습니다. 이 맵은 특히 실력 있는 플레이어들에게 추천됩니다. symmetrical한 구조와 중앙 Battlefield의 넓은 개활지는 전략적 깊이를 요구하며, 빠른 판단과 유닛 컨트롤이 승패를 가를 가능성이 높습니다. 또한, 테마와 이름에서 느껴지는 '미래'의 분위기는 단순히 전투가 아닌, 새로운 경험을 추구하는 플레이어들에게 매력적으로 다가올 것입니다. 다만, 초보 플레이어는 맵의 구조와 전략적 선택의 중요성을 충분히 이해하지 못해 어려움을 느낄 수 있습니다. 따라서, 이 맵을 플레이하기 전에는 기본적인 밀리 전략과 맵 리딩 능력을 갖추는 것이 좋습니다. "Colloseum of the Future" is a custom StarCraft: Brood War map designed for melee battles, set in a futuristic colosseum. The map features a massive circular arena at its center, with outer regions serving as each player's starting base. Its design is simple yet forces strategic choices—while the central arena is open and expansive, the starting bases are narrow and defensively advantageous. This setup drives intense early-game resource competition and fierce battles for control of the central battlefield. While the gameplay follows standard melee (MLEE) rules, the map’s name and description hint at a unique twist: the goal isn’t just standard combat but "destroying everything that isn’t human." This suggests the presence of destructible objects or structures during battles, setting it apart from typical melee maps. Additionally, the "future" theme implies unconventional tech trees or unit compositions, such as enhanced units or streamlined progression, leading to faster-paced combat. The defining feature of this map is its circular arena structure. The central battlefield is vast and open, while the outer bases are cramped and defensively strong, forcing players to balance early resource gathering with rapid entry into the central arena. The map’s symmetry ensures balance, giving both players equal strategic options. However, since the description is somewhat vague, the victory condition might hinge on "annihilating the enemy army" rather than destroying all structures. This map is highly recommended for skilled players. Its symmetrical layout and expansive central battlefield demand deep strategy, quick decision-making, and precise unit control to secure victory. The futuristic theme adds an immersive twist, appealing to players seeking more than just standard combat. Beginners, however, may struggle due to the map’s complexity and the importance of strategic positioning. It’s advisable to master basic melee tactics and map awareness before attempting this one.
최근 등록된 맵
새로 추가된 파일과 버전을 확인하세요.

샌드스톰 베이슨 1.2 (Sandstorm Basin 1.2)
Sandstorm Basin 1.2는 1대1 유즈맵으로 설계된 소규모 전투 지도이며, 1024×1024 타일 기반 레이아웃을 사용한다. 맵 전체가 황혼 타일셋으로 꾸며져 있어 낮과 밤의 대비가 뚜렷하고, 지형은 좁은 협곡과 넓은 평지가 교차한다. 시작 지점은 양쪽 끝에 배치되어 있어 초반에 빠른 정찰이 가능하고, 중간에 위치한 작은 언덕은 시야 확보와 유닛 이동 차단에 활용된다. 자원 배치는 각 진영 앞에 광물과 가스가 고르게 배치돼 있어 초반 경제 차이가 크게 발생하지 않는다. 주요 전투 구역은 협곡 중앙부이며, 여기서는 지형을 이용한 기습과 방어가 핵심 전략이 된다. 특히 언덕 위에 배치된 고지대는 사거리 유닛에게 유리한 포지션을 제공한다. 맵에는 숨겨진 경로가 몇 군데 존재해, 이를 발견하면 상대의 후방을 급습할 수 있다. 전투 흐름은 초반 정찰‑자원 확보‑전방 전투‑후방 기습 순으로 진행되며, 전투가 길어질수록 협곡의 좁은 통로가 병목 현상을 일으켜 유닛 관리가 중요해진다. 플레이 전 확인해야 할 포인트는 언덕과 숨은 경로의 위치, 그리고 자원 채취 순서이다. 초보자도 기본적인 마이크로와 매크로를 연습하기에 적합하지만, 지형을 활용한 고급 전략을 구사하려면 맵을 여러 차례 탐색해 숨은 요소를 파악해야 한다. 전체적인 플레이 타임은 약 20분 내외이며, 1대1 매치에서 전략적 깊이를 경험하고 싶은 플레이어에게 추천한다. Sandstorm Basin 1.2 is a small‑scale 1v1 UMS map built on a 1024×1024 tile layout using the Twilight tileset, which creates a clear contrast between day and night visuals. The map alternates between narrow canyons and open plains, with starting positions placed at opposite ends for early scouting. A modest hill in the middle offers sight advantage and can block unit movement, while resources are evenly distributed in front of each base, preventing large early economic gaps. The main combat zone lies in the canyon’s center, where exploiting terrain for ambushes and defenses is essential; the hill provides a high‑ground advantage for ranged units. Several hidden paths are scattered around, allowing a player who discovers them to launch surprise attacks on the opponent’s rear. The typical flow follows early scouting‑resource gathering‑frontline combat‑rear infiltration, and as the battle prolongs the canyon’s choke points demand careful unit micro‑management. Before playing, check the hill and hidden route locations as well as the optimal resource harvesting order. While beginners can practice basic macro‑micro here, mastering the map’s strategic depth requires multiple runs to learn its secret routes. A typical match lasts around 20 minutes, making it a solid choice for players seeking a tactical 1v1 experience.
1vs1 마이크로 프론트 (1vs1 MicroFront)
1vs1 MicroFront는 스타크래프트 브루드워 유즈맵 중 마이크로 컨트롤 연습에 특화된 1대1 아레나 맵이다. 사막 타일셋을 기반으로 128×128 타일 크기의 비교적 좁은 전장이 펼쳐지며, 최대 8인까지 입장 가능하지만 제목과 구성상 1대1 대전용으로 설계된 것으로 보인다. 내부 설명인 'Destroy all enemy buildings'는 일반적인 밀리 승리 조건과 동일하나, 맵 이름에 'Micro'가 붙은 점과 아레나 장르로 분류된 점을 고려하면 초반 빌드 오더 싸움이나 소수 유닛 교전, 드랍십·셔틀 컨트롤 같은 세밀한 마이크로 운영을 집중적으로 겨루는 환경으로 추정된다. 타일셋이 사막인 만큼 모래 지형 특유의 시야 제한이나 언덕 배치가 교전 변수로 작용할 수 있으며, 미니맵상 대칭 구조로 보이는 지형은 양 진영 간 공정성을 확보하려는 의도로 읽힌다. 플레이 인원이 8명으로 표기된 것은 여러 쌍의 1대1 매치가 동시에 진행되거나 관전·대기 슬롯을 염두에 둔 구성일 가능성이 크다. 실제 플레이는 표준 밀리 유닛을 그대로 쓰되 자원·기지 배치가 단순화되어 있어, 빌드 암기보다 실시간 컨트롤 판단력과 멀티태스킹 능력을 시험하는 데 초점이 맞춰진 것으로 보인다. 추천 대상은 초보자가 기본 유닛 조작을 익히는 단계부터 고수가 특정 매치업 마이크로를 갈고닦는 용도까지 폭넓으며, 짧은 호흡으로 반복 연습하기 좋다. 플레이 전에는 맵 에디터나 프리뷰로 기지 위치·자원 분포·언덕 여부를 확인하고, 원하는 종족 매치업이 가능한지 옵션 트리거 유무를 점검하는 것이 바람직하다. 1vs1 MicroFront is a StarCraft Brood War custom map specialized for micro-control practice in a 1v1 arena format. Built on the desert tileset with a compact 128×128 tile layout, it supports up to eight players but the title and structure indicate it is designed for 1v1 duels. The internal description "Destroy all enemy buildings" mirrors the standard melee victory condition, yet the "Micro" prefix and arena classification suggest the focus lies on early build-order clashes, small-skirmish unit control, and precise dropship or shuttle micro. Desert terrain may introduce sight blockers and elevation changes that affect engagements, while the seemingly symmetrical minimap layout points to an intent for fair matchups. The eight-player capacity likely accommodates multiple simultaneous 1v1 pairs or spectator slots. Gameplay uses standard melee units with simplified base and resource placement, shifting emphasis from build memorization to real-time control judgment and multitasking. It suits a wide range of players, from beginners learning basic unit handling to veterans refining matchup-specific micro, and allows short, repeatable practice sessions. Before playing, check the map editor or preview for base locations, resource distribution, elevation, and whether trigger options allow the desired race matchups.
콜로세움 오브 더 퓨처 (Colloseum of the Future)
스타크래프트: 브루드워의 유즈맵이자 밀리 기반의 대결 맵인 'Colloseum of the Future'는 이름 그대로 미래의 콜로세움을 배경으로 한 전투 공간입니다. 맵의 중앙에는 거대한 원형 arena가 자리 잡고 있으며, 이 공간을 둘러싼 외곽 지역은 각 플레이어가 시작하는 기지 역할을 합니다. 맵의 구조는 심플하면서도 전략적인 선택을 강제하는데, 중앙 arena는 넓은 개활지이지만 외곽 기지는 좁고 방어에 유리한 지형을 갖추고 있습니다. 이는 초반Resources 확보 경쟁과 함께 중앙Battle의 주도권을 잡기 위한 치열한 전투를 유도합니다. 플레이 방식은 기본 밀리(MLEE) 규칙을 따르지만, 맵의 이름과 설명에서 유추할 수 있듯 '인간이 아닌 모든 것 파괴'라는 목표가 강조됩니다. 이는 일반적인 밀리 맵과는 다르게, 전투 중 파괴 가능한 오브젝트나 구조물이 존재할 가능성을 시사합니다. 또한, 맵의 이름은 '미래'를 테마로 하고 있어, 테크트리나 유닛 조합이 독특하거나 제한적일 수 있습니다. 예를 들어, 특정 유닛들이 강화되거나, 테크트리가 축소되어 빠른 전투가 펼쳐질 가능성이 있습니다. 이 맵의 가장 큰 특징은 바로 '원형 arena' 구조입니다. 중앙 Battlefield는 넓고 개방적이지만, 외곽 기지들은 좁고 방어에 유리한 구조로 되어 있어, 플레이어는 초반Resources 확보와 함께 중앙 Battle에 얼마나 빠르게 진입할지를 결정해야 합니다. 또한, 맵의 симметри性은 밸런스를 맞추는 데 큰 역할을 하며, 양 플레이어의 전략적 선택을 균형 있게 만듭니다. 다만, 맵의 설명이 다소 모호한 만큼, 대결의 승패 조건은 '모든 적 구조물 파괴'가 아닌 '적 유닛 전멸'일 수도 있습니다. 이 맵은 특히 실력 있는 플레이어들에게 추천됩니다. symmetrical한 구조와 중앙 Battlefield의 넓은 개활지는 전략적 깊이를 요구하며, 빠른 판단과 유닛 컨트롤이 승패를 가를 가능성이 높습니다. 또한, 테마와 이름에서 느껴지는 '미래'의 분위기는 단순히 전투가 아닌, 새로운 경험을 추구하는 플레이어들에게 매력적으로 다가올 것입니다. 다만, 초보 플레이어는 맵의 구조와 전략적 선택의 중요성을 충분히 이해하지 못해 어려움을 느낄 수 있습니다. 따라서, 이 맵을 플레이하기 전에는 기본적인 밀리 전략과 맵 리딩 능력을 갖추는 것이 좋습니다. "Colloseum of the Future" is a custom StarCraft: Brood War map designed for melee battles, set in a futuristic colosseum. The map features a massive circular arena at its center, with outer regions serving as each player's starting base. Its design is simple yet forces strategic choices—while the central arena is open and expansive, the starting bases are narrow and defensively advantageous. This setup drives intense early-game resource competition and fierce battles for control of the central battlefield. While the gameplay follows standard melee (MLEE) rules, the map’s name and description hint at a unique twist: the goal isn’t just standard combat but "destroying everything that isn’t human." This suggests the presence of destructible objects or structures during battles, setting it apart from typical melee maps. Additionally, the "future" theme implies unconventional tech trees or unit compositions, such as enhanced units or streamlined progression, leading to faster-paced combat. The defining feature of this map is its circular arena structure. The central battlefield is vast and open, while the outer bases are cramped and defensively strong, forcing players to balance early resource gathering with rapid entry into the central arena. The map’s symmetry ensures balance, giving both players equal strategic options. However, since the description is somewhat vague, the victory condition might hinge on "annihilating the enemy army" rather than destroying all structures. This map is highly recommended for skilled players. Its symmetrical layout and expansive central battlefield demand deep strategy, quick decision-making, and precise unit control to secure victory. The futuristic theme adds an immersive twist, appealing to players seeking more than just standard combat. Beginners, however, may struggle due to the map’s complexity and the importance of strategic positioning. It’s advisable to master basic melee tactics and map awareness before attempting this one.
에어 존 컨트롤 w/매스어택 (Air Zone Control w/MassAtt)
스타크래프트 브루드워의 ‘에어 존 컨트롤 w/매스어택(Air Zone Control w/MassAtt)’은 공중 유닛으로만 전투를 펼치는 독특한 미니게임 형식의 유즈맵입니다. 맵 중앙에는 거대한 격자형 구조물이 있으며, 각 플레이어는 시작 지점에서 공중 유닛을 생산해 이 격자 주변의 ‘존’들을 차지하는 방식으로 진행됩니다. 맵에는 다양한 경로와 장애물이 배치되어 있어 유닛의 기동성과 컨트롤이 중요하며, 특히 대각선으로 연결된 좁은 길이나 구불구불한 루트를 통해 적의 공격을 피해가며 진형을 형성해야 합니다. 이미지 하단의 좌우에 있는 붉은색과 푸른색의 유닛들은 각각의 플레이어 진영을 상징하며, 맵 곳곳에서 벌어지는 공중전은 마치 aerial dogfight를 연상시킬 만큼 박진감 넘칩니다. 이 맵은 단순히 유닛을 생산하고 싸우는 것뿐만 아니라, 맵 상단의 ‘Boosted ‘n Upgraded’ 표기처럼 유닛의 업그레이드와 특수 능력 활용이 핵심입니다. 예를 들어 공중 유닛의 방어력이나 공격력을 강화하거나, 특정 조건에서 강력한 스킬을 사용할 수 있는 등 전략의 깊이가 더해집니다. 또한, 맵의 구조상 중앙 격자 주변으로의 진출이 승패를 좌우할 수 있어, 초보자와 숙련자 모두에게 흥미로운 전투 경험을 제공합니다. 특히 공중 유닛의 특성을 극대화할 수 있는 맵 디자인 덕분에, 테란의 바이킹, 프로토스의 캐리어, 저그의 뮤탈리스크 등 각 종족의 공중 유닛을 다양하게 활용할 수 있습니다. 추천 대상은 공중 유닛의 컨트롤에 익숙한 플레이어나, 스타크래프트의 다양한 유닛을 실험해보고 싶은 유저입니다. 또한, 팀전보다는 1대1이나 2대2 같은 소규모 전투에서 그 진가가 발휘되며, 맵의 난이도는 유닛의 생산과 배치, 그리고 실시간 전투의 균형에 따라 조절할 수 있습니다. 플레이 전에는 반드시 공중 유닛의 스펙과 맵의 지형을 숙지하고, 업그레이드와 특수 능력을 어떻게 활용할지 미리 계획해두는 것이 좋습니다. 맵의 독특한 디자인과 전투 시스템은 공중전만을 즐기고 싶은 유저들에게 색다른 재미를 선사할 것입니다. Air Zone Control w/MassAtt from StarCraft: Brood War is a unique mini-game-style custom map where battles are fought exclusively with aerial units. The map features a massive grid-like structure at its center, and players must capture 'zones' around this grid by producing air units from their starting positions. The map is designed with various pathways and obstacles, requiring precise unit control and maneuvering. The units in red and blue at the bottom of the image represent the two player factions, and the aerial battles across the map evoke the intensity of aerial dogfights. This map goes beyond simple unit production and combat by incorporating unit upgrades and special abilities, as indicated by the 'Boosted ‘n Upgraded' label at the top. Players can enhance their air units' defense, attack power, or unlock powerful skills under specific conditions, adding depth to the strategy. The central grid structure plays a crucial role in determining victory, as controlling the zones around it can shift the tides of battle. The design allows for diverse use of air units from all three races—Terrans' Vikings, Protoss' Carriers, and Zerg's Mutalisks—making it appealing to players who enjoy experimenting with different units. This map is ideal for players who are familiar with air unit control or those looking to explore the strengths of various StarCraft units. It works best in 1v1 or 2v2 matches rather than larger team battles. The difficulty can be adjusted based on unit production, placement, and real-time combat balance. Before playing, it's essential to study the specs of air units and the map's terrain, and plan how to utilize upgrades and special abilities effectively. The unique design and combat system of this map offer a fresh and exciting experience for players who love aerial combat.
네오 버티고 (Neo Vertigo)
네오 버티고(Neo Vertigo)는 스타크래프트 브루드워 환경에서 제작된 4인용 밀리 맵으로, 화산 타일셋을 기반으로 한 독특한 지형 설계가 특징입니다. 파일명 '(4)Neo Vertigo v2.2-Ob.scx'와 내부 설명에 'Suggested Players: 2'가 명시되어 있어 1대1 또는 2대2 팀전 모두 소화 가능한 구조로 보입니다. 제작자 Um Jaekyeong이 버전 2.2까지 개선해온 맵으로, 맵 해시 f3fb0a64ac91c17을 통해 정식 배포본임을 확인할 수 있습니다. 맵 크기는 4096×4096 픽셀, 타일 단위 128×128로 표준적인 밀리 맵 규격을 따르며, 화산 지형의 고저차와 용암 지대가 자연스러운 방어선과 공격 루트를 형성합니다. 메인 기지마다 미네랄과 가스 배치가 균형 잡혀 있고, 중앙 지역과 멀티 기지 간의 거리감이 치열한 자원 쟁탈을 유도합니다. 램프와 초크 포인트 배치가 정교해 초반 빌드 오더 싸움부터 중반 병력 운용, 후반 멀티 관리까지 전 단계를 아우르는 밀리 본연의 재미를 제공합니다. 플레이 경험 측면에서는 정석적인 밀리 빌드 연습용으로 적합하며, 특히 저그와 프로토스의 지형 활용 능력이 승부를 가르는 경우가 많습니다. 화산 타일셋 특유의 시야 제한과 고지 이점을 활용한 드랍 플레이, 럴커·하이템플러 등 고급 유닛 운영 연습에도 유리합니다. 2인 권장인 만큼 1대1 래더 스타일 연습이나 친구와의 맞대결용으로 추천되며, 팀전 시에는 대각선 배치로 2대2 밸런스를 맞출 수 있습니다. 플레이 전 확인 포인트는 맵 버전 2.2 적용 여부와 옵저버 슬롯(Ob) 존재 여부입니다. 파일명에 'Ob'가 포함되어 있어 옵저버 모드 지원 가능성이 높으며, 최신 패치와의 호환성을 위해 브루드워 1.16.1 이상 환경에서 구동하는 것이 좋습니다. 밀리 맵 입문자부터 고급 유저까지 두루 즐길 수 있는 완성도 높은 클래식 밀리 맵입니다. Neo Vertigo is a 4-player melee map created for StarCraft: Brood War, featuring a distinctive terrain design based on the volcanic tileset. The filename '(4)Neo Vertigo v2.2-Ob.scx' and internal description stating 'Suggested Players: 2' indicate it supports both 1v1 and 2v2 team play. Developed by Um Jaekyeong and refined through version 2.2, the map hash f3fb0a64ac91c17 confirms it as an official release. The map dimensions are 4096×4096 pixels with 128×128 tiles, following standard melee map specifications. The volcanic terrain's elevation changes and lava zones create natural defensive lines and attack routes. Each main base has balanced mineral and gas placement, while distances between the central area and expansion bases encourage fierce resource contention. Ramp and choke point placement is precise, delivering authentic melee gameplay spanning early build-order battles, mid-game army control, and late-game expansion management. In terms of play experience, it serves well for practicing standard melee builds, with terrain utilization often deciding matches—especially for Zerg and Protoss. The volcanic tileset's sight restrictions and high-ground advantages facilitate drop play and advanced unit practice like Lurkers and High Templar. Recommended for 2 players, it suits 1v1 ladder-style practice or friendly duels, while diagonal positioning enables balanced 2v2 team games. Pre-play checkpoints include verifying version 2.2 application and observer slot (Ob) availability. The 'Ob' in the filename suggests observer mode support, and running on Brood War 1.16.1 or later ensures compatibility with recent patches. This is a well-crafted classic melee map enjoyable for everyone from beginners to advanced players.
해설 크래프트 _ Lost Temple
해설 크래프트 로스트 템플은 스타크래프트 브루드워 역사상 가장 상징적인 밀리 맵인 로스트 템플을 대회 해설 및 관전 환경에 맞춰 재구성한 버전이다. 원작 맵의 128x128 타일 크기와 사막 타일셋, 4인용 멀티플레이 구조를 그대로 유지하면서 8인 슬롯을 확보해 4명의 플레이어와 4명의 옵저버·해설자가 동시에 입장할 수 있도록 설계되었다. 내부 설명에 따르면 1대1은 물론 2대2 팀전도 지원하며, 해설 전용임을 명시해 별도 트리거나 자원 변조 없이 순수한 실력 대결이 이루어지도록 의도한 점이 돋보인다. 제작자 KTF_DarkNight는 일부 유저가 1번 플레이어에게 자금을 지급하는 식으로 맵을 변조해 배포하는 행위를 경계하며, 본 버전은 표준 밸런스를 지키는 정식 맵임을 강조한다. 게임 플레이는 클래식 로스트 템플과 동일하게 본진 앞마당 확장, 중앙 섬 멀티, 좁은 입구 지형 등 기존 빌드 오더와 타이밍 싸움이 그대로 통용되므로 밀리 유저라면 별도 적응 없이 즉시 플레이 가능하다. 다만 8인 슬롯 중 플레이어 슬롯과 옵저버 슬롯을 방장이 정확히 지정해야 원활한 진행이 가능하며, 팀전 시에는 1-2번, 3-4번 등 고정 팀 배치가 권장된다. 래더 맵 풀에 자주 오르던 원작의 검증된 밸런스를 해설·방송·관전 용도로 활용하고 싶은 클랜전, 대회 운영자, 밀리 연습생에게 최적화된 맵이다. 플레이 전에는 슬롯 설정과 승리 조건이 적 전부 섬멸로 잡혀 있는지 확인하면 된다. Commentary Craft Lost Temple is a version of Lost Temple, the most iconic melee map in StarCraft: Brood War history, restructured for tournament commentary and observation environments. It preserves the original map's 128x128 tile size, desert tileset, and 4-player multiplayer structure while securing 8 player slots so that 4 players and 4 observers/commentators can join simultaneously. According to the internal description, it supports both 1v1 and 2v2 team games, and its designation as commentary only highlights the intention to ensure pure skill-based confrontation without separate triggers or resource modifications. Creator KTF_DarkNight warns against users distributing modified versions that grant money to Player 1, emphasizing that this version maintains standard balance. Gameplay is identical to classic Lost Temple: natural expansion at the main base, central island bases, and narrow choke points mean existing build orders and timing attacks apply directly, allowing melee players to jump in without adaptation. However, the host must correctly assign player and observer slots among the 8 slots for smooth proceedings, and fixed team arrangements (e.g., slots 1-2 vs 3-4) are recommended for team games. Optimized for clan wars, tournament organizers, and melee trainees who want to utilize the original's proven balance—frequently featured in ladder map pools—for commentary, broadcasting, and observation purposes. Before playing, verify that slot settings are correct and the victory condition is set to Eliminate All Enemies.
매치포인트 (MatchPoint 1.1)
《MatchPoint 1.1》는 스타크래프트 브루드워의 밀리 맵으로, 2인용 1:1 전투에 특화된 구조를 자랑한다. 우주 테마의 타일셋을 사용한 맵의 중앙부는 비교적 평평한 지형으로 이루어져 있으며, 양측 본진은 각각의 멀티와 연결된 러시 거리가 적당히 확보되어 있다. 본진과 멀티 사이에 위치한 미네랄 멀티는 게임 초반 자원 확보에 영향을 미치는데, 이를 둘러싼 언덕 지형이 중립 건물을 배치하기에 적합한 구조로 보인다. 맵의 양쪽 가장자리는 방어하기 어려운 넓은 평지인데, 이는 빠른 러시나 포지션 싸움을 유도할 수 있는 요소로 작용할 수 있다. 또한, 맵 곳곳에 배치된 소규모 언덕과 언덕 건너편의 미네랄 멀티는 전략적 포지션 선정을 강요하며, 테란의 벙커링이나 저그의 러커 활용을 고려한 설계로 추정된다. 맵의 균형은 비교적 잘 맞는 편으로, 양측이 대등한 자원과 지형을 확보할 수 있도록 배치되어 있지만, 중앙 평지의 넓이와 언덕의 배치에 따라 초보자와 숙련자 간의 실력 격차가 드러날 수 있는 맵이다. 초보자에게는 자원 확보와 멀티 활용이 용이한 반면, 숙련자에게는 미묘한 언덕과 평지 간의 포지션 싸움에서 승부가 갈릴 가능성이 높다. 특히 우주 테마의 타일셋은 밋밋해 보일 수 있지만, 맵의 평탄한 구조는 빠른 전투와 스나이핑을 선호하는 플레이어들에게 적합하다. 플레이 전에는 중앙 평지의 넓이와 본진 멀티의 접근성을 미리 확인하고, 상대방의 전략에 따라Early 메카닉, 바이오닉, 또는 저글링-히드라 위주의 빌드를 구상하는 것이 좋다. 또한, 언덕을 활용한 시야 싸움과 멀티 방어 타이밍을 철저히 연습한다면 이 맵에서 우위를 점할 수 있을 것이다. MatchPoint 1.1 is a StarCraft: Brood War melee map designed for intense 1v1 battles. The central area features a relatively flat terrain, while the main bases are connected to smaller multi expansions with moderate rush distances. The mineral-only expansions near the bases play a key role in early-game resource control, and the surrounding cliff formations provide strategic positions for neutral buildings. The wide open edges on both sides of the map make them vulnerable to fast rushes or positional clashes, while scattered small cliffs and mineral expansions in the mid-game force players to make critical decisions on build orders and expansions. The map maintains a balanced design, offering equal resources and terrain control to both players, though the spacious central plains and cliff placements can amplify skill gaps between beginners and experts. New players will benefit from easier resource gathering and multi expansion control, while experienced players will thrive on micro-intensive positional battles and precise execution of strategies such as Terran bunker rushes or Zerg lurker setups. The space-themed tileset may seem plain, but the flat terrain structure favors quick engagements and sniping tactics. Before playing, it's crucial to assess the central open area's width and the accessibility of base expansions, then adapt your build—whether Early Mech, Bio, or Ling-Hydra—to counter your opponent's strategy. Mastering cliff-based sight control and multi-defense timing will give you a significant advantage in this map.
디바이딩 라인 (Dividing Line)
디바이딩 라인(Dividing Line)은 2인용 밀리 맵으로, 정글 타일셋을 배경으로 한다. 맵 제목과 내부 설명인 "Nothing can make it past the dividing line..."에서 알 수 있듯, 중앙을 가로지르는 명확한 분할선이 양 진영을 가르는 핵심 지형 요소로 보인다. 96×96 타일 크기의 표준적인 맵 사이즈로, 양 플레이어는 각자 기지를 두고 중앙 분할선을 사이에 둔 대치 구도를 형성한다. 정글 타일셋 특유의 울창한 수풀과 고저차 지형이 시야 차단과 병력 이동 경로에 변수를 주며, 중앙 분할선을 돌파하거나 우회하는 타이밍 싸움이 승부를 가를 것으로 추정된다. 일반적인 1:1 밀리 진행 방식을 따르며, 별도 트리거나 특수 승리 조건 없이 상대 본진 파괴 시 승리한다. 초반 빌드 오더 싸움, 멀티 기지 확보, 중앙 지역 장악을 위한 소규모 교전이 반복되는 전형적인 밀리 흐름을 경험할 수 있다. 정글 타일셋 밀리 맵을 연습하거나, 지형지물을 활용한 견제·수비 플레이를 익히고 싶은 입문~중급 유저에게 적합하다. 플레이 전에는 중앙 분할선의 정확한 형태(능선, 강, 중립 건물 등)와 양쪽 확장 기지와의 거리, 러시 거리 등을 직접 확인해 빌드 오더를 짜는 것이 좋다. Dividing Line is a 2-player melee map set on the Jungle tileset. As the map title and internal description "Nothing can make it past the dividing line..." suggest, a clear dividing line running through the center appears to be the key terrain feature separating the two bases. With a standard 96×96 tile size, each player establishes a base facing the other across this central divide. The Jungle tileset's characteristic dense foliage and elevation changes create vision blockers and variable unit paths, and the timing battle to break through or flank the central dividing line will likely decide the match. It follows standard 1v1 melee progression with no special triggers or victory conditions beyond destroying the opponent's main structures. Players can experience typical melee flow: early build-order contests, expansion securing, and repeated skirmishes for central map control. This map suits beginner to intermediate users wanting to practice Jungle tileset melee or learn harassment and defensive play using terrain features. Before playing, it is advisable to verify the exact form of the central divide (ridge, river, neutral buildings), distances to third bases, and rush distances to plan build orders accordingly.
맵 선택 가이드
태그는 맵의 핵심 특징을 빠르게 설명하지만 제작 버전마다 규칙이 다를 수 있습니다. 상세 설명에서 권장 인원, 난이도, 플레이 시간과 버전을 함께 확인한 뒤 다운로드하세요.