
타임어택 스타크래프트 맵 모음
'타임어택' 태그가 등록된 맵을 모았습니다. 장르 하나로 찾기 어려운 플레이 방식, 난이도와 특징을 중심으로 인기 맵과 최신 맵을 비교해 보세요.
- 등록 맵
- 28개
- 누적 다운로드
- 1
- 누적 조회
- 1,035
인기 맵
다운로드와 조회 반응이 높은 맵입니다.
30분 동안 버티기 (Survive for 30 Minutes)
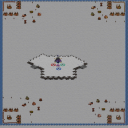
스타크래프트: 브루드워의 유즈맵 ‘30분 동안 버티기 (한스타용)’는 디펜스 장르의 대표적인 생존형 맵으로, 제한 시간 내에 끊임없이 밀려오는 적을 방어하며 버텨야 하는 짜릿한 긴장감을 선사한다. 맵은 중앙에 플레이어 기지가 위치하고, 주변으로 적의 공격 루트가 여러 갈래로 뻗어나가며, 각 루트마다 공세 타이밍과 강도가 조절되어 있는 구조다. 이미지 상단과 하단의_DIRT 테두리 안쪽에 배치된 유닛들은 적의 초기 공격을 표시하며, 중앙의 젤나가 크리스탈과 같은 오브젝트는 스폰 포인트로 추정된다. 플레이어는 제한 시간 30분 동안 각 루트를 방어하면서 자원을 확보하고, 방어선을 구축해야 한다. 특히 맵 하단의 ‘한스타용’이라는 표기는 한국어 사용자를 대상으로 한 맵임을 시사하며, 한스타(한국 스타크래프트) 커뮤니티에서 인기를 얻었을 가능성이 크다. 방어에 성공하면 승리하는 간단한 승리 조건이지만, 끊임없는 적의 압박과 시간 제한은 플레이어에게 전략적 깊이를 요구한다. 초보자보다는 중급 이상의 플레이어에게 적합하며, 디펜스 맵의 기본적인 메커니즘과 맵 리딩 능력을 시험할 수 있는 훌륭한 연습용 맵으로 보인다. 플레이 전에는 맵의 각 루트의 공세 패턴과 주요 스폰 지역을 숙지하는 것이 중요하며, 자원과 방어 시설 배치에 대한 계획을 세우는 것이 핵심이다. StarCraft: Brood War's custom map "Survive for 30 Minutes (Korean Version)" is a standout survival defense game where players must hold out against relentless enemy waves within a strict time limit, delivering an intense and thrilling challenge. The map features a central player base surrounded by multiple branching enemy attack routes, each with carefully timed and varying assaults. Enemies spawn from objects like the central Zerg crystal, while the top and bottom borders marked with _DIRT indicate initial attack directions. Players must defend each route, gather resources, and fortify their defenses over the 30-minute duration. The "Korean Version" label suggests it was designed with Korean StarCraft players in mind, likely gaining popularity within the Korean StarCraft community. While the victory condition is simple—surviving the time limit—the constant enemy pressure and ticking clock demand strategic depth. This map is better suited for intermediate to advanced players, serving as an excellent training ground for mastering defense mechanics and map awareness. Before playing, it’s crucial to study each route’s attack patterns and key spawn points, then plan resource gathering and defensive structures accordingly.
나는 전설이다 2 (I Am Legend 2)
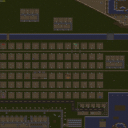
스타크래프트 브루드워 유즈맵 '나는 전설이다 2'는 사막 타일셋 위에 펼쳐진 7인 협동 서바이벌 맵이다. 파일명에 Final이 붙어 있고 내부 설명에서 '2는 여러 문제를 보완 했습니다'라고 밝힌 만큼, 전작의 밸런스와 버그를 다듬은 완결판 성격이 강하다. 맵 크기는 192×192 타일(6144×6144 픽셀)로 넉넉한 전장을 제공하며, 승리 조건은 제한된 시간까지 전원 생존, 패배 조건은 전원 사망으로 전형적인 타임어택 생존 방식을 따른다. 진행은 시작 지점에서 자원을 확보하고 방어를 구축한 뒤, 주기적으로 몰려오는 적 웨이브를 막아내는 흐름으로 이어진다. 7인 전원이 한 팀으로 묶여 있어 역할 분담이 자연스럽다. 초반은 미네랄·가스 확보와 기본 유닛 생산, 중반은 업그레이드와 특수 건물 배치, 후반은 대형 공세에 맞선 집중 화력과 수리·치유 순환이 핵심이다. 사막 지형 특성상 시야가 넓고 지형 장애물이 적어 적 이동 경로가 비교적 뚜렷하므로, 입구 막기와 집중 사격 라인 설계가 승패를 가른다. 난이도는 '보통' 수준으로 추정된다. 전작 피드백을 반영해 웨이브 간격, 적 조합, 자원 배분 등이 조정되었을 가능성이 높기 때문이다. 다만 7인 풀파티가 아니면 인원 수에 따른 난이도 스케일링이 어떻게 작동하는지 불확실하므로, 인원이 부족할 때는 컴퓨터 플레이어를 채우거나 난이도 조절 트리거가 있는지 게임 초반에 확인하는 것이 좋다. 플레이 타임은 웨이브 구성에 따라 25~35분 내외로 예상된다. 추천 대상은 협동 생존 장르를 즐기는 유저, 고정 파티로 호흡을 맞춰보고 싶은 클랜·친구 그룹, 그리고 '나는 전설이다' 시리즈의 완결판을 경험하고 싶은 올드 유저다. 맵 파일 인코딩이 cp949로 한글 설명이 깨지지 않으므로 한국어 환경에서 바로 실행 가능하다. 실행 전 버전 표기(Final/v2.0)와 트리거 초기화 여부만 체크하면 별도 패치 없이 바로 즐길 수 있다. I Am Legend 2 is a 7‑player cooperative survival map set on the Desert tileset. The filename carries “Final” and the internal description notes that version 2 fixed several issues, indicating this is a polished definitive edition. The map spans 192×192 tiles (6144×6144 pixels), giving a spacious battlefield. Victory requires all players to survive until the time limit expires; defeat triggers when everyone is eliminated — a classic time‑attack survival format. Gameplay follows a familiar arc: secure resources at the starting location, build defenses, then hold against periodic enemy waves. All seven players share a single team, so role division emerges naturally. Early game focuses on mineral/gas income and basic unit production; mid‑game adds upgrades and special structure placement; late game demands concentrated firepower, repair cycles, and healing against heavy assaults. The open desert terrain offers clear sightlines and few obstacles, making enemy paths predictable — thus chokepoint blocking and focused firing lines become decisive. Difficulty is estimated as “Normal.” Since the creator explicitly addressed balance and bug fixes from the first version, wave timing, enemy compositions, and resource distribution have likely been tuned. However, it is unclear how the map scales with fewer than seven players, so parties should check for difficulty‑adjustment triggers or fill slots with AI at the start. Expected playtime falls around 25–35 minutes depending on wave structure. Recommended for fans of cooperative survival, fixed groups looking for coordinated gameplay, and veterans wanting to experience the series’ final chapter. The map uses cp949 encoding, so Korean text displays correctly in a Korean locale. Before launching, simply verify the version label (Final/v2.0) and whether triggers initialize properly — no extra patches required.
Offensive Strike - Final Beta (공격형 타격 - 최종 베타)
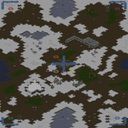
「Offensive Strike - Final Beta」는 스타크래프트: 브루드워의 유즈맵으로, 제한 시간 내에 모든 적 건물을 파괴하는 목표를 지닌 서바이벌 장르의 맵이다. 맵의 핵심은 ‘시간과 적의 반격’이라는 두 가지 압박 속에서 플레이어의 전략적 판단력을 시험하는 데 있다. 맵 중앙에 위치한 넓은 평지는 공격과 수비의 거점이 되며, 플레이어는 이곳을 중심으로 적의 건물을 찾아내 파괴해야 한다. 맵 곳곳에 배치된 적의 건물이 시간이 지나면서 점차 강력해지거나 수비 태세를 갖추기 때문에, 초반의 선제공격이 무엇보다 중요하다. 또한, 맵의 테두리에는 방어 시설이 배치되어 있어 무턱대고 공격을 펼쳤다가는 큰 손실을 입을 수 있다. 따라서 플레이어는 적의 건물을 하나씩 제거해 나가며, 동시에 자신의 기지를 보호하는 균형 잡힌 전략을 구사해야 한다. 이 맵은 특히 ‘Final Beta’라는 이름에 걸맞게 난이도 상승 요소가 뚜렷하다. 맵 설명에 따르면 ‘Each Level gets harder’라는 문구가 확인되며, 이는 맵의 구성이 단계적으로 어려워지는 구조를 갖추고 있음을 의미한다. 예를 들어 초기에는 소수의 건물이 느리게 반응하더라도, 시간이 지나면 적의 건물이 다수 등장하거나 방어 시설이 강화되는 방식으로 진행된다. 이러한 구조는 플레이어에게 끊임없는 긴장감을 제공하며, 단순히 공격만 펼치는 것이 아니라 ‘시간 관리’와 ‘자원 관리’를 동시에 요구한다. 또한, 15/20 Bases라는 설명은 맵 내에 존재하는 적 기지의 수를 암시하며, 이는 맵의 규모가 크고 전략적 깊이가 있음을 시사한다. 이 맵은 초보 플레이어보다는 중급 이상의 플레이어에게 추천된다. 맵의 구조상 빠른 판단력과Micro 컨트롤이 요구되며, 적의 반격을 효과적으로 방어하기 위해서는 맵에 대한 사전 이해가 필수적이다. 또한, 제한 시간 내에 모든 적을 파괴해야 한다는 목표는 플레이어의 실전 감각을 키우는 데 도움이 된다. 추천 전 확인해야 할 포인트는 맵의 중앙 평지 접근성, 적 건물의 배치 패턴, 그리고 방어 시설의 위치와 강도이다. 이러한 요소들을 숙지한 후 플레이한다면, 이 맵은 스타크래프트 유즈맵의 재미와 전략성을 동시에 느낄 수 있는佳作가 될 것이다. "Offensive Strike - Final Beta" is a custom map for *StarCraft: Brood War*, where the objective is to destroy all enemy buildings within a time limit. The core of the map lies in testing players' strategic decision-making under two key pressures: time and enemy counterattacks. The wide open field at the center serves as the focal point for both offense and defense, and players must locate and destroy enemy buildings from this central area. Since enemy buildings scattered across the map grow stronger or reinforce their defenses over time, a proactive early-game offense is crucial. Additionally, defensive structures along the map's edges mean reckless attacks can lead to heavy losses, forcing players to balance clearing enemy buildings one by one with protecting their own base. As the name "Final Beta" suggests, the difficulty escalates noticeably. The map description confirms this with the phrase "Each Level gets harder," indicating a progressive difficulty structure. Early on, enemy buildings may react slowly with few in number, but as time passes, more buildings appear, and defenses strengthen. This design keeps players constantly on edge, demanding not just aggressive play but also careful time and resource management. The mention of "15/20 Bases" hints at the number of enemy bases in the map, suggesting a large scale and deep strategic layers. This map is best suited for intermediate to advanced players. Its design requires quick decision-making and precise micro-management, and understanding the map’s layout is essential for effectively countering enemy responses. The goal of destroying all enemies within the time limit also sharpens players' real-game instincts. Before diving in, players should familiarize themselves with the accessibility of the central field, enemy building placement patterns, and the locations and strengths of defensive structures. With a solid grasp of these elements, this map proves to be an excellent work that delivers both fun and strategic depth in a *StarCraft* custom map.
오펜시브 스트라이크 (Offensive Strike)
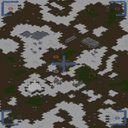
오펜시브 스트라이크는 서바이벌 장르에 속하는 스타크래프트 브루드워 유즈맵으로, 제한된 시간 안에 적 건물을 모두 파괴해야 하는 목표를 가지고 있습니다. 맵은 3072×3072 타일 기반으로 설계되어 있으며, 플랫폼 타일셋을 사용해 지형이 비교적 평탄하면서도 전략적 위치가 존재합니다. 각 레벨이 진행될수록 적 유닛과 건물의 배치가 복잡해지고, 타이머가 점점 짧아져 난이도가 상승합니다. 플레이어는 4인까지 동시에 참여할 수 있으며, 팀 전투보다는 개인 전투에 초점을 맞춘 솔로 혹은 자유로운 멀티플레이가 주된 플레이 방식입니다. 초기 레벨에서는 기본 유닛과 간단한 방어 구조를 활용해 빠르게 건물을 파괴하는 연습을 할 수 있지만, 후반부에서는 적의 방어 타워와 고레벨 유닛이 등장해 전투 전략을 재조정해야 합니다. 특히 건물 파괴 순서를 어떻게 잡느냐가 전체 클리어 시간에 큰 영향을 미치며, 자원 관리와 유닛 생산 타이밍이 핵심 요소로 작용합니다. 맵 내에는 숨겨진 고지대와 이동 경로가 몇 군데 존재해, 이를 활용하면 적의 방어선을 우회하거나 급습할 수 있는 전술적 선택지가 제공됩니다. 플레이 전에는 각 레벨의 타이머와 적 배치를 미리 확인하고, 필요한 유닛 조합을 미리 준비하는 것이 좋습니다. 초보자보다는 기본적인 유닛 운용에 익숙한 플레이어에게 적합하며, 빠른 판단과 지속적인 압박을 즐기는 유저에게 특히 추천됩니다. Offensive Strike is a survival‑type custom map for StarCraft: Brood War where the objective is to destroy all enemy buildings before the timer expires. The map spans 3072×3072 tiles using the platform tileset, offering a relatively flat terrain with several strategic positions. As the levels progress, enemy unit placements become more intricate and the time limit shortens, increasing overall difficulty. Up to four players can join, and the focus is on solo or free‑for‑all multiplayer rather than team combat. Early stages serve as a tutorial for basic unit control and rapid building demolition, while later stages introduce defensive towers and higher‑tier units that force players to rethink their tactics. The order in which buildings are targeted heavily influences the total clearance time, making resource management and unit production timing critical. Hidden high grounds and alternative pathways appear in several spots, allowing players to bypass defenses or launch surprise attacks. Before starting, it’s advisable to review the timer and enemy layout for each level and prepare the appropriate unit composition. This map suits players who are comfortable with basic unit handling and enjoy fast decision‑making and constant pressure, making it especially recommended for experienced gamers who like high‑tempo challenges.
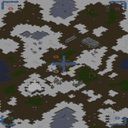
공격 섬멸 (Offensive Strike)
‘--- Offensive Strike ---’는 스타크래프트 브루드워의 서바이벌 장르 유즈맵으로, 제한된 시간 안에 적의 건물을 모두 파괴하는 것이 목표인 공격형 맵이다. 맵은 3072×3072 크기의 정사각형 구조로, 플랫폼 타일셋을 기반으로 제작되어 깔끔한 시야와 안정적인 연산을 제공한다. 플레이어는 4명으로 구성되며, 각각의 건물을 파괴해 나가면서 맵의 난이도가 점차 상승하는 특징을 보인다. 내부 설명에서 언급된 것처럼 ‘Final Version’이라는 수식어가 붙어 있으며, ‘Ultimate Survival’의 제작자인 SentryIII가 원작을 맡았고, LOC_KIRBY에 의해 수정되었다는 후기가 확인된다. 맵의 이름은 ‘Offensive Strike’로, 공격과 섬멸의 의미를 담고 있어 플레이 스타일이 공격적이고 속전속결형임을 짐작할 수 있다. 공격형 서바이벌 맵의 특성상, 초반에는 비교적 여유로운 플레이가 가능하지만 점차 증가하는 적의 수와 방어 시설로 인해 긴장감이 고조된다. 맵 중앙에는 넓은 개활지가 펼쳐져 있어 유닛의 기동성과 컨트롤이 중요해지며, 맵 외곽으로 갈수록 방어 시설이 밀집되어 있어 전략적인 진입로가 제한된다. 특히, 시간 제한이 있기 때문에 신속한 판단과 효율적인 자원 활용이 필수적이다. 플레이어는 초반에 충분한 병력을 확보한 뒤, 적의 건물을 하나씩 제거해 나가야 하는데, 방어 시설의 배치와 타임어택 요소로 인해 반복 플레이를 통해 최적의 전략을 익히는 것이 중요하다. 초보자보다는 어느 정도 스타크래프트에 익숙한 플레이어에게 적합하며, 특히 공격형 맵을 선호하는 유저들에게 추천할 만한 작품이다. 구조적으로는 중앙 광장과 외곽 방어 시설이 명확히 분리되어 있어, 맵을 여러 구역으로 나누어 전략을 수립할 수 있다. 또한, 맵의 크기가 크고 타일셋이 플랫폼으로 구성되어 있어 시야 확보가 용이하다는 장점이 있지만, 넓은 맵을 빠르게 осво해야 한다는 점에서 다소의 적응 시간이 요구된다. 맵을 플레이하기 전에는 맵의 주요 거점과 방어 시설의 위치를 숙지하고, 초반 자원 수급을 원활히 진행할 수 있도록 준비하는 것이 중요하다. 전체적으로는 공격형 서바이벌 맵의 정석을 따르고 있으며, 난이도 상승과 타임어택 요소로 인해 긴장감을 유지할 수 있는 구조로 설계되어 있다. Offensive Strike is a survival-style custom map for StarCraft: Brood War, where players must destroy all enemy buildings within a limited timeframe. The map features a 3072×3072 square layout with a platform tile set, ensuring clear visibility and smooth gameplay. Designed for four players, the difficulty escalates progressively as enemy structures are eliminated. The map is labeled as the 'Final Version,' originally created by SentryIII, known for 'Ultimate Survival,' and later modified by LOC_KIRBY. As an offensive survival map, Offensive Strike starts with a relatively relaxed pace but intensifies as enemy numbers and defensive structures increase. The central open area allows for dynamic unit movement, while the outer regions are densely fortified, requiring strategic planning for entry points. The time constraint demands quick decision-making and efficient resource management. Players should secure a strong early-game force to systematically dismantle enemy buildings, with the map’s defensive layouts and time-attack mechanics rewarding repeated attempts to refine strategies. This map is best suited for players familiar with StarCraft, particularly those who enjoy fast-paced, offensive gameplay. Structurally, the map divides into a central plaza and outer defensive zones, enabling players to divide their strategies into multiple sectors. The large map size and platform tile set provide excellent visibility, though the expansive layout requires some adaptation. Before playing, it’s crucial to familiarize yourself with key locations and defensive structures, ensuring smooth early-game resource gathering. Overall, Offensive Strike adheres to the classic offensive survival genre, offering tension through escalating difficulty and time constraints.
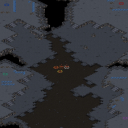
아트 오브 디펜스 (Art of Defense)
‘Art of Defense’는 스타크래프트 브루드워의 유즈맵으로, 50분 동안의 생존을 목표로 하는 디펜스 장르의 맵입니다. 내부 설명에 ‘Survive for fifty minutes and win’이라는 문구가 명시되어 있어, 시간 제한 내에 끊임없이 밀려오는 적을 방어하는 형식의 게임플레이가 예상됩니다. 맵 제목과 설명만으로는 장르가 명확히 드러나지 않지만, 디펜스라는 분류와 함께 ‘Art’라는 단어는 전략성이나 예술적인 디자인 요소를 강조하는 듯합니다. 맵 이미지에서는 중앙에 넓은 공간이 있고, 주변으로 방어 가능한 구조물이 배치되어 있는 구조가 보입니다. 이는 다수의 유닛이 몰려오는 상황을 고려한 디자인으로 보이며, 플레이어는 자원을 확보해 방어 시설을 구축하고 적의 공격을 막아내야 합니다. 디펜스 맵의 특징인 ‘지속적인 압박’과 ‘자원 관리’가 주요 요소로 작용할 것입니다. 추천 대상은 디펜스 장르를 좋아하는 플레이어로, 특히 꾸준한 방어와 전략적 자원 관리를 즐기는 유저에게 적합할 것입니다. 플레이 전에는 맵의 방어 구조와 자원 배치, 적의 공격 패턴을 미리 확인하는 것이 중요합니다. 맵의 공간 구성상 4인 플레이를 고려한 설계가 보이며, 팀 플레이보다는 개인 또는 독립적인 방어 라인을 구축하는 방식으로 진행될 가능성이 높습니다. 맵의 난이도는 기본 제공 정보가 없지만, ‘50분’이라는 긴 시간과 지속적인 공격은 초보자가 쉽게 접근하기 어려운 구조로 보입니다. 따라서 ‘보통’ 이상의 난이도를 예상할 수 있으며, 적응력을 요구하는 디펜스 게임을 선호하는 플레이어에게 추천합니다. 게임 진행 중에는 자원 확보와 방어 시설의 배치에 신경을 써야 하며, 예상치 못한 적의 공격 패턴에 대응할 수 있는 유연성이 필요합니다. 맵의 디자인과 구조상 ‘디펜스’로 명확히 분류할 수 있으며, 특히 ‘시간 제한 디펜스’라는 하위 장르에 해당할 가능성이 높습니다. "Art of Defense" is a custom map from StarCraft: Brood War, a defense genre map where the goal is survival for 50 minutes. The in-game description explicitly states "Survive for fifty minutes and win," indicating a gameplay style focused on continuously defending against waves of incoming enemies within the time limit. While the title and description alone don't clearly reveal the genre, the term "Defense" and the word "Art" suggest an emphasis on strategic depth or artistic design elements. The map image shows a wide open space in the center with defensive structures placed around the perimeter. This layout appears designed to accommodate large groups of units, requiring players to gather resources, build defenses, and fend off attacks. Key elements like sustained pressure and resource management, typical of defense maps, will play a major role. This map is recommended for players who enjoy the defense genre, especially those who appreciate steady defense and strategic resource management. Before playing, it's important to study the defensive structures, resource placement, and enemy attack patterns. The spatial design suggests it's tailored for four players, likely involving individual or independent defense lines rather than team play. While the exact difficulty isn't specified, the long 50-minute duration and continuous attacks make it challenging for beginners, suggesting an above-average difficulty level. It’s best suited for players who enjoy adaptive defense games and have some experience. During gameplay, focus on resource gathering and defensive structure placement, and be prepared to adapt to unexpected enemy attack patterns. The map's design and structure clearly classify it as a defense map, likely falling under the subgenre of "time-limited defense."
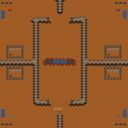
사하라 워즈 (Sahara Warz)
사하라 사막 한가운데서 펼쳐지는 피 튀기는 전투를 그린 스타크래프트 브루드워 유즈맵 <사하라 워즈>는, 플레이어와 적들이 모두 사막에 고립된 상태에서 벌어지는 사투를 묘사한 작품이다. 맵의 전체적인 구도는 사각형 형태의 넓은 평지 위에 건조한 사막 지형과 오아시스가 배치되어 있으며, 중앙에는 거대한 분화구가 있어 전투의 무대가 된다. 지형의 특징상 시야가 제한적이고 기동성이 중요해지는데, 특히 오아시스 주변은 자원 확보와 방어의 핵심 지점이 된다. 플레이어는 시작 지점에서 출발해 맵 곳곳에 흩어진 자원을 확보하며 병력을 양성하고, 상대방을 먼저 전멸시키는 것이 목표로 보인다. 맵의 중앙 분화구는 전투가 자주 벌어지는 장소로, 이곳에서 병력이 교착하는 경우가 많을 것이다. 맵의 가장자리로 갈수록 완만하게 지형이 높아지며, 언덕 지형이 제공되어 시야 확보와 방어에 유리한 지점이 된다. 맵의 디자인상으로는 중앙 지역이 가장 치열한 전투가 벌어지는 장소로 예상되며, 상대방을 각개격파하기보다는 중앙에서 포위 공략을 시도하는 전략이 유효할 것으로 보인다. 초보자부터 숙련자까지 모두 즐길 수 있는 밸런스형 맵으로 보이며, 자원 관리와 병력 운용이 핵심인 만큼 이 두 가지에 집중하면 좋은 결과를 얻을 수 있을 것이다. 특히, 초반 자원 확보가 느리므로 신속한 확장과 병력 생산 타이밍을 맞추는 것이 중요하다. 또한, 맵의 중앙 분화구는 적대 진영과의 등지고 싸우는 경우가 많으므로, 상대방의 병력 움직임을 예측하고 기동성을 살린 공격을 계획하는 것이 중요하다. 이 맵은 디펜스와 공격의 균형을 맞추는 전략적 사고를 요구하며, 이를 통해 플레이어는 전투의 재미와 긴장감을 동시에 느낄 수 있을 것이다. Sahara Warz is a StarCraft: Brood War custom map that immerses players in a brutal desert showdown. Set in the middle of the Sahara Desert, the map features a wide rectangular battlefield with arid terrain and scattered oases. The centerpiece is a massive crater, serving as the focal point of intense battles. The terrain restricts visibility and demands high mobility, especially around the oases, which are critical for resource control and defense. Players start at designated positions, gather scattered resources, and build armies to eliminate opponents. The central crater is likely the most contested area, where most clashes occur. The map edges rise gradually, offering elevated terrain that provides better visibility and defensive advantages. The design suggests that central area battles are inevitable, and strategies revolving around encirclement and coordination may prove effective. This map offers a balanced experience suitable for both beginners and seasoned players, with resource management and army deployment being key factors for success. Early-game resource scarcity makes quick expansion and timely army production vital. The central crater often forces face-to-face confrontations, so predicting enemy movements and leveraging mobility in attacks is crucial. Sahara Warz challenges players to balance defense and offense, delivering both strategic depth and thrilling combat experiences.
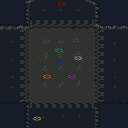
사격 훈련장 (Firing Range)
스타크래프트 브루드워 유즈맵 〈Firing Range〉는 타겟 사격과 시간 제한을 핵심으로 하는 퍼즐형 디펜스 맵입니다. 맵의_NAME_부분은 넓은 설원 맵 중앙에 배치된 다양한 표적들을 제한 시간 내에 정확히 타격해야 하는 구조로, 맵 곳곳에 흩어진 표적들은 플레이어의 정확한 조준과 타이밍을 요구합니다. 맵의_NAME_부분은 특히 표적의 위치와 움직이는 패턴을 파악하는 것이 중요하며, 잘못된 타격은 오히려 역효과를 불러올 수 있어 신중한 플레이가 필요합니다. 맵의_NAME_부분은 오른쪽 상단에 설치된 붉은색 'STOP' 표시등은 제한 시간을 알리는 신호로, 이 표시등이 깜빡이기 시작하면 남은 시간이 얼마 없음을 의미합니다. 맵의_NAME_부분은 중앙의 넓은 개활지는 표적들이 배치된 주요 공간이지만, 맵의_NAME_부분은 좌우 양측의 협소한 통로와 언덕 지형은 표적을 확인하거나 피격당하지 않기 위한 전략적 위치로 활용할 수 있습니다. 맵의_NAME_부분은 플레이어는 제한된 수의 총알과 제한 시간을 관리하며 표적을 모두 파괴하거나, 제한 시간 내에 목표를 달성해야 합니다. 맵의_NAME_부분은 맵의_NAME_부분은 맵의_NAME_부분은 초보자의 경우 표적의 패턴을 익히고 타이밍을 맞추는 데 집중해야 하며, 숙련자의 경우 빠른 조준과 효율적인 이동 경로를 계획하는 능력이 중요합니다. 맵의_NAME_부분은 맵의_NAME_부분은 특히 설원 테마의 맵답게 맵 곳곳에 눈이 쌓인 지형과 얼음 표면이 시각적 특징으로, 맵의_NAME_부분은 맵의_NAME_부분은 맵의_NAME_부분은 이 맵은 타겟 사격을 любительским способом 즐기고자 하는 플레이어들에게 적합한 퍼즐형 디펜스 맵으로, 전략과 정확성을 동시에 요구하는 재미있는 게임플레이를 제공합니다. 맵의_NAME_부분은 맵의_NAME_부분은 플레이 전 표적의 위치와 움직이는 패턴을 미리 확인하고, 제한 시간과 총알 수를 효율적으로 관리할 수 있는 전략을 세워야 원활한 플레이가 가능합니다. 맵의_NAME_부분은 맵의_NAME_부분은 StarCraft: Brood War custom map *Firing Range* is a puzzle-style defense map centered around target shooting and time limits. The map's core section features various targets placed in the vast snowy central area, where players must precisely hit them within the time limit. Scattered targets throughout the map demand accurate aiming and precise timing from players. Understanding the targets' positions and movement patterns is especially crucial in this section, as incorrect hits can backfire, requiring careful play. The red "STOP" signal light in the top-right corner serves as a time alert—when it starts flashing, only a short time remains. The wide open central zone is the primary area where targets are placed, while the narrow side passages and elevated terrain on both sides can be used strategically to spot targets or avoid being hit. Players must manage limited ammunition and time, either destroying all targets or achieving the objective within the time limit. Beginners should focus on memorizing target patterns and timing their shots, while advanced players need quick aiming and efficient movement planning. The snowy theme is reflected in the terrain, with snow-covered surfaces and icy areas adding to the visual appeal. This map is perfect for players looking to enjoy target shooting in a casual yet strategic way, offering engaging gameplay that tests both strategy and precision. Before playing, it's essential to study target locations and movement patterns and devise a strategy to manage time and ammunition effectively.
Left 4 Dead (좀비 생존) (Left 4 Dead (Zombie Survival))
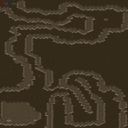
‘Left 4 Dead’는 스타크래프트: 브루드워의 유즈맵으로, 좀비 아포칼립스 속에서 살아남기 위한 서바이벌 디펜스 장르의 맵이다. 플레이어는 안전가옥에서 출발해 외부로 진입한 뒤 무전기로 구조 요청 신호를 보내야 하며, 신호를 활성화하는 순간부터 5분 동안 끊임없는 좀비 웨이브에 맞서 싸워야 한다. 맵의 핵심은 ‘생존’과 ‘자원 관리’로, 체력 팩과 아이템을 확보해가며 버텨야 한다. 보안에 신경 쓴 디자인으로, 좁은 통로와 협소한 공간이 좀비의 밀집을 강제해 전략적 대처가 필요하며, 좁은 길목을 방어하는 재미가 돋보인다. 좀비의 공격 패턴은 무작위성이 강하기 때문에 예측이 쉽지 않으며, 이를 극복하기 위한 팀워크가 중요하다. 특히 맵 곳곳에 배치된 체력 팩과 아이템을 빠르게 확보하는 것이 관건이다. 이 맵은 생존 디펜스 유즈맵의 정석을 보여주며, 5명의 플레이어가 한 팀을 이루어 협력하는 방식으로 진행된다. 구조 신호를 활성화한 후 5분의 긴박한 시간 동안 버텨야 하는 구조상, 플레이어들은 적절한 위치를 선정해 방어선을 구축하고, 좀비의 공격 타이밍을 계산해가며 아이템을 확보해야 한다. 맵의 디자인도 깔끔하게 짜여 있어, 좁은 복도나 통로가 좀비의 움직임을 제어하는 데 효과적으로 활용된다. 다만, 체력 관리와 아이템 확보 타이밍을 놓치면 순식간에 위험에 처할 수 있어, 초보자들은 적응하는 데 시간이 걸릴 수 있다. 초보자도 적응할 수 있도록 천천히 난이도를 조절해가며 플레이할 수 있지만, 숙련자들은 좀비의 패턴을 예측해 좀 더 효율적으로 대처할 수 있다. 이 맵을 추천하는 대상은 팀워크와 전략적 플레이를 즐기는 유저들로, 특히 디펜스 장르에 익숙한 플레이어라면 더욱 흥미롭게 즐길 수 있을 것이다. 다만, 체력과 아이템 관리를 소홀히 하면 쉽게 패배할 수 있으니, 신중한 플레이가 요구된다. 맵의 구조상 좁은 공간이 많기 때문에, 넓은 맵을 선호하는 플레이어보다는 협소한 공간에서 전략을 펼치는 것을 좋아하는 유저에게 어울린다. 마지막으로, 이 맵은 5명의 플레이어가 한 팀을 이루어 진행되므로, 팀원 간의 원활한 소통과 협력이 필수적임을 명심하자. “Left 4 Dead” is a user-made map for StarCraft: Brood War that falls under the survival-defense genre, set during a zombie apocalypse. Players start in a safe house, venture outside, and must send a distress signal via radio; once activated, they have five minutes of nonstop zombie waves to endure. The core mechanics revolve around survival and resource management—securing health packs and items while holding the line. The map’s design smartly funnels zombies through tight corridors and cramped spaces, forcing strategic positioning and rewarding clever defense of choke points. Zombie behavior is highly unpredictable, so teamwork becomes essential to adapt on the fly. Quickly grabbing scattered health packs and items is often the deciding factor in tough spots. This map exemplifies the survival-defense user-map archetype, played as a five-player team. After activating the distress signal, the team must hold out for five tense minutes by establishing defensive lines, timing their movements, and managing limited resources. The layout is meticulously structured—narrow hallways and corridors naturally guide zombie movement, giving players control over engagements. However, neglecting health or item collection can spell instant doom, so newcomers should expect a learning curve before mastering the flow. The difficulty ramps up gradually, allowing beginners to ease in while veterans can leverage zombie-pattern prediction for sharper tactics. This map shines for players who love teamwork and strategic depth, especially those already fond of defense-oriented games. Still, reckless play will lead to quick defeats, so careful management is a must. Because the map is packed with tight spaces, it suits those who prefer cramped, tactical arenas over sprawling open fields. Keep in mind that success hinges on seamless communication and cooperation among the five teammates.
고래를 폭격하라!!! 퍼펙트 (Nuke the Whales!!! Perfected)
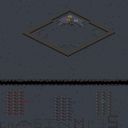
스타크래프트 브루드워의 유즈맵 명작 중 하나로 꼽히는 〈Nuke the Whales!!! Perfected〉는 8명의 플레이어가 동시에 참여하는 밀리 기반의 독특한 디펜스 게임이다. 맵의 이름은 '고래를 폭격하라!!!'라는 다소 과격한 슬로건에서부터 짐작할 수 있듯이, 제한 시간 내에 맵 중앙에 등장하는 거대한 고래를 파괴하는 것이 주 목표다. 하지만 단순하게 고래를 때리는 것뿐만 아니라, 고래가 맵 이곳저곳을 이동하며 플레이어의 기지를 위협하는 등 전략적인 요소도 포함되어 있어 긴장감을 고조시킨다. 맵은 우주 테마의 타일셋을 활용해 적대감 넘치는 우주 공간을 연출하며, 4096x4096의 넓은 공간에서 고래의 이동 경로와 플레이어의 배치, 자원 관리까지 신경 써야 한다. 제작자 M~M Kupo와 디버거 Chasinmp3s의 손길이 느껴지는Debugged by Chasinmp3sDebugged by Chasinmp3sDebugged by Chasinmp3sDebugged by Chasinmp3sDebugged by Chasinmp3sDebugged by Chasinmp3sDebugged by Chasinmp3sDebugged by Chasinmp3sDebugged by Chasinmp3sDebugged by Chasinmp3sDebugged by Chasinmp3sDebugged by Chasinmp3sDebugged by Chasinmp3sDebugged this map ensures 밸런스와 완성도를 높였다. 플레이어는 초반부터 고래가 맵 곳곳을 침범할 수 있음을 감안해 방어선을 구축하고, 고래를 공격할 수 있는 대공 포대를 배치해야 한다. 고래는 시간이 지나면서 점점 더 공격적으로 변하며, 플레이어는 이를 저지하기 위해 자원 채취와 유닛 생산을 병행해야 한다. 제한 시간 30분은 긴장감을 더하는 요소로, 타이밍을 놓치면 고래가 기지를 파괴하거나 목표를 달성하지 못할 위험이 있다. 이 맵의 가장 큰 매력은 8명이라는 다인원 플레이에서 오는 협동과 경쟁의 조화다. 각 플레이어는 고래를 공격할 수도, 방어할 수도, 또는 고래를 유도하는 전략을 취할 수도 있어 전술적 다양성이 뛰어나다. 또한, 우주 배경의 웅장한 그래픽과 조화로운 사운드가 몰입감을 한층 높인다. 초보자는 물론, 밀리 유즈맵의 전략적 깊이를 즐기는 숙련자들에게도 추천할 만한佳作이며, 특히 팀원 간의 의사소통이 핵심인 만큼 팀플레이 경험을 쌓기에도 좋다. 하지만 고래의 공격 패턴을 파악하지 못하거나 방어가 허술하면 순식간에 무너질 수 있으므로, 플레이 전 미리 맵 구조와 고래의 이동 경로를 숙지하는 것이 중요하다. 이 맵은 8인 밀리 기반 디펜스라는 독특한 장르의 정수를 보여주며, 스타크래프트 유즈맵의 역사에서 빼놓을 수 없는 명작으로 손꼽힌다.
핵으로 고래 잡기 퍼펙티드 (Nuke the Whales!!! Perfected)
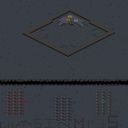
스타크래프트 브루드워 유즈맵 '핵으로 고래 잡기 퍼펙티드(Nuke the Whales!!! Perfected)'는 우주 타일셋을 배경으로 최대 8명이 함께 즐길 수 있는 협동 미션형 맵이다. 맵 설명에 따르면 플레이어는 30분 안에 모든 고래를 처치해야 승리하며, 제작자 {M~M}Kupo가 만들고 Chasinmp3s가 디버깅한 퍼펙티드 버전이다. 128x128 타일 크기의 넓은 우주 공간에서 펼쳐지는 이 맵은 제목 그대로 핵미사일이나 그에 준하는 강력한 무기를 활용해 거대 유닛인 '고래'들을 사냥하는 것이 핵심 플레이 방식이다. 제한 시간 30분이라는 타임어택 요소가 있어 신속한 자원 확보와 병력 생산, 그리고 핵 발사 타이밍 조절이 승패를 가른다. 8인 플레이가 가능하므로 역할 분담이 중요하며, 초반 빌드 오더와 중반 확장 타이밍, 후반 핵 사일로 건설 및 고래 위치 파악이 관건이다. 맵 크기는 4096x4096으로 넓은 전장을 제공하며, 타일셋이 우주인 만큼 지형 장애물이 적어 기동성이 중요하다. 고래라는 독특한 보스급 유닛은 높은 체력과 재생력을 지녔을 것으로 보이며, 일반 유닛으로는 효율적으로 잡기 어려워 핵미사일이나 특수 기술 활용이 필수적이다. 난이도는 제작자 의도상 '보통' 수준으로 추정되지만, 인원 수에 따라 체감 난이도가 달라질 수 있다. 혼자서는 버거울 수 있으니 4~8인 파티로 도전하는 것을 추천한다. 퍼펙티드 버전인 만큼 기존 버전의 버그나 밸런스 문제가 수정되어 쾌적한 플레이가 가능하다. 우주 배경의 독특한 컨셉과 명확한 승리 조건, 시간 제한이 주는 긴장감이 어우러져 캐주얼한 협동 플레이를 원하는 유저에게 적합하다. 플레이 전에는 핵미사일 사용법과 고래의 이동 패턴, 맵 곳곳에 숨은 자원 지대를 미리 숙지하면 클리어 확률을 높일 수 있다. StarCraft Brood War UMS map 'Nuke the Whales!!! Perfected' is a cooperative mission-style map for up to 8 players set on a space tileset. According to the map description, players must kill all whales within 30 minutes to win, and this Perfected version was created by {M~M}Kupo and debugged by Chasinmp3s. The 128x128 tile space battlefield centers on hunting giant 'whale' units using nuclear missiles or equivalent firepower as the title suggests. The 30-minute time limit adds a time-attack element, making rapid resource gathering, unit production, and nuclear launch timing critical. With 8-player support, role assignment is key: early build orders, mid-game expansion timing, late-game silo construction, and whale tracking determine success. The 4096x4096 map size offers a vast arena with few terrain obstacles, emphasizing mobility. The boss-like whales likely possess high health and regeneration, requiring nukes or special abilities rather than conventional units. Difficulty is estimated as 'Normal' but scales with player count; solo play is discouraged, so a 4-8 person party is recommended. The Perfected tag implies bug fixes and balance tweaks for a smoother experience. The unique space concept, clear win condition, and time-pressure tension suit players seeking casual cooperative gameplay. Before starting, familiarize yourself with nuke mechanics, whale movement patterns, and hidden resource locations to improve clear chances.
콘돔 파괴: 대량 공격 (Break The Condom W/Mass Attack)
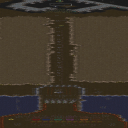
‘Break The Condom W/Mass Attack’는 스타크래프트 브루드워의 유즈맵으로, 특이한 소재와 다중 공격 시스템을 결합한 컴까기 맵이다. 맵의 핵심 목표는 ‘콘돔을 파괴하고 알에 도달하라’는 독특한 스토리를 바탕으로 진행된다. 플레이어는 각자의 시작 지점에서 콘돔을 파괴하기 위해 끊임없이 공격과 방어를 반복해야 하며, 이를 위해 다수의 유닛을 동원하는 ‘Mass Attack’ 시스템이 필수적이다. 맵은 8인용으로 설계되어 있으며, 황무지 타일셋을 기반으로 넓은 평야와 협곡이 조화를 이룬다. 게임은 15분간의 ‘오르가즘 타임’이라는 제한 시간이 설정되어 있어,在此期间 모든 플레이어가 경쟁적으로 콘돔을 파괴하고 알에 도달해야 한다. 공격과 방어의 균형을 맞추는 것이 관건으로, 초반에는 소규모 교전을 통해 자원과 유닛을 확보해야 하며, 중반부터는 대규모 병력을 동원해 상대를 압박하는 전략이 요구된다. 맵의 구조는 중앙에 위치한 콘돔과 알을 중심으로 대칭형으로 배치되어 있어, 공수 양면의 플레이가 가능하도록 설계되었다. 이 맵은 ‘콘돔 파괴’라는 파격적인 소재와 ‘Mass Attack’이라는 공격 시스템으로 인해 기존 디펜스나 컴까기 맵과는 차별화된 경험을 제공한다. 특히 8명의 플레이어가 동시에 경쟁하는 멀티플레이 환경에서 전략의 다양성과 긴장감이 극대화된다. 초보자에게는 다소 난해할 수 있지만, 전략적 사고와 빠른 판단력을 요구하는 맵으로, 숙련자들에게는 깊은 재미를 선사할 것으로 예상된다. 플레이 전에는 맵의 목표와 시스템을 충분히 숙지하고, 팀원과의 협력이 필수적임을 명심해야 한다. Break The Condom W/Mass Attack is a unique custom map for StarCraft: Brood War, blending an unconventional theme with a mass attack system in a team elimination-style gameplay. The core objective revolves around the quirky premise of "breaking the condom and reaching the egg," set within a 15-minute orgasm timer. Players must strategically deploy large-scale attacks to destroy the condom while defending their own positions. Designed for 8 players, the map features a symmetrical layout with a central condom and egg, surrounded by vast plains and canyons using a desert tileset. The Mass Attack system encourages coordinated assaults, forcing players to balance resource gathering, unit production, and defensive tactics. Early-game skirmishes give way to mid-game large-scale battles, where overwhelming force becomes key to victory. This map stands out due to its bold theme and emphasis on massed unit tactics, diverging from traditional defense or elimination maps. The multiplayer experience thrives on the tension of simultaneous competition, offering a fresh challenge for StarCraft veterans. While the mechanics may seem daunting to newcomers, the strategic depth and high-stakes gameplay provide a rewarding experience for those willing to master its intricacies. Prior knowledge of the map’s goals and systems is highly recommended, as teamwork and adaptability are crucial to success.
최근 등록된 맵
새로 추가된 파일과 버전을 확인하세요.
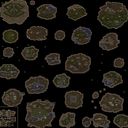
나이트 런 엘리스 4.45 (Knight Run Elice 4.45)
스타크래프트 브루드워의 유즈맵인 ‘나이트 런 엘리스 4.45’는 다채로운 맵 디자인과 흥미로운 진행 방식을 제공하는 디펜스 장르의 맵입니다. 맵 곳곳에 배치된 다양한 지형과 구조물을 활용해 적의 공격을 방어하면서 목표 지점까지 도달하는 플레이 방식이 특징입니다. 게임이 시작되면 플레이어는 우측 하단에 위치한 시작 지점에서 출발하며, 맵 중앙과 좌측 상단에는 여러 개의 방어 거점이 존재합니다. 이 거점들은 적의 공격 경로에 따라 배치되어 있어, 단순히 방어만 하는 것이 아니라 효율적인 길찾기와 전략적 대처가 필요합니다. 맵의 진행은 크게 세 단계로 나뉩니다. 첫 번째 단계에서는 약한 적들이 규칙적으로 쏟아져 나오며, 플레이어는 이들을 막아내며 전진할 수 있는 통로를 확보해야 합니다. 두 번째 단계로 접어들면 적의 공격 패턴이 다양해지고, 일부 구간에서는 좁은 통로에서 적이 몰려오는 ‘입구막기’ 형식의 방어가 요구됩니다. 마지막으로 세 번째 단계에서는 맵의 좌측 상단에 위치한 최종 목표 지점까지 도달해야 하는데, 이 과정에서 적의 강력한 공격과 기동성 있는 유닛들이 등장합니다. 맵 곳곳에 숨겨진 자원이나 보너스 아이템을 획득하면 일시적으로 아군의 전투력이 상승하는 효과가 있어, 이를 활용하는 것이 승리의 열쇠가 됩니다. 이 맵은 6명의 플레이어가 참여할 수 있으며, 각 플레이어는 고유한 시작 위치를 부여받아 개별적으로 또는 팀을 이뤄 진행할 수 있습니다. 맵의 난이도는 보통으로 설정되어 있지만, 적의 공격 패턴이 빠르게 변화하고 일부 구간에서는 타임어택 요소까지 포함되어 있어, 초보 플레이어보다는 어느 정도의 경험이 있는 유저에게 더 적합합니다. 또한, 맵의 디자인과 색상이 밝고 명쾌한 편이라 시각적인 피로감을 줄여줍니다. 전체적인 플레이 시간은 맵의 규모와 진행 방식에 따라 약 25~35분 정도로 추정되며, 여러 번 플레이하면서 자신만의 전략을 발전시킬 수 있는 재플레이 가치가 높은 맵입니다. 이 맵을 플레이하기 위해서는 맵의 구조와 적의 공격 패턴을 신속하게 파악하는 능력이 필요합니다. 특히 좁은 통로나 장애물이 많은 구간에서는 아군의 유닛을 효율적으로 배치하고, 보너스 아이템을 적극 활용하는 것이 중요합니다. 또한, 팀 플레이를 선호하는 유저라면 팀원 간의 협력이 승패를 좌우할 수 있으니, 사전 전략 회의를 통해 효율적인 플레이를 준비하는 것이 좋습니다. ‘나이트 런 엘리스 4.45’는 디펜스와 서바이벌 요소가 혼합된 맵으로, 전략적 사고와 빠른 판단력이 요구되는 유즈맵을 즐기는 유저들에게Strongly recommended합니다. This StarCraft: Brood War custom map, 'Knight Run Elice 4.45', offers a diverse map design and engaging gameplay in the defense genre. The map features a variety of terrains and structures that players must navigate while defending against enemy attacks and reaching the goal. The game begins with players starting at the bottom-right corner, and the map is divided into multiple defensive points scattered across the central and top-left areas. The gameplay is structured into three main phases. In the first phase, weaker enemies spawn regularly, and players must clear pathways to advance. The second phase introduces more varied enemy patterns, including 'choke point' defenses in narrow corridors. The final phase requires players to reach the top-left goal, facing stronger enemies and units with high mobility. Hidden resources and bonus items scattered throughout the map provide temporary boosts to combat effectiveness, making their acquisition crucial for success. Designed for up to six players, this map allows for both individual and team-based progression. While the difficulty is set to 'medium,' the dynamic enemy patterns and time-sensitive segments make it more suitable for experienced players than beginners. The map’s bright and clear visual design minimizes visual fatigue, and the estimated playtime ranges from 25 to 35 minutes, depending on the player’s strategy and efficiency. To excel in 'Knight Run Elice 4.45,' players must quickly understand the map layout and enemy behavior. Narrow corridors and obstacle-heavy areas require strategic unit placement and efficient use of bonus items. For team-based players, coordination and pre-game strategy discussions are vital for success. This map blends defense and survival elements, making it highly recommended for players who enjoy custom maps that demand strategic thinking and quick decision-making.
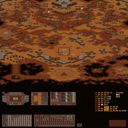
디지몬 다크마스터즈 H
《디지몬 다크마스터즈 H》는 디지몬 팬들에게 특별한 재미를 선사하는 스타크래프트 브루드워의 UMS 유즈맵이다. 이 맵은 플레이어가 5명의 인원으로 구성된 팀을 이끌고 바이러스 캐논을 보호하면서 황제드라몬의 팔라딘 모드를 제거하는 디펜스 형식을 취하고 있다. 12.9H 버전의 타이틀에서 알 수 있듯, 12분 9초 이내에 목표를 달성해야 하는 제한 시간과 함께 긴장감을 높이는 구조로 구성되어 있다. 맵의 배경은 황혼 테마의 타일셋으로 처리되어 있어 어둡고 긴박한 분위기를 연출하며, 플레이어들은 적의 끊임없는 공격을 방어하면서 동시에 황제드라몬의 강력한 공격을 상대해야 한다. 맵의 중앙에는 바이러스 캐논이 위치하고 있으며, 주변으로 좁은 통로가 뚫려 있어 방어선을 구축하기 용이하다. 반면 황제드라몬의 위치나 이동 경로는 맵의 구조상 비교적 유동적이며, 플레이어는 실시간으로 적의 움직임을 예측하며 방어 전략을 세워야 한다. 이 맵은 디지몬의 세계관을 좋아하는 유저들에게는无疑한 재미를 제공할 뿐만 아니라, 디펜스와 서바이벌 요소가 결합된 하이브리드 장르로도 주목받고 있다. 초보 플레이어의 경우 방어선을 구축하는 기본 전략을 익히기에 적합하며, 숙련된 플레이어는 제한 시간 내에 효율적인 자원 관리와 병력 운용을 통해 높은 점수를 노릴 수 있다. 맵의 제작 연도와 수정 내역을 살펴보면 2009년 11월에 처음 제작되어 꾸준히 개선된 작품임을 알 수 있으며, 베틀넷 ID를 통해 제작자의 활동도 확인할 수 있다. 이 맵을 플레이하기 전에는 제한 시간과 주요 목표, 그리고 적의 패턴을 숙지하는 것이 중요하다. 특히 황제드라몬의 공격 패턴과 바이러스 캐논의 위치 변화를 미리 파악해 두면 방어 전략 수립에 큰 도움이 된다. 또한, 팀원 간의 원활한 소통과 역할 분담이 성공의 열쇠가 될 수 있으므로 협동 플레이를 강조하는 맵이다. 디지몬 팬이 아니더라도 디펜스와 서바이벌 장르를 좋아하는 유저라면 충분히 즐길 수 있는 작품으로, 스타크래프트의Classic한 재미를 재발견할 수 있는 기회가 될 것이다. 《Digimon Dark Masters H》 is a custom UMS map in *StarCraft: Brood War* that offers a unique experience for *Digimon* fans. In this map, players form teams of five and engage in a defensive battle, protecting the Virus Cannon while eliminating Emperor Dragomon in its Paladin Mode. As indicated by the title of version 12.9H, the map features a tense 12-minute and 9-second time limit, adding to the pressure. The twilight-themed tileset creates a dark and intense atmosphere, forcing players to defend against relentless enemy attacks while also countering Emperor Dragomon's powerful assaults. The Virus Cannon is centrally located, surrounded by narrow pathways that make it easier to set up defensive lines. However, Emperor Dragomon's position and movement patterns are fluid due to the map's structure, requiring players to constantly adapt their strategies based on real-time enemy movements. This map not only provides undeniable fun for *Digimon* enthusiasts but also stands out as a hybrid genre combining defense and survival elements. For beginners, the map is a great way to learn basic defensive strategies, while experienced players can aim for high scores by efficiently managing resources and troops within the time limit. Examining the map's history, it was first created in November 2009 and has since undergone continuous improvements, with the creator's activity verifiable through their Battle.net ID. Before playing, it's crucial to understand the time limit, main objectives, and enemy patterns. Preemptively studying Emperor Dragomon's attack patterns and the Virus Cannon's positional changes will significantly aid in strategy planning. Effective team communication and role distribution are also key to success, making this a map that emphasizes cooperative play. Even for those who aren't *Digimon* fans, the map offers an enjoyable experience for defense and survival genre enthusiasts, providing a chance to rediscover the classic fun of *StarCraft*.
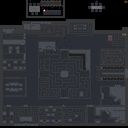
언데드 2 Fixed (The Undead 2 Fixed)
스타크래프트 브루드워의 대표적인 퍼블리셔였던 SpArTiEn[GkT]가 리메이크하고 LS_In_Hell이 밸런스를 재점검한 언데드 2Fixed는 8인용 언데드 종족 중심의 유즈맵으로, 종족별 특성과 전략을 극대화한 디펜스 장르의 정석 같은 작품이다. 맵은 4096x4096의 거대한 우주 타일셋을 기반으로 설계되어 전장 중앙에 위치한 넥서스를 중심으로 언데드 플레이어들이 다양한 유닛과 업그레이드를 활용해 적의 공격을 방어하는 구조다. 맵의 특징은 언데드 종족의 강력한 시체 활용과 디바우러, 디파일러의 마나 관리, 그리고 초반부터 후반까지 일관된 전략을 요구한다는 점이다. 특히 시체 소모량을 최소화하면서도 효과적인 스웜 전술을 펼칠 수 있는 최적의 입지선을 찾는 것이 핵심인데, 맵의 넓은 평지는 언데드 특유의 스웜을 최대한 활용할 수 있게 배치되어 있지만, 반대로 초반 자원 확보와 넥서스 방어 라인의 구축이 중요해진다. 플레이어 간 협력과 순간적인 판단력이 요구되는 이 맵은 언데드 종족의 장점을 극대화한 디펜스 유즈맵으로, 특히 언데드 유저가 있다면 전략의 깊이가 배가 된다. 초보자의 경우 언데드 종족의 특성을 충분히 숙지하지 않으면 방어 라인이 쉽게 무너질 수 있어, 어느 정도의 사전 지식과 연습이 필요하다. 한편, 맵의 밸런스는 LS_In_Hell에 의해 재정비되어 스웜 구성과 타이밍 러시의 위험성이 조절되어 있는데, 이를 바탕으로 언데드 플레이어는 안정적인 방어와 반격을 동시에 노릴 수 있다. 맵을 플레이하기 전에는 언데드 종족의 기본 전략과 유닛 조합, 특히 스웜 타이밍과 디바우러 활용법을 미리 숙지하는 것이 중요하다. 또한, 넥서스 주변의 시체 수집 지역과 주요 길목의 방어 건물 배치도 전략적으로 고려해야 하는데, 이는 맵의 넓은 평지가 오히려 단점으로 작용할 수 있는 포인트이기도 하다. 중앙 넥서스를 중심으로 펼쳐지는 대규모 전투는 스타크래프트 유즈맵의 정수를 보여주며, 언데드 종족의 매력을 한껏 느낄 수 있는 작품이다. 이 맵은 특히 언데드 팬들에게 강력히 추천하며, 다양한 전략을 시도해보며 최적의 방어 루틴을 찾는 재미가 쏠쏠하다. 다만, 타 종족 유저는 언데드 종족의 특성을 충분히 이해하지 못하고 플레이할 경우 전략적 약점을 노출할 위험이 있어, 초보자의 경우 언데드 전용 팁을 참고하는 것이 좋다. 맵의 구조는 언데드 종족의 장점을 극대화할 수 있도록 설계되어 있지만, 반대로 초반 자원 확보와 넥서스 방어 라인 구축이 중요하다는 점에서 전략적 깊이가 깊다. 언데드 종족의 시체 활용과 스웜 전술을 중심으로 한 디펜스 장르는 이 맵을 통해 한층 더 완성도 높은 플레이가 가능해진다. 맵의 밸런스는 LS_In_Hell에 의해 재정비되어 스웜 구성과 타이밍 러시의 리스크가 조절되어 있는데, 이를 바탕으로 언데드 플레이어는 안정적인 방어와 반격을 동시에 노릴 수 있다. 넥서스 주변의 시체 수집 지역과 주요 길목의 방어 건물 배치는 전략적으로 고려해야 하며, 맵의 넓은 평지가 오히려 단점으로 작용할 수 있는 포인트이기도 하다. 중앙 넥서스를 중심으로 펼쳐지는 대규모 전투는 스타크래프트 유즈맵의 정수를 보여주며, 언데드 종족의 매력을 한껏 느낄 수 있는 작품이다. StarCraft: Brood War’s renowned publisher SpArTiEn[GkT] remade the map, and LS_In_Hell rebalanced it, resulting in Undead 2Fixed, an 8-player Undead-centric custom map that epitomizes the defense genre by maximizing each race’s unique traits and strategies. The map is built on a massive 4096x4096 space-themed tileset, with a nexus at the center where Undead players defend using diverse units and upgrades. Its defining features revolve around the Undead’s strong corpse management, mana control for the Devourer and Defiler, and the need for a consistent strategy from start to finish. The key challenge is finding optimal positioning that minimizes corpse waste while enabling effective swarm tactics; though the vast open terrain allows Undead players to fully leverage their swarm strengths, securing early resources and fortifying the nexus perimeter become critical. This map demands teamwork and quick decision-making, serving as a defense custom that showcases the Undead’s strengths—especially when played by Undead users, whose strategic depth multiplies. Beginners may struggle if they don’t grasp the Undead’s mechanics, as weak defenses can crumble easily without prior knowledge and practice. The balance was overhauled by LS_In_Hell, adjusting swarm compositions and timing rushes to reduce risks, allowing Undead players to balance stable defense with counterattacks. Before playing, it’s essential to study the Undead’s core strategies, unit synergies, and especially swarm timing and Devourer usage. Strategic planning should also account for corpse-gathering zones around the nexus and defensive structure placements at key chokepoints—areas where the map’s openness can ironically become a drawback. The large-scale battles centered on the nexus capture the essence of StarCraft custom maps, offering a showcase of the Undead’s appeal. This map is highly recommended for Undead fans, rewarding experimentation with diverse strategies to discover the best defensive routines. However, non-Undead players risk exposing strategic weaknesses if they don’t fully understand the race’s mechanics, so beginners should consult Undead-specific tips. While the map’s design maximizes the Undead’s advantages, early resource collection and nexus fortification remain vital, adding layers of depth to the strategy. Through corpse utilization and swarm tactics, this defense genre reaches new heights on this map, with LS_In_Hell’s rebalancing further refining swarm setups and timing rush risks to let Undead players balance defense and offense seamlessly. The corpse zones around the nexus and defensive placements at critical paths demand careful thought, as the map’s expansive terrain can paradoxically become a liability. The sprawling battles around the central nexus exemplify the pinnacle of StarCraft custom maps, delivering an immersive showcase of the Undead’s unique charm.
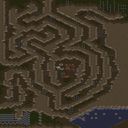
볼케이노 런 (Volcano Run)
‘볼케이노 런(Volcano Run)’은 스타크래프트: 브루드워의 유즈맵으로, 이름 그대로 화산이 폭발하는 상황 속에서 살아남기 위한 도주형 게임입니다. 맵 중앙에는 거대한 화산이 위치해 있으며, 시간이 지나면서 서서히 용암을 분출하고 지형이 파괴됩니다. 플레이어는 각자의 시작 지점에서 출발해 맵 외곽으로 탈출하는 것이 목표이며, 화산의 폭발 범위가 점차 넓어지면서 맵이 좁아지는 형식으로 진행됩니다. 맵은 사막 테마의 타일셋으로 구성되어 있으며, 초반에는 넓은 평지지만 시간이 흐를수록 지형이 무너지고 용암이 차오르는 등 생존을 위한 압박이 progressively intensifies합니다. 맵의 구조는 동심원 형태로 이루어진 해자를 따라 배치되어 있어, 중앙에서 멀어질수록 안정적인 탈출구가 존재합니다. 맵의 이름은 ‘Run AWAY’와 ‘Volcano’가 결합된 형태로, 플레이어에게 끊임없이 압박을 가하며 긴장감을 유지시키는 디자인입니다. 이 맵은 주로 6명의 플레이어가 동시에 참여하는 방식으로 구성되었으며, 각 플레이어의 생존 여부는 맵의 파괴 속도와 개인의 판단력에 달려 있습니다. 맵의 해상도는 4096x4096으로 상당히 넓게 제작되어 있으며, 타일 단위는 128x128로 세밀한 지형 변화가 가능하도록 설계되었습니다. 화산의 폭발 패턴은 일정하지 않으며, 지형 파괴와 용암 상승이 랜덤하게 이루어져 재플레이 가치를 높이고 있습니다. 특히, 맵의 중앙부에 위치한 화산은 시각적으로도 인상적이며, 폭발 시 나오는 파편과 용암은 플레이어에게 시각적 긴장감을 부여합니다. 이 맵은 디펜스나 전략적 플레이보다는 순수한 생존과 도주에 중점을 두고 있으며, 플레이어 간의 경쟁보다는 자기 생존이 주 목표입니다. 맵의 난이도는 플레이어의 반응 속도와 맵 이해도에 따라 크게 달라지므로, 초보 플레이어는 맵의 구조와 파괴 패턴을 숙지한 후 참여하는 것이 좋습니다. 마지막으로, 맵의 이름은 ‘Super Volcano Run.scx’라는 파일명으로 배포되었으며, 한국어 인코딩인 cp949로 저장되어 있어 한글 환경에서도 문제없이 사용이 가능합니다. ‘Volcano Run’ is a user-made map for *StarCraft: Brood War* where players must survive by escaping a volcanic eruption. At the center of the map lies a massive volcano that gradually erupts, spewing lava and reshaping the terrain over time. The goal is to flee from your starting position to the outer edges of the map before it’s too late, as the eruption’s danger zone expands and the playable area shrinks. The map features a desert-themed tileset, beginning with wide-open spaces that steadily collapse and fill with lava, increasing the survival pressure as time passes. The layout is designed in concentric circles with trenches, ensuring safer escape routes the farther you get from the center. The name ‘Volcano Run’ blends ‘Run AWAY’ and ‘Volcano,’ reflecting the constant tension and relentless pressure players face. The map supports up to six players at once, with survival depending on both the speed of the terrain’s destruction and individual decision-making. Built at a high resolution of 4096x4096 with 128x128 tile units, the map allows for detailed terrain changes. The volcano’s eruption patterns are unpredictable, with random terrain destruction and lava rises that enhance replayability. The central volcano is visually striking, and its explosions—complete with flying debris and molten lava—add to the intense atmosphere. Unlike defense or strategic maps, *Volcano Run* focuses purely on survival and escape, prioritizing individual survival over player competition. Difficulty varies based on reaction speed and map knowledge, so beginners should study the layout and eruption patterns before jumping in. The map is distributed under the filename *Super Volcano Run.scx* and saved in Korean encoding (cp949), ensuring compatibility in Korean-language environments.
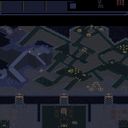
스타 워즈 세이셸 F1 (Star Wars Seychelles F1)
스타크래프트 브루드워의 ‘스타 워즈 세이셸 F1’(Star Wars Defense 3.1)은 7명의 플레이어가 공격과 방어 역할을 번갈아 맡아 진행하는 디펜스 장르의 유즈맵으로, ‘스타 워즈’의 세계관을 배경으로 삼아 다양한 유닛과 영웅을 활용한 전투를 즐길 수 있도록 설계되었다. 맵은 6144x6144의 넓은 공간에 화산 타일셋을 사용하여 전장의 분위기를 살렸으며, 중앙의 주요 거점을 두고 공격팀과 방어팀이 대립하는 구도로 구성되어 있다. 맵 제목에 포함된 특수문자(®)는 인코딩 오류로 보이며, 실제로는 ‘스타 워즈 세이셸 F1’로 표기하는 것이 자연스럽다. 내부 맵 제목과 설명을 종합해 보면, 공격팀은 제한 시간 내에 방어팀의 거점을 파괴해야 하며, 방어팀은 30분의 생존 시간을 채워야 승리하는 이중 목표가 존재함을 알 수 있다. 플레이어는 각자 7명의 인원 중 한 팀에 배정되어 미니언, 엘리트 유닛, 영웅 등 다양한 유닛을 조합해 전략을 펼치며, 특히 영웅의 레벨업과 스킬 활용이 승패를 좌우하는 핵심 요소로 보인다. 맵의 넓은 공간과 복잡한 지형은 유닛의 이동 경로를 제한하거나 우회로를 제공하여 전술적 선택지를 풍부하게 만든다. 또한, 맵 중앙의 교두보는 양 팀이 공방전을 벌이는 핵심 지역으로, here의 배치와 길목을 어떻게 활용하느냐가 게임의 흐름을 좌우할 것이다. 이 맵은 스타크래프트의 디펜스 장르에 익숙한 플레이어라면 누구나 즐길 수 있지만, 특히 팀워크와 전략적 사고가 요구되는 만큼 초보보다는 중간 이상의 숙련도를 가진 유저들에게 더 적합할 것으로 예상된다. 또한, ‘스타 워즈’의 세계관을 좋아하는 팬들에게는 친숙한 유닛과 스킨이 제공되어 몰입감을 높이는 요소로 작용할 것이다. 맵을 플레이하기 전에는 팀원 간의 역할 분담과 영웅의 스킬 조합을 사전에 논의하는 것이 중요하며, 방어팀은 거점 주변의 방어 시설 구축을, 공격팀은 효율적인 유닛 생산과 보급로를 확보하는 계획을 미리 세워두는 것이 좋다. Star Wars Defense 3.1 (Star Wars Seychelles F1) is a custom defense map for Brood War that pits 7 players against each other in alternating offense and defense roles, set against the Star Wars universe. The map spans 6144x6144 tiles using a volcanic tileset, creating an immersive battlefield where central chokepoints and strategic paths dictate the flow of combat. The title's special character (®) appears to be an encoding error, and the intended name is 'Star Wars Seychelles F1.' According to the internal description, the offense team must destroy the defense team's stronghold within a time limit, while the defense team aims to survive for 30 minutes. Players control a mix of minions, elite units, and heroes, with the latter offering unique abilities that can shift the tide of battle. The map's expansive layout and varied terrain force strategic decisions, such as controlling key paths or leveraging flanking routes, to outmaneuver the opposing team. This map is tailored for players familiar with defense-style custom maps, though it also appeals to Star Wars fans due to its thematic units and skins. While accessible to intermediate players, its reliance on team coordination and hero ability management makes it less ideal for absolute beginners. Before starting, teams should discuss hero skill synergies and resource allocation, with defenders focusing on fortifying the stronghold and attackers prioritizing unit production and supply lines. The map’s balance hinges on these preparatory steps, ensuring a dynamic and engaging experience for all participants.
사하라 워즈 (Sahara Warz)
사하라 사막 한가운데서 펼쳐지는 피 튀기는 전투를 그린 스타크래프트 브루드워 유즈맵 <사하라 워즈>는, 플레이어와 적들이 모두 사막에 고립된 상태에서 벌어지는 사투를 묘사한 작품이다. 맵의 전체적인 구도는 사각형 형태의 넓은 평지 위에 건조한 사막 지형과 오아시스가 배치되어 있으며, 중앙에는 거대한 분화구가 있어 전투의 무대가 된다. 지형의 특징상 시야가 제한적이고 기동성이 중요해지는데, 특히 오아시스 주변은 자원 확보와 방어의 핵심 지점이 된다. 플레이어는 시작 지점에서 출발해 맵 곳곳에 흩어진 자원을 확보하며 병력을 양성하고, 상대방을 먼저 전멸시키는 것이 목표로 보인다. 맵의 중앙 분화구는 전투가 자주 벌어지는 장소로, 이곳에서 병력이 교착하는 경우가 많을 것이다. 맵의 가장자리로 갈수록 완만하게 지형이 높아지며, 언덕 지형이 제공되어 시야 확보와 방어에 유리한 지점이 된다. 맵의 디자인상으로는 중앙 지역이 가장 치열한 전투가 벌어지는 장소로 예상되며, 상대방을 각개격파하기보다는 중앙에서 포위 공략을 시도하는 전략이 유효할 것으로 보인다. 초보자부터 숙련자까지 모두 즐길 수 있는 밸런스형 맵으로 보이며, 자원 관리와 병력 운용이 핵심인 만큼 이 두 가지에 집중하면 좋은 결과를 얻을 수 있을 것이다. 특히, 초반 자원 확보가 느리므로 신속한 확장과 병력 생산 타이밍을 맞추는 것이 중요하다. 또한, 맵의 중앙 분화구는 적대 진영과의 등지고 싸우는 경우가 많으므로, 상대방의 병력 움직임을 예측하고 기동성을 살린 공격을 계획하는 것이 중요하다. 이 맵은 디펜스와 공격의 균형을 맞추는 전략적 사고를 요구하며, 이를 통해 플레이어는 전투의 재미와 긴장감을 동시에 느낄 수 있을 것이다. Sahara Warz is a StarCraft: Brood War custom map that immerses players in a brutal desert showdown. Set in the middle of the Sahara Desert, the map features a wide rectangular battlefield with arid terrain and scattered oases. The centerpiece is a massive crater, serving as the focal point of intense battles. The terrain restricts visibility and demands high mobility, especially around the oases, which are critical for resource control and defense. Players start at designated positions, gather scattered resources, and build armies to eliminate opponents. The central crater is likely the most contested area, where most clashes occur. The map edges rise gradually, offering elevated terrain that provides better visibility and defensive advantages. The design suggests that central area battles are inevitable, and strategies revolving around encirclement and coordination may prove effective. This map offers a balanced experience suitable for both beginners and seasoned players, with resource management and army deployment being key factors for success. Early-game resource scarcity makes quick expansion and timely army production vital. The central crater often forces face-to-face confrontations, so predicting enemy movements and leveraging mobility in attacks is crucial. Sahara Warz challenges players to balance defense and offense, delivering both strategic depth and thrilling combat experiences.
공격 섬멸 (Offensive Strike)
‘--- Offensive Strike ---’는 스타크래프트 브루드워의 서바이벌 장르 유즈맵으로, 제한된 시간 안에 적의 건물을 모두 파괴하는 것이 목표인 공격형 맵이다. 맵은 3072×3072 크기의 정사각형 구조로, 플랫폼 타일셋을 기반으로 제작되어 깔끔한 시야와 안정적인 연산을 제공한다. 플레이어는 4명으로 구성되며, 각각의 건물을 파괴해 나가면서 맵의 난이도가 점차 상승하는 특징을 보인다. 내부 설명에서 언급된 것처럼 ‘Final Version’이라는 수식어가 붙어 있으며, ‘Ultimate Survival’의 제작자인 SentryIII가 원작을 맡았고, LOC_KIRBY에 의해 수정되었다는 후기가 확인된다. 맵의 이름은 ‘Offensive Strike’로, 공격과 섬멸의 의미를 담고 있어 플레이 스타일이 공격적이고 속전속결형임을 짐작할 수 있다. 공격형 서바이벌 맵의 특성상, 초반에는 비교적 여유로운 플레이가 가능하지만 점차 증가하는 적의 수와 방어 시설로 인해 긴장감이 고조된다. 맵 중앙에는 넓은 개활지가 펼쳐져 있어 유닛의 기동성과 컨트롤이 중요해지며, 맵 외곽으로 갈수록 방어 시설이 밀집되어 있어 전략적인 진입로가 제한된다. 특히, 시간 제한이 있기 때문에 신속한 판단과 효율적인 자원 활용이 필수적이다. 플레이어는 초반에 충분한 병력을 확보한 뒤, 적의 건물을 하나씩 제거해 나가야 하는데, 방어 시설의 배치와 타임어택 요소로 인해 반복 플레이를 통해 최적의 전략을 익히는 것이 중요하다. 초보자보다는 어느 정도 스타크래프트에 익숙한 플레이어에게 적합하며, 특히 공격형 맵을 선호하는 유저들에게 추천할 만한 작품이다. 구조적으로는 중앙 광장과 외곽 방어 시설이 명확히 분리되어 있어, 맵을 여러 구역으로 나누어 전략을 수립할 수 있다. 또한, 맵의 크기가 크고 타일셋이 플랫폼으로 구성되어 있어 시야 확보가 용이하다는 장점이 있지만, 넓은 맵을 빠르게 осво해야 한다는 점에서 다소의 적응 시간이 요구된다. 맵을 플레이하기 전에는 맵의 주요 거점과 방어 시설의 위치를 숙지하고, 초반 자원 수급을 원활히 진행할 수 있도록 준비하는 것이 중요하다. 전체적으로는 공격형 서바이벌 맵의 정석을 따르고 있으며, 난이도 상승과 타임어택 요소로 인해 긴장감을 유지할 수 있는 구조로 설계되어 있다. Offensive Strike is a survival-style custom map for StarCraft: Brood War, where players must destroy all enemy buildings within a limited timeframe. The map features a 3072×3072 square layout with a platform tile set, ensuring clear visibility and smooth gameplay. Designed for four players, the difficulty escalates progressively as enemy structures are eliminated. The map is labeled as the 'Final Version,' originally created by SentryIII, known for 'Ultimate Survival,' and later modified by LOC_KIRBY. As an offensive survival map, Offensive Strike starts with a relatively relaxed pace but intensifies as enemy numbers and defensive structures increase. The central open area allows for dynamic unit movement, while the outer regions are densely fortified, requiring strategic planning for entry points. The time constraint demands quick decision-making and efficient resource management. Players should secure a strong early-game force to systematically dismantle enemy buildings, with the map’s defensive layouts and time-attack mechanics rewarding repeated attempts to refine strategies. This map is best suited for players familiar with StarCraft, particularly those who enjoy fast-paced, offensive gameplay. Structurally, the map divides into a central plaza and outer defensive zones, enabling players to divide their strategies into multiple sectors. The large map size and platform tile set provide excellent visibility, though the expansive layout requires some adaptation. Before playing, it’s crucial to familiarize yourself with key locations and defensive structures, ensuring smooth early-game resource gathering. Overall, Offensive Strike adheres to the classic offensive survival genre, offering tension through escalating difficulty and time constraints.
오펜시브 스트라이크 (Offensive Strike)
오펜시브 스트라이크는 서바이벌 장르에 속하는 스타크래프트 브루드워 유즈맵으로, 제한된 시간 안에 적 건물을 모두 파괴해야 하는 목표를 가지고 있습니다. 맵은 3072×3072 타일 기반으로 설계되어 있으며, 플랫폼 타일셋을 사용해 지형이 비교적 평탄하면서도 전략적 위치가 존재합니다. 각 레벨이 진행될수록 적 유닛과 건물의 배치가 복잡해지고, 타이머가 점점 짧아져 난이도가 상승합니다. 플레이어는 4인까지 동시에 참여할 수 있으며, 팀 전투보다는 개인 전투에 초점을 맞춘 솔로 혹은 자유로운 멀티플레이가 주된 플레이 방식입니다. 초기 레벨에서는 기본 유닛과 간단한 방어 구조를 활용해 빠르게 건물을 파괴하는 연습을 할 수 있지만, 후반부에서는 적의 방어 타워와 고레벨 유닛이 등장해 전투 전략을 재조정해야 합니다. 특히 건물 파괴 순서를 어떻게 잡느냐가 전체 클리어 시간에 큰 영향을 미치며, 자원 관리와 유닛 생산 타이밍이 핵심 요소로 작용합니다. 맵 내에는 숨겨진 고지대와 이동 경로가 몇 군데 존재해, 이를 활용하면 적의 방어선을 우회하거나 급습할 수 있는 전술적 선택지가 제공됩니다. 플레이 전에는 각 레벨의 타이머와 적 배치를 미리 확인하고, 필요한 유닛 조합을 미리 준비하는 것이 좋습니다. 초보자보다는 기본적인 유닛 운용에 익숙한 플레이어에게 적합하며, 빠른 판단과 지속적인 압박을 즐기는 유저에게 특히 추천됩니다. Offensive Strike is a survival‑type custom map for StarCraft: Brood War where the objective is to destroy all enemy buildings before the timer expires. The map spans 3072×3072 tiles using the platform tileset, offering a relatively flat terrain with several strategic positions. As the levels progress, enemy unit placements become more intricate and the time limit shortens, increasing overall difficulty. Up to four players can join, and the focus is on solo or free‑for‑all multiplayer rather than team combat. Early stages serve as a tutorial for basic unit control and rapid building demolition, while later stages introduce defensive towers and higher‑tier units that force players to rethink their tactics. The order in which buildings are targeted heavily influences the total clearance time, making resource management and unit production timing critical. Hidden high grounds and alternative pathways appear in several spots, allowing players to bypass defenses or launch surprise attacks. Before starting, it’s advisable to review the timer and enemy layout for each level and prepare the appropriate unit composition. This map suits players who are comfortable with basic unit handling and enjoy fast decision‑making and constant pressure, making it especially recommended for experienced gamers who like high‑tempo challenges.
맵 선택 가이드
태그는 맵의 핵심 특징을 빠르게 설명하지만 제작 버전마다 규칙이 다를 수 있습니다. 상세 설명에서 권장 인원, 난이도, 플레이 시간과 버전을 함께 확인한 뒤 다운로드하세요.