
밀리 기반 스타크래프트 맵 모음
'밀리 기반' 태그가 등록된 맵을 모았습니다. 장르 하나로 찾기 어려운 플레이 방식, 난이도와 특징을 중심으로 인기 맵과 최신 맵을 비교해 보세요.
- 등록 맵
- 9개
- 누적 다운로드
- 0
- 누적 조회
- 336
인기 맵
다운로드와 조회 반응이 높은 맵입니다.
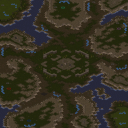
GAMEi Lost Temple
GAMEi Lost Temple은 블리자드의 대표적인 4인용 밀리 맵 '로스트 템플'을 기반으로 제작된 유즈맵(UMS)이다. 원작의 사막 타일셋과 128×128 타일 크기, 4인 대칭 구조를 유지하면서 트리거와 추가 오브젝트를 통해 새로운 플레이 방식을 부여한 것으로 보인다. 파일명에 '(4)' 접두사가 붙어 있어 4인 플레이를 전제로 하며, 내부 설명에 'RiVerS)Marine' 제작자와 다음 카페 주소가 명시된 점으로 보아 2000년대 초중반 한국 커뮤니티에서 배포된 커스텀 맵으로 추정된다. 장르는 UMS로 분류되나, 밀리 맵을 뼈대로 삼아 컴까기(컴퓨터 상대 협동/대전)나 특정 미션 형태의 시나리오, 혹은 변형 룰이 적용된 밀리 파생일 가능성이 높다. 로스트 템플 특유의 입구 좁은 본진, 중앙 확장 기지, 섬 멀티 구조가 그대로 유지되어 밀리 감각을 익히기에 적합하면서도, 트리거로 유닛 강화, 웨이브 디펜스, 보스전, 외교/동맹 고정 등 다양한 규칙이 덧씌워졌을 수 있다. 사막 타일셋 특성상 시야 확보가 용이하고 지형 지물이 적어 초보자도 지형 이해가 쉽다. 플레이 경험은 원작 밀리와 유사한 초반 빌드 운영에서 시작해, 트리거 발동 시점부터 UMS 고유의 재미로 전환되는 양상일 것이다. 컴까기라면 1~3명의 인간 플레이어가 동맹을 맺고 강화된 AI를 상대하는 협동전이 주를 이룰 것이며, 시나리오라면 스토리 트리거와 컷신, 승리 조건 달성이 핵심이다. 4인 동시 플레이가 가능하므로 친구들과 함께 즐기거나 솔로로 AI 난이도를 조절해 연습용으로 쓰기에도 무난하다. 플레이 전 확인 포인트는 맵 로딩 시 뜨는 트리거 설명창이나 브리핑을 통해 승리 조건, 난이도 설정, 동맹 고정 여부, 치트/강화 여부를 반드시 숙지하는 것이다. 별도 버전 표기가 없으므로 v1.0 기준으로 단일 버전일 가능성이 크다. GAMEi Lost Temple is a Use Map Settings (UMS) map based on Blizzard's iconic 4-player melee map "Lost Temple." It retains the original desert tileset, 128×128 tile dimensions, and symmetrical 4-player layout while appearing to introduce new gameplay through triggers and additional objects. The "(4)" prefix in the filename indicates 4-player design, and the internal credit to "RiVerS)Marine" with a Daum cafe URL suggests this is a Korean community custom map from the early-to-mid 2000s. Although classified as UMS, it uses a melee map as its skeleton, making it likely a comp-stomp (co-op vs AI), a scenario with mission objectives, or a modified melee variant with custom rules. The classic Lost Temple features—narrow main base entrances, central expansion, island bases—remain intact, preserving melee fundamentals while triggers may add unit upgrades, wave defense, boss fights, or fixed diplomacy. The desert tileset offers clear visibility and few terrain obstacles, making geography easy for beginners. The play experience likely starts with standard melee build orders, then shifts to UMS-specific fun when triggers activate. If comp-stomp, 1–3 human players ally against enhanced AI; if scenario, story triggers, cutscenes, and objective completion take center stage. Simultaneous 4-player support allows group play or solo practice against adjustable AI difficulty. Recommended for beginners learning Lost Temple geography, veteran users exploring classic UMS archives, and players wanting melee-based custom content. Before playing, check the trigger briefing on load for victory conditions, difficulty settings, fixed alliances, and cheat/enhancement status. With no version noted, it is likely a single v1.0 release.
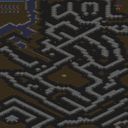
Army Men-Sarge's War
스타크래프트 브루드워의 유즈맵 ‘Army Men-Sarge's War’는 밀리 기반의 전투 맵으로, 내부 설명에 따르면 ‘검은색 국가(Tan Nation)’와 ‘녹색 국가’ 사이의 평화가 깨지고 새로운 적군이 등장하는 시나리오를 배경으로 한다. 맵은 황무지 타일셋으로 구성되어 있으며, 4096x4096의 넓은 크기를 자랑한다. 플레이어는 5인으로 구성된 팀을 이루며 전투를 펼친다. 맵의 구조는 중앙에 넓은 개활지가 펼쳐져 있어 대규모 교전이 가능하며, 곳곳에 지형적 요충지가 분포되어 있어 전략적 포지셔닝이 중요하다. 공격로와 수비 거점 간의 균형이 비교적 잘 맞춰져 있어, 전면전뿐만 아니라 기습 공격이나 방어 라인 구축이 핵심 전략이 될 것으로 보인다. 또한, 맵의 디자인에서 확인되는 중앙의 넓은 평지와 주변의 언덕, 숲지대는 시야 확보와 기동성에 영향을 미치며, 이는 곧 전투의 흐름을 좌우할 수 있는 요소로 작용할 것이다. 초보 플레이어는 넓은 맵에서 전술적 위치 선정을 어려워할 수 있으나, 익숙해지면 넓은 시야와 기동성을 활용한 전술을 펼칠 수 있다. 경험 많은 유저라면 중앙 교전이나 기습 타이밍을 노려 승리를 이끌어낼 수 있을 것이다. 이 맵은 밀리 기반의 전투를 즐기는 유저들에게 넓은 전장과 전략적 깊이를 제공하는 데 초점을 맞췄다. 전투의 승패는 단순히 유닛의 수적 우위가 아니라, 지형과 타이밍을 얼마나 잘 활용하느냐에 달려 있다. 특히, 다수의 플레이어가 참여하는 팀전에서는 소통과 협력이 필수적이며, 각기 다른 전략을 조율하는 재미가 크다. 이 맵을 플레이하기 전에는 맵의 주요 거점과 주요 공격로를 미리 숙지하는 것이 좋다. 또한, 팀원 간의 역할 분담(예: 방어 담당, 정찰 담당)을 미리 정하고 전투를 시작하면 효율적인 플레이가 가능하다. 넓은 맵에서 전투가 벌어질 때는 항상 시야 확보를 우선시하고, 적의 움직임을 예측하는 연습을 해야 한다. 초보자라면 작은 규모의 테스트 게임으로 맵의 특성을 익힌 후 본격적인 전투에 임하는 것이 바람직하다. 한편, 경험 많은 플레이어는 이 맵을 활용해 다양한 전술 실험을 시도할 수 있으며, 팀원 간의 협력과 전략적 사고를 깊게 다질 수 있는 기회가 될 것이다. "Army Men-Sarge's War" is a user-created battle map in *StarCraft: Brood War* based on the standard melee format. According to its internal description, the scenario unfolds as the peace between the "Tan Nation" (the black team) and the "Green Nation" collapses, with new enemy forces emerging. The map features a wasteland tile set and boasts a massive 4096x4096 size. Players form teams of five to engage in combat. The layout centers around a vast open field ideal for large-scale clashes, with strategic vantage points scattered throughout the terrain. The balance between attack paths and defensive strongholds is well-maintained, making both full-scale battles and surprise attacks or fortified defenses crucial to success. The map's design—featuring a central plain surrounded by hills and forests—affects visibility and mobility, which can significantly influence the flow of combat. Novice players may struggle with tactical positioning on such a large map, but once familiar, they can leverage the wide field of vision and mobility to execute advanced strategies. Experienced players can capitalize on central engagements or well-timed ambushes to secure victory. The map emphasizes expansive battlefields and strategic depth for players who enjoy melee-style combat, where victory hinges not on numerical superiority but on smart use of terrain and timing. In team battles with multiple players, communication and coordination are essential, and coordinating diverse strategies adds to the enjoyment. Before playing, it's advisable to study the map's key strongholds and primary attack routes. Pre-assigning roles (e.g., defense, scouting) among teammates can also improve efficiency during combat. When fighting on such a large map, prioritize vision control and practice predicting enemy movements. Beginners should start with smaller-scale test games to get a feel for the map before diving into full battles. Meanwhile, veteran players can use this map to experiment with various tactics, deepening both teamwork and strategic thinking.
![[UED] The Wall (더 월) 맵 미리보기](https://cdn-star-data.huzy.net/thumbnail_aa64c918450647489d803633e40d5c78.jpg)
[UED] The Wall (더 월)
스타크래프트 브루드워의 유즈맵 《[UED] The Wall》은 밀리 기반의 맵이지만, 그 이름처럼 거대한 벽을 사이에 두고 벌어지는 독특한 대결 구조를 지닌 맵입니다. 맵 중앙을 가로지르는 거대한 벽이 양 진영을 분리하고 있으며, 이 벽은 일방 통행이 가능한 좁은 통로 여러 개로만 통과할 수 있어 전략적인 대결을 유도합니다. 벽 너머에서 상대방의 기지를 확인할 수 있지만, 직접 공격할 수 있는 길은 제한되어 있어 견제와 확장의 중요성이 부각됩니다. 벽의 좁은 통로를 통제하는 플레이어는 상대방의 자원 채취와 expansion을 방해할 수 있으며, 반대로 통로를 잘 방어하지 못하면 일방적으로 밀리는 상황이 발생할 수 있습니다. 이 맵은 8명의 플레이어가 1대 1로 대결하는 구조를 기본으로 하며, 벽을 사이에 두고 벌어지는 견제와 방어, expansion 싸움으로 긴장감을 유지합니다. 벽의 통로를 두고 벌어지는 스나이핑이나 러시, 그리고 빠른 멀티 테스팅 등이 주요 전략 포인트입니다. 또한, 벽 너머의 시야를 확보하기 위해 오버로드나 스캔을 적극 활용하는 것이 관건이며, 통로의 좁은 지형 덕분에 치고 빠지기 전술이나 방어 타워의 효율성이 매우 높아집니다. 맵의 중앙 통로가 좁고 길게 뻗어 있어 테란의 벙커링이나 프로토스의 포톤 캐논 방어망 구축이 용이하다는 점도 특징입니다. 《[UED] The Wall》은 밀리 기반의 맵이지만, 벽을 사이에 둔 독특한 구조로 인해 밀리만의 전략과 유즈맵만의 재미를 동시에 느낄 수 있는 작품입니다. 벽의 통로를 두고 벌어지는 심리전과Resource Management가 핵심이므로, 좁은 길목에서의 싸움에 익숙한 플레이어라면 더욱 즐겁게 플레이할 수 있을 것입니다. 또한, 벽 너머의 시야 싸움과 빠른 판단이 요구되므로, 단순히 자원과 병력만 모으는 것이 아니라 적절한 타이밍에 공격을 감행하거나 방어를 굳히는 전략적 선택이 중요합니다. 벽을 넘는 것이 쉽지 않은 만큼, 초보보다는 어느 정도 경험이 있는 플레이어에게 더욱 추천할 수 있는 맵입니다. StarCraft: Brood War's custom map *<UED> The Wall>* is a melee-based map, but as its name suggests, it features a unique battle structure centered around a massive wall that divides the two sides. A giant wall runs through the center of the map, separating both bases, and the only way to pass through is via several narrow one-way passages, forcing strategic confrontations. While players can see the enemy base beyond the wall, direct attacks are limited, emphasizing the importance of harassment and expansion. Controlling the narrow passages allows players to disrupt enemy resource gathering and expansions, while failing to defend them can lead to one-sided defeats. The map is primarily designed for eight players battling in 1v1 matches, maintaining tension through wall-based harassment, defense, and expansion struggles. Key strategic points include sniping, rushes, and rapid multi-base testing through the wall’s passages. Securing vision beyond the wall using Overlords or scans is crucial, and the narrow terrain makes hit-and-run tactics or defensive towers highly effective. The map’s long, narrow central pathways also make it easy for Terran to deploy bunker rushes or for Protoss to establish photon cannon defenses. Though *<UED> The Wall>* is a melee-based map, its unique wall structure blends traditional melee strategies with custom map-specific fun. The core of the gameplay revolves around psychological warfare and resource management through the wall’s passages, making it especially enjoyable for players familiar with narrow-path combat. Beyond just gathering resources and amassing forces, success requires quick decision-making—knowing when to attack or when to fortify defenses. Since crossing the wall isn’t easy, this map is better suited for players with some experience rather than beginners.
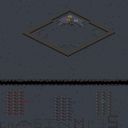
고래를 폭격하라!!! 퍼펙트 (Nuke the Whales!!! Perfected)
스타크래프트 브루드워의 유즈맵 명작 중 하나로 꼽히는 〈Nuke the Whales!!! Perfected〉는 8명의 플레이어가 동시에 참여하는 밀리 기반의 독특한 디펜스 게임이다. 맵의 이름은 '고래를 폭격하라!!!'라는 다소 과격한 슬로건에서부터 짐작할 수 있듯이, 제한 시간 내에 맵 중앙에 등장하는 거대한 고래를 파괴하는 것이 주 목표다. 하지만 단순하게 고래를 때리는 것뿐만 아니라, 고래가 맵 이곳저곳을 이동하며 플레이어의 기지를 위협하는 등 전략적인 요소도 포함되어 있어 긴장감을 고조시킨다. 맵은 우주 테마의 타일셋을 활용해 적대감 넘치는 우주 공간을 연출하며, 4096x4096의 넓은 공간에서 고래의 이동 경로와 플레이어의 배치, 자원 관리까지 신경 써야 한다. 제작자 M~M Kupo와 디버거 Chasinmp3s의 손길이 느껴지는Debugged by Chasinmp3sDebugged by Chasinmp3sDebugged by Chasinmp3sDebugged by Chasinmp3sDebugged by Chasinmp3sDebugged by Chasinmp3sDebugged by Chasinmp3sDebugged by Chasinmp3sDebugged by Chasinmp3sDebugged by Chasinmp3sDebugged by Chasinmp3sDebugged by Chasinmp3sDebugged by Chasinmp3sDebugged this map ensures 밸런스와 완성도를 높였다. 플레이어는 초반부터 고래가 맵 곳곳을 침범할 수 있음을 감안해 방어선을 구축하고, 고래를 공격할 수 있는 대공 포대를 배치해야 한다. 고래는 시간이 지나면서 점점 더 공격적으로 변하며, 플레이어는 이를 저지하기 위해 자원 채취와 유닛 생산을 병행해야 한다. 제한 시간 30분은 긴장감을 더하는 요소로, 타이밍을 놓치면 고래가 기지를 파괴하거나 목표를 달성하지 못할 위험이 있다. 이 맵의 가장 큰 매력은 8명이라는 다인원 플레이에서 오는 협동과 경쟁의 조화다. 각 플레이어는 고래를 공격할 수도, 방어할 수도, 또는 고래를 유도하는 전략을 취할 수도 있어 전술적 다양성이 뛰어나다. 또한, 우주 배경의 웅장한 그래픽과 조화로운 사운드가 몰입감을 한층 높인다. 초보자는 물론, 밀리 유즈맵의 전략적 깊이를 즐기는 숙련자들에게도 추천할 만한佳作이며, 특히 팀원 간의 의사소통이 핵심인 만큼 팀플레이 경험을 쌓기에도 좋다. 하지만 고래의 공격 패턴을 파악하지 못하거나 방어가 허술하면 순식간에 무너질 수 있으므로, 플레이 전 미리 맵 구조와 고래의 이동 경로를 숙지하는 것이 중요하다. 이 맵은 8인 밀리 기반 디펜스라는 독특한 장르의 정수를 보여주며, 스타크래프트 유즈맵의 역사에서 빼놓을 수 없는 명작으로 손꼽힌다.
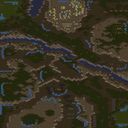
로스트 템플 VS 컴퓨터 (The Lost Temple VS Computer)
로스트 템플 VS 컴퓨터(exp)는 클래식 밀리 맵 '로스트 템플'을 기반으로 제작된 컴까기 유즈맵이다. 원제 'The Lost Temple VS C exp'와 파일명 '6;2로템컴잡기.scx'에서 알 수 있듯 최대 6인까지 참여해 컴퓨터 상대 협동전을 벌이는 구조다. 맵 크기는 128×128 타일, 사막 타일셋을 그대로 사용해 원작의 지형과 멀티 배치, 초크 포인트 등을 충실히 재현했다. 내부 설명에 'Suggested Players: 1-6'이라 명시되어 있어 솔로 플레이부터 6인 풀파티까지 인원 조정이 자유롭다. 진행 방식은 전형적인 컴까기다. 플레이어들은 각자 시작 위치에서 자원을 확보하고 병력을 생산해 맵 곳곳에 배치된 적 AI 기지를 공략한다. 원작의 대칭형 구조 덕분에 진영별 밸런스가 비교적 고르며, 중앙 멀티와 양옆 확장 기지를 차지하는 운영 싸움이 핵심이다. 'exp' 표기가 버전이나 난이도 조정을 의미하는 것으로 보여, 기본 AI보다 강화된 적이 등장할 가능성이 있다. 난이도는 초보부터 중급자까지 무난하게 즐길 수 있는 '보통' 수준으로 추정된다. 플레이 경험은 익숙한 지형에서 부담 없이 협동전을 즐기고 싶은 유저에게 적합하다. 밀리 빌드 연습, 유닛 조합 테스트, 친구들과의 가벼운 협동전 용도로 제격이다. 다만 트리거나 특수 이벤트보다는 순수 밀리 룰에 가까운 AI전이므로, 색다른 미션이나 스토리를 기대하기엔 아쉽다. 플레이 전 버전 표기(exp)의 정확한 의미와 AI 난이도 설정, 인원 수에 따른 밸런스 변화를 확인하고 시작하는 것이 좋다. Lost Temple VS Computer (exp) is a comp-stomp use map based on the classic melee map 'Lost Temple'. As indicated by the original title 'The Lost Temple VS C exp' and the filename '6;2로템컴잡기.scx', it supports up to 6 players in cooperative play against computer opponents. The map size is 128×128 tiles using the desert tileset, faithfully reproducing the original terrain, expansion locations, and choke points. The internal description states 'Suggested Players: 1-6', allowing flexible player counts from solo to a full 6-person party. The gameplay follows a typical comp-stomp format. Players start at their respective positions, gather resources, build armies, and attack enemy AI bases scattered across the map. The symmetrical layout of the original ensures relatively even balance across positions, with control of the central expansion and side bases being key to macro play. The 'exp' suffix likely denotes a version or difficulty adjustment, suggesting tougher AI than standard. Difficulty is estimated at 'Normal', suitable for beginners to intermediate players. The experience suits users wanting casual cooperative matches on familiar terrain. It is ideal for practicing melee builds, testing unit compositions, or light co-op with friends. However, since it stays close to standard melee rules against AI without special triggers or story events, those seeking unique missions may find it lacking. Before playing, it is advisable to verify the exact meaning of the 'exp' version tag, AI difficulty settings, and balance changes based on player count.
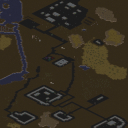
배드랜드 RP 0.06 (Badlands rp 0.06)
스타크래프트 브루드워 유즈맵 <Badlands rp 0.06 (fixed)>는 ‘vermi’ 제작자의 RP(리플레이 가능) 스타일을 구현한 밀리 맵으로, 기존 메카닉 전투를 기반으로 한 맵들과 달리 전략적 리플레이와 전투 후 점령을 통한 승리로 진행되는 독특한 구조를 자랑합니다. 맵의 이름처럼 황무지 지형을 기반으로 한 디자인이며, 넓은 평지와 중앙 고지대, 그리고 곳곳에 배치된 자원 멀티가 특징적입니다. 전투는 주로 중앙 평야에서 펼쳐지며, 승리 조건은 상대방의 넥서스를 파괴하는 대신 맵 곳곳에 배치된 점령 가능한 건물을 모두 차지하는 방식으로 진행됩니다. 이는 기존 밀리 맵의 승리를 위한 일방적인 전투 외에도 맵 통제와 전략적 자원 관리가 얼마나 중요한지를 강조합니다. 초반에는 자원과 병력 확보에 주력해야 하며, 중반부터는 점령 가능한 건물을 두고 경쟁을 벌이면서 상대방의 병력을 유인하거나 방어하는 플레이가 필요합니다. 맵의 난이도는 보통 수준으로, 초보자들이 접근하기에는 전략적 계획이 다소 복잡할 수 있지만, 여러 번 플레이하며 맵의 점령 포인트와 병력 운용 전략을 익히면 재미와 깊이를 느낄 수 있습니다. 특히 점령 가능한 건물이 맵 곳곳에 흩어져 있어, 각 포인트별로 방어와 공격을 조율해야 한다는 점이 이 맵의 핵심 재미 요소입니다. 추천 대상은 전략적 사고와 맵 컨트롤을 즐기는 유저들이며, 배틀넷이나 유즈맵 커뮤니티에서 인기 있는 맵 중 하나입니다. 플레이 전에는 반드시 점령 가능한 건물의 위치와 맵의 주요 루트를 미리 숙지하고, 초반 자원 관리와 병력 생산 타이밍을 잘 조절하는 것이 중요합니다. 또한, 상대방의 점령 전략을 예측하고 방어선을 구축하는 것 또한 승리를 위한 핵심 요소입니다. Badlands rp 0.06은 단순히 전투만으로 승부를 결정짓는 것이 아니라, 맵의 전반적인 통제와 전략적 판단이 요구되는 맵으로, 스타크래프트의 새로운 재미를 느낄 수 있는 유즈맵 중 하나로 손꼽힙니다. Badlands rp 0.06 (fixed) is a unique StarCraft: Brood War custom map by creator 'vermi,' blending traditional melee mechanics with an RP (replayable) style focused on strategic control and post-battle occupation. Set in a barren wasteland terrain, the map features expansive plains, elevated central zones, and scattered resource expansions. Unlike conventional melee maps where victory hinges solely on destroying the opponent's Nexus, this map emphasizes capturing all occupation points scattered across the map to secure a win. Combat primarily unfolds in the central lowlands, but victory is achieved through map control and resource management rather than brute-force destruction. Early gameplay demands resource gathering and military expansion, while mid-game shifts toward fierce competition over occupation points, requiring players to lure or defend against enemy forces. The map is rated as medium difficulty; while accessible to newcomers, its strategic depth—especially in managing multiple frontlines and predicting opponent moves—demands practice. The core enjoyment lies in the dynamic interplay between offense, defense, and map control, making it ideal for players who relish tactical depth and spatial awareness. Before playing, familiarize yourself with the occupation points' locations and main routes, prioritize early resource allocation, and balance troop production timings. Anticipating enemy strategies and securing defensive perimeters are crucial for success. Badlands rp 0.06 transcends typical melee maps by integrating strategic control and replayability, offering StarCraft veterans and newcomers alike a fresh and engaging experience.
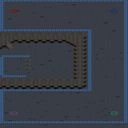
플랫폼 (Platform)
이 맵은 스타크래프트 브루드워의 기본 밀리 맵을 기반으로 한 유즈맵으로, 네 명의 플레이어가 각각의 진영을 차지하고 적 건물들을 파괴하는 것이 목표이다. 전체적으로 평평한 지형의 가운데에 커다란 섬이 위치하며, 섬 주변으로는 좁은 통로와 넓은 평지가 펼쳐진다. 섬의 중앙에는 추가 자원이나 방어 시설이 배치되어 있으며, 섬으로 진입하기 위해서는 좁은 다리나 해안가를 통해야 한다. 맵의 테두리에는 보호막이 쳐져 있어 외부에서 공격을 받기 어렵고, 섬 내부에서 발생하는 전투가 주를 이룬다. 섬 중앙의 건물들은 파괴하기 어렵게 배치되어 있어 전략적인 접근이 요구된다. 맵의 분위기는 우주 테마로 디자인되어 있으며, 어두운 톤의 배경과 함께 고르지 않은 지형이 전체적인 긴장감을 조성한다. 플레이어는 섬 주변의 평지에서 자원을 채취하며 병력을 생산하고, 섬으로의 진입을 노리게 된다. 섬 내부의 좁은 공간과 외부 평지의 넓은 공간이 조화를 이루며, 다양한 전략을 구사할 수 있는 여지를 제공한다. 초보자는 섬 주변의 평지에서 안정적으로 자원을 확보하며 병력을 모으는 것이 중요하며, 숙련자는 섬 내부의 방어 시설과 좁은 통로를 활용한 전략적 공격을 펼칠 수 있다. 섬의 중앙 건물들은 파괴 시 큰 보상을 주거나 게임의 승패에 영향을 미칠 것으로 추정된다. 맵의 밸런스는 기본 밀리 맵을 기반으로 하므로, 초보자와 숙련자 모두 즐길 수 있는 구조로 보인다. 그러나 섬 내부와 외부 간의 자원 분포와 방어 시설의 배치에 따라 밸런스가 좌우될 가능성이 크므로, 플레이 전 맵의 지형을 충분히 숙지하는 것이 중요하다. 섬 주변의 좁은 통로는 진입로를 두고 벌어지는 전투에서 치열한 접전을 벌일 수 있는 장소가 될 것이며, 섬 내부의 건물들은 신중한 접근이 필요한 목표물이 될 것이다. 전체적으로는 밀리 기반의 전략적 전투를 즐길 수 있는 맵으로, 섬이라는 독특한 지형이 제공하는 다양한 전투 양상을 경험할 수 있다. This custom map is a modified version of the classic StarCraft: Brood War melee map, designed for four players to engage in strategic combat. The map features a central island surrounded by narrow pathways and open terrain, with a protective shield along the outer edges restricting external attacks. The island’s interior contains key structures, including potential resource points and defensive buildings, making it a focal point for intense battles. The terrain is set in a space-themed environment, with dark tones and uneven surfaces enhancing the overall tension. Players must gather resources from the outer plains while managing the strategic challenge of island access. Beginners may find it easier to focus on outer resource collection and gradual expansion, while experienced players can exploit the island’s narrow passages and central structures for tactical advantage. The central buildings on the island likely play a decisive role in victory, requiring careful planning to destroy. The map’s balance hinges on resource distribution and defensive layouts, though it retains the accessibility of a standard melee map. Key areas for combat include the narrow bridges leading to the island and the central structures themselves. Overall, this map offers a fresh take on melee combat by incorporating the unique island terrain, providing diverse strategic opportunities for players of all skill levels.
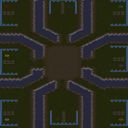
베스트 맵 에버 v1.1 (The Best Map Ever v1.1)
스타크래프트 브루드워의 고전 유즈맵 중 하나로 손꼽히는 $$$$THE BEST MAP EVER v1.1$$$$은 8인용 밀리 기반 맵이다. 내부 설명에서도 언급되듯 완벽한 대칭 구조를 바탕으로 모든 플레이어에게 동일한 조건을 제공하는 것이 특징으로, 밸런스를 중시한 디자인이 돋보인다. 사막 타일셋을 배경으로 펼쳐지는 이 맵은 초보자와 숙련자 모두에게 접근성을 제공하며, endless money라는 설명에서 알 수 있듯 경제력을 바탕으로 한 전략적인 플레이가 요구된다. 맵의 중앙에 위치한Resource를 둘러싼 위치전쟁은 시작부터 끝까지 긴장감을 유지하게 만든다. symmetrical bases(대칭 기지) 구조 덕분에 선두 플레이어와 추격자 간의 힘의 균형을 쉽게 유지할 수 있으며, 다양한 빌드 오더와 타이밍 러시가 가능한 만큼 창의적인 플레이가 가능하다. 또한, 맵이 커서 넓은 시야를 확보할 수 있어 정찰과 방어 라인 구축이 중요해진다. 하지만 중앙 자원 지역을 장악하지 못하면 흔들리는 게임이 되기 십상이므로, 초반Resource 확보가 승부의 열쇠라 할 수 있다. 이 맵의 가장 큰 장점은 바로 모든 플레이어에게 동일한 기회를 제공한다는 점이다. symmetrical bases 덕분에 기지 위치나 시작 자원의 불균형 없이 공정한 경쟁을 즐길 수 있으며, endless money라는 설명은 자원 수급이 원활하다는 점을 강조한다. 다만, 맵이 커서 넓은 시야를 확보하기 위해 정찰을 꾸준히 해야 하고, 중앙 Resource 지역을 두고 벌어지는 혈투에서 실수를 допу하면 쉽게 역전당할 수 있으니 주의가 필요하다. 또한, 맵의 대칭 구조상 한쪽이 우세를 점하면 그 흐름을 뒤집기 쉽지 않으므로, 초반Resource 확보와 방어 라인 구축을 철저히 준비해야 한다. 이 맵은 초보자들이 스타크래프트의 기본기를 익히기에 좋은 선택지 중 하나로, symmetrical bases 덕분에 상대방의 빌드나 전략을 빠르게 파악할 수 있으며, endless money 덕분에 자원 관리와 빌드 오더에 집중할 시간을 충분히 확보할 수 있다. 반면 숙련자들에게는 중앙 Resource 지역을 두고 벌어지는 치열한 전투와 넓은 시야를 활용한 전략적 플레이가 매력적으로 다가올 것이다. 특히, symmetrical bases 구조를 활용한 다양한 빌드 오더와 타이밍 러시, 그리고Resource 관리와 방어 라인 구축을 동시에 고려해야 하는 점은 숙련자들에게도 도전적인 요소로 작용할 수 있다. 이 맵을 플레이하기 전에는 symmetrical bases 구조와 central Resource 지역을 중심으로 한 전략적 플레이가 필요하다는 점을 미리 숙지하고, 초반Resource 확보와 방어 라인 구축을 철저히 준비해야 한다. 또한, endless money라는 설명을 바탕으로 자원 관리와 빌드 오더에 집중할 수 있도록 준비해야 한다. symmetrical bases 구조 덕분에 모든 플레이어에게 동일한 기회를 제공하므로, 초보자와 숙련자 모두에게 추천할 만한 맵이라 할 수 있다. The Best Map Ever v1.1 is a classic Brood War custom map designed for 8 players, primarily classified as a Melee map. The map features a perfectly symmetrical base layout, ensuring equal starting conditions for all players as highlighted in the internal description 'endless money on perfectly symetric bases..same chances for every player!!!'. Set against a desert tileset, the gameplay revolves around strategic resource control, particularly around the central resource areas, which serve as the focal point for intense early-game battles. The symmetrical base design allows for a variety of build orders and timing attacks, making the map accessible to both beginners and experienced players. Beginners can focus on learning basic mechanics and resource management, while skilled players can experiment with advanced strategies and counterattacks. The map's large size encourages constant scouting and the establishment of defensive lines, adding layers of complexity to the gameplay. However, failing to secure control of the central resources can lead to an uphill battle, as the symmetrical layout makes it difficult to recover once an opponent gains an advantage. One of the map's standout features is its commitment to fairness, with symmetrical bases eliminating any positional advantages and the 'endless money' mechanic ensuring a steady resource flow. This setup allows players to concentrate on macro management and strategic planning rather than getting bogged down by resource scarcity. The central resource zones are critical battlegrounds where early mistakes can quickly snowball into a lost game, so players must prioritize securing these areas while building robust defenses. The map's design rewards players who can balance aggression with defense, making it a compelling choice for those looking to refine their strategic depth. For beginners, The Best Map Ever v1.1 serves as an excellent training ground for mastering the fundamentals of StarCraft, such as scouting, resource management, and build orders. The symmetrical layout makes it easier to observe and adapt to opponents' strategies. Experienced players, on the other hand, will appreciate the map's depth, including the need for precise timing attacks, efficient resource allocation, and the ability to pivot strategies based on the opponent's moves. The central resource control and the requirement to maintain strong defensive positions add a layer of complexity that keeps even veteran players engaged. Before diving into the game, players should familiarize themselves with the symmetrical base structure and the importance of controlling the central resources. The 'endless money' mechanic means resource scarcity is less of a concern, allowing players to focus more on macro management and strategic planning. The map's design ensures a level playing field, making it a great choice for both casual and competitive players looking to sharpen their skills.
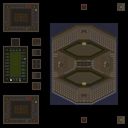
넥서스 디스트로이어스 페이블 (Nexus Destroyers Fable)
넥서스 디스트로이어스 페이블(Nexus Destroyers Fable)은 6인용 유즈맵으로, 제목 그대로 적 넥서스(커맨드 센터, 해처리)를 파괴하는 것이 핵심 목표인 '넥서스 부수기' 장르에 속한다. 사막 타일셋 위에 128×128 타일 크기로 펼쳐진 전장은 비교적 넓고 개방적인 지형을 보여주며, 중앙을 기준으로 대칭에 가까운 배치가 눈에 띈다. 각 플레이어는 본진에서 시작해 자원을 확보하고 병력을 양성한 뒤, 상대 본진의 핵심 건물을 노리는 정석적인 흐름을 따른다. 트리거나 특수 미션 없이 순수하게 밀리 유닛과 건물만으로 승부를 가리는 구성이라, 밀리 실력과 멀티태스킹, 타이밍 러시 판단력이 그대로 승패를 가른다. 6인 난전 특성상 초반 견제와 연합, 배신, 외교적 줄다리기가 빈번하게 발생하며, 한 번 밀리면 회복하기 어려운 눈덩이 효과가 강해 긴장감이 높다. 맵 설명이나 별도 스토리 텍스트는 확인되지 않으나, '페이블(Fable)'이라는 부제가 암시하듯 단순한 파괴전을 넘어선 나름의 서사나 맵 메이커의 의도가 깔려 있을 가능성이 있다. 밀리 감각을 유지하면서도 정해진 빌드 오더 외의 변수 창출을 즐기는 중급 이상 유저, 자유도 높은 난전형 유즈맵을 찾는 플레이어에게 적합하다. 플레이 전에는 본진 입구 너비, 멀티 기지 간 거리, 자원 분포 등 지형적 이점을 미리 파악하고 초반 빌드를 짜두면 초반 생존율을 크게 높일 수 있다. Nexus Destroyers Fable is a 6-player UMS map that belongs to the "Nexus Destroyer" genre, where the core objective is to destroy the enemy Nexus, Command Center, or Hatchery. The battlefield spreads across a 128×128 tile desert tileset, offering a relatively wide and open terrain with a near-symmetrical layout centered on the middle. Each player starts from a main base, secures resources, builds an army, and then targets the opponent's key structure in a classic flow. With no triggers or special missions, the match is decided purely by melee units and buildings, making raw melee skill, multitasking, and timing-rush judgment the decisive factors. The 6-player free-for-all nature invites frequent early harassment, temporary alliances, betrayals, and diplomatic maneuvering, while the snowball effect is strong and recovery from a deficit is difficult, keeping tension high. Although no map description or story text is present, the subtitle "Fable" hints at a possible underlying narrative or creator intent beyond simple destruction. This map suits intermediate-to-advanced players who want to maintain melee mechanics while enjoying high-freedom chaotic battles. Before playing, scouting the main-base choke width, distances between expansions, and resource distribution to prepare an early build order will significantly improve early-game survival.
최근 등록된 맵
새로 추가된 파일과 버전을 확인하세요.
로스트 템플 VS 컴퓨터 (The Lost Temple VS Computer)
로스트 템플 VS 컴퓨터(exp)는 클래식 밀리 맵 '로스트 템플'을 기반으로 제작된 컴까기 유즈맵이다. 원제 'The Lost Temple VS C exp'와 파일명 '6;2로템컴잡기.scx'에서 알 수 있듯 최대 6인까지 참여해 컴퓨터 상대 협동전을 벌이는 구조다. 맵 크기는 128×128 타일, 사막 타일셋을 그대로 사용해 원작의 지형과 멀티 배치, 초크 포인트 등을 충실히 재현했다. 내부 설명에 'Suggested Players: 1-6'이라 명시되어 있어 솔로 플레이부터 6인 풀파티까지 인원 조정이 자유롭다. 진행 방식은 전형적인 컴까기다. 플레이어들은 각자 시작 위치에서 자원을 확보하고 병력을 생산해 맵 곳곳에 배치된 적 AI 기지를 공략한다. 원작의 대칭형 구조 덕분에 진영별 밸런스가 비교적 고르며, 중앙 멀티와 양옆 확장 기지를 차지하는 운영 싸움이 핵심이다. 'exp' 표기가 버전이나 난이도 조정을 의미하는 것으로 보여, 기본 AI보다 강화된 적이 등장할 가능성이 있다. 난이도는 초보부터 중급자까지 무난하게 즐길 수 있는 '보통' 수준으로 추정된다. 플레이 경험은 익숙한 지형에서 부담 없이 협동전을 즐기고 싶은 유저에게 적합하다. 밀리 빌드 연습, 유닛 조합 테스트, 친구들과의 가벼운 협동전 용도로 제격이다. 다만 트리거나 특수 이벤트보다는 순수 밀리 룰에 가까운 AI전이므로, 색다른 미션이나 스토리를 기대하기엔 아쉽다. 플레이 전 버전 표기(exp)의 정확한 의미와 AI 난이도 설정, 인원 수에 따른 밸런스 변화를 확인하고 시작하는 것이 좋다. Lost Temple VS Computer (exp) is a comp-stomp use map based on the classic melee map 'Lost Temple'. As indicated by the original title 'The Lost Temple VS C exp' and the filename '6;2로템컴잡기.scx', it supports up to 6 players in cooperative play against computer opponents. The map size is 128×128 tiles using the desert tileset, faithfully reproducing the original terrain, expansion locations, and choke points. The internal description states 'Suggested Players: 1-6', allowing flexible player counts from solo to a full 6-person party. The gameplay follows a typical comp-stomp format. Players start at their respective positions, gather resources, build armies, and attack enemy AI bases scattered across the map. The symmetrical layout of the original ensures relatively even balance across positions, with control of the central expansion and side bases being key to macro play. The 'exp' suffix likely denotes a version or difficulty adjustment, suggesting tougher AI than standard. Difficulty is estimated at 'Normal', suitable for beginners to intermediate players. The experience suits users wanting casual cooperative matches on familiar terrain. It is ideal for practicing melee builds, testing unit compositions, or light co-op with friends. However, since it stays close to standard melee rules against AI without special triggers or story events, those seeking unique missions may find it lacking. Before playing, it is advisable to verify the exact meaning of the 'exp' version tag, AI difficulty settings, and balance changes based on player count.
Army Men-Sarge's War
스타크래프트 브루드워의 유즈맵 ‘Army Men-Sarge's War’는 밀리 기반의 전투 맵으로, 내부 설명에 따르면 ‘검은색 국가(Tan Nation)’와 ‘녹색 국가’ 사이의 평화가 깨지고 새로운 적군이 등장하는 시나리오를 배경으로 한다. 맵은 황무지 타일셋으로 구성되어 있으며, 4096x4096의 넓은 크기를 자랑한다. 플레이어는 5인으로 구성된 팀을 이루며 전투를 펼친다. 맵의 구조는 중앙에 넓은 개활지가 펼쳐져 있어 대규모 교전이 가능하며, 곳곳에 지형적 요충지가 분포되어 있어 전략적 포지셔닝이 중요하다. 공격로와 수비 거점 간의 균형이 비교적 잘 맞춰져 있어, 전면전뿐만 아니라 기습 공격이나 방어 라인 구축이 핵심 전략이 될 것으로 보인다. 또한, 맵의 디자인에서 확인되는 중앙의 넓은 평지와 주변의 언덕, 숲지대는 시야 확보와 기동성에 영향을 미치며, 이는 곧 전투의 흐름을 좌우할 수 있는 요소로 작용할 것이다. 초보 플레이어는 넓은 맵에서 전술적 위치 선정을 어려워할 수 있으나, 익숙해지면 넓은 시야와 기동성을 활용한 전술을 펼칠 수 있다. 경험 많은 유저라면 중앙 교전이나 기습 타이밍을 노려 승리를 이끌어낼 수 있을 것이다. 이 맵은 밀리 기반의 전투를 즐기는 유저들에게 넓은 전장과 전략적 깊이를 제공하는 데 초점을 맞췄다. 전투의 승패는 단순히 유닛의 수적 우위가 아니라, 지형과 타이밍을 얼마나 잘 활용하느냐에 달려 있다. 특히, 다수의 플레이어가 참여하는 팀전에서는 소통과 협력이 필수적이며, 각기 다른 전략을 조율하는 재미가 크다. 이 맵을 플레이하기 전에는 맵의 주요 거점과 주요 공격로를 미리 숙지하는 것이 좋다. 또한, 팀원 간의 역할 분담(예: 방어 담당, 정찰 담당)을 미리 정하고 전투를 시작하면 효율적인 플레이가 가능하다. 넓은 맵에서 전투가 벌어질 때는 항상 시야 확보를 우선시하고, 적의 움직임을 예측하는 연습을 해야 한다. 초보자라면 작은 규모의 테스트 게임으로 맵의 특성을 익힌 후 본격적인 전투에 임하는 것이 바람직하다. 한편, 경험 많은 플레이어는 이 맵을 활용해 다양한 전술 실험을 시도할 수 있으며, 팀원 간의 협력과 전략적 사고를 깊게 다질 수 있는 기회가 될 것이다. "Army Men-Sarge's War" is a user-created battle map in *StarCraft: Brood War* based on the standard melee format. According to its internal description, the scenario unfolds as the peace between the "Tan Nation" (the black team) and the "Green Nation" collapses, with new enemy forces emerging. The map features a wasteland tile set and boasts a massive 4096x4096 size. Players form teams of five to engage in combat. The layout centers around a vast open field ideal for large-scale clashes, with strategic vantage points scattered throughout the terrain. The balance between attack paths and defensive strongholds is well-maintained, making both full-scale battles and surprise attacks or fortified defenses crucial to success. The map's design—featuring a central plain surrounded by hills and forests—affects visibility and mobility, which can significantly influence the flow of combat. Novice players may struggle with tactical positioning on such a large map, but once familiar, they can leverage the wide field of vision and mobility to execute advanced strategies. Experienced players can capitalize on central engagements or well-timed ambushes to secure victory. The map emphasizes expansive battlefields and strategic depth for players who enjoy melee-style combat, where victory hinges not on numerical superiority but on smart use of terrain and timing. In team battles with multiple players, communication and coordination are essential, and coordinating diverse strategies adds to the enjoyment. Before playing, it's advisable to study the map's key strongholds and primary attack routes. Pre-assigning roles (e.g., defense, scouting) among teammates can also improve efficiency during combat. When fighting on such a large map, prioritize vision control and practice predicting enemy movements. Beginners should start with smaller-scale test games to get a feel for the map before diving into full battles. Meanwhile, veteran players can use this map to experiment with various tactics, deepening both teamwork and strategic thinking.
베스트 맵 에버 v1.1 (The Best Map Ever v1.1)
스타크래프트 브루드워의 고전 유즈맵 중 하나로 손꼽히는 $$$$THE BEST MAP EVER v1.1$$$$은 8인용 밀리 기반 맵이다. 내부 설명에서도 언급되듯 완벽한 대칭 구조를 바탕으로 모든 플레이어에게 동일한 조건을 제공하는 것이 특징으로, 밸런스를 중시한 디자인이 돋보인다. 사막 타일셋을 배경으로 펼쳐지는 이 맵은 초보자와 숙련자 모두에게 접근성을 제공하며, endless money라는 설명에서 알 수 있듯 경제력을 바탕으로 한 전략적인 플레이가 요구된다. 맵의 중앙에 위치한Resource를 둘러싼 위치전쟁은 시작부터 끝까지 긴장감을 유지하게 만든다. symmetrical bases(대칭 기지) 구조 덕분에 선두 플레이어와 추격자 간의 힘의 균형을 쉽게 유지할 수 있으며, 다양한 빌드 오더와 타이밍 러시가 가능한 만큼 창의적인 플레이가 가능하다. 또한, 맵이 커서 넓은 시야를 확보할 수 있어 정찰과 방어 라인 구축이 중요해진다. 하지만 중앙 자원 지역을 장악하지 못하면 흔들리는 게임이 되기 십상이므로, 초반Resource 확보가 승부의 열쇠라 할 수 있다. 이 맵의 가장 큰 장점은 바로 모든 플레이어에게 동일한 기회를 제공한다는 점이다. symmetrical bases 덕분에 기지 위치나 시작 자원의 불균형 없이 공정한 경쟁을 즐길 수 있으며, endless money라는 설명은 자원 수급이 원활하다는 점을 강조한다. 다만, 맵이 커서 넓은 시야를 확보하기 위해 정찰을 꾸준히 해야 하고, 중앙 Resource 지역을 두고 벌어지는 혈투에서 실수를 допу하면 쉽게 역전당할 수 있으니 주의가 필요하다. 또한, 맵의 대칭 구조상 한쪽이 우세를 점하면 그 흐름을 뒤집기 쉽지 않으므로, 초반Resource 확보와 방어 라인 구축을 철저히 준비해야 한다. 이 맵은 초보자들이 스타크래프트의 기본기를 익히기에 좋은 선택지 중 하나로, symmetrical bases 덕분에 상대방의 빌드나 전략을 빠르게 파악할 수 있으며, endless money 덕분에 자원 관리와 빌드 오더에 집중할 시간을 충분히 확보할 수 있다. 반면 숙련자들에게는 중앙 Resource 지역을 두고 벌어지는 치열한 전투와 넓은 시야를 활용한 전략적 플레이가 매력적으로 다가올 것이다. 특히, symmetrical bases 구조를 활용한 다양한 빌드 오더와 타이밍 러시, 그리고Resource 관리와 방어 라인 구축을 동시에 고려해야 하는 점은 숙련자들에게도 도전적인 요소로 작용할 수 있다. 이 맵을 플레이하기 전에는 symmetrical bases 구조와 central Resource 지역을 중심으로 한 전략적 플레이가 필요하다는 점을 미리 숙지하고, 초반Resource 확보와 방어 라인 구축을 철저히 준비해야 한다. 또한, endless money라는 설명을 바탕으로 자원 관리와 빌드 오더에 집중할 수 있도록 준비해야 한다. symmetrical bases 구조 덕분에 모든 플레이어에게 동일한 기회를 제공하므로, 초보자와 숙련자 모두에게 추천할 만한 맵이라 할 수 있다. The Best Map Ever v1.1 is a classic Brood War custom map designed for 8 players, primarily classified as a Melee map. The map features a perfectly symmetrical base layout, ensuring equal starting conditions for all players as highlighted in the internal description 'endless money on perfectly symetric bases..same chances for every player!!!'. Set against a desert tileset, the gameplay revolves around strategic resource control, particularly around the central resource areas, which serve as the focal point for intense early-game battles. The symmetrical base design allows for a variety of build orders and timing attacks, making the map accessible to both beginners and experienced players. Beginners can focus on learning basic mechanics and resource management, while skilled players can experiment with advanced strategies and counterattacks. The map's large size encourages constant scouting and the establishment of defensive lines, adding layers of complexity to the gameplay. However, failing to secure control of the central resources can lead to an uphill battle, as the symmetrical layout makes it difficult to recover once an opponent gains an advantage. One of the map's standout features is its commitment to fairness, with symmetrical bases eliminating any positional advantages and the 'endless money' mechanic ensuring a steady resource flow. This setup allows players to concentrate on macro management and strategic planning rather than getting bogged down by resource scarcity. The central resource zones are critical battlegrounds where early mistakes can quickly snowball into a lost game, so players must prioritize securing these areas while building robust defenses. The map's design rewards players who can balance aggression with defense, making it a compelling choice for those looking to refine their strategic depth. For beginners, The Best Map Ever v1.1 serves as an excellent training ground for mastering the fundamentals of StarCraft, such as scouting, resource management, and build orders. The symmetrical layout makes it easier to observe and adapt to opponents' strategies. Experienced players, on the other hand, will appreciate the map's depth, including the need for precise timing attacks, efficient resource allocation, and the ability to pivot strategies based on the opponent's moves. The central resource control and the requirement to maintain strong defensive positions add a layer of complexity that keeps even veteran players engaged. Before diving into the game, players should familiarize themselves with the symmetrical base structure and the importance of controlling the central resources. The 'endless money' mechanic means resource scarcity is less of a concern, allowing players to focus more on macro management and strategic planning. The map's design ensures a level playing field, making it a great choice for both casual and competitive players looking to sharpen their skills.
플랫폼 (Platform)
이 맵은 스타크래프트 브루드워의 기본 밀리 맵을 기반으로 한 유즈맵으로, 네 명의 플레이어가 각각의 진영을 차지하고 적 건물들을 파괴하는 것이 목표이다. 전체적으로 평평한 지형의 가운데에 커다란 섬이 위치하며, 섬 주변으로는 좁은 통로와 넓은 평지가 펼쳐진다. 섬의 중앙에는 추가 자원이나 방어 시설이 배치되어 있으며, 섬으로 진입하기 위해서는 좁은 다리나 해안가를 통해야 한다. 맵의 테두리에는 보호막이 쳐져 있어 외부에서 공격을 받기 어렵고, 섬 내부에서 발생하는 전투가 주를 이룬다. 섬 중앙의 건물들은 파괴하기 어렵게 배치되어 있어 전략적인 접근이 요구된다. 맵의 분위기는 우주 테마로 디자인되어 있으며, 어두운 톤의 배경과 함께 고르지 않은 지형이 전체적인 긴장감을 조성한다. 플레이어는 섬 주변의 평지에서 자원을 채취하며 병력을 생산하고, 섬으로의 진입을 노리게 된다. 섬 내부의 좁은 공간과 외부 평지의 넓은 공간이 조화를 이루며, 다양한 전략을 구사할 수 있는 여지를 제공한다. 초보자는 섬 주변의 평지에서 안정적으로 자원을 확보하며 병력을 모으는 것이 중요하며, 숙련자는 섬 내부의 방어 시설과 좁은 통로를 활용한 전략적 공격을 펼칠 수 있다. 섬의 중앙 건물들은 파괴 시 큰 보상을 주거나 게임의 승패에 영향을 미칠 것으로 추정된다. 맵의 밸런스는 기본 밀리 맵을 기반으로 하므로, 초보자와 숙련자 모두 즐길 수 있는 구조로 보인다. 그러나 섬 내부와 외부 간의 자원 분포와 방어 시설의 배치에 따라 밸런스가 좌우될 가능성이 크므로, 플레이 전 맵의 지형을 충분히 숙지하는 것이 중요하다. 섬 주변의 좁은 통로는 진입로를 두고 벌어지는 전투에서 치열한 접전을 벌일 수 있는 장소가 될 것이며, 섬 내부의 건물들은 신중한 접근이 필요한 목표물이 될 것이다. 전체적으로는 밀리 기반의 전략적 전투를 즐길 수 있는 맵으로, 섬이라는 독특한 지형이 제공하는 다양한 전투 양상을 경험할 수 있다. This custom map is a modified version of the classic StarCraft: Brood War melee map, designed for four players to engage in strategic combat. The map features a central island surrounded by narrow pathways and open terrain, with a protective shield along the outer edges restricting external attacks. The island’s interior contains key structures, including potential resource points and defensive buildings, making it a focal point for intense battles. The terrain is set in a space-themed environment, with dark tones and uneven surfaces enhancing the overall tension. Players must gather resources from the outer plains while managing the strategic challenge of island access. Beginners may find it easier to focus on outer resource collection and gradual expansion, while experienced players can exploit the island’s narrow passages and central structures for tactical advantage. The central buildings on the island likely play a decisive role in victory, requiring careful planning to destroy. The map’s balance hinges on resource distribution and defensive layouts, though it retains the accessibility of a standard melee map. Key areas for combat include the narrow bridges leading to the island and the central structures themselves. Overall, this map offers a fresh take on melee combat by incorporating the unique island terrain, providing diverse strategic opportunities for players of all skill levels.
넥서스 디스트로이어스 페이블 (Nexus Destroyers Fable)
넥서스 디스트로이어스 페이블(Nexus Destroyers Fable)은 6인용 유즈맵으로, 제목 그대로 적 넥서스(커맨드 센터, 해처리)를 파괴하는 것이 핵심 목표인 '넥서스 부수기' 장르에 속한다. 사막 타일셋 위에 128×128 타일 크기로 펼쳐진 전장은 비교적 넓고 개방적인 지형을 보여주며, 중앙을 기준으로 대칭에 가까운 배치가 눈에 띈다. 각 플레이어는 본진에서 시작해 자원을 확보하고 병력을 양성한 뒤, 상대 본진의 핵심 건물을 노리는 정석적인 흐름을 따른다. 트리거나 특수 미션 없이 순수하게 밀리 유닛과 건물만으로 승부를 가리는 구성이라, 밀리 실력과 멀티태스킹, 타이밍 러시 판단력이 그대로 승패를 가른다. 6인 난전 특성상 초반 견제와 연합, 배신, 외교적 줄다리기가 빈번하게 발생하며, 한 번 밀리면 회복하기 어려운 눈덩이 효과가 강해 긴장감이 높다. 맵 설명이나 별도 스토리 텍스트는 확인되지 않으나, '페이블(Fable)'이라는 부제가 암시하듯 단순한 파괴전을 넘어선 나름의 서사나 맵 메이커의 의도가 깔려 있을 가능성이 있다. 밀리 감각을 유지하면서도 정해진 빌드 오더 외의 변수 창출을 즐기는 중급 이상 유저, 자유도 높은 난전형 유즈맵을 찾는 플레이어에게 적합하다. 플레이 전에는 본진 입구 너비, 멀티 기지 간 거리, 자원 분포 등 지형적 이점을 미리 파악하고 초반 빌드를 짜두면 초반 생존율을 크게 높일 수 있다. Nexus Destroyers Fable is a 6-player UMS map that belongs to the "Nexus Destroyer" genre, where the core objective is to destroy the enemy Nexus, Command Center, or Hatchery. The battlefield spreads across a 128×128 tile desert tileset, offering a relatively wide and open terrain with a near-symmetrical layout centered on the middle. Each player starts from a main base, secures resources, builds an army, and then targets the opponent's key structure in a classic flow. With no triggers or special missions, the match is decided purely by melee units and buildings, making raw melee skill, multitasking, and timing-rush judgment the decisive factors. The 6-player free-for-all nature invites frequent early harassment, temporary alliances, betrayals, and diplomatic maneuvering, while the snowball effect is strong and recovery from a deficit is difficult, keeping tension high. Although no map description or story text is present, the subtitle "Fable" hints at a possible underlying narrative or creator intent beyond simple destruction. This map suits intermediate-to-advanced players who want to maintain melee mechanics while enjoying high-freedom chaotic battles. Before playing, scouting the main-base choke width, distances between expansions, and resource distribution to prepare an early build order will significantly improve early-game survival.
고래를 폭격하라!!! 퍼펙트 (Nuke the Whales!!! Perfected)
스타크래프트 브루드워의 유즈맵 명작 중 하나로 꼽히는 〈Nuke the Whales!!! Perfected〉는 8명의 플레이어가 동시에 참여하는 밀리 기반의 독특한 디펜스 게임이다. 맵의 이름은 '고래를 폭격하라!!!'라는 다소 과격한 슬로건에서부터 짐작할 수 있듯이, 제한 시간 내에 맵 중앙에 등장하는 거대한 고래를 파괴하는 것이 주 목표다. 하지만 단순하게 고래를 때리는 것뿐만 아니라, 고래가 맵 이곳저곳을 이동하며 플레이어의 기지를 위협하는 등 전략적인 요소도 포함되어 있어 긴장감을 고조시킨다. 맵은 우주 테마의 타일셋을 활용해 적대감 넘치는 우주 공간을 연출하며, 4096x4096의 넓은 공간에서 고래의 이동 경로와 플레이어의 배치, 자원 관리까지 신경 써야 한다. 제작자 M~M Kupo와 디버거 Chasinmp3s의 손길이 느껴지는Debugged by Chasinmp3sDebugged by Chasinmp3sDebugged by Chasinmp3sDebugged by Chasinmp3sDebugged by Chasinmp3sDebugged by Chasinmp3sDebugged by Chasinmp3sDebugged by Chasinmp3sDebugged by Chasinmp3sDebugged by Chasinmp3sDebugged by Chasinmp3sDebugged by Chasinmp3sDebugged by Chasinmp3sDebugged this map ensures 밸런스와 완성도를 높였다. 플레이어는 초반부터 고래가 맵 곳곳을 침범할 수 있음을 감안해 방어선을 구축하고, 고래를 공격할 수 있는 대공 포대를 배치해야 한다. 고래는 시간이 지나면서 점점 더 공격적으로 변하며, 플레이어는 이를 저지하기 위해 자원 채취와 유닛 생산을 병행해야 한다. 제한 시간 30분은 긴장감을 더하는 요소로, 타이밍을 놓치면 고래가 기지를 파괴하거나 목표를 달성하지 못할 위험이 있다. 이 맵의 가장 큰 매력은 8명이라는 다인원 플레이에서 오는 협동과 경쟁의 조화다. 각 플레이어는 고래를 공격할 수도, 방어할 수도, 또는 고래를 유도하는 전략을 취할 수도 있어 전술적 다양성이 뛰어나다. 또한, 우주 배경의 웅장한 그래픽과 조화로운 사운드가 몰입감을 한층 높인다. 초보자는 물론, 밀리 유즈맵의 전략적 깊이를 즐기는 숙련자들에게도 추천할 만한佳作이며, 특히 팀원 간의 의사소통이 핵심인 만큼 팀플레이 경험을 쌓기에도 좋다. 하지만 고래의 공격 패턴을 파악하지 못하거나 방어가 허술하면 순식간에 무너질 수 있으므로, 플레이 전 미리 맵 구조와 고래의 이동 경로를 숙지하는 것이 중요하다. 이 맵은 8인 밀리 기반 디펜스라는 독특한 장르의 정수를 보여주며, 스타크래프트 유즈맵의 역사에서 빼놓을 수 없는 명작으로 손꼽힌다.
[UED] The Wall (더 월)
스타크래프트 브루드워의 유즈맵 《[UED] The Wall》은 밀리 기반의 맵이지만, 그 이름처럼 거대한 벽을 사이에 두고 벌어지는 독특한 대결 구조를 지닌 맵입니다. 맵 중앙을 가로지르는 거대한 벽이 양 진영을 분리하고 있으며, 이 벽은 일방 통행이 가능한 좁은 통로 여러 개로만 통과할 수 있어 전략적인 대결을 유도합니다. 벽 너머에서 상대방의 기지를 확인할 수 있지만, 직접 공격할 수 있는 길은 제한되어 있어 견제와 확장의 중요성이 부각됩니다. 벽의 좁은 통로를 통제하는 플레이어는 상대방의 자원 채취와 expansion을 방해할 수 있으며, 반대로 통로를 잘 방어하지 못하면 일방적으로 밀리는 상황이 발생할 수 있습니다. 이 맵은 8명의 플레이어가 1대 1로 대결하는 구조를 기본으로 하며, 벽을 사이에 두고 벌어지는 견제와 방어, expansion 싸움으로 긴장감을 유지합니다. 벽의 통로를 두고 벌어지는 스나이핑이나 러시, 그리고 빠른 멀티 테스팅 등이 주요 전략 포인트입니다. 또한, 벽 너머의 시야를 확보하기 위해 오버로드나 스캔을 적극 활용하는 것이 관건이며, 통로의 좁은 지형 덕분에 치고 빠지기 전술이나 방어 타워의 효율성이 매우 높아집니다. 맵의 중앙 통로가 좁고 길게 뻗어 있어 테란의 벙커링이나 프로토스의 포톤 캐논 방어망 구축이 용이하다는 점도 특징입니다. 《[UED] The Wall》은 밀리 기반의 맵이지만, 벽을 사이에 둔 독특한 구조로 인해 밀리만의 전략과 유즈맵만의 재미를 동시에 느낄 수 있는 작품입니다. 벽의 통로를 두고 벌어지는 심리전과Resource Management가 핵심이므로, 좁은 길목에서의 싸움에 익숙한 플레이어라면 더욱 즐겁게 플레이할 수 있을 것입니다. 또한, 벽 너머의 시야 싸움과 빠른 판단이 요구되므로, 단순히 자원과 병력만 모으는 것이 아니라 적절한 타이밍에 공격을 감행하거나 방어를 굳히는 전략적 선택이 중요합니다. 벽을 넘는 것이 쉽지 않은 만큼, 초보보다는 어느 정도 경험이 있는 플레이어에게 더욱 추천할 수 있는 맵입니다. StarCraft: Brood War's custom map *<UED> The Wall>* is a melee-based map, but as its name suggests, it features a unique battle structure centered around a massive wall that divides the two sides. A giant wall runs through the center of the map, separating both bases, and the only way to pass through is via several narrow one-way passages, forcing strategic confrontations. While players can see the enemy base beyond the wall, direct attacks are limited, emphasizing the importance of harassment and expansion. Controlling the narrow passages allows players to disrupt enemy resource gathering and expansions, while failing to defend them can lead to one-sided defeats. The map is primarily designed for eight players battling in 1v1 matches, maintaining tension through wall-based harassment, defense, and expansion struggles. Key strategic points include sniping, rushes, and rapid multi-base testing through the wall’s passages. Securing vision beyond the wall using Overlords or scans is crucial, and the narrow terrain makes hit-and-run tactics or defensive towers highly effective. The map’s long, narrow central pathways also make it easy for Terran to deploy bunker rushes or for Protoss to establish photon cannon defenses. Though *<UED> The Wall>* is a melee-based map, its unique wall structure blends traditional melee strategies with custom map-specific fun. The core of the gameplay revolves around psychological warfare and resource management through the wall’s passages, making it especially enjoyable for players familiar with narrow-path combat. Beyond just gathering resources and amassing forces, success requires quick decision-making—knowing when to attack or when to fortify defenses. Since crossing the wall isn’t easy, this map is better suited for players with some experience rather than beginners.
배드랜드 RP 0.06 (Badlands rp 0.06)
스타크래프트 브루드워 유즈맵 <Badlands rp 0.06 (fixed)>는 ‘vermi’ 제작자의 RP(리플레이 가능) 스타일을 구현한 밀리 맵으로, 기존 메카닉 전투를 기반으로 한 맵들과 달리 전략적 리플레이와 전투 후 점령을 통한 승리로 진행되는 독특한 구조를 자랑합니다. 맵의 이름처럼 황무지 지형을 기반으로 한 디자인이며, 넓은 평지와 중앙 고지대, 그리고 곳곳에 배치된 자원 멀티가 특징적입니다. 전투는 주로 중앙 평야에서 펼쳐지며, 승리 조건은 상대방의 넥서스를 파괴하는 대신 맵 곳곳에 배치된 점령 가능한 건물을 모두 차지하는 방식으로 진행됩니다. 이는 기존 밀리 맵의 승리를 위한 일방적인 전투 외에도 맵 통제와 전략적 자원 관리가 얼마나 중요한지를 강조합니다. 초반에는 자원과 병력 확보에 주력해야 하며, 중반부터는 점령 가능한 건물을 두고 경쟁을 벌이면서 상대방의 병력을 유인하거나 방어하는 플레이가 필요합니다. 맵의 난이도는 보통 수준으로, 초보자들이 접근하기에는 전략적 계획이 다소 복잡할 수 있지만, 여러 번 플레이하며 맵의 점령 포인트와 병력 운용 전략을 익히면 재미와 깊이를 느낄 수 있습니다. 특히 점령 가능한 건물이 맵 곳곳에 흩어져 있어, 각 포인트별로 방어와 공격을 조율해야 한다는 점이 이 맵의 핵심 재미 요소입니다. 추천 대상은 전략적 사고와 맵 컨트롤을 즐기는 유저들이며, 배틀넷이나 유즈맵 커뮤니티에서 인기 있는 맵 중 하나입니다. 플레이 전에는 반드시 점령 가능한 건물의 위치와 맵의 주요 루트를 미리 숙지하고, 초반 자원 관리와 병력 생산 타이밍을 잘 조절하는 것이 중요합니다. 또한, 상대방의 점령 전략을 예측하고 방어선을 구축하는 것 또한 승리를 위한 핵심 요소입니다. Badlands rp 0.06은 단순히 전투만으로 승부를 결정짓는 것이 아니라, 맵의 전반적인 통제와 전략적 판단이 요구되는 맵으로, 스타크래프트의 새로운 재미를 느낄 수 있는 유즈맵 중 하나로 손꼽힙니다. Badlands rp 0.06 (fixed) is a unique StarCraft: Brood War custom map by creator 'vermi,' blending traditional melee mechanics with an RP (replayable) style focused on strategic control and post-battle occupation. Set in a barren wasteland terrain, the map features expansive plains, elevated central zones, and scattered resource expansions. Unlike conventional melee maps where victory hinges solely on destroying the opponent's Nexus, this map emphasizes capturing all occupation points scattered across the map to secure a win. Combat primarily unfolds in the central lowlands, but victory is achieved through map control and resource management rather than brute-force destruction. Early gameplay demands resource gathering and military expansion, while mid-game shifts toward fierce competition over occupation points, requiring players to lure or defend against enemy forces. The map is rated as medium difficulty; while accessible to newcomers, its strategic depth—especially in managing multiple frontlines and predicting opponent moves—demands practice. The core enjoyment lies in the dynamic interplay between offense, defense, and map control, making it ideal for players who relish tactical depth and spatial awareness. Before playing, familiarize yourself with the occupation points' locations and main routes, prioritize early resource allocation, and balance troop production timings. Anticipating enemy strategies and securing defensive perimeters are crucial for success. Badlands rp 0.06 transcends typical melee maps by integrating strategic control and replayability, offering StarCraft veterans and newcomers alike a fresh and engaging experience.
맵 선택 가이드
태그는 맵의 핵심 특징을 빠르게 설명하지만 제작 버전마다 규칙이 다를 수 있습니다. 상세 설명에서 권장 인원, 난이도, 플레이 시간과 버전을 함께 확인한 뒤 다운로드하세요.