
고지대 스타크래프트 맵 모음
'고지대' 태그가 등록된 맵을 모았습니다. 장르 하나로 찾기 어려운 플레이 방식, 난이도와 특징을 중심으로 인기 맵과 최신 맵을 비교해 보세요.
- 등록 맵
- 13개
- 누적 다운로드
- 0
- 누적 조회
- 457
인기 맵
다운로드와 조회 반응이 높은 맵입니다.
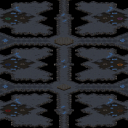
p4
이 맵은 스타크래프트 브루드워에서 3대3 팀전으로 즐길 수 있는 밀리 유즈맵으로, 중앙에 위치한 넓은 평야와 고지대가 조화를 이룬 전략적인 배치로 구성되어 있다. 좌우 대칭 형태의 넓은 평지 주변으로는 언덕과 협곡이 배치되어 있으며, 각 팀은 맨 처음 시작 지점에서 약간 떨어진 곳에 본진 건물을 배치할 수 있도록 설계되어 있다. 본진과 연결된 mineral line은 각각의 팀이 자원을 안정적으로 확보할 수 있도록 충분한 광물 지대가 배치되어 있다. 맵의 중앙부는 넓은 개활지로 펼쳐져 있어 병력 충돌 시 대규모 전투가 발생할 가능성이 높고, 고지대와 언덕은 시야 확보와 방어-line 구축에 유리한 요소가 된다. 왼쪽 상단과 오른쪽 하단에는 본진과 멀지 않은 곳에 추가 자원 지대가 배치되어 있어 초반 자원 경쟁이 치열해질 수 있는 구조다. 전체적으로 밸런스 잡힌 3vs3 밀리 맵으로서, 중앙 평야를 차지하기 위한 초반 러시와 정면 대결이 주요 전략 포인트가 될 것으로 보인다. 또한, 언덕과 협곡을 활용한 기습이나 방어-line 구축이 승패를 좌우할 수 있는 핵심 요소로 작용할 것으로 예상된다. 이 맵은 초보자부터 숙련자까지 모두 즐길 수 있도록 설계되었지만, 중앙 평야를 둘러싼 고지대와 언덕의 활용법을 익히는 것이 중요하다. 특히, 팀원과의 협력과 자원 관리, 그리고 중앙 평야를 차지하기 위한 전략적 결정이 게임의 흐름을 크게 좌우할 것이다. 빠른 병력 생산과 병력 간의 조화로운 전투가 요구되며, 초반 자원 확보와 mineral line의 안정적인 운영이 게임의 승패를 가르는 중요한 포인트가 될 것이다. 또한, 언덕과 협곡을 활용한 기습이나 방어-line 구축은 숙련자들에게는 승리의 열쇠가 될 수 있는 요소다. 이 맵을 플레이하기 전에 중앙 평야의 지형을 숙지하고, 팀원과의 원활한 소통을 통해 전략을 조율하는 것이 중요하다. 이 맵은 넓은 개활지와 고지대, 언덕이 조화를 이룬 전략적인 배치로 인해, 초보자들에게는 다소 복잡하게 느껴질 수 있지만, 숙련자들에게는 치밀한 전략과 팀워크가 요구되는 흥미로운 대결을 제공한다. 특히, 중앙 평야를 둘러싼 고지대와 협곡을 활용한 플레이어의 센스가 승패를 결정짓는 요소로 작용할 것이다. 팀원 간의 유기적인 협력과 자원 관리, 그리고 전략적 판단을 통해 승리를 쟁취해보길 바란다. 이 맵은 3vs3 밀리 유즈맵으로서, 팀워크와 전략적 사고가 요구되는 classic 스타일의 재미를 느낄 수 있는 맵이다. This map is a StarCraft: Brood War custom melee map designed for 3v3 team battles, featuring a strategic layout with a vast central plain surrounded by highlands and hills. The symmetrical wide flat terrain is bordered by hills and ravines, and each team starts with their main base slightly offset from the initial spawn point. The mineral lines connected to the bases are generously spaced to ensure stable resource gathering. The central area opens into a wide expanse where large-scale battles are likely to occur, while elevated terrain and hills provide advantages for vision control and defensive line setups. Additional resource clusters near the top-left and bottom-right bases allow for intense early-game resource competition. As a well-balanced 3v3 melee map, securing the central plain through early rushes and direct confrontations will be key strategic focuses. Ambushes and defensive formations utilizing hills and ravines are expected to play decisive roles in determining the outcome. While designed to be enjoyable for both beginners and experienced players, mastering the use of high ground and elevated terrain around the central plain is crucial. Team coordination, resource management, and strategic decisions regarding control of the central plain will heavily influence the game’s flow. Efficient unit production and cohesive combat tactics are essential, with early resource gathering and stable mineral line operations serving as critical factors in victory. For skilled players, leveraging hills and ravines for ambushes or defensive setups can be the key to success. Though the map’s blend of open fields, high ground, and hills may feel complex to newcomers, it offers a rich and engaging challenge for veterans, where player intuition and terrain utilization around the central plain become decisive factors. Strong teamwork, smart resource handling, and strategic foresight will be vital in securing victory. This map delivers classic 3v3 melee action, rewarding teamwork and strategic thinking in a timeless StarCraft experience.
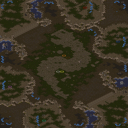
Python 1.3
Python 1.3은 사막 타일셋을 기반으로 한 8인 멀티플레이 MELEE 맵이다. 맵 전체가 4096×4096 픽셀 규모로 설계돼 넓은 전장을 제공하며, 주요 지형은 중앙에 위치한 넓은 오픈 구역과 양쪽 끝에 배치된 작은 고지대로 구성된다. 플레이어는 각 코너에 시작 위치를 가지고, 초기 자원은 기본 베이스와 동일하게 배치된다. 전투는 주로 중앙 오픈 구역에서 벌어지며, 고지대는 저격 유닛이나 공중 유닛이 시야를 확보하기 좋은 포지션으로 활용될 수 있다. 지도 내에는 사막 특유의 모래 언덕과 바위 구조물이 흩어져 있어 이동 경로를 다양하게 만든다. 특히, 고지대와 오픈 구역 사이에 짧은 좁은 통로가 있어 기습과 방어 전술을 동시에 구사할 수 있다. 플레이 경험은 초반에 자원을 확보하고 진형을 잡는 과정이 중요하며, 중반 이후에는 고지대를 장악하거나 상대의 진로를 차단하는 것이 승패를 좌우한다. 초보자도 기본적인 전투 흐름을 파악하기 쉽지만, 고지대 활용과 이동 경로 선택에 따라 전략적 깊이가 크게 달라진다. 따라서 빠른 판단과 유닛 조합에 익숙한 플레이어에게 특히 추천한다. 플레이 전에 확인할 점은 각 코너의 시작 위치가 대칭인지, 고지대와 통로의 배치가 균형을 이루는지 여부이다. 이를 통해 팀 구성을 미리 계획하고, 초기 스플릿 전략을 세울 수 있다. Python 1.3 is a desert‑tileset 8‑player MELEE map. The map spans 4096×4096 pixels, offering a large battlefield composed of a wide open area in the centre and small hills at both ends. Each player starts in a corner with the usual base resources. Combat mainly unfolds in the central zone, while the hills provide good sight for snipers or air units. Scattered sand dunes and rock formations create varied movement paths. Notably, a short narrow passage between the hills and the open area allows both ambushes and defensive play. Early game focuses on securing resources and forming a formation; mid‑game hinges on controlling the hills or cutting off enemy routes, which determines the outcome. Beginners can grasp the basic flow easily, but strategic depth grows with hill usage and path choices, making it especially suitable for players comfortable with quick decisions and unit combos. Before playing, check whether corner start positions are symmetrical and whether hill and passage placements are balanced, as this helps plan team composition and early split strategies.
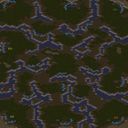
헌터스 (The Hunters-KPGA)
The Hunters-KPGA는 사막 타일셋을 활용한 8인용 팀 밀리 맵으로, 팀 간 전투와 전략적 포지셔닝이 핵심인 유즈맵이다. 맵 전체가 4096×4096 픽셀의 대형 사이즈로 구성돼 있어 넓은 전장을 자유롭게 활용할 수 있다. 시작 지점은 각 팀마다 대칭적으로 배치돼 있어 초기 전투에서 균형을 유지한다. 주요 특징은 중간에 위치한 고지대와 사막의 자연 지형을 이용한 은폐와 우회로가 많다는 점이다. 플레이어는 초기 자원을 확보한 뒤, 병력을 빠르게 생산해 적 팀의 진영을 압박하거나 방어 기반을 구축한다. 특히 사막 타일셋 특유의 모래언덕과 바위 구조물이 시야를 가려 주기 때문에, 정찰 유닛을 활용한 정보 수집이 승패를 좌우한다. 전투는 주로 근접 유닛과 공중 유닛의 조합으로 진행되며, 팀원 간의 협력이 중요하다. 적 팀의 주요 거점을 차지하면 추가 자원 보너스를 얻을 수 있어, 전투 후반부에는 대규모 전투가 자연스럽게 전개된다. 초반에는 방어 라인을 빠르게 구축하고, 중반부터는 적의 약점을 파악해 집중 공격을 시도하는 것이 효과적이다. 플레이 전 확인해야 할 포인트는 각 팀의 시작 위치와 고지대 접근 경로, 그리고 자원 채취 지점의 위치이다. 이 맵은 팀워크와 전술적 판단을 중시하는 플레이어에게 적합하며, 특히 팀 밀리 경험이 풍부한 유저에게 추천한다. The Hunters-KPGA is a large desert‑tileset UMS map designed for eight players in a team melee format, emphasizing both direct combat and strategic positioning. The map spans 4096 × 4096 pixels, offering a spacious battlefield where each team starts from mirrored locations, ensuring a balanced early game. Key terrain features include elevated high‑grounds and numerous sand dunes that provide natural cover and multiple routes for flanking. After securing initial resources, players should quickly produce units to pressure the opposing team or fortify their own base. Because the desert tileset creates many sight‑blocking obstacles, scouting units become essential for gathering intel and planning attacks. Combat typically involves a mix of ground and air units, making coordinated team play crucial. Capturing the enemy’s core area yields additional resource bonuses, leading to larger, decisive battles in the late game. Early focus on solid defenses, followed by mid‑game reconnaissance to identify weak points for concentrated assaults, yields the best results. Before starting, verify each team’s spawn points, high‑ground access routes, and resource node locations. This map suits players who enjoy teamwork, tactical decision‑making, and have solid experience with team melee scenarios.
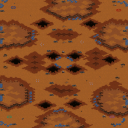
데저트 드롭 (Desert Drop)
Desert Drop은 4명의 플레이어가 동시에 전투를 벌이는 전형적인 밀리 맵으로, 사막 지형을 배경으로 한 넓은 전장이 특징이다. 맵 중앙에 위치한 고지대와 양쪽 끝에 배치된 작은 오아시스는 전략적 요충지 역할을 하며, 여기서 자원을 확보하고 상대를 견제하는 것이 승리의 핵심이다. 이동 경로가 비교적 자유로워 전술적 기동성이 높으며, 지형 자체에 방어용 건물이나 고정된 장애물이 거의 없어 순수한 유닛 전투에 집중할 수 있다. 초반에는 각 플레이어가 베이스 주변에서 기본 유닛을 생산해 전진하고, 중반 이후에는 고지대를 장악해 시야와 공격 범위를 확보하는 것이 유리하다. 특히, 사막의 넓은 평야는 대규모 전투를 유도하므로, 대규모 유닛 조합을 활용하거나 빠른 기동성을 갖춘 유닛으로 교전하는 플레이어에게 적합하다. 반면, 방어에 특화된 유닛만으로는 상대의 공격을 효과적으로 막기 어려우므로, 공격과 방어를 균형 있게 구성하는 것이 중요하다. 게임을 시작하기 전에는 초기 자원 배치와 유닛 생산 순서를 미리 계획하고, 고지대와 오아시스 위치를 파악해 빠르게 점령할 전략을 세우는 것이 좋다. Desert Drop is a classic melee map for four players set on a vast desert battlefield. The central hill and two small oasis points at opposite ends serve as strategic choke points where securing resources and pressuring opponents is key to victory. With relatively open movement paths, the map offers high tactical mobility and lacks fixed defensive structures, allowing pure unit combat to shine. Early game focuses on producing basic units near each base and advancing, while mid‑game control of the hill grants vision and attack range advantages. The expansive plains encourage large‑scale engagements, favoring players who use massed armies or highly mobile units. Purely defensive unit builds struggle to hold off attacks, so a balanced mix of offense and defense is essential. Before starting, plan your initial resource allocation and unit production order, and scout the hill and oasis locations to devise a swift capture strategy.
네오메두사2.0 OBs (NeoMedusa2.0 OBs)
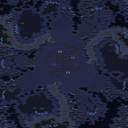
NeoMedusa2.0 OBs는 스타크래프트 브루드워의 클래식 밀리 맵을 현대적인 균형감과 레이아웃으로 재구성한 유즈맵이다. 맵 전체가 4096×4096 화산 타일셋으로 채워져 있어 고지대와 저지대가 자연스럽게 섞여 있으며, 양측 베이스는 중앙을 향해 대칭적으로 배치돼 있다. 초반에는 자원 채취와 정찰이 핵심이며, 중반부터는 고지대에 위치한 중립 정크와 파워드 스폰 포인트를 차지하기 위한 전투가 빈번해진다. 특히 화산 지형의 좁은 협곡과 넓은 평야가 교차하면서 기동성을 활용한 전술과 방어 라인 구축이 동시에 요구된다. 플레이어는 적의 진입로를 예측해 타워와 유닛 배치를 조정해야 하며, 중간에 나타나는 중립 유닛을 효과적으로 이용하면 전투 흐름을 뒤집을 수 있다. 맵은 8명의 플레이어가 자유롭게 대전할 수 있도록 설계돼 있어, 4대 4 혹은 자유분배 형태 모두에 적합하다. 팀 플레이가 아닌 순수 밀리 경험을 원하는 유저에게 특히 추천한다. 경기 시작 전에는 베이스 주변의 정크 위치와 고지대 스폰 타이밍을 확인하고, 초기 빌드 순서를 미리 정해두면 초반 압박을 피하기 쉽다. 또한, 화산 타일셋 특성상 시야가 제한되는 구역이 많으니 정찰 유닛을 꾸준히 운용해 적의 움직임을 파악하는 것이 중요하다. NeoMedusa2.0 OBs is a user map for StarCraft: Brood War that reimagines a classic melee layout with modern balance and design. The entire map is built on a 4096×4096 volcanic tileset, featuring a mix of high ground and low ground that creates natural choke points and open fields. Both bases are placed symmetrically toward the center, making early resource gathering and scouting essential. Around the mid‑game, control of neutral junk and powered spawn points on the high ground becomes a focal point, leading to frequent skirmishes. The narrow volcanic corridors combined with wide plains demand both mobility‑based tactics and solid defensive line placement. Players must anticipate enemy entry routes, adjust tower and unit placements accordingly, and make effective use of neutral units that appear mid‑match to swing the battle. Designed for up to eight players, the map supports 4‑vs‑4 or free‑for‑all configurations, but it shines most in pure melee scenarios without team restrictions. It is especially recommended for players seeking a traditional melee experience. Before starting, check the locations of neutral junk and high‑ground spawn timings, and decide on an early build order to avoid early pressure. Due to many sight‑blocked volcanic areas, continuous scouting is crucial for tracking opponent movements.
스나이퍼스 발드 락스 (Snipers Bald Locks)
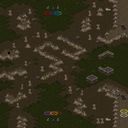
Snipers Bald Locks는 사막 타일셋을 배경으로 한 유즈맵으로, 주로 저격 유닛을 활용한 전투가 중심이 되는 구조를 가지고 있다. 맵은 2048×2048 크기의 넓은 필드에 여러 고지대와 은폐 지형이 배치되어 있어, 플레이어는 스나이퍼 유닛을 적절히 배치하고 시야를 확보하며 상대를 견제한다. 초기 배치 지점은 대체로 맵 양쪽 끝에 위치해 있어, 게임 시작 직후 빠른 이동보다는 정찰과 포지션 확보가 중요하다. 전투는 주로 원거리 교전 위주이며, 중간에 나타나는 작은 건물이나 바위는 추가적인 은폐 공간을 제공한다. 맵에는 제한된 자원 수급 구역이 존재하지 않아, 기본 유닛을 활용한 전략적 움직임과 스킬 사용이 승패를 가른다. 특히 스나이퍼의 사거리와 사격 간격을 고려한 타이밍 조절이 핵심이며, 적의 움직임을 예측해 미리 사격 지점을 잡는 것이 유리하다. 플레이 경험상, 초반에는 서로의 위치를 파악하기 위한 정찰이 필요하고, 중후반으로 갈수록 고지대를 장악한 플레이어가 전투를 주도한다. 따라서 정확한 마이크로 컨트롤과 맵 인식을 갖춘 플레이어에게 적합하며, 스나이퍼 유닛을 좋아하거나 원거리 전투에 익숙한 유저에게 추천한다. 플레이 전에는 맵의 은폐 지형과 고지대 위치를 미리 파악하고, 스나이퍼 유닛의 사거리와 사격 딜레이를 고려해 유닛 배치를 계획하는 것이 좋다. Snipers Bald Locks is a user-made map set on a desert tileset, focusing on combat with sniper units. The map spans 2048×2048 and features numerous high grounds and cover terrain, encouraging players to position snipers strategically and control sightlines. Starting positions are typically at opposite ends, making early reconnaissance and position securing more important than rapid movement. Battles are primarily ranged engagements, with small structures and rocks providing additional concealment. Since there are no dedicated resource zones, success hinges on tactical unit placement and skill usage. Timing the sniper’s range and fire interval is crucial, and anticipating enemy movement to pre‑aim shots offers a decisive edge. Early gameplay involves scouting to locate opponents, while mid‑to‑late game sees players who dominate high ground dictating the flow of combat. This map suits players with strong micro‑control and map awareness, especially those who enjoy sniper units or long‑range tactics. Before playing, familiarize yourself with cover spots and high ground locations, and plan sniper deployments considering their range and cooldown.
문글레이브 2.1 (MoonGlaive 2.1)
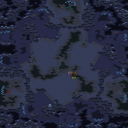
MoonGlaive 2.1은 4096×4096 화산 타일셋을 기반으로 한 8인용 유즈맵으로, 자유로운 위치 선정이 가능한 대규모 전장을 제공한다. 맵 중앙에는 넓은 평지가 배치되어 있어 초반에 기지를 신속히 건설할 수 있으며, 주변에는 자연스럽게 형성된 용암 협곡과 바위 지형이 방어용 고지대를 만든다. 자원은 중앙 평지와 외곽 고지에 고르게 분포돼 있어, 초기 확장과 방어 전략을 동시에 고민하게 만든다. 특히, 협곡을 이용한 급습 루트와 고지를 점령했을 때 얻는 시야 확보가 게임 흐름을 크게 좌우한다. 플레이어는 자신의 기지를 원하는 위치에 건설하고, 적의 확장을 차단하거나 직접 공격하는 두 가지 스타일을 자유롭게 선택할 수 있다. 초반에는 자원 확보와 방어 타워 배치가 핵심이며, 중반 이후에는 상대의 핵심 건물을 압박하는 공격 전환이 효과적이다. 맵은 대규모 전투를 염두에 두고 설계됐기 때문에, 유닛 이동 경로를 미리 파악하고 협곡을 통한 기습을 대비하는 것이 중요하다. 또한, 화산 지형 특성상 건물 배치 시 지형과의 충돌을 주의해야 하며, 높은 지대에 방어 시설을 배치하면 시야와 사거리 면에서 유리하다. 전체적인 흐름은 빠른 확장‑방어‑공격 순환을 반복하도록 설계돼 있어, 빠른 판단력과 다각적인 전략을 구사할 수 있는 플레이어에게 특히 추천한다. MoonGlaive 2.1 is a user‑made map for up to eight players, built on a 4096×4096 volcanic tileset that offers a large, freely selectable battlefield. The central area features a wide plain where players can quickly establish their base at the start, while surrounding lava canyons and rocky terrain naturally create elevated defensive positions. Resources are evenly distributed between the central plain and outer high grounds, prompting players to balance early expansion with defensive planning. Notably, the canyons provide rapid‑strike routes, and securing the high grounds grants superior vision that can dominate the flow of the match. Players may place their bases wherever they prefer, allowing either a defensive fortification style or an aggressive rush approach. In the early game, securing resources and positioning defensive towers are crucial; in the mid‑game, pressuring an opponent’s core structures becomes effective. Because the map is designed for large‑scale battles, anticipating unit movement paths and preparing for canyon ambushes are essential. Additionally, the volcanic terrain requires careful building placement to avoid terrain collisions, and positioning defenses on higher ground offers advantages in sight and range. Overall, the map encourages a cycle of rapid expansion, defense, and attack, making it especially suitable for players who can make swift decisions and employ versatile strategies.
라시리온 (Lathírion)
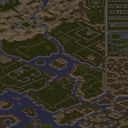
RP - Lathírion은 사막 타일셋을 기반으로 한 유즈맵으로, 6명의 플레이어가 자유롭게 전투를 펼칠 수 있는 대규모 전장이다. 맵은 8192×8192 규모의 넓은 공간에 여러 개의 고지대와 협곡, 그리고 맞춤형 텔레포트 포털이 배치되어 있어 이동 경로와 전술 선택이 다양하다. 초반에는 자원을 확보하고 주요 지점을 선점하는 것이 핵심이며, 텔레포트를 활용해 급습하거나 후퇴할 수 있다. 고지대는 시야 확보와 방어에 유리하지만, 낮은 지형은 기동성을 높여 적을 우회하거나 매복하기에 적합하다. 전투는 주로 컴퓨터 상대와의 대결이 아니라 인간 플레이어 간의 직접적인 교전이 중심이 되며, 팀 구성이 자유로워 개인전, 2대2, 3대3 등 다양한 형태로 즐길 수 있다. 맵의 지형 특성상 초반에 빠른 확장과 방어 구축이 중요하고, 중반 이후에는 텔레포트를 이용한 기습 전술이 승패를 좌우한다. 플레이 전에는 텔레포트 위치와 주요 고지대를 미리 파악하고, 자원 채취 루트를 계획하는 것이 좋다. 또한, 사막 타일셋 특성상 시야가 제한되는 구역이 존재하므로, 정찰 유닛을 적절히 배치해 적의 움직임을 예측하는 것이 필요하다. 전반적으로 다양한 전술을 시도할 수 있는 자유도가 높아, 전략적인 사고와 빠른 판단을 즐기는 플레이어에게 추천한다. RP - Lathírion is a user-made map built on a desert tileset, offering a massive battlefield where up to six players can freely engage in combat. The map spans 8192×8192 tiles and features multiple high grounds, valleys, and custom teleport portals that provide diverse movement options and tactical choices. Early game focuses on securing resources and capturing key positions, while teleporters enable rapid strikes or retreats. High ground offers vision and defensive advantages, whereas low terrain enhances mobility for flanking or ambushes. The gameplay centers on direct player-versus-player combat rather than AI opponents, allowing flexible team setups such as solo, 2v2, or 3v3 matches. Given the terrain, early expansion and fortification are crucial, and mid‑game success often hinges on effective use of teleport‑based surprise attacks. Before playing, it is advisable to familiarize yourself with teleport locations and major high‑ground areas, and to plan resource‑gathering routes. The desert tileset also creates blind spots, so deploying scouting units to monitor enemy movements is essential. Overall, the map’s high strategic freedom and demand for quick decision‑making make it ideal for players who enjoy thoughtful tactics and fast‑paced action.
Sniper_DarK_OppS
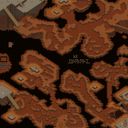
Sniper_DarK_OppS는 스나이퍼 유닛을 중심으로 전개되는 1대1 혹은 1대다 전투를 목표로 설계된 UMS 맵이다. 맵 전체가 넓은 오픈 필드와 중간에 위치한 고지대로 구성돼 있어, 플레이어는 초반에 정찰을 통해 적 스나이퍼의 위치를 파악하고, 고지를 장악하거나 은신처를 확보해야 한다. 고지대는 시야가 넓어 원거리 공격에 유리하지만, 주변에 배치된 작은 건물과 바위 지형은 은폐를 제공해 역습을 시도할 수 있게 만든다. 스나이퍼 유닛만을 사용하도록 제한된 트리거는 없지만, 맵 이름과 내부 설명이 ‘Snipers’라고 명시된 점을 고려하면 스나이퍼 중심 전략을 권장한다. 전투는 주로 거리 조절과 사격 타이밍에 달려 있어, 초보자보다는 기본적인 마이크로 관리와 타이밍 감각을 갖춘 플레이어에게 적합하다. 플레이 전에는 맵의 고지대와 은신처 위치를 미리 확인하고, 초기 자원 배분을 어떻게 할지 전략을 세우는 것이 중요하다. 또한, 적의 스나이퍼가 고지에 올라오면 즉시 저격하거나, 반대로 저격당하지 않도록 이동 경로를 끊임없이 바꾸는 것이 승리 확률을 높인다. 전체적인 플레이 흐름은 정찰‑고지 장악‑상대 저격‑결정타 순으로 진행되며, 전투가 길어질수록 사격 정확도와 체력 관리가 핵심이 된다. 따라서, 스나이퍼 전용 전술 연습이나 원거리 전투를 즐기는 유저에게 강력히 추천한다. Sniper_DarK_OppS is a UMS map designed around sniper units, focusing on one‑on‑one or one‑against‑many engagements. The map features a large open field with a central high ground that provides extensive sight lines, while scattered buildings and rock formations offer cover for ambushes. Although there are no explicit triggers limiting unit choice, the map’s title and internal description “Snipers” suggest a sniper‑centric strategy. Early game revolves around scouting to locate the opponent’s sniper and securing the high ground or a concealed position. High ground grants superior range but also makes you a visible target, so constant movement and timing of shots are crucial. Players should familiarize themselves with the locations of the high ground and hiding spots before the match and plan their initial resource allocation accordingly. When the enemy sniper occupies the high ground, immediate counter‑sniping or rapid repositioning can turn the tide. The overall flow follows scouting → high‑ground control → opponent elimination → decisive strike, with accuracy and health management becoming increasingly important as the battle prolongs. This map is highly recommended for players who enjoy practicing sniper tactics and long‑range combat.
마인드 컨트롤 디펜스 (Mind Control Defense)
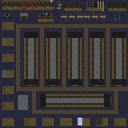
마인드 컨트롤 디펜스는 이름에서 알 수 있듯이 방어형 유즈맵으로, 플레이어는 제한된 베이스를 중심으로 적 유닛의 침입을 막아야 합니다. 맵은 4096×4096 타일맵에 황무지 타일셋을 사용해 넓은 평야와 몇 개의 고지대로 구성되어 있으며, 베이스는 중앙에 위치해 사방에서 오는 공격을 동시에 대응해야 합니다. 주요 목표는 적의 파동을 차단하고, 방어 타워와 유닛을 적절히 배치해 지속적인 압력을 견디는 것입니다. 초반에는 기본 방어 타워와 소규모 유닛을 배치해 적의 첫 물결을 막고, 중반 이후에는 고지대에 위치한 포지션을 활용해 원거리 공격을 강화합니다. 맵에는 몇 차례에 걸쳐 강력한 스펠이 등장하는데, 이는 플레이어가 미리 대비하거나 스펠 쿨타임을 관리해야 함을 의미합니다. 전투가 진행될수록 적 유닛의 종류와 속도가 다양해지므로, 방어 라인을 유동적으로 재배치하고, 필요시 유닛을 교체하는 것이 승리의 핵심입니다. 특히, 베이스 주변에 배치된 작은 고지대는 방어 타워의 시야를 확장시켜 주어, 적의 접근을 조기에 감지할 수 있게 도와줍니다. 플레이 전 확인해야 할 포인트는 베이스 주변의 지형 고저 차와 스펠 트리거 위치이며, 이를 파악하면 방어 전략을 보다 효율적으로 설계할 수 있습니다. 이 맵은 6인 멀티플레이를 기본으로 설계되었으며, 팀 플레이보다는 개인 혹은 소규모 그룹이 협력해 방어를 구축하는 데 적합합니다. 초보자도 기본 방어 메커니즘을 익히기에 좋은 입문용 방어맵이며, 중급 이상 플레이어는 고급 유닛 조합과 스펠 관리로 도전적인 라운드를 즐길 수 있습니다. Mind Control Defense is a defense‑type UMS map where players must protect a central base against waves of enemy units. The map spans a 4096×4096 tile area using the Desert tileset, featuring a wide plain and several elevated hills that surround the base positioned in the middle. The main objective is to block enemy waves by placing defensive towers and units strategically, sustaining pressure throughout the match. Early game focuses on basic towers and a small contingent of units to stop the first surge, while mid‑game encourages using hill positions for long‑range attacks. The map includes occasional powerful spells that require players to anticipate or manage cooldowns. As the battle progresses, enemy unit types and speeds diversify, demanding flexible repositioning of defenses and unit swaps to secure victory. Small hills around the base extend tower sightlines, allowing early detection of approaching forces. Before playing, note the terrain elevation around the base and the locations of spell triggers, as this information helps design an efficient defense strategy. Designed for six players, the map suits solo or small‑group cooperation rather than large team play. It serves as an accessible introduction for beginners to learn basic defense mechanics, while intermediate and advanced players can enjoy challenging rounds through advanced unit combos and spell management.
게인 (Gheynn)
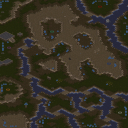
Gheynn 맵은 4096×4096 사막 타일셋을 기반으로 한 대규모 전장으로, 7명의 플레이어가 동시에 전투를 벌일 수 있도록 설계되었습니다. 맵 전반에 걸쳐 방어가 어려운 고지대와 좁은 골짜기가 얽혀 있어, 공격과 방어를 동시에 고민해야 하는 전형적인 밀리형 전투를 제공합니다. 시작 지점은 맵 양쪽 끝에 배치되어 있어 초기 정찰과 빠른 확장이 승패를 좌우합니다. 특히 중앙에 위치한 넓은 사막 평원은 시야 확보와 유닛 이동에 큰 영향을 미치며, 여기서의 전투는 유닛 조합과 마이크로 관리 능력을 시험합니다. 사막 타일 특성상 시야가 제한되고, 건물 배치가 제한적이어서 자연 지형을 활용한 포지셔닝이 핵심 전략이 됩니다. 방어가 어려운 위치가 많아 초반부터 공격적인 플레이를 유도하지만, 동시에 적의 진형을 끊어내기 위한 방어 라인 구축도 중요합니다. 따라서 초보자보다는 어느 정도 경험을 갖춘 플레이어에게 적합하며, 특히 유닛 마이크로와 맵 컨트롤을 중시하는 플레이어에게 추천합니다. 플레이 전에는 각 고지대와 골짜기의 접근 경로를 미리 파악하고, 초기 정찰 유닛을 활용해 상대의 움직임을 예측하는 것이 좋습니다. Gheynn is a large-scale desert‑tileset map measuring 4096×4096, designed for up to seven players to fight simultaneously. The map intertwines hard‑to‑defend high grounds and narrow valleys, creating a classic melee battlefield where both offense and defense must be considered at once. Starting locations are placed at opposite ends, making early scouting and rapid expansion decisive. The central open desert plain heavily influences vision and unit movement, testing unit composition and micro‑management skills. Because desert tiles limit line of sight and building placement, positioning that leverages natural terrain becomes essential. Numerous defensively weak spots encourage aggressive early play, yet establishing solid defensive lines to break enemy formations remains crucial. Consequently, the map suits players with some experience, especially those who value unit micro and map control. Before playing, identify the access routes to each high ground and valley, and use early scouting units to anticipate opponent movements.
Impossible Scenarioes BGH
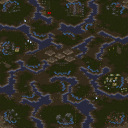
Impossible Scenarioes BGH는 사막 타일셋을 활용한 4096×4096 규모의 유즈맵으로, 6명의 플레이어가 동시에 대결할 수 있도록 설계되었습니다. 맵 전반에 걸쳐 넓은 오픈 구역과 복잡한 지형이 혼재해 있어 이동 경로를 선택하는 데 전략적인 판단이 요구됩니다. 시작 지점은 맵 중앙에 배치돼 있으며, 각 플레이어는 주변에 흩어져 있는 자원 포인트를 확보한 뒤 상대 진영을 공격하거나 방어할 수 있습니다. 특히 고지대와 협곡이 교차하는 구역에서는 시야 확보와 유닛 배치가 승패를 좌우하므로, 초반에 정찰 유닛을 활용해 적 위치를 파악하는 것이 중요합니다. 전투는 주로 지상 유닛 중심으로 진행되지만, 일부 지역에서는 공중 유닛이 유리한 고지를 차지할 수 있어 다양한 유닛 조합을 시험해 볼 수 있습니다. 맵의 목표는 상대의 핵심 건물을 파괴하거나, 일정 시간 동안 살아남는 형태가 아니라, 전투를 통해 상대를 전멸시키는 전형적인 컴까기 스타일입니다. 따라서 빠른 공격과 방어 전환, 유닛 마이크로 관리가 핵심 플레이 포인트가 됩니다. 초보자보다는 어느 정도 유닛 운용 경험이 있는 플레이어에게 적합하며, 특히 다인전에서 다양한 전술을 실험하고 싶은 유저에게 추천합니다. 플레이 전에는 각 지형의 고지와 협곡 위치를 미리 파악하고, 자원 포인트를 효율적으로 확보할 루트를 정해두면 초반 전투에서 유리하게 시작할 수 있습니다. Impossible Scenarioes BGH is a user-made map that uses a desert tileset and spans a large 4096×4096 area, allowing up to six players to battle simultaneously. The map features a mix of wide open spaces and intricate terrain, requiring players to make strategic decisions about movement paths. Starting positions are placed near the center, and each player must secure scattered resource points before launching attacks or setting up defenses against opponents. High ground and canyon intersections create critical sightlines, making early scouting units essential for locating enemy forces. While ground units dominate most engagements, certain elevated spots favor air units, offering opportunities to experiment with diverse unit compositions. The objective follows a classic “kill‑everything” style rather than timed survival or base destruction, so rapid offense, quick defensive switches, and precise micro‑management are the key gameplay elements. This map suits players with some unit‑control experience, especially those who enjoy multi‑player skirmishes and want to test various tactics. Before playing, it’s advisable to identify the high‑ground and canyon locations and plan efficient routes to resource points, giving a strong early‑game advantage.
최근 등록된 맵
새로 추가된 파일과 버전을 확인하세요.
스나이퍼스 발드 락스 (Snipers Bald Locks)
Snipers Bald Locks는 사막 타일셋을 배경으로 한 유즈맵으로, 주로 저격 유닛을 활용한 전투가 중심이 되는 구조를 가지고 있다. 맵은 2048×2048 크기의 넓은 필드에 여러 고지대와 은폐 지형이 배치되어 있어, 플레이어는 스나이퍼 유닛을 적절히 배치하고 시야를 확보하며 상대를 견제한다. 초기 배치 지점은 대체로 맵 양쪽 끝에 위치해 있어, 게임 시작 직후 빠른 이동보다는 정찰과 포지션 확보가 중요하다. 전투는 주로 원거리 교전 위주이며, 중간에 나타나는 작은 건물이나 바위는 추가적인 은폐 공간을 제공한다. 맵에는 제한된 자원 수급 구역이 존재하지 않아, 기본 유닛을 활용한 전략적 움직임과 스킬 사용이 승패를 가른다. 특히 스나이퍼의 사거리와 사격 간격을 고려한 타이밍 조절이 핵심이며, 적의 움직임을 예측해 미리 사격 지점을 잡는 것이 유리하다. 플레이 경험상, 초반에는 서로의 위치를 파악하기 위한 정찰이 필요하고, 중후반으로 갈수록 고지대를 장악한 플레이어가 전투를 주도한다. 따라서 정확한 마이크로 컨트롤과 맵 인식을 갖춘 플레이어에게 적합하며, 스나이퍼 유닛을 좋아하거나 원거리 전투에 익숙한 유저에게 추천한다. 플레이 전에는 맵의 은폐 지형과 고지대 위치를 미리 파악하고, 스나이퍼 유닛의 사거리와 사격 딜레이를 고려해 유닛 배치를 계획하는 것이 좋다. Snipers Bald Locks is a user-made map set on a desert tileset, focusing on combat with sniper units. The map spans 2048×2048 and features numerous high grounds and cover terrain, encouraging players to position snipers strategically and control sightlines. Starting positions are typically at opposite ends, making early reconnaissance and position securing more important than rapid movement. Battles are primarily ranged engagements, with small structures and rocks providing additional concealment. Since there are no dedicated resource zones, success hinges on tactical unit placement and skill usage. Timing the sniper’s range and fire interval is crucial, and anticipating enemy movement to pre‑aim shots offers a decisive edge. Early gameplay involves scouting to locate opponents, while mid‑to‑late game sees players who dominate high ground dictating the flow of combat. This map suits players with strong micro‑control and map awareness, especially those who enjoy sniper units or long‑range tactics. Before playing, familiarize yourself with cover spots and high ground locations, and plan sniper deployments considering their range and cooldown.
Sniper_DarK_OppS
Sniper_DarK_OppS는 스나이퍼 유닛을 중심으로 전개되는 1대1 혹은 1대다 전투를 목표로 설계된 UMS 맵이다. 맵 전체가 넓은 오픈 필드와 중간에 위치한 고지대로 구성돼 있어, 플레이어는 초반에 정찰을 통해 적 스나이퍼의 위치를 파악하고, 고지를 장악하거나 은신처를 확보해야 한다. 고지대는 시야가 넓어 원거리 공격에 유리하지만, 주변에 배치된 작은 건물과 바위 지형은 은폐를 제공해 역습을 시도할 수 있게 만든다. 스나이퍼 유닛만을 사용하도록 제한된 트리거는 없지만, 맵 이름과 내부 설명이 ‘Snipers’라고 명시된 점을 고려하면 스나이퍼 중심 전략을 권장한다. 전투는 주로 거리 조절과 사격 타이밍에 달려 있어, 초보자보다는 기본적인 마이크로 관리와 타이밍 감각을 갖춘 플레이어에게 적합하다. 플레이 전에는 맵의 고지대와 은신처 위치를 미리 확인하고, 초기 자원 배분을 어떻게 할지 전략을 세우는 것이 중요하다. 또한, 적의 스나이퍼가 고지에 올라오면 즉시 저격하거나, 반대로 저격당하지 않도록 이동 경로를 끊임없이 바꾸는 것이 승리 확률을 높인다. 전체적인 플레이 흐름은 정찰‑고지 장악‑상대 저격‑결정타 순으로 진행되며, 전투가 길어질수록 사격 정확도와 체력 관리가 핵심이 된다. 따라서, 스나이퍼 전용 전술 연습이나 원거리 전투를 즐기는 유저에게 강력히 추천한다. Sniper_DarK_OppS is a UMS map designed around sniper units, focusing on one‑on‑one or one‑against‑many engagements. The map features a large open field with a central high ground that provides extensive sight lines, while scattered buildings and rock formations offer cover for ambushes. Although there are no explicit triggers limiting unit choice, the map’s title and internal description “Snipers” suggest a sniper‑centric strategy. Early game revolves around scouting to locate the opponent’s sniper and securing the high ground or a concealed position. High ground grants superior range but also makes you a visible target, so constant movement and timing of shots are crucial. Players should familiarize themselves with the locations of the high ground and hiding spots before the match and plan their initial resource allocation accordingly. When the enemy sniper occupies the high ground, immediate counter‑sniping or rapid repositioning can turn the tide. The overall flow follows scouting → high‑ground control → opponent elimination → decisive strike, with accuracy and health management becoming increasingly important as the battle prolongs. This map is highly recommended for players who enjoy practicing sniper tactics and long‑range combat.
헌터스 (The Hunters-KPGA)
The Hunters-KPGA는 사막 타일셋을 활용한 8인용 팀 밀리 맵으로, 팀 간 전투와 전략적 포지셔닝이 핵심인 유즈맵이다. 맵 전체가 4096×4096 픽셀의 대형 사이즈로 구성돼 있어 넓은 전장을 자유롭게 활용할 수 있다. 시작 지점은 각 팀마다 대칭적으로 배치돼 있어 초기 전투에서 균형을 유지한다. 주요 특징은 중간에 위치한 고지대와 사막의 자연 지형을 이용한 은폐와 우회로가 많다는 점이다. 플레이어는 초기 자원을 확보한 뒤, 병력을 빠르게 생산해 적 팀의 진영을 압박하거나 방어 기반을 구축한다. 특히 사막 타일셋 특유의 모래언덕과 바위 구조물이 시야를 가려 주기 때문에, 정찰 유닛을 활용한 정보 수집이 승패를 좌우한다. 전투는 주로 근접 유닛과 공중 유닛의 조합으로 진행되며, 팀원 간의 협력이 중요하다. 적 팀의 주요 거점을 차지하면 추가 자원 보너스를 얻을 수 있어, 전투 후반부에는 대규모 전투가 자연스럽게 전개된다. 초반에는 방어 라인을 빠르게 구축하고, 중반부터는 적의 약점을 파악해 집중 공격을 시도하는 것이 효과적이다. 플레이 전 확인해야 할 포인트는 각 팀의 시작 위치와 고지대 접근 경로, 그리고 자원 채취 지점의 위치이다. 이 맵은 팀워크와 전술적 판단을 중시하는 플레이어에게 적합하며, 특히 팀 밀리 경험이 풍부한 유저에게 추천한다. The Hunters-KPGA is a large desert‑tileset UMS map designed for eight players in a team melee format, emphasizing both direct combat and strategic positioning. The map spans 4096 × 4096 pixels, offering a spacious battlefield where each team starts from mirrored locations, ensuring a balanced early game. Key terrain features include elevated high‑grounds and numerous sand dunes that provide natural cover and multiple routes for flanking. After securing initial resources, players should quickly produce units to pressure the opposing team or fortify their own base. Because the desert tileset creates many sight‑blocking obstacles, scouting units become essential for gathering intel and planning attacks. Combat typically involves a mix of ground and air units, making coordinated team play crucial. Capturing the enemy’s core area yields additional resource bonuses, leading to larger, decisive battles in the late game. Early focus on solid defenses, followed by mid‑game reconnaissance to identify weak points for concentrated assaults, yields the best results. Before starting, verify each team’s spawn points, high‑ground access routes, and resource node locations. This map suits players who enjoy teamwork, tactical decision‑making, and have solid experience with team melee scenarios.
라시리온 (Lathírion)
RP - Lathírion은 사막 타일셋을 기반으로 한 유즈맵으로, 6명의 플레이어가 자유롭게 전투를 펼칠 수 있는 대규모 전장이다. 맵은 8192×8192 규모의 넓은 공간에 여러 개의 고지대와 협곡, 그리고 맞춤형 텔레포트 포털이 배치되어 있어 이동 경로와 전술 선택이 다양하다. 초반에는 자원을 확보하고 주요 지점을 선점하는 것이 핵심이며, 텔레포트를 활용해 급습하거나 후퇴할 수 있다. 고지대는 시야 확보와 방어에 유리하지만, 낮은 지형은 기동성을 높여 적을 우회하거나 매복하기에 적합하다. 전투는 주로 컴퓨터 상대와의 대결이 아니라 인간 플레이어 간의 직접적인 교전이 중심이 되며, 팀 구성이 자유로워 개인전, 2대2, 3대3 등 다양한 형태로 즐길 수 있다. 맵의 지형 특성상 초반에 빠른 확장과 방어 구축이 중요하고, 중반 이후에는 텔레포트를 이용한 기습 전술이 승패를 좌우한다. 플레이 전에는 텔레포트 위치와 주요 고지대를 미리 파악하고, 자원 채취 루트를 계획하는 것이 좋다. 또한, 사막 타일셋 특성상 시야가 제한되는 구역이 존재하므로, 정찰 유닛을 적절히 배치해 적의 움직임을 예측하는 것이 필요하다. 전반적으로 다양한 전술을 시도할 수 있는 자유도가 높아, 전략적인 사고와 빠른 판단을 즐기는 플레이어에게 추천한다. RP - Lathírion is a user-made map built on a desert tileset, offering a massive battlefield where up to six players can freely engage in combat. The map spans 8192×8192 tiles and features multiple high grounds, valleys, and custom teleport portals that provide diverse movement options and tactical choices. Early game focuses on securing resources and capturing key positions, while teleporters enable rapid strikes or retreats. High ground offers vision and defensive advantages, whereas low terrain enhances mobility for flanking or ambushes. The gameplay centers on direct player-versus-player combat rather than AI opponents, allowing flexible team setups such as solo, 2v2, or 3v3 matches. Given the terrain, early expansion and fortification are crucial, and mid‑game success often hinges on effective use of teleport‑based surprise attacks. Before playing, it is advisable to familiarize yourself with teleport locations and major high‑ground areas, and to plan resource‑gathering routes. The desert tileset also creates blind spots, so deploying scouting units to monitor enemy movements is essential. Overall, the map’s high strategic freedom and demand for quick decision‑making make it ideal for players who enjoy thoughtful tactics and fast‑paced action.
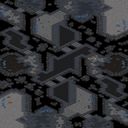
인투 더 다크니스 (Into the Darkness)
Into the Darkness는 4096×4096 타일셋을 활용한 대형 우주 테마 유즈맵으로, 8명의 플레이어가 동시에 자유롭게 전투를 펼칠 수 있는 구조를 가지고 있다. 맵 중앙에 넓은 개활지가 배치되어 있어 초기 자원 확보와 확장이 비교적 용이하지만, 주변을 둘러싼 고지대와 좁은 통로가 전략적인 이동 경로를 제한한다. 플레이어는 각자 시작 지점에서 기본 유닛과 건물을 배치한 뒤, 자원을 채취하고 방어 타워를 건설하거나 공격 유닛을 생산해 상대를 압박한다. 특히 고지대에 설치된 포탑은 시야가 넓어 상대 움직임을 조기에 파악할 수 있어, 방어와 공격을 동시에 고려하는 플레이가 요구된다. 맵 전반에 걸쳐 대규모 전투가 발생할 수 있도록 설계돼 있어, 초반에 빠른 확장을 시도하거나, 중반 이후에 대규모 군단을 집결시켜 일제 공격을 감행하는 전략이 효과적이다. 다만, 자원 노드가 제한된 구역에 집중돼 있기 때문에 자원 관리와 유닛 생산 타이밍이 승패를 좌우한다. 플레이 전에는 각자의 시작 위치와 고지대 배치를 파악해 방어 라인을 어떻게 구축할지, 그리고 언제 공격으로 전환할지를 미리 계획하는 것이 중요하다. 초반에 방어를 과도하게 구축하면 자원 소모가 커져 중후반에 전력 부족을 겪을 수 있고, 반대로 공격에만 집중하면 방어가 무너져 상대에게 쉽게 역공을 당한다. 따라서 균형 잡힌 경제 운영과 유닛 조합이 핵심이며, 다수의 플레이어가 동시에 전투에 참여하는 만큼 협동보다는 개인의 판단과 순간적인 전술 선택이 크게 작용한다. 이 맵은 자유로운 전투와 전략적 위치 선정이 중요한 유즈맵을 선호하는 숙련된 플레이어에게 특히 추천한다. 초보자는 초기 자원 확보와 방어 타워 배치에 집중하고, 전투 경험을 쌓으며 고지대 활용법을 익히는 것이 좋다. Into the Darkness is a large-scale UMS map set on a space tileset with a resolution of 4096×4096, allowing up to eight players to fight simultaneously. The central open area makes early resource gathering and expansion relatively easy, while surrounding high grounds and narrow passages restrict movement routes, creating strategic choke points. Each player starts at a designated location with basic units and structures, then harvests resources, builds defensive towers, or produces attack forces to pressure opponents. High ground positions host turrets that provide wide vision, enabling early detection of enemy movements, so players must balance defense and offense. The map is designed for large battles; an early rush to expand quickly or a mid‑game massing of armies for a coordinated assault can be effective. However, resource nodes are clustered in limited zones, making resource management and unit production timing critical to victory. Before playing, it is essential to study starting positions and high‑ground layouts to plan defensive lines and decide when to transition to offense. Over‑investing in early defense can deplete resources, leading to shortages later, while focusing solely on attacks may leave defenses vulnerable to counter‑strikes. Balanced economy and unit composition are key, and with many players engaged, personal decision‑making and tactical timing outweigh cooperative strategies. This map is especially recommended for experienced players who enjoy free‑form combat and strategic positioning on UMS maps. Beginners should concentrate on early resource acquisition and tower placement, gradually learning how to exploit high ground and manage battles.
마인드 컨트롤 디펜스 (Mind Control Defense)
마인드 컨트롤 디펜스는 이름에서 알 수 있듯이 방어형 유즈맵으로, 플레이어는 제한된 베이스를 중심으로 적 유닛의 침입을 막아야 합니다. 맵은 4096×4096 타일맵에 황무지 타일셋을 사용해 넓은 평야와 몇 개의 고지대로 구성되어 있으며, 베이스는 중앙에 위치해 사방에서 오는 공격을 동시에 대응해야 합니다. 주요 목표는 적의 파동을 차단하고, 방어 타워와 유닛을 적절히 배치해 지속적인 압력을 견디는 것입니다. 초반에는 기본 방어 타워와 소규모 유닛을 배치해 적의 첫 물결을 막고, 중반 이후에는 고지대에 위치한 포지션을 활용해 원거리 공격을 강화합니다. 맵에는 몇 차례에 걸쳐 강력한 스펠이 등장하는데, 이는 플레이어가 미리 대비하거나 스펠 쿨타임을 관리해야 함을 의미합니다. 전투가 진행될수록 적 유닛의 종류와 속도가 다양해지므로, 방어 라인을 유동적으로 재배치하고, 필요시 유닛을 교체하는 것이 승리의 핵심입니다. 특히, 베이스 주변에 배치된 작은 고지대는 방어 타워의 시야를 확장시켜 주어, 적의 접근을 조기에 감지할 수 있게 도와줍니다. 플레이 전 확인해야 할 포인트는 베이스 주변의 지형 고저 차와 스펠 트리거 위치이며, 이를 파악하면 방어 전략을 보다 효율적으로 설계할 수 있습니다. 이 맵은 6인 멀티플레이를 기본으로 설계되었으며, 팀 플레이보다는 개인 혹은 소규모 그룹이 협력해 방어를 구축하는 데 적합합니다. 초보자도 기본 방어 메커니즘을 익히기에 좋은 입문용 방어맵이며, 중급 이상 플레이어는 고급 유닛 조합과 스펠 관리로 도전적인 라운드를 즐길 수 있습니다. Mind Control Defense is a defense‑type UMS map where players must protect a central base against waves of enemy units. The map spans a 4096×4096 tile area using the Desert tileset, featuring a wide plain and several elevated hills that surround the base positioned in the middle. The main objective is to block enemy waves by placing defensive towers and units strategically, sustaining pressure throughout the match. Early game focuses on basic towers and a small contingent of units to stop the first surge, while mid‑game encourages using hill positions for long‑range attacks. The map includes occasional powerful spells that require players to anticipate or manage cooldowns. As the battle progresses, enemy unit types and speeds diversify, demanding flexible repositioning of defenses and unit swaps to secure victory. Small hills around the base extend tower sightlines, allowing early detection of approaching forces. Before playing, note the terrain elevation around the base and the locations of spell triggers, as this information helps design an efficient defense strategy. Designed for six players, the map suits solo or small‑group cooperation rather than large team play. It serves as an accessible introduction for beginners to learn basic defense mechanics, while intermediate and advanced players can enjoy challenging rounds through advanced unit combos and spell management.
문글레이브 2.1 (MoonGlaive 2.1)
MoonGlaive 2.1은 4096×4096 화산 타일셋을 기반으로 한 8인용 유즈맵으로, 자유로운 위치 선정이 가능한 대규모 전장을 제공한다. 맵 중앙에는 넓은 평지가 배치되어 있어 초반에 기지를 신속히 건설할 수 있으며, 주변에는 자연스럽게 형성된 용암 협곡과 바위 지형이 방어용 고지대를 만든다. 자원은 중앙 평지와 외곽 고지에 고르게 분포돼 있어, 초기 확장과 방어 전략을 동시에 고민하게 만든다. 특히, 협곡을 이용한 급습 루트와 고지를 점령했을 때 얻는 시야 확보가 게임 흐름을 크게 좌우한다. 플레이어는 자신의 기지를 원하는 위치에 건설하고, 적의 확장을 차단하거나 직접 공격하는 두 가지 스타일을 자유롭게 선택할 수 있다. 초반에는 자원 확보와 방어 타워 배치가 핵심이며, 중반 이후에는 상대의 핵심 건물을 압박하는 공격 전환이 효과적이다. 맵은 대규모 전투를 염두에 두고 설계됐기 때문에, 유닛 이동 경로를 미리 파악하고 협곡을 통한 기습을 대비하는 것이 중요하다. 또한, 화산 지형 특성상 건물 배치 시 지형과의 충돌을 주의해야 하며, 높은 지대에 방어 시설을 배치하면 시야와 사거리 면에서 유리하다. 전체적인 흐름은 빠른 확장‑방어‑공격 순환을 반복하도록 설계돼 있어, 빠른 판단력과 다각적인 전략을 구사할 수 있는 플레이어에게 특히 추천한다. MoonGlaive 2.1 is a user‑made map for up to eight players, built on a 4096×4096 volcanic tileset that offers a large, freely selectable battlefield. The central area features a wide plain where players can quickly establish their base at the start, while surrounding lava canyons and rocky terrain naturally create elevated defensive positions. Resources are evenly distributed between the central plain and outer high grounds, prompting players to balance early expansion with defensive planning. Notably, the canyons provide rapid‑strike routes, and securing the high grounds grants superior vision that can dominate the flow of the match. Players may place their bases wherever they prefer, allowing either a defensive fortification style or an aggressive rush approach. In the early game, securing resources and positioning defensive towers are crucial; in the mid‑game, pressuring an opponent’s core structures becomes effective. Because the map is designed for large‑scale battles, anticipating unit movement paths and preparing for canyon ambushes are essential. Additionally, the volcanic terrain requires careful building placement to avoid terrain collisions, and positioning defenses on higher ground offers advantages in sight and range. Overall, the map encourages a cycle of rapid expansion, defense, and attack, making it especially suitable for players who can make swift decisions and employ versatile strategies.
네오메두사2.0 OBs (NeoMedusa2.0 OBs)
NeoMedusa2.0 OBs는 스타크래프트 브루드워의 클래식 밀리 맵을 현대적인 균형감과 레이아웃으로 재구성한 유즈맵이다. 맵 전체가 4096×4096 화산 타일셋으로 채워져 있어 고지대와 저지대가 자연스럽게 섞여 있으며, 양측 베이스는 중앙을 향해 대칭적으로 배치돼 있다. 초반에는 자원 채취와 정찰이 핵심이며, 중반부터는 고지대에 위치한 중립 정크와 파워드 스폰 포인트를 차지하기 위한 전투가 빈번해진다. 특히 화산 지형의 좁은 협곡과 넓은 평야가 교차하면서 기동성을 활용한 전술과 방어 라인 구축이 동시에 요구된다. 플레이어는 적의 진입로를 예측해 타워와 유닛 배치를 조정해야 하며, 중간에 나타나는 중립 유닛을 효과적으로 이용하면 전투 흐름을 뒤집을 수 있다. 맵은 8명의 플레이어가 자유롭게 대전할 수 있도록 설계돼 있어, 4대 4 혹은 자유분배 형태 모두에 적합하다. 팀 플레이가 아닌 순수 밀리 경험을 원하는 유저에게 특히 추천한다. 경기 시작 전에는 베이스 주변의 정크 위치와 고지대 스폰 타이밍을 확인하고, 초기 빌드 순서를 미리 정해두면 초반 압박을 피하기 쉽다. 또한, 화산 타일셋 특성상 시야가 제한되는 구역이 많으니 정찰 유닛을 꾸준히 운용해 적의 움직임을 파악하는 것이 중요하다. NeoMedusa2.0 OBs is a user map for StarCraft: Brood War that reimagines a classic melee layout with modern balance and design. The entire map is built on a 4096×4096 volcanic tileset, featuring a mix of high ground and low ground that creates natural choke points and open fields. Both bases are placed symmetrically toward the center, making early resource gathering and scouting essential. Around the mid‑game, control of neutral junk and powered spawn points on the high ground becomes a focal point, leading to frequent skirmishes. The narrow volcanic corridors combined with wide plains demand both mobility‑based tactics and solid defensive line placement. Players must anticipate enemy entry routes, adjust tower and unit placements accordingly, and make effective use of neutral units that appear mid‑match to swing the battle. Designed for up to eight players, the map supports 4‑vs‑4 or free‑for‑all configurations, but it shines most in pure melee scenarios without team restrictions. It is especially recommended for players seeking a traditional melee experience. Before starting, check the locations of neutral junk and high‑ground spawn timings, and decide on an early build order to avoid early pressure. Due to many sight‑blocked volcanic areas, continuous scouting is crucial for tracking opponent movements.
맵 선택 가이드
태그는 맵의 핵심 특징을 빠르게 설명하지만 제작 버전마다 규칙이 다를 수 있습니다. 상세 설명에서 권장 인원, 난이도, 플레이 시간과 버전을 함께 확인한 뒤 다운로드하세요.