
Zerg 디펜스 星海爭霸地圖集
收集了已註冊「Zerg 디펜스」標籤的地圖。請以難易度與特徵等單靠類型難以尋找的遊玩方式為中心,比較熱門地圖與最新地圖。
- 已註冊地圖
- 2個
- 累計下載
- 0
- 累計瀏覽
- 114
人氣地圖
這是下載與瀏覽熱度都很高的地圖。
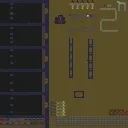
2제곱디팬스 (2Squared Defense)
스타크래프트 브루드워의 대표적인 컴퓨팅 디펜스 유즈맵인 〈2제곱디팬스〉는 플레이어가 적의 끊임없는 공격을 방어하는 동시에 성장형 메커니즘을 통해 성을 강화하는 전략성이 돋보이는 맵입니다. 맵 중앙에 위치한 플레이어 기지와 주위에서 끊임없이 몰려드는 적 유닛을 상대로 방어선을 구축해야 하는데, 기본 베이스를 지키면서 동시에 미네랄과 가스를 확보해 방어 건물을 지속적으로 업그레이드하고 보충할 수 있습니다. 맵의 특징은 ‘2제곱’이라는 이름에서 알 수 있듯, 적의 공격 패턴이 단계적으로 강화되면서 난이도가 기하급수적으로 상승한다는 점입니다. 초반에는 약한 저글링과 히드라리스크가 주를 이루지만, 후반으로 갈수록 울트라리스크, 디바우러,甚至 공중 유닛까지 동원되는 혼종 부대가 등장해 방어가 increasingly 어려워집니다. 특히 맵의 왼쪽과 오른쪽에서 동시에 공격을 펼치는 패턴이 자주 등장하는데, 이 때문에 멀티태스킹 능력이 필수적입니다. 또한, 맵에 배치된 방어 건물 슬롯과 자원 분포가 전략적 선택을 요구하는 요소로 작용합니다. 방어 건물의 종류와 배치 위치를 잘못 선택하면 적의 공격을 버티지 못하고 금방 무너질 수 있으며, 반대로 효율적인 배치와 업그레이드는 후반까지 버틸 수 있는 튼튼한 성을 구축할 수 있습니다. 플레이어는 초반 자원 관리와 건물 배치 타이밍을 잘 잡아야 하며, 후반으로 갈수록 공격 패턴을 예측하고 방어선을 재구축하는 능력이 중요해집니다. 〈2제곱디팜스〉는 초보 플레이어에게는 다소 어려운 진입 장벽이 있지만, 적절한 전략과 꾸준한 연습을 통해 점차 숙련도를 높일 수 있는 맵입니다. 특히 팀 플레이가 가능하다는 점도 특징으로, 팀원 간의 역할 분담과 실시간 커뮤니케이션이 승패를 좌우할 수 있습니다. 이 맵을 즐기는 유저들에게는 방어 전략의 깊이를 느낄 수 있는 매력이 있으며, 적절한 난이도 조절과 흥미로운 성장 메커니즘이 특징입니다. 추천 대상은 전략 게임과 디펜스 장르를 선호하는 플레이어이며, 특히 ‘컴퓨터 상대 디펜스’ 유형의 맵을 즐기는 유저들에게 적합합니다. 플레이 전에는 기본 방어 건물의 종류와 특성을 숙지하고, 자원 관리와 건물 배치의 중요성을 인지하는 것이 좋습니다. 또한, 후반으로 갈수록 예측하기 어려운 적의 공격 패턴에 대비해 유연한 전략 수립이 필요합니다. StarCraft: Brood War’s classic computing defense custom map, 〈2제곱디팬스〉, challenges players to defend their base against relentless enemy waves while growing stronger through an upgrade system. The map centers around a player’s main base, surrounded by waves of Zerg units that escalate in difficulty exponentially—starting with basic Zerglings and Hydralisks before culminating in Ultralisks, Devourers, and even mixed air units. The name ‘2제곱디팜스’ hints at the geometric difficulty increase, where each phase of the attack grows more complex and destructive. Players must manage resources efficiently to build and upgrade defensive structures, with limited slots forcing strategic placement decisions. Left and right flanks often face simultaneous assaults, demanding multitasking and adaptability. The map’s appeal lies in its blend of resource management, defensive architecture, and escalating challenge, making it a test of both foresight and quick decision-making. While the learning curve is steep for beginners, mastery rewards players with a satisfying sense of progression and resilience. Team play is supported, allowing coordinated defenses and shared responsibilities. Ideal for fans of strategy and defense genres, this map rewards preparation—understanding defensive structures, resource allocation, and adaptive tactics are key to survival. Players should familiarize themselves with building types and enemy patterns early on to maximize their chances in later, unpredictable assaults.
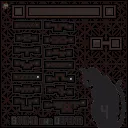
Bound and Defend 4
스타크래프트 브루드워의 디펜스 장르 유즈맵인 <Bound and Defend 4>는 6명의 플레이어가 한 팀으로 모여 적의 끊임없는 공격을 방어해내는 컴까기 유형의 맵이다. 정글 타일셋으로 구성된 넓은 맵 중앙에는 플레이어의 넥서스가 위치하며, 사방에서 몰려드는 저글링, 히드라, 울트라리스크 등 다양한 종족 유닛을 상대해야 한다. 맵 곳곳에 흩어져 있는 방어 건물이나 보너스 지역을 활용해 전략적으로 대처할 수 있도록 설계되어 있으며, 적의 공격을 막아내면서 동시에 자원을 모아 병력을 보강하는 균형 잡힌 플레이가 요구된다. 초반에는 상대적으로 약한 적이 등장하지만, 시간이 지날수록 점점 강력한 조합의 적군이 등장해 난이도가 높아진다. 플레이어는 맵의 구조를 잘 활용해 방어선을 구축하고, 자원과 병력을 효율적으로 관리해야 한다. 특히, 좁은 길목을 막아 적을 소모시키는 전술이 중요하며, 보너스 건물이나 아이템을 획득해 일시적인 우위를 점할 수도 있다. 맵의 테두리에는 여러 개의 입구가 존재해 적의 공격 루트가 다양하다는 점도 특징으로, 이를 고려한 대비를 해야 한다. 이 맵은 초보자부터 숙련자까지 모두 즐길 수 있도록 제작되었지만, 특히 디펜스와 컴까기 경험이 있는 플레이어에게 추천한다. 방어 건물의 배치와 병력 조합을 끊임없이 고민하게 만들며, 긴장감 넘치는 전투를 즐길 수 있다. 또한, 15레벨이라는 내구도가 설정되어 있어 초반에 실수하더라도 다시 도전해 볼 수 있는 구조로 되어 있다. 맵을 플레이하기 전에는 방어 건물의 위치와 적의 공격 패턴을 숙지하는 것이 중요하다. 초반 자원 확보와 방어선 구축에 실패하면 게임이 쉽게 무너질 수 있기 때문이다. 꾸준한 연습과 전략을 통해 점차 실력을 키워 나가도록 하자. Bound and Defend 4 is a defense-themed UMS custom map for StarCraft: Brood War where 6 players work together as a single team to defend against relentless enemy waves. Set in a jungle tile, the large central map features the players' nexus at its heart, surrounded by entry points where Zerg units like zerglings, hydralisks, and ultralisks continuously spawn. The map incorporates defensive structures and bonus areas to strategically counter incoming attacks while managing resources to reinforce forces. Early waves consist of weaker enemies, but the difficulty escalates as stronger enemy compositions appear over time. Players must establish effective defensive lines, utilize map structures to their advantage, and balance resource collection with unit production. Narrow pathways act as choke points to slow enemy advances, and temporary power-ups or item pickups can provide crucial advantages. Multiple entry points along the map edges ensure varied attack routes, requiring adaptive strategies. Designed for both beginners and experienced players, this map rewards tactical thinking and efficient resource management. While accessible to newcomers, those familiar with defense or tower-defense mechanics will find it particularly engaging. The map's 15-level durability system allows for learning from mistakes and retrying, though careful attention to initial resource gathering and defensive layouts is essential to avoid early-game collapse. Consistent practice and strategic refinement are key to mastering the challenges Bound and Defend 4 offers.
最近註冊的地圖
查看最新新增的檔案與版本。
2제곱디팬스 (2Squared Defense)
스타크래프트 브루드워의 대표적인 컴퓨팅 디펜스 유즈맵인 〈2제곱디팬스〉는 플레이어가 적의 끊임없는 공격을 방어하는 동시에 성장형 메커니즘을 통해 성을 강화하는 전략성이 돋보이는 맵입니다. 맵 중앙에 위치한 플레이어 기지와 주위에서 끊임없이 몰려드는 적 유닛을 상대로 방어선을 구축해야 하는데, 기본 베이스를 지키면서 동시에 미네랄과 가스를 확보해 방어 건물을 지속적으로 업그레이드하고 보충할 수 있습니다. 맵의 특징은 ‘2제곱’이라는 이름에서 알 수 있듯, 적의 공격 패턴이 단계적으로 강화되면서 난이도가 기하급수적으로 상승한다는 점입니다. 초반에는 약한 저글링과 히드라리스크가 주를 이루지만, 후반으로 갈수록 울트라리스크, 디바우러,甚至 공중 유닛까지 동원되는 혼종 부대가 등장해 방어가 increasingly 어려워집니다. 특히 맵의 왼쪽과 오른쪽에서 동시에 공격을 펼치는 패턴이 자주 등장하는데, 이 때문에 멀티태스킹 능력이 필수적입니다. 또한, 맵에 배치된 방어 건물 슬롯과 자원 분포가 전략적 선택을 요구하는 요소로 작용합니다. 방어 건물의 종류와 배치 위치를 잘못 선택하면 적의 공격을 버티지 못하고 금방 무너질 수 있으며, 반대로 효율적인 배치와 업그레이드는 후반까지 버틸 수 있는 튼튼한 성을 구축할 수 있습니다. 플레이어는 초반 자원 관리와 건물 배치 타이밍을 잘 잡아야 하며, 후반으로 갈수록 공격 패턴을 예측하고 방어선을 재구축하는 능력이 중요해집니다. 〈2제곱디팜스〉는 초보 플레이어에게는 다소 어려운 진입 장벽이 있지만, 적절한 전략과 꾸준한 연습을 통해 점차 숙련도를 높일 수 있는 맵입니다. 특히 팀 플레이가 가능하다는 점도 특징으로, 팀원 간의 역할 분담과 실시간 커뮤니케이션이 승패를 좌우할 수 있습니다. 이 맵을 즐기는 유저들에게는 방어 전략의 깊이를 느낄 수 있는 매력이 있으며, 적절한 난이도 조절과 흥미로운 성장 메커니즘이 특징입니다. 추천 대상은 전략 게임과 디펜스 장르를 선호하는 플레이어이며, 특히 ‘컴퓨터 상대 디펜스’ 유형의 맵을 즐기는 유저들에게 적합합니다. 플레이 전에는 기본 방어 건물의 종류와 특성을 숙지하고, 자원 관리와 건물 배치의 중요성을 인지하는 것이 좋습니다. 또한, 후반으로 갈수록 예측하기 어려운 적의 공격 패턴에 대비해 유연한 전략 수립이 필요합니다. StarCraft: Brood War’s classic computing defense custom map, 〈2제곱디팬스〉, challenges players to defend their base against relentless enemy waves while growing stronger through an upgrade system. The map centers around a player’s main base, surrounded by waves of Zerg units that escalate in difficulty exponentially—starting with basic Zerglings and Hydralisks before culminating in Ultralisks, Devourers, and even mixed air units. The name ‘2제곱디팜스’ hints at the geometric difficulty increase, where each phase of the attack grows more complex and destructive. Players must manage resources efficiently to build and upgrade defensive structures, with limited slots forcing strategic placement decisions. Left and right flanks often face simultaneous assaults, demanding multitasking and adaptability. The map’s appeal lies in its blend of resource management, defensive architecture, and escalating challenge, making it a test of both foresight and quick decision-making. While the learning curve is steep for beginners, mastery rewards players with a satisfying sense of progression and resilience. Team play is supported, allowing coordinated defenses and shared responsibilities. Ideal for fans of strategy and defense genres, this map rewards preparation—understanding defensive structures, resource allocation, and adaptive tactics are key to survival. Players should familiarize themselves with building types and enemy patterns early on to maximize their chances in later, unpredictable assaults.
Bound and Defend 4
스타크래프트 브루드워의 디펜스 장르 유즈맵인 <Bound and Defend 4>는 6명의 플레이어가 한 팀으로 모여 적의 끊임없는 공격을 방어해내는 컴까기 유형의 맵이다. 정글 타일셋으로 구성된 넓은 맵 중앙에는 플레이어의 넥서스가 위치하며, 사방에서 몰려드는 저글링, 히드라, 울트라리스크 등 다양한 종족 유닛을 상대해야 한다. 맵 곳곳에 흩어져 있는 방어 건물이나 보너스 지역을 활용해 전략적으로 대처할 수 있도록 설계되어 있으며, 적의 공격을 막아내면서 동시에 자원을 모아 병력을 보강하는 균형 잡힌 플레이가 요구된다. 초반에는 상대적으로 약한 적이 등장하지만, 시간이 지날수록 점점 강력한 조합의 적군이 등장해 난이도가 높아진다. 플레이어는 맵의 구조를 잘 활용해 방어선을 구축하고, 자원과 병력을 효율적으로 관리해야 한다. 특히, 좁은 길목을 막아 적을 소모시키는 전술이 중요하며, 보너스 건물이나 아이템을 획득해 일시적인 우위를 점할 수도 있다. 맵의 테두리에는 여러 개의 입구가 존재해 적의 공격 루트가 다양하다는 점도 특징으로, 이를 고려한 대비를 해야 한다. 이 맵은 초보자부터 숙련자까지 모두 즐길 수 있도록 제작되었지만, 특히 디펜스와 컴까기 경험이 있는 플레이어에게 추천한다. 방어 건물의 배치와 병력 조합을 끊임없이 고민하게 만들며, 긴장감 넘치는 전투를 즐길 수 있다. 또한, 15레벨이라는 내구도가 설정되어 있어 초반에 실수하더라도 다시 도전해 볼 수 있는 구조로 되어 있다. 맵을 플레이하기 전에는 방어 건물의 위치와 적의 공격 패턴을 숙지하는 것이 중요하다. 초반 자원 확보와 방어선 구축에 실패하면 게임이 쉽게 무너질 수 있기 때문이다. 꾸준한 연습과 전략을 통해 점차 실력을 키워 나가도록 하자. Bound and Defend 4 is a defense-themed UMS custom map for StarCraft: Brood War where 6 players work together as a single team to defend against relentless enemy waves. Set in a jungle tile, the large central map features the players' nexus at its heart, surrounded by entry points where Zerg units like zerglings, hydralisks, and ultralisks continuously spawn. The map incorporates defensive structures and bonus areas to strategically counter incoming attacks while managing resources to reinforce forces. Early waves consist of weaker enemies, but the difficulty escalates as stronger enemy compositions appear over time. Players must establish effective defensive lines, utilize map structures to their advantage, and balance resource collection with unit production. Narrow pathways act as choke points to slow enemy advances, and temporary power-ups or item pickups can provide crucial advantages. Multiple entry points along the map edges ensure varied attack routes, requiring adaptive strategies. Designed for both beginners and experienced players, this map rewards tactical thinking and efficient resource management. While accessible to newcomers, those familiar with defense or tower-defense mechanics will find it particularly engaging. The map's 15-level durability system allows for learning from mistakes and retrying, though careful attention to initial resource gathering and defensive layouts is essential to avoid early-game collapse. Consistent practice and strategic refinement are key to mastering the challenges Bound and Defend 4 offers.
地圖選擇指南
태그는 맵의 핵심 특징을 빠르게 설명하지만 제작 버전마다 규칙이 다를 수 있습니다. 상세 설명에서 권장 인원, 난이도, 플레이 시간과 버전을 함께 확인한 뒤 다운로드하세요.