
단계형 디펜스 星海爭霸地圖集
收集了已註冊「단계형 디펜스」標籤的地圖。請以難易度與特徵等單靠類型難以尋找的遊玩方式為中心,比較熱門地圖與最新地圖。
- 已註冊地圖
- 2個
- 累計下載
- 0
- 累計瀏覽
- 47
人氣地圖
這是下載與瀏覽熱度都很高的地圖。
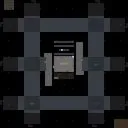
썬큰 디펜스 10웨이 17.9 임파서블 (SunkenD 10Way 17.9 Impossible)
스타크래프트 브루드워의 유즈맵 ‘썬큰 디펜스 10웨이 17.9 임파서블(SunkenD 10Way 17.9 Impossible)’은 디펜스 장르의 대표적인 ‘컴퓨터 상대 유즈맵’으로, 총 25단계에 이르는 난이도별 웨이브를 뚫고 최종 승리를 차지하는 것이 목표다. 맵의 중앙에 위치한 플레이어 기지 주변으로 10방향의 웨이브가 지속적으로 밀려오며, 각 웨이브마다 스캐럽, 뮤탈리스크, 울트라리스크, 가디언 등 다양한 저그 유닛들이 조합되어 공격을 펼쳐온다. 특히 17.9 버전부터는 저글러와 럴커의 조합이 강화되어 맵의 난이도가 한층 높아졌으며, 후속 버전인 12.9나 13.5와 비교했을 때도 피하기와 생존 전략이 더욱 중요해진다. 맵의 구조는 센터 기지에서 멀어질수록 방어가 약화되는 특징이 있어, 초반에는 기지에서 버티면서 자원을 확보하고, 중반부터는 멀티 테란, 멀티 저그 등 추가 기지를 확보하는 전략이 필수적이다. 또한, 맵 상단과 하단에 위치한 추가 멀티 지역은 자원 확보와 방어선을 넓히는 데 핵심적인 역할을 한다. 울트라리스크와 가디언의 조합이 강력한 15단계 이후로는 ‘백워시’ 지역에서도 공격을 방어해야 하며, 이 지역을 소홀히 하면 기지가 순식간에 무너질 수 있다. 초보자라면 10단계까지는 무리 없이 클리어할 수 있지만, 15단계 이후부터는 난이도가 급격히 상승하므로, 방어 건물의 배치와 유닛 조합을 신중히 계획해야 한다. 이 맵은 ‘컴퓨터 상대 디펜스’ 장르에 익숙한 플레이어에게는 훌륭한 도전 과제가 되며, 특히 10웨이의 균형 잡힌 공격 패턴과 단계별 난이도 상승이 흥미로운 플레이 경험을 제공한다. 하지만, 초보자의 경우 난이도 조절이 필요할 수 있으며, 방어塔의 업그레이드와 유닛의 효율적인 관리 전략을 익히는 것이 중요하다. 플레이 전에는 맵의 멀티 지역과 주요 공격 경로, 그리고 후속 웨이브의 유닛 조합을 미리 숙지하고 준비하는 것이 좋다. StarCraft: Brood War's custom map *Sunken Defense 10-Way 17.9 Impossible* is a standout among defense genre custom maps, where the objective is to survive 25 increasingly difficult waves and achieve final victory. Waves continuously assault the player's base from 10 directions around the central starting location, with each wave featuring diverse Zerg unit compositions such as Scourges, Mutalisks, Ultralisks, and Guardians. Starting with version 17.9, the inclusion of Zealots and Lurkers has significantly increased the map's difficulty, making evasion and survival strategies even more crucial compared to earlier versions like 12.9 or 13.5. The map's design weakens defenses the farther they are from the center, so early survival depends on holding the main base while securing resources. As the game progresses, expanding with additional Terran or Zerg bases becomes essential. The upper and lower sections of the map offer critical multi-resource areas that play a key role in resource gathering and expanding defensive lines. After wave 15, where Ultralisks and Guardians dominate, players must also defend the 'Backwash' area—neglecting it can lead to a swift base collapse. While beginners can typically clear up to wave 10 without much trouble, difficulty spikes sharply after wave 15, requiring careful planning of defensive structures and unit compositions. For players familiar with the *computer opponent defense* genre, this map offers an excellent challenge, especially with its balanced 10-way attack patterns and progressively escalating difficulty. However, newcomers may need to adjust the difficulty settings and focus on mastering turret upgrades and efficient unit management strategies. Before playing, it's advisable to familiarize yourself with the map's multi-resource areas, main attack paths, and upcoming wave compositions to prepare effectively.
Lurker Defense On Your Own!2.0 (라커 디펜스 온 유어 오운! 2.0)
스타크래프트 브루드워의 대표적인 디펜스 유즈맵인 <Lurker Defense On Your Own!2.0>는 30단계에 걸쳐 끊임없이 몰려오는 적 유닛을 방어하는 하이브리드 디펜스 게임이다. 맵 이미지 상단은 방어 진영, 하단은 적의 시작 지점으로 확인되며, 중앙의 좁은 길목을 중심으로 리버, 캐리어, 스카웃 등 강력한 공중 유닛과 지상 유닛들이 끊임없이 진격해 온다. 플레이어는 각 단계마다 주어지는 제한된 자원으로 방어 건물을 배치하고, 유닛을 생산해 적을 저지해야 한다. 특히 저글링, 히드라리스크, 뮤탈리스크 같은 저렴하고 빠른 유닛들이 다수 등장해 초반 방어선을 무너뜨리기 쉽기 때문에 신중한 자원 관리와 배치 전략이 요구된다. 이 맵의 가장 큰 특징은 단계별로 점점 강화되는 적의 조합과 패턴이다. 초반에는 저글링과 히드라가 주를 이루지만, 후반부로 갈수록 캐리어, 디바우러, 울트라리스크 같은 고급 유닛들이 등장해 방어 난이도가 급격히 상승한다. 또한 특정 단계에서는 특수 유닛이나 버프가 주어지기도 하는데, 이는 맵 이미지에서 확인하기 어려운 부분이지만 게임 내 트리거로 구현된 것으로 추정된다. 방어 건물로는 성큰 콜로니, 포톤 캐논, 터렛, 미사일 터렛을 사용할 수 있으며, 각 건물이 가진 특성과 사정거리를 고려해 배치해야 한다. 플레이어는 7명의 인원으로 구성되며, 각자 독립된 미네랄과 가스 자원을 보유하고 있다. 하지만 중앙의 주요 방어 지점은 공유하기 때문에 팀원 간의 협력이 필수적이다. 자원의 분배와 건물 배치, 유닛 생산 타이밍을 조율하지 않으면 특정 단계에서 방어에 실패할 가능성이 크다. 맵의 전체 크기가 6144x6144로 넓고 황혼 타일셋을 사용해 시각적으로도 깔끔한 디자인을 자랑하지만, 디펜스 게임의 특성상 좁은 길목에 집중된 전투가 대부분이다. 또한 맵의 해상도가 높고 타일 단위가 192x192로 큰 편이어서 미세한 건물 배치가 어려울 수 있어, 초보자의 경우 어려움을 느낄 수 있다. 이 맵은 디펜스 유즈맵의 정석을 보여주는 작품으로, 단순한 방어 게임의 틀을 넘어서 전략적 깊이를 더한 점이 인상적이다. 각 단계마다 주어지는 제한된 자원으로 최적의 방어선을 구축해야 하며, 적의 패턴을 읽고 대응하는 능력이 요구된다. 특히 30단계에 걸쳐 진행되는 긴 플레이 시간 동안 지치지 않고 전략을 유지할 수 있는 인내심과 집중력이 필요하다. 초보자의 경우 처음 몇 단계는 무난하게 클리어할 수 있지만, 후반부로 갈수록 방어 난이도가 급격히 상승하기 때문에 꾸준한 연습과 팀원 간의 협력이 필수적이다. 디펜스 게임을 좋아하는 유저라면 한번쯤 도전해 볼 만한 작품이다. This classic StarCraft: Brood War defense custom map, <Lurker Defense On Your Own!2.0>, challenges players to hold the line against relentless waves of enemy units across 30 escalating stages. The map features a clear split between the player-controlled upper section and the enemy spawn zone below, connected by narrow chokepoints that force strategic engagements. Players must allocate limited resources to construct defensive structures like Sunken Colonies, Photon Cannons, and Missile Turrets while producing units to counter the onslaught of Zerg and Protoss forces. The map's hybrid defense system allows for both static defenses and active unit production, adding depth to the strategy required. A standout feature of this map is its progressive difficulty, where early stages are dominated by cost-effective units like Zerglings and Hydralisks, but later stages introduce elite units such as Carriers, Devourers, and Ultralisks, demanding precise micro-management and adaptive tactics. While the map's image doesn't reveal specific triggers or unique mechanics, internal descriptions suggest that certain stages may unlock special units or buffs, adding unpredictability to the challenge. The shared defensive chokepoint in the center of the map encourages coordination among the seven players, each controlling independent mineral and gas resources, making teamwork a critical factor in survival. Visually, the map utilizes the Twilight tileset with a high resolution of 6144x6144, providing a clean and immersive aesthetic, though the large tile size (192x192) can make fine adjustments to building placements tricky for newcomers. The gameplay revolves around narrow corridors and concentrated battles, typical of defense maps, but the map's hybrid nature—combining resource management, unit production, and strategic positioning—sets it apart from simpler tower defense variants. Players must balance immediate threats with long-term planning, as poor early-game decisions can cascade into failure in later stages. Ideal for defense map enthusiasts, <Lurker Defense On Your Own!2.0> offers a rewarding experience for those who enjoy strategic depth and escalating challenges. While the early stages are accessible, the later levels demand sharp reflexes, adaptive strategies, and strong team coordination. The map's longevity is evident in its 30-stage structure, which tests both patience and tactical acumen. For players seeking a robust defense experience that goes beyond basic tower placement, this map delivers a compelling and engaging challenge.
最近註冊的地圖
查看最新新增的檔案與版本。
썬큰 디펜스 10웨이 17.9 임파서블 (SunkenD 10Way 17.9 Impossible)
스타크래프트 브루드워의 유즈맵 ‘썬큰 디펜스 10웨이 17.9 임파서블(SunkenD 10Way 17.9 Impossible)’은 디펜스 장르의 대표적인 ‘컴퓨터 상대 유즈맵’으로, 총 25단계에 이르는 난이도별 웨이브를 뚫고 최종 승리를 차지하는 것이 목표다. 맵의 중앙에 위치한 플레이어 기지 주변으로 10방향의 웨이브가 지속적으로 밀려오며, 각 웨이브마다 스캐럽, 뮤탈리스크, 울트라리스크, 가디언 등 다양한 저그 유닛들이 조합되어 공격을 펼쳐온다. 특히 17.9 버전부터는 저글러와 럴커의 조합이 강화되어 맵의 난이도가 한층 높아졌으며, 후속 버전인 12.9나 13.5와 비교했을 때도 피하기와 생존 전략이 더욱 중요해진다. 맵의 구조는 센터 기지에서 멀어질수록 방어가 약화되는 특징이 있어, 초반에는 기지에서 버티면서 자원을 확보하고, 중반부터는 멀티 테란, 멀티 저그 등 추가 기지를 확보하는 전략이 필수적이다. 또한, 맵 상단과 하단에 위치한 추가 멀티 지역은 자원 확보와 방어선을 넓히는 데 핵심적인 역할을 한다. 울트라리스크와 가디언의 조합이 강력한 15단계 이후로는 ‘백워시’ 지역에서도 공격을 방어해야 하며, 이 지역을 소홀히 하면 기지가 순식간에 무너질 수 있다. 초보자라면 10단계까지는 무리 없이 클리어할 수 있지만, 15단계 이후부터는 난이도가 급격히 상승하므로, 방어 건물의 배치와 유닛 조합을 신중히 계획해야 한다. 이 맵은 ‘컴퓨터 상대 디펜스’ 장르에 익숙한 플레이어에게는 훌륭한 도전 과제가 되며, 특히 10웨이의 균형 잡힌 공격 패턴과 단계별 난이도 상승이 흥미로운 플레이 경험을 제공한다. 하지만, 초보자의 경우 난이도 조절이 필요할 수 있으며, 방어塔의 업그레이드와 유닛의 효율적인 관리 전략을 익히는 것이 중요하다. 플레이 전에는 맵의 멀티 지역과 주요 공격 경로, 그리고 후속 웨이브의 유닛 조합을 미리 숙지하고 준비하는 것이 좋다. StarCraft: Brood War's custom map *Sunken Defense 10-Way 17.9 Impossible* is a standout among defense genre custom maps, where the objective is to survive 25 increasingly difficult waves and achieve final victory. Waves continuously assault the player's base from 10 directions around the central starting location, with each wave featuring diverse Zerg unit compositions such as Scourges, Mutalisks, Ultralisks, and Guardians. Starting with version 17.9, the inclusion of Zealots and Lurkers has significantly increased the map's difficulty, making evasion and survival strategies even more crucial compared to earlier versions like 12.9 or 13.5. The map's design weakens defenses the farther they are from the center, so early survival depends on holding the main base while securing resources. As the game progresses, expanding with additional Terran or Zerg bases becomes essential. The upper and lower sections of the map offer critical multi-resource areas that play a key role in resource gathering and expanding defensive lines. After wave 15, where Ultralisks and Guardians dominate, players must also defend the 'Backwash' area—neglecting it can lead to a swift base collapse. While beginners can typically clear up to wave 10 without much trouble, difficulty spikes sharply after wave 15, requiring careful planning of defensive structures and unit compositions. For players familiar with the *computer opponent defense* genre, this map offers an excellent challenge, especially with its balanced 10-way attack patterns and progressively escalating difficulty. However, newcomers may need to adjust the difficulty settings and focus on mastering turret upgrades and efficient unit management strategies. Before playing, it's advisable to familiarize yourself with the map's multi-resource areas, main attack paths, and upcoming wave compositions to prepare effectively.
Lurker Defense On Your Own!2.0 (라커 디펜스 온 유어 오운! 2.0)
스타크래프트 브루드워의 대표적인 디펜스 유즈맵인 <Lurker Defense On Your Own!2.0>는 30단계에 걸쳐 끊임없이 몰려오는 적 유닛을 방어하는 하이브리드 디펜스 게임이다. 맵 이미지 상단은 방어 진영, 하단은 적의 시작 지점으로 확인되며, 중앙의 좁은 길목을 중심으로 리버, 캐리어, 스카웃 등 강력한 공중 유닛과 지상 유닛들이 끊임없이 진격해 온다. 플레이어는 각 단계마다 주어지는 제한된 자원으로 방어 건물을 배치하고, 유닛을 생산해 적을 저지해야 한다. 특히 저글링, 히드라리스크, 뮤탈리스크 같은 저렴하고 빠른 유닛들이 다수 등장해 초반 방어선을 무너뜨리기 쉽기 때문에 신중한 자원 관리와 배치 전략이 요구된다. 이 맵의 가장 큰 특징은 단계별로 점점 강화되는 적의 조합과 패턴이다. 초반에는 저글링과 히드라가 주를 이루지만, 후반부로 갈수록 캐리어, 디바우러, 울트라리스크 같은 고급 유닛들이 등장해 방어 난이도가 급격히 상승한다. 또한 특정 단계에서는 특수 유닛이나 버프가 주어지기도 하는데, 이는 맵 이미지에서 확인하기 어려운 부분이지만 게임 내 트리거로 구현된 것으로 추정된다. 방어 건물로는 성큰 콜로니, 포톤 캐논, 터렛, 미사일 터렛을 사용할 수 있으며, 각 건물이 가진 특성과 사정거리를 고려해 배치해야 한다. 플레이어는 7명의 인원으로 구성되며, 각자 독립된 미네랄과 가스 자원을 보유하고 있다. 하지만 중앙의 주요 방어 지점은 공유하기 때문에 팀원 간의 협력이 필수적이다. 자원의 분배와 건물 배치, 유닛 생산 타이밍을 조율하지 않으면 특정 단계에서 방어에 실패할 가능성이 크다. 맵의 전체 크기가 6144x6144로 넓고 황혼 타일셋을 사용해 시각적으로도 깔끔한 디자인을 자랑하지만, 디펜스 게임의 특성상 좁은 길목에 집중된 전투가 대부분이다. 또한 맵의 해상도가 높고 타일 단위가 192x192로 큰 편이어서 미세한 건물 배치가 어려울 수 있어, 초보자의 경우 어려움을 느낄 수 있다. 이 맵은 디펜스 유즈맵의 정석을 보여주는 작품으로, 단순한 방어 게임의 틀을 넘어서 전략적 깊이를 더한 점이 인상적이다. 각 단계마다 주어지는 제한된 자원으로 최적의 방어선을 구축해야 하며, 적의 패턴을 읽고 대응하는 능력이 요구된다. 특히 30단계에 걸쳐 진행되는 긴 플레이 시간 동안 지치지 않고 전략을 유지할 수 있는 인내심과 집중력이 필요하다. 초보자의 경우 처음 몇 단계는 무난하게 클리어할 수 있지만, 후반부로 갈수록 방어 난이도가 급격히 상승하기 때문에 꾸준한 연습과 팀원 간의 협력이 필수적이다. 디펜스 게임을 좋아하는 유저라면 한번쯤 도전해 볼 만한 작품이다. This classic StarCraft: Brood War defense custom map, <Lurker Defense On Your Own!2.0>, challenges players to hold the line against relentless waves of enemy units across 30 escalating stages. The map features a clear split between the player-controlled upper section and the enemy spawn zone below, connected by narrow chokepoints that force strategic engagements. Players must allocate limited resources to construct defensive structures like Sunken Colonies, Photon Cannons, and Missile Turrets while producing units to counter the onslaught of Zerg and Protoss forces. The map's hybrid defense system allows for both static defenses and active unit production, adding depth to the strategy required. A standout feature of this map is its progressive difficulty, where early stages are dominated by cost-effective units like Zerglings and Hydralisks, but later stages introduce elite units such as Carriers, Devourers, and Ultralisks, demanding precise micro-management and adaptive tactics. While the map's image doesn't reveal specific triggers or unique mechanics, internal descriptions suggest that certain stages may unlock special units or buffs, adding unpredictability to the challenge. The shared defensive chokepoint in the center of the map encourages coordination among the seven players, each controlling independent mineral and gas resources, making teamwork a critical factor in survival. Visually, the map utilizes the Twilight tileset with a high resolution of 6144x6144, providing a clean and immersive aesthetic, though the large tile size (192x192) can make fine adjustments to building placements tricky for newcomers. The gameplay revolves around narrow corridors and concentrated battles, typical of defense maps, but the map's hybrid nature—combining resource management, unit production, and strategic positioning—sets it apart from simpler tower defense variants. Players must balance immediate threats with long-term planning, as poor early-game decisions can cascade into failure in later stages. Ideal for defense map enthusiasts, <Lurker Defense On Your Own!2.0> offers a rewarding experience for those who enjoy strategic depth and escalating challenges. While the early stages are accessible, the later levels demand sharp reflexes, adaptive strategies, and strong team coordination. The map's longevity is evident in its 30-stage structure, which tests both patience and tactical acumen. For players seeking a robust defense experience that goes beyond basic tower placement, this map delivers a compelling and engaging challenge.
地圖選擇指南
태그는 맵의 핵심 특징을 빠르게 설명하지만 제작 버전마다 규칙이 다를 수 있습니다. 상세 설명에서 권장 인원, 난이도, 플레이 시간과 버전을 함께 확인한 뒤 다운로드하세요.