
시즈만 뽑아라 HELL - 100% 地圖系列與版本
根據檔名與標題分類為相同系列的 2個版本。請比較註冊日期、版本名稱、檔案大小與玩家反應,以選擇想要的檔案。
 最近註冊版本
시즈만 뽑아라 HELL - 100%
無版本資訊 · 씨즈만 뽑아 절대모하드.scx
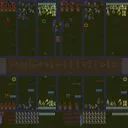
시즈만 뽑아라 HELL - 100%는 스타크래프트 브루드워 유즈맵으로, 맵 내에서 플레이어는 시즈 탱크와 시즈 모드 유닛만을 생산하여 점점 강화되는 적 웨이브를 막아야 하는 디펜스 형태의 게임이다. 사막 타일셋을 배경으로 한 넓은 맵은 중앙에 방어 라인을 형성할 수 있는 공간을 제공하며, 주변에는 자원 공급이 제한되어 있어 유닛 생산과 업그레이드에 신중한 자원 관리가 요구된다. 게임 시작 시 기본 자원이 소량 주어지고, 매 웨이브가 종료될 때마다 일정량의 미네랄과 가스가 보급되지만, 시즈 탱크의 생산 비용과 업그레이드 가격이 높아 효율적인 타이밍에 시즈 모드를 전환하고 수리비를 절감하는 전략이 승부의 관건이다. 적 웨이브는 초기에는 저글링과 젤럿으로 시작하여 중반에는 히드라리스크와 거즈러시, 후반에는 울트라리스크와 전투함까지 다양하게 나타나며, 각 웨이브마다 다른 경로로 접근해오므로 단순히 하나의 진지에만 의존하기 보다는 좌우 측면을 유연하게 보강해야 한다. 플레이어는 시즈 탱크의 사거리와 피해를 최대한 활용하기 위해 지형의 고저를 고려한 배치를 고민해야 하며, 시즈 모드 전환 시 딜레이를 감안한 선제 사격이 필수적이다. 또한, 맵 중앙에 위치한 작은 광물 필드는 자원 보충의 중요한 거점이 되므로 이를 사수하면서 동시에 전방을 압박하는 운영이 승률을 높인다. 이 맵은 마이크로 관리와 전략적 배치를 좋아하는 중급 이상의 플레이어에게 적합하며, 시즈 탱크의 운용에 익숙하지 않은 초보자에게는 난이도가 높게 느껴질 수 있다. 플레이 전에는 사막 맵 특유의 시야 제한을 고려하고, 초기 건물을 지을 위치와 시즈 탱크 생산 타이밍을 미리 계획해두는 것이 좋다. Siezman pporyeora HELL - 100% is a StarCraft: Brood War UMS map where players can produce only Siege Tank and Siege Mode units to fend off increasingly strong enemy waves in a defense-style gameplay. Set on a desert tileset, the spacious map provides space to form a defense line in the center, while surrounding resource supplies are limited, requiring careful resource management for unit production and upgrades. At the start, a small amount of resources is given, and after each wave ends a fixed amount of minerals and gas are supplied, but the high cost and upgrade price of Siege Tanks make efficient timing to switch to Siege Mode and save repair costs key to victory. Enemy waves begin with Zerglings and Zealots, then mid-game feature Hydralisks and Zergling rushes, and late-game bring Ultralisks and battleships, appearing via different routes each wave, so relying on a single position is insufficient and players must flexibly reinforce both flanks. Players must consider terrain elevation to maximize the range and damage of Siege Tanks, and pre-emptive firing that accounts for the delay when switching to Siege Mode is essential. Additionally, the small mineral patch located at the map center serves as an important resource hub; defending it while simultaneously pressing forward improves win rate. This map suits intermediate and above players who enjoy micro-management and strategic placement, while beginners unfamiliar with Siege Tank operation may find the difficulty high. Before playing, consider the limited vision inherent to desert maps and plan the initial building placement and Siege Tank production timing in advance.
下載 0觀看次數 0喜歡 0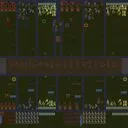 先前的版本 1
시즈만 뽑아라 HELL - 100%
v1.0 · 씨즈만 뽑아 절대모하드.scx
스타크래프트 브루드워 맵 중에서도 독특한 콘셉트와 강력한 난이도로 도전 의식을 자극하는 유즈맵을 찾고 있다면, 시즈만 뽑아라 HELL - 100% (Siege Tank Only HELL - 100%)는 눈여겨볼 만한 작품이다. 이 스타크래프트 맵은 제목에서 직관적으로 드러나듯 테란의 핵심 화력 유닛인 시즈 탱크를 활용하여 몰려오는 적의 공세를 막아내거나 특정 목표를 달성하는 방식을 취하고 있다. 일반적인 밀리 방식의 대전과 달리, 정해진 조건과 제한된 유닛 활용 속에서 최적의 방어 진형을 구축해야 하는 독특한 게임 플레이를 선사한다. 특히 난이도 표기에 HELL과 100%라는 표현이 포함된 만큼, 단순한 물량 공세를 넘어 정밀한 컨트롤과 철저한 자원 관리가 동반되지 않으면 순식간에 기지가 초토화되는 매운맛을 경험할 수 있다. 유즈맵 특유의 제한된 선택지와 극단적인 제약 속에서 오는 긴장감이 이 맵의 가장 큰 매력 포인트라 할 수 있다. 맵의 구조를 살펴보면 플레이어들은 각자 배정된 구역에서 독립적이면서도 유기적인 방어선을 형성하게 된다. 화면 전반의 배치와 유닛 구성을 보면 다수의 플레이어가 동시에 참여하여 각자의 진지를 사수하는 협동 중심의 진행 방식을 유추할 수 있다. 중앙 진격로와 각 플레이어의 기지 배치는 정형화된 디펜스 및 컴까기류 유즈맵의 문법을 따르고 있으며, 밀려드는 적의 웨이브를 시즈 탱크의 강력한 화력으로 어떻게 조율하고 배치하느냐가 승패를 가르는 결정적인 요인이 된다. 초반부터 쉴 새 없이 압박해 오는 적들의 공격을 버텨내기 위해서는 팀원 간의 소통과 사격 각도 조절이 필수적이며, 한쪽 라인이 무너질 경우 전체 전선에 연쇄적인 타격이 가해지는 구조를 띠고 있다. 따라서 평소 타워 디펜스나 고난도 컴까기, 제한된 조건 속에서 유닛을 운용하는 서바이벌류 유즈맵을 즐기는 유저들에게 안성맞춤인 전장이다. 이 맵을 본격적으로 플레이하기 전에는 몇 가지 요소를 염두에 두어야 한다. 우선, 제공되는 유닛의 선택지가 극도로 제한되어 있기 때문에 일반적인 테란 운용 방식과는 전혀 다른 접근이 필요하다. 무분별한 생산보다는 진형의 효율성과 화력 집중 배치가 승리의 열쇠가 되므로, 시즈 모드 전환 타이밍과 적의 이동 경로를 예측하는 시야 확보가 중요하다. 또한 고난도 맵 특성상 초행 플레이어라면 적의 공세 타이밍과 물량 규모에 당황할 수 있으므로, 방어 진형의 기본기를 다진 후에 도전하는 것을 권장한다. 친구들과 함께 역할을 나누어 협동 플레이를 즐기거나, 극단적인 화력전의 재미를 느끼고 싶은 스타크래프트 브루드워 유저라면 이번 주말에 이 독특한 방어 유즈맵을 통해 한계에 도전해 보는 것을 추천한다. If you are looking for a StarCraft Brood War use map that stimulates your sense of challenge with a unique concept and intense difficulty, Siege Tank Only HELL - 100% is a work worth noting. As intuitively revealed in the title, this map adopts a method of utilizing the Terran core firepower unit, the Siege Tank, to block oncoming enemy offensives or achieve specific objectives. Unlike standard melee matches, it delivers unique gameplay where you must build an optimal defensive formation under predetermined conditions and limited unit utilization. In particular, since the difficulty rating includes expressions like HELL and 100%, you can experience a harsh taste where your base is instantly devastated unless precise control and thorough resource management accompany beyond simple mass offensives. The tension that comes from the limited choices and extreme constraints unique to use maps can be said to be the greatest charm point of this map. Looking at the structure of the map, players form independent yet organic defensive lines in their respective assigned areas. Looking at the overall screen layout and unit composition, one can infer a cooperative progression method where multiple players participate simultaneously to defend their respective bases. The central advance route and the arrangement of each player's base follow the grammar of standardized defense and computer-opponent use maps, and how to coordinate and deploy the incoming enemy waves with the powerful firepower of Siege Tanks becomes a decisive factor determining victory or defeat. To withstand the relentless attacks pressing from the beginning, communication among teammates and adjustment of firing angles are essential, and if one line collapses, it takes a structure where sequential damage is inflicted on the entire front. Therefore, it is a battlefield perfectly suited for users who usually enjoy tower defense, high-difficulty computer battles, or survival-style use maps operating units under limited conditions. Before playing this map in earnest, there are several factors to keep in mind. First of all, since the choices of available units are extremely limited, a completely different approach from the standard Terran operation method is required. Rather than reckless production, efficiency of formations and concentrated firepower deployment are the keys to victory, so securing vision to predict siege mode transition timing and enemy movement paths is important. Also, due to the nature of high-difficulty maps, first-time players may be embarrassed by the enemy's offensive timing and mass scale, so it is recommended to challenge after building the basics of defensive formations. If you are a StarCraft Brood War user who wants to enjoy cooperative play by dividing roles with friends or feel the fun of extreme firepower battles, it is recommended to challenge your limits through this unique defensive use map this weekend.
下載 0觀看次數 44喜歡 0