
Lurker 星海爭霸地圖集
收集了已註冊「Lurker」標籤的地圖。請以難易度與特徵等單靠類型難以尋找的遊玩方式為中心,比較熱門地圖與最新地圖。
- 已註冊地圖
- 3個
- 累計下載
- 1
- 累計瀏覽
- 649
人氣地圖
這是下載與瀏覽熱度都很高的地圖。
아포칼립스 1.4 (Apocalypse 1.4)
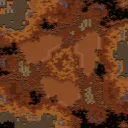
‘Apocalypse 1.4’는 스타크래프트: 브루드워의 유즈맵으로, 황혼 타일셋을 기반으로 제작된 대규모 디펜스 장르의 맵이다. 맵 중앙에 위치한 주 건물 주변으로Dark Swarm, Defiler Mound, Lurker Den 등 저그의 핵심 건물들이 배치되어 있으며, 주변은 다수의 Creep으로 둘러싸인 형태다. 플레이어는 초반에 자원을 확보한 뒤 건물들을 점차 확장해 나가며 방어선을 구축해야 한다. 맵의 특징 중 하나는 중앙 건물을 중심으로 방어 임무를 수행하는 동시에, 외곽 지역에서 자원 채취와 추가 병력 생산을 병행해야 한다는 점이다. 또한, 맵 곳곳에 숨겨진 자원 지대와 방어 건물 설치 포인트가 존재해 전략적 배치와 자원 관리가 핵심으로 작용한다. 전투는 주로 저그 대 저그의 대결 구도로 전개되지만, 일부 구간에서는 플레이어의 자원 채취 효율과 방어 건물의 배치에 따라 승패가 갈릴 수 있다. 초보자의 경우 방어 시설의 중요성을 간과하기 쉬우며, 자원 활용의 균형을 맞추지 못해 어려움을 겪을 수 있다. 반면, 경험이 풍부한 플레이어는 중앙 건물 주변의 방어선을 효율적으로 구축하고 외곽 자원을 적극적으로 활용해 장기전을 유리하게 이끌어갈 수 있다. 맵의 전체적인 분위기는 어둡고 웅장하며, 황혼 타일셋의 어두운 색감과 붉은 조명이 시너지를 이루어 긴장감을 조성한다. 특히, Creep으로 둘러싸인 지역과 방어 건물 사이의 간격이 좁아 적의 진격을 저지하기 어려운 구조가 특징적이다. 이 맵은 ‘컴까기’나 ‘디펜스’ 장르를 선호하는 유저들에게 적합하며, 방어 전략과 자원 관리 능력을 동시에 요구하는 중상의 난이도를 지닌다. 플레이 전에는 방어 건물의 배치 위치와 자원 채취 경로를 미리 숙지하는 것이 중요하다. 또한,Dark Swarm의 활용 여부가 승패를 좌우할 수 있으므로, 저그의 특성을 충분히 이해하고 전략을 수립하는 것이 필수적이다. 이 맵을 즐기기 위해서는 최소한의 저그 병력 생산과 방어 시설 구축 능력이 요구된다. 특히, Lurker의 활용과 Defiler의 Dark Swarm 스킬을 적재적소에 사용해야 방어에 성공할 가능성이 높아진다. ‘Apocalypse 1.4’ is a *StarCraft: Brood War* custom map featuring a large-scale defense genre built on the Twilight tileset. The map centers around a main building surrounded by core Zerg structures like the Dark Swarm, Defiler Mound, and Lurker Den, with the surrounding area enclosed by extensive Creep. Players must secure resources early, expand their structures, and gradually fortify their defenses. A defining feature is the dual requirement of defending the central building while simultaneously gathering resources and producing reinforcements in the outer zones. Hidden resource deposits and strategic defensive structure placement points scattered across the map make resource management and tactical positioning crucial. Combat primarily unfolds in Zerg-vs-Zerg matches, but victory in certain sections can hinge on resource efficiency and the placement of defensive buildings. Novices often overlook the importance of defensive facilities or struggle to balance resource allocation, while experienced players can optimize the central defense lines and leverage outer resources to dominate prolonged engagements. The map’s overall atmosphere is dark and grand, with the Twilight tileset’s deep hues and crimson lighting creating a tense, immersive ambiance. The narrow gaps between Creep-covered zones and defensive structures make it difficult to halt enemy advances, reinforcing the map’s strategic depth. Ideal for fans of ‘comp stomping’ or defense-style scenarios, *Apocalypse 1.4* demands a moderate skill level, requiring players to balance defense strategies with resource management. Before playing, it’s essential to memorize defensive structure placements and resource-gathering routes. The effective use of Dark Swarm can often decide the outcome, so understanding Zerg mechanics and planning accordingly is vital. To fully enjoy the map, players need at least basic proficiency in producing Zerg units and constructing defensive buildings, with Lurker positioning and Defiler Dark Swarm usage being particularly critical for success.
40 Way Lurker Defence V3.0
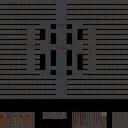
40 Way Lurker Defence V3.0은 5명의 플레이어가 동시에 참여해 각자 Lurker 유닛을 활용해 상대 진영을 방어하는 UMS 맵이다. 맵은 3072×4096 크기의 우주 타일셋으로 구성돼 넓은 공간에 40개의 방어 포인트가 배치돼 있다. 각 포인트마다 Lurker가 숨을 수 있는 지형이 존재해 위치 선정과 타이밍이 승패를 좌우한다. 초반에는 자원을 확보하고 방어 라인을 잡는 것이 핵심이며, 중반 이후에는 적의 공격 파동이 점차 강해지면서 Lurker의 사정거리와 스플래시 데미지를 최대한 활용해야 한다. 플레이어는 방어 라인을 고정시키는 대신, 필요에 따라 Lurker를 이동시켜 새로운 진입로를 차단하거나 적의 약점을 공략한다. 이 과정에서 맵의 고저 차와 좁은 통로가 전략적 요소로 작용해, 빠른 판단과 유닛 배치가 요구된다. 특히 Lurker의 은신 상태를 유지하면서 적을 유인하는 기술은 경험이 있는 유저에게 큰 이점을 제공한다. 초보자는 Lurker의 사거리와 은신 타이밍을 익히는 데 집중하고, 중급 이상은 방어 포인트를 효율적으로 연결해 연속적인 방어망을 구축하는 것이 좋다. 플레이 전에는 각 방어 포인트의 위치와 주변 지형을 미리 파악해, Lurker를 배치할 최적 위치를 선정하고, 자원 채취 루트를 확보하는 것이 중요하다. 이 맵은 빠른 템포와 전략적 깊이를 동시에 제공하므로, UMS를 즐기는 유저 중 방어와 공격을 균형 있게 경험하고 싶은 플레이어에게 추천한다. 40 Way Lurker Defence V3.0 is a UMS map designed for five players who simultaneously defend their bases using Lurker units. The map spans 3072×4096 pixels with a space tileset, featuring forty defensive points scattered across a large area. Each point includes terrain that allows Lurkers to burrow, making positioning and timing crucial for success. Early game focuses on gathering resources and establishing a defensive line, while mid‑game sees increasingly strong enemy waves that require optimal use of Lurker range and splash damage. Players can either hold a static defense or relocate Lurkers to block new entry routes and exploit enemy weaknesses. The map’s elevation changes and narrow passages add strategic depth, demanding quick decisions and precise unit placement. Mastering Lurker burrow timing provides a significant advantage for experienced players. Beginners should concentrate on learning Lurker range and burrow timing, whereas intermediate and advanced players benefit from linking defensive points to create a continuous shield. Before playing, it’s advisable to study the layout of each defensive point and surrounding terrain, select optimal Lurker positions, and secure resource paths. This map offers both fast‑paced action and strategic depth, making it ideal for UMS enthusiasts who want a balanced defensive and offensive experience.
Lurker Defence
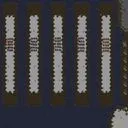
Lurker Defence 맵은 스타크래프트 브루드워의 UMS(유즈맵) 장르를 기반으로 한 전략적 전투 환경을 구현했습니다. 맵은 5개의 섬으로 구성되어 있으며, 각 섬에는 고유한 특징과 전투 요소가 포함되어 있습니다. 중앙 섬에는 적 군대의 출현이 시작되며, 플레이어는 섬의 지형을 활용해 자원을 수집하고 군대를 훈련시켜 적을 방어해야 합니다. 맵의 핵심 요소는 Lurker 유닛의 효과적인 활용으로, 이 유닛은 지하에서 출현하여 적을 감추고 공격하는 방식으로 전투를 진행합니다. 플레이어는 군대 구성과 위치 배치를 전략적으로 결정해 방어선을 구축해야 하며, 각 섬의 특성을 고려해 유닛을 배치하는 것이 승리 전략이 됩니다. 맵의 진행 방식은 초기 자원 확보부터 적 군대와의 전투, 섬 간의 이동 및 전략적 재조직을 포함하며, 고난도 전략적 사고와 실행력을 요구합니다. 추천 대상은 UMS 맵을 즐기는 플레이어, 전략적 전투를 선호하는 사용자, 그리고 Lurker 유닛을 활용한 독특한 전투 방식을 경험하고 싶은 사람들에게 적합합니다. 맵의 난이도는 중간 수준으로, 전략적 접근이 효과적인 플레이가 가능합니다. 맵 크기는 4096 x 2048, 타일 단위는 128 x 64로, 플레이 시간은 예상 30분 내외로 소요됩니다. Lurker Defence is a strategic combat map based on the UMS (custom map) genre of StarCraft: Brood War. The map consists of five islands, each with unique features and combat elements. The central island is where enemy forces begin to appear, and players must use the island's terrain to gather resources, train armies, and defend against the enemies. A core element of the map is the effective use of the Lurker unit, which emerges from underground to ambush and attack enemies. Players must strategically decide on army composition and positioning to build defensive lines, with unit placement tailored to each island's characteristics being key to victory. The map's progression includes early resource gathering, combat with enemy forces, movement between islands, and strategic reorganization, requiring high-level strategic thinking and execution. Recommended for players who enjoy UMS maps, those who prefer strategic combat, and those interested in experiencing a unique combat style utilizing Lurker units. The map's difficulty is moderate, allowing for effective play through strategic approaches. The map size is 4096 x 2048, with tile units of 128 x 64, and the estimated playtime is around 30 minutes.
最近註冊的地圖
查看最新新增的檔案與版本。
Lurker Defence
Lurker Defence 맵은 스타크래프트 브루드워의 UMS(유즈맵) 장르를 기반으로 한 전략적 전투 환경을 구현했습니다. 맵은 5개의 섬으로 구성되어 있으며, 각 섬에는 고유한 특징과 전투 요소가 포함되어 있습니다. 중앙 섬에는 적 군대의 출현이 시작되며, 플레이어는 섬의 지형을 활용해 자원을 수집하고 군대를 훈련시켜 적을 방어해야 합니다. 맵의 핵심 요소는 Lurker 유닛의 효과적인 활용으로, 이 유닛은 지하에서 출현하여 적을 감추고 공격하는 방식으로 전투를 진행합니다. 플레이어는 군대 구성과 위치 배치를 전략적으로 결정해 방어선을 구축해야 하며, 각 섬의 특성을 고려해 유닛을 배치하는 것이 승리 전략이 됩니다. 맵의 진행 방식은 초기 자원 확보부터 적 군대와의 전투, 섬 간의 이동 및 전략적 재조직을 포함하며, 고난도 전략적 사고와 실행력을 요구합니다. 추천 대상은 UMS 맵을 즐기는 플레이어, 전략적 전투를 선호하는 사용자, 그리고 Lurker 유닛을 활용한 독특한 전투 방식을 경험하고 싶은 사람들에게 적합합니다. 맵의 난이도는 중간 수준으로, 전략적 접근이 효과적인 플레이가 가능합니다. 맵 크기는 4096 x 2048, 타일 단위는 128 x 64로, 플레이 시간은 예상 30분 내외로 소요됩니다. Lurker Defence is a strategic combat map based on the UMS (custom map) genre of StarCraft: Brood War. The map consists of five islands, each with unique features and combat elements. The central island is where enemy forces begin to appear, and players must use the island's terrain to gather resources, train armies, and defend against the enemies. A core element of the map is the effective use of the Lurker unit, which emerges from underground to ambush and attack enemies. Players must strategically decide on army composition and positioning to build defensive lines, with unit placement tailored to each island's characteristics being key to victory. The map's progression includes early resource gathering, combat with enemy forces, movement between islands, and strategic reorganization, requiring high-level strategic thinking and execution. Recommended for players who enjoy UMS maps, those who prefer strategic combat, and those interested in experiencing a unique combat style utilizing Lurker units. The map's difficulty is moderate, allowing for effective play through strategic approaches. The map size is 4096 x 2048, with tile units of 128 x 64, and the estimated playtime is around 30 minutes.
40 Way Lurker Defence V3.0
40 Way Lurker Defence V3.0은 5명의 플레이어가 동시에 참여해 각자 Lurker 유닛을 활용해 상대 진영을 방어하는 UMS 맵이다. 맵은 3072×4096 크기의 우주 타일셋으로 구성돼 넓은 공간에 40개의 방어 포인트가 배치돼 있다. 각 포인트마다 Lurker가 숨을 수 있는 지형이 존재해 위치 선정과 타이밍이 승패를 좌우한다. 초반에는 자원을 확보하고 방어 라인을 잡는 것이 핵심이며, 중반 이후에는 적의 공격 파동이 점차 강해지면서 Lurker의 사정거리와 스플래시 데미지를 최대한 활용해야 한다. 플레이어는 방어 라인을 고정시키는 대신, 필요에 따라 Lurker를 이동시켜 새로운 진입로를 차단하거나 적의 약점을 공략한다. 이 과정에서 맵의 고저 차와 좁은 통로가 전략적 요소로 작용해, 빠른 판단과 유닛 배치가 요구된다. 특히 Lurker의 은신 상태를 유지하면서 적을 유인하는 기술은 경험이 있는 유저에게 큰 이점을 제공한다. 초보자는 Lurker의 사거리와 은신 타이밍을 익히는 데 집중하고, 중급 이상은 방어 포인트를 효율적으로 연결해 연속적인 방어망을 구축하는 것이 좋다. 플레이 전에는 각 방어 포인트의 위치와 주변 지형을 미리 파악해, Lurker를 배치할 최적 위치를 선정하고, 자원 채취 루트를 확보하는 것이 중요하다. 이 맵은 빠른 템포와 전략적 깊이를 동시에 제공하므로, UMS를 즐기는 유저 중 방어와 공격을 균형 있게 경험하고 싶은 플레이어에게 추천한다. 40 Way Lurker Defence V3.0 is a UMS map designed for five players who simultaneously defend their bases using Lurker units. The map spans 3072×4096 pixels with a space tileset, featuring forty defensive points scattered across a large area. Each point includes terrain that allows Lurkers to burrow, making positioning and timing crucial for success. Early game focuses on gathering resources and establishing a defensive line, while mid‑game sees increasingly strong enemy waves that require optimal use of Lurker range and splash damage. Players can either hold a static defense or relocate Lurkers to block new entry routes and exploit enemy weaknesses. The map’s elevation changes and narrow passages add strategic depth, demanding quick decisions and precise unit placement. Mastering Lurker burrow timing provides a significant advantage for experienced players. Beginners should concentrate on learning Lurker range and burrow timing, whereas intermediate and advanced players benefit from linking defensive points to create a continuous shield. Before playing, it’s advisable to study the layout of each defensive point and surrounding terrain, select optimal Lurker positions, and secure resource paths. This map offers both fast‑paced action and strategic depth, making it ideal for UMS enthusiasts who want a balanced defensive and offensive experience.
아포칼립스 1.4 (Apocalypse 1.4)
‘Apocalypse 1.4’는 스타크래프트: 브루드워의 유즈맵으로, 황혼 타일셋을 기반으로 제작된 대규모 디펜스 장르의 맵이다. 맵 중앙에 위치한 주 건물 주변으로Dark Swarm, Defiler Mound, Lurker Den 등 저그의 핵심 건물들이 배치되어 있으며, 주변은 다수의 Creep으로 둘러싸인 형태다. 플레이어는 초반에 자원을 확보한 뒤 건물들을 점차 확장해 나가며 방어선을 구축해야 한다. 맵의 특징 중 하나는 중앙 건물을 중심으로 방어 임무를 수행하는 동시에, 외곽 지역에서 자원 채취와 추가 병력 생산을 병행해야 한다는 점이다. 또한, 맵 곳곳에 숨겨진 자원 지대와 방어 건물 설치 포인트가 존재해 전략적 배치와 자원 관리가 핵심으로 작용한다. 전투는 주로 저그 대 저그의 대결 구도로 전개되지만, 일부 구간에서는 플레이어의 자원 채취 효율과 방어 건물의 배치에 따라 승패가 갈릴 수 있다. 초보자의 경우 방어 시설의 중요성을 간과하기 쉬우며, 자원 활용의 균형을 맞추지 못해 어려움을 겪을 수 있다. 반면, 경험이 풍부한 플레이어는 중앙 건물 주변의 방어선을 효율적으로 구축하고 외곽 자원을 적극적으로 활용해 장기전을 유리하게 이끌어갈 수 있다. 맵의 전체적인 분위기는 어둡고 웅장하며, 황혼 타일셋의 어두운 색감과 붉은 조명이 시너지를 이루어 긴장감을 조성한다. 특히, Creep으로 둘러싸인 지역과 방어 건물 사이의 간격이 좁아 적의 진격을 저지하기 어려운 구조가 특징적이다. 이 맵은 ‘컴까기’나 ‘디펜스’ 장르를 선호하는 유저들에게 적합하며, 방어 전략과 자원 관리 능력을 동시에 요구하는 중상의 난이도를 지닌다. 플레이 전에는 방어 건물의 배치 위치와 자원 채취 경로를 미리 숙지하는 것이 중요하다. 또한,Dark Swarm의 활용 여부가 승패를 좌우할 수 있으므로, 저그의 특성을 충분히 이해하고 전략을 수립하는 것이 필수적이다. 이 맵을 즐기기 위해서는 최소한의 저그 병력 생산과 방어 시설 구축 능력이 요구된다. 특히, Lurker의 활용과 Defiler의 Dark Swarm 스킬을 적재적소에 사용해야 방어에 성공할 가능성이 높아진다. ‘Apocalypse 1.4’ is a *StarCraft: Brood War* custom map featuring a large-scale defense genre built on the Twilight tileset. The map centers around a main building surrounded by core Zerg structures like the Dark Swarm, Defiler Mound, and Lurker Den, with the surrounding area enclosed by extensive Creep. Players must secure resources early, expand their structures, and gradually fortify their defenses. A defining feature is the dual requirement of defending the central building while simultaneously gathering resources and producing reinforcements in the outer zones. Hidden resource deposits and strategic defensive structure placement points scattered across the map make resource management and tactical positioning crucial. Combat primarily unfolds in Zerg-vs-Zerg matches, but victory in certain sections can hinge on resource efficiency and the placement of defensive buildings. Novices often overlook the importance of defensive facilities or struggle to balance resource allocation, while experienced players can optimize the central defense lines and leverage outer resources to dominate prolonged engagements. The map’s overall atmosphere is dark and grand, with the Twilight tileset’s deep hues and crimson lighting creating a tense, immersive ambiance. The narrow gaps between Creep-covered zones and defensive structures make it difficult to halt enemy advances, reinforcing the map’s strategic depth. Ideal for fans of ‘comp stomping’ or defense-style scenarios, *Apocalypse 1.4* demands a moderate skill level, requiring players to balance defense strategies with resource management. Before playing, it’s essential to memorize defensive structure placements and resource-gathering routes. The effective use of Dark Swarm can often decide the outcome, so understanding Zerg mechanics and planning accordingly is vital. To fully enjoy the map, players need at least basic proficiency in producing Zerg units and constructing defensive buildings, with Lurker positioning and Defiler Dark Swarm usage being particularly critical for success.
地圖選擇指南
태그는 맵의 핵심 특징을 빠르게 설명하지만 제작 버전마다 규칙이 다를 수 있습니다. 상세 설명에서 권장 인원, 난이도, 플레이 시간과 버전을 함께 확인한 뒤 다운로드하세요.