
스택 星海爭霸地圖集
收集了已註冊「스택」標籤的地圖。請以難易度與特徵等單靠類型難以尋找的遊玩方式為中心,比較熱門地圖與最新地圖。
- 已註冊地圖
- 28個
- 累計下載
- 1
- 累計瀏覽
- 1,091
人氣地圖
這是下載與瀏覽熱度都很高的地圖。
터렛 디펜스 스택 프로 (Turret Defense STACK PRO)
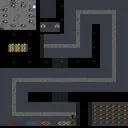
스타크래프트 브루드워의 대표적인 컴까기(컴퓨터 상대 디펜스) 유즈맵인 《터렛 디펜스 스택 프로》는 이름 그대로 방어 타워를 차곡차곡 쌓아 적의 공격을 막아내는 전략적 재미를 극대화한 맵이다. 이 맵은 기본적인 디펜스 장르의 틀을 유지하면서도, ‘스택’이라는 독특한 시스템을 도입해 플레이어의 선택과 전략을 한층 다채롭게 만든다. 맵 중앙에 위치한 넥서스를 중심으로 다수의 입구가 배치되어 있으며, 각 입구는 방어 타워를 설치할 수 있는 공간과 자원 분배가 이루어진다. 적의 웨이브는 일정 주기마다 등장해 넥서스를 향해 진격하며, 플레이어는 충분한 타워를 건설하고 업그레이드해 이를 저지해야 한다. 스택 시스템의 특징은 특정 조건(예: 자원량, 타워 종류, 배치 위치)에 따라 타워가 ‘스택’되어 stronger한 버전으로 강화되는 점이다. 이를 통해 단순한 디펜스에서 벗어나 전략적 깊이를 더할 수 있으며, 초보자는 기본 타워로 안정적으로 방어하되, 숙련자는 스택 시스템을 활용해 효율적인 대처를 모색할 수 있다. 맵의 구조는 비교적 평이하게 설계되어 있으나, 후반부로 갈수록 적의 공격 강도가 급격히 상승하므로 자원 관리와 타워 배치의 균형을 carefully하게 맞춰야 한다. 특히 입구별로 자원이 균등하게 분배되지 않으므로, 자원 확보가 어려운 입구는 초반 방어에 집중하고, 여유 자원은 업그레이드와 스택에 투자하는 것이 핵심 포인트다. 추천 대상은 디펜스 장르에 익숙한 플레이어는 물론, 전략적 사고와Resource Management 능력을 키우고 싶은 유저들에게도 적합하다. 다만, 스택 시스템의 경우 조건과 효과가 맵 내 설명 없이 직관적이지 않으므로, 플레이 전 간단한 전략 가이드나 팁을 미리 숙지하는 것이 좋다. 맵의 볼륨은 비교적 작지만, 스택 시스템과 반복 플레이를 통해 다양한 전략을 시뮬레이션해 볼 수 있어 재플레이성이 높은 편이다. 초심자의 경우 난이도를 ‘어려움’으로 설정하고 연습 모드로 진입하는 것도 좋은 방법이다. StarCraft: Brood War’s classic computer-defense custom map, *Turret Defense Stack Pro*, lives up to its name by maximizing strategic fun through stacking defensive towers to fend off waves of enemies. While keeping the core defense-genre framework intact, the map introduces a unique “stack” system that diversifies player choices and strategies. Multiple entrances surround the Nexus at the map’s center, each offering space for tower construction and resource allocation. Enemies spawn periodically and march toward the Nexus, so players must build and upgrade enough towers to hold the line. The stack system enhances towers into stronger versions when specific conditions—such as resource thresholds, tower type, or placement—are met, adding strategic depth beyond a simple defense scenario. Beginners can secure defenses with basic towers, while experienced players can leverage the stack system for efficient counterplay. The layout is straightforward, but enemy intensity ramps up sharply in later stages, demanding careful balancing of resource management and tower placement. Since resources aren’t evenly distributed across entrances, players should prioritize early defense at resource-scarce gates while investing surplus resources into upgrades and stacking. This map suits both veterans of the defense genre and those looking to sharpen strategic thinking and resource management skills. However, the stack system’s conditions and effects aren’t intuitive without prior explanation, so reviewing a quick strategy guide or tips before playing is advisable. Though compact in scale, the map offers high replayability through its stack system and the ability to simulate various strategies across repeated plays. Beginners may find it helpful to start on “Hard” difficulty and enter practice mode to get accustomed.
추즈 유어 디펜스 스택 10웨이 (Choose Your Defense Stack 10Way)
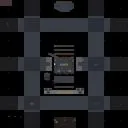
스타크래프트 브루드워 유즈맵 '추즈 유어 디펜스 스택 10웨이(Choose Your Defense Stack 10Way)'는 파일명 'Choose Your D 10way Stack!.scm'과 내부 제목에서 확인되듯, 'Choose Your Defense' 시리즈 계열의 타워 디펜스 맵으로 보인다. 제작자는 'TeX789'로 표기되어 있으며, 우주 타일셋을 배경으로 6인 플레이가 가능한 구조다. 맵 크기는 4096x4096으로 넓은 편에 속하며, 128x128 타일 단위로 10개의 진입로(10Way)가 배치된 것으로 추정된다. 핵심 메커닉은 제목에 포함된 '스택(Stack)'과 '선택(Choose)'에 있다. 플레이어는 각 웨이브 시작 전이나 특정 시점에 유닛 종류, 업그레이드, 특수 능력 등을 선택해 자신의 방어 라인을 강화하는 방식으로 진행되는 것으로 보인다. 10개의 길이 존재하지만 인원이 6명이므로, 일부 라인은 비워두거나 공동 방어를 하거나, 혹은 1인 다중 라인 관리가 요구될 수 있다. 적 유닛은 우주 배경에 맞춰 저그나 프로토스, 테란 혼종이 출현할 가능성이 높으며, 웨이브가 거듭될수록 체력과 공격력이 상승하는 전형적인 디펜스 흐름을 따를 것으로 예상된다. 플레이 경험 측면에서는 '스택' 시스템 덕분에 초반 선택이 중후반 생존을 가르는 전략적 깊이가 있을 것으로 보인다. 무작위 요소(랜덤 유닛/업그레이드)가 가미되었을 경우 매 판 다른 빌드를 시도하는 재미가 있고, 협동 디펜스 특유의 역할 분담(딜러, 탱커, 서포터)이 자연스럽게 발생한다. 다만 10웨이 구조상 맵 인지가 낯선 초보자는 라인 배분과 업그레이드 타이밍을 놓쳐 조기 패배할 수 있다. 추천 대상은 타워 디펜스 장르를 즐기는 유저, 'Choose Your Defense' 시리즈 경험자, 협동 전략 플레이를 선호하는 3~6인 파티다. 플레이 전 확인할 점은 인원 수에 따른 라인 분담 규칙, 스택 최대치 제한 여부, 승리 조건(최종 웨이브 클리어 또는 보스 처치) 등이다. 파일명에 'BEST', 'Stacked' 등 변형 버전이 존재하는 만큼, 최신 버전인지 확인 후 접속하는 것이 좋다. StarCraft Brood War UMS map 'Choose Your Defense Stack 10Way' appears to be a tower defense map in the 'Choose Your Defense' series, as indicated by the filename 'Choose Your D 10way Stack!.scm' and internal title. The creator is listed as 'TeX789', and the map supports 6 players on a space tileset. The map size is 4096x4096, relatively large, with an estimated 10 lanes (10Way) arranged in 128x128 tile units. The core mechanics lie in 'Stack' and 'Choose' from the title. Players likely select unit types, upgrades, and special abilities before each wave or at specific intervals to strengthen their defense lanes. With 10 lanes but only 6 players, some lanes may be left empty, shared for joint defense, or require single-player multi-lane management. Enemy units will likely be Zerg, Protoss, or Terran hybrids fitting the space theme, following a typical defense progression where HP and damage increase per wave. In terms of play experience, the 'Stack' system suggests strategic depth where early choices determine mid-to-late game survival. Random elements (random units/upgrades) could add replayability with different builds each game, and cooperative defense naturally creates roles like DPS, tank, and support. However, beginners unfamiliar with the 10-lane layout may lose early due to poor lane allocation or upgrade timing. Recommended for tower defense fans, players familiar with the 'Choose Your Defense' series, and 3-6 player parties preferring cooperative strategy. Pre-check points include lane assignment rules per player count, stack limit caps, and victory conditions (final wave clear or boss kill). Since variant versions like 'BEST' and 'Stacked' exist in filenames, verifying the latest version before joining is advised.
Cat&MouseOreWars v16 Stack
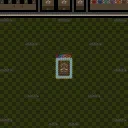
고양이와 쥐(Cat and Mouse) 장르에 자원 채광과 성장 요소를 결합한 유즈맵이다. 사막 타일셋의 2048×2048 대형 맵에서 최대 6인이 참여하며, 쥐 진영은 광물을 채굴해 자금을 모으고 고양이 진영은 쥐를 사냥해 보상을 얻는 비대칭 구도로 진행된다. 내부 설명에 따르면 쥐는 생존과 저축, 채광으로 자금을 불리고 고양이·새끼고양이·독수리 등 사냥 유닛을 모두 처치하면 승리한다. 반면 고양이 측은 쥐 전멸이 목표다. 스택(Stack) 버전 표기로 보아 유닛 중첩이나 건물 쌓기 등 고유 트리거가 적용된 것으로 보이며, v16에 이어 v17 파일명이 공존하는 점에서 지속적인 밸런스 수정이 이뤄진 버전으로 추정된다. 초반 채광 효율과 기지 배치, 중반 업그레이드 타이밍, 후반 사냥 유닛 대응이 승부를 가른다. 비대칭 대전과 생존·성장 재미를 동시에 원하는 유저, 고전 캣앤마우스 룰에 자원 관리 깊이를 더한 변주를 찾는 플레이어에게 권한다. 플레이 전 버전 차이(v16/v17)와 스택 옵션 적용 여부를 호스트와 확인하는 것이 좋다. This is a use map settings (UMS) map that combines the classic Cat and Mouse genre with resource mining and progression elements. On a 2048×2048 desert tileset supporting up to six players, the mice faction gathers funds through mining and saving while the cat faction hunts mice for rewards, creating an asymmetric structure. According to the internal description, mice win by accumulating money through survival, saving, and mining, then eliminating all cats, kittens, and eagles, while cats aim to wipe out all mice. The "Stack" suffix suggests custom triggers such as unit stacking or building stacking, and the coexistence of v16 in the title with a v17 filename indicates ongoing balance revisions. Early mining efficiency and base placement, mid-game upgrade timing, and late-game responses to hunter units determine the outcome. Recommended for players who want both asymmetric competition and survival-growth gameplay, or those seeking a twist on classic Cat and Mouse rules with deeper resource management. Before playing, confirm the version difference (v16/v17) and whether the Stack option is active with the host.
Another Defense Stackv5
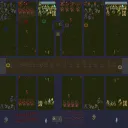
Another Defense Stackv5는 사막 타일셋을 배경으로 한 디펜스형 유즈맵이다. 지도는 좌우가 대칭 구조이며, 각각의 색상 진영이 상대 진영을 반대쪽 끝으로 침입하지 못하도록 방어 라인을 구축한다. 플레이어는 총 6명까지 참여할 수 있어 보통 3대 3 형태로 진행되며, 각 진영은 제한된 자원을 활용해 방어 타워와 유닛을 배치한다. 맵 중앙에는 넓은 오픈 구역이 있어 초기 전투가 활발히 일어나며, 이후 방어 라인을 강화해 상대의 침입을 차단한다. 주요 진행 방식은 방어 설계와 타워 업그레이드, 유닛 생산 타이밍 조절이며, 상대의 공격 루트를 예측해 효과적인 방어 포지션을 잡는 것이 승리의 핵심이다. 플레이 경험은 초반 빠른 전투와 중후반 방어 구축 사이의 템포 변화가 돋보이며, 전략적 판단이 요구된다. 특히 사막 타일셋 특유의 넓은 시야와 이동 속도 차이를 고려해 유닛 배치를 최적화해야 한다. 초보자보다는 기본 방어 메커니즘을 이해한 플레이어에게 적합하며, 팀워크와 커뮤니케이션이 중요한 팀전에서도 활용 가능하다. 플레이 전에는 자원 배분 계획과 방어 라인 설계, 상대 진영 침입 경로를 미리 점검하는 것이 좋다. Another Defense Stackv5 is a defense‑type custom map set on a desert tileset. The map features a symmetrical left‑right layout where each colored side must prevent the opponent from reaching the opposite edge. Up to six players can join, typically forming a 3‑vs‑3 match, and each side uses limited resources to place defensive towers and produce units. The central area is wide and open, leading to intense early skirmishes before players reinforce their lines. The core gameplay revolves around building defenses, upgrading towers, and timing unit production, with success hinging on predicting enemy attack routes and securing strong defensive positions. The experience offers a fast‑paced early fight followed by strategic fortification, demanding solid tactical decisions. Because of the desert tileset’s broad sightlines and movement variations, unit placement must be optimized. The map suits players familiar with basic defense mechanics rather than complete beginners, and it can also serve team‑based play where coordination is key. Before starting, players should plan resource allocation, design their defense lines, and review potential enemy ingress paths.
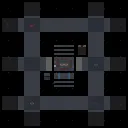
캐논/선큰 D10-웨이 스택 (Cannon/Sunken D10-Way STACK)
'캐논/선큰 D10-웨이 스택(Cannon/Sunken D10-Way STACK)'은 스타크래프트 브루드워 유즈맵 중 전형적인 컴까기 디펜스 장르에 속하는 맵이다. 파일명 'Cannon & sunken.scm'과 내부 제목이 일치하며, 제작자는 'J-and-R'로 표기되어 있다. 우주 타일셋 기반의 128x128 크기 맵에서 최대 6인이 협력해 10방향(D10-Way)에서 몰려드는 적 유닛을 캐논과 선큰 콜로니 등 고정 방어 건물로 막아내는 것이 핵심 진행 방식이다. 맵 이름에 포함된 'STACK'은 방어 건물을 좁은 지형에 밀집 배치해 화력을 극대화하는 '스택' 플레이를 유도함을 암시한다. 10갈래 진입로를 커버해야 하므로 초반 자원 분배와 입구별 병력 배치가 승패를 가른다. 테란은 벙커와 터렛, 프로토스는 포톤 캐논, 저그는 선큰 콜로니와 스포어 콜로니를 주력 삼아 웨이브를 버텨야 한다. 트리거나 별도 승리 조건 설명은 제공되지 않았으나, 통상 일정 시간 생존 또는 최종 웨이브 격퇴가 목표로 추정된다. 난이도는 협력도와 입구 막기 숙련도에 따라 체감 차이가 크며, 초보자도 입구 하나만 전담하면 부담 없이 즐길 수 있다. 6인 풀파티 시 난이도 하락이 두드러지므로 인원 수에 따른 자원 조절이나 자체 룰 적용을 권장한다. 플레이 전 맵 폴더 내 리드미나 브리핑 트리거로 웨이브 구성, 승리 조건, 금지 사항(핵, 특정 유닛 등) 확인을 권한다. 고전 감성의 정적 디펜스를 선호하는 유저에게 적합한 맵이다. 'Cannon/Sunken D10-Way STACK' is a classic comp-stomp defense map in StarCraft: Brood War UMS category. The filename 'Cannon & sunken.scm' matches the internal title, and the creator is noted as 'J-and-R'. On a 128x128 space tileset, up to 6 players cooperate to stop enemy units rushing from 10 directions (D10-Way) using static defenses like Photon Cannons and Sunken Colonies. The 'STACK' in the name implies gameplay that encourages stacking defensive structures in tight chokes to maximize firepower. Covering 10 entry points makes early resource allocation and per-choke assignment critical. Terran relies on Bunkers and Turrets, Protoss on Photon Cannons, Zerg on Sunken and Spore Colonies. While triggers and exact win conditions are not provided, survival for a set time or clearing a final wave is the presumed objective. Difficulty varies greatly with teamwork and choke-holding skill; beginners can participate by managing a single entrance. Full 6-player parties significantly lower difficulty, so house rules or resource adjustments are recommended. Before playing, check any readme or briefing triggers for wave composition, win conditions, and restrictions (nukes, specific units, etc.). Recommended for users who enjoy classic static defense nostalgia.
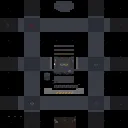
CHOOSE UR D STACKD, FREE$$$$$$
'CHOOSE UR D STACKD, FREE$$$$$$'는 6인용 우주 배경의 방어형 유즈맵으로, 제목에서 알 수 있듯 플레이어가 직접 방어 방식(D)을 선택하고 이를 쌓아 올리는(STACKD) 독특한 진행 방식을 보인다. 맵 크기 128x128 타일로 비교적 넓게 구성되어 있으며, 'FREE' 표기로 미루어 초반 자원이나 유닛 선택에 제약이 적은 샌드박스 성향이 강한 것으로 추정된다. 제작자 BLooD_Sp1LLa의 의도대로라면 각 진영 입구에서 밀려오는 적 웨이브를 막기 위해 타워나 유닛을 자유롭게 조합하고 업그레이드하는 재미가 핵심일 것이다. 6인 협동 플레이가 기본 구성이므로 팀원 간 역할 분담과 시너지 조합이 승패를 가를 것으로 보인다. 난이도는 자원 자유도에 따라 유동적이나, 웨이브 후반부로 갈수록 체계적인 방어선 설계가 요구되어 중급자 이상에게 적합해 보인다. 스타크래프트 브루드워 유즈맵 특유의 트리거 연출과 커스텀 시스템을 경험하고 싶은 유저, 디펜스 장르의 변주인 '스택 디펜스'를 체험하고 싶은 이들에게 추천한다. 플레이 전에는 맵 설명에 명시된 선택 키나 단축키, 승리 조건(최후 생존/웨이브 클리어) 등을 숙지하는 것이 좋다. 'CHOOSE UR D STACKD, FREE$$$$$$' is a 6-player space-themed defense UMS map where, as the title suggests, players choose their defense type (D) and stack upgrades (STACKD) in a unique progression. The map spans 128x128 tiles, offering a relatively wide battlefield, and the 'FREE' notation implies a sandbox nature with fewer restrictions on early resources or unit selection. Following the creator BLooD_Sp1LLa's design, the core fun likely lies in freely combining and upgrading towers or units to hold back enemy waves rushing each base entrance. Since 6-player co-op is the default setup, role division and synergy among teammates will determine victory. Difficulty scales with resource freedom, but systematic defense line design becomes crucial in later waves, making it suitable for intermediate players and above. Recommended for users wanting to experience custom triggers and systems unique to StarCraft Brood War UMS maps, or those seeking a 'stack defense' variation of the genre. Before playing, it is advised to familiarize oneself with selection hotkeys, shortcuts, and victory conditions (last stand/wave clear) noted in the map description.
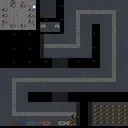
터렛 디펜스 스택 (Turret Defense STACK)
를 통해 살펴볼 '터렛 디펜스 스택 (Turret Defense STACK)'은 클래식 디펜스 장르의 재미를 충실히 담아낸 대표적인 유즈맵이다. 이 맵은 우주 테마의 타일셋을 배경으로 펼쳐지며, 플레이어는 정해진 길을 따라 몰려오는 적 유닛들을 막아내야 하는 명확한 목표를 가지고 진행하게 된다. 전체적인 맵 구조를 살펴보면, 적들이 생성되어 이동하는 경로와 방어 타일이 배치된 구역이 유기적으로 연결되어 있어 직관적이면서도 전략적인 자리 배치의 중요성을 강조한다. 특히 맵 이름에서 유추할 수 있듯이 터렛과 관련된 독특한 스택 시스템이 더해져 일반적인 디펜스 장르와는 또 다른 양상의 플레이 경험을 제공한다. 게임이 시작되면 플레이어들은 주어진 자원과 공간을 활용해 효율적으로 방어선을 구축해야 하며, 웨이브가 거듭될수록 강해지는 적들에 대응하기 위해 끊임없이 업그레이드와 재배치를 고민하게 된다. 다인용 플레이를 지원하는 만큼 여러 명의 플레이어가 협력하여 각자의 방어 구역을 책임지고 유기적인 방어망을 형성하는 재미가 돋보인다. 초보 플레이어부터 디펜스 장르에 익숙한 베테랑까지 누구나 쉽게 적응할 수 있는 직관적인 진행 방식을 지니고 있어, 친구들과 함께 가볍게 즐기면서도 깊이 있는 협동 플레이를 경험하고 싶은 유저들에게 추천할 만하다. 플레이하기 전에는 맵에 적용된 고유한 스택 시스템과 타일 배치 구조를 미리 파악하고, 팀원 간의 역할 분담이나 자원 분배 방식을 조율하는 것이 원활한 클리어에 큰 도움이 된다. Turret Defense STACK is a classic defense genre usemap that faithfully captures the fun of traditional defense gameplay in StarCraft: Brood War. Set against a space-themed tileset background, players are given the clear objective of stopping enemy units moving along predetermined paths. Examining the overall map structure, the generation and movement routes of enemies are organically connected with defense placement areas, emphasizing intuitive yet strategic positioning. Notably, as hinted by the map's name, a unique stack system related to turrets is added, offering a gameplay experience distinct from standard defense maps. Once the game begins, players must utilize given resources and space to efficiently establish defensive lines, constantly rethinking upgrades and repositioning to counter increasingly stronger waves. Supporting multiplayer, it shines when multiple players cooperate, taking responsibility for individual defense zones and forming organic defensive networks. With an intuitive progression style that allows both beginners and veterans of the defense genre to easily adapt, it is recommended for users who want to enjoy casual yet deep cooperative gameplay with friends. Before playing, it is helpful to understand the unique stack system and tile placement structure applied to the map, and coordinate role distribution or resource sharing among team members for a smoother clear.
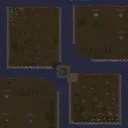
6 vs 2 Islands STACK+FAST
'6 vs 2 Islands STACK+FAST'는 6명의 플레이어가 2명의 컴퓨터를 상대로 섬 지형에서 대결하는 컴까기 유즈맵이다. 제목 그대로 스택(Stacking)과 패스트 빌드(Fast Build) 옵션이 적용되어 자원 채취와 유닛 생산 속도가 극도로 빨라진 것이 핵심 특징이다. 사막 타일셋 기반의 128x128 타일 대형 맵에 각 진영이 섬으로 분리되어 있어 공중 유닛이나 수송선 운영이 필수적이다. 스택 시스템 덕분에 미네랄과 가스가 한 곳에 밀집되어 있어 초반 빌드 오더 고민 없이 바로 대규모 병력 양성이 가능하며, 패스트 빌드로 건물 건설과 업그레이드 시간이 단축되어 시원시원한 한타 위주 플레이가 펼쳐진다. 컴퓨터 인공지능은 기본 AI를 따르지만 빠른 자원 확보로 인해 초반 러시만 잘 막아내면 중반 이후 압도적인 물량으로 섬멸전이 가능하다. 입문자도 부담 없이 즐길 수 있는 난이도이나, 섬 맵 특성상 드랍십/오버로드/셔틀 컨트롤과 공중전 이해도가 승패를 가른다. 협동전 감각으로 가볍게 즐기거나 빌드 연습용으로 적합하며, 6인 풀파티가 모였을 때 가장 이상적이다. 플레이 전에는 스택 범위와 패스트 빌드 배율, 컴퓨터 난이도 설정이 트리거로 고정되어 있는지 확인하는 것이 좋다. '6 vs 2 Islands STACK+FAST' is a comp-stomp UMS map where six players face two computers on an island terrain. As the title indicates, Stacking and Fast Build options are applied, making resource gathering and unit production extremely fast. Based on the Desert tileset, the 128x128 tile large map separates each base onto islands, making air units or transport management essential. The stacking system clusters minerals and gas in one spot, allowing immediate mass production without early build-order concerns, while Fast Build shortens construction and upgrade times for refreshing large-scale battles. The computer AI follows standard scripts, but with rapid resource income, holding the early rush leads to overwhelming force in the mid-to-late game. Difficulty is accessible for beginners, though island mechanics demand dropship/overlord/shuttle control and air combat understanding. It suits casual co-op play or build-order practice, shining best with a full 6-player party. Before playing, verify that stack range, fast build multiplier, and AI difficulty are fixed via triggers.
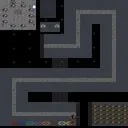
터렛 디펜스 스택 (Turret Defense STACK)
스타크래프트 브루드워의 대표적인 디펜스형 유즈맵인 〈터렛 디펜스 스택〉은 적의 물량을 방어하는 동시에 자신의 터렛을 체계적으로 배치할 수 있는 전략적 깊이가 돋보이는 맵입니다. 맵 중앙에 위치한 넓은 평지 위에 플레이어의 시작 지점이 배치되어 있으며, 외부에서 끊임없이 몰려오는 적군(주로 저글링, 히드라리스크, 울트라리스크 등)을 방어용 터렛과 유닛을 조합해 물리쳐야 합니다. 맵의 특징 중 하나는 ‘스택’이라는 시스템으로, 플레이어는 자신의 터렛을 원하는 위치에 배치할 수 있지만, 일정 시간이 지나면 중복된 터렛이 자동으로 ‘스택’되어 성능이 업그레이드됩니다. 예를 들어 동일한 종류의 터렛을 같은 자리에 연속해서 설치하면 공격력, 사거리, 연사력이 점차 상승하는 방식으로, 전략적 배치와 타이밍이 victory의 핵심입니다. 게임은 크게 세 단계로 나뉘는데, 초반에는 제한된 자원으로 기본 터렛을 설치하며 방어선을 구축해야 하고, 중반에는 스택 시스템을 활용해 공격력을 끌어올리며 적의 공격을 버티는 구간에 들어섭니다. 후반부로 갈수록 적의 물량이 거세지며 방어선이 무너지기 쉬운데, 이때는 미리 설치해 둔 고급 터렛이나 보조 유닛(예: 스파이더 마인, 골리앗 등)을 적극 활용해야 합니다. 맵의 구조는 비교적 간단한 편이지만, 터렛 스택의 메커니즘과 적의 공격 패턴을 읽는 능력이 요구되며, 이는 초보자와 숙련자 간의 체감 난이도 차이를 크게 만드는 요소입니다. 특히, 스택 타이밍을 잘못 잡으면 방어선이 무너질 위험이 커지므로 신중한 플레이가 필요합니다. 이 맵은 주로 1인 플레이를 상정하고 제작되었지만, 6인까지 동시에 플레이할 수 있어 팀전으로도 즐길 수 있습니다. 각 플레이어의 시작 지점은 맵 외곽에 배치되어 있으며, 중앙으로 몰려드는 적군을 공유하는 구조지만, 개별 터렛의 배치와 스택 타이밍은 독립적으로 진행됩니다. 또한, 맵의 중앙 지역은 비교적 넓은 평지로 이루어져 있어 대규모 전투가 벌어질 수 있는 공간이 마련되어 있습니다. 추천 대상은 디펜스 맵을 즐기며 전략적 사고와Resource management 능력을 키우고 싶은 유저들에게 적합합니다. 다만, 스택 시스템에 익숙하지 않으면 초반 방어가 허술해지기 쉬우므로, 몇 차례의 연습을 거친 후 도전하는 것이 좋습니다. 플레이 전 확인해야 할 포인트는 터렛의 종류와 스택 효과, 적의 공격 패턴입니다. 터렛은 종류에 따라 공격 범위와 공격 유형이 다르므로, 맵을 시작하기 전에 각 터렛의 특성을 숙지하는 것이 중요합니다. 또한, 적의 공격이 일정 주기로 몰려오므로, 이를 예측하고 방어선을 미리 구축해야 합니다. 마지막으로, 스택 시스템을 최대한 활용하기 위해서는 터렛을 같은 자리에 연속해서 설치하는 타이밍을 잡는 연습이 필요합니다. 이 맵은 단순하고 반복적인 플레이가 아니라, 전략과 타이밍을 요구하는 깊이 있는 디펜스 게임이므로, 꾸준한 연습을 통해 실력을 키워나가는 재미가 있습니다. Turret Defense STACK is one of the most iconic defense-style custom maps in StarCraft: Brood War, offering players a deep strategic experience centered around placing and upgrading turrets to fend off relentless enemy waves. The map features a large central area where players start, surrounded by multiple entry points where waves of enemies—primarily Zerglings, Hydralisks, and Ultralisks—emerge. The standout feature of this map is its stacking system: players can place turrets in desired locations, and over time, stacking identical turrets within the same spot automatically enhances their performance, increasing damage, range, and attack speed. The gameplay is divided into three clear phases. Early on, players must use limited resources to build basic turrets and establish a defensive line. The mid-game focuses on leveraging the stacking system to amplify firepower while weathering increasingly intense enemy assaults. By the late game, enemy waves become overwhelming, requiring players to rely on pre-placed high-tier turrets or auxiliary units like Spider Mines or Goliaths to survive. The map’s layout is straightforward, but the stacking mechanism and the need to predict enemy patterns create a steep learning curve that sharply differentiates casual players from experienced ones. A single misstep in stacking timing can lead to a collapsed defense line, making strategy and precision critical. While primarily designed for single-player, Turret Defense STACK supports up to six players simultaneously, making it viable for team-based play as well. Each player’s starting position is located on the outer edges of the map, sharing the central battlefield where enemies converge. The wide open central area allows for large-scale confrontations, adding another layer of tactical depth. This map is ideal for players who enjoy defense maps and wish to hone their strategic planning and resource management skills. However, those unfamiliar with the stacking system may struggle initially, so practicing a few rounds before diving into serious attempts is highly recommended. Before diving in, players should familiarize themselves with turret types and stacking effects, as well as enemy attack patterns. Different turrets have varying ranges and attack types, so understanding these nuances before starting is crucial. Additionally, since enemies attack in predictable waves, anticipating these assaults and preparing defenses in advance is essential. Finally, mastering the stacking system requires practice in timing the placement of identical turrets in the same spot to maximize upgrades. Unlike mindless repetitive defense games, Turret Defense STACK offers a rewarding experience that demands strategy, timing, and continuous improvement, making it a standout title in the genre.
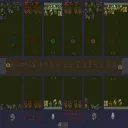
Another Defense Stackv6
'어나더 디펜스 스택 v6'는 사막 타일셋의 가로로 긴 직사각형 맵에서 펼쳐지는 6인 협동 디펜스 유즈맵이다. 맵 설명인 '어느 색상도 반대편에 도달하지 못하게 하라'는 문구에서 알 수 있듯, 두 갈래의 공격 루트(색상)가 존재하며 플레이어들은 중앙 또는 양옆에서 밀려오는 적 유닛을 막아내야 한다. '스택(Stack)'이라는 명칭답게 유닛을 생산하고 업그레이드하여 화력을 집중시키는 전형적인 스택 디펜스 방식이 예상되며, 6인이 동시에 참여하는 만큼 초반 자원 분배와 역할 분담이 승패를 가른다. 사막 지형의 개방적인 시야는 적의 이동 경로를 예측하기 용이하지만, 양쪽 라인을 동시에 커버해야 하므로 병력 분산과 타이밍 좋은 지원 병력 배치가 핵심이다. 난이도는 버전업 과정에서 조절되었을 것으로 보이나, 후반부로 갈수록 몰려오는 물량 공세에 대비한 고티어 유닛 확보와 특수 스킬 활용이 요구된다. 디펜스 장르 특유의 몰입감과 여럿이서 호흡을 맞추는 재미를 원하는 유저에게 적합하며, 입문자는 초반 빌드 오더를 숙지하고 베테랑은 효율적인 스택 운용으로 클리어 타임을 단축해 볼 만하다. 플레이 전 맵 버전(v6.1) 확인과 팀원 간 라인 담당 조율이 필수적이다. 'Another Defense Stack v6' is a 6-player cooperative defense use-map set on a horizontally elongated rectangular map with the Desert tileset. As the description states, 'Don't let either color get to the opposite side,' two distinct attack routes (colors) exist, and players must stop enemy units pushing from both sides. True to its name 'Stack,' the gameplay likely follows the classic stack defense style of producing and upgrading units to concentrate firepower. With six players participating simultaneously, early resource allocation and role assignment determine victory or defeat. The open view of the desert terrain makes it easy to predict enemy paths, but covering both lanes simultaneously requires troop dispersion and timely reinforcement deployment. Difficulty appears adjusted through version updates, but later stages demand high-tier units and special skills to withstand massive waves. It suits users seeking the immersion of the defense genre and the fun of coordinating with a team; beginners should master early build orders while veterans can optimize stack management for faster clears. Verifying the map version (v6.1) and coordinating lane assignments with teammates are essential before playing.
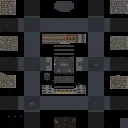
Choose urD 10stacked AdVaNcEd
스타크래프트 브루드워 유즈맵 '추즈 유어 디 10스택 어드밴스드'는 우주 타일셋의 128x128 크기 맵에서 최대 6인이 즐길 수 있는 선택·강화형 콘텐츠로 보인다. 제목의 'Choose urD(Your D)'와 '10stacked'는 플레이어가 초반에 특정 유닛이나 빌드(D)를 선택한 뒤, 스탯이나 업그레이드를 10단계까지 중첩(스택)시켜 성장시키는 핵심 메커니즘을 암시한다. 'Advanced' 표기는 기존 버전보다 난이도나 선택지가 확장되었음을 뜻한다. 진행 방식은 일반적인 'Choose your~' 계열처럼 시작 시 유닛·능력치를 고르고, 이후 웨이브 디펜스나 프리포올 아레나 중 한 형태로 전개될 가능성이 높다. 6인 풀 인원 기준 FFA 또는 팀전 모두 소화 가능한 구조로 추정되며, 우주 배경 특유의 넓은 시야와 기동성이 강화 성장 속도에 영향을 줄 것으로 보인다. 플레이 경험은 초반 선택의 전략성과 중반 이후 급격히 상승하는 스탯 체감, 후반부 압도적인 화력으로 적을 제압하는 쾌감에 집중된다. 추천 대상은 짧은 시간 내 폭발적인 성장과 빌드 최적화를 즐기는 유저, 스택 메커니즘 특유의 숫자 불리기 재미를 선호하는 유저다. 플레이 전 확인 포인트는 승리 조건(최후 생존/웨이브 클리어), 스택 최대치 10의 실체감, 선택지 간 밸런스 여부다. StarCraft Brood War UMS map 'Choose Your D 10stacked Advanced' appears to be a selection-and-enhancement content playable by up to 6 players on a 128x128 space tileset. The title's 'Choose urD (Your D)' and '10stacked' imply a core mechanic where players pick an initial unit or build (D) early on, then stack stats or upgrades up to 10 levels for growth. The 'Advanced' label suggests expanded difficulty or options over a base version. Gameplay likely follows the typical 'Choose your~' formula: choose a unit/ability at start, then proceed through either wave defense or free-for-all arena. With 6 players, it likely supports both FFA and team modes. The space background offers wide vision and mobility, influencing enhancement pacing. The experience focuses on strategic early choices, rapid stat scaling mid-game, and the thrill of overwhelming firepower late-game. Recommended for users who enjoy explosive growth, build optimization, and the satisfaction of stacking numbers. Key points to check before play: win condition (last man standing/wave clear), tangible impact of the 10-stack limit, and balance between initial choices.
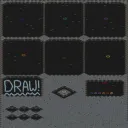
드로잉 콘테스트 위드 스택 (Drawing Contest with STACK!)
스타크래프트 브루드워 유즈맵 'Drawing Contest with STACK!'은 고전적인 그림 그리기 콘테스트 형식을 바탕으로 스택(Stacking) 능력이 추가된 창작형 미니게임 맵이다. 7인용으로 설계된 이 맵은 황무지 타일셋 위에서 플레이어 각자가 캔버스 역할을 하는 영역에 유닛이나 건물 배치를 통해 그림을 그리고, 서로의 작품을 감상한 뒤 투표로 승자를 가리는 방식으로 진행된다. 기존 드로잉 콘테스트 맵이 점수 제한이나 라운드 제약이 있었던 것과 달리, 이 버전은 무제한 점수 시스템과 '승리한 플레이어에게' 유닛이 주어지는 보상 트리거가 더해져 자유로운 창작 활동이 가능하다. SeffRaiku가 추가한 스택 능력은 유닛이나 오브젝트를 겹쳐 배치할 수 있게 해 주어, 입체적인 표현이나 복잡한 도형 구성이 가능해졌다는 점에서 큰 차별점이다. 맵 크기는 128×128 타일로 넉넉한 캔버스 공간을 제공하며, 별도의 전투 유닛 생산이나 자원 관리 없이 마우스 조작과 단축키만으로 직관적으로 참여할 수 있다. 경쟁보다는 감상과 소통에 초점을 맞춘 캐주얼한 플레이 경험을 제공하므로, 실력 차이 없이 누구나 부담 없이 즐길 수 있는 파티 맵이나 친목용 맵으로 적합하다. 플레이 전에는 스택 기능 단축키와 투표 UI 사용법을 익혀두면 더 원활하게 진행할 수 있다. StarCraft Brood War custom map 'Drawing Contest with STACK!' is a creative mini-game map based on the classic drawing contest format with an added Stacking ability. Designed for 7 players, each player draws pictures by placing units or buildings on their canvas area within the Badlands tileset, then everyone views the works and votes to decide the winner. Unlike traditional drawing contest maps that had point limits or round restrictions, this version features an unlimited point system and a reward trigger that gives a 'Victory goes to' unit to the winner, enabling free creative expression. The Stacking ability added by SeffRaiku allows overlapping placement of units or objects, enabling three-dimensional expression and complex shape composition. The 128×128 tile map provides generous canvas space, and participation is intuitive with just mouse controls and hotkeys without any combat unit production or resource management. Focused on appreciation and communication rather than competition, it offers a casual play experience suitable as a party map or social map where anyone can enjoy regardless of skill level. Learning the stacking hotkeys and voting UI beforehand will help smoother gameplay.
最近註冊的地圖
查看最新新增的檔案與版本。
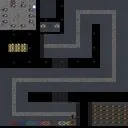
터렛 디펜스 스택 프로 (Turret Defense STACK PRO)
Turret Defense STACK PRO는 우주 타일셋을 배경으로 한 6인용 디펜스 맵이다. 기본적인 타워 디펜스 구조에 스택 시스템이 추가되어 유닛을 중첩 배치할 수 있고, 이를 통해 화력을 집중시키는 전략적 선택이 가능하다. 맵은 별도의 트리거나 스토리 없이 순수한 웨이브 생존 방식으로 진행되며, 각 웨이브마다 적 유닛의 종류와 수가 점진적으로 증가해 난이도가 자연스럽게 올라간다. 플레이어는 자원 관리와 타워 업그레이드 타이밍을 조절하며, 스택 기능을 활용해 좁은 통로나 핵심 지점에 강력한 방어선을 구축해야 한다. 협동 플레이가 필수적이므로 팀원 간의 역할 분담과 실시간 소통이 승패를 가른다. 초보자에게는 기본 타워 디펜스 감각을 익히기 좋고, 숙련자는 스택 조합을 극대화해 고난도 웨이브를 클리어하는 재미를 느낄 수 있다. 플레이 전에는 맵 파일이 최신 패치 버전인지, 스택 기능이 정상 작동하는지 확인하고, 팀원 수에 맞춰 난이도 조절 옵션이 있는지 살펴보는 것이 좋다. 맵의 우주 배경은 시각적으로 깔끔하며, 타일셋 특유의 어두운 분위기가 긴장감을 더한다. 6인 전용으로 설계되어 솔로 플레이는 권장되지 않으며, 각 플레이어는 고유한 자원 라인을 공유해 협력적 경제 운영이 필수적이다. 웨이브 간 간격이 짧아 빠른 판단과 즉각적인 타워 배치가 요구되며, 스택 기능을 활용한 다중 타워 집중 사격은 후반부 대형 유닛 처리에 결정적이다. 업그레이드 트리는 기본 공격력, 사거리, 공격 속도 세 가지로 나뉘어 있어 전략적 선택의 폭이 넓다. 게임 시작 전에는 맵 파일의 체크섬을 비교해 손상 여부를 확인하고, 모든 참가자가 동일한 버전을 사용하는지 확인해야 한다. 또한 네트워크 지연이 심할 경우 스택 동기화 오류가 발생할 수 있으니 안정적인 연결 환경을 준비하는 것이 좋다. 마지막으로, 맵 폴더 내 리드미 파일에 기재된 알려진 버그 목록을 참고해 사전에 대응 방안을 마련하면 플레이 안정성이 크게 향상된다. Turret Defense STACK PRO is a six‑player defense map set on a space tileset. The basic tower‑defense layout is enhanced with a stack system that lets units be placed on top of each other, allowing concentrated firepower as a strategic option. The map runs purely on wave survival without separate triggers or story, and each wave gradually increases the variety and number of enemy units so difficulty rises naturally. Players must manage resources and time tower upgrades while using the stack feature to build strong defensive lines at chokepoints and key locations. Cooperative play is essential, so role division and real‑time communication among teammates decide victory. Beginners can learn core tower‑defense mechanics, while veterans can maximize stack combinations to clear high‑difficulty waves. Before playing, verify that the map file is the latest patched version, that the stack mechanic works correctly, and that a difficulty‑adjustment option matching the team size exists. The space background looks clean and its dark atmosphere adds tension. Designed for six players, solo play is not recommended; each player shares a unique resource line, making cooperative economy management mandatory. Wave intervals are short, demanding quick decisions and immediate tower placement, and stacked multi‑tower focus fire becomes decisive against large late‑game units. The upgrade tree splits into base damage, range, and attack speed, giving a wide strategic choice. At game start, compare the map’s checksum to detect corruption and ensure all participants run the same version. Also, high network latency can cause stack desynchronization, so prepare a stable connection. Finally, consult the known‑bug list in the map folder’s readme to prepare countermeasures, which greatly improves play stability.
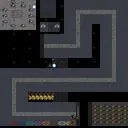
터렛 디펜스 스택 인핸스드 (Turret Defense Stack Enhanced)
스타크래프트 브루드워의 디펜스 장르 유즈맵인 《터렛 디펜스 스택 인핸스드(Turret Defense Stack Enhanced)》는 강력한 터렛을 쌓아가며 끊임없이 몰려오는 적의 공세를 방어하는 전략적 재미를 제공합니다. 맵은 우주 타일셋을 기반으로 2048x2048 크기의 넓은 공간에 펼쳐져 있으며, 플레이어는 초반부터 제공되는 제한된 자원으로 방어 타워를 건설하고 강화해야 합니다. 맵의 특징은 '스택' 시스템으로, 같은 종류의 터렛을 인접하게 배치하면 공격력이나 방어력이 상승하는 메커니즘이 있다는 점입니다. 이를 통해 플레이어는 단순히 타워를 짓는 것뿐 아니라, 효율적인 배치를 고민해야 하며, 적의 공격 패턴과 지형에 맞춰 전략을 유동적으로 변화시켜야 합니다. 공격 루트는 크게 세 갈래로 나뉘며, 각 루트마다 적의 종류와 공격 패턴이 조금씩 다릅니다. 중앙 루트는 가장 많은 수의 적들이 몰려오는 주요 루트로, 빠르게 방어선을 구축하지 않으면 금세 뚫리게 됩니다. 좌우 루트는 상대적으로 적은 수의 적이 오지만, 일부는 공중 유닛이나 특수 능력을 지닌 적들이 포함되어 있어 방어 전략을 달리해야 합니다. 또한, 후반부로 갈수록 적의 종류가 다양해지고 공격력이 강해지므로, 초반에 안정적인 자원 관리와 타워 배치에 신경 써야 합니다. 이 맵의 가장 큰 매력은 '스택' 시스템의 전략적 깊이에 있습니다. 예를 들어, 미사일 터렛을 세로로 배치하면 관통력이 상승하거나, 대공 터렛을 집중 배치하면 공중 유닛에 대한 방어력이 크게 향상되는 등, 단순히 숫자에 의존하는 것이 아니라 배치의 중요성이 극대화됩니다. 또한, 맵 곳곳에 흩어져 있는 미네랄과 가스 채취 지역을 활용해 자원을 확보하고, 이를 바탕으로 더 강력한 터렛을 건설하거나 연구를 진행할 수 있습니다. 다만, 자원 채취 지역이 맵 중앙에 밀집되어 있어 초반 방어 라인을 구축하는 동안에는 자원 확보가 다소 어려운 편입니다. 이 맵은 디펜스 장르를 любителей이면서, 타워의 배치와 스택 시스템에 대한 전략적 깊이를 원하는 플레이어에게 특히 추천됩니다. 초보자의 경우, 적의 공격 패턴을 숙지하고 자원 관리에 집중하는 것이 중요하며, 숙련자의 경우라면 스택 시스템을 최대한 활용해 효율적인 방어 라인을 구축하는 것에 도전해 볼 만합니다. 또한, 팀 플레이가 가능한 맵이 아니기 때문에 1인 플레이에 최적화되어 있으며, 혼자서도 긴장감 넘치는 플레이를 즐길 수 있습니다. 맵을 플레이하기 전에는 반드시 제공되는 터렛의 종류와 스택 효과를 숙지하고, 맵의 주요 공격 루트를 미리 파악해 두는 것이 좋습니다. 특히, 중앙 루트의 방어 라인을 튼튼히 구축하지 않으면 게임이 쉽게 무너질 수 있으니 주의가 필요합니다. Turret Defense Stack Enhanced is a StarCraft: Brood War defense custom map that offers strategic fun by stacking powerful turrets to defend against endless waves of enemy attacks. Built on a space-themed tileset with a 2048x2048 grid, the map challenges players to construct and upgrade defensive towers while managing limited resources. A key feature is the stacking system, where placing the same type of turret adjacent to each other boosts their attack or defense power, forcing players to think beyond simple tower construction and consider efficient placement. The map features three main attack paths, each with distinct enemy types and attack patterns. The central path sees the heaviest traffic, requiring a robust early defense to prevent breakthroughs. The left and right paths, while less frequented, include air units and special enemies that demand varied defensive strategies. As the game progresses, enemies become stronger and more diverse, making early resource management and tower placement critical for survival. The stacking system is the heart of this map's strategic depth. For example, vertically stacking missile turrets enhances piercing power, while concentrating anti-air turrets significantly improves defense against aerial threats. Resources scattered across the map can be mined, but they are concentrated near the center, making early tower construction challenging. Players must balance tower upgrades with resource collection to build a resilient defense. This map is ideal for defense genre enthusiasts who seek strategic depth in tower placement and stacking mechanics. Beginners should focus on understanding enemy patterns and resource management, while advanced players can experiment with maximizing stacking efficiency. As a single-player experience, it delivers intense, tension-filled gameplay. Before playing, review the tower types and stacking effects, and map out the main attack routes—especially the central path, which is critical to maintaining a strong defense.
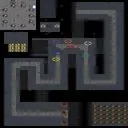
터렛 디펜스 스택 프로 2 (Turret Defense STACK PRO 2)
스타크래프트 브루드워 유즈맵 '터렛 디펜스 스택 프로 2'는 6인 협동으로 진행되는 타워 디펜스 장르의 맵이다. 우주 타일셋을 배경으로 2048x2048 크기의 넓은 전장에서 플레이어는 각자의 진영에 터렛을 건설하고 몰려오는 적 유닛 웨이브를 막아내야 한다. 내부 설명에 따르면 [Ghost]Yoon이 제작하고 Kozi가 업그레이드했으며, OTE-Fire_Dragon이 스택 시스템을 추가하고 SicKoe_dt_가 유닛 밸런스 수정과 새로운 루트를 구현한 것으로 보인다. 스택 메커니즘은 동일한 유형의 터렛을 중첩해 공격력을 극대화하는 방식으로, 자원 관리와 배치 전략에 깊이를 더한다. 64x64 타일 단위의 정교한 지형 설계와 새로운 공격 루트 추가는 매 게임마다 다른 공략을 요구하며, 난이도 조절이 가능한 트리거가 있을 것으로 추정된다. 맵 중앙에는 공통 자원 지대가 배치되어 있어 초반 확장 경쟁이 치열하며, 각 진영 입구는 좁은 초크 포인트로 설계되어 터렛 밀집 방어가 유리하다. 적 웨이브는 지상과 공중 유닛이 혼합되어 출현하므로 대공 터렛 배치도 필수적이다. 스택 시스템은 최대 3~5단계까지 중첩 가능하며, 단계별로 공격 속도와 사거리가 비약적으로 상승한다. 업그레이드 트리거는 미네랄과 가스를 소모해 터렛 공격력, 방어력, 특수 능력을 강화하는 방식이다. 새로운 루트 추가는 적 이동 경로를 분기시켜 단일 방어선으로는 막기 힘든 상황을 연출한다. 협동 플레이 시 역할 분담이 중요한데, 한 명이 자원 채취와 업그레이드를 전담하고 나머지가 터렛 건설과 수리에 집중하는 조합이 효율적이다. 맵 크기가 큰 만큼 미니맵을 활용한 전체 전황 파악이 필수이며, 후반부에는 슈퍼 유닛급 보스 웨이브가 등장해 집중 화력이 요구된다. 버전 정보는 별도로 표기되지 않았으나 내부 설명의 수정 이력을 통해 지속적인 밸런스 패치가 이루어졌음을 알 수 있다. 플레이 인원은 6명으로 고정되어 있으며, 팀 수는 1팀으로 전원 협력하는 구조로 보인다. 예상 플레이 타임은 30분 내외로, 초반 빌드 오더와 중반 업그레이드 타이밍, 후반 스택 완성도가 승패를 가른다. 입문자는 터렛 종류별 특성과 스택 효율을 익히는 데 시간이 필요하지만, 숙련자라면 최적의 루트 차단과 자원 순환으로 클리어 안정성을 높일 수 있다. 추천 대상은 타워 디펜스 고유의 빌드 최적화와 파티 플레이를 즐기는 유저이며, 플레이 전에는 스택 시스템의 중첩 제한과 유닛 상성 표기를 확인하는 것이 좋다. StarCraft Brood War UMS map 'Turret Defense STACK PRO 2' is a tower defense genre map played cooperatively by six players. Set on a space tileset across a 2048x2048 battlefield, each player builds turrets in their own base to stop incoming enemy unit waves. According to the internal description, it was created by [Ghost]Yoon, upgraded by Kozi, with stack system added by OTE-Fire_Dragon and unit fixes plus new routes implemented by SicKoe_dt_. The stack mechanic allows stacking identical turret types to maximize damage, adding depth to resource management and placement strategy. The intricate 64x64 tile terrain design and added attack routes demand different tactics each game, and difficulty-adjusting triggers are presumed to exist. A shared resource zone in the center creates early expansion competition, while narrow choke points at each base entrance favor concentrated turret defense. Enemy waves mix ground and air units, making anti-air turret placement essential. The stack system likely allows 3-5 stacking levels, with each level significantly increasing attack speed and range. Upgrade triggers consume minerals and gas to enhance turret damage, armor, and special abilities. New routes branch enemy paths, creating situations where a single defense line is insufficient. In cooperative play, role division is key: one player focusing on resource gathering and upgrades while others handle turret construction and repair is efficient. The large map size makes minimap awareness crucial, and late-game super-unit boss waves demand focused firepower. Version info is not explicitly listed, but the modification history indicates ongoing balance patches. Player count is fixed at six, with a single team structure where all cooperate. Estimated playtime is around 30 minutes, where early build orders, mid-game upgrade timing, and late-game stack completion determine victory. Beginners need time to learn turret characteristics and stack efficiency, while veterans can increase clear consistency through optimal path blocking and resource cycling. Recommended for users who enjoy tower defense build optimization and party play; before playing, check the stack system's stacking limits and unit matchup charts.
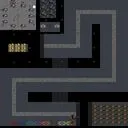
터렛 디펜스 스택 프로 (Turret Defense STACK PRO)
스타크래프트 브루드워의 디펜스 장르 유즈맵인 <Turret Defense STACK PRO>는 터렛과 스택 메커니즘을 결합한 독특한 전략성을 자랑하는 맵입니다. 맵의 중앙에는 넓은 평지가 펼쳐져 있으며, 이를 둘러싸고 있는 적의 기지나 길목에 터렛을 건설하고 방어선을 구축하는 방식으로 진행됩니다. 이미지에서 확인된 것처럼 맵 곳곳에 배치된 터렛 슬롯과 자원 수집 지역, serta 적의 웨이브가 밀려오는 루트가 체계적으로 설계되어 있어 플레이어는 공격과 방어의 밸런스를 carefully 조절해야 합니다. 특히 'STACK'이라는 요소가 추가되면서, 터렛의 중첩 배치나 자원 관리, 방어 타워의 효율적인 배치가 핵심 전략으로 부각됩니다. 이 맵은 초보자는 물론 숙련자까지도 다양한 전략을 시도해 볼 수 있도록 유도하며, 디펜스 장르의 기본 틀을 유지하면서도 새로운 메커니즘으로 차별화를 시도한 점이 돋보입니다. 플레이어는 맵의 구조를 익히는 동시에, 적의 웨이브 패턴과 터렛의 스택 효과를 활용해 최적의 방어 라인을 구축해야 합니다. 추천 대상은 디펜스 장르에 익숙한 플레이어는 물론, 새로운 전략적 도전을 원하는 유저들에게도 좋은 선택지가 될 것입니다. 단, 맵의 난이도는 비교적 높은 편이므로 초보자의 경우 사전 연습이나 튜토리얼을 통해 맵의 특성을 숙지하는 것이 중요합니다. 또한, 터렛의 배치와 스택 메커니즘을 이해하지 못하면 방어에 치명적인 실수를 범할 수 있으니, 플레이 전 반드시 맵의 구조와 주요 메커니즘을 확인해 두는 것이 좋습니다. This Brood War defense custom map, Turret Defense STACK PRO, combines turret-building mechanics with a stacking system to deliver a unique strategic challenge. The map features a central open area surrounded by enemy bases or pathways where players must strategically place turrets to establish defensive lines. As seen in the image, the map includes designated turret slots, resource collection zones, and enemy wave pathways, all designed to require careful balancing of offense and defense. The 'STACK' element adds complexity, emphasizing efficient turret stacking, resource management, and optimal tower placement. The map appeals to both beginners and experienced players by encouraging experimentation with diverse strategies while maintaining the core mechanics of the defense genre. Players must familiarize themselves with the map's layout, adapt to enemy wave patterns, and leverage turret stacking effects to build effective defenses. While the map offers a fresh take on traditional defenses, its mechanics demand prior understanding; newcomers should practice or review tutorials to grasp its nuances. Missteps in turret placement or stacking can lead to critical failures, so players are advised to study the map's structure and mechanics before diving into full matches.
터렛 디펜스 스택 프로 (Turret Defense STACK PRO)
스타크래프트 브루드워의 대표적인 컴까기(컴퓨터 상대 디펜스) 유즈맵인 《터렛 디펜스 스택 프로》는 이름 그대로 방어 타워를 차곡차곡 쌓아 적의 공격을 막아내는 전략적 재미를 극대화한 맵이다. 이 맵은 기본적인 디펜스 장르의 틀을 유지하면서도, ‘스택’이라는 독특한 시스템을 도입해 플레이어의 선택과 전략을 한층 다채롭게 만든다. 맵 중앙에 위치한 넥서스를 중심으로 다수의 입구가 배치되어 있으며, 각 입구는 방어 타워를 설치할 수 있는 공간과 자원 분배가 이루어진다. 적의 웨이브는 일정 주기마다 등장해 넥서스를 향해 진격하며, 플레이어는 충분한 타워를 건설하고 업그레이드해 이를 저지해야 한다. 스택 시스템의 특징은 특정 조건(예: 자원량, 타워 종류, 배치 위치)에 따라 타워가 ‘스택’되어 stronger한 버전으로 강화되는 점이다. 이를 통해 단순한 디펜스에서 벗어나 전략적 깊이를 더할 수 있으며, 초보자는 기본 타워로 안정적으로 방어하되, 숙련자는 스택 시스템을 활용해 효율적인 대처를 모색할 수 있다. 맵의 구조는 비교적 평이하게 설계되어 있으나, 후반부로 갈수록 적의 공격 강도가 급격히 상승하므로 자원 관리와 타워 배치의 균형을 carefully하게 맞춰야 한다. 특히 입구별로 자원이 균등하게 분배되지 않으므로, 자원 확보가 어려운 입구는 초반 방어에 집중하고, 여유 자원은 업그레이드와 스택에 투자하는 것이 핵심 포인트다. 추천 대상은 디펜스 장르에 익숙한 플레이어는 물론, 전략적 사고와Resource Management 능력을 키우고 싶은 유저들에게도 적합하다. 다만, 스택 시스템의 경우 조건과 효과가 맵 내 설명 없이 직관적이지 않으므로, 플레이 전 간단한 전략 가이드나 팁을 미리 숙지하는 것이 좋다. 맵의 볼륨은 비교적 작지만, 스택 시스템과 반복 플레이를 통해 다양한 전략을 시뮬레이션해 볼 수 있어 재플레이성이 높은 편이다. 초심자의 경우 난이도를 ‘어려움’으로 설정하고 연습 모드로 진입하는 것도 좋은 방법이다. StarCraft: Brood War’s classic computer-defense custom map, *Turret Defense Stack Pro*, lives up to its name by maximizing strategic fun through stacking defensive towers to fend off waves of enemies. While keeping the core defense-genre framework intact, the map introduces a unique “stack” system that diversifies player choices and strategies. Multiple entrances surround the Nexus at the map’s center, each offering space for tower construction and resource allocation. Enemies spawn periodically and march toward the Nexus, so players must build and upgrade enough towers to hold the line. The stack system enhances towers into stronger versions when specific conditions—such as resource thresholds, tower type, or placement—are met, adding strategic depth beyond a simple defense scenario. Beginners can secure defenses with basic towers, while experienced players can leverage the stack system for efficient counterplay. The layout is straightforward, but enemy intensity ramps up sharply in later stages, demanding careful balancing of resource management and tower placement. Since resources aren’t evenly distributed across entrances, players should prioritize early defense at resource-scarce gates while investing surplus resources into upgrades and stacking. This map suits both veterans of the defense genre and those looking to sharpen strategic thinking and resource management skills. However, the stack system’s conditions and effects aren’t intuitive without prior explanation, so reviewing a quick strategy guide or tips before playing is advisable. Though compact in scale, the map offers high replayability through its stack system and the ability to simulate various strategies across repeated plays. Beginners may find it helpful to start on “Hard” difficulty and enter practice mode to get accustomed.
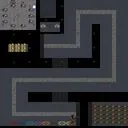
터렛 디펜스 STACK PRO Adv. (Turret Defense STACK PRO Advanced)
스타크래프트 브루드워의 대표적인 디펜스 유즈맵인 <Turret Defense STACK PRO Adv.>는 방어 구조물을 적극 활용해 끊임없이 몰려드는 적군을 막아내는 전략성이 뛰어난 맵이다. 맵은 우주 테마의 타일셋으로 구성되어 있으며, 플레이어는 제한된 자원과 업그레이드를 통해 방어 시설(주로 터렛과 포탑)을 건설하고 강화해야 한다. 중앙의 넓은 공간에서 시작하는 적군은 다양한 루트를 통해 공격해 오며, 이들을 효과적으로 저지하기 위해 터렛의 배치와 화력 분배가 핵심 포인트가 된다. 6인의 플레이어가 참여할 수 있는 이 맵은 팀 플레이보다는 개별 운영에 중점을 두고 있으며, 방어선을 구축하고 유지하는 동시에 자원을 효율적으로 관리하는 능력이 요구된다. 맵의 난이도는 맵 제작자의 추가 수정과 스택(Stack) 시스템 도입으로 인해 상당히 높아졌을 것으로 추정된다. 또한, 타워 디펜스와 달리 터렛의 중첩(Stack) 기능을 통해 방어력을 극대화할 수 있는 구조가 특징으로, 이를 활용한 전략적 플레이가 가능하다는 점에서 다른 디펜스 맵과는 차별화된 재미를 제공한다. 플레이 전에는 터렛의 배치 위치와 각 업그레이드 포인트의 효율성을 미리 숙지하는 것이 중요하다. 특히 중앙의 넓은 공간을 어떻게 방어할 것인지, 그리고 각 플레이어 간의 자원 분배를 어떻게 할 것인지에 따라 게임의 승패가 좌우될 수 있다. 또한, 맵의 우주 테마에 맞게 배경과 그래픽이 디자인되어 있어 시각적 몰입감을 높이는 요소도 특징적이다. 이 맵은 초보자보다는 중급 이상의 플레이어에게 적합하며, 방어 구조물의 배치와 화력 조절을 연습할 수 있는 좋은 기회가 된다. 또한, 팀보다는 개인 플레이에 중점을 둔 맵이기 때문에 개인의 전략적 사고와 자원 관리 능력이 중요하다. Turret Defense STACK PRO Advanced is a tower defense-style custom map in StarCraft: Brood War, featuring a space-themed tile set and a unique stacking system for turrets. Players must strategically place and upgrade defensive structures to fend off waves of enemy units approaching from multiple directions. The map emphasizes individual strategy over team coordination, requiring players to manage resources wisely while maintaining a strong defensive line. The stack system allows turrets to be stacked or combined, boosting their firepower and defensive capabilities, which sets this map apart from conventional tower defense scenarios. With support for up to six players, the game focuses on personal skill in turret placement and upgrade prioritization, making it more challenging and rewarding for intermediate to advanced players. The space-themed graphics enhance immersion, while the open central area challenges players to optimize their defensive layouts against relentless enemy assaults.
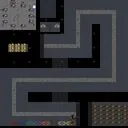
터렛 디펜스 스택 프로 (Turret Defense STACK PRO)
터렛 디펜스 스택 프로는 스타크래프트 브루드워 유즈맵 중에서도 타워 디펜스 장르에 속하는 협동형 맵이다. 우주 타일셋을 배경으로 6인 플레이가 가능하며, 파일명에 '2 man'이 명시된 점으로 보아 2인 협동을 기본으로 설계되었으나 최대 6인까지 수용하는 구조로 보인다. 핵심 메커닉은 '스택(Stack)' 시스템으로, 동일한 종류의 터렛을 중첩 배치해 공격력과 사거리를 극대화하는 전략적 선택을 요구한다. 웨이브 단위로 몰려오는 적 유닛을 막아내며 자원을 모아 터렛을 업그레이드하고, 보스급 유닛 등장 시 집중 화력을 쏟아야 하는 전형적인 디펜스 진행 방식을 따른다. 맵 크기 2048x2048의 넓은 전장은 다수의 진입로를 제공해 입구 막기식 단순 방어가 아닌, 다각도에서 접근하는 적을 커버할 터렛 배치와 자원 분배가 승패를 가른다. 제작자 [Ghost]Yoon과 Kozi, OTE-Fire_Dragon, Stephen 등이 개량에 참여한 만큼 밸런스 조정과 트리거 구성이 비교적 정교하게 다듬어져 있다. 초보자도 기본적인 터렛 조합만 익히면 무난히 클리어할 수 있으나, 고난도 웨이브에서는 유닛 상성과 스택 효율을 정확히 계산해야 하므로 숙련자도 충분히 도전적이다. 추천 대상은 타워 디펜스 입문자부터 협동 전략을 즐기는 유저까지 폭넓으며, 플레이 전에는 '스택' 개념과 터렛별 특성, 자원 순환 구조를 숙지하면 보다 원활한 진행이 가능하다. Turret Defense STACK PRO is a cooperative tower defense map for StarCraft: Brood War UMS. Set on a space tileset, it supports up to six players, though the filename '2 man' suggests a core design for two-player co-op. The central mechanic is the 'Stack' system, where stacking identical turrets amplifies damage and range, demanding strategic placement choices. Players face waves of enemies, gather resources to upgrade turrets, and must concentrate firepower when boss units appear, following classic defense progression. The expansive 2048x2048 map offers multiple entry points, preventing simple choke-point defense and requiring careful turret coverage and resource allocation across angles. Credited to creators [Ghost]Yoon, Kozi, OTE-Fire_Dragon, and Stephen, the map features refined balance and trigger work. Beginners can clear with basic turret combos, but higher waves demand precise knowledge of unit matchups and stack efficiency, providing depth for veterans. Recommended for both tower defense newcomers and co-op strategy fans; before playing, understanding the stack concept, turret traits, and resource flow will ensure smoother runs.
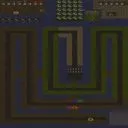
2003 터렛 디펜스 스택 (2003 Turret Defense STAAACK)
2003 터렛 디펜스 스택(2003 Turret Defense STAAACK)은 2003년에 제작된 클래식 터렛 디펜스 맵을 현대 환경에서 즐길 수 있도록 복원한 작품이다. 원작자인 CentauriBoy의 설계를 바탕으로 Fleppy가 업데이트를 맡아 호환성을 개선했으며, 'STAAACK'이라는 부제에서 알 수 있듯 터렛을 중첩 배치해 화력을 극대화하는 스택 메커니즘이 핵심이다. 사막 타일셋 위에서 96×96 타일, 3072×3072 크기의 전장이 펼쳐지며, 최대 6인이 협력해 몰려드는 적 웨이브를 막아내는 구성을 띤다. 진행 방식은 일반적인 터렛 디펜스 공식을 따른다. 플레이어는 시작 자원으로 기본 터렛을 건설하고, 적을 처치해 얻은 미네랄과 가스로 상위 유닛을 생산하거나 기존 터렛을 업그레이드한다. 이 맵의 특징은 터렛 간 시너지와 배치 밀도에 따라 화력 효율이 기하급수적으로 변한다는 점이다. 좁은 길목에 고밀도 터렛을 쌓아 올리는 '스택' 플레이가 정석으로 통하며, 웨이브 후반부로 갈수록 공중·지상 혼합 병력이 쏟아져 나와 대공·대지 밸런스를 고려한 배치가 요구된다. 트리거로 구현된 웨이브 시스템은 고전적 감성을 유지하면서도 난이도 곡선이 가파르지 않아 입문자도 부담 없이 접근할 수 있다. 협동 플레이 시 역할 분담이 자연스럽게 이뤄진다. 자원 관리를 전담하는 플레이어와 전선 배치를 맡는 플레이어가 나뉘면 효율이 오르며, 특정 웨이브에서 등장하는 보스급 유닛은 집중 포화로 제압해야 하므로 팀원 간 호흡이 승패를 가른다. 맵 곳곳에 숨겨진 보너스 구역이나 비밀 업그레이드 요소가 있어 반복 플레이 동기를 부여하며, 고전 맵 특유의 직관적인 UI와 단순한 승리 조건(모든 웨이브 클리어)은 복잡한 시스템에 지친 유저에게 쾌적한 대안이 된다. 추천 대상은 추억의 유즈맵을 찾는 올드비 유저, 터렛 디펜스 장르 입문자, 6인 협동 콘텐츠를 원하는 클랜·친구 그룹이다. 플레이 전 확인할 점은 브루드워 1.16.1 이상 버전 호환 여부와 cp949 인코딩 환경에서 한글 깨짐 없이 실행되는지 정도다. 고전 명작을 현대적으로 다듬은 만큼, 가볍게 즐기기 좋은 디펜스 맵으로 손색없다. 2003 Turret Defense STAAACK is a restored version of a classic 2003 turret defense map, updated for modern play. Based on the original design by CentauriBoy, Fleppy handled the update to improve compatibility. As the subtitle 'STAAACK' suggests, the core mechanic revolves around stacking turrets to maximize firepower. The battlefield spans 3072×3072 pixels (96×96 tiles) on a desert tileset, where up to six players cooperate to fend off incoming enemy waves. The gameplay follows the standard turret defense formula. Players spend starting resources on basic turrets, then earn minerals and gas from kills to produce advanced units or upgrade existing structures. The map's distinguishing feature is that firepower efficiency scales geometrically with turret synergy and placement density. The orthodox strategy involves 'stacking' high-density turrets at chokepoints, and later waves introduce mixed air-ground forces that demand balanced anti-air and anti-ground coverage. The trigger-based wave system retains a retro feel while maintaining an accessible difficulty curve for newcomers. In cooperative play, natural role division emerges. A player dedicated to resource management paired with another handling frontline placement increases efficiency, and boss-tier units appearing in specific waves require focused fire, making team coordination decisive. Hidden bonus zones and secret upgrades scattered across the map encourage replayability, while the classic map's intuitive UI and simple victory condition—clear all waves—offer a refreshing alternative for players fatigued by complex systems. Recommended for veterans seeking nostalgic UMS maps, newcomers to the turret defense genre, and clans or friend groups wanting six-player cooperative content. Before playing, verify compatibility with Brood War 1.16.1 or later and ensure the cp949 encoding environment runs without Korean text corruption. As a modern polish of a classic masterpiece, it stands as a solid, accessible defense map for casual enjoyment.
地圖選擇指南
태그는 맵의 핵심 특징을 빠르게 설명하지만 제작 버전마다 규칙이 다를 수 있습니다. 상세 설명에서 권장 인원, 난이도, 플레이 시간과 버전을 함께 확인한 뒤 다운로드하세요.