
zerg 스타크래프트 맵 모음
'zerg' 태그가 등록된 맵을 모았습니다. 장르 하나로 찾기 어려운 플레이 방식, 난이도와 특징을 중심으로 인기 맵과 최신 맵을 비교해 보세요.
- 등록 맵
- 7개
- 누적 다운로드
- 1
- 누적 조회
- 226
인기 맵
다운로드와 조회 반응이 높은 맵입니다.
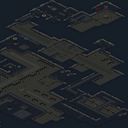
Assimilation (어시밀레이션)
스타크래프트 브루드워의 유즈맵 ‘Assimilation’을 소개한다. 이 맵은 내부 제목 그대로 Zerg 캠페인 5번째 맵으로, 플레이어는 저그의Mother Keeper 역할을 맡아 저그의 동화 능력을 활용해 적 프로토스와 테란을 흡수하는 전술을 펼치게 된다. 맵은 설원 테마의 타일셋으로 꾸며졌으며, 넓은 평지 위에 흩어진 적 건물과 유닛을 흡수하는 방식으로 진행된다. 흡수된 유닛은 플레이어의 컨트롤로 전환되어 함께 싸울 수 있으며, 이를 통해 점차 세력을 확장해나가는 것이 핵심 전략이다. 맵의 특징은 흡수 메커니즘에 있으며, 적 유닛을 일정 시간 유지하거나 특정 조건을 만족시켜야 흡수가 가능하다는 점이다. 또한, 흡수된 유닛의 특성에 따라 전투력이나 유틸리티가 달라지는 경우도 확인된다. 초반에는 제한된 자원으로 흡수 가능한 적 유닛을 신중히 선택해야 하며, 흡수된 유닛을 효율적으로 활용해 적의 공격을 방어하면서 점차 세력을 늘려나가는 것이 중요하다. 맵의 난이도는 흡수 가능한 적 유닛의 배치와 적 AI의 공격 패턴에 따라 달라지며, 흡수 메커니즘을 이해하고 전략적으로 활용할 수 있는지가 관건이다. 추천 대상은 저그 유즈맵을 люби하는 플레이어이며, 특히 Zerg의 유닛 흡수 능력을 활용한 전략 수립을 즐기는 유저에게 적합하다. 플레이 전에는 흡수 가능한 유닛의 종류와 흡수 조건을 미리 확인하고, 흡수된 유닛의 특성을 숙지하는 것이 좋다. 또한, 흡수된 유닛을 잃지 않도록 보호하는 전략도 함께 고려해야 한다. 맵의 분위기는 고전적인 저그 캠페인의 느낌이 강하게 드는 반면, 흡수 메커니즘을 통해 새로운 전략적 깊이를 제공한다는 점이 특징이다. This map, *Assimilation*, from *StarCraft: Brood War* is a custom game that closely mirrors the fifth Zerg campaign mission. Players take on the role of the Mother Keeper, using the Zerg’s assimilation ability to absorb enemy Protoss and Terran forces into their own army. Set in a snowy tile theme, the map features wide open terrain dotted with enemy structures and units that must be captured to progress. Once absorbed, these units come under the player’s control and fight alongside them, allowing the player to gradually expand their forces. The core of the strategy revolves around the map’s unique absorption mechanics, which require maintaining control of enemy units for a set duration or meeting specific conditions before they can be fully assimilated. The effectiveness of absorbed units varies depending on their type, with some providing combat power while others offer utility. Early on, players must carefully select which units to absorb based on limited resources, balancing defense against enemy attacks while steadily growing their army. The difficulty of the map fluctuates depending on the placement of absorbable units and the AI’s attack patterns, making mastery of the absorption system and its strategic applications essential. This map is ideal for players who enjoy Zerg custom maps, particularly those who appreciate strategizing around the race’s unit absorption mechanics. Before playing, it’s wise to review the types of units that can be absorbed and their conditions, as well as the traits of absorbed units. Protecting these units from loss is also a key consideration. While the atmosphere strongly evokes the classic Zerg campaign, the absorption mechanics introduce fresh strategic depth.
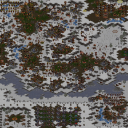
Arctic Special Forces SE³
Arctic Special Forces SE³는 스타크래프트 브루드워용 UMS 유즈맵으로, 3072×3072 해상도의 플랫폼 타일셋을 기반으로 한 대규모 전투 지형을 제공합니다. 맵은 해안가와 빙하 지역을 연결하는 여러 경로와 고지대, 숨겨진 동굴이 배치돼 있어 플레이어는 정찰과 우회 전략을 동시에 고민해야 합니다. 주요 목표는 Zerg의 침공을 방어하면서 특수부대 유닛을 활용해 전방에서 교전하는 것으로, 전투는 주로 근접 전투와 유닛 스킬 활용에 초점이 맞춰져 있습니다. 초반에는 자원 채취와 방어 거점 구축이 중요하며, 중반 이후에는 적의 대규모 파동을 차단하기 위한 방어 라인을 재배치해야 합니다. 맵은 5인 플레이를 기본으로 설계돼 있어 소규모 팀전이나 1대4 상황에서도 균형을 유지하도록 설계된 흔적이 보입니다. 추천 대상은 전략적 판단과 미세 조정이 필요한 플레이어이며, 특히 특수부대 유닛 운용에 익숙한 유저에게 적합합니다. 플레이 전에 확인해야 할 포인트는 빙하 지역의 이동 속도 감소 효과와 해안가에 배치된 숨겨진 포탑 위치이며, 이들을 사전에 파악하면 전투 흐름을 크게 유리하게 끌고 갈 수 있습니다. Arctic Special Forces SE³ is a UMS custom map for StarCraft: Brood War, featuring a large 3072×3072 platform tileset battlefield. The map connects coastal and glacier areas with multiple routes, high ground, and hidden caves, requiring players to balance scouting and flanking strategies. The main objective is to repel Zerg invasions while using elite special forces units for frontline engagements, focusing on close‑quarters combat and unit abilities. Early game emphasizes resource gathering and establishing defensive positions; mid‑game shifts to repositioning defense lines to block massive enemy waves. Designed for 5 players, the map maintains balance in small team or 1‑vs‑4 scenarios. It is recommended for players who enjoy strategic decision‑making and precise unit control, especially those familiar with special forces units. Before playing, note the movement‑slow effect in glacier zones and the concealed turret spots along the coast, as identifying these beforehand can greatly sway the battle in your favor.
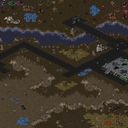
Purificación
이 맵은 스페인어로 된 튜토리얼 맵으로, ‘Escuela de Batalla’ 모드의 초보자를 위한 교육 단계로 설계되었습니다. 내부 제목과 설명에서 알 수 있듯이, 플레이어는 인간 마린 부대를 조종해 끔찍한 저그의 침공으로부터 동료를 구출해야 합니다. 맵 구조는 비교적 제한된 영역에 여러 방어 지점이 배치되어 있어, 마린 유닛을 적절히 배치하고 방어 타워와 특수 능력을 활용해 저그 유닛의 파동을 차단하는 방식으로 진행됩니다. 초반에는 기본적인 유닛 생산과 이동, 공격 명령을 익히게 되며, 점차 저그의 공격 파동이 강해지면서 유닛 관리와 자원 배분의 중요성이 부각됩니다. 시야가 제한된 구역과 좁은 통로가 존재해, 적의 급습을 예측하고 사전 대비를 해야 하는 점이 특징이며, 이는 초보자에게 전략적 사고를 키우는 좋은 연습이 됩니다. 플레이 경험은 서서히 난이도가 상승하면서도, 각 단계마다 명확한 목표와 피드백을 제공해 학습 곡선을 부드럽게 유지합니다. 따라서 스타크래프트 브루드워의 기본 전투 메커니즘을 익히고자 하는 초보자나, 저그에 대한 방어 전술을 연습하고 싶은 유저에게 적합합니다. 플레이 전에는 맵 내의 방어 지점과 자원 위치를 미리 확인하고, 마린 유닛의 체력과 스킬 쿨타임을 관리할 준비를 하는 것이 좋습니다. This map is a Spanish-language tutorial designed for the ‘Escuela de Batalla’ mode, serving as an introductory training stage for beginners. According to its internal title and description, the player controls a Marine squad tasked with rescuing comrades from the onslaught of repulsive Zerg. The layout features a confined area with several defensive positions where Marines must be strategically placed, employing basic structures and special abilities to halt waves of Zerg units. Early sections teach fundamental unit production, movement, and attack commands, while later waves increase the Zerg pressure, emphasizing unit management and resource allocation. Limited vision zones and narrow passages require anticipating Zerg rushes and preparing defenses in advance, which provides valuable strategic practice for newcomers. The gameplay experience gradually escalates in difficulty but offers clear objectives and feedback at each step, ensuring a smooth learning curve. Consequently, this map is well-suited for StarCraft: Brood War beginners looking to master basic combat mechanics or players wishing to rehearse Zerg defense tactics. Before playing, it is advisable to familiarize yourself with the defensive positions and resource spots on the map, and be ready to monitor Marine health and skill cooldowns.
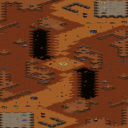
Chain of Command: Zerg
체인 오브 커맨드: Zerg는 8인용 UMS 맵으로, 주로 저그 플레이어가 상대방의 베이스를 빠르게 침공해 점령을 목표로 하는 전형적인 컴까기형 전투를 제공한다. 맵은 2048×3072 해상도에 64×96 타일로 구성돼 넓은 전장과 복잡한 지형을 활용해 초반 스카웃과 정찰이 중요하다. 시작 지점은 서로 대칭 배치돼 있어 초기 자원 확보와 유닛 생산 타이밍이 승패를 가른다. 특히 황혼 타일셋을 사용해 어두운 색조가 시야 확보를 어렵게 만들며, 적의 움직임을 예측해 방어 건물을 배치하거나 빠른 공격 루트를 찾아야 한다. 전투는 초반부터 빠르게 전개되며, 자원 채취와 유닛 조합(드론·히드라·루크) 선택이 전략적 깊이를 더한다. 플레이 전에는 적군의 입구를 차단할 방어 라인을 미리 계획하고, 스플릿 타워나 미네랄 클러스터를 활용해 초반 압박을 견뎌내는 것이 좋다. 초보자보다는 기본 유닛 운용에 익숙한 플레이어에게 적합하지만, 빠른 의사결정과 공격‑방어 전환을 연습하고 싶은 이들에게도 도전 가치가 있다. Chain of Command: Zerg is an 8‑player UMS map that mainly offers a rush‑style combat where Zerg players aim to quickly invade and claim the opponent’s base. The map spans 2048×3072 pixels with 64×96 tiles, providing a large battlefield and intricate terrain that makes early scouting essential. Starting locations are symmetrically placed, so the timing of resource gathering and unit production decides the outcome. Using the Twilight tileset, the dark palette hinders line‑of‑sight, requiring players to predict enemy movement, set up defensive structures, or find fast attack routes. Battles erupt early, and choices of resource harvesting and unit composition (Drones, Hydras, Lurkers) add strategic depth. Before playing, it’s advisable to plan defensive lines to block enemy entry and utilize split towers or mineral clusters to withstand early pressure. The map suits players comfortable with basic unit control rather than complete beginners, yet it offers a solid challenge for anyone looking to practice rapid decision‑making and attack‑defense transitions.
Mission 2a: Playing with Fire
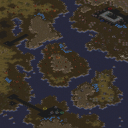
이번 리뷰는 스타크래프트 브루드워의 캠페인 맵 “Mission 2a: Playing with Fire”(한글 제목: 미션 2a: 불장난)를 중심으로 진행됩니다. 맵은 4096×4096 타일 기반 황무지 타일셋을 사용해 넓은 전장을 제공하며, 두 명의 플레이어가 각각 프로토스와 저그 진영을 선택해 진행하는 협동형 스토리 미션입니다. 내부 설명에 따르면 베테랑 레벨 캠페인으로, 스케자르가 제어한 저그 세레브레이트를 파괴해야 하며, 프로토스는 별도의 목표를 가지고 있습니다. 따라서 전투는 주된 목표를 향한 직접적인 공격과 동시에 상대 진영의 방어를 뚫는 형태로 전개됩니다. 플레이 전에는 양 진영의 유닛 조합과 스킬 쿨다운을 확인하고, 특히 저그 세레브레이트가 등장하는 구역은 시야 확보와 빠른 공격이 핵심 포인트입니다. 맵 구조는 여러 개의 고지대와 좁은 통로가 섞여 있어 위치 선점과 기동성이 승패를 좌우합니다. 초반에는 자원을 확보하고 방어 라인을 구축한 뒤, 중반에 세레브레이트가 있는 중심 지역으로 진입해 빠르게 전투를 마무리하는 것이 효율적입니다. 협동 플레이를 즐기는 유저와 캠페인 스토리를 체험하고 싶은 플레이어에게 적합하며, 양쪽 진영 모두 일정 수준 이상의 마이크로 관리가 요구됩니다. This review focuses on the StarCraft: Brood War campaign map “Mission 2a: Playing with Fire” (Korean title: 미션 2a: 불장난). The map uses a 4096×4096 tile‑based Wasteland tileset, offering a large battlefield for two players who each choose either the Protoss or Zerg side in a cooperative story mission. According to the internal description, it is a veteran‑level campaign where Schezar has taken control of a Zerg cerebrate that must be destroyed, while the Protoss have a separate objective. Consequently, combat consists of direct assaults toward the main goal combined with breaking through the opponent’s defenses. Before playing, check each faction’s unit composition and skill cooldowns, especially securing vision and rapid attacks in the area where the Zerg cerebrate appears. The map layout mixes high ground and narrow passages, making map control and mobility decisive. Early game should focus on gathering resources and establishing defenses, then in mid‑game push toward the central area containing the cerebrate for a swift conclusion. It suits players who enjoy cooperative play and want to experience campaign story content, though both sides require a moderate level of micro‑management.
개인러커디펜Ver 1.8
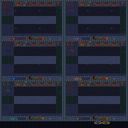
‘개인러커디펜Ver 1.8’이라는 제목에서 느껴지듯, 이 맵은 스타크래프트 브루드워의 개인 유즈맵으로, 러커를 중심으로 한 디펜스 형식을 채택하고 있다. 맵의 전체적인 구조는 가로로 긴 2048×3072 해상도의 가로형 디자인으로, 중앙에 위치한 방어 지점을 중심으로 러커와 저글링이 끊임없이 몰려오는 적군을 상대한다. 맵 상단과 하단에는 각 플레이어의 본진이 배치되어 있으며, 러커와 저글링이 spawn되는 지점이 맵 외곽에 배치되어 있는 것으로 보인다. 맵의 타일셋은 화산 지형을 사용해 독특한 분위기를 연출하며, 플레이어는 중앙 방어선을 지키며 자원을 모아 업그레이드와 병력 생산을 병행해야 한다. 러커의 사정거리와 스플래시 대미지가 주요 전략 포인트로 작용할 것으로 추정되며, 방어 건물의 배치와 러커의 위치 선정이 승패를 좌우할 가능성이 크다. 초보자도 쉽게 접근할 수 있는 구조이지만, 러커의 특성을 제대로 이해하지 못하면 방어선이 쉽게 무너질 수 있어 난이도는 보통 수준으로 예상된다. 또한, 맵의 가로형 디자인 덕분에 플레이어 간 간섭이 적고 각자의 플레이 스타일에 따라 전략을 펼칠 수 있는 공간이 넓다는 장점이 있다. 개인전인 만큼 1대1 또는 2~3인 정도의 소규모 전투가 주가 될 것으로 보이며, 러커와 저글링의 물량 공세에 대응하며 자원을 효율적으로 관리하는 것이 핵심이다. 특히, 러커의 스플래시가 건물에 미치는 영향을 고려한 방어 건물의 배치와 업그레이드 타이밍이 승리의 열쇠가 될 것이다. 이 맵을 즐기기 위해서는 러커의 특성과 스플래시 대미지에 대한 이해가 필수적이며, 자원 관리와 병력 생산의 균형이 무엇보다 중요하다. 또한, 맵의 가로형 디자인 덕분에 시야가 넓어 적의 움직임을 미리 예측할 수 있는 장점이 있지만, 그만큼 넓은 공간을 효율적으로 활용해야 한다는 점도 염두에 두어야 한다. 개인 러커 디펜스라는 장르의 특성상, 러커의 물량 공세에 대처하는 재미와 긴장감이 주된 매력 포인트로 작용할 것이며, 특히 러커의 스플래시 대미지를 활용한 전략적 플레이가 가능하다는 점이 이 맵의 특징이다. 플레이 전에는 러커의 특성과 스플래시 대미지에 대한 기본적인 이해를 갖추는 것이 좋으며, 방어 건물의 배치와 업그레이드 타이밍을 carefully 계획해야 한다. 또한, 자원의 효율적인 관리와 병력 생산의 균형을 맞추는 연습을 통해 보다 안정적인 방어선을 구축할 수 있을 것이다. 이 맵은 러커와 저글링의 물량 공세를 방어하는 재미와 전략적 깊이를 동시에 제공하는 excellent한 개인 디펜스 유즈맵으로, 스타크래프트의 classic한 유즈맵 장르를 좋아하는 플레이어라면 반드시 한번 시도해볼 만한 맵이다. This map, titled ‘개인러커디펜Ver 1.8’, is a personal UMS (user-made scenario) in StarCraft: Brood War, designed around a defense-focused gameplay centered on the Zerg Lurker. The map features a horizontally elongated 2048×3072 resolution with a volcanic tileset, creating a unique atmosphere. Players defend a central point from waves of incoming Lurkers and Zerglings spawned from outer edges of the map. The horizontal layout minimizes player interference, allowing for personalized strategies while maintaining focus on core mechanics like resource management, unit production, and defense tower positioning. The key challenge lies in understanding the Lurker’s splash damage and timing upgrades to maximize efficiency. The map’s broad sightlines aid in early threat detection, but players must strategically place defenses to counter persistent waves. The personal nature of the map suggests 1v1 or small-scale battles (2-3 players), emphasizing balanced resource allocation and strategic Lurker utilization. Before playing, it’s recommended to familiarize oneself with the Lurker’s splash mechanics and plan defense layouts carefully. The map’s appeal lies in its blend of strategic depth and the classic appeal of defending against overwhelming Zerg forces, making it a must-try for fans of StarCraft defense UMS maps.

총총지전 (Chong Chong Zhi Zhan)
Chong Chong Zhi Zhan은 7K Zerg vs Zerg 전투를 중심으로 설계된 UMS(유즈맵) 형태의 8인 전투 맵이다. 맵 전체가 사막 타일셋으로 꾸며져 있으며, 1024×1024 크기의 대형 전장이 플레이어에게 충분한 이동 공간을 제공한다. 시작 지점은 맵 네 모서리에 배치돼 있어 각 플레이어가 대칭적인 위치에서 전투를 시작한다. 자원 배치는 중앙과 각 코너에 고르게 배치되어 있어 초반 확장과 방어 구축이 균형을 이루도록 설계되었다. 주요 지형은 넓은 평지와 몇 개의 작은 고지대로 구성돼 있어 Zerg 유닛의 이동과 스플리팅 전술을 활용하기에 적합하다. 특히 고지대에서는 레이더 스캔과 공중 유닛을 이용한 정찰이 효과적이며, 평지에서는 대규모 군단을 빠르게 집결시킬 수 있다. 맵 진행 방식은 전형적인 멜리 전투와 동일하게, 상대를 전멸시키는 것이 승리 조건이다. 따라서 초반 자원 확보와 빠른 군단 생산이 핵심이며, 중반 이후에는 상대의 군단을 견제하고 교전 타이밍을 조절하는 것이 승패를 좌우한다. 플레이 경험은 빠른 템포와 지속적인 교전이 특징이며, Zerg 플레이어라면 라인 관리와 군단 분산·집결 전술을 연습하기에 좋은 연습용 맵이다. 추천 대상은 1대1부터 8대8까지 다양한 인원 구성이 가능한 멜리 플레이어와, Zerg 전술을 연마하고자 하는 초중급 유저이다. 플레이 전 확인할 포인트는 자원 배치와 고지대 위치를 파악해 초기 정찰 루트를 설정하고, 스플리팅 전술을 활용할 수 있는 지형을 미리 체크하는 것이다. Chong Chong Zhi Zhan is an 8-player UMS map built around a 7K Zerg vs Zerg showdown. The map uses a desert tileset and spans 1024 × 1024, offering ample space for movement and strategic positioning. Starting locations are placed at the four corners, giving each player a symmetric launch point. Resources are distributed evenly between the center and each corner, allowing balanced early expansion and base building. The terrain consists mainly of wide plains with a few small hills, which suit Zerg’s mobility and splitting tactics; hills are ideal for radar scans and air unit reconnaissance, while plains enable rapid massing of armies. Victory is achieved by eliminating all opponents, following the classic melee format, so early resource control and swift army production are essential, and mid‑game timing of engagements becomes decisive. The gameplay feels fast‑paced with constant skirmishes, making it an excellent practice ground for line management, army dispersion, and regrouping. It is recommended for players ranging from 1v1 to 8v8 who enjoy melee combat and for intermediate Zerg users looking to hone their tactics. Before starting, players should note the resource layout and hill positions, plan early scouting routes, and identify terrain that facilitates effective splitting.
최근 등록된 맵
새로 추가된 파일과 버전을 확인하세요.
총총지전 (Chong Chong Zhi Zhan)
Chong Chong Zhi Zhan은 7K Zerg vs Zerg 전투를 중심으로 설계된 UMS(유즈맵) 형태의 8인 전투 맵이다. 맵 전체가 사막 타일셋으로 꾸며져 있으며, 1024×1024 크기의 대형 전장이 플레이어에게 충분한 이동 공간을 제공한다. 시작 지점은 맵 네 모서리에 배치돼 있어 각 플레이어가 대칭적인 위치에서 전투를 시작한다. 자원 배치는 중앙과 각 코너에 고르게 배치되어 있어 초반 확장과 방어 구축이 균형을 이루도록 설계되었다. 주요 지형은 넓은 평지와 몇 개의 작은 고지대로 구성돼 있어 Zerg 유닛의 이동과 스플리팅 전술을 활용하기에 적합하다. 특히 고지대에서는 레이더 스캔과 공중 유닛을 이용한 정찰이 효과적이며, 평지에서는 대규모 군단을 빠르게 집결시킬 수 있다. 맵 진행 방식은 전형적인 멜리 전투와 동일하게, 상대를 전멸시키는 것이 승리 조건이다. 따라서 초반 자원 확보와 빠른 군단 생산이 핵심이며, 중반 이후에는 상대의 군단을 견제하고 교전 타이밍을 조절하는 것이 승패를 좌우한다. 플레이 경험은 빠른 템포와 지속적인 교전이 특징이며, Zerg 플레이어라면 라인 관리와 군단 분산·집결 전술을 연습하기에 좋은 연습용 맵이다. 추천 대상은 1대1부터 8대8까지 다양한 인원 구성이 가능한 멜리 플레이어와, Zerg 전술을 연마하고자 하는 초중급 유저이다. 플레이 전 확인할 포인트는 자원 배치와 고지대 위치를 파악해 초기 정찰 루트를 설정하고, 스플리팅 전술을 활용할 수 있는 지형을 미리 체크하는 것이다. Chong Chong Zhi Zhan is an 8-player UMS map built around a 7K Zerg vs Zerg showdown. The map uses a desert tileset and spans 1024 × 1024, offering ample space for movement and strategic positioning. Starting locations are placed at the four corners, giving each player a symmetric launch point. Resources are distributed evenly between the center and each corner, allowing balanced early expansion and base building. The terrain consists mainly of wide plains with a few small hills, which suit Zerg’s mobility and splitting tactics; hills are ideal for radar scans and air unit reconnaissance, while plains enable rapid massing of armies. Victory is achieved by eliminating all opponents, following the classic melee format, so early resource control and swift army production are essential, and mid‑game timing of engagements becomes decisive. The gameplay feels fast‑paced with constant skirmishes, making it an excellent practice ground for line management, army dispersion, and regrouping. It is recommended for players ranging from 1v1 to 8v8 who enjoy melee combat and for intermediate Zerg users looking to hone their tactics. Before starting, players should note the resource layout and hill positions, plan early scouting routes, and identify terrain that facilitates effective splitting.
Assimilation (어시밀레이션)
스타크래프트 브루드워의 유즈맵 ‘Assimilation’을 소개한다. 이 맵은 내부 제목 그대로 Zerg 캠페인 5번째 맵으로, 플레이어는 저그의Mother Keeper 역할을 맡아 저그의 동화 능력을 활용해 적 프로토스와 테란을 흡수하는 전술을 펼치게 된다. 맵은 설원 테마의 타일셋으로 꾸며졌으며, 넓은 평지 위에 흩어진 적 건물과 유닛을 흡수하는 방식으로 진행된다. 흡수된 유닛은 플레이어의 컨트롤로 전환되어 함께 싸울 수 있으며, 이를 통해 점차 세력을 확장해나가는 것이 핵심 전략이다. 맵의 특징은 흡수 메커니즘에 있으며, 적 유닛을 일정 시간 유지하거나 특정 조건을 만족시켜야 흡수가 가능하다는 점이다. 또한, 흡수된 유닛의 특성에 따라 전투력이나 유틸리티가 달라지는 경우도 확인된다. 초반에는 제한된 자원으로 흡수 가능한 적 유닛을 신중히 선택해야 하며, 흡수된 유닛을 효율적으로 활용해 적의 공격을 방어하면서 점차 세력을 늘려나가는 것이 중요하다. 맵의 난이도는 흡수 가능한 적 유닛의 배치와 적 AI의 공격 패턴에 따라 달라지며, 흡수 메커니즘을 이해하고 전략적으로 활용할 수 있는지가 관건이다. 추천 대상은 저그 유즈맵을 люби하는 플레이어이며, 특히 Zerg의 유닛 흡수 능력을 활용한 전략 수립을 즐기는 유저에게 적합하다. 플레이 전에는 흡수 가능한 유닛의 종류와 흡수 조건을 미리 확인하고, 흡수된 유닛의 특성을 숙지하는 것이 좋다. 또한, 흡수된 유닛을 잃지 않도록 보호하는 전략도 함께 고려해야 한다. 맵의 분위기는 고전적인 저그 캠페인의 느낌이 강하게 드는 반면, 흡수 메커니즘을 통해 새로운 전략적 깊이를 제공한다는 점이 특징이다. This map, *Assimilation*, from *StarCraft: Brood War* is a custom game that closely mirrors the fifth Zerg campaign mission. Players take on the role of the Mother Keeper, using the Zerg’s assimilation ability to absorb enemy Protoss and Terran forces into their own army. Set in a snowy tile theme, the map features wide open terrain dotted with enemy structures and units that must be captured to progress. Once absorbed, these units come under the player’s control and fight alongside them, allowing the player to gradually expand their forces. The core of the strategy revolves around the map’s unique absorption mechanics, which require maintaining control of enemy units for a set duration or meeting specific conditions before they can be fully assimilated. The effectiveness of absorbed units varies depending on their type, with some providing combat power while others offer utility. Early on, players must carefully select which units to absorb based on limited resources, balancing defense against enemy attacks while steadily growing their army. The difficulty of the map fluctuates depending on the placement of absorbable units and the AI’s attack patterns, making mastery of the absorption system and its strategic applications essential. This map is ideal for players who enjoy Zerg custom maps, particularly those who appreciate strategizing around the race’s unit absorption mechanics. Before playing, it’s wise to review the types of units that can be absorbed and their conditions, as well as the traits of absorbed units. Protecting these units from loss is also a key consideration. While the atmosphere strongly evokes the classic Zerg campaign, the absorption mechanics introduce fresh strategic depth.
Purificación
이 맵은 스페인어로 된 튜토리얼 맵으로, ‘Escuela de Batalla’ 모드의 초보자를 위한 교육 단계로 설계되었습니다. 내부 제목과 설명에서 알 수 있듯이, 플레이어는 인간 마린 부대를 조종해 끔찍한 저그의 침공으로부터 동료를 구출해야 합니다. 맵 구조는 비교적 제한된 영역에 여러 방어 지점이 배치되어 있어, 마린 유닛을 적절히 배치하고 방어 타워와 특수 능력을 활용해 저그 유닛의 파동을 차단하는 방식으로 진행됩니다. 초반에는 기본적인 유닛 생산과 이동, 공격 명령을 익히게 되며, 점차 저그의 공격 파동이 강해지면서 유닛 관리와 자원 배분의 중요성이 부각됩니다. 시야가 제한된 구역과 좁은 통로가 존재해, 적의 급습을 예측하고 사전 대비를 해야 하는 점이 특징이며, 이는 초보자에게 전략적 사고를 키우는 좋은 연습이 됩니다. 플레이 경험은 서서히 난이도가 상승하면서도, 각 단계마다 명확한 목표와 피드백을 제공해 학습 곡선을 부드럽게 유지합니다. 따라서 스타크래프트 브루드워의 기본 전투 메커니즘을 익히고자 하는 초보자나, 저그에 대한 방어 전술을 연습하고 싶은 유저에게 적합합니다. 플레이 전에는 맵 내의 방어 지점과 자원 위치를 미리 확인하고, 마린 유닛의 체력과 스킬 쿨타임을 관리할 준비를 하는 것이 좋습니다. This map is a Spanish-language tutorial designed for the ‘Escuela de Batalla’ mode, serving as an introductory training stage for beginners. According to its internal title and description, the player controls a Marine squad tasked with rescuing comrades from the onslaught of repulsive Zerg. The layout features a confined area with several defensive positions where Marines must be strategically placed, employing basic structures and special abilities to halt waves of Zerg units. Early sections teach fundamental unit production, movement, and attack commands, while later waves increase the Zerg pressure, emphasizing unit management and resource allocation. Limited vision zones and narrow passages require anticipating Zerg rushes and preparing defenses in advance, which provides valuable strategic practice for newcomers. The gameplay experience gradually escalates in difficulty but offers clear objectives and feedback at each step, ensuring a smooth learning curve. Consequently, this map is well-suited for StarCraft: Brood War beginners looking to master basic combat mechanics or players wishing to rehearse Zerg defense tactics. Before playing, it is advisable to familiarize yourself with the defensive positions and resource spots on the map, and be ready to monitor Marine health and skill cooldowns.
개인러커디펜Ver 1.8
‘개인러커디펜Ver 1.8’이라는 제목에서 느껴지듯, 이 맵은 스타크래프트 브루드워의 개인 유즈맵으로, 러커를 중심으로 한 디펜스 형식을 채택하고 있다. 맵의 전체적인 구조는 가로로 긴 2048×3072 해상도의 가로형 디자인으로, 중앙에 위치한 방어 지점을 중심으로 러커와 저글링이 끊임없이 몰려오는 적군을 상대한다. 맵 상단과 하단에는 각 플레이어의 본진이 배치되어 있으며, 러커와 저글링이 spawn되는 지점이 맵 외곽에 배치되어 있는 것으로 보인다. 맵의 타일셋은 화산 지형을 사용해 독특한 분위기를 연출하며, 플레이어는 중앙 방어선을 지키며 자원을 모아 업그레이드와 병력 생산을 병행해야 한다. 러커의 사정거리와 스플래시 대미지가 주요 전략 포인트로 작용할 것으로 추정되며, 방어 건물의 배치와 러커의 위치 선정이 승패를 좌우할 가능성이 크다. 초보자도 쉽게 접근할 수 있는 구조이지만, 러커의 특성을 제대로 이해하지 못하면 방어선이 쉽게 무너질 수 있어 난이도는 보통 수준으로 예상된다. 또한, 맵의 가로형 디자인 덕분에 플레이어 간 간섭이 적고 각자의 플레이 스타일에 따라 전략을 펼칠 수 있는 공간이 넓다는 장점이 있다. 개인전인 만큼 1대1 또는 2~3인 정도의 소규모 전투가 주가 될 것으로 보이며, 러커와 저글링의 물량 공세에 대응하며 자원을 효율적으로 관리하는 것이 핵심이다. 특히, 러커의 스플래시가 건물에 미치는 영향을 고려한 방어 건물의 배치와 업그레이드 타이밍이 승리의 열쇠가 될 것이다. 이 맵을 즐기기 위해서는 러커의 특성과 스플래시 대미지에 대한 이해가 필수적이며, 자원 관리와 병력 생산의 균형이 무엇보다 중요하다. 또한, 맵의 가로형 디자인 덕분에 시야가 넓어 적의 움직임을 미리 예측할 수 있는 장점이 있지만, 그만큼 넓은 공간을 효율적으로 활용해야 한다는 점도 염두에 두어야 한다. 개인 러커 디펜스라는 장르의 특성상, 러커의 물량 공세에 대처하는 재미와 긴장감이 주된 매력 포인트로 작용할 것이며, 특히 러커의 스플래시 대미지를 활용한 전략적 플레이가 가능하다는 점이 이 맵의 특징이다. 플레이 전에는 러커의 특성과 스플래시 대미지에 대한 기본적인 이해를 갖추는 것이 좋으며, 방어 건물의 배치와 업그레이드 타이밍을 carefully 계획해야 한다. 또한, 자원의 효율적인 관리와 병력 생산의 균형을 맞추는 연습을 통해 보다 안정적인 방어선을 구축할 수 있을 것이다. 이 맵은 러커와 저글링의 물량 공세를 방어하는 재미와 전략적 깊이를 동시에 제공하는 excellent한 개인 디펜스 유즈맵으로, 스타크래프트의 classic한 유즈맵 장르를 좋아하는 플레이어라면 반드시 한번 시도해볼 만한 맵이다. This map, titled ‘개인러커디펜Ver 1.8’, is a personal UMS (user-made scenario) in StarCraft: Brood War, designed around a defense-focused gameplay centered on the Zerg Lurker. The map features a horizontally elongated 2048×3072 resolution with a volcanic tileset, creating a unique atmosphere. Players defend a central point from waves of incoming Lurkers and Zerglings spawned from outer edges of the map. The horizontal layout minimizes player interference, allowing for personalized strategies while maintaining focus on core mechanics like resource management, unit production, and defense tower positioning. The key challenge lies in understanding the Lurker’s splash damage and timing upgrades to maximize efficiency. The map’s broad sightlines aid in early threat detection, but players must strategically place defenses to counter persistent waves. The personal nature of the map suggests 1v1 or small-scale battles (2-3 players), emphasizing balanced resource allocation and strategic Lurker utilization. Before playing, it’s recommended to familiarize oneself with the Lurker’s splash mechanics and plan defense layouts carefully. The map’s appeal lies in its blend of strategic depth and the classic appeal of defending against overwhelming Zerg forces, making it a must-try for fans of StarCraft defense UMS maps.
Chain of Command: Zerg
체인 오브 커맨드: Zerg는 8인용 UMS 맵으로, 주로 저그 플레이어가 상대방의 베이스를 빠르게 침공해 점령을 목표로 하는 전형적인 컴까기형 전투를 제공한다. 맵은 2048×3072 해상도에 64×96 타일로 구성돼 넓은 전장과 복잡한 지형을 활용해 초반 스카웃과 정찰이 중요하다. 시작 지점은 서로 대칭 배치돼 있어 초기 자원 확보와 유닛 생산 타이밍이 승패를 가른다. 특히 황혼 타일셋을 사용해 어두운 색조가 시야 확보를 어렵게 만들며, 적의 움직임을 예측해 방어 건물을 배치하거나 빠른 공격 루트를 찾아야 한다. 전투는 초반부터 빠르게 전개되며, 자원 채취와 유닛 조합(드론·히드라·루크) 선택이 전략적 깊이를 더한다. 플레이 전에는 적군의 입구를 차단할 방어 라인을 미리 계획하고, 스플릿 타워나 미네랄 클러스터를 활용해 초반 압박을 견뎌내는 것이 좋다. 초보자보다는 기본 유닛 운용에 익숙한 플레이어에게 적합하지만, 빠른 의사결정과 공격‑방어 전환을 연습하고 싶은 이들에게도 도전 가치가 있다. Chain of Command: Zerg is an 8‑player UMS map that mainly offers a rush‑style combat where Zerg players aim to quickly invade and claim the opponent’s base. The map spans 2048×3072 pixels with 64×96 tiles, providing a large battlefield and intricate terrain that makes early scouting essential. Starting locations are symmetrically placed, so the timing of resource gathering and unit production decides the outcome. Using the Twilight tileset, the dark palette hinders line‑of‑sight, requiring players to predict enemy movement, set up defensive structures, or find fast attack routes. Battles erupt early, and choices of resource harvesting and unit composition (Drones, Hydras, Lurkers) add strategic depth. Before playing, it’s advisable to plan defensive lines to block enemy entry and utilize split towers or mineral clusters to withstand early pressure. The map suits players comfortable with basic unit control rather than complete beginners, yet it offers a solid challenge for anyone looking to practice rapid decision‑making and attack‑defense transitions.
Arctic Special Forces SE³
Arctic Special Forces SE³는 스타크래프트 브루드워용 UMS 유즈맵으로, 3072×3072 해상도의 플랫폼 타일셋을 기반으로 한 대규모 전투 지형을 제공합니다. 맵은 해안가와 빙하 지역을 연결하는 여러 경로와 고지대, 숨겨진 동굴이 배치돼 있어 플레이어는 정찰과 우회 전략을 동시에 고민해야 합니다. 주요 목표는 Zerg의 침공을 방어하면서 특수부대 유닛을 활용해 전방에서 교전하는 것으로, 전투는 주로 근접 전투와 유닛 스킬 활용에 초점이 맞춰져 있습니다. 초반에는 자원 채취와 방어 거점 구축이 중요하며, 중반 이후에는 적의 대규모 파동을 차단하기 위한 방어 라인을 재배치해야 합니다. 맵은 5인 플레이를 기본으로 설계돼 있어 소규모 팀전이나 1대4 상황에서도 균형을 유지하도록 설계된 흔적이 보입니다. 추천 대상은 전략적 판단과 미세 조정이 필요한 플레이어이며, 특히 특수부대 유닛 운용에 익숙한 유저에게 적합합니다. 플레이 전에 확인해야 할 포인트는 빙하 지역의 이동 속도 감소 효과와 해안가에 배치된 숨겨진 포탑 위치이며, 이들을 사전에 파악하면 전투 흐름을 크게 유리하게 끌고 갈 수 있습니다. Arctic Special Forces SE³ is a UMS custom map for StarCraft: Brood War, featuring a large 3072×3072 platform tileset battlefield. The map connects coastal and glacier areas with multiple routes, high ground, and hidden caves, requiring players to balance scouting and flanking strategies. The main objective is to repel Zerg invasions while using elite special forces units for frontline engagements, focusing on close‑quarters combat and unit abilities. Early game emphasizes resource gathering and establishing defensive positions; mid‑game shifts to repositioning defense lines to block massive enemy waves. Designed for 5 players, the map maintains balance in small team or 1‑vs‑4 scenarios. It is recommended for players who enjoy strategic decision‑making and precise unit control, especially those familiar with special forces units. Before playing, note the movement‑slow effect in glacier zones and the concealed turret spots along the coast, as identifying these beforehand can greatly sway the battle in your favor.
Mission 2a: Playing with Fire
이번 리뷰는 스타크래프트 브루드워의 캠페인 맵 “Mission 2a: Playing with Fire”(한글 제목: 미션 2a: 불장난)를 중심으로 진행됩니다. 맵은 4096×4096 타일 기반 황무지 타일셋을 사용해 넓은 전장을 제공하며, 두 명의 플레이어가 각각 프로토스와 저그 진영을 선택해 진행하는 협동형 스토리 미션입니다. 내부 설명에 따르면 베테랑 레벨 캠페인으로, 스케자르가 제어한 저그 세레브레이트를 파괴해야 하며, 프로토스는 별도의 목표를 가지고 있습니다. 따라서 전투는 주된 목표를 향한 직접적인 공격과 동시에 상대 진영의 방어를 뚫는 형태로 전개됩니다. 플레이 전에는 양 진영의 유닛 조합과 스킬 쿨다운을 확인하고, 특히 저그 세레브레이트가 등장하는 구역은 시야 확보와 빠른 공격이 핵심 포인트입니다. 맵 구조는 여러 개의 고지대와 좁은 통로가 섞여 있어 위치 선점과 기동성이 승패를 좌우합니다. 초반에는 자원을 확보하고 방어 라인을 구축한 뒤, 중반에 세레브레이트가 있는 중심 지역으로 진입해 빠르게 전투를 마무리하는 것이 효율적입니다. 협동 플레이를 즐기는 유저와 캠페인 스토리를 체험하고 싶은 플레이어에게 적합하며, 양쪽 진영 모두 일정 수준 이상의 마이크로 관리가 요구됩니다. This review focuses on the StarCraft: Brood War campaign map “Mission 2a: Playing with Fire” (Korean title: 미션 2a: 불장난). The map uses a 4096×4096 tile‑based Wasteland tileset, offering a large battlefield for two players who each choose either the Protoss or Zerg side in a cooperative story mission. According to the internal description, it is a veteran‑level campaign where Schezar has taken control of a Zerg cerebrate that must be destroyed, while the Protoss have a separate objective. Consequently, combat consists of direct assaults toward the main goal combined with breaking through the opponent’s defenses. Before playing, check each faction’s unit composition and skill cooldowns, especially securing vision and rapid attacks in the area where the Zerg cerebrate appears. The map layout mixes high ground and narrow passages, making map control and mobility decisive. Early game should focus on gathering resources and establishing defenses, then in mid‑game push toward the central area containing the cerebrate for a swift conclusion. It suits players who enjoy cooperative play and want to experience campaign story content, though both sides require a moderate level of micro‑management.
맵 선택 가이드
태그는 맵의 핵심 특징을 빠르게 설명하지만 제작 버전마다 규칙이 다를 수 있습니다. 상세 설명에서 권장 인원, 난이도, 플레이 시간과 버전을 함께 확인한 뒤 다운로드하세요.