
Queen 보호 스타크래프트 맵 모음
'Queen 보호' 태그가 등록된 맵을 모았습니다. 장르 하나로 찾기 어려운 플레이 방식, 난이도와 특징을 중심으로 인기 맵과 최신 맵을 비교해 보세요.
- 등록 맵
- 4개
- 누적 다운로드
- 0
- 누적 조회
- 127
인기 맵
다운로드와 조회 반응이 높은 맵입니다.
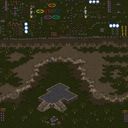
PTQ -Fyre- 5
PTQ -Fyre- 5는 스타크래프트 브루드워의 유즈맵으로, 총 6명의 플레이어가 방어와 협동을 중시하는 전략적 플레이를 경험할 수 있는 맵입니다. 맵의 핵심은 'Queen'을 보호하는 것이며, 플레이어는 각각의 진영에서 제공되는 유닛과 건물을 활용해 끊임없이 몰려드는 적의 공격을 막아내야 합니다. 맵의 중앙에는 Queen이 위치한 보호 구역이 있으며, 이곳을 중심으로 방어선이 형성됩니다. 플레이어는 각자의Spawn 지역에서 시작해 자원을 확보하고, 방어 타워를 건설하거나 유닛을 생산해 전선에 배치해야 합니다. 맵 곳곳에 scattered된 자원 지역을 확보하는 것이 중요하며, 이를 통해 지속적인 자원 공급을 유지하는 것이 승리의 열쇠가 됩니다. 적의 공격은 랜덤한 타이밍과 패턴으로 발생하며, 특히 Queen을 직접 노리는 공격이 빈번하므로 방어선 구축과 유닛 관리에 주의를 기울여야 합니다. 또한, 플레이어 간의 협력이 필수적인데, 자원 공유나 방어 지원 등을 통해 팀워크를 발휘할 수 있습니다. 맵의 배경은 사막 지형으로, 전체적으로 건조하고 황량한 분위기를 연출하며, 이는 플레이어의 긴장감을 더하는 요소로 작용합니다. PTQ -Fyre- 5는 방어와 협동, 자원 관리라는 세 가지 요소를 균형 있게 요구하는 맵으로, 이러한 요소들이 조화를 이룰 때 비로소 안정적인 방어가 가능해집니다. 초보자의 경우 방어 타워의 배치와 유닛 조합에 어려움을 느낄 수 있으므로, 먼저 연습 모드나 튜토리얼을 통해 맵의 기본 메커니즘을 숙지하는 것이 좋습니다. 또한, Queen을 보호하는 동시에 자원 확보와 방어선의 유지라는 다중 과제를 동시에 수행해야 하므로, 플레이어는 멀티태스킹 능력을 키우는 것이 중요합니다. 맵의 난이도는 중간 정도로, 방어선 구축과 자원 관리에 익숙해지면 점차 안정적인 플레이가 가능해집니다. PTQ -Fyre- 5는 방어와 협동에 중점을 둔 유즈맵으로, 스타크래프트의 전략적 깊이를 즐기고자 하는 플레이어들에게 추천할 만한 작품입니다. 특히, 팀플레이와 전략적 사고를 동시에 요구하는 맵이기 때문에, 친구들과 함께 플레이할 때 그 재미가 배가됩니다. 맵의 분위기와 긴장감 있는 전개는 유즈맵의 장점을 잘 살려내며, 반복 플레이를 통해 다양한 전략을 시도해 볼 수 있는 재미도 있습니다. 플레이 전에 맵의 자원 분포와 방어 포인트를 미리 숙지한다면, 보다 효율적인 플레이가 가능할 것입니다. 마지막으로, Queen을 보호하는 것이 핵심 목표이므로, 방어 라인의 중요성을 항상 염두에 두고 플레이해야 합니다. PTQ -Fyre- 5 is a custom map for *StarCraft: Brood War* that allows six players to experience strategic gameplay focused on defense and cooperation. The core objective is to protect the "Queen," with players defending against waves of enemy attacks using the units and buildings provided in their respective factions. At the center of the map lies the Queen's protected zone, where defensive lines are formed. Players start in their own spawn areas, gathering resources, constructing defensive towers, and deploying units to the front lines. Securing scattered resource points throughout the map is crucial, as maintaining a steady resource supply is key to victory. Enemy attacks occur at random intervals and follow unpredictable patterns, with frequent assaults targeting the Queen directly. This makes it essential to build and manage defenses carefully. Cooperation among players is also vital, as sharing resources and supporting each other’s defenses strengthens teamwork. The map’s desert terrain sets a dry and desolate atmosphere, heightening tension during gameplay. PTQ -Fyre- 5 balances defense, cooperation, and resource management, requiring players to harmonize these elements for stable defense. Beginners may struggle with tower placement and unit compositions, so practicing in the training mode or reviewing the map’s mechanics is recommended. Players must also juggle multiple tasks—protecting the Queen, securing resources, and maintaining defenses—so developing multitasking skills is important. The map offers moderate difficulty, and as players become familiar with defense and resource management, they can achieve more consistent performance. With its emphasis on defense and teamwork, PTQ -Fyre- 5 is a recommended custom map for those seeking strategic depth in *StarCraft*. The cooperative and strategic demands make it especially enjoyable with friends, and the tense atmosphere and dynamic progression highlight the strengths of custom maps. Repeated plays allow for experimenting with different strategies, and studying the map’s resource distribution and key defense points before starting can lead to more efficient gameplay. Always remember that protecting the Queen is the ultimate goal, so keeping defense lines a top priority is essential.
프로텍트 더 퀸 v1.2 (Protect The Queen v1.2)
스타크래프트 브루드워의 유즈맵 <프로텍트 더 퀸 v1.2(Protect The Queen v1.2)>는Queen을 보호하는 디펜스 장르의 유즈맵으로, 한 명의 플레이어가 Queen을 조종하며 끊임없이 몰려드는 적군을 막아내는 것이 핵심 목표다. 맵의 전체적인 구조는 Queen이 위치한 중앙 요새 주변으로 적의 공격로가 모여드는 형태로 설계되어 있으며, 플레이어는 Queen의 체력 관리와 방어 건물의 배치, 유닛 생산 및 업그레이드를 통해 방어선을 구축해야 한다. 맵의 배경은 사막 타일셋을 기반으로 하며, 요새 주변의 지형은 비교적 평탄한 편으로 시야 확보가 용이하지만, 일부 협소한 길목에서는 적의 다수 유닛이 몰려오는 경우 대처가 어려워질 수 있다.Queen의 체력은 제한적이므로 초반부터 방어 건물을 적극적으로 건설하고, 중반 이후에는 업그레이드를 통해 유닛의 효율을 극대화해야 한다. 특히 Queen 주변의 자원 채취 건물과 방어 타워의 배치 위치가 방어 성공 여부를 좌우하므로, 플레이어는 맵의 지형적 특징을 잘 활용해야 한다. 또한, 적의 공격 패턴이 점차 강화되므로 방어 전략을 상황에 맞게 유연하게 변경해야 하며, 중반 이후에는 고급 유닛의 생산과 업그레이드가 필수적이다.이 맵은Queen 보호에 집중된 디펜스 장르이므로, 방어형 플레이에 익숙한 유저나 디펜스 유즈맵을 좋아하는 유저들에게 추천할 만하다. 다만, Queen의 체력이 제한적이기 때문에 초반 방어가 약할 경우 순식간에 게임이 종료될 수 있으므로, 빠른 판단을 요구하는 맵이라고 할 수 있다.Queen을 보호하는 동시에 자원 관리와 방어 건물의 최적 배치, 그리고 적의 공격 타이밍을 예측하는 능력이 요구되는 이 맵은, 단순히 방어만 한다고 승리할 수 없다는 점에서 전략적 깊이가 있는 유즈맵이다.Queen의 생존 여부가 승패를 좌우하는 만큼,Queen의 위치와 방어 라인을 어떻게 구축할 것인지에 대한 고민이 게임 내내 지속된다.Queen을 보호하는 동시에 끊임없이 몰려오는 적군을 상대해야 하므로, 긴장감과 몰입감을 동시에 느낄 수 있는 맵으로, 특히 디펜스 장르를 좋아하는 플레이어들에게 강력히 추천한다.Queen이 위치한 요새 주변으로 적의 공격로가 집중되므로, 방어 건물의 배치와 업그레이드 타이밍을 잘 조절해야만 long-term survival이 가능하다.Queen의 체력이 제한적이기 때문에, 초반부터 방어 건물을 적극적으로 건설하고, 중반 이후에는 유닛의 업그레이드와 고급 유닛의 생산을 서둘러야 한다.Queen 주변의 지형적 특징을 잘 활용하여 방어 라인을 구축한다면, 상대적으로 쉽게 방어에 성공할 수 있지만, 그렇지 못할 경우 Queen이 순식간에 전멸당할 위험이 있다.Queen 보호에 특화된 디펜스 장르이므로,Queen의 생존을 최우선으로 삼는 플레이 스타일이 요구되며,Queen의 체력 관리와 함께 방어 건물의 배치 및 업그레이드가 승패를 좌우한다.Queen을 보호하는 동시에 끊임없이 몰려오는 적군을 상대해야 하므로,Queen의 위치와 방어 라인을 어떻게 구축할 것인지에 대한 전략적 사고가 필수적이다.Queen의 생존 여부가 승패를 결정짓는 만큼,Queen을 중심으로 한 방어 전략을 신중히 세울 필요가 있다.Queen을 보호하는 디펜스 유즈맵으로서,Queen의 체력과 방어 건물의 배치, 그리고 업그레이드 타이밍이 게임의 성공 여부를 좌우하는 핵심 요소다.Queen을 보호하는 동시에 끊임없이 밀려오는 적군을 상대해야 하므로,Queen의 위치와 방어 라인을 어떻게 최적화할 것인지에 대한 고민이 게임 내내 지속된다.Queen의 생존 여부가 승패를 결정짓는 만큼,Queen을 중심으로 한 방어 전략을 신중히 계획해야 한다.Queen을 보호하는 디펜스 장르의 유즈맵으로,Queen의 체력 관리와 방어 건물의 배치, 그리고 적의 공격 패턴에 대한 빠른 대처가 요구되는 전략적 깊이가 있는 맵이다. StarCraft: Brood War’s custom map *Protect the Queen v1.2* is a defense-style game where one player controls the Queen, tasked with holding off endless waves of enemies. The map is structured around a central fortress where the Queen resides, with enemy attack paths converging toward it. Players must manage the Queen’s health, strategically place defensive buildings, and produce and upgrade units to build their defenses. The desert-themed map features relatively flat terrain around the fortress, offering good visibility, though narrow passages can become choke points where overwhelming enemy forces can overwhelm defenses. Since the Queen’s health is limited, players must prioritize constructing defensive buildings early and focus on upgrades as the game progresses to maximize unit efficiency. The placement of resource-gathering buildings and defensive towers near the Queen is critical to success, so players should leverage the map’s terrain effectively. Enemy attacks escalate in difficulty, requiring adaptive strategies—late-game success hinges on producing advanced units and upgrades. This map is ideal for players who enjoy defense-focused gameplay or custom defense maps, though its reliance on the Queen’s limited health demands quick decision-making, as a weak early defense can lead to an abrupt loss. Balancing Queen protection with resource management, tower placement, and predicting enemy timings makes this more than just a straightforward defense game—strategic depth is key. The Queen’s survival determines victory, so players must constantly consider how to position defenses and reinforce lines. The relentless onslaught of enemies creates tension and immersion, making it a standout for defense-map enthusiasts. Concentrating enemy paths around the Queen’s fortress means timing defensive building placements and upgrades perfectly is essential for long-term survival. With the Queen’s health finite, early tower construction and mid-to-late-game unit upgrades and elite unit production are vital. Leveraging the terrain around the Queen to fortify defenses can simplify victory, but poor positioning risks swift annihilation. As a Queen-focused defense map, survival depends on prioritizing her safety alongside tower placement and upgrades. The Queen’s fate dictates the outcome, so a defensive strategy centered on her is non-negotiable. This custom defense map demands careful planning around the Queen’s protection, defensive building placement, and upgrade timing—all critical to success. The constant pressure of incoming waves forces players to continuously refine their Queen’s position and defensive lines. Ultimately, victory hinges on the Queen’s survival, making strategic foresight around her defense the cornerstone of every match.
프로텍트 더 퀸 v1.1 (Protect the Queen v1.1)
스타크래프트 브루드워의 유즈맵 <프로텍트 더 퀸 v1.1>은 6명의 플레이어가 한 팀을 이뤄Queen을 보호하며 적의 공격을 방어하는 디펜스 장르의 유즈맵이다. 맵은 사막 타일셋으로 구성되어 있으며, 중앙에 위치한 Queen을 중심으로 다양한 방어 구조물이 배치된 것이 특징이다. 플레이어들은 Queen 주변에서 적 유닛의 진입을 저지하거나, 일정 시간마다 등장하는 웨이브 공세를 막아내야 한다. 맵의 주요 전략은 Queen의 위치와 방어 타워의 배치, 그리고 적의 공격 패턴을 예측하는 것이다.Queen의 체력이 0이 되거나 모든 플레이어가 사망하면 게임이 패배로 끝나며, 반대로 모든 웨이브를 막아내면 승리한다. 맵의 난이도는 상대의 공격 패턴과Queen의 체력 유지 여부에 따라 달라지며, 초보자도 쉽게 접근할 수 있지만 숙련자의 경우 더 전략적인 플레이가 요구된다. 플레이 전에는 Queen의 위치와 방어 타워의 배치를 확인하는 것이 중요하며, 특히Queen 주변의 좁은 통로를 활용한 방어가 핵심이다. 또한, 적의 공격 타이밍과 유닛 종류를 미리 파악하여 대비하는 것이 중요하다. 이 맵은Queen을 보호하는 재미와 긴장감을 동시에 느낄 수 있어, 디펜스 장르를 좋아하는 플레이어들에게 추천할 만한 유즈맵이다. "Protect the Queen v1.1" is a custom map in *StarCraft: Brood War* where six players form a team to defend the Queen and fend off enemy attacks in a defense-style gameplay. The map features a desert tile set, with the Queen positioned at the center surrounded by various defensive structures. Players must block enemy units from reaching the Queen and withstand periodic wave attacks. The key strategies involve positioning the Queen, placing defensive towers, and anticipating enemy attack patterns. The game ends in defeat if the Queen's health drops to zero or all players die, but victory is achieved by surviving all waves. Difficulty varies depending on enemy patterns and the Queen's health management—beginners can easily pick it up, while experienced players need more strategic depth. Before starting, it's crucial to check the Queen's location and tower placements, especially utilizing the narrow pathways around her for defense. Understanding enemy attack timings and unit compositions in advance is also vital. This map offers a fun and tense experience in protecting the Queen, making it a great choice for fans of the defense genre.
퀸 보호하기 v1.5 (Protect the Queen v1.5)
스타크래프트 브루드워의 유즈맵 'Protect the Queen v1.5(final)'은Queen을 보호하는 디펜스 장르의 유즈맵으로, 플레이어는 Queen을 안전하게 보호하면서 적의 끊임없는 공격으로부터 방어해야 한다. 맵은 사막 타일셋을 배경으로 하며, Queen이 위치한 중앙에는 넓은 방어 구역이 마련되어 있다. 플레이어는 각자 자원을 확보해 방어 건물이나 유닛을 건설하거나 업그레이드할 수 있으며, Queen의 체력이 낮아지면 패배하게 된다. 맵의 핵심은 균형 잡힌 방어와 공격의 조합으로, 너무 공격에 치우치면 방어가 허술해지고, 방어에만 집중하면 자원이 부족해진다. 특히 Queen 주변의 좁은 통로와 요새화된 지형이 전략적 포인트를 제공하며, 이 곳을 어떻게 활용하느냐가 승패를 가른다. 맵의 플레이 인원은 6명으로, 각 플레이어는 개별적으로 행동하거나 협력해 Queen을 보호해야 한다. 맵의 특징은 맵 중앙의 Queen 주변에 배치된 방어 시설과 좁은 길목으로, 이 곳을 적절히 방어하지 않으면 적들이 쉽게 Queen에게 접근할 수 있다. 또한, 맵 곳곳에 배치된 자원 지대와 미네랄 멀티는 자원 확보를 위한 중요 포인트이며, 이를 두고 플레이어 간 경쟁이 벌어질 수 있다. 맵의 난이도는 보통 수준으로, 초보자는Queen 보호에 집중하는 데 어려움을 느낄 수 있지만, 익숙해지면 전략적인 플레이가 가능해진다. 추천 대상은 스타크래프트 유즈맵을 즐기는 플레이어, 특히 디펜스 장르를 좋아하는 유저들에게 적합하며, Queen 보호와 방어 전략을 중시하는 플레이어에게 추천할 만하다. 플레이 전에는 Queen 주변의 방어 시설 배치와 자원 확보 루트를 미리 확인하는 것이 중요하다. 또한, 팀원과의 협력이 필수적이므로, 팀 플레이에 익숙하지 않다면 사전 준비를 권장한다. 맵의 분위기는 긴장감 넘치는 방어전으로, Queen을 보호하는 긴박한 순간들이 플레이의 재미를 더한다. 이 맵은 유즈맵의 특성을 살린 전략적 디펜스로, 스타크래프트의Classic한 재미를 느낄 수 있는 작품이다. Protect the Queen v1.5(final) is a UMS defense map in StarCraft: Brood War where players must protect the Queen from relentless enemy attacks. Set against a desert tileset, the map features a central Queen protected by a fortified area, where players gather resources to build defenses or upgrade units. The core challenge lies in balancing offense and defense—neglecting one leads to an inevitable defeat. The narrow pathways and chokepoints around the Queen are critical strategic spots, and their control often determines the outcome. With a player count of six, each participant operates independently or collaboratively to safeguard the Queen. Key features include the Queen’s defensive structures, resource-rich areas, and mineral multis, which spark competition among players. The difficulty is moderate, offering a fair challenge for beginners while rewarding strategic depth for experienced players. This map is ideal for fans of UMS defense games, especially those who enjoy protecting key units and planning defenses. Before playing, it’s crucial to study the Queen’s defensive layout and resource routes. Teamwork is essential, so coordination with teammates is highly recommended. The tense, high-stakes atmosphere of protecting the Queen makes this map a thrilling and strategic experience, capturing the classic appeal of StarCraft’s UMS maps.
최근 등록된 맵
새로 추가된 파일과 버전을 확인하세요.
퀸 보호하기 v1.5 (Protect the Queen v1.5)
스타크래프트 브루드워의 유즈맵 'Protect the Queen v1.5(final)'은Queen을 보호하는 디펜스 장르의 유즈맵으로, 플레이어는 Queen을 안전하게 보호하면서 적의 끊임없는 공격으로부터 방어해야 한다. 맵은 사막 타일셋을 배경으로 하며, Queen이 위치한 중앙에는 넓은 방어 구역이 마련되어 있다. 플레이어는 각자 자원을 확보해 방어 건물이나 유닛을 건설하거나 업그레이드할 수 있으며, Queen의 체력이 낮아지면 패배하게 된다. 맵의 핵심은 균형 잡힌 방어와 공격의 조합으로, 너무 공격에 치우치면 방어가 허술해지고, 방어에만 집중하면 자원이 부족해진다. 특히 Queen 주변의 좁은 통로와 요새화된 지형이 전략적 포인트를 제공하며, 이 곳을 어떻게 활용하느냐가 승패를 가른다. 맵의 플레이 인원은 6명으로, 각 플레이어는 개별적으로 행동하거나 협력해 Queen을 보호해야 한다. 맵의 특징은 맵 중앙의 Queen 주변에 배치된 방어 시설과 좁은 길목으로, 이 곳을 적절히 방어하지 않으면 적들이 쉽게 Queen에게 접근할 수 있다. 또한, 맵 곳곳에 배치된 자원 지대와 미네랄 멀티는 자원 확보를 위한 중요 포인트이며, 이를 두고 플레이어 간 경쟁이 벌어질 수 있다. 맵의 난이도는 보통 수준으로, 초보자는Queen 보호에 집중하는 데 어려움을 느낄 수 있지만, 익숙해지면 전략적인 플레이가 가능해진다. 추천 대상은 스타크래프트 유즈맵을 즐기는 플레이어, 특히 디펜스 장르를 좋아하는 유저들에게 적합하며, Queen 보호와 방어 전략을 중시하는 플레이어에게 추천할 만하다. 플레이 전에는 Queen 주변의 방어 시설 배치와 자원 확보 루트를 미리 확인하는 것이 중요하다. 또한, 팀원과의 협력이 필수적이므로, 팀 플레이에 익숙하지 않다면 사전 준비를 권장한다. 맵의 분위기는 긴장감 넘치는 방어전으로, Queen을 보호하는 긴박한 순간들이 플레이의 재미를 더한다. 이 맵은 유즈맵의 특성을 살린 전략적 디펜스로, 스타크래프트의Classic한 재미를 느낄 수 있는 작품이다. Protect the Queen v1.5(final) is a UMS defense map in StarCraft: Brood War where players must protect the Queen from relentless enemy attacks. Set against a desert tileset, the map features a central Queen protected by a fortified area, where players gather resources to build defenses or upgrade units. The core challenge lies in balancing offense and defense—neglecting one leads to an inevitable defeat. The narrow pathways and chokepoints around the Queen are critical strategic spots, and their control often determines the outcome. With a player count of six, each participant operates independently or collaboratively to safeguard the Queen. Key features include the Queen’s defensive structures, resource-rich areas, and mineral multis, which spark competition among players. The difficulty is moderate, offering a fair challenge for beginners while rewarding strategic depth for experienced players. This map is ideal for fans of UMS defense games, especially those who enjoy protecting key units and planning defenses. Before playing, it’s crucial to study the Queen’s defensive layout and resource routes. Teamwork is essential, so coordination with teammates is highly recommended. The tense, high-stakes atmosphere of protecting the Queen makes this map a thrilling and strategic experience, capturing the classic appeal of StarCraft’s UMS maps.
프로텍트 더 퀸 v1.1 (Protect the Queen v1.1)
스타크래프트 브루드워의 유즈맵 <프로텍트 더 퀸 v1.1>은 6명의 플레이어가 한 팀을 이뤄Queen을 보호하며 적의 공격을 방어하는 디펜스 장르의 유즈맵이다. 맵은 사막 타일셋으로 구성되어 있으며, 중앙에 위치한 Queen을 중심으로 다양한 방어 구조물이 배치된 것이 특징이다. 플레이어들은 Queen 주변에서 적 유닛의 진입을 저지하거나, 일정 시간마다 등장하는 웨이브 공세를 막아내야 한다. 맵의 주요 전략은 Queen의 위치와 방어 타워의 배치, 그리고 적의 공격 패턴을 예측하는 것이다.Queen의 체력이 0이 되거나 모든 플레이어가 사망하면 게임이 패배로 끝나며, 반대로 모든 웨이브를 막아내면 승리한다. 맵의 난이도는 상대의 공격 패턴과Queen의 체력 유지 여부에 따라 달라지며, 초보자도 쉽게 접근할 수 있지만 숙련자의 경우 더 전략적인 플레이가 요구된다. 플레이 전에는 Queen의 위치와 방어 타워의 배치를 확인하는 것이 중요하며, 특히Queen 주변의 좁은 통로를 활용한 방어가 핵심이다. 또한, 적의 공격 타이밍과 유닛 종류를 미리 파악하여 대비하는 것이 중요하다. 이 맵은Queen을 보호하는 재미와 긴장감을 동시에 느낄 수 있어, 디펜스 장르를 좋아하는 플레이어들에게 추천할 만한 유즈맵이다. "Protect the Queen v1.1" is a custom map in *StarCraft: Brood War* where six players form a team to defend the Queen and fend off enemy attacks in a defense-style gameplay. The map features a desert tile set, with the Queen positioned at the center surrounded by various defensive structures. Players must block enemy units from reaching the Queen and withstand periodic wave attacks. The key strategies involve positioning the Queen, placing defensive towers, and anticipating enemy attack patterns. The game ends in defeat if the Queen's health drops to zero or all players die, but victory is achieved by surviving all waves. Difficulty varies depending on enemy patterns and the Queen's health management—beginners can easily pick it up, while experienced players need more strategic depth. Before starting, it's crucial to check the Queen's location and tower placements, especially utilizing the narrow pathways around her for defense. Understanding enemy attack timings and unit compositions in advance is also vital. This map offers a fun and tense experience in protecting the Queen, making it a great choice for fans of the defense genre.
PTQ -Fyre- 5
PTQ -Fyre- 5는 스타크래프트 브루드워의 유즈맵으로, 총 6명의 플레이어가 방어와 협동을 중시하는 전략적 플레이를 경험할 수 있는 맵입니다. 맵의 핵심은 'Queen'을 보호하는 것이며, 플레이어는 각각의 진영에서 제공되는 유닛과 건물을 활용해 끊임없이 몰려드는 적의 공격을 막아내야 합니다. 맵의 중앙에는 Queen이 위치한 보호 구역이 있으며, 이곳을 중심으로 방어선이 형성됩니다. 플레이어는 각자의Spawn 지역에서 시작해 자원을 확보하고, 방어 타워를 건설하거나 유닛을 생산해 전선에 배치해야 합니다. 맵 곳곳에 scattered된 자원 지역을 확보하는 것이 중요하며, 이를 통해 지속적인 자원 공급을 유지하는 것이 승리의 열쇠가 됩니다. 적의 공격은 랜덤한 타이밍과 패턴으로 발생하며, 특히 Queen을 직접 노리는 공격이 빈번하므로 방어선 구축과 유닛 관리에 주의를 기울여야 합니다. 또한, 플레이어 간의 협력이 필수적인데, 자원 공유나 방어 지원 등을 통해 팀워크를 발휘할 수 있습니다. 맵의 배경은 사막 지형으로, 전체적으로 건조하고 황량한 분위기를 연출하며, 이는 플레이어의 긴장감을 더하는 요소로 작용합니다. PTQ -Fyre- 5는 방어와 협동, 자원 관리라는 세 가지 요소를 균형 있게 요구하는 맵으로, 이러한 요소들이 조화를 이룰 때 비로소 안정적인 방어가 가능해집니다. 초보자의 경우 방어 타워의 배치와 유닛 조합에 어려움을 느낄 수 있으므로, 먼저 연습 모드나 튜토리얼을 통해 맵의 기본 메커니즘을 숙지하는 것이 좋습니다. 또한, Queen을 보호하는 동시에 자원 확보와 방어선의 유지라는 다중 과제를 동시에 수행해야 하므로, 플레이어는 멀티태스킹 능력을 키우는 것이 중요합니다. 맵의 난이도는 중간 정도로, 방어선 구축과 자원 관리에 익숙해지면 점차 안정적인 플레이가 가능해집니다. PTQ -Fyre- 5는 방어와 협동에 중점을 둔 유즈맵으로, 스타크래프트의 전략적 깊이를 즐기고자 하는 플레이어들에게 추천할 만한 작품입니다. 특히, 팀플레이와 전략적 사고를 동시에 요구하는 맵이기 때문에, 친구들과 함께 플레이할 때 그 재미가 배가됩니다. 맵의 분위기와 긴장감 있는 전개는 유즈맵의 장점을 잘 살려내며, 반복 플레이를 통해 다양한 전략을 시도해 볼 수 있는 재미도 있습니다. 플레이 전에 맵의 자원 분포와 방어 포인트를 미리 숙지한다면, 보다 효율적인 플레이가 가능할 것입니다. 마지막으로, Queen을 보호하는 것이 핵심 목표이므로, 방어 라인의 중요성을 항상 염두에 두고 플레이해야 합니다. PTQ -Fyre- 5 is a custom map for *StarCraft: Brood War* that allows six players to experience strategic gameplay focused on defense and cooperation. The core objective is to protect the "Queen," with players defending against waves of enemy attacks using the units and buildings provided in their respective factions. At the center of the map lies the Queen's protected zone, where defensive lines are formed. Players start in their own spawn areas, gathering resources, constructing defensive towers, and deploying units to the front lines. Securing scattered resource points throughout the map is crucial, as maintaining a steady resource supply is key to victory. Enemy attacks occur at random intervals and follow unpredictable patterns, with frequent assaults targeting the Queen directly. This makes it essential to build and manage defenses carefully. Cooperation among players is also vital, as sharing resources and supporting each other’s defenses strengthens teamwork. The map’s desert terrain sets a dry and desolate atmosphere, heightening tension during gameplay. PTQ -Fyre- 5 balances defense, cooperation, and resource management, requiring players to harmonize these elements for stable defense. Beginners may struggle with tower placement and unit compositions, so practicing in the training mode or reviewing the map’s mechanics is recommended. Players must also juggle multiple tasks—protecting the Queen, securing resources, and maintaining defenses—so developing multitasking skills is important. The map offers moderate difficulty, and as players become familiar with defense and resource management, they can achieve more consistent performance. With its emphasis on defense and teamwork, PTQ -Fyre- 5 is a recommended custom map for those seeking strategic depth in *StarCraft*. The cooperative and strategic demands make it especially enjoyable with friends, and the tense atmosphere and dynamic progression highlight the strengths of custom maps. Repeated plays allow for experimenting with different strategies, and studying the map’s resource distribution and key defense points before starting can lead to more efficient gameplay. Always remember that protecting the Queen is the ultimate goal, so keeping defense lines a top priority is essential.
프로텍트 더 퀸 v1.2 (Protect The Queen v1.2)
스타크래프트 브루드워의 유즈맵 <프로텍트 더 퀸 v1.2(Protect The Queen v1.2)>는Queen을 보호하는 디펜스 장르의 유즈맵으로, 한 명의 플레이어가 Queen을 조종하며 끊임없이 몰려드는 적군을 막아내는 것이 핵심 목표다. 맵의 전체적인 구조는 Queen이 위치한 중앙 요새 주변으로 적의 공격로가 모여드는 형태로 설계되어 있으며, 플레이어는 Queen의 체력 관리와 방어 건물의 배치, 유닛 생산 및 업그레이드를 통해 방어선을 구축해야 한다. 맵의 배경은 사막 타일셋을 기반으로 하며, 요새 주변의 지형은 비교적 평탄한 편으로 시야 확보가 용이하지만, 일부 협소한 길목에서는 적의 다수 유닛이 몰려오는 경우 대처가 어려워질 수 있다.Queen의 체력은 제한적이므로 초반부터 방어 건물을 적극적으로 건설하고, 중반 이후에는 업그레이드를 통해 유닛의 효율을 극대화해야 한다. 특히 Queen 주변의 자원 채취 건물과 방어 타워의 배치 위치가 방어 성공 여부를 좌우하므로, 플레이어는 맵의 지형적 특징을 잘 활용해야 한다. 또한, 적의 공격 패턴이 점차 강화되므로 방어 전략을 상황에 맞게 유연하게 변경해야 하며, 중반 이후에는 고급 유닛의 생산과 업그레이드가 필수적이다.이 맵은Queen 보호에 집중된 디펜스 장르이므로, 방어형 플레이에 익숙한 유저나 디펜스 유즈맵을 좋아하는 유저들에게 추천할 만하다. 다만, Queen의 체력이 제한적이기 때문에 초반 방어가 약할 경우 순식간에 게임이 종료될 수 있으므로, 빠른 판단을 요구하는 맵이라고 할 수 있다.Queen을 보호하는 동시에 자원 관리와 방어 건물의 최적 배치, 그리고 적의 공격 타이밍을 예측하는 능력이 요구되는 이 맵은, 단순히 방어만 한다고 승리할 수 없다는 점에서 전략적 깊이가 있는 유즈맵이다.Queen의 생존 여부가 승패를 좌우하는 만큼,Queen의 위치와 방어 라인을 어떻게 구축할 것인지에 대한 고민이 게임 내내 지속된다.Queen을 보호하는 동시에 끊임없이 몰려오는 적군을 상대해야 하므로, 긴장감과 몰입감을 동시에 느낄 수 있는 맵으로, 특히 디펜스 장르를 좋아하는 플레이어들에게 강력히 추천한다.Queen이 위치한 요새 주변으로 적의 공격로가 집중되므로, 방어 건물의 배치와 업그레이드 타이밍을 잘 조절해야만 long-term survival이 가능하다.Queen의 체력이 제한적이기 때문에, 초반부터 방어 건물을 적극적으로 건설하고, 중반 이후에는 유닛의 업그레이드와 고급 유닛의 생산을 서둘러야 한다.Queen 주변의 지형적 특징을 잘 활용하여 방어 라인을 구축한다면, 상대적으로 쉽게 방어에 성공할 수 있지만, 그렇지 못할 경우 Queen이 순식간에 전멸당할 위험이 있다.Queen 보호에 특화된 디펜스 장르이므로,Queen의 생존을 최우선으로 삼는 플레이 스타일이 요구되며,Queen의 체력 관리와 함께 방어 건물의 배치 및 업그레이드가 승패를 좌우한다.Queen을 보호하는 동시에 끊임없이 몰려오는 적군을 상대해야 하므로,Queen의 위치와 방어 라인을 어떻게 구축할 것인지에 대한 전략적 사고가 필수적이다.Queen의 생존 여부가 승패를 결정짓는 만큼,Queen을 중심으로 한 방어 전략을 신중히 세울 필요가 있다.Queen을 보호하는 디펜스 유즈맵으로서,Queen의 체력과 방어 건물의 배치, 그리고 업그레이드 타이밍이 게임의 성공 여부를 좌우하는 핵심 요소다.Queen을 보호하는 동시에 끊임없이 밀려오는 적군을 상대해야 하므로,Queen의 위치와 방어 라인을 어떻게 최적화할 것인지에 대한 고민이 게임 내내 지속된다.Queen의 생존 여부가 승패를 결정짓는 만큼,Queen을 중심으로 한 방어 전략을 신중히 계획해야 한다.Queen을 보호하는 디펜스 장르의 유즈맵으로,Queen의 체력 관리와 방어 건물의 배치, 그리고 적의 공격 패턴에 대한 빠른 대처가 요구되는 전략적 깊이가 있는 맵이다. StarCraft: Brood War’s custom map *Protect the Queen v1.2* is a defense-style game where one player controls the Queen, tasked with holding off endless waves of enemies. The map is structured around a central fortress where the Queen resides, with enemy attack paths converging toward it. Players must manage the Queen’s health, strategically place defensive buildings, and produce and upgrade units to build their defenses. The desert-themed map features relatively flat terrain around the fortress, offering good visibility, though narrow passages can become choke points where overwhelming enemy forces can overwhelm defenses. Since the Queen’s health is limited, players must prioritize constructing defensive buildings early and focus on upgrades as the game progresses to maximize unit efficiency. The placement of resource-gathering buildings and defensive towers near the Queen is critical to success, so players should leverage the map’s terrain effectively. Enemy attacks escalate in difficulty, requiring adaptive strategies—late-game success hinges on producing advanced units and upgrades. This map is ideal for players who enjoy defense-focused gameplay or custom defense maps, though its reliance on the Queen’s limited health demands quick decision-making, as a weak early defense can lead to an abrupt loss. Balancing Queen protection with resource management, tower placement, and predicting enemy timings makes this more than just a straightforward defense game—strategic depth is key. The Queen’s survival determines victory, so players must constantly consider how to position defenses and reinforce lines. The relentless onslaught of enemies creates tension and immersion, making it a standout for defense-map enthusiasts. Concentrating enemy paths around the Queen’s fortress means timing defensive building placements and upgrades perfectly is essential for long-term survival. With the Queen’s health finite, early tower construction and mid-to-late-game unit upgrades and elite unit production are vital. Leveraging the terrain around the Queen to fortify defenses can simplify victory, but poor positioning risks swift annihilation. As a Queen-focused defense map, survival depends on prioritizing her safety alongside tower placement and upgrades. The Queen’s fate dictates the outcome, so a defensive strategy centered on her is non-negotiable. This custom defense map demands careful planning around the Queen’s protection, defensive building placement, and upgrade timing—all critical to success. The constant pressure of incoming waves forces players to continuously refine their Queen’s position and defensive lines. Ultimately, victory hinges on the Queen’s survival, making strategic foresight around her defense the cornerstone of every match.
맵 선택 가이드
태그는 맵의 핵심 특징을 빠르게 설명하지만 제작 버전마다 규칙이 다를 수 있습니다. 상세 설명에서 권장 인원, 난이도, 플레이 시간과 버전을 함께 확인한 뒤 다운로드하세요.