
AI 디펜스 스타크래프트 맵 모음
'AI 디펜스' 태그가 등록된 맵을 모았습니다. 장르 하나로 찾기 어려운 플레이 방식, 난이도와 특징을 중심으로 인기 맵과 최신 맵을 비교해 보세요.
- 등록 맵
- 4개
- 누적 다운로드
- 0
- 누적 조회
- 51
인기 맵
다운로드와 조회 반응이 높은 맵입니다.
미네랄4겹 빅헌터 느린무한 AI
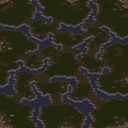
스타크래프트 브루드워의 유즈맵 중 하나로, ‘미네랄4겹 빅헌터 느린무한 AI’는 싱글 플레이어 전용의 무한 디펜스 형식 맵이다. 맵의 핵심은 이름에서도 유추할 수 있듯 미네랄이 4겹으로 배치되어 있다는 점으로, 이는 플레이어가 끊임없이 자원을 확보할 수 있도록 설계된 구조다. ‘빅헌터’는 맵 곳곳에 배치된 강력한 적 유닛을 의미하며, ‘느린무한’이란 이름에서 알 수 있듯 적의 스폰 텀과 속도가 비교적 느리게 설정되어 초보자도 안정적으로 플레이할 수 있도록 배려된 점이 특징이다. 맵의 진행 방식은 단순하면서도 중독성 있는 디펜스 게임으로, 플레이어는 본진에서 자원을 채취하며 방어 건물이나 유닛을 지속적으로 생산하고 배치해야 한다. 4겹으로 배치된 미네랄은 자원 확보의 용이성을 높여주지만, 동시에 적의 공격 루트와 방어 포인트가 복잡해질 수 있어 전략적인 배치와 관리가 요구된다. 맵 곳곳의 ‘빅헌터’는 일정 주기마다 등장하는 강력한 적 유닛으로, 이를 상대하기 위해 플레이어는 방어 건물의 업그레이드나 특수 유닛의 생산을 고려해야 한다. ‘느린무한’이라는 설명처럼 적의 스폰 텀과 이동 속도가 느리게 설정되어 있어, 리소스 관리와 방어 전략을 차근차근 세워나갈 수 있다. 이 맵은 특히 스타크래프트의 AI를 활용한 무한 디펜스라는 장르에 특화된 경험을 제공하며, 싱글 플레이어용으로 설계되어 있어 타 플레이어와의 협동이나 경쟁 없이도 혼자서 긴장감 있는 플레이를 즐길 수 있다. 초보자도 쉽게 접근할 수 있도록 난이도가 조절되어 있지만, 지속적인 자원 관리와 방어 전략의 최적화가 필요해 고수 유저에게도 도전을 제공한다. 또한, 맵의 구조가 비교적 크고 복잡하지 않아 자원 확보와 방어 포인트의 선택이 중요하며, 이를 통해 플레이어의 전략적 사고력을 키울 수 있는 좋은 연습용 맵으로도 활용할 수 있다. 이 맵을 플레이하기 전에, 맵의 구조와 자원 배치, 적의 스폰 위치를 미리 확인하는 것이 중요하다. 또한, 방어 건물의 종류와 특성, 그리고 ‘빅헌터’의 패턴을 숙지하여 효율적인 방어 전략을 세우는 것이 관건이다. 초보자라면 먼저 느린 템포의 AI와 전투를 경험해보며 자원 관리와 방어 건물의 배치에 익숙해지는 것이 좋으며, 고수라면 보다 효율적인 자원 활용과 공격 루트의 차단에 중점을 두고 플레이해볼 만하다. This StarCraft: Brood War custom map, titled ‘Mineral Quad-layer Big Hunter Slow Infinite AI,’ is a single-player infinite defense game designed for solo play. The map’s title already hints at its core mechanics: the mineral fields are arranged in four concentric layers, ensuring a steady stream of resources for the player. The term ‘Big Hunter’ refers to the powerful enemy units scattered across the map, while ‘Slow Infinite’ indicates that the enemy spawn rate and movement speed are deliberately slowed down, making the game accessible even to beginners. The gameplay revolves around a classic defense strategy where the player must gather resources, construct and upgrade defensive buildings, and deploy units to fend off waves of enemies. The four-layered mineral structure simplifies resource collection but adds complexity to enemy approach routes, requiring careful planning for optimal defense placement. The ‘Big Hunters’ appear periodically as powerful foes, necessitating strategic upgrades or specialized unit production to counter them effectively. The ‘slow infinite’ pacing ensures that players have ample time to manage resources and refine their defensive setups without feeling overwhelmed. This map is tailored for fans of AI-driven infinite defense games and offers a satisfying solo experience without the need for multiplayer coordination. While the difficulty is balanced for beginners, the strategic depth lies in resource management and adaptive defense planning, making it equally engaging for advanced players. The map’s size and structure are manageable, emphasizing the importance of mineral distribution and choke point control, which helps players hone their tactical thinking. Before playing, it’s advisable to familiarize yourself with the map layout, mineral distribution, and enemy spawn points. Understanding the capabilities of defensive structures and the patterns of ‘Big Hunters’ is crucial for building an effective strategy. Beginners should start by acclimating to the slower pace and practicing resource management, while experienced players can focus on optimizing their mineral income and blocking enemy routes for maximum efficiency.
개인 MaRiNe Defense
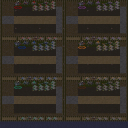
스타크래프트: 브루드워의 대표적인 디펜스 장르 유즈맵인 개인 MaRiNe Defense는 1인 플레이를 전제로 한 AI 디펜스 맵으로, 플레이어는 마린 유닛을 조종하여 끊임없이 몰려오는 적군을 방어하는 것이 핵심 목표다. 맵 상단 중앙에 위치한 마린 부대 기지에서 시작하며, 맵 곳곳에 배치된 길목을 따라 끊임없이 밀려오는 저글링, 히드라리스크, 울트라리스크 등 다양한 저그 유닛을 상대로 버티는 전투가 펼쳐진다. 특히 맵의 세로 폭이 넓고 타일이 조밀하게 배치되어 있어, 유닛들이 전장을 종횡무진하며 전략적으로 배치할 수 있는 공간이 풍부하다는 특징이 있다. 맵의 배경은 사막 타일셋으로 구성되어 있으며, 상단과 하단의 넓은 평지 구간은 방어 거점으로 활용하기에 알맞고, 중앙의 협소한 길목은 좁은 틈을 뚫고 오는 적군을 효과적으로 저지할 수 있는 구조로 설계되어 있다. 플레이어는 제한된 자원으로 유닛을 생산하고, 방어선을 구축하며, 때로는 후방 침투를 노리는 적에 대응하기 위해 신속한 판단이 요구된다. 맵의 난이도는 초반에는 비교적 쉽지만, 시간이 지날수록 적군의 병력이 점점 강력해지고, 다양한 조합을 구사하는 패턴을 보이므로 방어선 관리에 주의를 기울여야 한다. 특히 적군이 몰려드는 주요 경로인 상단과 하단의 평지 구간을 사수하는 것이 승리의 관건으로 보이며, 중앙 길목은 보조 방어선으로 활용하는 전략이 효과적일 것으로 추정된다. 맵의 인기는 오랜 시간 동안 이어져 왔으며, 초기 버전부터 꾸준한 업데이트와 밸런스 조정을 거치면서도 플레이어들에게 꾸준한 재미를 선사하고 있는 것으로 보인다. 디펜스 장르에 익숙한 플레이어뿐만 아니라, 전략적 사고와 빠른 반응 속도를 키우고 싶은 초보 플레이어에게도 좋은 입문용 맵으로 추천할 수 있다. 다만, AI의 공격 패턴이 일정 수준 이상이 되면 난이도가 급격히 상승하므로, 방어 전략과 유닛 조합에 대한 숙련도가 필요하다는 점을 염두에 둬야 한다. 맵을 플레이하기 전에는 기지 주변의 주요 길목과 방어 가능한 위치를 미리 파악해두는 것이 좋다. 또한, 적군의 병력이 집중되는 시간대와 패턴을 관찰하여 대비책을 마련하는 것도 중요하다. 이 맵은 단순히 방어하는 것뿐만 아니라, 유닛 생산과 자원 관리를 동시에 고려해야 하는 전략성이 돋보이는 작품으로, 디펜스 장르의 정수를 느낄 수 있는佳作 중 하나로 손꼽힌다. 특히 개인 전투를 중시하는 플레이어들에게는 최고의 선택지가 될 것이다. 맵의 제목과 설명에서 알 수 있듯이, 마린 유닛을 중심으로 한 전투가 주를 이루지만, AI의 공격 패턴에 따라 다양한 유닛을 활용해야 한다는 점도 흥미로운 요소다. 마린의 장점인 사정거리와 기동성을 살리면서도, 때로는 히드라리스크나 뮤탈리스크 같은 공중 유닛을 상대하기 위한 대공 병력의 생산도 필요하다는 점이 맵의 깊이를 더하고 있다. 전체적으로 이 맵은 디펜스 장르의 기본기를 익히기에 좋은 맵이며, 플레이어의 전략적 사고와 적응력을Test를 동시에 요구하는佳作로 평가할 수 있다. Marine Defense is a classic *StarCraft: Brood War* defense-style custom map where players control Marine units to fend off endless waves of enemy forces. The core objective is survival—defending against relentless assaults from Zerg units like Zerglings, Hydralisks, and Ultralisks as they push through the map’s choke points. The map features a wide vertical layout with densely packed tiles, offering ample space for strategic unit positioning and maneuvering. Its desert-themed background contrasts with the open plains at the top and bottom, which serve as ideal defensive frontlines, while the narrow central corridor is designed to funnel and disrupt enemy advances. Players must manage limited resources, construct defensive lines, and react swiftly to counter infiltrations or sudden threats. While the early game is relatively straightforward, difficulty ramps up significantly as enemy forces grow stronger and employ more varied compositions over time. Securing the upper and lower plains—primary attack routes—is crucial for victory, with the central path often used as a secondary defensive line. The map has maintained popularity for years, thanks to consistent updates and balance adjustments that keep it engaging. Ideal for both seasoned defense players and beginners looking to sharpen their strategic thinking and reflexes, Marine Defense demands adaptability as AI patterns become more complex. Scouting key chokepoints, anticipating enemy waves, and optimizing unit production are essential for success. More than just a test of endurance, the map challenges players to balance resource management, unit composition, and real-time decision-making. While Marines form the backbone of the defense, players must also prepare for aerial threats like Mutalisks, adding depth to the strategy. Overall, it’s a well-crafted title that serves as an excellent introduction to the defense genre while pushing players to refine their tactical skills.
원 빅 좀비 램페이지 (One Big Zombie Rampage)
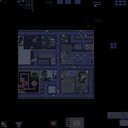
스타크래프트 브루드워의 고전 유즈맵 ‘원 빅 좀비 램페이지(One Big Zombie Rampage)’는 4명의 플레이어가 협동하거나 경쟁하며 좀비 웨이브를 막아내는 디펜스 장르의 명작으로, 8192x8192의 넓은 화산 타일셋 맵에서 펼쳐지는 긴장감 넘치는 전투가 특징이다. 이 맵은 화면 가득 펼쳐지는 넓은 맵과 화산 테마의 어두운 분위기, 그리고 적절한 디자인으로 플레이어들에게 몰입감을 선사하며, 특히 좀비의 공격 패턴과 방어 시설을 적재적소에 배치해야 하는 전략성이 돋보인다. 플레이 방식은 크게 두 가지로 나뉘는데, 하나는 1~4명의 플레이어가 협동하여 끊임없이 밀려오는 좀비를 방어하는 ‘협동 디펜스’ 모드와, 다른 하나는 각 플레이어가 좀비로 변신해 상대방을 공격하는 ‘좀비 PvP’ 모드로 추정된다. 협동 모드에서는 각 플레이어가 건물을 건설하고 자원을 모아 방어선을 구축해야 하며, 좀비는 일정 시간마다 일정 수만큼 스폰되어 플레이어의 건물을 공격하거나 점령을 시도한다. 맵 중앙에 위치한 주요 건물을 보호하는 것이 핵심 목표로 보이며, 방어 시설의 배치와 업그레이드가 승패를 좌우할 것이다. 시각적으로는 화산 테마의 어두운 배경에 붉은빛이 도는 좀비와 방어 시설이 대비되어 긴장감을 높이며, 넓은 맵 덕분에 전략적 선택지가 다양하다는 장점이 있다. 다만, 넓은 맵 특성상 초반에는 자원 확보와 방어 시설 건설이 다소 어려울 수 있으므로, 자원 수집과 건물을 배치하는 타이밍을 잘 잡아야 한다. 이 맵은 디펜스 장르를 좋아하는 플레이어들에게는 물론, 넓은 맵을 활용한 전략적 플레이를 즐기는 유저들에게도 훌륭한 선택지가 될 것이다. 다만, AI가 조종하는 좀비의 공격 패턴이 다소 단순할 수 있으므로, 초보자보다는 경험 있는 플레이어에게 더 어울릴 것으로 보인다. One Big Zombie Rampage is a classic UMS map in StarCraft: Brood War where four players either cooperate or compete against waves of zombies in an intense defense-style gameplay set on an expansive 8192x8192 volcanic-themed map. The game delivers deep immersion through its dark volcanic atmosphere and strategic depth, requiring players to build defenses and manage resources effectively while fending off relentless zombie attacks. The gameplay splits into two primary modes: cooperative defense and zombie PvP. In the cooperative mode, players work together to defend against an endless stream of zombies by constructing buildings and upgrading defenses to protect key structures, likely located centrally on the map. The zombie PvP mode, as the name suggests, allows players to transform into zombies and attack opponents, adding a competitive twist. Visually, the volcanic backdrop with its dark tones and red-lit zombie sprites creates a tense atmosphere, while the vast map size offers diverse strategic options. Early-game challenges include resource gathering and base layout, demanding careful timing and planning. This map is ideal for fans of defense games and players who enjoy strategic depth on large maps. However, the AI-controlled zombies might have predictable attack patterns, making the game more suitable for experienced players than beginners.
![이뽀서블 클레미 [R] v1.02 (Impossible Clemy [R] v1.02) 맵 미리보기](https://cdn-star-data.huzy.net/thumbnail_6ee7d75f072641a29102176ad1cbe46b.jpg)
이뽀서블 클레미 [R] v1.02 (Impossible Clemy [R] v1.02)
스타크래프트 브루드워의 유즈맵 <이뽀서블 클레미 [R] v1.02>는 AI를 상대로 한 디펜스 및 생존형 맵으로, 플레이어가 극한의 난관 속에서 자원을 관리하고 방어선을 구축하며 살아남아야 하는 독특한 플레이 경험을 제공한다. 맵의 이름은 'Impossible Clemy'로, 제작자 Flemy가 직접 수정한 버전임을 알 수 있으며 AI의 버그나 패턴을 공략하는 것이 핵심 목표로 보인다. 맵의 크기는 가로 4096, 세로 6144로 상당히 넓은 편이며, 황혼 타일셋을 사용하여 어두운 분위기의 전략적 공간을 연출한다. 맵의 구조는 중앙에 광물이 집중되어 있고, 주변으로 멀티 지역과 방어 거점이 배치되어 있어 자원 확보와 방어 전략이 모두 중요한 요소로 작용한다. 플레이어는 시작과 동시에 AI의 공격에 노출되며, F10+J를 통해 맵의 기능을 확인하거나 피드백을 전송할 수 있다. 맵의 이름은 'Impossible'이라는 단어에서 알 수 있듯이 난이도가 매우 높을 것으로 추정되며, AI의 공격 패턴을 분석하고 이를 극복하는 것이 주된 목표로 보인다. 맵의 상단과 좌우 측면에 배치된 자원 멀티는 전략적으로 중요하며, 방어선 구축과 자원 관리, 병력 생산의 밸런스를 맞추는 것이 관건이다. 또한, 맵의 넓은 공간을 활용한 기동전이나 기습 공격도 고려해야 할 요소로 보인다. 이 맵은 초보보다는 경험 많은 플레이어에게 적합할 것으로 보이며, 특히 AI의 패턴을 분석하고 이를 극복하는 재미에 중점을 둔 디펜스 및 생존형 맵으로 분류할 수 있다. 제작자의 디스코드 피드백 채널이 제공되어 있어, 플레이 중 발생하는 문제나 개선 사항을 피드백할 수 있는 구조로 되어 있다. 맵의 넓은 공간과 복잡한 구조는 여러 번의 플레이를 통해 공략법을 익힐 수 있도록 설계되어 있다. 이 맵을 즐기기 위해서는 AI의 공격 패턴을 미리 파악하고, 방어선을 효율적으로 구축하는 능력이 필요하며, 자원 관리와 병력 생산의 균형을 맞추는 것이 필수적이다. 또한, 넓은 맵을 활용한 기동전이나 기습 공격 전략도 고려해 볼 만하다. 이러한 요소들이 결합되어 플레이어에게 도전적이고 흥미로운 경험을 제공할 것으로 예상된다. The StarCraft: Brood War custom map *<Impossible Clemy [R] v1.02>* is a defense and survival-style map where players must manage resources, build defenses, and endure extreme challenges against AI opponents. The name "Impossible Clemy" suggests it’s a modified version by the creator Flemy, with a core focus on exploiting AI bugs or patterns. The map spans 4096x6144 tiles, offering a vast battlefield with a twilight tileset that sets a dark, strategic tone. Resources are concentrated in the center, surrounded by expansion areas and defensive strongholds, making resource control and defense equally critical. Players are immediately exposed to AI attacks upon starting and can check map features or send feedback via F10+J. As the name "Impossible" implies, the difficulty is expected to be extremely high, with the main challenge revolving around analyzing and overcoming AI attack patterns. The resource expansions along the top and sides are strategically vital, requiring a balance between defense, resource management, and unit production. The map’s vast space also allows for maneuver warfare and surprise attacks, adding another layer of strategy. This map is likely best suited for experienced players rather than beginners, offering a defense and survival experience centered on deciphering and overcoming AI patterns. The creator provides a Discord feedback channel for reporting issues or suggesting improvements. The map’s size and complexity are designed to require multiple playthroughs to master its strategies. To enjoy this map, players must study AI attack patterns, build efficient defenses, and maintain a balance between resource management and unit production. Leveraging the large map for mobility and ambush tactics is also key. These elements combine to deliver a challenging and engaging experience.
최근 등록된 맵
새로 추가된 파일과 버전을 확인하세요.
이뽀서블 클레미 [R] v1.02 (Impossible Clemy [R] v1.02)
스타크래프트 브루드워의 유즈맵 <이뽀서블 클레미 [R] v1.02>는 AI를 상대로 한 디펜스 및 생존형 맵으로, 플레이어가 극한의 난관 속에서 자원을 관리하고 방어선을 구축하며 살아남아야 하는 독특한 플레이 경험을 제공한다. 맵의 이름은 'Impossible Clemy'로, 제작자 Flemy가 직접 수정한 버전임을 알 수 있으며 AI의 버그나 패턴을 공략하는 것이 핵심 목표로 보인다. 맵의 크기는 가로 4096, 세로 6144로 상당히 넓은 편이며, 황혼 타일셋을 사용하여 어두운 분위기의 전략적 공간을 연출한다. 맵의 구조는 중앙에 광물이 집중되어 있고, 주변으로 멀티 지역과 방어 거점이 배치되어 있어 자원 확보와 방어 전략이 모두 중요한 요소로 작용한다. 플레이어는 시작과 동시에 AI의 공격에 노출되며, F10+J를 통해 맵의 기능을 확인하거나 피드백을 전송할 수 있다. 맵의 이름은 'Impossible'이라는 단어에서 알 수 있듯이 난이도가 매우 높을 것으로 추정되며, AI의 공격 패턴을 분석하고 이를 극복하는 것이 주된 목표로 보인다. 맵의 상단과 좌우 측면에 배치된 자원 멀티는 전략적으로 중요하며, 방어선 구축과 자원 관리, 병력 생산의 밸런스를 맞추는 것이 관건이다. 또한, 맵의 넓은 공간을 활용한 기동전이나 기습 공격도 고려해야 할 요소로 보인다. 이 맵은 초보보다는 경험 많은 플레이어에게 적합할 것으로 보이며, 특히 AI의 패턴을 분석하고 이를 극복하는 재미에 중점을 둔 디펜스 및 생존형 맵으로 분류할 수 있다. 제작자의 디스코드 피드백 채널이 제공되어 있어, 플레이 중 발생하는 문제나 개선 사항을 피드백할 수 있는 구조로 되어 있다. 맵의 넓은 공간과 복잡한 구조는 여러 번의 플레이를 통해 공략법을 익힐 수 있도록 설계되어 있다. 이 맵을 즐기기 위해서는 AI의 공격 패턴을 미리 파악하고, 방어선을 효율적으로 구축하는 능력이 필요하며, 자원 관리와 병력 생산의 균형을 맞추는 것이 필수적이다. 또한, 넓은 맵을 활용한 기동전이나 기습 공격 전략도 고려해 볼 만하다. 이러한 요소들이 결합되어 플레이어에게 도전적이고 흥미로운 경험을 제공할 것으로 예상된다. The StarCraft: Brood War custom map *<Impossible Clemy [R] v1.02>* is a defense and survival-style map where players must manage resources, build defenses, and endure extreme challenges against AI opponents. The name "Impossible Clemy" suggests it’s a modified version by the creator Flemy, with a core focus on exploiting AI bugs or patterns. The map spans 4096x6144 tiles, offering a vast battlefield with a twilight tileset that sets a dark, strategic tone. Resources are concentrated in the center, surrounded by expansion areas and defensive strongholds, making resource control and defense equally critical. Players are immediately exposed to AI attacks upon starting and can check map features or send feedback via F10+J. As the name "Impossible" implies, the difficulty is expected to be extremely high, with the main challenge revolving around analyzing and overcoming AI attack patterns. The resource expansions along the top and sides are strategically vital, requiring a balance between defense, resource management, and unit production. The map’s vast space also allows for maneuver warfare and surprise attacks, adding another layer of strategy. This map is likely best suited for experienced players rather than beginners, offering a defense and survival experience centered on deciphering and overcoming AI patterns. The creator provides a Discord feedback channel for reporting issues or suggesting improvements. The map’s size and complexity are designed to require multiple playthroughs to master its strategies. To enjoy this map, players must study AI attack patterns, build efficient defenses, and maintain a balance between resource management and unit production. Leveraging the large map for mobility and ambush tactics is also key. These elements combine to deliver a challenging and engaging experience.
미네랄4겹 빅헌터 느린무한 AI
스타크래프트 브루드워의 유즈맵 중 하나로, ‘미네랄4겹 빅헌터 느린무한 AI’는 싱글 플레이어 전용의 무한 디펜스 형식 맵이다. 맵의 핵심은 이름에서도 유추할 수 있듯 미네랄이 4겹으로 배치되어 있다는 점으로, 이는 플레이어가 끊임없이 자원을 확보할 수 있도록 설계된 구조다. ‘빅헌터’는 맵 곳곳에 배치된 강력한 적 유닛을 의미하며, ‘느린무한’이란 이름에서 알 수 있듯 적의 스폰 텀과 속도가 비교적 느리게 설정되어 초보자도 안정적으로 플레이할 수 있도록 배려된 점이 특징이다. 맵의 진행 방식은 단순하면서도 중독성 있는 디펜스 게임으로, 플레이어는 본진에서 자원을 채취하며 방어 건물이나 유닛을 지속적으로 생산하고 배치해야 한다. 4겹으로 배치된 미네랄은 자원 확보의 용이성을 높여주지만, 동시에 적의 공격 루트와 방어 포인트가 복잡해질 수 있어 전략적인 배치와 관리가 요구된다. 맵 곳곳의 ‘빅헌터’는 일정 주기마다 등장하는 강력한 적 유닛으로, 이를 상대하기 위해 플레이어는 방어 건물의 업그레이드나 특수 유닛의 생산을 고려해야 한다. ‘느린무한’이라는 설명처럼 적의 스폰 텀과 이동 속도가 느리게 설정되어 있어, 리소스 관리와 방어 전략을 차근차근 세워나갈 수 있다. 이 맵은 특히 스타크래프트의 AI를 활용한 무한 디펜스라는 장르에 특화된 경험을 제공하며, 싱글 플레이어용으로 설계되어 있어 타 플레이어와의 협동이나 경쟁 없이도 혼자서 긴장감 있는 플레이를 즐길 수 있다. 초보자도 쉽게 접근할 수 있도록 난이도가 조절되어 있지만, 지속적인 자원 관리와 방어 전략의 최적화가 필요해 고수 유저에게도 도전을 제공한다. 또한, 맵의 구조가 비교적 크고 복잡하지 않아 자원 확보와 방어 포인트의 선택이 중요하며, 이를 통해 플레이어의 전략적 사고력을 키울 수 있는 좋은 연습용 맵으로도 활용할 수 있다. 이 맵을 플레이하기 전에, 맵의 구조와 자원 배치, 적의 스폰 위치를 미리 확인하는 것이 중요하다. 또한, 방어 건물의 종류와 특성, 그리고 ‘빅헌터’의 패턴을 숙지하여 효율적인 방어 전략을 세우는 것이 관건이다. 초보자라면 먼저 느린 템포의 AI와 전투를 경험해보며 자원 관리와 방어 건물의 배치에 익숙해지는 것이 좋으며, 고수라면 보다 효율적인 자원 활용과 공격 루트의 차단에 중점을 두고 플레이해볼 만하다. This StarCraft: Brood War custom map, titled ‘Mineral Quad-layer Big Hunter Slow Infinite AI,’ is a single-player infinite defense game designed for solo play. The map’s title already hints at its core mechanics: the mineral fields are arranged in four concentric layers, ensuring a steady stream of resources for the player. The term ‘Big Hunter’ refers to the powerful enemy units scattered across the map, while ‘Slow Infinite’ indicates that the enemy spawn rate and movement speed are deliberately slowed down, making the game accessible even to beginners. The gameplay revolves around a classic defense strategy where the player must gather resources, construct and upgrade defensive buildings, and deploy units to fend off waves of enemies. The four-layered mineral structure simplifies resource collection but adds complexity to enemy approach routes, requiring careful planning for optimal defense placement. The ‘Big Hunters’ appear periodically as powerful foes, necessitating strategic upgrades or specialized unit production to counter them effectively. The ‘slow infinite’ pacing ensures that players have ample time to manage resources and refine their defensive setups without feeling overwhelmed. This map is tailored for fans of AI-driven infinite defense games and offers a satisfying solo experience without the need for multiplayer coordination. While the difficulty is balanced for beginners, the strategic depth lies in resource management and adaptive defense planning, making it equally engaging for advanced players. The map’s size and structure are manageable, emphasizing the importance of mineral distribution and choke point control, which helps players hone their tactical thinking. Before playing, it’s advisable to familiarize yourself with the map layout, mineral distribution, and enemy spawn points. Understanding the capabilities of defensive structures and the patterns of ‘Big Hunters’ is crucial for building an effective strategy. Beginners should start by acclimating to the slower pace and practicing resource management, while experienced players can focus on optimizing their mineral income and blocking enemy routes for maximum efficiency.
원 빅 좀비 램페이지 (One Big Zombie Rampage)
스타크래프트 브루드워의 고전 유즈맵 ‘원 빅 좀비 램페이지(One Big Zombie Rampage)’는 4명의 플레이어가 협동하거나 경쟁하며 좀비 웨이브를 막아내는 디펜스 장르의 명작으로, 8192x8192의 넓은 화산 타일셋 맵에서 펼쳐지는 긴장감 넘치는 전투가 특징이다. 이 맵은 화면 가득 펼쳐지는 넓은 맵과 화산 테마의 어두운 분위기, 그리고 적절한 디자인으로 플레이어들에게 몰입감을 선사하며, 특히 좀비의 공격 패턴과 방어 시설을 적재적소에 배치해야 하는 전략성이 돋보인다. 플레이 방식은 크게 두 가지로 나뉘는데, 하나는 1~4명의 플레이어가 협동하여 끊임없이 밀려오는 좀비를 방어하는 ‘협동 디펜스’ 모드와, 다른 하나는 각 플레이어가 좀비로 변신해 상대방을 공격하는 ‘좀비 PvP’ 모드로 추정된다. 협동 모드에서는 각 플레이어가 건물을 건설하고 자원을 모아 방어선을 구축해야 하며, 좀비는 일정 시간마다 일정 수만큼 스폰되어 플레이어의 건물을 공격하거나 점령을 시도한다. 맵 중앙에 위치한 주요 건물을 보호하는 것이 핵심 목표로 보이며, 방어 시설의 배치와 업그레이드가 승패를 좌우할 것이다. 시각적으로는 화산 테마의 어두운 배경에 붉은빛이 도는 좀비와 방어 시설이 대비되어 긴장감을 높이며, 넓은 맵 덕분에 전략적 선택지가 다양하다는 장점이 있다. 다만, 넓은 맵 특성상 초반에는 자원 확보와 방어 시설 건설이 다소 어려울 수 있으므로, 자원 수집과 건물을 배치하는 타이밍을 잘 잡아야 한다. 이 맵은 디펜스 장르를 좋아하는 플레이어들에게는 물론, 넓은 맵을 활용한 전략적 플레이를 즐기는 유저들에게도 훌륭한 선택지가 될 것이다. 다만, AI가 조종하는 좀비의 공격 패턴이 다소 단순할 수 있으므로, 초보자보다는 경험 있는 플레이어에게 더 어울릴 것으로 보인다. One Big Zombie Rampage is a classic UMS map in StarCraft: Brood War where four players either cooperate or compete against waves of zombies in an intense defense-style gameplay set on an expansive 8192x8192 volcanic-themed map. The game delivers deep immersion through its dark volcanic atmosphere and strategic depth, requiring players to build defenses and manage resources effectively while fending off relentless zombie attacks. The gameplay splits into two primary modes: cooperative defense and zombie PvP. In the cooperative mode, players work together to defend against an endless stream of zombies by constructing buildings and upgrading defenses to protect key structures, likely located centrally on the map. The zombie PvP mode, as the name suggests, allows players to transform into zombies and attack opponents, adding a competitive twist. Visually, the volcanic backdrop with its dark tones and red-lit zombie sprites creates a tense atmosphere, while the vast map size offers diverse strategic options. Early-game challenges include resource gathering and base layout, demanding careful timing and planning. This map is ideal for fans of defense games and players who enjoy strategic depth on large maps. However, the AI-controlled zombies might have predictable attack patterns, making the game more suitable for experienced players than beginners.
개인 MaRiNe Defense
스타크래프트: 브루드워의 대표적인 디펜스 장르 유즈맵인 개인 MaRiNe Defense는 1인 플레이를 전제로 한 AI 디펜스 맵으로, 플레이어는 마린 유닛을 조종하여 끊임없이 몰려오는 적군을 방어하는 것이 핵심 목표다. 맵 상단 중앙에 위치한 마린 부대 기지에서 시작하며, 맵 곳곳에 배치된 길목을 따라 끊임없이 밀려오는 저글링, 히드라리스크, 울트라리스크 등 다양한 저그 유닛을 상대로 버티는 전투가 펼쳐진다. 특히 맵의 세로 폭이 넓고 타일이 조밀하게 배치되어 있어, 유닛들이 전장을 종횡무진하며 전략적으로 배치할 수 있는 공간이 풍부하다는 특징이 있다. 맵의 배경은 사막 타일셋으로 구성되어 있으며, 상단과 하단의 넓은 평지 구간은 방어 거점으로 활용하기에 알맞고, 중앙의 협소한 길목은 좁은 틈을 뚫고 오는 적군을 효과적으로 저지할 수 있는 구조로 설계되어 있다. 플레이어는 제한된 자원으로 유닛을 생산하고, 방어선을 구축하며, 때로는 후방 침투를 노리는 적에 대응하기 위해 신속한 판단이 요구된다. 맵의 난이도는 초반에는 비교적 쉽지만, 시간이 지날수록 적군의 병력이 점점 강력해지고, 다양한 조합을 구사하는 패턴을 보이므로 방어선 관리에 주의를 기울여야 한다. 특히 적군이 몰려드는 주요 경로인 상단과 하단의 평지 구간을 사수하는 것이 승리의 관건으로 보이며, 중앙 길목은 보조 방어선으로 활용하는 전략이 효과적일 것으로 추정된다. 맵의 인기는 오랜 시간 동안 이어져 왔으며, 초기 버전부터 꾸준한 업데이트와 밸런스 조정을 거치면서도 플레이어들에게 꾸준한 재미를 선사하고 있는 것으로 보인다. 디펜스 장르에 익숙한 플레이어뿐만 아니라, 전략적 사고와 빠른 반응 속도를 키우고 싶은 초보 플레이어에게도 좋은 입문용 맵으로 추천할 수 있다. 다만, AI의 공격 패턴이 일정 수준 이상이 되면 난이도가 급격히 상승하므로, 방어 전략과 유닛 조합에 대한 숙련도가 필요하다는 점을 염두에 둬야 한다. 맵을 플레이하기 전에는 기지 주변의 주요 길목과 방어 가능한 위치를 미리 파악해두는 것이 좋다. 또한, 적군의 병력이 집중되는 시간대와 패턴을 관찰하여 대비책을 마련하는 것도 중요하다. 이 맵은 단순히 방어하는 것뿐만 아니라, 유닛 생산과 자원 관리를 동시에 고려해야 하는 전략성이 돋보이는 작품으로, 디펜스 장르의 정수를 느낄 수 있는佳作 중 하나로 손꼽힌다. 특히 개인 전투를 중시하는 플레이어들에게는 최고의 선택지가 될 것이다. 맵의 제목과 설명에서 알 수 있듯이, 마린 유닛을 중심으로 한 전투가 주를 이루지만, AI의 공격 패턴에 따라 다양한 유닛을 활용해야 한다는 점도 흥미로운 요소다. 마린의 장점인 사정거리와 기동성을 살리면서도, 때로는 히드라리스크나 뮤탈리스크 같은 공중 유닛을 상대하기 위한 대공 병력의 생산도 필요하다는 점이 맵의 깊이를 더하고 있다. 전체적으로 이 맵은 디펜스 장르의 기본기를 익히기에 좋은 맵이며, 플레이어의 전략적 사고와 적응력을Test를 동시에 요구하는佳作로 평가할 수 있다. Marine Defense is a classic *StarCraft: Brood War* defense-style custom map where players control Marine units to fend off endless waves of enemy forces. The core objective is survival—defending against relentless assaults from Zerg units like Zerglings, Hydralisks, and Ultralisks as they push through the map’s choke points. The map features a wide vertical layout with densely packed tiles, offering ample space for strategic unit positioning and maneuvering. Its desert-themed background contrasts with the open plains at the top and bottom, which serve as ideal defensive frontlines, while the narrow central corridor is designed to funnel and disrupt enemy advances. Players must manage limited resources, construct defensive lines, and react swiftly to counter infiltrations or sudden threats. While the early game is relatively straightforward, difficulty ramps up significantly as enemy forces grow stronger and employ more varied compositions over time. Securing the upper and lower plains—primary attack routes—is crucial for victory, with the central path often used as a secondary defensive line. The map has maintained popularity for years, thanks to consistent updates and balance adjustments that keep it engaging. Ideal for both seasoned defense players and beginners looking to sharpen their strategic thinking and reflexes, Marine Defense demands adaptability as AI patterns become more complex. Scouting key chokepoints, anticipating enemy waves, and optimizing unit production are essential for success. More than just a test of endurance, the map challenges players to balance resource management, unit composition, and real-time decision-making. While Marines form the backbone of the defense, players must also prepare for aerial threats like Mutalisks, adding depth to the strategy. Overall, it’s a well-crafted title that serves as an excellent introduction to the defense genre while pushing players to refine their tactical skills.
맵 선택 가이드
태그는 맵의 핵심 특징을 빠르게 설명하지만 제작 버전마다 규칙이 다를 수 있습니다. 상세 설명에서 권장 인원, 난이도, 플레이 시간과 버전을 함께 확인한 뒤 다운로드하세요.