
AI 대전 스타크래프트 맵 모음
'AI 대전' 태그가 등록된 맵을 모았습니다. 장르 하나로 찾기 어려운 플레이 방식, 난이도와 특징을 중심으로 인기 맵과 최신 맵을 비교해 보세요.
- 등록 맵
- 25개
- 누적 다운로드
- 0
- 누적 조회
- 818
인기 맵
다운로드와 조회 반응이 높은 맵입니다.
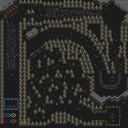
투패스트 투 퓨리어스 (2Fast 2 Furious)
‘투패스트 투 퓨리어스(2Fast 2 Furious)’는 스타크래프트 브루드워의 유즈맵 중 하나로, 레이싱과 경쟁을 결합한 독특한 장르의 맵이다. 이 맵은 플레이어들이 서로 경주하며AI 또는 다른 플레이어들과 경쟁하는 방식으로 구성되어 있어, 경쟁과 속도감을 중시하는 유저들에게 적합하다. 특히 7명의 플레이어가 참여할 수 있으며, 각 플레이어는 맵 상의 트랙을 따라 진행하며ゴール을 향해 달려야 한다. 맵의 배경은 황무지 타일셋을 활용해 넓은 트랙과 주변 환경이 조성되어 있으며, 맵 중앙에는 다리를 건너는 구간이 있어 지형을 활용한 전략적 플레이가 가능하다. 레이싱 맵의 특성상 맵의 흐름과 트랙의 배치, 그리고 장애물의 존재가 플레이 경험을 좌우한다. 이 맵에서는 AI 또는 다른 플레이어들과의 경쟁이 주요 포인트로, 순위 경쟁 및 속도 최적화, 그리고 트랙 상의 장애물 회피 전략이 요구된다. 또한 맵의 크기가 3072x2048로 비교적 크기 때문에 넓은 시야를 활용한 전략적 판단이 중요하다. 맵의 인코딩은 cp949로 설정되어 있어 한글 사용 환경에서 안정적으로 구동되며, 타일셋은 황무지 기반으로 제작되어 있어 황량한 분위기의 레이싱 트랙이 연출된다. 레이싱 맵의 경우, 플레이어 간의 경쟁 외에도 AI의 난이도나 트랙의 복잡도가 플레이 경험을 결정짓는 요소로 작용한다. 이 맵은 레이싱이라는 장르의 특성상 빠른 판단력과 정확한 조작이 요구되며, 특히 7명이라는 인원이 참여할 수 있어 다인 플레이에서도 흥미로운 경쟁을 즐길 수 있다. 레이싱의 재미를 극대화하기 위해서는 맵의 구조를 숙지하고, AI의 패턴이나 다른 플레이어의 움직임을 예측하는 능력이 필요하다. 또한 트랙의 장애물을 어떻게 회피하거나 활용할지에 따라 순위가 갈릴 수 있으므로, 전략적인 플레이가 중요하다. 레이싱 맵을 좋아하는 유저들이라면 이 맵의 트랙과 경쟁 요소를 통해 재미있는 시간을 보낼 수 있을 것이다. 이 맵을 플레이하기 전에 확인해야 할 요소는 트랙의 배치와 장애물의 위치, 그리고 AI의 난이도 설정이다. 트랙의 복잡한 구간이나 좁은 길목에서는 충돌이나 추월 시도를 주의해야 하며, AI의 난이도에 따라レース의 난이도가 달라질 수 있으므로 자신에게 맞는 난이도를 선택하는 것이 중요하다. 또한 맵의 넓은 크기를 고려하여, 시야를 넓게 활용하고 빠르게 이동할 수 있는 유닛이나 구조물을 활용하는 전략도 고려해 볼 만하다. ‘2Fast 2 Furious’ is a unique custom map in *StarCraft: Brood War* that blends racing and competitive gameplay. Players compete against AI or other players by racing along a track, making it ideal for users who enjoy speed and competition. The map supports up to seven players, each navigating the track toward the finish line. Set in a wasteland tile theme, the map features wide tracks and surrounding environments, with a bridge-crossing section in the center that allows for strategic terrain-based play. In a racing map, the flow of the track, its layout, and obstacles are key factors that shape the player experience. Here, the main focus is on competing against AI or other players, requiring strategies for ranking, optimizing speed, and avoiding obstacles on the track. With a large map size of 3072x2048, players must make strategic decisions based on a broad field of vision. The map is encoded in CP949 for stable operation in Korean environments, and its wasteland-based tile set creates a desolate racing track atmosphere. Beyond player competition, the AI difficulty and track complexity also influence the experience. As a racing map, it demands quick decision-making and precise control, especially with up to seven players, offering engaging multiplayer competition. To maximize the fun, players should familiarize themselves with the map’s layout, predict AI patterns or opponent movements, and strategize obstacle avoidance or utilization—key factors that can determine rankings. Fans of racing maps will likely enjoy the track design and competitive elements this map provides. Before playing, check the track layout, obstacle locations, and AI difficulty settings. Be cautious of collisions or overtaking attempts in tight or complex sections, as the AI difficulty directly affects race difficulty—choosing the right setting is crucial. Given the map’s size, consider strategies that utilize wide vision and fast-moving units or structures for efficient movement.
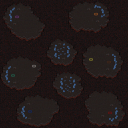
Sea of Fire - Observer Edition
스타크래프트 브루드워 유즈맵 '불의 바다 - 옵저버 에디션(Sea of Fire - Observer Edition)'은 동서 양 진영이 불타는 전장에서 격돌하는 모습을 관전하는 옵저버 전용 맵입니다. 정글 타일셋 기반 128×96 타일 크기의 전장에서 최대 8명이 입장해 동쪽과 서쪽으로 나뉜 컴퓨터 세력의 대규모 전투를 지켜볼 수 있습니다. 맵 설명에 '3명 이상 권장'이라 표기되어 있으나 실제로는 혼자서도 관전이 가능하며, 플레이어 개입 없이 AI 간 자원 확보, 병력 생산, 전면전이 자동으로 진행됩니다. 옵저버 모드 특성상 직접 조작할 유닛이 없고 트리거로 승패가 갈리므로 난이도는 쉬움에 가깝습니다. 컴까기나 AI 대전 구경, 빌드 오더 연구, 맵 지형 분석용으로 적합하며, 별도 승리 조건 없이 전투 종료까지 관람하는 방식입니다. 플레이 전 옵저버 슬롯 배정과 게임 속도 설정을 확인하면 더 쾌적하게 감상할 수 있습니다. StarCraft: Brood War UMS map 'Sea of Fire - Observer Edition' is an observer-only map where you watch the Eastern and Western factions clash in a burning battlefield. On a Jungle tileset spanning 128×96 tiles, up to 8 players can join to observe the large-scale battle between computer forces divided into East and West. Although the description suggests 3+ players, solo observation is perfectly viable; with no player intervention, the AI automatically gathers resources, produces units, and engages in all-out war. Since observers control no units and victory is determined by triggers, the difficulty is effectively Easy. It suits comp-stomp spectators, AI match viewers, build-order study, and terrain analysis, with no separate win condition beyond watching until the battle ends. Checking observer slot assignment and game speed before starting ensures a smoother viewing experience.
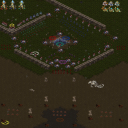
Encampment Siege (캠프 공성전 vFinal)
스타크래프트 브루드워의 유즈맵 〈Encampment Siege vFinal〉은 방어와 공격을 모두 경험할 수 있는 흥미로운 디펜스 장르의 맵입니다. 이 맵은 플레이어에게 두 가지 선택지를 제공합니다. 하나는 방어 진영이 되어 적의 공격을 막아내는 역할로, 캠프를 지키며 공격해 오는 적군을 상대로 시간을 버티는 것입니다. 또 다른 하나는 공격 진영이 되어 방어자의 캠프를 무너뜨리는 것입니다. 맵 중앙에는 커다란 방어 진영이 자리 잡고 있으며, 주변에는 공격 루트가 복잡하게 배치되어 있어 전략적 플레이가 요구됩니다. 방어 진영은 건물을 짓고 자원을 모아 방어선을 강화할 수 있으며, 공격 진영은 유닛을 생산해 방어자를 밀어붙이는 방식으로 진행됩니다. 맵의 디자인과 타일셋은 사막 분위기를 연출하며, 시야가 넓은 오픈 필드와 협소한 통로들이 혼재되어 있어 전술적 선택이 중요해집니다. 특히 방어 진영은 적의 공격 루트를 미리 예측하고 방어 건물을 배치해야 하며, 공격 진영은 적의 방어선을 공략할 수 있는 효율적인 루트를 찾아야 합니다. 플레이어 간 경쟁이 아닌, 맵 자체의 구조와AI를 상대로 한 전투가 주를 이루므로, 혼자 플레이하거나 팀을 이뤄도 재미있게 즐길 수 있습니다. 초보자는 방어 위주로 플레이하며 AI의 공격 패턴을 익히는 데 집중하고, 숙련자는 공격 루트를 효율적으로 공략하는 전략을 세워보는 것을 추천합니다. 맵의 난이도는 내구도와 공격 패턴에 따라 달라지므로, 처음에는 쉬운 난이도로 시작해 점차 어려움을 늘려가는 방식이 좋습니다. 맵의 특징은 중앙 방어 진영의 취약성과 공격 루트의 다양성으로, 이를 활용한 전략적 플레이가 핵심이 됩니다. This StarCraft: Brood War custom map, 〈Encampment Siege vFinal〉, offers a compelling defense genre experience where players can engage in both defensive and offensive roles. The map presents two distinct playstyles: defending the central encampment against waves of AI-controlled enemies or attacking the enemy's stronghold to destroy it. The central encampment features a robust defensive structure surrounded by intricate attack routes, requiring strategic foresight. Defenders can construct buildings and gather resources to fortify their position, while attackers must coordinate unit production and movement to breach the defenses. The map’s desert-themed tile set enhances the visual experience, with a mix of open fields and narrow passages that demand tactical decision-making. Defenders must anticipate enemy attack patterns and place defensive structures wisely, whereas attackers need to identify and exploit weak points in the enemy lines. The map supports both solo and team play, with AI-controlled opponents providing dynamic challenges. Beginners may focus on defensive strategies to learn AI attack patterns, while advanced players can experiment with efficient attack routes. The difficulty varies based on the encampment’s durability and the AI’s aggression, making it ideal to start with easier settings and gradually increase the challenge. The map’s standout features are the central encampment’s vulnerabilities and the diverse attack routes, which encourage deep strategic planning and adaptability.
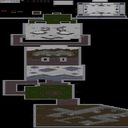
랜덤 마이크로 디펜스 (Random Micro Defense)
스타크래프트 브루드워의 유즈맵인 <Random Micro Defense>는 플레이어가 직접 유닛을 조합하고 전략을 세워 방어전을 펼치는 컴까기(컴퓨터 상대) 디펜스 장르의 맵이다. 5명의 플레이어가 각각의 선택지를 통해 다양한 미세 조종이 가능한 유닛 조합을 구성할 수 있으며, 이를 활용해 본진을 forsvara(방어)하고 HQ가 파괴되지 않도록 저지하는 것이 핵심 목표다. 맵의 구조는 중앙에 위치한 본진과 사방으로 뻗어나가는 길목, 그리고 다수의 적 기지들이 배치되어 있어 전략적 방어 라인을 구축해야 한다. 플레이어는 선택지를 통해 테란, 저그, 프로토스 유닛을 조합할 수 있으며, 각 유닛의 특성과 스킬을 활용한 미세 조종이 요구된다. 특히, 유닛의 체력 관리와 포지셔닝, 타이밍을 맞춘 공격 타이밍이 승패를 좌우한다. 맵의 난이도는 선택한 유닛 조합과 플레이어의 숙련도에 따라 크게 달라지며, 초보자는 기본 유닛 위주로 조합하는 것이 좋고 숙련자는 조합과 컨트롤을 극대화해 상대방을 압박할 수 있다. 컴퓨터 상대 유닛을 조합해 방어하는 형식의 맵인 만큼, 전략적 사고와 실시간 미세 조종 능력이 모두 요구된다. 특히, 적의 공격을 효율적으로 방어하면서도 반격 타이밍을 노리는 것이 중요하다. 맵의 규모가 크고 길목이 많아 유닛 배치와 이동 경로를 신중히 계획해야 하며, 사소한 실수가 패배로 이어질 수 있어 주의가 필요하다. 이 맵은 디펜스 장르임에도 불구하고 유닛 조합의 자유도가 높아 단순히 방어만 하는 것이 아니라 능동적인 플레이가 가능하다는 점이 특징이다. 또한, 미세 조종을 요구하는 만큼 전략적 깊이와 재미가 있는 편으로, 컴까기 유즈맵을 즐기는 플레이어들에게 추천할 만한 작품이다. 플레이 전에는 자신에게 맞는 유닛 조합을 미리 생각해 보고, 방어 라인을 어떻게 구축할 것인지 계획을 세워두는 것이 좋다. Random Micro Defense is a UMS (Use Map Settings) defense map in StarCraft: Brood War where players assemble custom micro-intensive unit compositions to defend their base against AI-controlled enemies. The map is designed for 5 players, each selecting a unique mix of Terran, Zerg, or Protoss units to create a balanced defense team. The objective is straightforward: protect your headquarters (HQ) from destruction by strategically positioning and controlling your units. The map features a central starting location with multiple pathways leading to enemy bases, requiring players to establish defensive lines at key chokepoints. Unit control is critical, as players must manage health, positioning, and timing to maximize effectiveness. Beginners may opt for simpler compositions, while experienced players can experiment with advanced micro strategies to overwhelm opponents. As a computer-based defense map, success depends on both strategic planning and real-time execution. Players must anticipate enemy movements, adapt to changing conditions, and strike a balance between defense and counterattacks. The large map size and intricate pathways demand careful unit placement and pathfinding to avoid critical mistakes. What sets Random Micro Defense apart from conventional defense maps is its emphasis on player-driven unit customization and micro play. This adds a layer of depth and replayability, making it an engaging choice for fans of UMS and defense-style maps. Before playing, it's advisable to experiment with different unit combinations and plan defensive setups to ensure a smoother experience.
스나이퍼 페인트볼 엘리트 AI (Sniper Paintball Elite AI)
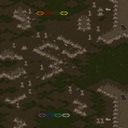
스타크래프트 브루드워 유즈맵 '스나이퍼 페인트볼 엘리트 AI'는 4인 협동으로 CPU 엘리트 저격수들과 대결하는 미니게임형 생존 맵이다. 사막 타일셋의 2048×2048 크기 전장에서 플레이어는 고스트 유닛을 조작해 적 저격수의 공격을 피하면서 반격해야 한다. 맵 설명에 명시된 'Anti-Camp' 시스템은 한 자리에 머무르며 대기하는 캠핑 플레이를 방지해 끊임없는 이동과 엄폐, 타이밍 좋은 사격을 강제한다. 인공지능 저격수는 정확한 에임과 반응 속도를 보여주며, 난이도가 올라갈수록 탄속 예측과 지형 활용이 필수적이다. 4인 협력 시에는 역할 분담(유인, 엄폐 사격, 측면 기동)이 승패를 가른다. 맵 구조는 개활지와 암석 지대가 섞여 있어 시야 확보와 은신처 선택이 전략적 깊이를 더한다. 일반적인 디펜스나 밀리와 달리 라운드 단위 생존과 점수 경쟁 요소가 결합돼 짧은 호흡으로 긴장감을 즐기기에 적합하다. 추천 대상은 에임 연습, 반사 신경 테스트, 협동 생존 플레이를 원하는 유저다. 플레이 전에는 AI 난도 조절 여부, 라운드 제한 시간, 부활 시스템 유무를 확인하면 좋다. Sniper Paintball Elite AI is a StarCraft Brood War UMS map where four players cooperate against CPU-controlled elite snipers in a mini-game survival format. Set on a 2048×2048 desert tileset, each player controls a Ghost unit and must dodge incoming sniper fire while returning accurate shots. The map description mentions an "Anti-Camp" system that prevents players from staying in one spot, forcing constant movement, cover usage, and well-timed firing. The AI snipers demonstrate precise aim and fast reaction speeds, and as difficulty increases, predicting bullet trajectories and leveraging terrain become essential. In four-player cooperation, role division such as baiting, covering fire, and flanking determines success. The layout mixes open ground with rocky areas, adding strategic depth to vision control and hiding spot selection. Unlike standard defense or melee maps, this map combines round-based survival with score competition, making it suitable for short, intense sessions. It is recommended for players who want to practice aiming, test reflexes, or enjoy cooperative survival gameplay. Before playing, check whether AI difficulty is adjustable, if there is a round time limit, and whether a respawn system exists.
알라모 전투 (The Alamo)
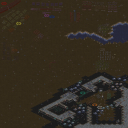
스타크래프트 브루드워의 유즈맵 《The Alamo》는 역사적 전투를 재현한 전략 디펜스 장르의 맵으로, 플레이어는 멕시코군과 알라모 요새 수비대를 동시에 조종할 수 있는 독특한 구도를 갖추고 있다. 맵 중앙에는 알라모 요새가 위치하며, 외곽으로 펼쳐진 넓은 평야는 적군의 진격로를 제공한다. 맵의 특성은 동시 다중 시점에서 전투를 진행할 수 있도록 디자인되어 있어, 알라모 수비대의 입장에서는 요새 안의 방어시설을 지키며 적군을 물리쳐야 하고, 멕시코군 입장에서는 요새로 진입해 방어군을 섬멸하는 전략을 구사해야 한다. 초반에는 소규모 교전이 펼쳐지다가 점차 대규모 전투로 발전하는 구조로, 전략적 선택과 자원 관리 능력이 중요하다. 플레이어는 각 진영의 유닛을 직접 컨트롤하거나 컴퓨터가 관리하는 AI로 플레이할 수 있으며, 맵의 넓은 공간을 활용한 포위 공격이나 요새 방어를 어떻게 펼치느냐에 따라 승패가 좌우된다. 특히 요새 안의 방어 시설과 외곽의 지형이 전투의 흐름을 결정짓는 핵심 요소로 작용한다. 맵의 그래픽은 황무지 타일셋을 기반으로 하여 전쟁의 분위기를 잘 연출하며, 적절한 시야와 시야 차단 요소가 전략적 깊이를 더한다. 이 맵은 역사적 전투를 소재로 삼아 흥미로운 스토리텔링 요소를 제공하며, 특히 알라모 전투의 서사적 긴장감을 느낄 수 있도록 구성되어 있다. 멀티플레이를 전제로 제작되었으나 싱글 플레이에서도 인공지능 상대와 대전을 즐길 수 있다. 초보 플레이어는 각 진영의 유닛 역할과 맵의 주요 지점을 숙지하는 것이 중요하며, 숙련된 플레이어는 전략적 기습이나 방어 라인 구축을 통해 승리를 노릴 수 있다. 맵의 규모가 크고 전투가 장기전으로 흐를 가능성이 높아, 지속적인 집중력과 판단력이 요구된다. 이 맵은 ‘TER)V(INATOR’ 또는 ‘ALA)V(ODEFENDER’라는 제작자에 의해 제작되었으며, 본래 ‘Braveheart’라는 맵을 기반으로 개선된 버전으로 알려져 있다. 맵의 제목 《The Alamo》는 텍사스 독립 전쟁 당시의 알라모 전투를 의미하며, 역사적 배경과 게임플레이의 결합이 이 맵의 특징을 잘 드러낸다. This Brood War custom map, *The Alamo*, is a strategic defense game that reenacts a historical battle, allowing players to control both the Mexican Army and the defenders of the Alamo simultaneously. The map features a central Alamo fortress surrounded by vast plains, serving as a battlefield for opposing forces. The unique design enables simultaneous multi-view gameplay, where defenders must protect the fort while the attacking force aims to breach its walls. Early skirmishes escalate into large-scale battles, emphasizing strategic planning and resource management. Players can either manually control units or rely on AI for their faction, with the vast terrain and defensive structures playing a crucial role in determining the outcome. The map uses a barren tileset to enhance the war atmosphere, incorporating line-of-sight mechanics that add depth to tactical decisions. The narrative of the Alamo battle adds historical context, making the experience both engaging and educational. Designed for multiplayer, *The Alamo* also supports single-player against AI opponents. Beginners should focus on understanding unit roles and key map locations, while experienced players can leverage ambushes or defensive setups for victory. The large scale and potential for prolonged battles demand sustained attention and strategic thinking. Created by ‘TER)V(INATOR’ or ‘ALA)V(ODEFENDER’, this map is an improved version of the original *Braveheart* map. The title *The Alamo* reflects its historical inspiration, blending real-world events with immersive gameplay to create a compelling experience.
Recruit Map
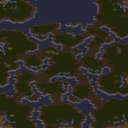
스타크래프트 브루드워의 유즈맵 "Recruit Map"은 한때 밀리 맵으로 분류되었지만, 8인 플레이를 지원하는 이 맵은 실제로는 팀 기반의 컴까기(컴퓨터 상대 유즈맵) 형식으로 진행된다. 맵의 전체적인 분위기는 사막 타일셋을 활용해 건조한 사막 지형을 연출하며, 중앙에 위치한 넓은 평지가 전투의 주요 무대가 된다. 맵의 구조는 비교적 간소하지만, 8명의 플레이어가 각기 다른 위치에서 시작해 중앙으로 모여드는 구조로 이루어져 있어 초반의 전략적 움직임이 중요하다. 맵의 난이도는 보통 수준으로, 맵의 배치를 최대한 활용해 적절한 위치 선정을 통해 유리한 고지를 점유하는 것이 관건이다. 특히 컴까기 형식답게 AI가 상대방으로 등장하며, 플레이어들은 AI를 상대로 자신의 기지를 방어하거나 AI의 기지를 공격하는 방식으로 진행된다. 맵의 진행 방식은 비교적 단순하지만, 8인의 대전이 주는 긴장감과 팀워크가 요구되는 점이 특징이다. 추천 대상은 스타크래프트 브루드워를 즐기는 모든 유저이며, 특히 팀플레이를 선호하는 유저들에게 적합하다. 플레이 전에는 맵의 구조를 충분히 숙지하고, 초반의 위치 선정을 신중히 결정할 필요가 있다. 또한 AI의 패턴을 미리 분석해 두면 보다 수월한 플레이가 가능하다. 맵의 밸런스는 평균 수준으로, 초보자와 숙련자 모두 즐길 수 있도록 구성되어 있다. 다만, 팀 간의 협력이 필수적이므로 팀원과의 원활한 소통이 뒷받침되어야만 최고의 플레이 경험을 얻을 수 있다. "Recruit Map" from StarCraft: Brood War was once classified as a melee map, but this 8-player map is actually a team-based "vs. AI" custom game where players fight against computer opponents. The map features a desert tile set, creating a dry, arid terrain with a large central plain serving as the main battlefield. While the layout is relatively simple, the eight players start in different positions and must converge on the center, making early strategic movement crucial. The difficulty is moderate, with success depending on leveraging the map's layout to secure advantageous positions. As an AI-based mode, players defend their bases against AI attacks or launch assaults on the AI's territory. The gameplay is straightforward, but the intensity of an eight-player match and the need for teamwork stand out. This map is recommended for all Brood War players, especially those who enjoy team play. Before playing, it's important to thoroughly understand the map layout and carefully choose starting positions. Analyzing the AI's patterns in advance can also make the game easier. The balance is average, making it enjoyable for both beginners and experienced players, though strong teamwork and communication are essential for the best experience.
5vs3hardcomp(stack)
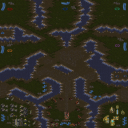
‘5 vs 3 하드 컴까기(5vs3 Hard Comp Stack)’는 사막 타일셋의 96×96 맵에서 5명의 플레이어가 3명의 하드 난이도 컴퓨터를 상대로 협동전을 벌이는 유즈맵이다. 맵 제목과 내부 설명인 ‘REMEBER TO LABEL UR CIV BEFORE TURNING OFF LIGHTS!’에서 알 수 있듯 게임 시작 시 문명(종족·보너스)을 선택하는 라벨링 과정이 필수적이며, 이후 라이트를 끄면 본격적인 전투가 개시된다. 컴퓨터 3기는 자원과 병력 생산이 크게 강화된 ‘스택’ 상태로 배치되어 초반 러시부터 중반 대규모 공세까지 강한 압박을 가하므로, 5인 팀원 간 자원 분담·테크 트리 조율·공격 타이밍 맞춤이 승패를 가른다. 맵 크기가 3072×3072로 넓어 멀티 기지 확보와 맵 장악 싸움이 중요하며, 고정 맵 특성상 지형 지물과 초크 포인트를 활용한 방어선 구축이 가능하다. 제작자 표기 ‘Fixed up by: cLass1C’로 보아 기존 컴까기 맵을 밸런스 조정·버그 수정해 재배포한 버전으로 추정된다. 협동 매크로 운영과 대규모 병력 컨트롤을 즐기는 중상급 유저에게 적합하며, 입문자는 문명 선택 가이드와 초반 빌드 오더를 숙지한 뒤 도전하는 것을 권한다. 플레이 전 체크 포인트는 문명 라벨링 순서, 라이트 끄기 트리거 작동 여부, 팀원 간 종족 중복 방지다. '5 vs 3 Hard Comp Stomp (5vs3 Hard Comp Stack)' is a use-map set on a 96×96 Desert tileset where five players cooperate against three Hard-difficulty computers. As the internal description ‘REMEBER TO LABEL UR CIV BEFORE TURNING OFF LIGHTS!’ indicates, the match begins with a mandatory civilization-picking phase; once the lights are turned off, the real battle starts. The three AIs run with heavily stacked resources and production, applying relentless pressure from early rushes to mid-game deathballs, so the human team must coordinate economy splits, tech paths, and attack timing. The 3072×3072 map size encourages multi-base expansion and map control, while the fixed layout lets players build defensive lines around chokepoints. The credit ‘Fixed up by: cLass1C’ suggests this is a rebalanced, debugged re-release of an existing comp-stomp map. It suits intermediate-to-advanced players who enjoy cooperative macro management and large-army control; newcomers should study the civ-picking guide and early build orders first. Pre-play checks: civilization labeling order, light-switch trigger function, and avoiding race overlap among teammates.
터칸하이드군두르! (TurCanHydGoonDur!)
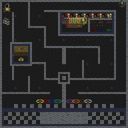
《TurCanHydGoonDur!》는 스타크래프트 브루드워의 유즈맵으로, 6명의 플레이어가 참여하는 대규모 컴까기 장르의 맵입니다. 내부 설명에 마린, 고스트, 짐 레이너, Kerrigan, Stukov, Duran 등 다양한 유닛과 건물이 등장하는 것으로 보아, 스킬 대전을 기반으로 한 팀 전투가 주된 플레이 방식일 것으로 추정됩니다. 특히 'Turret', 'Cannon', 'Hydra', 'Dragoons' 등의 키워드는 방어와 공격의 균형을 맞추는 전략적 요소가 포함되어 있음을 시사합니다. 맵 제목에서 느껴지는 강렬한 느낌과 함께, 내부 설명의 수치(예: Marine 10+4, Ghosts 35+15 등)는 유닛의 초기 수량과 강화 수치를 의미하는 것으로 보이며, 이는 플레이어의 전략적 선택과 팀워크가 중요한 요소임을 강조합니다. 이 맵의 핵심은 '컴까기'로, AI가 통제하는 적군과 대결하는 형식으로 진행됩니다. 플레이어는 각자 선택한 유닛과 건물을 바탕으로 적을 격파하거나 방어에 성공해야 하며, 팀별로 협력하여 공략해야 하는 구조가 예상됩니다. 내부 설명의 수치와 유닛 목록은 맵의 난이도나 플레이 스타일을 유추할 수 있게 해주며, Kerrigan이나 Duran과 같은 강력한 유닛이 포함되어 있어 고난이도의 전투가 예상됩니다. 또한, Turret와 Cannon의 등장은 방어 구조물을 구축할 수 있는 기회를 제공하며, Hydra와 Dragoons는 공격과 방어를 동시에 고려해야 하는 복잡한 전략을 요구할 것입니다. 맵의 이름은 다소 난해하지만, 이는 플레이어 간의 커뮤니케이션이나 전략적 암호를 암시할 수도 있습니다. 이 맵은 주로 전략적 사고와 팀워크를 중시하는 플레이어에게 적합하며, 특히 컴까기 장르에 익숙한 유저라면 즐겁게 플레이할 수 있을 것입니다. 다만, 내부 설명의 수치가 플레이어 수나 난이도를 직접적으로示唆하지 않으므로, 실제 플레이 전에 맵의 설명이나 튜토리얼을 꼼꼼히 확인하는 것이 중요합니다. 또한, 다양한 유닛과 건물이 등장하므로, 각 유닛의 특성과 역할을 미리 숙지하고 플레이에 임하는 것이 좋습니다. 전체적으로 《TurCanHydGoonDur!》는 팀워크와 전략이 요구되는 흥미로운 유즈맵으로, 컴까기 장르의 팬들에게 strong한 추천을 드립니다. 《TurCanHydGoonDur!》 is a *StarCraft: Brood War* custom map designed for six players, falling under the large-scale AI-combat genre where teams battle against AI-controlled enemies. Based on the internal description mentioning units and buildings like Marines, Ghosts, Jim Raynor, Kerrigan, Stukov, and Duran, the gameplay likely revolves around skill-based team combat. Key terms such as "Turret," "Cannon," "Hydra," and "Dragoons" suggest strategic elements balancing offense and defense. The intense feel of the map’s title, combined with numerical values in the description (e.g., "Marine 10+4," "Ghosts 35+15"), indicates initial unit counts and upgrade levels, emphasizing the importance of player strategy and teamwork. The core gameplay focuses on "AI combat," where players must defeat or defend against AI-controlled forces using their chosen units and structures, requiring close team coordination. The unit list and stats provide insight into the map’s difficulty and playstyle, with powerful units like Kerrigan and Duran suggesting high-intensity battles. The presence of defensive structures like Turrets and Cannons allows for strategic base-building, while Hydras and Dragoons introduce complex tactics balancing attack and defense. Though the title may seem cryptic, it could hint at player communication or coded strategies. This map is best suited for players who value strategic thinking and teamwork, particularly those familiar with AI-combat genres. Since the internal stats don’t directly indicate player count or difficulty, reviewing the map’s instructions or tutorials beforehand is crucial. With its diverse units and structures, understanding each unit’s role beforehand will enhance the experience. Overall, 《TurCanHydGoonDur!》 is a compelling custom map that demands teamwork and strategy, making it a strong recommendation for fans of the AI-combat genre.
그리스 전쟁 V3.3 (War In Greece V3.3)
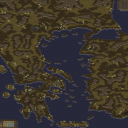
스타크래프트 브루드워 맵 ‘War In Greece V3.3’는 그리스 신화와 고대 전쟁사를 배경으로 한 대규모 전략 디펜스 유즈맵으로, 플레이어는 로마, 페르시아, 그리스 등 고대 제국을 선택해 적대 세력을 상대로 영토를 방어하고 확장하는 전투를 펼친다. 맵은 넓은 황무지 타일셋 위에 고대 도시와 요새, 해상 루트까지 세밀하게 배치되어 있으며, 각 제국의 유닛과 건물이 고유한 특성을 반영해 전략적 깊이를 더한다. 전투는mostly 근접전과 원거리 공격 위주로 진행되며, AI가 조종하는 적군(바바리안 등)과의 교전이 주를 이룬다. 맵의 가장 큰 특징은 ‘강화된_DETAIL’로 설명된 대로 디자인과 밸런스가 개선되어, 기존 버전보다 더 디테일한 맵 구조와 제한적인 증원 시스템이 적용되어 있다. 플레이어는Empire 선택 후 초반 자원 확보와 방어선 구축에 주력해야 하며, 후방 침공을 방지하기 위한 요새 배치와 병력 운용이 핵심 전략이다. 맵은 7인 플레이를 상정하고 있으나, 팀 구성이 명확하지 않으며 싱글 플레이 또는 AI 팀전 형태로도 즐길 수 있어, 고대 전쟁 드라마를 체험하고 싶은 유저들에게 적합하다. 특히 그리스 신화와 고대 로마의 군사 역사를 좋아하는 팬들에게는 몰입감 있는 경험을 제공할 것으로 보인다. 다만, 넓은 맵 특성상 초보자는 맵 리딩과 병력 관리에 어려움을 느낄 수 있으니, 동영상 가이드나 커뮤니티 팁을 참고하는 것이 좋다. War In Greece V3.3 is a large-scale strategy defense custom map for StarCraft: Brood War, set in ancient Greece and based on historical wars. Players choose from empires like Rome, Persia, and Greece to defend their territory and expand while battling hostile forces such as AI-controlled barbarians. The map features a vast wasteland tileset with meticulously placed ancient cities, fortresses, and sea routes, each reflecting the unique units and buildings of the selected empire. Combat revolves around melee and ranged attacks, with strategic depth added by the 'New War in Greece with much more detail' improvements, including refined designs and limited reinforcement systems. Players focus on early resource gathering and fortifying defenses, as rear invasions by barbarians are a constant threat. Designed for 7 players, the map can also be enjoyed in single-player or AI team modes, making it ideal for fans of ancient warfare dramas and military history. However, beginners may struggle with map reading and unit management due to the map's scale, so consulting guides or community tips is recommended for smoother gameplay.
SC UpⓖL 라이드오브발키리 (SC UpⓖL Ride of Valkyrie)
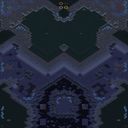
‘SC UpⓖL 라이드오브발키리’는 스타크래프트 브루드워 유즈맵의 정석이라 할 수 있는 컴까기 장르의 명작으로, 플레이어가 직접 조작할 수 있는 AI와 협동하여 거대한 적진을 뚫고 나가야 하는 긴장감 넘치는 진행이 특징이다. 맵의 이름은 북유럽 신화의 전사 ‘발키리’에서 유래한 듯하며, 실제 플레이에서도 죽음의 전투를 연상케 하는 스케일과 박력이 인상적이다. 내부 설명에 따르면 7명의 플레이어 중 2명은 제작자, 4명은 조작 가능한 플레이어로 구분되어 팀워크와 전략적 연계를 요구하는 구조로 보인다. 화산 타일셋으로 조성된 배경은 붉은 색감과 용암 지형이 어우러져 전쟁의 참혹함을 시각적으로 극대화하며, 넓은 맵 크기는 대규모 병력 이동과 기동전을 펼치기에 최적화되어 있다. 맵의 핵심은 ‘업그레이드’라는 이름처럼 지속적인 기술 개발을 통해 유닛의 능력치를 강화하거나 새로운 특수 능력을 획득하는 시스템에 있으며, 이는 단순한 전투를 넘어 전략적 선택과Resource 관리 능력을 시험하는 요소로 작용한다. 적진은 중앙에 집중되어 있으며, 플레이어는 동서남북 네 방향의 입구를 통해 조금씩 전진해 나가며 중간중간 배치된 방어 기지나 보급 거점을 차지해야 한다. 맵의 균형은 초반에는 비교적 안정된 편이지만, 업그레이드와 병력의 질이 나뉘면서 중후반으로 갈수록 긴장감이 높아지며, 특히 AI의 난이도나 맵 내 패턴이 플레이어의 전략에 따라 변동할 가능성이 있어 재플레이 가치가 높다. 초보자에게는 AI의 특성과 맵의 구조를 익히는 과정이 다소 버겁게 다가올 수 있지만, 숙련된 플레이어라면 각자의 역할 분담을 통해 효율적인 협동을 도모할 수 있으며, 특히 업그레이드 타이밍과 병력 구성을 신중히 고려해야만 최종 목표인 ‘발키리’의 소환에 성공할 수 있다. 맵의 플레이 시간은 맵 크기와 목표의 복잡성을 고려했을 때 약 45~60분 내외로 예상되며, 다양한 전략적 접근이 가능한 만큼 같은 맵이라도 매 판마다 다른 재미를 느낄 수 있다. 추천 대상은 팀플레이를 즐기는 스타크래프트 유저, 특히 유즈맵에서 전략적 깊이를 추구하는 게이머라면 반드시 한 번쯤 플레이해 볼 만한 가치가 있다. 플레이 전에는 내부 설명을 숙지하여 각 플레이어의 역할과 업그레이드 시스템의 의미를 정확히 이해하고, 팀원과의 사전 협의를 통해 전략을 공유하는 것이 성공의 관건이다. 또한, 맵의 넓은 크기상 미니맵을 적극 활용하여 시야를 넓히고, 주요 거점의 확보 우선순위를 신중히 결정해야 한다. 맵의 인코딩과 타일셋의 특성상 로딩 시간이나 그래픽 품질에 영향을 받을 수 있으니, 사양에 맞는 최적화 설정을 미리 확인하는 것도 중요하다. ‘SC UpⓖL Ride of the Valkyrie’ is a masterpiece of the classic "commander-killing" genre in *StarCraft: Brood War* custom maps, where players team up with directly controllable AI to push through massive enemy territory in a tense, high-stakes progression. The map’s name likely draws from Norse mythology’s warrior "Valkyrie," and its scale and intensity in gameplay evoke the brutality of a deathmatch. According to the in-game description, the seven-player setup divides roles: two players are the creators, while four are active commanders, emphasizing teamwork and strategic coordination. The volcanic tile set—with its deep red hues and molten terrain—visually amplifies the horrors of war, while the expansive map size is perfectly suited for large-scale troop movements and maneuver warfare. At its core, the map revolves around an "upgrade" system that lets players continuously enhance unit stats or unlock new special abilities, turning battles into a test of strategic foresight and resource management rather than brute force alone. Enemy bases are clustered near the center, and players advance slowly from one of four cardinal directions (north, south, east, west), seizing intermediate defensive outposts or supply points along the way. The early game feels relatively stable, but as upgrades and troop quality diverge, tension escalates in the late stages—especially since AI difficulty and map patterns may shift based on player strategies, ensuring high replayability. Beginners might struggle to grasp the AI’s quirks and map layout, but experienced players can optimize roles and coordination, particularly by carefully timing upgrades and troop compositions to successfully summon the "Valkyrie" in the endgame. With an estimated playtime of 45–60 minutes (accounting for map size and objective complexity), the map offers varied strategic paths, making each run feel fresh. It’s a must-play for *StarCraft* fans who enjoy team-based custom maps, especially those seeking depth in strategy. Before diving in, study the in-game instructions to fully understand each player’s role and the upgrade system, and coordinate with teammates to align strategies—this is key to success. Given the map’s vast scale, make full use of the minimap to expand vision and prioritize securing critical strongholds wisely. Since encoding and tile set features can affect loading times and graphical quality, it’s wise to check and adjust settings beforehand to match your system’s specs.
킹 오브 더 힐 (King of the Hill)
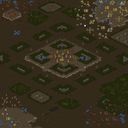
‘킹 오브 더 힐’(King of the Hill)은 스타크래프트 브루드워에서 즐기는 대표적인 1인용 유즈맵으로, 맵 중앙에 위치한 언덕 위에서 상대 진영을 몰아내고 자신의 자리를 지켜내는 것이 핵심 목표다. 맵은 사막 타일셋으로 구성되어 있으며, 중앙 언덕 주변으로 넓은 평지가 펼쳐져 있고, 각 플레이어는 시작 지점에서 언덕을 향해 빠르게 이동해야 한다. 맵의 특징은 언덕 중앙에 위치한 깃발(혹은 오브젝트)으로, 이 깃발을 차지하고 일정 시간 동안 유지하면 승리 조건이 충족된다. 상대방이 깃발을 차지하려고 시도하거나 언덕 위에서 밀어내려고 하면 전투가 벌어지며, 맵의 지형은 비교적 평평해 기동성과 공격력이 중요한 요소로 작용한다. 플레이어는 초반에 자원을 확보해 유닛을 생산하고, 중앙 언덕을 향해 빠르게 이동해야 한다. 언덕에 도착하면 상대방과 실시간으로 전투를 벌이면서 자리를 차지하거나 방어해야 하며, 지형을 활용한 기동전이나 유닛 조합이 승패를 좌우한다. 맵은 4096x4096 크기로 비교적 넓지만, 중앙 언덕 주변은 좁아져 있어 전투가 밀집되는 경향이 있다. 또한, 사막 타일셋의 특징상 시야가 넓고, 멀리서도 상대의 움직임을 확인할 수 있어 전략적인 플레이가 요구된다. 이 맵은 1인용으로 설계되어 있어 혼자서도 충분한 재미와 긴장감을 느낄 수 있으며, 상대 AI의 난이도나 전략에 따라 플레이 스타일이 달라진다. 초보자는 기본 유닛을 중심으로 방어와 공격을 병행하는 플레이가 권장되며, 숙련자는 기동성과 유닛 컨트롤을 극대화해 빠른 승리를 노릴 수 있다. 맵의 난이도는 상대 AI의 수준에 따라 달라지지만, 대체로 초보에서 숙련자까지 폭넓게 즐길 수 있는 구조다. 특히, 언덕 위에서 벌어지는 전투는 스타크래프트의 기본 메카닉을 최대한 살려낼 수 있어, 밀리 경험을 유즈맵으로 느낄 수 있는 매력이 있다. 플레이 전에는 맵의 중앙 언덕 위치와 지형을 미리 숙지하고, 시작 지점에서 빠르게 이동할 수 있는 루트를 плани하는 것이 중요하다. 또한, 상대 AI의 패턴을 파악해 유닛 생산과 컨트롤을 최적화해야 하며, 언덕 위에서 벌어지는 전투에서 지형 우위를 활용하는 전략이 필수적이다. 맵의 승리 조건은 단순히 깃발을 차지하는 것이 아니라, 일정 시간 동안 유지하는 것이기 때문에, 방어와 공격의 균형을 잘 맞춰야 한다. 이 맵은 스타크래프트 유즈맵의 classic한 장르인 ‘킹 오브 더 힐’ 장르의 대표작으로, 1인용으로도 충분히 재미있고 긴장감 넘치는 플레이가 가능하다. 특히, 스타크래프트의 기본 메커닉을 활용한 전투가 중심이 되기 때문에, 밀리 경험이 있는 플레이어라면 쉽게 적응할 수 있는 구조다. 또한, 맵의 지형과 타일셋이 시야를 넓게 제공해 전략적인 플레이가 가능하다는 점도 장점이다. 이 맵을 즐기기 위해서는Central Hill을 차지하고 유지하는 전략적 사고와 빠른 판단력이 요구된다. 특히, 상대방의 움직임을 미리 예측하고, 언덕의 좁은 지형을 활용한 방어 태세를 갖추는 것이 중요하다. 초보자라면 AI의 난이도를 낮춰 천천히 적응해 나가고, 숙련자라면 더 빠른 전투와 기동성을 바탕으로 승리를 노려볼 만하다. 맵의 특성상, 유닛의 생산과 컨트롤뿐만 아니라, 맵 리딩 능력도 중요하기 때문에, 반복 플레이를 통해 실력을 키우는 것이 좋다. 이 맵은 스타크래프트 브루드워의 classic한 UMS 유즈맵으로, 1인용으로도 충분히 재미있고 전략적인 플레이가 가능한 작품이다. 특히, 중앙 언덕을 차지하고 유지하는 것이 핵심인 만큼, 전투와 자원 관리를 동시에 신경 써야 한다. 맵의 구조와 규칙을 잘 이해하고, 상대 AI의 패턴을 분석한다면, 누구나 즐길 수 있는 매력적인 유즈맵이라 할 수 있다. "King of the Hill" is a classic single-player custom map in *StarCraft: Brood War*, where the core objective is to seize and hold the central hill, driving opponents away from your position. The map features a desert tileset with wide open plains surrounding the central hill, and players must quickly move from their starting points toward the hill. The defining feature is the flag (or objective) located at the top of the hill—holding it for a set duration fulfills the victory condition. Battles erupt when opponents attempt to take the flag or push you off the hill, and the relatively flat terrain emphasizes mobility and firepower. Players must secure resources early to produce units and rush toward the central hill. Once there, real-time combat ensues as you fight to claim or defend the position, with terrain-based maneuvers and unit compositions determining the outcome. Despite the map’s large 4096x4096 size, the area around the hill narrows, forcing concentrated battles. The desert tileset also provides long sightlines, allowing you to monitor enemy movements from afar, demanding strategic play. Designed for single-player, the map delivers both fun and tension, adapting to the AI’s difficulty and strategy. Beginners are advised to focus on balanced defense and offense with basic units, while advanced players can maximize mobility and unit control for quick victories. The difficulty scales with the AI’s level, making it enjoyable for players of all skill levels. The hilltop battles showcase *StarCraft*’s core mechanics, offering a way to experience melee-style combat through a custom map. Before playing, familiarize yourself with the hill’s location and terrain, and plan a fast route from your starting point. Study the AI’s patterns to optimize unit production and control, and leverage the hill’s terrain advantages in combat. Victory isn’t just about seizing the flag—holding it for the required time is key, so balancing offense and defense is crucial. As a quintessential example of the *King of the Hill* genre in *StarCraft* custom maps, this title shines in single-player with high tension and replayability. Its reliance on *StarCraft*’s fundamental mechanics makes it accessible to experienced players, while the open desert tileset encourages strategic depth. Success hinges on strategic thinking—securing and maintaining control of the Central Hill—requiring quick decisions and foresight. Predict enemy movements, fortify the narrow hilltop terrain, and adapt your playstyle: beginners should start with lower AI difficulty to ease into the mechanics, while veterans can aim for faster, more dynamic victories. Since unit production, control, and map awareness all play critical roles, repeated plays are essential for improving your skills. A classic UMS custom map in *StarCraft: Brood War*, this title offers engaging single-player experiences with strategic depth. The core challenge—taking and holding the central hill—demands a balance of combat and resource management. Understanding the map’s structure and rules, along with analyzing the AI’s tendencies, makes this an enjoyable experience for any player.
최근 등록된 맵
새로 추가된 파일과 버전을 확인하세요.
킹 오브 더 힐 (King of the Hill)
‘킹 오브 더 힐’(King of the Hill)은 스타크래프트 브루드워에서 즐기는 대표적인 1인용 유즈맵으로, 맵 중앙에 위치한 언덕 위에서 상대 진영을 몰아내고 자신의 자리를 지켜내는 것이 핵심 목표다. 맵은 사막 타일셋으로 구성되어 있으며, 중앙 언덕 주변으로 넓은 평지가 펼쳐져 있고, 각 플레이어는 시작 지점에서 언덕을 향해 빠르게 이동해야 한다. 맵의 특징은 언덕 중앙에 위치한 깃발(혹은 오브젝트)으로, 이 깃발을 차지하고 일정 시간 동안 유지하면 승리 조건이 충족된다. 상대방이 깃발을 차지하려고 시도하거나 언덕 위에서 밀어내려고 하면 전투가 벌어지며, 맵의 지형은 비교적 평평해 기동성과 공격력이 중요한 요소로 작용한다. 플레이어는 초반에 자원을 확보해 유닛을 생산하고, 중앙 언덕을 향해 빠르게 이동해야 한다. 언덕에 도착하면 상대방과 실시간으로 전투를 벌이면서 자리를 차지하거나 방어해야 하며, 지형을 활용한 기동전이나 유닛 조합이 승패를 좌우한다. 맵은 4096x4096 크기로 비교적 넓지만, 중앙 언덕 주변은 좁아져 있어 전투가 밀집되는 경향이 있다. 또한, 사막 타일셋의 특징상 시야가 넓고, 멀리서도 상대의 움직임을 확인할 수 있어 전략적인 플레이가 요구된다. 이 맵은 1인용으로 설계되어 있어 혼자서도 충분한 재미와 긴장감을 느낄 수 있으며, 상대 AI의 난이도나 전략에 따라 플레이 스타일이 달라진다. 초보자는 기본 유닛을 중심으로 방어와 공격을 병행하는 플레이가 권장되며, 숙련자는 기동성과 유닛 컨트롤을 극대화해 빠른 승리를 노릴 수 있다. 맵의 난이도는 상대 AI의 수준에 따라 달라지지만, 대체로 초보에서 숙련자까지 폭넓게 즐길 수 있는 구조다. 특히, 언덕 위에서 벌어지는 전투는 스타크래프트의 기본 메카닉을 최대한 살려낼 수 있어, 밀리 경험을 유즈맵으로 느낄 수 있는 매력이 있다. 플레이 전에는 맵의 중앙 언덕 위치와 지형을 미리 숙지하고, 시작 지점에서 빠르게 이동할 수 있는 루트를 плани하는 것이 중요하다. 또한, 상대 AI의 패턴을 파악해 유닛 생산과 컨트롤을 최적화해야 하며, 언덕 위에서 벌어지는 전투에서 지형 우위를 활용하는 전략이 필수적이다. 맵의 승리 조건은 단순히 깃발을 차지하는 것이 아니라, 일정 시간 동안 유지하는 것이기 때문에, 방어와 공격의 균형을 잘 맞춰야 한다. 이 맵은 스타크래프트 유즈맵의 classic한 장르인 ‘킹 오브 더 힐’ 장르의 대표작으로, 1인용으로도 충분히 재미있고 긴장감 넘치는 플레이가 가능하다. 특히, 스타크래프트의 기본 메커닉을 활용한 전투가 중심이 되기 때문에, 밀리 경험이 있는 플레이어라면 쉽게 적응할 수 있는 구조다. 또한, 맵의 지형과 타일셋이 시야를 넓게 제공해 전략적인 플레이가 가능하다는 점도 장점이다. 이 맵을 즐기기 위해서는Central Hill을 차지하고 유지하는 전략적 사고와 빠른 판단력이 요구된다. 특히, 상대방의 움직임을 미리 예측하고, 언덕의 좁은 지형을 활용한 방어 태세를 갖추는 것이 중요하다. 초보자라면 AI의 난이도를 낮춰 천천히 적응해 나가고, 숙련자라면 더 빠른 전투와 기동성을 바탕으로 승리를 노려볼 만하다. 맵의 특성상, 유닛의 생산과 컨트롤뿐만 아니라, 맵 리딩 능력도 중요하기 때문에, 반복 플레이를 통해 실력을 키우는 것이 좋다. 이 맵은 스타크래프트 브루드워의 classic한 UMS 유즈맵으로, 1인용으로도 충분히 재미있고 전략적인 플레이가 가능한 작품이다. 특히, 중앙 언덕을 차지하고 유지하는 것이 핵심인 만큼, 전투와 자원 관리를 동시에 신경 써야 한다. 맵의 구조와 규칙을 잘 이해하고, 상대 AI의 패턴을 분석한다면, 누구나 즐길 수 있는 매력적인 유즈맵이라 할 수 있다. "King of the Hill" is a classic single-player custom map in *StarCraft: Brood War*, where the core objective is to seize and hold the central hill, driving opponents away from your position. The map features a desert tileset with wide open plains surrounding the central hill, and players must quickly move from their starting points toward the hill. The defining feature is the flag (or objective) located at the top of the hill—holding it for a set duration fulfills the victory condition. Battles erupt when opponents attempt to take the flag or push you off the hill, and the relatively flat terrain emphasizes mobility and firepower. Players must secure resources early to produce units and rush toward the central hill. Once there, real-time combat ensues as you fight to claim or defend the position, with terrain-based maneuvers and unit compositions determining the outcome. Despite the map’s large 4096x4096 size, the area around the hill narrows, forcing concentrated battles. The desert tileset also provides long sightlines, allowing you to monitor enemy movements from afar, demanding strategic play. Designed for single-player, the map delivers both fun and tension, adapting to the AI’s difficulty and strategy. Beginners are advised to focus on balanced defense and offense with basic units, while advanced players can maximize mobility and unit control for quick victories. The difficulty scales with the AI’s level, making it enjoyable for players of all skill levels. The hilltop battles showcase *StarCraft*’s core mechanics, offering a way to experience melee-style combat through a custom map. Before playing, familiarize yourself with the hill’s location and terrain, and plan a fast route from your starting point. Study the AI’s patterns to optimize unit production and control, and leverage the hill’s terrain advantages in combat. Victory isn’t just about seizing the flag—holding it for the required time is key, so balancing offense and defense is crucial. As a quintessential example of the *King of the Hill* genre in *StarCraft* custom maps, this title shines in single-player with high tension and replayability. Its reliance on *StarCraft*’s fundamental mechanics makes it accessible to experienced players, while the open desert tileset encourages strategic depth. Success hinges on strategic thinking—securing and maintaining control of the Central Hill—requiring quick decisions and foresight. Predict enemy movements, fortify the narrow hilltop terrain, and adapt your playstyle: beginners should start with lower AI difficulty to ease into the mechanics, while veterans can aim for faster, more dynamic victories. Since unit production, control, and map awareness all play critical roles, repeated plays are essential for improving your skills. A classic UMS custom map in *StarCraft: Brood War*, this title offers engaging single-player experiences with strategic depth. The core challenge—taking and holding the central hill—demands a balance of combat and resource management. Understanding the map’s structure and rules, along with analyzing the AI’s tendencies, makes this an enjoyable experience for any player.
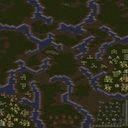
헌터스 Z 터보! 히어로 버전 (Hunters Z Turbo! Hero Version)
스타크래프트 브루드워의 유즈맵 중 하나로 renowned된 ‘헌터스 Z’ 시리즈의 후속작인 ‘헌터스 Z 터보! 히어로 버전’이 제공하는 짜릿한 속도감과 전략적 긴장감을 경험해 보세요. 이 맵은 4명의 플레이어가 각자의 영웅 유닛을 조종하며 적의 공격으로부터 살아남아야 하는 서바이벌 디펜스 장르의 유즈맵으로, 빠른 판단력과 효율적인 자원 관리가 핵심인 작품입니다. 맵 곳곳에 배치된 방어 건물과 지형적 요소들을 활용해 적의 물량을 막아내야 하며, 영웅 유닛의 스킬을 적재적소에 활용하는 것이 승리의 열쇠가 됩니다. 특히 ‘터보’라는 이름답게 맵의 진행 속도가 타 디펜스 유즈맵에 비해 상당히 빠른 편으로, 초반부터 끊임없이 밀려오는 적을 상대해야 하는 긴장감이 특징입니다. 맵의 배경은 사막 타일셋으로 구성되어 있어 건조한 분위기가 독특한 플레이 감각을 더해줍니다. 초보 플레이어는 영웅의 스킬과 방어 건물의 조합을 익히느라 다소 어려운 느낌을 받을 수 있지만, 익숙해지면 긴장감 넘치는 전투를 즐길 수 있는 매력이 있는 맵입니다. рекомен드 플레이 전에는 영웅의 스킬셋과 방어 건물의 배치 위치를 숙지하고, 자원 수집과 방어 라인의 균형을 맞추는 연습을 해두는 것이 좋습니다. 빠른 패턴을 요구하는 만큼, 맵의 흐름을 미리 예측하고 대응하는 능력이 중요합니다. 이 맵은 주로 4인 협동 플레이를 상정하고 제작되었지만, AI 적의 난이도나 맵의 배치에 따라 싱글 플레이로도 충분히 즐길 수 있는 구조로 보입니다. 특히 ‘히어로 버전’이라는 타이틀답게 영웅 유닛의 개성과 스토리성이 강조된 부분이 특징적입니다. 이처럼 헌터스 Z 터보!는 속도감과 전략성이 조화를 이룬 디펜스 유즈맵으로, 스타크래프트 유즈맵의 매력을 한층 깊게 느낄 수 있는 작품입니다. 초보자도 꾸준한 연습으로 적응할 수 있지만, 숙련자라면 더 높은 난이도에서 새로운 전략을 발휘할 수 있는 매력이 있습니다. Experience the thrilling speed and strategic tension of *Hunters Z Turbo! Hero Version*, the latest installment in the renowned *Hunters Z* series of Brood War custom maps. In this survival defense game, four players each control their own hero units, fighting to survive relentless enemy waves. Quick decision-making and efficient resource management are key, as you must use strategically placed defensive structures and terrain to fend off waves of enemies while deploying your hero’s abilities at the right moments for victory. True to its name, *Turbo!* features a much faster pace than typical defense maps, with enemies constantly assaulting from the very beginning, keeping the tension high. The map’s desert tile set adds a dry, immersive atmosphere that enhances the unique play experience. While beginners may struggle at first as they learn to combine hero skills with defensive structures, once mastered, the map offers an exhilarating combat experience. Before jumping into a recommended playthrough, it’s wise to familiarize yourself with each hero’s skill set and the placement of defensive buildings, as well as practice balancing resource collection and maintaining your defensive lines. Since the map demands quick reactions, the ability to anticipate and adapt to its flow is crucial. Designed primarily for four-player cooperative play, *Hunters Z Turbo!* can also be enjoyed solo, depending on the AI difficulty and map layout—especially with its *Hero Version* focus, which emphasizes the personality and narrative of each hero unit. *Hunters Z Turbo!* strikes a perfect balance between speed and strategy, offering a deeper dive into the charm of StarCraft custom maps. While newcomers can adapt with practice, seasoned players will find new strategies to explore at higher difficulty levels.
SC UpⓖL 라이드오브발키리 (SC UpⓖL Ride of Valkyrie)
‘SC UpⓖL 라이드오브발키리’는 스타크래프트 브루드워 유즈맵의 정석이라 할 수 있는 컴까기 장르의 명작으로, 플레이어가 직접 조작할 수 있는 AI와 협동하여 거대한 적진을 뚫고 나가야 하는 긴장감 넘치는 진행이 특징이다. 맵의 이름은 북유럽 신화의 전사 ‘발키리’에서 유래한 듯하며, 실제 플레이에서도 죽음의 전투를 연상케 하는 스케일과 박력이 인상적이다. 내부 설명에 따르면 7명의 플레이어 중 2명은 제작자, 4명은 조작 가능한 플레이어로 구분되어 팀워크와 전략적 연계를 요구하는 구조로 보인다. 화산 타일셋으로 조성된 배경은 붉은 색감과 용암 지형이 어우러져 전쟁의 참혹함을 시각적으로 극대화하며, 넓은 맵 크기는 대규모 병력 이동과 기동전을 펼치기에 최적화되어 있다. 맵의 핵심은 ‘업그레이드’라는 이름처럼 지속적인 기술 개발을 통해 유닛의 능력치를 강화하거나 새로운 특수 능력을 획득하는 시스템에 있으며, 이는 단순한 전투를 넘어 전략적 선택과Resource 관리 능력을 시험하는 요소로 작용한다. 적진은 중앙에 집중되어 있으며, 플레이어는 동서남북 네 방향의 입구를 통해 조금씩 전진해 나가며 중간중간 배치된 방어 기지나 보급 거점을 차지해야 한다. 맵의 균형은 초반에는 비교적 안정된 편이지만, 업그레이드와 병력의 질이 나뉘면서 중후반으로 갈수록 긴장감이 높아지며, 특히 AI의 난이도나 맵 내 패턴이 플레이어의 전략에 따라 변동할 가능성이 있어 재플레이 가치가 높다. 초보자에게는 AI의 특성과 맵의 구조를 익히는 과정이 다소 버겁게 다가올 수 있지만, 숙련된 플레이어라면 각자의 역할 분담을 통해 효율적인 협동을 도모할 수 있으며, 특히 업그레이드 타이밍과 병력 구성을 신중히 고려해야만 최종 목표인 ‘발키리’의 소환에 성공할 수 있다. 맵의 플레이 시간은 맵 크기와 목표의 복잡성을 고려했을 때 약 45~60분 내외로 예상되며, 다양한 전략적 접근이 가능한 만큼 같은 맵이라도 매 판마다 다른 재미를 느낄 수 있다. 추천 대상은 팀플레이를 즐기는 스타크래프트 유저, 특히 유즈맵에서 전략적 깊이를 추구하는 게이머라면 반드시 한 번쯤 플레이해 볼 만한 가치가 있다. 플레이 전에는 내부 설명을 숙지하여 각 플레이어의 역할과 업그레이드 시스템의 의미를 정확히 이해하고, 팀원과의 사전 협의를 통해 전략을 공유하는 것이 성공의 관건이다. 또한, 맵의 넓은 크기상 미니맵을 적극 활용하여 시야를 넓히고, 주요 거점의 확보 우선순위를 신중히 결정해야 한다. 맵의 인코딩과 타일셋의 특성상 로딩 시간이나 그래픽 품질에 영향을 받을 수 있으니, 사양에 맞는 최적화 설정을 미리 확인하는 것도 중요하다. ‘SC UpⓖL Ride of the Valkyrie’ is a masterpiece of the classic "commander-killing" genre in *StarCraft: Brood War* custom maps, where players team up with directly controllable AI to push through massive enemy territory in a tense, high-stakes progression. The map’s name likely draws from Norse mythology’s warrior "Valkyrie," and its scale and intensity in gameplay evoke the brutality of a deathmatch. According to the in-game description, the seven-player setup divides roles: two players are the creators, while four are active commanders, emphasizing teamwork and strategic coordination. The volcanic tile set—with its deep red hues and molten terrain—visually amplifies the horrors of war, while the expansive map size is perfectly suited for large-scale troop movements and maneuver warfare. At its core, the map revolves around an "upgrade" system that lets players continuously enhance unit stats or unlock new special abilities, turning battles into a test of strategic foresight and resource management rather than brute force alone. Enemy bases are clustered near the center, and players advance slowly from one of four cardinal directions (north, south, east, west), seizing intermediate defensive outposts or supply points along the way. The early game feels relatively stable, but as upgrades and troop quality diverge, tension escalates in the late stages—especially since AI difficulty and map patterns may shift based on player strategies, ensuring high replayability. Beginners might struggle to grasp the AI’s quirks and map layout, but experienced players can optimize roles and coordination, particularly by carefully timing upgrades and troop compositions to successfully summon the "Valkyrie" in the endgame. With an estimated playtime of 45–60 minutes (accounting for map size and objective complexity), the map offers varied strategic paths, making each run feel fresh. It’s a must-play for *StarCraft* fans who enjoy team-based custom maps, especially those seeking depth in strategy. Before diving in, study the in-game instructions to fully understand each player’s role and the upgrade system, and coordinate with teammates to align strategies—this is key to success. Given the map’s vast scale, make full use of the minimap to expand vision and prioritize securing critical strongholds wisely. Since encoding and tile set features can affect loading times and graphical quality, it’s wise to check and adjust settings beforehand to match your system’s specs.
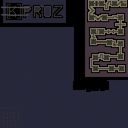
트위치 바운드 (Twitch Bound)
스타크래프트 브루드워의 유즈맵 ‘Twitch Bound’는 시청자 참여형 디펜스 장르로,Twitch 스트리밍 플랫폼과의 연동이 특징인 흥미로운 컨셉의 맵이다. 맵은 사막 타일셋으로 구성되어 있으며, 플레이어는 중앙에 위치한 거점을 방어하면서 일련의 웨이브를 이겨내야 한다. 적들은 맵 외곽에서 끊임없이 공격해오며, 플레이어는 자원 수집과 건물을 건설해 방어선을 구축해야 한다. 특히 눈에 띄는 점은 시청자 투표나 채팅 명령을 받아 특정 전략을 선택할 수 있는 시스템이 포함된 것으로 보인다. 맵의 구조는 비교적 단조로우나, 방어형 건물 배치와 자원 관리가 승패를 좌우할 것으로 추정된다. 주로 컴퓨터 상대 유즈맵으로 제작된 만큼, 플레이어는 AI의 패턴을 익혀가며 점차 난이도를 높이는 방식으로 즐길 수 있을 것이다. 초보 플레이어는 기본적인 방어 전략을 익히기에 적합하며, 숙련자는 시청자 참여 요소와 정교한 방어 구조로 도전해 볼 만하다. 다만, 시청자 참여 기능이 제대로 동작하려면 추가적인 트리거나 외부 연동이 필요할 수 있으며, 이는 맵을 플레이하기 전 반드시 확인해야 할 부분이다. 맵의 볼륨은 중간 정도이지만, 디펜스 장르 특유의 긴장감과 전략적 깊이를 제공할 것으로 예상된다. 추천 대상은 디펜스 장르를 좋아하는 플레이어이며, 특히 시청자 참여형 콘텐츠에 관심이 있는 스트리머에게도 흥미로운 경험이 될 것이다. 단, 시청자 참여 기능이 없다면 일반적인 디펜스 유즈맵으로 즐길 수 있을 것이다. Twitch Bound is a unique user-made defense map in StarCraft: Brood War designed around Twitch streaming integration, set in a desert tile environment. Players defend a central base against waves of enemies spawned from the map's edges while gathering resources to build defensive structures. The standout feature appears to be a system allowing viewer votes or chat commands to influence strategy choices during gameplay. While the layout is relatively straightforward, success hinges on smart building placement and resource management. As an AI-focused defense map, it likely progresses in difficulty as players learn enemy patterns. Beginners can use it to practice core defense mechanics, while experienced players can experiment with viewer-driven tactics if the streaming features are properly implemented. One key consideration before playing is verifying the Twitch integration setup since the map’s core appeal depends on it. The volume is moderate, but it delivers the tense, strategic experience typical of defense maps. Recommended for fans of the genre and streamers looking to add interactive elements to their broadcasts. Without the streaming integration active, it functions as a standard defense custom map.
터칸하이드군두르! (TurCanHydGoonDur!)
《TurCanHydGoonDur!》는 스타크래프트 브루드워의 유즈맵으로, 6명의 플레이어가 참여하는 대규모 컴까기 장르의 맵입니다. 내부 설명에 마린, 고스트, 짐 레이너, Kerrigan, Stukov, Duran 등 다양한 유닛과 건물이 등장하는 것으로 보아, 스킬 대전을 기반으로 한 팀 전투가 주된 플레이 방식일 것으로 추정됩니다. 특히 'Turret', 'Cannon', 'Hydra', 'Dragoons' 등의 키워드는 방어와 공격의 균형을 맞추는 전략적 요소가 포함되어 있음을 시사합니다. 맵 제목에서 느껴지는 강렬한 느낌과 함께, 내부 설명의 수치(예: Marine 10+4, Ghosts 35+15 등)는 유닛의 초기 수량과 강화 수치를 의미하는 것으로 보이며, 이는 플레이어의 전략적 선택과 팀워크가 중요한 요소임을 강조합니다. 이 맵의 핵심은 '컴까기'로, AI가 통제하는 적군과 대결하는 형식으로 진행됩니다. 플레이어는 각자 선택한 유닛과 건물을 바탕으로 적을 격파하거나 방어에 성공해야 하며, 팀별로 협력하여 공략해야 하는 구조가 예상됩니다. 내부 설명의 수치와 유닛 목록은 맵의 난이도나 플레이 스타일을 유추할 수 있게 해주며, Kerrigan이나 Duran과 같은 강력한 유닛이 포함되어 있어 고난이도의 전투가 예상됩니다. 또한, Turret와 Cannon의 등장은 방어 구조물을 구축할 수 있는 기회를 제공하며, Hydra와 Dragoons는 공격과 방어를 동시에 고려해야 하는 복잡한 전략을 요구할 것입니다. 맵의 이름은 다소 난해하지만, 이는 플레이어 간의 커뮤니케이션이나 전략적 암호를 암시할 수도 있습니다. 이 맵은 주로 전략적 사고와 팀워크를 중시하는 플레이어에게 적합하며, 특히 컴까기 장르에 익숙한 유저라면 즐겁게 플레이할 수 있을 것입니다. 다만, 내부 설명의 수치가 플레이어 수나 난이도를 직접적으로示唆하지 않으므로, 실제 플레이 전에 맵의 설명이나 튜토리얼을 꼼꼼히 확인하는 것이 중요합니다. 또한, 다양한 유닛과 건물이 등장하므로, 각 유닛의 특성과 역할을 미리 숙지하고 플레이에 임하는 것이 좋습니다. 전체적으로 《TurCanHydGoonDur!》는 팀워크와 전략이 요구되는 흥미로운 유즈맵으로, 컴까기 장르의 팬들에게 strong한 추천을 드립니다. 《TurCanHydGoonDur!》 is a *StarCraft: Brood War* custom map designed for six players, falling under the large-scale AI-combat genre where teams battle against AI-controlled enemies. Based on the internal description mentioning units and buildings like Marines, Ghosts, Jim Raynor, Kerrigan, Stukov, and Duran, the gameplay likely revolves around skill-based team combat. Key terms such as "Turret," "Cannon," "Hydra," and "Dragoons" suggest strategic elements balancing offense and defense. The intense feel of the map’s title, combined with numerical values in the description (e.g., "Marine 10+4," "Ghosts 35+15"), indicates initial unit counts and upgrade levels, emphasizing the importance of player strategy and teamwork. The core gameplay focuses on "AI combat," where players must defeat or defend against AI-controlled forces using their chosen units and structures, requiring close team coordination. The unit list and stats provide insight into the map’s difficulty and playstyle, with powerful units like Kerrigan and Duran suggesting high-intensity battles. The presence of defensive structures like Turrets and Cannons allows for strategic base-building, while Hydras and Dragoons introduce complex tactics balancing attack and defense. Though the title may seem cryptic, it could hint at player communication or coded strategies. This map is best suited for players who value strategic thinking and teamwork, particularly those familiar with AI-combat genres. Since the internal stats don’t directly indicate player count or difficulty, reviewing the map’s instructions or tutorials beforehand is crucial. With its diverse units and structures, understanding each unit’s role beforehand will enhance the experience. Overall, 《TurCanHydGoonDur!》 is a compelling custom map that demands teamwork and strategy, making it a strong recommendation for fans of the AI-combat genre.
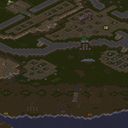
트로이 전쟁 7.8 (The Trojan War 7.8)
스타크래프트 브루드워의 유즈맵Classic ‘The Trojan War 7.8’은 트로이 전쟁이라는 신화 속 이야기를 재해석한 디펜스 장르 유즈맵으로, 플레이어는 그리스 연합군과 트로이 양측으로 나뉘어 전쟁의 흐름을 재현하는 전투를 펼친다. 맵은 사막 타일셋을 기반으로 넓은 평야와 산맥, 해안선이 조화를 이루며, 전투가 벌어질 주요 지점을 중심으로 구조가 설계되어 있다. 맵 중앙에는 거대한 ‘트로이의 목마’가 prominent 하게 배치되어 있으며, 주변에는 방어 시설과 기지가 분포되어 있는데, 이는 신화 속 트로이 함락 과정을 시각적으로 연상시킨다. 플레이어는 AI가 조종하는 적군 또는 동맹군을 통제하면서, 다수의 웨이브로 밀려오는 적 병력을 저지하거나 침공을 감행하는 방식으로 진행된다. 전투는 소규모~중규모의 교전이 반복되며, 맵 곳곳의 요충지를 점령하거나 방어선을 구축하는 전략적 선택이 필수적이다. 맵의 특징은 ‘목마’라는 핵심 오브젝트가 존재한다는 점으로, 이를 파괴하거나 지켜내는 것이 승리 조건일 가능성이 크다. 또한, 맵의 넓이와 구조상 정찰과 기지 관리, 자원 수집(추정) 등이 게임 플레이의 핵심 요소로 작용할 것으로 보이며, 디펜스임에도 불구하고 양측이 모두 공격과 방어를 병행해야 하는 대칭형 구성이 인상적이다. 초보자에게는 맵의 규모와 복잡한 전투 패턴 때문에 다소 난해할 수 있지만, 전략적 깊이를 추구하는 플레이어에게는 매력적인 선택지가 될 것이다. 플레이 전에는 맵의 승리 조건과 AI의 패턴, 자원 시스템(존재 시)을 숙지하고, 팀원 간의 역할 분담을 명확히 하는 것이 중요하다. 특히, ‘목마’의 파괴/보호 여부가 승패를 좌우할 가능성이 높으므로, 해당 오브젝트의 위치를 빠르게 파악하고 우선순위를 정하는 것이 관건이다. 맵의 밸런스는 제작자 및 수정자에 따라 다르겠지만, 대규모 전투와 긴장감 넘치는 공방전이 조화를 이룬다는 점에서 유즈맵으로서의 완성도가 높다고 평가된다. The Trojan War 7.8 is a classic Starcraft: Brood War UMS defense map that reimagines the mythical Trojan War. Players are divided into the Greek alliance and the Trojans, engaging in battles that recreate the flow of the legendary conflict. The map utilizes a desert tileset, featuring vast plains, mountain ranges, and shorelines that create a visually striking battlefield. At the center of the map stands a prominent 'Trojan Horse,' with defensive structures and bases distributed around it, visually echoing the fall of Troy. Players control AI-driven allied or enemy forces, either defending against waves of incoming enemies or launching invasions themselves. Combat consists of repeated small to medium-scale engagements, requiring strategic choices such as occupying key locations or fortifying defensive lines. A standout feature is the 'horse' object, whose destruction or protection likely serves as a critical victory condition. The map's size and layout imply that scouting, base management, and resource collection (if present) are essential gameplay elements. Despite being a defense map, its symmetrical design allows both sides to alternate between attack and defense, adding depth to the experience. While the map's scale and complex combat patterns may pose a challenge for beginners, it offers rich strategic possibilities for players seeking depth. Before playing, it's important to understand the victory conditions, AI behavior patterns, and any resource systems in place. Prioritizing the 'horse' object's location and role is crucial, as its status may determine the outcome. While balance varies by creator and modifier, the map's blend of large-scale battles and high-stakes combat suggests strong UMS map quality and replayability.
스나이퍼 페인트볼 엘리트 AI (Sniper Paintball Elite AI)
스타크래프트 브루드워 유즈맵 '스나이퍼 페인트볼 엘리트 AI'는 4인 협동으로 CPU 엘리트 저격수들과 대결하는 미니게임형 생존 맵이다. 사막 타일셋의 2048×2048 크기 전장에서 플레이어는 고스트 유닛을 조작해 적 저격수의 공격을 피하면서 반격해야 한다. 맵 설명에 명시된 'Anti-Camp' 시스템은 한 자리에 머무르며 대기하는 캠핑 플레이를 방지해 끊임없는 이동과 엄폐, 타이밍 좋은 사격을 강제한다. 인공지능 저격수는 정확한 에임과 반응 속도를 보여주며, 난이도가 올라갈수록 탄속 예측과 지형 활용이 필수적이다. 4인 협력 시에는 역할 분담(유인, 엄폐 사격, 측면 기동)이 승패를 가른다. 맵 구조는 개활지와 암석 지대가 섞여 있어 시야 확보와 은신처 선택이 전략적 깊이를 더한다. 일반적인 디펜스나 밀리와 달리 라운드 단위 생존과 점수 경쟁 요소가 결합돼 짧은 호흡으로 긴장감을 즐기기에 적합하다. 추천 대상은 에임 연습, 반사 신경 테스트, 협동 생존 플레이를 원하는 유저다. 플레이 전에는 AI 난도 조절 여부, 라운드 제한 시간, 부활 시스템 유무를 확인하면 좋다. Sniper Paintball Elite AI is a StarCraft Brood War UMS map where four players cooperate against CPU-controlled elite snipers in a mini-game survival format. Set on a 2048×2048 desert tileset, each player controls a Ghost unit and must dodge incoming sniper fire while returning accurate shots. The map description mentions an "Anti-Camp" system that prevents players from staying in one spot, forcing constant movement, cover usage, and well-timed firing. The AI snipers demonstrate precise aim and fast reaction speeds, and as difficulty increases, predicting bullet trajectories and leveraging terrain become essential. In four-player cooperation, role division such as baiting, covering fire, and flanking determines success. The layout mixes open ground with rocky areas, adding strategic depth to vision control and hiding spot selection. Unlike standard defense or melee maps, this map combines round-based survival with score competition, making it suitable for short, intense sessions. It is recommended for players who want to practice aiming, test reflexes, or enjoy cooperative survival gameplay. Before playing, check whether AI difficulty is adjustable, if there is a round time limit, and whether a respawn system exists.
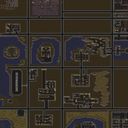
심즈 인 더 시티 (Sims In The City)
스타크래프트 브루드워의 유즈맵인 〈Sims In The City〉는 도시를 배경으로 한 컴까기 장르의 맵으로, 플레이어는 각각 시뮬레이션 게임 〈심즈〉의 캐릭터처럼 행동하며 도시를 발전시키고 자원을 관리하는 전략을 펼치게 된다. 맵은 황량한 황무지 타일셋 위에 도시가 형성되어 있으며, 건물과 도로, 자원 등이 배치되어 있다. 게임은 턴제 또는 실시간으로 진행되며, 플레이어는 자원을 모아 건물을 짓고 인구를 늘리는 동시에, 적대 세력이나 자연재해로부터 도시를 방어해야 한다. UI와 인터페이스는 〈심즈〉 시리즈의 분위기를 오마주한 듯 보이지만, 실제 게임성은 스타크래프트의 유즈맵 특유의 전략성과 속도를 요구한다. 맵의 디자인은 비교적 단순하지만, 도시의 확장과 자원 관리, 방어 전략의 균형을 맞추는 것이 핵심 포인트다. 플레이어는 초기 자원과 건물을 기반으로 도시를 발전시키며, 경쟁자 또는 AI 상대와의 자원 경쟁에서 우위를 점해야 승리를 노릴 수 있다. 추천 대상은 스타크래프트의 유즈맵을 즐기는 플레이어, 특히 컴까기 및 도시 건설 시뮬레이션을 좋아하는 유저들에게 알맞다. 시작 전에는 자원 배치와 건물 건설 우선순위를 미리 확인해 두는 것이 중요하며, AI의 공격 패턴이나 자원 분포에 따라 전략을 유동적으로 변경해야 한다. 맵의 난이도는 중간 정도로 예상되며, 초보자는 자원 관리와 방어에 중점을 두는 것이 좋다. 또한, 팀 플레이가 가능한 맵인 만큼 팀원 간의 협력이 victoria를 결정짓는 주요 요소가 될 수 있다. 〈Sims In The City〉는 〈심즈〉 팬이 아닌 일반 플레이어에게도 흥미로운 경험을 제공할 수 있는 유즈맵으로, 도시 개발의 재미와 전략적 보완을 동시에 즐길 수 있다. "Sims in the City" is a StarCraft: Brood War custom map set in a city, blending city-building and defense mechanics. Players take on the roles of *The Sims* characters, developing their city and managing resources while defending against hostile forces or natural disasters. The map features a barren wasteland tile set transformed into a cityscape, complete with buildings, roads, and resource nodes. The game can be played in turn-based or real-time modes, where players gather resources to construct buildings, expand their population, and fend off threats. The UI and interface draw inspiration from *The Sims* series, but the gameplay retains the strategic depth and pace typical of StarCraft custom maps. While the design is straightforward, mastering resource management, expansion, and defense is key to success. Players must grow their city from initial resources and structures, competing for dominance in resource-rich areas against rivals or AI opponents. The map is best suited for fans of StarCraft custom maps—particularly those who enjoy city-building sims and tower defense-style gameplay. Before starting, it’s wise to check resource placement and building priorities, as adapting strategies based on AI attack patterns or resource distribution is crucial. With a moderate difficulty level, beginners should focus on stabilizing their economy and fortifying defenses. Since team play is supported, coordination with teammates can be decisive for victory. Even players unfamiliar with *The Sims* will find "Sims in the City" engaging, offering a fun mix of urban development and tactical strategy.
맵 선택 가이드
태그는 맵의 핵심 특징을 빠르게 설명하지만 제작 버전마다 규칙이 다를 수 있습니다. 상세 설명에서 권장 인원, 난이도, 플레이 시간과 버전을 함께 확인한 뒤 다운로드하세요.