
AI 대결 스타크래프트 맵 모음
'AI 대결' 태그가 등록된 맵을 모았습니다. 장르 하나로 찾기 어려운 플레이 방식, 난이도와 특징을 중심으로 인기 맵과 최신 맵을 비교해 보세요.
- 등록 맵
- 13개
- 누적 다운로드
- 78
- 누적 조회
- 803
인기 맵
다운로드와 조회 반응이 높은 맵입니다.
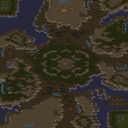
내가 컴퓨터의마린 Vision 0.1
스타크래프트 브루드워의 유즈맵 장르 중에서도 독특한 시도를 보여주는 ‘내가 컴퓨터의마린 Vision 0.1’이 눈에 띈다. 이 맵은 플레이어에게 컴퓨터의 마린이 되어보는 새로운 경험을 제공하며, 기존의 유저가 직접 플레이하는 방식과는 반대되는 관점에서 전투를 설계했다는 점이 특징이다. 맵은 넓은 사막 지형을 바탕으로 구성되어 있으며, 플레이어는 컴퓨터의 마린을 조종하는 동시에 AI가 조종하는 적군과 맞서야 한다. 맵의 중앙에는 넓은 개활지가 펼쳐져 있어 마린의 기동성과 전투력을 십분 발휘할 수 있는 공간으로 보인다. 맵의 가장자리로 갈수록 지형이 복잡해지며, 언덕이나 바위 지형이 배치되어 있어 시야 확보와 기동성 측면에서 전략적인 선택이 요구된다. 컴퓨터의 마린을 조종한다는 설정은 단순히 적을 물리치는 것뿐만 아니라, AI가 펼치는 다양한 전술에 대응해야 한다는 점에서 흥미로운 도전 과제를 제시한다. 맵의 제목에서 알 수 있듯이, 이 맵은 컴퓨터의 관점에서 마린을 플레이한다는 아이디어가 핵심 아이덴티티로, 기존의 유즈맵과는 차별화된 플레이 경험을 제공한다. 마린의 빠른 속도와 사정거리를 고려하여 맵을 설계한 것으로 보이며, 플레이어는 AI의 움직임을 예측하고 효율적인 위치 선정을 통해 승리를 이끌어야 한다. 초보자도 쉽게 접근할 수 있지만, AI의 패턴을 파악하고 전략을 세우는 데는 경험이 필요할 것으로 보인다. 맵의 전체적인 분위기는 사막 지형의 황량한 느낌을 살리며, 전투의 긴장감을 배가시키는 역할을 한다. 이 맵을 플레이하기 전에 맵의 구조와 마린의 특성을 충분히 숙지하는 것이 중요하며, 특히 넓은 개활지에서 벌어지는 전투에서는 시야 확보와 기동성을 중시해야 한다. 또한, AI의 패턴을 분석하는 능력이 뒷받침되어야만 안정적인 승리를 기대할 수 있을 것이다. 이 맵은 일반적인 유즈맵과는 다른 새로운 시도를 추구하므로, 스타크래프트의 매니아뿐만 아니라 유즈맵에 대한 새로운 경험을 원하는 플레이어에게도 권장할 만하다. One standout custom map in *StarCraft: Brood War* that offers a unique twist is *"I Am the AI’s Marine Vision 0.1."* This map delivers a fresh experience by letting players take on the role of a Marine controlled by the computer, flipping the traditional gameplay dynamic on its head. Set across vast desert terrain, players must command the AI’s Marine while facing off against enemy forces controlled by the same AI. The map’s central area opens up into a wide, open battlefield, ideal for Marines to showcase their speed and combat range. As players move toward the edges, the terrain grows more complex, with hills and rocky formations that demand strategic decisions regarding visibility and mobility. The core appeal of controlling the AI’s Marine lies not just in defeating enemies but in adapting to the AI’s unpredictable tactics—a compelling challenge that sets this map apart. The title itself hints at the core identity: playing as the AI’s Marine offers a perspective rarely seen in other custom maps, providing a fresh take on gameplay. Designed with the Marine’s quick movement and range in mind, the map rewards players who can anticipate the AI’s movements and secure advantageous positions. While accessible to newcomers, mastering the AI’s patterns and refining strategies will require experience. The map’s barren desert atmosphere enhances the tension of combat, creating an immersive setting where every decision matters. Before diving in, players should study the map’s layout and the Marine’s strengths, particularly in open battles where visibility and mobility are key. Success also hinges on analyzing the AI’s behavior—only then can players secure consistent victories. With its unconventional approach, this map isn’t just for *StarCraft* veterans or custom map enthusiasts; it’s a great choice for anyone looking to experience something new in the *Brood War* modding scene.
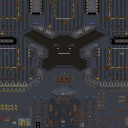
5v3 레벨업 헬 (5v3c Level Up Hell) v1.3
스타크래프트: 브루드워의 유즈맵 중 하나로, 레벨업과 컴까기 요소가 결합된 5v3c Level Up Hell v1.3은 플레이어들에게 전략적 깊이를 더하는 흥미로운 맵이다. 이 맵은 5명의 플레이어가 한 팀을 이루고, 3명의 컴퓨터 상대와 대결을 펼치는 구조로 되어 있어 팀워크와 전략적 사고가 필수적이다. 맵의 중앙에는 넓은 전투 공간이 펼쳐져 있으며, 양측 진영은 각각의 기지 주변에 건물을 배치할 수 있는 공간을 확보하고 있다. 레벨업 시스템은 이 맵의 핵심 요소로, 플레이어는 전투에서 승리하거나 특정 조건을 달성함으로써 레벨을 올릴 수 있으며, 레벨이 오를수록 보유한 유닛의 능력치가 향상된다. 이러한 시스템은 단순한 컴까기를 넘어 전략적 성장 요소까지 더해, 플레이어들에게 장기적인 계획을 요구한다. 특히, 컴퓨터 상대인 3명의 AI는 각각의 특징을 가지고 있어, 이를 파악하고 대처하는 것이 승리의 관건이다. 맵의 디자인 또한 세밀한 부분까지 신경 쓴 것이 느껴진다. 전투 공간은 넓으면서도 각 지형이 전략적으로 활용될 수 있도록 배치되어 있으며, 기지 방어 시설은 플레이어의 전략에 따라 자유롭게 구축할 수 있다. 이는 단순히 컴퓨터를 상대로 승리하는 것을 넘어, 자신의 플레이 스타일을 구축하고 발전시키는 재미를 제공한다. 초보 플레이어는 기본적인 전략을 익히기에 좋으며, 숙련자는 레벨업 시스템을 활용한 역전극을 노릴 수 있어 다양한 플레이 경험을 제공한다. 이 맵을 즐기기 위해서는 레벨업 시스템과 컴퓨터 AI의 패턴을 이해하고, 팀원과의 소통이 원활해야 한다. 또한, 맵의 넓은 공간을 효율적으로 활용하기 위한Micro 컨트롤도 중요하다. 특히, 레벨이 오를수록 강력한 유닛을 보유할 수 있게 되므로, 초반 전투에서 손실을 최소화하는 것이 관건이다. 이러한 요소들이 조화를 이루어, 이 맵은 전략적 깊이를 추구하는 플레이어들에게 큰 매력을 선사할 것이다. Level Up Hell v1.3 is a unique custom map for StarCraft: Brood War that combines leveling mechanics with a classic 5v3c computer-killing format. The map offers a strategic experience where players must balance unit control, teamwork, and character progression to secure victory against three AI opponents. The core of the gameplay revolves around a leveling system that rewards players for defeating enemies or fulfilling objectives. As players level up, their units gain enhanced stats, providing a significant advantage in late-game scenarios. This system transforms a typical computer-killing map into something more dynamic and engaging, requiring players to think ahead and manage resources wisely. The map’s layout is spacious yet strategically designed, with distinct areas for base building, combat, and resource collection. Each team’s starting base is protected, and the open battlefield allows for creative unit positioning and maneuvering. The three AI opponents are programmed with unique behaviors, adding an extra layer of challenge and forcing players to adapt their strategies accordingly. For newcomers, the map offers a great introduction to the basics of team-based strategies and unit progression. For experienced players, the leveling system provides opportunities for dramatic comebacks and high-level micromanagement. To succeed, players need to coordinate with their team, prioritize leveling upgrades, and maintain strong unit control throughout the match. The combination of these elements makes Level Up Hell v1.3 a compelling choice for those seeking a deeper, more rewarding custom map experience.
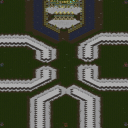
7인 대 프로토스 AI (7Human Vs 1Protoss AI)
스타크래프트: 브루드워의 흥미로운 유즈맵인 <7Human Vs 1Protoss AI>는 7명의 플레이어가 하나의 AI Protoss를 상대로 대결하는 독특한 구도를 자랑한다. 이 맵은 4명의 테란과 3명의 저그 플레이어가 연합하여 Protoss AI의 공격과 방어 능력을 시험하는 구조로, 협동의 중요성과 전략적 대결을 동시에 경험할 수 있도록 설계되었다. 맵 중앙에는 Protoss AI의 본진이 자리 잡고 있으며, 주변으로 7명의 인간 플레이어들이 각각의 진영을 구축할 수 있는 공간이 마련되어 있다. AI Protoss는 주기적으로 공격을 가하거나 방어 태세를 갖추며, 플레이어들은 이를 저지하거나 AI의 자원 및 건물을 파괴하는 데 집중해야 한다. 전체적으로 맵의 지형은 비교적 평지 위주지만, 곳곳에 언덕과 협곡이 배치되어 있어 시야 확보와 기지 방어에 strategic depth를 제공한다. 특히 AI Protoss의 공격 루트는 중앙 통로와 양측 언덕을 따라 나뉘어 있어, 플레이어들은 각자의 위치와 역할에 맞게 방어를 분담하거나 협력해야 한다. 맵의 규모는 4096x4096로 꽤 넓지만, AI Protoss의 공격 주기가 비교적 일정하여 플레이어들이 실시간으로 대응할 수 있는 시간적 여유가 존재한다. 또한, 테란과 저그의 조합을 고려한 플레이어들은 서로의 장점을 살려 AI Protoss의 방어선을 공략하거나, 반대로 AI의 공격으로부터 아군을 보호하는 임무를 수행하게 된다. 이 맵은 협동과 전략이 필수적인 만큼, 초보자보다는 중급 이상의 플레이어들에게 더 적합할 것으로 보인다. 특히 Protoss AI의 공격 패턴을 숙지하고, 테란과 저그의 유닛 조합을 최적화하는 능력이 요구된다. 또한, 7명의 플레이어 간 원활한 의사소통과 역할 분담이 없다면 AI Protoss를 이기기 어려운 구조이므로, 팀워크가 중요한 맵으로 평가할 수 있다. 마지막으로, AI Protoss의 난이도가 조절 가능한지 여부에 따라 플레이 경험이 크게 달라질 수 있으니, 사전 점검을 통해 적절한 난이도를 설정하는 것이 중요하다. 이 맵을 즐기기 위해서는 Protoss AI의 공격 루트를 미리 파악하고, 각 플레이어의 진영이 AI의 공격 경로에 노출되지 않도록 대비해야 한다. 또한, 테란과 저그의 유닛을 조합하여 AI Protoss의 방어선을 공략하는 전략을 세우는 것이 핵심이다. AI Protoss의 공격 타이밍을 예측하고, 각 플레이어가 맡은 역할을 충실히 수행한다면 흥미로운 대결을 즐길 수 있을 것이다. This interesting custom map in *StarCraft: Brood War*, *7 Humans vs 1 Protoss AI*, offers a unique setup where seven players team up against a single AI Protoss opponent. The map pits four Terran and three Zerg players against an AI Protoss, testing their combined offensive and defensive capabilities while emphasizing teamwork and strategic play. At the center sits the Protoss AI’s main base, surrounded by spaces for the seven human players to establish their own bases. The AI Protoss launches periodic attacks or shifts into defensive stances, forcing players to either fend off its assaults or focus on destroying its resources and structures. The terrain is mostly flat but features strategic hills and ravines that enhance visibility and base defense. The AI’s attack routes split along the central path and the flanking hills, requiring players to coordinate their defenses based on their positions and roles. While the map spans a large 4096x4096 area, the AI’s predictable attack cycles give players enough time to react in real time. Given the combination of Terran and Zerg units, players must leverage their strengths—either breaking through the AI’s defenses or shielding allies from its advances. Designed for teamwork and strategy, this map is better suited for intermediate to advanced players. Success hinges on understanding the Protoss AI’s attack patterns and optimizing unit compositions between Terran and Zerg. Without clear communication and role distribution among the seven players, defeating the AI becomes nearly impossible, making teamwork essential. Additionally, the overall experience can vary greatly depending on whether the AI Protoss’s difficulty can be adjusted, so checking and setting the appropriate level beforehand is crucial. To enjoy this map, players should first identify the Protoss AI’s attack routes and prepare defenses to prevent their bases from being exposed. Developing a strategy that combines Terran and Zerg units to dismantle the AI’s defenses is key. Predicting the AI’s attack timing and executing assigned roles diligently will turn the match into an engaging and rewarding challenge.
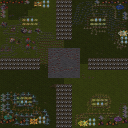
히드라 랜처즈 (Hydra Rancherz v7.1-6)
히드라 랜처즈(Hydra Rancherz)는 스타크래프트: 브루드워의 유즈맵으로, 8명의 플레이어가 협동하거나 경쟁하는 방식으로 진행되는 컴까기(컴퓨터 상대 키우기) 장르의 맵입니다. 사막 타일셋으로 구성된 넓은 맵 위에서 히드라를 키우고 강화하는 것이 주된 목표로 보이며, 버전 7.1이 Lone_Wolf, YEMMY, Nupper에 의해 업그레이드된 후속 버전으로 추정됩니다. 맵의 중심에는 중앙 건물이 배치되어 있으며, 주변으로는 히드라 사육장이 여러 개 배치되어 있는 구조가 보입니다. 플레이어들은 각자 자원과 건물을 관리하며 히드라를 성장시키고, 적대적인 환경이나 AI를 상대해야 하는 것으로 보입니다. 히드라의 성장 속도, 공격력, 체력 등을 관리하는 재미와 함께, 협동 플레이를 통한 시너지 효과나 경쟁 플레이를 통한 전략적 대결이 주요 볼거리일 것으로 예상됩니다. 난이도는 플레이어의 협동 여부와 전략에 따라 달라질 수 있으며, 초보부터 숙련자까지 모두 즐길 수 있도록 구성된 것으로 보입니다. 특히 히드라의 성장과 강화 시스템이 매력적인 요소로, 플레이어의 전략적 선택과 리스크 관리가 중요한 포인트입니다. 이 맵은 히드라를 키우고 성장시키는 재미와 함께, 컴퓨터 AI와의 대결에서 승리하는 짜릿함을 느낄 수 있는 유즈맵으로 추천합니다. 플레이 전에는 각 플레이어의 시작 위치와 자원 분배, 히드라의 성장 포인트를 미리 계획하는 것이 중요할 것으로 보입니다. 또한, 팀 플레이를 선호하는 경우라면 동료와의 원활한 소통이 필수적입니다. 맵의 전체적인 구조는 넓고 개방적이지만, 히드라의 성장과 관리를 위한Resource Management와 Strategic Planning이 요구되는 점을 유념해야 합니다. Hydra Rancherz is a custom map from StarCraft: Brood War where eight players either cooperate or compete in a "build-the-computer" genre match. Set on a wide desert tileset, the main objective seems to be raising and upgrading Hydralisks. The latest version, 7.1, appears to have been enhanced by Lone_Wolf, YEMMY, and Nupper. At the center of the map stands a main building, surrounded by multiple Hydralisk pens. Players manage their own resources and structures while growing Hydralisks and facing hostile environments or AI opponents. The appeal lies in balancing Hydralisk growth speed, attack power, and health, as well as leveraging synergy in cooperative play or strategic rivalry in competitive matches. Difficulty varies based on teamwork and strategy, making it accessible for both beginners and veterans. The standout feature is the Hydralisk growth and upgrade system, where strategic choices and risk management play crucial roles. This custom map offers the thrill of nurturing Hydralisks while battling AI opponents, making it a recommended experience. Before starting, it's important to plan starting positions, resource distribution, and Hydralisk growth priorities. For team play, smooth communication with teammates is essential. While the map is open and expansive, players should keep in mind the need for careful resource management and strategic planning to succeed.
파이썬 1.3 (Python 1.3)
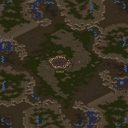
스타크래프트 브루드워의 유즈맵 '파이썬 1.3'은 독특한 아이디어와 전략적 깊이를 동시에 제공하는 컴까기 장르의 대표적인 작품 중 하나로 꼽힌다. 이 맵은 이름에서부터 느껴지듯 프로그래밍 언어인 '파이썬'을 모티브로 삼아, 플레이어들이 컴퓨터를 상대로 AI 기반의 전략을 펼칠 수 있도록 설계되었다. 맵 곳곳에는 'if', 'import', 'for'와 같은 프로그래밍 키워드와 유사한 구조물이 배치되어 있어, 마치 코딩을 하듯 매 턴마다 전략을 수립하고 적의 움직임을 예측해야 한다. 사막 타일셋을 기반으로 한 맵의 시각적 구성은 깔끔하면서도 전략적 요소를 강조한다. 플레이 방식은 턴제에 가까운 구조로, 각 플레이어는 제한된 리소스를 바탕으로 건물을 건설하고 유닛을 생산하여 컴퓨터 상대를 격파해야 한다. 컴퓨터는 단순한 랜덤 공격이 아니라, 맵 내부에 숨겨진 규칙과 패턴을 바탕으로 플레이어를 공격하기 때문에, 단순히 빌드를 맞추는 것만으로는 승리를 장담할 수 없다. 특히, 맵의 중앙부에 위치한 넓은 공간은 '메인 필드'로, 이곳에서 대부분의 전투가 벌어지며, 플레이어는 이곳을 어떻게 활용하느냐에 따라 승패가 갈리게 된다. 건물을 지을 수 있는 위치와 자원의 분포가 균일하지 않기 때문에, 자원 관리와 위치 선정이 매우 중요하다. 이 맵은 초보자보다는 중급 이상의 플레이어들에게 추천된다. 프로그래밍 로직과 유사한 구조를 이해하지 못하면 컴퓨터의 패턴을 읽기 어려울 뿐만 아니라, 리소스 관리와 빌드 오더를 맞추는 것 자체가 어려운 과제이기 때문이다. 또한, 게임의 진행이 다소 지루해질 수 있어, 빠른 진행을 선호하는 플레이어보다는 전략적 사고를 즐기는 플레이어에게 적합하다. 맵의 난이도는 '보통' 정도로 설정되어 있지만, 컴퓨터의 공격 패턴을 파악하고 대응할 수 있는 능력이 요구된다. 플레이 전에는 맵의 구조와 컴퓨터의 기본적인 공격 패턴을 숙지하는 것이 필수적이다. 컴퓨터를 상대로 한 전략적 전투를 즐기는 유저들에게는 매우 매력적인 선택지가 될 수 있으며, 특히 전략 게임과 프로그래밍에 관심이 있는 플레이어라면 한 번쯤 도전해 볼 만한 가치가 있다. 다만, 게임의 재미는 개인의 전략적 능력에 크게 좌우되기 때문에, 단순히 무작정 플레이하는 것보다 맵의 구조와 컴퓨터의 패턴을 분석하는 데 시간을 투자하는 것이 좋다. Python 1.3 is one of the most acclaimed custom maps in StarCraft: Brood War, blending programming concepts with strategic gameplay in a unique tower-defense-like format. The map draws inspiration from Python, a popular programming language, and integrates its syntax and logic into the gameplay mechanics. Players face off against an AI-controlled opponent that executes attacks based on conditional statements and loops, much like a real program. The desert-themed tileset provides a clean and immersive backdrop that emphasizes the strategic depth of the map. The gameplay revolves around a turn-based or semi-turn-based system where players must construct buildings, gather resources, and produce units to counter the AI's attacks. The AI does not rely on random moves; instead, it follows predefined rules and patterns, making it a formidable opponent that requires careful planning. The central area of the map serves as the main battlefield, where most combat occurs. Players must strategically position their buildings and units to maximize efficiency and defense against the AI's assaults. Resource distribution is uneven, requiring smart allocation and management to sustain long-term growth. This map is best suited for intermediate to advanced players who enjoy strategic challenges. Beginners may struggle to understand the AI's attack patterns or manage resources effectively, as the game demands a solid grasp of both macro and micro strategies. While the difficulty is rated as 'medium', the actual experience can vary widely depending on the player's ability to adapt and strategize. Those who prefer fast-paced or casual games might find Python 1.3 too demanding, but players who appreciate deep strategy and problem-solving will likely find it highly engaging. For fans of programming, strategy games, or AI-driven challenges, Python 1.3 offers a refreshing and intellectually stimulating experience. To fully enjoy the map, players should invest time in analyzing the AI's behavior and experimenting with different build orders. The map rewards patience, adaptability, and strategic foresight, making it a standout title in the UMS (User-Made Scenario) category.
7vs1 하드 컴퓨터 (7vs1 Hard Computer)
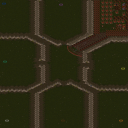
스타크래프트 브루드워 유즈맵 ‘7vs1 hard computer’는 한 명의 플레이어가 매우 강력한 컴퓨터와 맞서는 디펜스 장르의 재미있는 게임입니다. 맵 제목 그대로 7명의 플레이어가 한 팀을 이루어 극악의 난이도를 자랑하는 AI를 상대해야 하는데, 컴퓨터는 무지막지한 러시력으로 공격해오기 때문에 방어 건물과 병력을 신속히 건설하고 배치하는 전략이 무엇보다 중요합니다. 맵은 사막 타일셋을 기반으로 구성되어 있으며, 넓은 평야와 구릉 지형이 펼쳐져 있어 시야 확보와 병력 이동의 효율성이 관건이 됩니다. 특히 컴퓨터의 공격을 방어하기 위한 건물을 어디에, 어떻게 배치할지가 승부의 갈림길이 될 것입니다. 이 맵의 핵심은 방어와 자원 관리에 있습니다. 플레이어들은 초반부터 재빨리 미네랄과 가스를 확보한 뒤, 방어 건물인 벙커, 터렛, 포톤 캐논 등을 배치하여 컴퓨터의 공격을 막아내야 합니다. 또한, 공격과 방어 양면을 고려한 병력 조합과 업그레이드도 필수적입니다. 컴퓨터는 초반부터 강력한 유닛들을 끊임없이 보내기 때문에, 방심하거나 자원 관리가 미숙하면 순식간에 밀리게 됩니다. 맵의 난이도가 ‘하드(hard)’로 표기되어 있듯이, 초보자들은 경험이 쌓이기 전까지는 어려움을 느낄 수 있으며, 보통 이상의 실력을 지닌 플레이어들에게 적합한 맵입니다. 7명이서 팀을 이루어 협동하는 재미도 considerable하며, 한 명의 실수가 팀 전체의 패배로 이어질 수 있어 긴장감과 전략적 깊이가 돋보입니다. 이 맵을 플레이하기 전에는 팀원 간의 원활한 소통과 역할 분배가 무엇보다 중요하다는 점을 꼭 염두에 두어야 합니다. 각 플레이어가 맡은 구역의 방어와 자원 채취를 책임지는 동시에, 필요 시에는 전장 합류를 위한 이동 경로도 신중히 계획해야 합니다. 또한, 컴퓨터의 공격 패턴을 예측하고 대응하는 연습을 꾸준히 해야 실력이 향상될 수 있습니다. 이 맵은 단순히 방어만을 목표로 하는 것이 아니라, 팀워크와 전략적 사고를 동시에 요구하는 점이 매력적으로 다가옵니다. 만약 디펜스 장르를 좋아하는 플레이어라면, 이 맵이 제공하는 긴장감과 성취감을 충분히 느낄 수 있을 것입니다. StarCraft: Brood War custom map "7vs1 Hard Computer" is a fun defense-style game where one player faces off against an extremely powerful AI. As the title suggests, seven players team up to battle an AI with brutal difficulty, as the computer launches relentless rushes, making quick construction and strategic placement of defensive buildings and forces essential. The map is set on a desert tileset, featuring vast plains and hilly terrain, where securing vision and efficient troop movement are key. Deciding where and how to place defensive structures to counter the AI’s attacks often determines victory or defeat. The core of this map lies in defense and resource management. Players must secure minerals and gas early, then deploy defensive structures like bunkers, turrets, and photon cannons to fend off the AI’s assaults. Balancing offensive and defensive unit compositions and upgrades is also crucial. Since the AI continuously sends powerful units from the start, carelessness or poor resource management can lead to a swift defeat. Labeled as "hard," this map can be challenging for beginners until they gain experience, making it best suited for players with above-average skill. The cooperative aspect of teaming up with six others adds considerable depth, and a single mistake can doom the entire team, heightening tension and strategic complexity. Before playing, prioritize clear communication and role distribution among teammates. Each player must defend their assigned zone, gather resources, and plan efficient paths to reinforce other areas when needed. Regular practice in predicting and countering the AI’s attack patterns is vital for improvement. This map isn’t just about defense—it demands teamwork and strategic thinking, which makes it appealing. If you enjoy defense-style games, this map delivers the thrill and satisfaction that fans of the genre crave.
7vs1 하드 컴퓨터 (7vs1 Hard Computer)
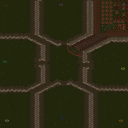
스타크래프트 브루드워 유즈맵 '7vs1 hard computer'는 7명의 플레이어가 단 한 명의 '매우 어려운 컴퓨터' 플레이어를 상대로 방어전을 펼치는 디펜스 장르의 협동형 맵이다. 맵의 핵심은 극한의 러시 타이밍을 잡아오는 AI의 공격을 효과적으로 방어하고, 이를 기반으로 역공을 노리는 전략적 균형에 있다. 맵은 사막 타일셋으로 구성되어 있으며, 넓은 평야와 중앙 언덕 지형이 특징적이다. 중앙 언덕은 방어 거점을 확보하기 좋은 위치로, 다수의 건물을 배치해 병력을 생산하고 요새화할 수 있는 공간이 제공된다. 플레이어들은 시작 지점에서 건물을 건설하고 자원을 채취할 수 있으며, AI는 주로 저그 종족으로 등장해 빠른 타이밍 러시를 시도하는 것으로 보인다. 방어에 실패하면 순식간에 건물이 파괴되고 게임이 끝나므로, 초반 자원 관리와 방어 시설 구축이 무엇보다 중요하다. 또한, AI의 공격 패턴은 상대적으로 예측 가능한 편이지만, '매우 어려움' 난이도답게 병력 규모가 크고 속도가 빨라서 방심할 수 없다. 이 맵은 협동심이 중요한데, 각 플레이어가 맡은 구역을 방어하지 못하면 전체가 무너질 수 있어 팀웍이 필수적이다. 초보자에게는 다소 어려운 편이지만, 방어 구조와 병력 운용에 익숙해지면 점차 재미를 느낄 수 있는 맵이다. 추천 플레이어는 적어도 중급 이상으로, 스타크래프트의 기본적인 빌드와 전략을 이해하고 있는 플레이어들이 즐기기 좋다. 맵을 시작하기 전에는 방어 거점의 확보와 초기 자원 배분을 carefully 해야 하며, AI의 공격 루트를 미리 예상해 대비하는 것이 중요하다. 또한, 협동 채팅을 통해 방어 계획과 병력 공유를 원활히 하는 것이 승리의 열쇠가 될 것이다. 이 맵은 디펜스 장르의 정수를 느낄 수 있는 동시에, 플레이어 간의 화합과 전략적 사고를 요구하는 흥미로운 경험을 선사할 것이다. 특히, AI의 공격 패턴을 분석하고 이를 바탕으로 방어 전략을 발전시키는 재미가 있다. 한정된 자원과 넓은 맵 공간을 활용해 어떻게 효율적으로 방어선을 구축할 것인지 고민해 보는 것도 이 맵의 묘미 중 하나다. 초반에는 방어에 집중하되, AI의 공격을 성공적으로 막아낸 후에는 역공을 노려볼 수도 있다. 하지만 역공 타이밍을 잡는 것은 매우 어려우므로, 기본적으로는 방어에 중점을 두고 플레이하는 것이 좋다. 이 맵을 즐기기 위해서는 스타크래프트의 기본적인 메커니즘을 잘 이해하고 있어야 하며, 특히 저그의 공격 패턴과 방어 건물의 배치에 대한 지식이 helpful 하다. 또한, 팀원 간의 원활한 소통이 없으면 방어에 구멍이 생길 수 있으므로, 협동심을 키우는 것도 중요하다. 이 맵은 단순히 방어만 하는 것이 아니라, 어떻게 하면 AI의 공격을 효과적으로 막아내고 역전을 노릴 수 있는지를 끊임없이 고민하게 만드는 매력이 있다. 따라서, 디펜스 장르를 좋아하는 플레이어라면 반드시 한 번쯤 도전해 볼 만한 가치가 있는 맵이라 할 수 있다. 이 맵을 통해 협동의 중요성과 전략적 사고의 필요성을 느낄 수 있을 것이다. 또한, AI의 공격 패턴을 분석하고 이를 바탕으로 한 방어 전략을 세워보는 것은 스타크래프트의 기본기를 다지는 데에도 큰 도움이 될 것이다. 이 맵은 단순히 재미뿐만 아니라, 실력 향상에도 도움이 되는 유용한 맵으로 평가할 수 있다. 마지막으로, 이 맵을 플레이할 때는 각자의 역할 분담을 명확히 하고, 팀원 간의 호흡을 맞추는 것이 무엇보다 중요하다는 점을 잊지 말아야 한다.只有这样,才能在激烈的防守战中取得最终的胜利。 This StarCraft: Brood War custom map, *"7 vs. 1 Hard Computer,"* is a cooperative defense-style map where seven players must defend against a single, extremely difficult AI opponent. The core challenge lies in effectively countering the AI's relentless rush timing and maintaining a strategic balance to launch a counterattack. The map features a desert tileset with expansive plains and a central hill terrain, which provides an ideal defensive position. The elevated ground allows players to establish strongholds, construct multiple buildings, and fortify their defenses. Players begin by building structures and gathering resources at their starting points, while the AI, typically playing as the Zerg, launches rapid early-game rushes. Failing to defend properly results in buildings being destroyed almost instantly, ending the game—making early resource management and defensive infrastructure crucial. Though the AI's attack patterns are somewhat predictable, its "very hard" difficulty ensures overwhelming force with fast-moving units, leaving no room for complacency. Teamwork is essential here; if any player fails to hold their sector, the entire defense collapses, making coordination vital. While challenging for beginners, the map becomes more enjoyable as players master defensive structures and unit control. It's best suited for intermediate to advanced players who understand basic builds and strategies. Before starting, careful planning is needed to secure defensive positions and allocate initial resources, while anticipating the AI's attack routes is key. Effective use of in-game chat for strategy discussions and shared reinforcements is often the difference between victory and defeat. This map offers a pure defense experience while demanding teamwork and strategic thinking, rewarding players who analyze the AI's patterns and adapt their defenses accordingly. The limited resources and vast map space encourage creative solutions for building efficient defensive lines. Early focus should be on defense, but successful stops can open opportunities for counterattacks—though timing these pushes is extremely difficult, so defense should remain the priority. To fully enjoy the map, players should have a solid grasp of StarCraft's mechanics, especially Zerg attack patterns and defensive building placements. Strong communication among teammates is also critical, as gaps in coordination can lead to critical failures. Beyond just defense, the map challenges players to constantly refine their strategies to not only withstand the AI's onslaught but also turn the tide in their favor. For fans of the defense genre, it's a must-try experience that highlights the importance of teamwork and tactical thinking. Analyzing the AI's behavior and adjusting defenses accordingly also serves as excellent practice for improving fundamental StarCraft skills. Ultimately, this map is valuable not just for its entertainment value but also for its role in skill development. When playing, players should clearly define roles, synchronize with teammates, and never forget that only through unity can they achieve victory in this intense defensive battle.
AI 파이어벳 디펜스 v.2 (AI FireBat Def v.2)
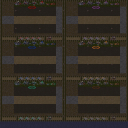
스타크래프트 브루드워의 컴까기 유즈맵으로 유명한 ‘AI FireBat Def v.2’는 플레이어가 AI가 조종하는Firebat을 상대로 방어전을 펼치는 디펜스형 맵이다. 맵은 넓은 사막 지형을 배경으로 삼아 시야를 제한하는 오브젝트와 좁은 통로를 활용해 전략적 선택을 강제하는 구조로 설계되었다. 플레이는 크게 세 가지 구역으로 나뉘며, 각 구역은 AI의 공격 패턴과 난이도가 다르다. 초반에는 소수의 Firebat과 마린이 등장해 방어선을 구축할 시간을 벌 수 있지만, 시간이 지나면서 AI는 벌처, 고스트, 시즈 탱크까지 동원해 공격해 온다. 플레이어는 미네랄과 가스를 확보해 업그레이드와 병력 생산을 병행해야 하는데, 자원 채취가 제한적인 구조라 자원 관리가 필수적이다. 특히 업그레이드와 병력 조합을 얼마나 효율적으로 구성하느냐가 승패를 좌우한다. 맵의 특징은 AI의 공격 패턴이 무작위가 아닌 특정 조건(예: 일정 시간 경과, 자원 소모량)에 따라 변한다는 점으로, 이를 예측하고 대비해야 한다. 또한 맵 곳곳에 숨겨진 보급고와 미네랄 덩어리가 배치되어 있어 이를 확보하는 것이Resource Management의 핵심이다. 초보자의 경우 Firebat과 마린 위주로 방어선을 구축하는 것이 안정적이지만, 고수층은 업그레이드와 유닛 조합을 다양화해 AI의 공격을 효과적으로 차단할 수 있다. 맵의 밸런스는 AI의 공격 빈도와 플레이어의 자원 수급이 맞아떨어지는지 여부에 달려 있으며, 난이도 조절이 가능한 설정 옵션이 제공된다. 플레이 전에는 맵의 구역별 방어 우선순위를 미리 정해두고, 자원 확보를 위한 병력 출격 타이밍을 조절하는 것이 중요하다. 이 맵은 소규모 팀플레이보다는 1인 또는 2인 Verteidungsstrategie에 최적화되어 있으며, 특히 ‘컴까기’ 장르를 좋아하는 유저들에게 인기가 많다. 맵의 분위기는 사막의 황량한 풍경과 AI의 공격 소리가 어우러져 긴장감을 높이는 데 기여한다. 마지막으로, 맵의 변종 버전인 ‘AI Firebat Defense!!!v1.0’과의 차이점도 확인해 볼 필요가 있다. 이 맵은 디펜스 장르의 전형적인 구조를 따르지만, AI의 공격 패턴과 맵 디자인이 기존 버전보다 더 정교해진 점이 특징이다. AI FireBat Def v.2 is a UMS defense-style custom map in StarCraft: Brood War where players must defend against AI-controlled Firebats in a desert-themed terrain. The map features three distinct zones, each escalating in difficulty as AI deploys increasingly advanced units like Vultures, Ghosts, and Siege Tanks over time. Players start with limited resources and must strategically balance mineral and gas gathering with unit production and upgrades to withstand relentless assaults. The map's design includes narrow pathways and vision-obstructing elements to force players into making critical tactical decisions. Hidden supply depots and mineral clusters scattered across the map add an extra layer of Resource Management, requiring players to scout and secure key areas early. Beginners may find success by focusing on Firebats and Marines for a stable defense, while advanced players can experiment with diverse unit compositions and upgrade paths to counter AI's evolving strategies. The map's balance hinges on the synchronization between AI's attack frequency and the player's resource income, with adjustable difficulty settings for varied playthroughs. Before diving in, players should prioritize zone defense strategies and time their mineral-gathering sorties carefully. This map excels in solo or duo play scenarios, catering especially to fans of the 'computer-killing' genre. The desert ambiance, combined with the AI's aggressive assaults, creates an immersive and tense experience. Players familiar with the predecessor 'AI Firebat Defense!!!v1.0' will notice refined AI behavior and more intricate map design in this iteration.
크리미널 마스터마인드 (Criminal Mastermind v1.1)
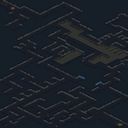
《Criminal Mastermind》는 스타크래프트: 브루드워의 유즈맵 중 하나로, 8명의 플레이어가 참여하는 대결형 디펜스 맵이다. 맵 제목에서부터 느낄 수 있듯이, ‘범죄의 대가’인 플레이어(S.W.A.T.)와 ‘범죄 마스터마인드’로 불리는 상대방(A.I. 또는 다른 플레이어) 간의 두뇌 싸움과 전략이 주된 볼거리다. 설원 타일셋으로 구성된 넓은 필드는 눈 덮인 도시와 도로, 건물들이 조화를 이루며, 밤 하늘 아래에서 은은한 조명이 맵의 분위기를 한층 더 깊게 만든다. 맵의 구조는 중앙에 위치한 주요 거점과 이를 둘러싼 방어 시설로 이루어져 있으며, S.W.A.T. 팀은 이 거점을 지키며 끊임없이 몰려드는 적들을 물리쳐야 한다. 반면, 범죄 마스터마인드는 주기적으로 쏟아지는 웨이브를 공격하고, 거점을 점령하거나 파괴하는 방식으로 승리를 노린다. 맵의 특징 중 하나는 플레이어 간의 긴장감이 지속된다는 점이다. S.W.A.T. 팀은 방어에 특화된 유닛과 건물을 배치할 수 있지만, 한 순간의 실수가 모든 것을 무너뜨릴 수 있다. 반면, 범죄 마스터마인드는 자원과 유닛을 효율적으로 관리하며 공격을 펼쳐야 하며, 때로는 기습이나 함정 전략을 구사하기도 한다. 이러한 상반된 목표는 플레이어들에게 끊임없는 긴장감과 전략적 사고를 요구한다. 이 맵은 특히 팀워크와 전략적 계획이 중요한데, 개인의 실력보다도 팀 전체의 호흡과 타이밍이 승패를 좌우할 가능성이 높다. 또한, 맵의 디자인과 사운드가 조화를 이루어 몰입감을 높이는 데 한몫을 한다. 플레이어는 눈 덮인 도시의 웅장함 속에서 자신의 전략을 펼쳐가며, 상대방의 움직임을 예측하고 대응해야 한다. 《Criminal Mastermind》는 디펜스와 전략이 결합된 유즈맵으로, 단순히 적이 오는 대로 막는 것이 아니라 상대방을 이기기 위한 심리전과Resource 관리까지 고려해야 하는 깊이 있는 플레이가 요구된다. 이 맵을 즐기기 위해서는 방어 시설의 배치와 유닛의 효율적인 사용법, 그리고 팀원 간의 소통이 무엇보다 중요하다. 초보자의 경우 방어와 공격의 균형을 잡는 데 다소 어려움을 느낄 수 있지만, 점차 익숙해지면서 전략의 깊이를 더할 수 있을 것이다. 또한, 맵의 난이도가 높을수록 더 많은 변수가 발생하기 때문에, 플레이 전 맵의 구조와 주요 거점, 그리고 각 플레이어의 역할 분담을 충분히 숙지하는 것이 좋다. 이 맵은 디펜스와 전략 게임을 좋아하는 유저들에게 강력히 추천할 만한 작품이다. 맵의 분위기와 긴장감, 그리고 치밀한 전략 요소는 스타크래프트 유즈맵의 새로운 경지를 보여준다. 특히, 팀 플레이를 즐기는 유저들에게는 필수적으로 경험해 볼 만한 맵으로 손꼽힌다. 8명의 플레이어가 참여하는 만큼, 각자의 역할과 책임을 다하는 것이 승리를 위한 열쇠가 될 것이다. 《Criminal Mastermind》 is a user-made defense map in *StarCraft: Brood War* that features an eight-player competitive battle. As the title suggests, the game revolves around a battle of wits and strategy between the "Master of Crime" player (S.W.A.T.) and the opposing "Criminal Mastermind" (either AI or another player). Set on a snowy tileset, the vast battlefield is adorned with snow-covered cities, roads, and buildings, its atmosphere deepened by the soft glow of the night sky. The map’s design centers around a key stronghold surrounded by defensive structures—S.W.A.T. must hold the line against relentless waves of enemies, while the Criminal Mastermind aims to overrun the stronghold through periodic assaults, occupation, or destruction. One of the map’s defining features is the sustained tension between players. The S.W.A.T. team can deploy specialized defensive units and buildings, but a single mistake can lead to collapse. Meanwhile, the Criminal Mastermind must manage resources and units efficiently, sometimes employing ambushes or trap-based tactics. These opposing objectives create constant pressure and demand sharp strategic thinking. Teamwork and coordinated planning are crucial, as victory often hinges more on team synergy and timing than on individual skill. The map’s immersive design and sound design further enhance the experience, with the grandeur of the snowy cityscape serving as a backdrop for unfolding strategies. 《Criminal Mastermind》 blends defense and strategy into a user-made map that goes beyond mere wave-clearing. It requires psychological warfare, resource management, and careful planning to outmaneuver opponents. Mastering the placement of defensive structures, efficient unit control, and clear communication with teammates is essential. Beginners may struggle to balance offense and defense at first, but as they grow accustomed to the mechanics, they can delve deeper into strategy. The higher the difficulty, the more variables come into play, so it’s important to study the map’s layout, key strongholds, and each player’s role before diving in. This map is highly recommended for fans of defense and strategy games, offering a fresh take on StarCraft user-made maps with its gripping atmosphere, intense pressure, and intricate strategic elements. It’s especially a must-try for players who enjoy team-based gameplay, where fulfilling one’s role and responsibilities is the key to victory. With eight players participating, success depends on everyone playing their part.
디펜드 더 힐 (Defend The Hill) 1.0
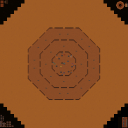
‘디펜드 더 힐(Defend The Hill) 1.0’은 스타크래프트: 브루드워에서 제공하는 유즈맵으로, 중앙의 언덕을 중심으로 펼쳐지는 디펜스형 게임이다. 맵 중앙에는 원형의 언덕이 있으며, 언덕 주변으로 좁은 길이 나 있어 적의 진격이 제한되어 있다. 플레이어는 언덕 주변의 건물이나 유닛을 배치하여 언덕을 방어해야 하며, 언덕 중앙에 위치한 건물을 보호하는 것이 핵심 목표로 추정된다. 맵의 구조는 언덕을 중심으로 대칭을 이루고 있어, 공세가 어떤 방향에서 오더라도 대응할 수 있도록 배치할 여유가 있다. 언덕의 지형은 비교적 평탄한 편이지만, 언덕 가장자리에는 돌출된 바위나 장애물이 배치되어 있어 유닛의 이동을 방해하는 요소로 작용할 수 있다. 맵의 테두리에는 넓은 평지가 펼쳐져 있어, 언덕으로 진격하는 적을 미리 저지하거나 유인할 수 있는 공간이 마련되어 있다. 맵의 색상과 텍스처는 황혼 타일셋을 기반으로 하여 따뜻한 오렌지색 톤이 특징적이며, 이는 맵의 분위기를 한층 더Highlighting the atmosphere of the game. 플레이어는 맵의 구조와 지형을 잘 활용하여 방어 라인을 구축하고, 언덕 중앙에 위치한 건물을 보호해야 한다. 맵의 인공지능이 제공하는 적군은 언덕을 오르며 지속적으로 공격을 퍼부을 것으로 보이며, 방어에 실패하면 건물이 파괴되어 패배할 가능성이 높다. 맵의 난이도는 조절 가능한 것으로 보이며, 언덕 주변의 배치와 유닛 선택이 승패를 좌우할 핵심 요소로 작용할 것이다. 특히 언덕 가장자리의 장애물과 좁은 길목을 활용한 방어 전략이 요구된다. 이 맵은 스타크래프트의 유닛과 건물을 활용한 전략적 디펜스를 즐기고 싶은 플레이어들에게 적합하며, 한정된 공간에서 효율적인 방어 전략을 세워야 한다는 점에서 흥미로운 도전 과제를 제공한다. 맵을 플레이하기 전에는 언덕 주변의 지형과 장애물을 꼼꼼히 살피고, 방어에 최적화된 유닛과 건물을 미리 준비하는 것이 중요하다. 또한, 적군의 공격 패턴을 예측하고, 언덕으로 진격하는 적을 저지할 수 있는 대책을 마련해야 한다. Defend The Hill 1.0 is a custom map for StarCraft: Brood War, designed as a defense-style game centered around a central hill. The map features a circular hill in the middle, surrounded by narrow paths that restrict enemy movements. Players must defend the hill by strategically placing buildings or units around its perimeter, with the primary objective likely being the protection of a structure located at the hill's center. The map is symmetrical around the hill, allowing players to prepare defenses that can counter attacks from any direction. The terrain around the hill is relatively flat, but the edges are lined with protruding rocks and obstacles that can hinder unit movement. The outer edges of the map consist of wide open spaces, providing room to intercept or lure advancing enemies before they reach the hill. The map's color scheme and textures are based on the Twilight tileset, giving it a warm orange hue that enhances the game's atmosphere. Players must utilize the map's layout and terrain to establish defensive lines and protect the central structure. The AI-controlled enemies are expected to continuously attack while advancing up the hill, and failure to defend will result in the destruction of the central building and a likely loss. The difficulty appears adjustable, with the placement of units and buildings around the hill being critical to success. Special attention should be given to the obstacles and narrow paths along the hill's edge, as they play a key role in forming effective defensive strategies. This map is ideal for players who enjoy strategic defense mechanics in StarCraft, offering a challenging experience that requires efficient use of limited space. Before playing, it's essential to thoroughly examine the terrain and obstacles around the hill, prepare optimal units and buildings for defense, and anticipate enemy attack patterns to devise countermeasures.
트로이 전쟁 v. 아킬레스 (Trojan War v. Achilles)
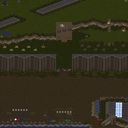
트로이 전쟁의 전설이 스타크래프트 브루드워 유즈맵으로 재탄생한 <트로이 전쟁 v. 아킬레스(Trojan War v. Achilles)>는 디펜스 장르의 핵심 요소와 전략적 깊이를 결합한 작품이다. 고대 그리스 신화 속의 영웅 아킬레스가 주인공으로 등장하며, 플레이어는 그의 공격과 방어 능력을 활용해 끊임없이 몰려드는 적을 물리쳐야 한다. 맵의 구조는 중앙에 위치한 아킬레스의 거점과 주변을 둘러싼 넓은 평야로 나뉘며, 적의 공격 루트는 크게 세 갈래로 나뉘어 있어 지형을 활용한 전략적 배치와 자원 관리가 중요하다. 특히, 맵의 가장자리에 위치한 적의 기지들은 AI로 구동되며, 각 기지에서 생산되는 유닛들은 플레이어의 거점을 향해 끊임없이 진군한다. 이를 저지하기 위해 플레이어는 방어 건물과 유닛을 배치하거나, 아킬레스의 스킬을 적극 활용해 전세를 뒤집어야 한다. 맵의 특징 중 하나는 적의 공격 패턴이 시간에 따라 변화한다는 점으로, 초반에는 소규모의 약한 유닛들이 끊임없이 쏟아지지만, 중반 이후에는 강력한 조합의 부대가 등장해 플레이어의 방어선을 압박한다. 이러한 변화는 게임의 긴장감을 높이며, 플레이어는 constantly evolving 전략을 요구받는다. 또한, 맵의 디자인에서 돋보이는 점은 고대 그리스의 건축 양식을 반영한 건물들과 지형물의 디테일로, 플레이어에게 몰입감을 제공한다. 이 맵은 초보자와 숙련자 모두에게 즐길 수 있도록 설계되었지만, 특히 방어와 자원 관리에 중점을 두고 싶다면 중간 이상의 난이도를 추천한다. 마지막으로, 맵의 전체적인 밸런스는 아직 완전하지 않을 수 있으며, 추후 패치를 통해 개선될 여지가 있다. 플레이 전에는 적의 공격 패턴과 맵의 주요 지점을 숙지하고, 방어 건물의 배치와 유닛의 조합을 미리 계획하는 것이 중요하다. 이 맵은 디펜스 장르의 팬뿐만 아니라, 전략적 깊이를 추구하는 플레이어에게도 훌륭한 선택지가 될 것이다. This StarCraft: Brood War custom map, <Trojan War v. Achilles>, reimagines the legendary Trojan War with a defense-focused gameplay experience. Players take on the role of Achilles, the mythical Greek hero, defending their base against relentless waves of enemy forces. The map’s layout features a central base for Achilles, surrounded by vast open plains where enemies spawn and advance along three primary routes. Strategic placement of defensive structures and resource management are crucial as the AI-controlled enemy bases produce increasingly powerful units over time. Early waves consist of weaker, smaller units, but as the game progresses, more formidable combinations emerge, testing the player’s adaptability. The map’s design incorporates elements of ancient Greek architecture, adding visual depth and immersion to the experience. While accessible to both beginners and veterans, the map demands careful planning, especially in defensive positioning and unit composition. Players should familiarize themselves with enemy attack patterns and key map locations before diving in. Though the map’s balance may evolve with updates, it offers a compelling challenge for defense genre enthusiasts and strategy-focused players alike.
랜덤물량막기 0.6v (Random Wave Defense 0.6v)
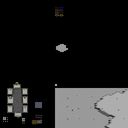
‘랜덤물량막기 0.6v’는 스타크래프트 브루드워 유즈맵 중 디펜스 장르에 속하는 맵으로, 이름 그대로 무작위로 쏟아지는 적의 물량을 방어하는 것이 핵심 목표다. 맵의 구조는 비교적 단순하지만, ‘랜덤’이라는 요소가 게임의 재미와 난이도를 좌우한다. 플레이어는 시작 지점에서부터 끊임없이 밀려오는 적 유닛을 상대해야 하며, 각 웨이브마다 등장하는 유닛의 종류와 수가 랜덤으로 결정된다. 이 때문에 매 플레이마다 새로운 전략을 세워야 하고, 행운에 따라 난이도가 크게 달라질 수 있다. 맵의 디자인 측면에서는 중앙에 위치한 방어 타워와 외부에서 공세를 펼치는 적 유닛의 배치에 주목할 필요가 있다. 방어 타워는 자체적인 공격 능력을 갖추고 있지만, 모든 적을 상대로 만능은 아니다. 플레이어는 맵 곳곳에 흩어져 있는 추가 건물을 활용해 방어선을 보강하거나, 특정 유닛을 집중적으로 방어하는 전략을 세울 수 있다. 또한, 맵의 가장자리에 위치한 입구는 좁고 길어서 방어에 용이하지만, 반대로 적이 한꺼번에 몰려올 수 있는 위험 요소이기도 하다. 이러한 구조적 특징은 플레이어의 판단력과 반응 속도를 동시에 요구한다. 플레이 경험 측면에서 ‘랜덤물량막기 0.6v’는 컴까기(컴퓨터 상대) 유즈맵의 특성을 강하게 띄고 있다. 플레이어는 단독으로 게임을 진행하며, AI가 조종하는 적군과 1대1로 대결을 펼친다. 게임의 진행은 웨이브 형식으로, 일정 주기마다 새로운 적군이 등장하며, 웨이브가 지나갈수록 적의 물량과 유닛의 레벨이 상승한다. 이러한 시스템은 플레이어에게 끊임없는 긴장감을 제공하며, 방어에 실패했을 때의 리스크도 크다. 특히, 랜덤으로 등장하는 유닛의 조합은 예측 불가능성을 높여 전략의 다양성을 증대시킨다. 이 맵을 추천할 대상은 디펜스 장르를 좋아하는 유저들이나, 스타크래프트의 전략적 측면을 즐기는 플레이어들이다. 또한,AI와의 대결을 통해 실력을 테스트하고 싶거나, 행운 요소가 포함된 게임을 좋아하는 경우에도 적합하다. 다만, 랜덤 요소 때문에 때로는 운에 좌우되는 플레이가 될 수 있어, 전략적 사고와 함께 운도 따라줘야 한다는 점은 유념해야 한다. 미리 방어 타워의 배치와 보강할 유닛의 종류를 숙지하고, 맵의 구조를 잘 이해한 후 플레이를 시작하는 것이 좋다. This Brood War UMS map, titled ‘랜덤물량막기 0.6v’ (Random Wave Defense 0.6v), falls under the defense genre, specifically a randomized wave-based tower defense. The core gameplay revolves around surviving relentless, randomly generated enemy waves by strategically placing defensive structures and units. Each wave introduces a mix of units—ranging from basic ground forces to advanced aerial threats—whose compositions are unpredictable, forcing players to adapt dynamically. The map’s layout features a central spawn point for enemies, funneling them through narrow chokepoints toward the player’s base. Defensive towers are pre-placed but can be upgraded or supplemented with additional structures scattered across the map. The limited entry points make defense manageable, yet the sheer volume and randomness of incoming units demand quick decision-making and resource management. Players must balance between reinforcing weak points and optimizing tower placements to counter the AI’s evolving threats. The experience leans heavily toward a solo challenge, where the player faces off against an AI opponent in a continuous battle of attrition. Waves escalate in intensity, with later stages introducing larger groups and higher-tier units, testing the player’s ability to sustain defenses under pressure. The randomness adds replayability, as no two games play out the same way, appealing to those who enjoy unpredictability alongside strategic depth. Recommended for fans of tower defense mechanics, Brood War strategy enthusiasts, or players seeking a solo challenge with a mix of luck and skill. While the map’s outcome depends partly on randomness, understanding its mechanics—such as tower synergies and chokepoint control—can significantly improve success rates. New players may find the learning curve steep due to the unpredictable nature of enemy waves, but mastering the basics of unit countering and tower placement will make the experience more rewarding.
최근 등록된 맵
새로 추가된 파일과 버전을 확인하세요.
내가 컴퓨터의마린 Vision 0.1
스타크래프트 브루드워의 유즈맵 장르 중에서도 독특한 시도를 보여주는 ‘내가 컴퓨터의마린 Vision 0.1’이 눈에 띈다. 이 맵은 플레이어에게 컴퓨터의 마린이 되어보는 새로운 경험을 제공하며, 기존의 유저가 직접 플레이하는 방식과는 반대되는 관점에서 전투를 설계했다는 점이 특징이다. 맵은 넓은 사막 지형을 바탕으로 구성되어 있으며, 플레이어는 컴퓨터의 마린을 조종하는 동시에 AI가 조종하는 적군과 맞서야 한다. 맵의 중앙에는 넓은 개활지가 펼쳐져 있어 마린의 기동성과 전투력을 십분 발휘할 수 있는 공간으로 보인다. 맵의 가장자리로 갈수록 지형이 복잡해지며, 언덕이나 바위 지형이 배치되어 있어 시야 확보와 기동성 측면에서 전략적인 선택이 요구된다. 컴퓨터의 마린을 조종한다는 설정은 단순히 적을 물리치는 것뿐만 아니라, AI가 펼치는 다양한 전술에 대응해야 한다는 점에서 흥미로운 도전 과제를 제시한다. 맵의 제목에서 알 수 있듯이, 이 맵은 컴퓨터의 관점에서 마린을 플레이한다는 아이디어가 핵심 아이덴티티로, 기존의 유즈맵과는 차별화된 플레이 경험을 제공한다. 마린의 빠른 속도와 사정거리를 고려하여 맵을 설계한 것으로 보이며, 플레이어는 AI의 움직임을 예측하고 효율적인 위치 선정을 통해 승리를 이끌어야 한다. 초보자도 쉽게 접근할 수 있지만, AI의 패턴을 파악하고 전략을 세우는 데는 경험이 필요할 것으로 보인다. 맵의 전체적인 분위기는 사막 지형의 황량한 느낌을 살리며, 전투의 긴장감을 배가시키는 역할을 한다. 이 맵을 플레이하기 전에 맵의 구조와 마린의 특성을 충분히 숙지하는 것이 중요하며, 특히 넓은 개활지에서 벌어지는 전투에서는 시야 확보와 기동성을 중시해야 한다. 또한, AI의 패턴을 분석하는 능력이 뒷받침되어야만 안정적인 승리를 기대할 수 있을 것이다. 이 맵은 일반적인 유즈맵과는 다른 새로운 시도를 추구하므로, 스타크래프트의 매니아뿐만 아니라 유즈맵에 대한 새로운 경험을 원하는 플레이어에게도 권장할 만하다. One standout custom map in *StarCraft: Brood War* that offers a unique twist is *"I Am the AI’s Marine Vision 0.1."* This map delivers a fresh experience by letting players take on the role of a Marine controlled by the computer, flipping the traditional gameplay dynamic on its head. Set across vast desert terrain, players must command the AI’s Marine while facing off against enemy forces controlled by the same AI. The map’s central area opens up into a wide, open battlefield, ideal for Marines to showcase their speed and combat range. As players move toward the edges, the terrain grows more complex, with hills and rocky formations that demand strategic decisions regarding visibility and mobility. The core appeal of controlling the AI’s Marine lies not just in defeating enemies but in adapting to the AI’s unpredictable tactics—a compelling challenge that sets this map apart. The title itself hints at the core identity: playing as the AI’s Marine offers a perspective rarely seen in other custom maps, providing a fresh take on gameplay. Designed with the Marine’s quick movement and range in mind, the map rewards players who can anticipate the AI’s movements and secure advantageous positions. While accessible to newcomers, mastering the AI’s patterns and refining strategies will require experience. The map’s barren desert atmosphere enhances the tension of combat, creating an immersive setting where every decision matters. Before diving in, players should study the map’s layout and the Marine’s strengths, particularly in open battles where visibility and mobility are key. Success also hinges on analyzing the AI’s behavior—only then can players secure consistent victories. With its unconventional approach, this map isn’t just for *StarCraft* veterans or custom map enthusiasts; it’s a great choice for anyone looking to experience something new in the *Brood War* modding scene.
트로이 전쟁 v. 아킬레스 (Trojan War v. Achilles)
트로이 전쟁의 전설이 스타크래프트 브루드워 유즈맵으로 재탄생한 <트로이 전쟁 v. 아킬레스(Trojan War v. Achilles)>는 디펜스 장르의 핵심 요소와 전략적 깊이를 결합한 작품이다. 고대 그리스 신화 속의 영웅 아킬레스가 주인공으로 등장하며, 플레이어는 그의 공격과 방어 능력을 활용해 끊임없이 몰려드는 적을 물리쳐야 한다. 맵의 구조는 중앙에 위치한 아킬레스의 거점과 주변을 둘러싼 넓은 평야로 나뉘며, 적의 공격 루트는 크게 세 갈래로 나뉘어 있어 지형을 활용한 전략적 배치와 자원 관리가 중요하다. 특히, 맵의 가장자리에 위치한 적의 기지들은 AI로 구동되며, 각 기지에서 생산되는 유닛들은 플레이어의 거점을 향해 끊임없이 진군한다. 이를 저지하기 위해 플레이어는 방어 건물과 유닛을 배치하거나, 아킬레스의 스킬을 적극 활용해 전세를 뒤집어야 한다. 맵의 특징 중 하나는 적의 공격 패턴이 시간에 따라 변화한다는 점으로, 초반에는 소규모의 약한 유닛들이 끊임없이 쏟아지지만, 중반 이후에는 강력한 조합의 부대가 등장해 플레이어의 방어선을 압박한다. 이러한 변화는 게임의 긴장감을 높이며, 플레이어는 constantly evolving 전략을 요구받는다. 또한, 맵의 디자인에서 돋보이는 점은 고대 그리스의 건축 양식을 반영한 건물들과 지형물의 디테일로, 플레이어에게 몰입감을 제공한다. 이 맵은 초보자와 숙련자 모두에게 즐길 수 있도록 설계되었지만, 특히 방어와 자원 관리에 중점을 두고 싶다면 중간 이상의 난이도를 추천한다. 마지막으로, 맵의 전체적인 밸런스는 아직 완전하지 않을 수 있으며, 추후 패치를 통해 개선될 여지가 있다. 플레이 전에는 적의 공격 패턴과 맵의 주요 지점을 숙지하고, 방어 건물의 배치와 유닛의 조합을 미리 계획하는 것이 중요하다. 이 맵은 디펜스 장르의 팬뿐만 아니라, 전략적 깊이를 추구하는 플레이어에게도 훌륭한 선택지가 될 것이다. This StarCraft: Brood War custom map, <Trojan War v. Achilles>, reimagines the legendary Trojan War with a defense-focused gameplay experience. Players take on the role of Achilles, the mythical Greek hero, defending their base against relentless waves of enemy forces. The map’s layout features a central base for Achilles, surrounded by vast open plains where enemies spawn and advance along three primary routes. Strategic placement of defensive structures and resource management are crucial as the AI-controlled enemy bases produce increasingly powerful units over time. Early waves consist of weaker, smaller units, but as the game progresses, more formidable combinations emerge, testing the player’s adaptability. The map’s design incorporates elements of ancient Greek architecture, adding visual depth and immersion to the experience. While accessible to both beginners and veterans, the map demands careful planning, especially in defensive positioning and unit composition. Players should familiarize themselves with enemy attack patterns and key map locations before diving in. Though the map’s balance may evolve with updates, it offers a compelling challenge for defense genre enthusiasts and strategy-focused players alike.
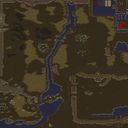
SOG 히어로 픽 (SOG HeroPick)
‘SOG 히어로 픽(SOG HeroPick)’은 스타크래프트: 브루드워의 유명 유즈맵 ‘세이지 오브 곤도르(Siege of Gondor)’를 기반으로, 영웅 선택과 랜덤화를 추가한 컴까기 디펜스 맵이다. 맵의 핵심은 ‘랜덤 영웅 픽’ 시스템으로, 플레이어는 전투 전에 무작위로 배정된 영웅을 활용해 적의 공격을 방어해야 한다. 황무지 타일셋을 기반으로 한 광활한 평원과 절벽 지형은 시야를 가리고 진형 변경을 강제하는 요소로 작용하며, 후반으로 갈수록 밀려오는 적의 물량과 기지 파괴 위험이 높아지면서 긴장감이 지속된다. 맵 구조는 크게 세 개의 주요 진영 구역으로 나뉘어 있으며, 각 구역은 독특한 방어 구조와 지형을 가지고 있어 전략적 접근이 필요하다. 예를 들어 중앙 구역은 좁은 통로를 통한 방어가 강제되는 반면, 외곽 구역은 넓은 개활지를 활용한 기습과 기동전이 중요하다. 플레이어는 제한된 자원으로 영웅의 스킬과 유닛의 특성을 잘 조합해야 하며, 특히 랜덤 영웅의 능력치가 전투의 승패를 좌우할 수 있어 재플레이성이 매우 높다. 맵의 랜덤성은 초보 플레이어에게는 예측 불가능한 변수를 제공해 흥미를 유발하지만, 숙련된 플레이어에게는 전략의 깊이를 더하는 요소로 작용한다. 또한, 맵의 장시간 플레이를 고려한 밸런스 설계가 돋보이며, AI의 공격 패턴과 스폰 타이밍이 조절되어 일정한 긴장감을 유지한다. ‘SOG 히어로 픽’은 ‘세이지 오브 곤도르’의 클래식한 디펜스 구조를 재해석한 작품으로, 영웅 시스템을 통해 새로운 재미를 더한 점이 특징이다. 이 맵은 디펜스와 컴까기 장르를 любителей에게는 물론, 전략적 깊이와 랜덤성을 좋아하는 플레이어에게도 강력히 추천할 만하다. 플레이 전에는 맵의 구조와 영웅의 특성표를 미리 확인해 두는 것이 좋으며, 특히 협동 플레이 시 팀원 간의 역할 분배가 중요하다. 또한, AI의 난이도 설정이나 스폰 위치를 조절할 수 있는 옵션이 있다면 더욱 유용할 것이다. 이 맵은 스타크래프트 유즈맵의 장점을 잘 살린 작품으로, 오랜 시간 동안 사랑받아 온 ‘세이지 오브 곤도르’의 팬이라면 반드시 체험해볼 가치가 있다. 특히, 팀 플레이 시 각 영웅의 시너지를 고려한 전략 수립이 관건이며, 랜덤성이 주는 재미와 긴장감을 즐길 수 있는 맵이다. ‘SOG HeroPick’ is a tower defense and micro-management map based on the classic StarCraft: Brood War custom map ‘Siege of Gondor,’ featuring added hero selection and randomization. The core of the map is the ‘Random Hero Pick’ system, where players must defend against enemy attacks using randomly assigned heroes before each battle. The vast plains and cliff terrain, based on the Wasteland tileset, obscure vision and force strategic formation changes, while the increasing enemy waves and risk of base destruction heighten tension as the game progresses. The map is divided into three major faction zones, each with unique defensive structures and terrain that require different strategic approaches. For example, the central zone demands defense through narrow passages, while the outer zones emphasize ambushes and mobile warfare in open areas. Players must effectively combine limited resources with hero abilities and unit traits, as the random hero stats can determine the outcome of battles, making each playthrough highly replayable. The map’s randomization offers unpredictable variables for beginners, adding excitement, while providing strategic depth for experienced players. Its balance is designed for long sessions, with AI attack patterns and spawn timings adjusted to maintain consistent tension. ‘SOG HeroPick’ reimagines the classic defense structure of ‘Siege of Gondor’ by introducing a hero system, adding fresh appeal to the genre. It’s highly recommended not only for fans of defense and micro-management maps but also for players who enjoy strategic depth and randomization. Before playing, it’s advisable to review the map layout and hero traits, especially in team mode, where role distribution among teammates is crucial. Having options to adjust AI difficulty or spawn locations would further enhance the experience. This map perfectly captures the strengths of StarCraft custom maps and is a must-try for fans of the long-beloved ‘Siege of Gondor.’ In team play, building strategies around hero synergies is key, and the map delivers both the fun and tension of its randomized elements.
크리미널 마스터마인드 (Criminal Mastermind v1.1)
《Criminal Mastermind》는 스타크래프트: 브루드워의 유즈맵 중 하나로, 8명의 플레이어가 참여하는 대결형 디펜스 맵이다. 맵 제목에서부터 느낄 수 있듯이, ‘범죄의 대가’인 플레이어(S.W.A.T.)와 ‘범죄 마스터마인드’로 불리는 상대방(A.I. 또는 다른 플레이어) 간의 두뇌 싸움과 전략이 주된 볼거리다. 설원 타일셋으로 구성된 넓은 필드는 눈 덮인 도시와 도로, 건물들이 조화를 이루며, 밤 하늘 아래에서 은은한 조명이 맵의 분위기를 한층 더 깊게 만든다. 맵의 구조는 중앙에 위치한 주요 거점과 이를 둘러싼 방어 시설로 이루어져 있으며, S.W.A.T. 팀은 이 거점을 지키며 끊임없이 몰려드는 적들을 물리쳐야 한다. 반면, 범죄 마스터마인드는 주기적으로 쏟아지는 웨이브를 공격하고, 거점을 점령하거나 파괴하는 방식으로 승리를 노린다. 맵의 특징 중 하나는 플레이어 간의 긴장감이 지속된다는 점이다. S.W.A.T. 팀은 방어에 특화된 유닛과 건물을 배치할 수 있지만, 한 순간의 실수가 모든 것을 무너뜨릴 수 있다. 반면, 범죄 마스터마인드는 자원과 유닛을 효율적으로 관리하며 공격을 펼쳐야 하며, 때로는 기습이나 함정 전략을 구사하기도 한다. 이러한 상반된 목표는 플레이어들에게 끊임없는 긴장감과 전략적 사고를 요구한다. 이 맵은 특히 팀워크와 전략적 계획이 중요한데, 개인의 실력보다도 팀 전체의 호흡과 타이밍이 승패를 좌우할 가능성이 높다. 또한, 맵의 디자인과 사운드가 조화를 이루어 몰입감을 높이는 데 한몫을 한다. 플레이어는 눈 덮인 도시의 웅장함 속에서 자신의 전략을 펼쳐가며, 상대방의 움직임을 예측하고 대응해야 한다. 《Criminal Mastermind》는 디펜스와 전략이 결합된 유즈맵으로, 단순히 적이 오는 대로 막는 것이 아니라 상대방을 이기기 위한 심리전과Resource 관리까지 고려해야 하는 깊이 있는 플레이가 요구된다. 이 맵을 즐기기 위해서는 방어 시설의 배치와 유닛의 효율적인 사용법, 그리고 팀원 간의 소통이 무엇보다 중요하다. 초보자의 경우 방어와 공격의 균형을 잡는 데 다소 어려움을 느낄 수 있지만, 점차 익숙해지면서 전략의 깊이를 더할 수 있을 것이다. 또한, 맵의 난이도가 높을수록 더 많은 변수가 발생하기 때문에, 플레이 전 맵의 구조와 주요 거점, 그리고 각 플레이어의 역할 분담을 충분히 숙지하는 것이 좋다. 이 맵은 디펜스와 전략 게임을 좋아하는 유저들에게 강력히 추천할 만한 작품이다. 맵의 분위기와 긴장감, 그리고 치밀한 전략 요소는 스타크래프트 유즈맵의 새로운 경지를 보여준다. 특히, 팀 플레이를 즐기는 유저들에게는 필수적으로 경험해 볼 만한 맵으로 손꼽힌다. 8명의 플레이어가 참여하는 만큼, 각자의 역할과 책임을 다하는 것이 승리를 위한 열쇠가 될 것이다. 《Criminal Mastermind》 is a user-made defense map in *StarCraft: Brood War* that features an eight-player competitive battle. As the title suggests, the game revolves around a battle of wits and strategy between the "Master of Crime" player (S.W.A.T.) and the opposing "Criminal Mastermind" (either AI or another player). Set on a snowy tileset, the vast battlefield is adorned with snow-covered cities, roads, and buildings, its atmosphere deepened by the soft glow of the night sky. The map’s design centers around a key stronghold surrounded by defensive structures—S.W.A.T. must hold the line against relentless waves of enemies, while the Criminal Mastermind aims to overrun the stronghold through periodic assaults, occupation, or destruction. One of the map’s defining features is the sustained tension between players. The S.W.A.T. team can deploy specialized defensive units and buildings, but a single mistake can lead to collapse. Meanwhile, the Criminal Mastermind must manage resources and units efficiently, sometimes employing ambushes or trap-based tactics. These opposing objectives create constant pressure and demand sharp strategic thinking. Teamwork and coordinated planning are crucial, as victory often hinges more on team synergy and timing than on individual skill. The map’s immersive design and sound design further enhance the experience, with the grandeur of the snowy cityscape serving as a backdrop for unfolding strategies. 《Criminal Mastermind》 blends defense and strategy into a user-made map that goes beyond mere wave-clearing. It requires psychological warfare, resource management, and careful planning to outmaneuver opponents. Mastering the placement of defensive structures, efficient unit control, and clear communication with teammates is essential. Beginners may struggle to balance offense and defense at first, but as they grow accustomed to the mechanics, they can delve deeper into strategy. The higher the difficulty, the more variables come into play, so it’s important to study the map’s layout, key strongholds, and each player’s role before diving in. This map is highly recommended for fans of defense and strategy games, offering a fresh take on StarCraft user-made maps with its gripping atmosphere, intense pressure, and intricate strategic elements. It’s especially a must-try for players who enjoy team-based gameplay, where fulfilling one’s role and responsibilities is the key to victory. With eight players participating, success depends on everyone playing their part.
랜덤물량막기 0.6v (Random Wave Defense 0.6v)
‘랜덤물량막기 0.6v’는 스타크래프트 브루드워 유즈맵 중 디펜스 장르에 속하는 맵으로, 이름 그대로 무작위로 쏟아지는 적의 물량을 방어하는 것이 핵심 목표다. 맵의 구조는 비교적 단순하지만, ‘랜덤’이라는 요소가 게임의 재미와 난이도를 좌우한다. 플레이어는 시작 지점에서부터 끊임없이 밀려오는 적 유닛을 상대해야 하며, 각 웨이브마다 등장하는 유닛의 종류와 수가 랜덤으로 결정된다. 이 때문에 매 플레이마다 새로운 전략을 세워야 하고, 행운에 따라 난이도가 크게 달라질 수 있다. 맵의 디자인 측면에서는 중앙에 위치한 방어 타워와 외부에서 공세를 펼치는 적 유닛의 배치에 주목할 필요가 있다. 방어 타워는 자체적인 공격 능력을 갖추고 있지만, 모든 적을 상대로 만능은 아니다. 플레이어는 맵 곳곳에 흩어져 있는 추가 건물을 활용해 방어선을 보강하거나, 특정 유닛을 집중적으로 방어하는 전략을 세울 수 있다. 또한, 맵의 가장자리에 위치한 입구는 좁고 길어서 방어에 용이하지만, 반대로 적이 한꺼번에 몰려올 수 있는 위험 요소이기도 하다. 이러한 구조적 특징은 플레이어의 판단력과 반응 속도를 동시에 요구한다. 플레이 경험 측면에서 ‘랜덤물량막기 0.6v’는 컴까기(컴퓨터 상대) 유즈맵의 특성을 강하게 띄고 있다. 플레이어는 단독으로 게임을 진행하며, AI가 조종하는 적군과 1대1로 대결을 펼친다. 게임의 진행은 웨이브 형식으로, 일정 주기마다 새로운 적군이 등장하며, 웨이브가 지나갈수록 적의 물량과 유닛의 레벨이 상승한다. 이러한 시스템은 플레이어에게 끊임없는 긴장감을 제공하며, 방어에 실패했을 때의 리스크도 크다. 특히, 랜덤으로 등장하는 유닛의 조합은 예측 불가능성을 높여 전략의 다양성을 증대시킨다. 이 맵을 추천할 대상은 디펜스 장르를 좋아하는 유저들이나, 스타크래프트의 전략적 측면을 즐기는 플레이어들이다. 또한,AI와의 대결을 통해 실력을 테스트하고 싶거나, 행운 요소가 포함된 게임을 좋아하는 경우에도 적합하다. 다만, 랜덤 요소 때문에 때로는 운에 좌우되는 플레이가 될 수 있어, 전략적 사고와 함께 운도 따라줘야 한다는 점은 유념해야 한다. 미리 방어 타워의 배치와 보강할 유닛의 종류를 숙지하고, 맵의 구조를 잘 이해한 후 플레이를 시작하는 것이 좋다. This Brood War UMS map, titled ‘랜덤물량막기 0.6v’ (Random Wave Defense 0.6v), falls under the defense genre, specifically a randomized wave-based tower defense. The core gameplay revolves around surviving relentless, randomly generated enemy waves by strategically placing defensive structures and units. Each wave introduces a mix of units—ranging from basic ground forces to advanced aerial threats—whose compositions are unpredictable, forcing players to adapt dynamically. The map’s layout features a central spawn point for enemies, funneling them through narrow chokepoints toward the player’s base. Defensive towers are pre-placed but can be upgraded or supplemented with additional structures scattered across the map. The limited entry points make defense manageable, yet the sheer volume and randomness of incoming units demand quick decision-making and resource management. Players must balance between reinforcing weak points and optimizing tower placements to counter the AI’s evolving threats. The experience leans heavily toward a solo challenge, where the player faces off against an AI opponent in a continuous battle of attrition. Waves escalate in intensity, with later stages introducing larger groups and higher-tier units, testing the player’s ability to sustain defenses under pressure. The randomness adds replayability, as no two games play out the same way, appealing to those who enjoy unpredictability alongside strategic depth. Recommended for fans of tower defense mechanics, Brood War strategy enthusiasts, or players seeking a solo challenge with a mix of luck and skill. While the map’s outcome depends partly on randomness, understanding its mechanics—such as tower synergies and chokepoint control—can significantly improve success rates. New players may find the learning curve steep due to the unpredictable nature of enemy waves, but mastering the basics of unit countering and tower placement will make the experience more rewarding.
히드라 랜처즈 (Hydra Rancherz v7.1-6)
히드라 랜처즈(Hydra Rancherz)는 스타크래프트: 브루드워의 유즈맵으로, 8명의 플레이어가 협동하거나 경쟁하는 방식으로 진행되는 컴까기(컴퓨터 상대 키우기) 장르의 맵입니다. 사막 타일셋으로 구성된 넓은 맵 위에서 히드라를 키우고 강화하는 것이 주된 목표로 보이며, 버전 7.1이 Lone_Wolf, YEMMY, Nupper에 의해 업그레이드된 후속 버전으로 추정됩니다. 맵의 중심에는 중앙 건물이 배치되어 있으며, 주변으로는 히드라 사육장이 여러 개 배치되어 있는 구조가 보입니다. 플레이어들은 각자 자원과 건물을 관리하며 히드라를 성장시키고, 적대적인 환경이나 AI를 상대해야 하는 것으로 보입니다. 히드라의 성장 속도, 공격력, 체력 등을 관리하는 재미와 함께, 협동 플레이를 통한 시너지 효과나 경쟁 플레이를 통한 전략적 대결이 주요 볼거리일 것으로 예상됩니다. 난이도는 플레이어의 협동 여부와 전략에 따라 달라질 수 있으며, 초보부터 숙련자까지 모두 즐길 수 있도록 구성된 것으로 보입니다. 특히 히드라의 성장과 강화 시스템이 매력적인 요소로, 플레이어의 전략적 선택과 리스크 관리가 중요한 포인트입니다. 이 맵은 히드라를 키우고 성장시키는 재미와 함께, 컴퓨터 AI와의 대결에서 승리하는 짜릿함을 느낄 수 있는 유즈맵으로 추천합니다. 플레이 전에는 각 플레이어의 시작 위치와 자원 분배, 히드라의 성장 포인트를 미리 계획하는 것이 중요할 것으로 보입니다. 또한, 팀 플레이를 선호하는 경우라면 동료와의 원활한 소통이 필수적입니다. 맵의 전체적인 구조는 넓고 개방적이지만, 히드라의 성장과 관리를 위한Resource Management와 Strategic Planning이 요구되는 점을 유념해야 합니다. Hydra Rancherz is a custom map from StarCraft: Brood War where eight players either cooperate or compete in a "build-the-computer" genre match. Set on a wide desert tileset, the main objective seems to be raising and upgrading Hydralisks. The latest version, 7.1, appears to have been enhanced by Lone_Wolf, YEMMY, and Nupper. At the center of the map stands a main building, surrounded by multiple Hydralisk pens. Players manage their own resources and structures while growing Hydralisks and facing hostile environments or AI opponents. The appeal lies in balancing Hydralisk growth speed, attack power, and health, as well as leveraging synergy in cooperative play or strategic rivalry in competitive matches. Difficulty varies based on teamwork and strategy, making it accessible for both beginners and veterans. The standout feature is the Hydralisk growth and upgrade system, where strategic choices and risk management play crucial roles. This custom map offers the thrill of nurturing Hydralisks while battling AI opponents, making it a recommended experience. Before starting, it's important to plan starting positions, resource distribution, and Hydralisk growth priorities. For team play, smooth communication with teammates is essential. While the map is open and expansive, players should keep in mind the need for careful resource management and strategic planning to succeed.
디펜드 더 힐 (Defend The Hill) 1.0
‘디펜드 더 힐(Defend The Hill) 1.0’은 스타크래프트: 브루드워에서 제공하는 유즈맵으로, 중앙의 언덕을 중심으로 펼쳐지는 디펜스형 게임이다. 맵 중앙에는 원형의 언덕이 있으며, 언덕 주변으로 좁은 길이 나 있어 적의 진격이 제한되어 있다. 플레이어는 언덕 주변의 건물이나 유닛을 배치하여 언덕을 방어해야 하며, 언덕 중앙에 위치한 건물을 보호하는 것이 핵심 목표로 추정된다. 맵의 구조는 언덕을 중심으로 대칭을 이루고 있어, 공세가 어떤 방향에서 오더라도 대응할 수 있도록 배치할 여유가 있다. 언덕의 지형은 비교적 평탄한 편이지만, 언덕 가장자리에는 돌출된 바위나 장애물이 배치되어 있어 유닛의 이동을 방해하는 요소로 작용할 수 있다. 맵의 테두리에는 넓은 평지가 펼쳐져 있어, 언덕으로 진격하는 적을 미리 저지하거나 유인할 수 있는 공간이 마련되어 있다. 맵의 색상과 텍스처는 황혼 타일셋을 기반으로 하여 따뜻한 오렌지색 톤이 특징적이며, 이는 맵의 분위기를 한층 더Highlighting the atmosphere of the game. 플레이어는 맵의 구조와 지형을 잘 활용하여 방어 라인을 구축하고, 언덕 중앙에 위치한 건물을 보호해야 한다. 맵의 인공지능이 제공하는 적군은 언덕을 오르며 지속적으로 공격을 퍼부을 것으로 보이며, 방어에 실패하면 건물이 파괴되어 패배할 가능성이 높다. 맵의 난이도는 조절 가능한 것으로 보이며, 언덕 주변의 배치와 유닛 선택이 승패를 좌우할 핵심 요소로 작용할 것이다. 특히 언덕 가장자리의 장애물과 좁은 길목을 활용한 방어 전략이 요구된다. 이 맵은 스타크래프트의 유닛과 건물을 활용한 전략적 디펜스를 즐기고 싶은 플레이어들에게 적합하며, 한정된 공간에서 효율적인 방어 전략을 세워야 한다는 점에서 흥미로운 도전 과제를 제공한다. 맵을 플레이하기 전에는 언덕 주변의 지형과 장애물을 꼼꼼히 살피고, 방어에 최적화된 유닛과 건물을 미리 준비하는 것이 중요하다. 또한, 적군의 공격 패턴을 예측하고, 언덕으로 진격하는 적을 저지할 수 있는 대책을 마련해야 한다. Defend The Hill 1.0 is a custom map for StarCraft: Brood War, designed as a defense-style game centered around a central hill. The map features a circular hill in the middle, surrounded by narrow paths that restrict enemy movements. Players must defend the hill by strategically placing buildings or units around its perimeter, with the primary objective likely being the protection of a structure located at the hill's center. The map is symmetrical around the hill, allowing players to prepare defenses that can counter attacks from any direction. The terrain around the hill is relatively flat, but the edges are lined with protruding rocks and obstacles that can hinder unit movement. The outer edges of the map consist of wide open spaces, providing room to intercept or lure advancing enemies before they reach the hill. The map's color scheme and textures are based on the Twilight tileset, giving it a warm orange hue that enhances the game's atmosphere. Players must utilize the map's layout and terrain to establish defensive lines and protect the central structure. The AI-controlled enemies are expected to continuously attack while advancing up the hill, and failure to defend will result in the destruction of the central building and a likely loss. The difficulty appears adjustable, with the placement of units and buildings around the hill being critical to success. Special attention should be given to the obstacles and narrow paths along the hill's edge, as they play a key role in forming effective defensive strategies. This map is ideal for players who enjoy strategic defense mechanics in StarCraft, offering a challenging experience that requires efficient use of limited space. Before playing, it's essential to thoroughly examine the terrain and obstacles around the hill, prepare optimal units and buildings for defense, and anticipate enemy attack patterns to devise countermeasures.
AI 파이어벳 디펜스 v.2 (AI FireBat Def v.2)
스타크래프트 브루드워의 컴까기 유즈맵으로 유명한 ‘AI FireBat Def v.2’는 플레이어가 AI가 조종하는Firebat을 상대로 방어전을 펼치는 디펜스형 맵이다. 맵은 넓은 사막 지형을 배경으로 삼아 시야를 제한하는 오브젝트와 좁은 통로를 활용해 전략적 선택을 강제하는 구조로 설계되었다. 플레이는 크게 세 가지 구역으로 나뉘며, 각 구역은 AI의 공격 패턴과 난이도가 다르다. 초반에는 소수의 Firebat과 마린이 등장해 방어선을 구축할 시간을 벌 수 있지만, 시간이 지나면서 AI는 벌처, 고스트, 시즈 탱크까지 동원해 공격해 온다. 플레이어는 미네랄과 가스를 확보해 업그레이드와 병력 생산을 병행해야 하는데, 자원 채취가 제한적인 구조라 자원 관리가 필수적이다. 특히 업그레이드와 병력 조합을 얼마나 효율적으로 구성하느냐가 승패를 좌우한다. 맵의 특징은 AI의 공격 패턴이 무작위가 아닌 특정 조건(예: 일정 시간 경과, 자원 소모량)에 따라 변한다는 점으로, 이를 예측하고 대비해야 한다. 또한 맵 곳곳에 숨겨진 보급고와 미네랄 덩어리가 배치되어 있어 이를 확보하는 것이Resource Management의 핵심이다. 초보자의 경우 Firebat과 마린 위주로 방어선을 구축하는 것이 안정적이지만, 고수층은 업그레이드와 유닛 조합을 다양화해 AI의 공격을 효과적으로 차단할 수 있다. 맵의 밸런스는 AI의 공격 빈도와 플레이어의 자원 수급이 맞아떨어지는지 여부에 달려 있으며, 난이도 조절이 가능한 설정 옵션이 제공된다. 플레이 전에는 맵의 구역별 방어 우선순위를 미리 정해두고, 자원 확보를 위한 병력 출격 타이밍을 조절하는 것이 중요하다. 이 맵은 소규모 팀플레이보다는 1인 또는 2인 Verteidungsstrategie에 최적화되어 있으며, 특히 ‘컴까기’ 장르를 좋아하는 유저들에게 인기가 많다. 맵의 분위기는 사막의 황량한 풍경과 AI의 공격 소리가 어우러져 긴장감을 높이는 데 기여한다. 마지막으로, 맵의 변종 버전인 ‘AI Firebat Defense!!!v1.0’과의 차이점도 확인해 볼 필요가 있다. 이 맵은 디펜스 장르의 전형적인 구조를 따르지만, AI의 공격 패턴과 맵 디자인이 기존 버전보다 더 정교해진 점이 특징이다. AI FireBat Def v.2 is a UMS defense-style custom map in StarCraft: Brood War where players must defend against AI-controlled Firebats in a desert-themed terrain. The map features three distinct zones, each escalating in difficulty as AI deploys increasingly advanced units like Vultures, Ghosts, and Siege Tanks over time. Players start with limited resources and must strategically balance mineral and gas gathering with unit production and upgrades to withstand relentless assaults. The map's design includes narrow pathways and vision-obstructing elements to force players into making critical tactical decisions. Hidden supply depots and mineral clusters scattered across the map add an extra layer of Resource Management, requiring players to scout and secure key areas early. Beginners may find success by focusing on Firebats and Marines for a stable defense, while advanced players can experiment with diverse unit compositions and upgrade paths to counter AI's evolving strategies. The map's balance hinges on the synchronization between AI's attack frequency and the player's resource income, with adjustable difficulty settings for varied playthroughs. Before diving in, players should prioritize zone defense strategies and time their mineral-gathering sorties carefully. This map excels in solo or duo play scenarios, catering especially to fans of the 'computer-killing' genre. The desert ambiance, combined with the AI's aggressive assaults, creates an immersive and tense experience. Players familiar with the predecessor 'AI Firebat Defense!!!v1.0' will notice refined AI behavior and more intricate map design in this iteration.
맵 선택 가이드
태그는 맵의 핵심 특징을 빠르게 설명하지만 제작 버전마다 규칙이 다를 수 있습니다. 상세 설명에서 권장 인원, 난이도, 플레이 시간과 버전을 함께 확인한 뒤 다운로드하세요.