
8인 대결 스타크래프트 맵 모음
'8인 대결' 태그가 등록된 맵을 모았습니다. 장르 하나로 찾기 어려운 플레이 방식, 난이도와 특징을 중심으로 인기 맵과 최신 맵을 비교해 보세요.
- 등록 맵
- 8개
- 누적 다운로드
- 0
- 누적 조회
- 230
인기 맵
다운로드와 조회 반응이 높은 맵입니다.
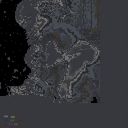
파리 힐튼 1 (Paris Hilton 1)
‘파리 힐튼 1’은 스타크래프트 브루드워의 밀리 맵으로, 8명의 플레이어가 경쟁하는 1vs7 대전을 기본으로 한다. 맵은 우주 타일셋을 사용해 넓은 개방형 공간과 중앙의 ‘파리 힐튼’이란 이름의 주요 건물 구역이 특징이다. 맵의 구조는 비교적 평지 위주로 펼쳐져 있어 초반 빠른 확장이 용이하며, 중앙 부지는 초반 전투가 집중될 가능성이 높다. 맵의 이름은 다소 이색적이지만, 실질적으로는 밀리 대전을 위한 균형 잡힌 공간 배치를 제공한다. 플레이어들은 중앙을 차지하기 위한 치열한 전투를 펼치며,Resource를 확보하고 병력을 모아 상대방을 압박하는 전략이 요구된다. 맵의 넓이는 넓지만, 건물이 배치된 지역은 제한적이어서Resource 수급 경쟁이 치열해질 수 있다. 초보 플레이어는 중앙 지역을 놓고 벌어지는 전투에서 밀리기 쉬우며,Resource 확보와 병력 생산 타이밍을 잘 조율해야 한다. 반면, 경험 많은 플레이어는 빠른Resource 수급과 중앙 점령을 통해 경기를 주도할 수 있다. 맵의 밸런스는 대체로 균형 잡혀 있지만, 초반Resource 분배가 승패를 좌우할 수 있어 Resource 관리 능력을 테스트하는 맵으로 평가된다. 이 맵은 밀리 대전을 즐기는 플레이어라면 누구나 한 번쯤 도전해 볼 만한 가치가 있으며, 특히Resource 관리와 전투 타이밍을 연마하고 싶은 유저들에게 추천한다. 다만, 맵의 이름이 다소 이색적이어서 플레이 전에 ‘파리 힐튼’이 어떤 역할인지 내부 설명이나 커뮤니티 후기를 참고하는 것이 좋다. ‘Paris Hilton 1’ is a Brood War melee map where eight players compete in a 1vs7 format. The map uses a space-themed tileset, featuring wide open terrain and a central area called “Paris Hilton,” which serves as the primary building zone. Its layout is mostly flat, allowing for quick early expansions, but the central area is likely to become the focus of early battles. Though the name is unconventional, the map provides a well-balanced space for melee combat. Players must fight fiercely for control of the center, secure resources, and build forces to pressure opponents. While the map is spacious, building placement is limited, leading to intense competition for resources. Novice players may struggle in the central battles and must carefully coordinate resource gathering and troop production timing. Experienced players, however, can dominate by securing resources and seizing the center early. The map is generally balanced, but early resource distribution can decide the outcome, making it a test of resource management skills. It’s worth trying for any melee enthusiast, especially those looking to refine their resource control and combat timing. Given the map’s unusual name, checking internal descriptions or community feedback beforehand to understand the role of “Paris Hilton” is recommended.
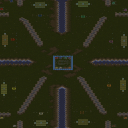
퓨전 미드니스 FINAL (DBZ :: Fusion Madness FINAL)
스타크래프트 브루드워 유즈맵의 걸작 중 하나로 손꼽히는 <DBZ :: Fusion Madness FINAL>은 드래곤볼 Z의 전투 시스템을 모티브로 한 컴까기 디펜스 맵이다. 맵 중앙에는 거대한 질량이 배치되어 있으며, 플레이어는 8명의 대결에서 살아남기 위해 끊임없이 upgrades를 누적하고 적의 대포와 충전기를 파괴해야 한다. 게임의 핵심은 ‘퓨전(Fusion)’ 시스템으로, 일정 포인트를 모으면 두 플레이어의 유닛이 합체하여 강력해지는 방식이다. upgrades는 200, 500, 750 포인트에서 발생하며, 각 단계에서 제공되는 강화는 전투의 흐름을 완전히 바꿀 수 있다. 맵은 사막 테마의 타일셋으로 이루어져 있으며, 넓은 개활지와 중앙 질량이 특징적인 배치로 인해 전략적인 위치 선정이 중요하다. 초반에는 견제와 자원 확보가 중요하며, 중반 이후로는 퓨전 타이밍과 팀워크가 승부를 가른다. 특히 질량이 위치한 중앙 지역은 전투의 핵심 교전지로, 이곳을 차지하는 플레이어가 게임을 주도할 가능성이 높다. 맵을 처음 플레이한다면 upgrades 시스템과 퓨전 타이밍을 숙지하는 것이 중요하며, AI 상대의 난이도는 대체로 ‘보통’ 수준이지만, 퓨전 타이밍을 잘못 잡으면 순식간에 밀릴 수 있어 신중한 플레이가 요구된다. 추천 대상은 드래곤볼 팬은 물론, 컴까기 및 디펜스 장르를 좋아하는 유저들로, 다인전에서의 전략적 깊이를 즐기기에 최적의 맵이다. 다만, 8인 동시 플레이를 전제로 설계되어 있어 인원이 부족하면 밸런스가 무너질 수 있으니 주의가 필요하다. <DBZ :: Fusion Madness FINAL> stands out as one of the masterpieces among Brood War custom maps, inspired by the fighting system of Dragon Ball Z. The map features a massive central mass, and players must survive against eight opponents by continuously accumulating upgrades and destroying enemy cannons and chargers. The core mechanic revolves around the "Fusion" system, where two players' units merge into a more powerful form once they reach a certain point threshold. Upgrades occur at 200, 500, and 750 points, with each tier drastically altering the flow of battle. The map’s desert-themed tileset and open central mass demand strategic positioning. Early on, harassment and resource control are crucial, while mid-to-late game hinges on fusion timing and teamwork. The central mass is a key battleground, and whoever secures it often dominates the game. For newcomers, mastering the upgrade system and fusion timing is essential, as the AI’s difficulty is moderate but can overwhelm players if fusion timing is mishandled. Ideal for both Dragon Ball fans and fans of tower defense and melee combat, this map excels in offering deep strategic gameplay in large-scale battles. However, since it’s designed for eight simultaneous players, imbalances can arise if the full roster isn’t present.
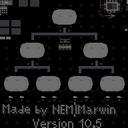
마이크로 토너먼트 10.5v2 (Micro Tournament 10.5v2)
스타크래프트 브루드워의 아레나 장르 유즈맵인 〈마이크로 토너먼트 10.5v2〉는micro-tournament 스타일의 대결 맵으로, 8명의 플레이어가 좁은 맵 중앙에 모여 벌이는Micro-tournament micro-battles의 짜릿함을 느낄 수 있다. 맵은 6144x6144의 거대한 우주 타일셋으로 구성되어 있으나, 실질적인 전투 공간은 중앙의 좁고 구역화된 지역으로 한정된다. 맵 곳곳에는 건물과 장애물이 배치되어 있어 시야와 기동성을 제한하며,micro-tournament micro-battle 맵의 특징인 '마이크로 전투'가 가능한 공간을 제공한다. 각 플레이어는 시작 지점에서 시작하며, 맵 중앙의 좁은 구역으로 진입해 상대와 직접 전투를 벌이게 된다. 맵의 구조상 초반부터 대치 상황이 자주 발생할 가능성이 높으며, 좁은 공간에서의micro-tournament micro-combat 특성상 한순간의 실수가 승패를 좌우할 수 있다. 맵의 전체 크기는 넓지만 전투가 벌어지는 핵심 지역은 매우 밀집되어 있어,micro-tournament micro-battle 스타일의 맵이라고 할 수 있다. 이 맵은 특히Micro-tournament micro-battles를 즐기는 유저들에게 추천되며, 좁은 공간에서의Micro-tournament micro-combat 능력을 키우고자 하는 초보 플레이어들에게도 적합한 연습용 맵으로 활용될 수 있다. 다만, 좁은 공간에서의 전투가 반복되다 보니 지루함을 느낄 수도 있어,Micro-tournament micro-battle를 선호하는 플레이어들에게만 어울릴 수 있다. 맵을 플레이하기 전에는Micro-tournament micro-battles의 특성을 충분히 숙지하고, 좁은 공간에서의Micro-tournament micro-combat에 대비하는 것이 좋다. 또한Micro-tournament micro-battle 스타일의 맵이므로,Micro-tournament micro-battles의 기본 전략과Micro-tournament micro-combat 기술을 미리 연습해두는 것이 좋다. Micro Tournament 10.5v2 is an arena-style custom map for StarCraft: Brood War, designed for micro-tournament battles where 8 players face off in a confined central arena. The map uses a massive 6144x6144 space-themed tileset, but the actual battlefield is limited to a narrow, segmented central area optimized for micro-battles. Buildings and obstacles are strategically placed to restrict vision and mobility, forcing players into close-quarters combat typical of micro-tournament scenarios. The map’s design encourages early engagement and intense micro-management, as a single mistake in positioning or unit control can quickly turn the tide. While the overall map size is large, the core combat zone is highly concentrated, making it ideal for players who enjoy micro-tournament micro-battles. This map is recommended for those who seek to refine their micro-tournament micro-combat skills, especially beginners looking to practice in a high-pressure environment. However, the repetitive nature of confined combat may feel monotonous for players who prefer larger or more dynamic battlefields. Before playing, it’s advisable to familiarize yourself with micro-tournament micro-battle strategies and practice basic micro-management techniques to maximize your performance in these intense encounters.
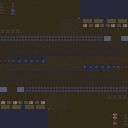
프리스쿨 쇼다운 6.3 파이널 (Preschool Showdown 6.3 Final)
‘프리스쿨 쇼다운 6.3 파이널(Preschool Showdown 6.3 Final)’은 스타크래프트: 브루드워의 유즈맵 중 하나로, 8명의 플레이어가 경쟁하는 디펜스 장르의 유닛 조합 및 전략이 요구되는 맵이다. 맵의 구조는 중앙을 가로지르는 넓은 길과 그 주변으로 배치된 방어 건물, 자원 지대, 그리고 보스 몬스터 zona로 구성되어 있으며, 보스를 처치하는 것이 주요 승리 조건으로 추정된다. 맵의 디자인과 타일셋(황무지)은 전쟁과 학원의 대결이라는 테마를 반영한 듯 보인다. 플레이어는 초반에 기본 유닛을 확보한 뒤, 중간중간 등장하는 웨이브를 막아내며 자원을 모아 업그레이드와 영웅 유닛을 육성하는 방식으로 진행되는 것으로 보인다. 맵의 밸런스는 여러 버전을 거치며 개선된 것으로 보이며, 버그 픽스와 밸런스 조정도 이루어진 것으로 추측된다. 특히 zona 보스를 중심으로 한 전투는 전략적 선택이 요구되는 포인트로, 플레이어 간의 협력과 개인의 판단력이 중요할 것으로 예상된다. 초보자는 맵의 구조와 유닛 조합법, zona의 패턴을 숙지하는 데 시간이 필요할 수 있으며, 보통 이상의 난이도에서는 빠른 판단력과 자원 관리 능력이 필수적일 것이다. 맵의 플레이 시간은 공략에 따라 30분에서 1시간 내외로 예상되며, 팀플레이보다는 개인의 판단력이 더 중요할 수 있다. 맵의 세부적인 승리 조건, zona의 패턴, 유닛 밸런스 등은 후속 버전이나 커뮤니티의 피드백을 통해 점차 정교해졌을 가능성이 크다. 플레이 전 미리 맵의 주요 지점(자원 지대, 보스 위치, 주요 길목)을 확인하고, zona의 공격 패턴을 숙지하는 것이 좋다. 또한, 초반 자원 확보와 영웅 유닛의 선택이 게임의 흐름을 좌우할 수 있으므로 신중한 플레이가 필요하다. zona를 중심으로 한 보스 전투는 맵의 핵심이며, 보스를 처치하지 못하면 게임 진행이 어려워질 수 있으므로 전략적 선택이 중요하다. 맵의 디자인과 구조는 간결하면서도 전략적인 요소들이 잘 배치되어 있어, 반복 플레이 시에도 새로운 전략을 시도해 볼 수 있는 재미가 있다. 특히 zona의 패턴과 웨이브의 강도가 점차 증가하는 구조는 긴장감을 유지시키는 데 효과적이다. 초보자라면 zona의 패턴을 분석하고, 유닛 조합의 최적화를 위한 연습을 권장한다. 반면, 숙련자라면 zona의 약점을 exploitable한 전략을 구사하거나, 자원과 유닛의 효율적인 활용을 통해 보다 빠르게 보스를 처치하는 데 주력할 수 있다. 맵의 규모와 구조는 대규모 전투와 개별 전투가 혼재되어 있어, 전투의 흐름을 읽는 능력이 중요하다. zona 보스를 중심으로 한 전투는 맵의 핵심であり, 성공적인 처치를 위해서는 플레이어 간의 협력이 필수적일 수 있다. 맵의 밸런스는 여러 버전을 거치며 개선되었으므로, 최신 버전인 6.3 파이널을 플레이하는 것이 가장 안정적일 것으로 보인다. zona의 패턴과 웨이브의 강도는 플레이어의 전략에 따라 크게 달라질 수 있으므로, 상황에 맞게 유연하게 대처해야 한다. 맵의 디자인과 구조는 단순하면서도 전략적인 깊이가 있어, 브루드워의 유즈맵 중에서도 인기 있는 장르에 속할 가능성이 높다. zona의 패턴과 보스의 난이도는 플레이어의 숙련도에 따라 조절할 수 있도록 설계되었을 가능성이 있으며, 이는 맵의 재플레이 가능성을 높이는 요소로 작용한다. zona를 중심으로 한 전투는 맵의 핵심であり, 보스를 처치하지 못하면 게임의 진행이 어려워질 수 있으므로, 전략적 선택이 무엇보다 중요하다. 맵의 구조는 중앙의 넓은 길과 주변의 방어 건물이 균형 있게 배치되어 있어, 초보자와 숙련자 모두에게 공평한 기회를 제공할 것으로 보인다. zona의 패턴과 웨이브의 강도는 점차 증가하는 구조로, 플레이어의 전략과 판단력이 요구되는 디자인이다. 맵의 밸런스는 여러 버전을 거치며 개선되었으므로, 최신 버전인 6.3 파이널을 플레이하는 것이 가장 안정적일 것이다. zona의 패턴과 보스의 난이도는 플레이어의 숙련도에 따라 조절할 수 있도록 설계되었을 가능성이 있으며, 이는 맵의 재플레이 가능성을 높이는 요소로 작용한다. ‘Preschool Showdown 6.3 Final’ is a custom defense map from *StarCraft: Brood War* where eight players compete by combining units and employing strategies. The map features a wide central path flanked by defensive structures, resource zones, and the boss monster *Zona*, whose defeat appears to be the primary win condition. The design and tileset (a wasteland) reflect a theme of war versus academia. Players start by securing basic units, then defend against waves while gathering resources to upgrade and train hero units. The balance seems refined through multiple versions, with bug fixes and adjustments made along the way. Battles centered around *Zona* demand strategic choices, requiring both teamwork and individual judgment. Beginners may need time to learn the map’s layout, unit combinations, and *Zona*’s patterns, while higher difficulties demand quick decision-making and resource management. The playtime typically ranges from 30 minutes to an hour, depending on strategy, and individual judgment may matter more than teamwork. Details like win conditions, *Zona*’s patterns, and unit balance likely evolved through community feedback in later versions. Before playing, it’s wise to study key areas—resource zones, the boss’s location, and chokepoints—and familiarize yourself with *Zona*’s attack patterns. Early resource collection and hero unit selection can heavily influence the game’s flow, so careful planning is essential. The boss fight around *Zona* is the map’s core challenge; failing to defeat it early can make progression difficult, so strategic decisions are critical. The design is clean yet packed with strategic depth, allowing for fresh approaches even after multiple playthroughs. The escalating intensity of *Zona*’s patterns and wave strength keeps tension high. Beginners should analyze *Zona*’s behavior and practice unit compositions, while experienced players can exploit weaknesses or optimize resource and unit efficiency for faster boss kills. The map blends large-scale battles with smaller skirmishes, making it crucial to read the flow of combat. Success against *Zona* may hinge on cooperation, and the balance improvements over several versions suggest the latest 6.3 Final is the most stable choice. *Zona*’s patterns and wave difficulty adapt to player strategies, requiring flexible responses. Its design—simple yet strategically rich—makes it a standout in Brood War’s custom maps. The difficulty of *Zona* and its patterns may be adjustable based on player skill, enhancing replayability. Since defeating the boss is essential for progression, strategic choices remain the top priority. The central path and surrounding defenses are balanced to offer fair opportunities for both beginners and veterans, with *Zona*’s gradually intensifying challenges testing players’ adaptability.
넥서스 메카 vs 프로 (NEXUS Meca vs Pro)
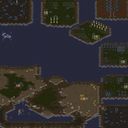
「NEXUS Meca vs Pro」는 스타크래프트: 브루드워의 유즈맵으로, 넥서스 파괴를 핵심 목표로 삼은 전략 디펜스 장르의 맵이다. 8명의 플레이어가 2팀으로 나뉘어 대결을 펼치며, 각 팀은 메카닉 유닛을 조종해 상대방의 넥서스를 파괴하는 것이 목표로 보인다. 맵 중앙에는 넓은 평지가 펼쳐져 있어 유닛의 이동과 교전이 활발할 것으로 추정되며, 사이드에는 방어 시설이나 기지 구조가 배치되어 있어 상대방을 견제하거나 방어할 수 있는 공간이 마련되어 있다. 맵 배경은 사막 타일셋을 사용하여 건조한 환경이 연출되며, 이는 맵의 전략적 깊이를 더하는 요소로 작용한다. 제작자 Tp0p가 편집한 버전인 만큼, 밸런스와 디자인 면에서 어느 정도 검증된 버전으로 보이며, 원본 버전의 영향을 받아 다양한 메카닉 유닛이 등장할 가능성이 크다. 플레이어는 유닛의 조합과 타이밍을 carefully 관리해야 하며, 넥서스 파괴를 위한 전략적 선택이 중요할 것으로 보인다. 초보자보다는 중급 이상의 플레이어에게 적합한 맵으로, 긴장감 있는 대결을 즐길 수 있을 것이다. 또한, 맵의 규모가 크고 타일셋이 사막인 점을 고려할 때, 시야 확보와 유닛의 기동성이 큰 영향을 미칠 것으로 보인다. 팀워크와 개인의 컨트롤이 모두 요구되는 이 맵은, 스타크래프트의 기본 전략을 응용하면서도 새로운 재미를 제공할 것으로 기대된다. 플레이 전에는 맵의 주요 길목과 기지 입구를 미리 숙지하고, 상대방의 전략에 대응할 준비를 갖추는 것이 중요하다. 넥서스 파괴라는 명확한 목표와 함께, 디펜스와 공격의 균형을 잘 맞춰야만 승리를 쟁취할 수 있을 것이다. 「NEXUS Meca vs Pro」 is a StarCraft: Brood War custom map that falls under the strategy defense genre, with the core objective being the destruction of the Nexus. Eight players are divided into two teams, each controlling mechanical units to destroy the opposing team's Nexus. A vast open plain stretches across the center of the map, likely facilitating active unit movement and engagements, while defensive structures and base layouts are positioned on the sides, providing spaces to pressure or defend against opponents. The map employs a desert tile set, creating a dry environment that adds to its strategic depth. As this is a version edited by the creator Tp0p, it appears to be a relatively balanced and well-designed iteration, likely retaining elements from the original version where various mechanical units are featured. Players must carefully manage unit compositions and timing, with strategic decisions for Nexus destruction being crucial. This map is better suited for intermediate to advanced players rather than beginners, offering intense and engaging battles. Given the map's large scale and desert tile set, vision control and unit mobility will play significant roles. Requiring both teamwork and individual control, the map promises new fun while applying StarCraft's fundamental strategies. Before playing, it's important to familiarize yourself with key pathways and base entrances and prepare countermeasures against the opponent's strategies. With the clear goal of Nexus destruction, balancing defense and offense will be essential to securing victory.
게릴라 128 크로스파이어 2M (Guerilla 128 Crossfire 2M)
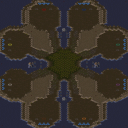
‘게릴라 128 크로스파이어 2M v2.0’은 스타크래프트: 브루드워의 밀리 기반 맵으로, 8명의 플레이어가 사막 지형을 무대로 전투를 벌이는 컴팩트한 전투형 맵이다. 맵의 이름은 ‘Guerilla’라는 단어에서 볼 수 있듯 게릴라 전술을 연상시키며, 좁고 복잡한 통로와 개활지 간의 조화가 특징이다. 맵의 중앙에는 넓은 광장이 자리 잡고 있으며, 그 주변으로 좁은 길목과 언덕 지형이 배치되어 있어 플레이어들은 자연스럽게 시야 싸움과 근접 전투에 몰리게 된다. 맵의 특징 중 하나는 가스가 매우 부족하다는 점인데, 이는 맵 제작자의 의도대로Resource Management(자원 관리)에 대한 압박을 가하고 있다. 초보자에게는 다소 불리할 수 있지만,Resource Management(자원 관리)를 중시하는 플레이어들에게는 전략적 깊이를 더하는 요소로 작용할 수 있다. 이 맵은 ‘RootWebGod’이라는 제작자에 의해 개선 및 유지보수되어 왔으며, ‘The Root Underground’라는 커뮤니티를 통해 배포되고 있다. 맵의 구조상 플레이어들은 초반부터 중앙 지역을 차지하기 위한 경쟁에 돌입하게 되며,Resource Management(자원 관리)와 동시에 상대방을 견제하는 플레이가 요구된다. 좁은 길목에서의 전투는 미니맵만으로는 상대의 움직임을 정확히 파악하기 어려운 경우가 많아,Resource Management(자원 관리)와 함께 시야 확보와 컨트롤이 중요한 포인트로 작용한다. 특히Resource Management(자원 관리)가 부족한 맵 특성상, 초반Resource Management(자원 관리) 확보를 위한 빌드 오더가 승패를 좌우할 가능성이 높다. 이 맵을 플레이하기 전에는Resource Management(자원 관리)가 부족하다는 점을 염두에 두고Resource Management(자원 관리) 효율성을 높이는 빌드를 준비해야 하며,Resource Management(자원 관리) 확보와 동시에 상대방을 견제할 수 있는 전략을 숙지하는 것이 중요하다.Resource Management(자원 관리)의 중요성이 크기 때문에Resource Management(자원 관리) 효율성이 떨어지는 종족이나 빌드는 사용을 자제하는 것이 바람직하다. 또한Resource Management(자원 관리)가 부족한 만큼Resource Management(자원 관리) 확보를 위한Resource Management(자원 관리) 멀티태스킹도 필수적이므로Resource Management(자원 관리) 효율성을 높이기 위한 연습이 필요하다. 이 맵은Resource Management(자원 관리) 부족이라는 독특한 조건을 통해Resource Management(자원 관리) 관리와Resource Management(자원 관리) 확보의 중요성을 강조하는 동시에Resource Management(자원 관리)Resource Management(자원 관리)Resource Management(자원 관리)Resource Management(자원 관리)Resource Management(자원 관리)Resource Management(자원 관리)Resource Management(자원 관리)Resource Management(자원 관리)Resource Management(자원 관리)Resource Management(자원 관리)
신 대 악마 255 업그레이드+패스트 모드 (GodVsSatan255upgrades+FastMode)
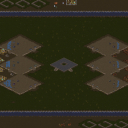
스타크래프트 브루드워의 대표적인 유즈맵 장르 중 하나인 ‘신 대 악마’ 시리즈의 최신 버전으로, 총 8명의 플레이어가 선과 악의 대결을 펼치는 디펜스형 전략 맵이다. 맵의 전체적인 구조는 중앙에 위치한 ‘지구’를 중심으로 선(Good)과 악(Evil)이 대칭을 이루며 배치되어 있으며, 각 진영에는 고유한 방어 건물과 업그레이드 시스템이 존재한다. 플레이어는 시작과 동시에 자원을 수집하며 건물을 건설하고 유닛을 생산하여 상대 진영의 건물이나 유닛을 파괴하거나 방어해야 한다. 특히 ‘255 업그레이드’와 ‘Fast Mode’라는 특징은 기존 버전에 비해 업그레이드 한도가 대폭 증가하고 게임의 진행 속도가 빨라졌다는 점을 시사한다. 맵의 중앙에는 거대한 지구 지형이 배치되어 있어 전략적 요충지로 기능하며, 양 진영의 건물이 지형 주변에 밀집되어 있어 치열한 공방전이 예상된다. 맵의 디자인과 배치로 미루어보아, 장기戦보다는 비교적 빠른 템포로 진행되는 디펜스 및 대치형 전략이 주된 플레이 스타일이 될 것으로 보인다. 초보자와 숙련자 모두 즐길 수 있도록 난이도 조절이 가능한 구조로 설계되었으나, 255 업그레이드 시스템으로 인해 후반부로 갈수록 전투의 스케일이 커질 가능성이 높다. 이 맵을 플레이하기 위해서는 선과 악 각각의 유닛과 건물의 특징, 그리고 업그레이드 시스템에 대한 사전 이해가 필요하다. 또한, 빠른 진행을 위한 ‘Fast Mode’가 적용되어 있어 게임의 템포에 익숙해지는 것이 중요하다. 추천 대상은 전형적인 디펜스 및 전략 유즈맵을 즐기는 플레이어이며, 특히 ‘신 대 악마’ 시리즈의 팬이라면 새로운 업그레이드와 Fast Mode의 조합으로 더욱 흥미로운 경험을 할 수 있을 것이다. 플레이 전에는 맵의 중앙 지구 지형과 양 진영의 건물 배치를 숙지하고, 자원 관리와 업그레이드 타이밍을 잘 조절하는 것이 승리의 관건이 될 것이다. StarCraft: Brood War’s classic "God vs. Demon" series returns with its latest version, a defense-style strategy map where eight players battle between good and evil. The map is structured symmetrically around a central "Earth" terrain, with each faction—Good and Evil—having unique defensive buildings and upgrade systems. Players gather resources, construct buildings, and produce units to either destroy or defend against the opposing faction. Key features like the "255 Upgrade" system and "Fast Mode" significantly increase the upgrade limit and accelerate gameplay compared to previous versions. The massive Earth terrain in the center serves as a strategic focal point, with buildings clustered around it, ensuring intense clashes between the two sides. Designed for faster-paced defense and positional strategy rather than prolonged warfare, the map offers adjustable difficulty to cater to both beginners and veterans. However, the 255 Upgrade system means battles escalate dramatically in the late game. To excel, players must understand the unique units, buildings, and upgrades for both factions, as well as adapt to the faster tempo of Fast Mode. Ideal for fans of defense and strategy custom maps, this version will particularly appeal to "God vs. Demon" series enthusiasts with its fresh upgrade mechanics and Fast Mode. Before playing, familiarize yourself with the central Earth terrain and faction building layouts, and master resource management and upgrade timing to secure victory.

네 개의 나라 전쟁 2.00 (Four Countries War 2.00)
스타크래프트 브루드워의 대표적인 유즈맵 중 하나로 꼽히는 <네 개의 나라 전쟁 2.00>은 8명의 플레이어가 참여하는 전략 대결 유즈맵이다. 내부 맵 제목과 파일명에서 확인할 수 있듯 중국 제작자 Snake_T에 의해 제작되었으며, Beijing(베이징)을 제작 기점으로 삼고 있다. 맵은 우주 타일셋을 기반으로 1024x1024 크기의 넓은 맵에서 펼쳐지며, 각 플레이어는 시작 지점에서 자원을 채취하고 건물을 건설하여 병력을 양성한 뒤 적대국가를 공격하거나 방어하는 방식으로 진행된다. 맵의 특징은 공중 유닛과 지상 유닛의 균형 잡힌 조합을 요구하며, 넓은 시야와 전략적 요충지를 차지하기 위한 치열한 전투가 벌어지는 점이다. 특히, 맵의 중앙 지역은 주요 전략 지점으로 다수의 플레이어가 한꺼번에 모여 전투를 벌이는 경우가 많아 초기 자원 확보와 진출 타이밍이 승패를 좌우할 수 있다. 게임의 목표는 상대방의 기지를 파괴하거나 모든 적을 제거하는 것으로 추정되며, 다인 플레이 특유의 긴장감과 예측 불가능한 동맹 관계가 이 맵의 재미를 한층 높인다. 초보자의 경우 중앙 지역을 장악하는 데 어려움을 겪을 수 있지만, 좁은 길목에서 벌어지는 전투를 연습하다 보면 점차 익숙해질 수 있다. 반면 숙련된 플레이어는 후방 침투, 기습 공격, 자원 테러 등 다양한 전략을 구사하여 상대방을 혼란에 빠뜨릴 수 있다. 맵의 분위기는 전쟁과 전략에 중점을 두고 있으며, 제작자의 메시지에서 느낄 수 있듯 제작 배경을 엿볼 수 있는 요소도 포함되어 있다. 8인 플레이를 전제로 설계되었으므로 4인, 6인 등 인원 변동 시 밸런스 문제가 발생할 가능성이 있으니 가능한 한 정원 수를 맞추는 것이 좋다. 또한, 다양한 유닛 조합과 맵의 넓은 공간을 활용한 전략적 플레이가 요구되므로, 단순 컨트롤보다는 종합적인 판단력이 중요한 맵으로 분류된다. 이 맵을 즐기기 위해서는 스타크래프트의 기본적인 빌드와 유닛 특성을 숙지하는 것이 필수적이며, 특히 프로토스의 보호막과 테란의 방어 건물, 저그의 다수 군락 전략 등을 적절히 활용할 수 있어야 한다. <Four Nations War 2.00> is one of the most iconic custom maps in StarCraft: Brood War, featuring an 8-player strategic battle. Created by Chinese mapmaker Snake_T, the map is set in Beijing, as indicated by its internal title and filename. Built on a space-themed tileset, the expansive 1024x1024 map challenges players to gather resources, construct buildings, and train armies to attack or defend against rival nations. The map demands a balanced mix of air and ground units, with intense battles for high-ground positions and wide visibility. The central area serves as a critical strategic point where multiple players often clash, making early resource control and timing crucial to victory. The goal is to destroy opponents' bases or eliminate all enemies, with the map’s tension and unpredictable alliances adding to its appeal. Beginners may struggle to secure the center, but practice in narrow engagements helps build familiarity. Skilled players can exploit rear infiltrations, ambushes, and resource raids to disrupt opponents. The map’s war-focused atmosphere reflects its strategic depth, with subtle nods to its creator’s background. Since it’s designed for 8 players, balancing becomes difficult with fewer participants, so playing with the full roster is ideal. Success requires more than just micro-management—strategic foresight is key. To fully enjoy this map, players should master basic builds and unit mechanics, particularly Protoss shields, Terran defensive structures, and Zerg massed-hatchery strategies.
최근 등록된 맵
새로 추가된 파일과 버전을 확인하세요.
네 개의 나라 전쟁 2.00 (Four Countries War 2.00)
스타크래프트 브루드워의 대표적인 유즈맵 중 하나로 꼽히는 <네 개의 나라 전쟁 2.00>은 8명의 플레이어가 참여하는 전략 대결 유즈맵이다. 내부 맵 제목과 파일명에서 확인할 수 있듯 중국 제작자 Snake_T에 의해 제작되었으며, Beijing(베이징)을 제작 기점으로 삼고 있다. 맵은 우주 타일셋을 기반으로 1024x1024 크기의 넓은 맵에서 펼쳐지며, 각 플레이어는 시작 지점에서 자원을 채취하고 건물을 건설하여 병력을 양성한 뒤 적대국가를 공격하거나 방어하는 방식으로 진행된다. 맵의 특징은 공중 유닛과 지상 유닛의 균형 잡힌 조합을 요구하며, 넓은 시야와 전략적 요충지를 차지하기 위한 치열한 전투가 벌어지는 점이다. 특히, 맵의 중앙 지역은 주요 전략 지점으로 다수의 플레이어가 한꺼번에 모여 전투를 벌이는 경우가 많아 초기 자원 확보와 진출 타이밍이 승패를 좌우할 수 있다. 게임의 목표는 상대방의 기지를 파괴하거나 모든 적을 제거하는 것으로 추정되며, 다인 플레이 특유의 긴장감과 예측 불가능한 동맹 관계가 이 맵의 재미를 한층 높인다. 초보자의 경우 중앙 지역을 장악하는 데 어려움을 겪을 수 있지만, 좁은 길목에서 벌어지는 전투를 연습하다 보면 점차 익숙해질 수 있다. 반면 숙련된 플레이어는 후방 침투, 기습 공격, 자원 테러 등 다양한 전략을 구사하여 상대방을 혼란에 빠뜨릴 수 있다. 맵의 분위기는 전쟁과 전략에 중점을 두고 있으며, 제작자의 메시지에서 느낄 수 있듯 제작 배경을 엿볼 수 있는 요소도 포함되어 있다. 8인 플레이를 전제로 설계되었으므로 4인, 6인 등 인원 변동 시 밸런스 문제가 발생할 가능성이 있으니 가능한 한 정원 수를 맞추는 것이 좋다. 또한, 다양한 유닛 조합과 맵의 넓은 공간을 활용한 전략적 플레이가 요구되므로, 단순 컨트롤보다는 종합적인 판단력이 중요한 맵으로 분류된다. 이 맵을 즐기기 위해서는 스타크래프트의 기본적인 빌드와 유닛 특성을 숙지하는 것이 필수적이며, 특히 프로토스의 보호막과 테란의 방어 건물, 저그의 다수 군락 전략 등을 적절히 활용할 수 있어야 한다. <Four Nations War 2.00> is one of the most iconic custom maps in StarCraft: Brood War, featuring an 8-player strategic battle. Created by Chinese mapmaker Snake_T, the map is set in Beijing, as indicated by its internal title and filename. Built on a space-themed tileset, the expansive 1024x1024 map challenges players to gather resources, construct buildings, and train armies to attack or defend against rival nations. The map demands a balanced mix of air and ground units, with intense battles for high-ground positions and wide visibility. The central area serves as a critical strategic point where multiple players often clash, making early resource control and timing crucial to victory. The goal is to destroy opponents' bases or eliminate all enemies, with the map’s tension and unpredictable alliances adding to its appeal. Beginners may struggle to secure the center, but practice in narrow engagements helps build familiarity. Skilled players can exploit rear infiltrations, ambushes, and resource raids to disrupt opponents. The map’s war-focused atmosphere reflects its strategic depth, with subtle nods to its creator’s background. Since it’s designed for 8 players, balancing becomes difficult with fewer participants, so playing with the full roster is ideal. Success requires more than just micro-management—strategic foresight is key. To fully enjoy this map, players should master basic builds and unit mechanics, particularly Protoss shields, Terran defensive structures, and Zerg massed-hatchery strategies.
프리스쿨 쇼다운 6.3 파이널 (Preschool Showdown 6.3 Final)
‘프리스쿨 쇼다운 6.3 파이널(Preschool Showdown 6.3 Final)’은 스타크래프트: 브루드워의 유즈맵 중 하나로, 8명의 플레이어가 경쟁하는 디펜스 장르의 유닛 조합 및 전략이 요구되는 맵이다. 맵의 구조는 중앙을 가로지르는 넓은 길과 그 주변으로 배치된 방어 건물, 자원 지대, 그리고 보스 몬스터 zona로 구성되어 있으며, 보스를 처치하는 것이 주요 승리 조건으로 추정된다. 맵의 디자인과 타일셋(황무지)은 전쟁과 학원의 대결이라는 테마를 반영한 듯 보인다. 플레이어는 초반에 기본 유닛을 확보한 뒤, 중간중간 등장하는 웨이브를 막아내며 자원을 모아 업그레이드와 영웅 유닛을 육성하는 방식으로 진행되는 것으로 보인다. 맵의 밸런스는 여러 버전을 거치며 개선된 것으로 보이며, 버그 픽스와 밸런스 조정도 이루어진 것으로 추측된다. 특히 zona 보스를 중심으로 한 전투는 전략적 선택이 요구되는 포인트로, 플레이어 간의 협력과 개인의 판단력이 중요할 것으로 예상된다. 초보자는 맵의 구조와 유닛 조합법, zona의 패턴을 숙지하는 데 시간이 필요할 수 있으며, 보통 이상의 난이도에서는 빠른 판단력과 자원 관리 능력이 필수적일 것이다. 맵의 플레이 시간은 공략에 따라 30분에서 1시간 내외로 예상되며, 팀플레이보다는 개인의 판단력이 더 중요할 수 있다. 맵의 세부적인 승리 조건, zona의 패턴, 유닛 밸런스 등은 후속 버전이나 커뮤니티의 피드백을 통해 점차 정교해졌을 가능성이 크다. 플레이 전 미리 맵의 주요 지점(자원 지대, 보스 위치, 주요 길목)을 확인하고, zona의 공격 패턴을 숙지하는 것이 좋다. 또한, 초반 자원 확보와 영웅 유닛의 선택이 게임의 흐름을 좌우할 수 있으므로 신중한 플레이가 필요하다. zona를 중심으로 한 보스 전투는 맵의 핵심이며, 보스를 처치하지 못하면 게임 진행이 어려워질 수 있으므로 전략적 선택이 중요하다. 맵의 디자인과 구조는 간결하면서도 전략적인 요소들이 잘 배치되어 있어, 반복 플레이 시에도 새로운 전략을 시도해 볼 수 있는 재미가 있다. 특히 zona의 패턴과 웨이브의 강도가 점차 증가하는 구조는 긴장감을 유지시키는 데 효과적이다. 초보자라면 zona의 패턴을 분석하고, 유닛 조합의 최적화를 위한 연습을 권장한다. 반면, 숙련자라면 zona의 약점을 exploitable한 전략을 구사하거나, 자원과 유닛의 효율적인 활용을 통해 보다 빠르게 보스를 처치하는 데 주력할 수 있다. 맵의 규모와 구조는 대규모 전투와 개별 전투가 혼재되어 있어, 전투의 흐름을 읽는 능력이 중요하다. zona 보스를 중심으로 한 전투는 맵의 핵심であり, 성공적인 처치를 위해서는 플레이어 간의 협력이 필수적일 수 있다. 맵의 밸런스는 여러 버전을 거치며 개선되었으므로, 최신 버전인 6.3 파이널을 플레이하는 것이 가장 안정적일 것으로 보인다. zona의 패턴과 웨이브의 강도는 플레이어의 전략에 따라 크게 달라질 수 있으므로, 상황에 맞게 유연하게 대처해야 한다. 맵의 디자인과 구조는 단순하면서도 전략적인 깊이가 있어, 브루드워의 유즈맵 중에서도 인기 있는 장르에 속할 가능성이 높다. zona의 패턴과 보스의 난이도는 플레이어의 숙련도에 따라 조절할 수 있도록 설계되었을 가능성이 있으며, 이는 맵의 재플레이 가능성을 높이는 요소로 작용한다. zona를 중심으로 한 전투는 맵의 핵심であり, 보스를 처치하지 못하면 게임의 진행이 어려워질 수 있으므로, 전략적 선택이 무엇보다 중요하다. 맵의 구조는 중앙의 넓은 길과 주변의 방어 건물이 균형 있게 배치되어 있어, 초보자와 숙련자 모두에게 공평한 기회를 제공할 것으로 보인다. zona의 패턴과 웨이브의 강도는 점차 증가하는 구조로, 플레이어의 전략과 판단력이 요구되는 디자인이다. 맵의 밸런스는 여러 버전을 거치며 개선되었으므로, 최신 버전인 6.3 파이널을 플레이하는 것이 가장 안정적일 것이다. zona의 패턴과 보스의 난이도는 플레이어의 숙련도에 따라 조절할 수 있도록 설계되었을 가능성이 있으며, 이는 맵의 재플레이 가능성을 높이는 요소로 작용한다. ‘Preschool Showdown 6.3 Final’ is a custom defense map from *StarCraft: Brood War* where eight players compete by combining units and employing strategies. The map features a wide central path flanked by defensive structures, resource zones, and the boss monster *Zona*, whose defeat appears to be the primary win condition. The design and tileset (a wasteland) reflect a theme of war versus academia. Players start by securing basic units, then defend against waves while gathering resources to upgrade and train hero units. The balance seems refined through multiple versions, with bug fixes and adjustments made along the way. Battles centered around *Zona* demand strategic choices, requiring both teamwork and individual judgment. Beginners may need time to learn the map’s layout, unit combinations, and *Zona*’s patterns, while higher difficulties demand quick decision-making and resource management. The playtime typically ranges from 30 minutes to an hour, depending on strategy, and individual judgment may matter more than teamwork. Details like win conditions, *Zona*’s patterns, and unit balance likely evolved through community feedback in later versions. Before playing, it’s wise to study key areas—resource zones, the boss’s location, and chokepoints—and familiarize yourself with *Zona*’s attack patterns. Early resource collection and hero unit selection can heavily influence the game’s flow, so careful planning is essential. The boss fight around *Zona* is the map’s core challenge; failing to defeat it early can make progression difficult, so strategic decisions are critical. The design is clean yet packed with strategic depth, allowing for fresh approaches even after multiple playthroughs. The escalating intensity of *Zona*’s patterns and wave strength keeps tension high. Beginners should analyze *Zona*’s behavior and practice unit compositions, while experienced players can exploit weaknesses or optimize resource and unit efficiency for faster boss kills. The map blends large-scale battles with smaller skirmishes, making it crucial to read the flow of combat. Success against *Zona* may hinge on cooperation, and the balance improvements over several versions suggest the latest 6.3 Final is the most stable choice. *Zona*’s patterns and wave difficulty adapt to player strategies, requiring flexible responses. Its design—simple yet strategically rich—makes it a standout in Brood War’s custom maps. The difficulty of *Zona* and its patterns may be adjustable based on player skill, enhancing replayability. Since defeating the boss is essential for progression, strategic choices remain the top priority. The central path and surrounding defenses are balanced to offer fair opportunities for both beginners and veterans, with *Zona*’s gradually intensifying challenges testing players’ adaptability.
파리 힐튼 1 (Paris Hilton 1)
‘파리 힐튼 1’은 스타크래프트 브루드워의 밀리 맵으로, 8명의 플레이어가 경쟁하는 1vs7 대전을 기본으로 한다. 맵은 우주 타일셋을 사용해 넓은 개방형 공간과 중앙의 ‘파리 힐튼’이란 이름의 주요 건물 구역이 특징이다. 맵의 구조는 비교적 평지 위주로 펼쳐져 있어 초반 빠른 확장이 용이하며, 중앙 부지는 초반 전투가 집중될 가능성이 높다. 맵의 이름은 다소 이색적이지만, 실질적으로는 밀리 대전을 위한 균형 잡힌 공간 배치를 제공한다. 플레이어들은 중앙을 차지하기 위한 치열한 전투를 펼치며,Resource를 확보하고 병력을 모아 상대방을 압박하는 전략이 요구된다. 맵의 넓이는 넓지만, 건물이 배치된 지역은 제한적이어서Resource 수급 경쟁이 치열해질 수 있다. 초보 플레이어는 중앙 지역을 놓고 벌어지는 전투에서 밀리기 쉬우며,Resource 확보와 병력 생산 타이밍을 잘 조율해야 한다. 반면, 경험 많은 플레이어는 빠른Resource 수급과 중앙 점령을 통해 경기를 주도할 수 있다. 맵의 밸런스는 대체로 균형 잡혀 있지만, 초반Resource 분배가 승패를 좌우할 수 있어 Resource 관리 능력을 테스트하는 맵으로 평가된다. 이 맵은 밀리 대전을 즐기는 플레이어라면 누구나 한 번쯤 도전해 볼 만한 가치가 있으며, 특히Resource 관리와 전투 타이밍을 연마하고 싶은 유저들에게 추천한다. 다만, 맵의 이름이 다소 이색적이어서 플레이 전에 ‘파리 힐튼’이 어떤 역할인지 내부 설명이나 커뮤니티 후기를 참고하는 것이 좋다. ‘Paris Hilton 1’ is a Brood War melee map where eight players compete in a 1vs7 format. The map uses a space-themed tileset, featuring wide open terrain and a central area called “Paris Hilton,” which serves as the primary building zone. Its layout is mostly flat, allowing for quick early expansions, but the central area is likely to become the focus of early battles. Though the name is unconventional, the map provides a well-balanced space for melee combat. Players must fight fiercely for control of the center, secure resources, and build forces to pressure opponents. While the map is spacious, building placement is limited, leading to intense competition for resources. Novice players may struggle in the central battles and must carefully coordinate resource gathering and troop production timing. Experienced players, however, can dominate by securing resources and seizing the center early. The map is generally balanced, but early resource distribution can decide the outcome, making it a test of resource management skills. It’s worth trying for any melee enthusiast, especially those looking to refine their resource control and combat timing. Given the map’s unusual name, checking internal descriptions or community feedback beforehand to understand the role of “Paris Hilton” is recommended.
넥서스 메카 vs 프로 (NEXUS Meca vs Pro)
「NEXUS Meca vs Pro」는 스타크래프트: 브루드워의 유즈맵으로, 넥서스 파괴를 핵심 목표로 삼은 전략 디펜스 장르의 맵이다. 8명의 플레이어가 2팀으로 나뉘어 대결을 펼치며, 각 팀은 메카닉 유닛을 조종해 상대방의 넥서스를 파괴하는 것이 목표로 보인다. 맵 중앙에는 넓은 평지가 펼쳐져 있어 유닛의 이동과 교전이 활발할 것으로 추정되며, 사이드에는 방어 시설이나 기지 구조가 배치되어 있어 상대방을 견제하거나 방어할 수 있는 공간이 마련되어 있다. 맵 배경은 사막 타일셋을 사용하여 건조한 환경이 연출되며, 이는 맵의 전략적 깊이를 더하는 요소로 작용한다. 제작자 Tp0p가 편집한 버전인 만큼, 밸런스와 디자인 면에서 어느 정도 검증된 버전으로 보이며, 원본 버전의 영향을 받아 다양한 메카닉 유닛이 등장할 가능성이 크다. 플레이어는 유닛의 조합과 타이밍을 carefully 관리해야 하며, 넥서스 파괴를 위한 전략적 선택이 중요할 것으로 보인다. 초보자보다는 중급 이상의 플레이어에게 적합한 맵으로, 긴장감 있는 대결을 즐길 수 있을 것이다. 또한, 맵의 규모가 크고 타일셋이 사막인 점을 고려할 때, 시야 확보와 유닛의 기동성이 큰 영향을 미칠 것으로 보인다. 팀워크와 개인의 컨트롤이 모두 요구되는 이 맵은, 스타크래프트의 기본 전략을 응용하면서도 새로운 재미를 제공할 것으로 기대된다. 플레이 전에는 맵의 주요 길목과 기지 입구를 미리 숙지하고, 상대방의 전략에 대응할 준비를 갖추는 것이 중요하다. 넥서스 파괴라는 명확한 목표와 함께, 디펜스와 공격의 균형을 잘 맞춰야만 승리를 쟁취할 수 있을 것이다. 「NEXUS Meca vs Pro」 is a StarCraft: Brood War custom map that falls under the strategy defense genre, with the core objective being the destruction of the Nexus. Eight players are divided into two teams, each controlling mechanical units to destroy the opposing team's Nexus. A vast open plain stretches across the center of the map, likely facilitating active unit movement and engagements, while defensive structures and base layouts are positioned on the sides, providing spaces to pressure or defend against opponents. The map employs a desert tile set, creating a dry environment that adds to its strategic depth. As this is a version edited by the creator Tp0p, it appears to be a relatively balanced and well-designed iteration, likely retaining elements from the original version where various mechanical units are featured. Players must carefully manage unit compositions and timing, with strategic decisions for Nexus destruction being crucial. This map is better suited for intermediate to advanced players rather than beginners, offering intense and engaging battles. Given the map's large scale and desert tile set, vision control and unit mobility will play significant roles. Requiring both teamwork and individual control, the map promises new fun while applying StarCraft's fundamental strategies. Before playing, it's important to familiarize yourself with key pathways and base entrances and prepare countermeasures against the opponent's strategies. With the clear goal of Nexus destruction, balancing defense and offense will be essential to securing victory.
마이크로 토너먼트 10.5v2 (Micro Tournament 10.5v2)
스타크래프트 브루드워의 아레나 장르 유즈맵인 〈마이크로 토너먼트 10.5v2〉는micro-tournament 스타일의 대결 맵으로, 8명의 플레이어가 좁은 맵 중앙에 모여 벌이는Micro-tournament micro-battles의 짜릿함을 느낄 수 있다. 맵은 6144x6144의 거대한 우주 타일셋으로 구성되어 있으나, 실질적인 전투 공간은 중앙의 좁고 구역화된 지역으로 한정된다. 맵 곳곳에는 건물과 장애물이 배치되어 있어 시야와 기동성을 제한하며,micro-tournament micro-battle 맵의 특징인 '마이크로 전투'가 가능한 공간을 제공한다. 각 플레이어는 시작 지점에서 시작하며, 맵 중앙의 좁은 구역으로 진입해 상대와 직접 전투를 벌이게 된다. 맵의 구조상 초반부터 대치 상황이 자주 발생할 가능성이 높으며, 좁은 공간에서의micro-tournament micro-combat 특성상 한순간의 실수가 승패를 좌우할 수 있다. 맵의 전체 크기는 넓지만 전투가 벌어지는 핵심 지역은 매우 밀집되어 있어,micro-tournament micro-battle 스타일의 맵이라고 할 수 있다. 이 맵은 특히Micro-tournament micro-battles를 즐기는 유저들에게 추천되며, 좁은 공간에서의Micro-tournament micro-combat 능력을 키우고자 하는 초보 플레이어들에게도 적합한 연습용 맵으로 활용될 수 있다. 다만, 좁은 공간에서의 전투가 반복되다 보니 지루함을 느낄 수도 있어,Micro-tournament micro-battle를 선호하는 플레이어들에게만 어울릴 수 있다. 맵을 플레이하기 전에는Micro-tournament micro-battles의 특성을 충분히 숙지하고, 좁은 공간에서의Micro-tournament micro-combat에 대비하는 것이 좋다. 또한Micro-tournament micro-battle 스타일의 맵이므로,Micro-tournament micro-battles의 기본 전략과Micro-tournament micro-combat 기술을 미리 연습해두는 것이 좋다. Micro Tournament 10.5v2 is an arena-style custom map for StarCraft: Brood War, designed for micro-tournament battles where 8 players face off in a confined central arena. The map uses a massive 6144x6144 space-themed tileset, but the actual battlefield is limited to a narrow, segmented central area optimized for micro-battles. Buildings and obstacles are strategically placed to restrict vision and mobility, forcing players into close-quarters combat typical of micro-tournament scenarios. The map’s design encourages early engagement and intense micro-management, as a single mistake in positioning or unit control can quickly turn the tide. While the overall map size is large, the core combat zone is highly concentrated, making it ideal for players who enjoy micro-tournament micro-battles. This map is recommended for those who seek to refine their micro-tournament micro-combat skills, especially beginners looking to practice in a high-pressure environment. However, the repetitive nature of confined combat may feel monotonous for players who prefer larger or more dynamic battlefields. Before playing, it’s advisable to familiarize yourself with micro-tournament micro-battle strategies and practice basic micro-management techniques to maximize your performance in these intense encounters.
신 대 악마 255 업그레이드+패스트 모드 (GodVsSatan255upgrades+FastMode)
스타크래프트 브루드워의 대표적인 유즈맵 장르 중 하나인 ‘신 대 악마’ 시리즈의 최신 버전으로, 총 8명의 플레이어가 선과 악의 대결을 펼치는 디펜스형 전략 맵이다. 맵의 전체적인 구조는 중앙에 위치한 ‘지구’를 중심으로 선(Good)과 악(Evil)이 대칭을 이루며 배치되어 있으며, 각 진영에는 고유한 방어 건물과 업그레이드 시스템이 존재한다. 플레이어는 시작과 동시에 자원을 수집하며 건물을 건설하고 유닛을 생산하여 상대 진영의 건물이나 유닛을 파괴하거나 방어해야 한다. 특히 ‘255 업그레이드’와 ‘Fast Mode’라는 특징은 기존 버전에 비해 업그레이드 한도가 대폭 증가하고 게임의 진행 속도가 빨라졌다는 점을 시사한다. 맵의 중앙에는 거대한 지구 지형이 배치되어 있어 전략적 요충지로 기능하며, 양 진영의 건물이 지형 주변에 밀집되어 있어 치열한 공방전이 예상된다. 맵의 디자인과 배치로 미루어보아, 장기戦보다는 비교적 빠른 템포로 진행되는 디펜스 및 대치형 전략이 주된 플레이 스타일이 될 것으로 보인다. 초보자와 숙련자 모두 즐길 수 있도록 난이도 조절이 가능한 구조로 설계되었으나, 255 업그레이드 시스템으로 인해 후반부로 갈수록 전투의 스케일이 커질 가능성이 높다. 이 맵을 플레이하기 위해서는 선과 악 각각의 유닛과 건물의 특징, 그리고 업그레이드 시스템에 대한 사전 이해가 필요하다. 또한, 빠른 진행을 위한 ‘Fast Mode’가 적용되어 있어 게임의 템포에 익숙해지는 것이 중요하다. 추천 대상은 전형적인 디펜스 및 전략 유즈맵을 즐기는 플레이어이며, 특히 ‘신 대 악마’ 시리즈의 팬이라면 새로운 업그레이드와 Fast Mode의 조합으로 더욱 흥미로운 경험을 할 수 있을 것이다. 플레이 전에는 맵의 중앙 지구 지형과 양 진영의 건물 배치를 숙지하고, 자원 관리와 업그레이드 타이밍을 잘 조절하는 것이 승리의 관건이 될 것이다. StarCraft: Brood War’s classic "God vs. Demon" series returns with its latest version, a defense-style strategy map where eight players battle between good and evil. The map is structured symmetrically around a central "Earth" terrain, with each faction—Good and Evil—having unique defensive buildings and upgrade systems. Players gather resources, construct buildings, and produce units to either destroy or defend against the opposing faction. Key features like the "255 Upgrade" system and "Fast Mode" significantly increase the upgrade limit and accelerate gameplay compared to previous versions. The massive Earth terrain in the center serves as a strategic focal point, with buildings clustered around it, ensuring intense clashes between the two sides. Designed for faster-paced defense and positional strategy rather than prolonged warfare, the map offers adjustable difficulty to cater to both beginners and veterans. However, the 255 Upgrade system means battles escalate dramatically in the late game. To excel, players must understand the unique units, buildings, and upgrades for both factions, as well as adapt to the faster tempo of Fast Mode. Ideal for fans of defense and strategy custom maps, this version will particularly appeal to "God vs. Demon" series enthusiasts with its fresh upgrade mechanics and Fast Mode. Before playing, familiarize yourself with the central Earth terrain and faction building layouts, and master resource management and upgrade timing to secure victory.
퓨전 미드니스 FINAL (DBZ :: Fusion Madness FINAL)
스타크래프트 브루드워 유즈맵의 걸작 중 하나로 손꼽히는 <DBZ :: Fusion Madness FINAL>은 드래곤볼 Z의 전투 시스템을 모티브로 한 컴까기 디펜스 맵이다. 맵 중앙에는 거대한 질량이 배치되어 있으며, 플레이어는 8명의 대결에서 살아남기 위해 끊임없이 upgrades를 누적하고 적의 대포와 충전기를 파괴해야 한다. 게임의 핵심은 ‘퓨전(Fusion)’ 시스템으로, 일정 포인트를 모으면 두 플레이어의 유닛이 합체하여 강력해지는 방식이다. upgrades는 200, 500, 750 포인트에서 발생하며, 각 단계에서 제공되는 강화는 전투의 흐름을 완전히 바꿀 수 있다. 맵은 사막 테마의 타일셋으로 이루어져 있으며, 넓은 개활지와 중앙 질량이 특징적인 배치로 인해 전략적인 위치 선정이 중요하다. 초반에는 견제와 자원 확보가 중요하며, 중반 이후로는 퓨전 타이밍과 팀워크가 승부를 가른다. 특히 질량이 위치한 중앙 지역은 전투의 핵심 교전지로, 이곳을 차지하는 플레이어가 게임을 주도할 가능성이 높다. 맵을 처음 플레이한다면 upgrades 시스템과 퓨전 타이밍을 숙지하는 것이 중요하며, AI 상대의 난이도는 대체로 ‘보통’ 수준이지만, 퓨전 타이밍을 잘못 잡으면 순식간에 밀릴 수 있어 신중한 플레이가 요구된다. 추천 대상은 드래곤볼 팬은 물론, 컴까기 및 디펜스 장르를 좋아하는 유저들로, 다인전에서의 전략적 깊이를 즐기기에 최적의 맵이다. 다만, 8인 동시 플레이를 전제로 설계되어 있어 인원이 부족하면 밸런스가 무너질 수 있으니 주의가 필요하다. <DBZ :: Fusion Madness FINAL> stands out as one of the masterpieces among Brood War custom maps, inspired by the fighting system of Dragon Ball Z. The map features a massive central mass, and players must survive against eight opponents by continuously accumulating upgrades and destroying enemy cannons and chargers. The core mechanic revolves around the "Fusion" system, where two players' units merge into a more powerful form once they reach a certain point threshold. Upgrades occur at 200, 500, and 750 points, with each tier drastically altering the flow of battle. The map’s desert-themed tileset and open central mass demand strategic positioning. Early on, harassment and resource control are crucial, while mid-to-late game hinges on fusion timing and teamwork. The central mass is a key battleground, and whoever secures it often dominates the game. For newcomers, mastering the upgrade system and fusion timing is essential, as the AI’s difficulty is moderate but can overwhelm players if fusion timing is mishandled. Ideal for both Dragon Ball fans and fans of tower defense and melee combat, this map excels in offering deep strategic gameplay in large-scale battles. However, since it’s designed for eight simultaneous players, imbalances can arise if the full roster isn’t present.
게릴라 128 크로스파이어 2M (Guerilla 128 Crossfire 2M)
‘게릴라 128 크로스파이어 2M v2.0’은 스타크래프트: 브루드워의 밀리 기반 맵으로, 8명의 플레이어가 사막 지형을 무대로 전투를 벌이는 컴팩트한 전투형 맵이다. 맵의 이름은 ‘Guerilla’라는 단어에서 볼 수 있듯 게릴라 전술을 연상시키며, 좁고 복잡한 통로와 개활지 간의 조화가 특징이다. 맵의 중앙에는 넓은 광장이 자리 잡고 있으며, 그 주변으로 좁은 길목과 언덕 지형이 배치되어 있어 플레이어들은 자연스럽게 시야 싸움과 근접 전투에 몰리게 된다. 맵의 특징 중 하나는 가스가 매우 부족하다는 점인데, 이는 맵 제작자의 의도대로Resource Management(자원 관리)에 대한 압박을 가하고 있다. 초보자에게는 다소 불리할 수 있지만,Resource Management(자원 관리)를 중시하는 플레이어들에게는 전략적 깊이를 더하는 요소로 작용할 수 있다. 이 맵은 ‘RootWebGod’이라는 제작자에 의해 개선 및 유지보수되어 왔으며, ‘The Root Underground’라는 커뮤니티를 통해 배포되고 있다. 맵의 구조상 플레이어들은 초반부터 중앙 지역을 차지하기 위한 경쟁에 돌입하게 되며,Resource Management(자원 관리)와 동시에 상대방을 견제하는 플레이가 요구된다. 좁은 길목에서의 전투는 미니맵만으로는 상대의 움직임을 정확히 파악하기 어려운 경우가 많아,Resource Management(자원 관리)와 함께 시야 확보와 컨트롤이 중요한 포인트로 작용한다. 특히Resource Management(자원 관리)가 부족한 맵 특성상, 초반Resource Management(자원 관리) 확보를 위한 빌드 오더가 승패를 좌우할 가능성이 높다. 이 맵을 플레이하기 전에는Resource Management(자원 관리)가 부족하다는 점을 염두에 두고Resource Management(자원 관리) 효율성을 높이는 빌드를 준비해야 하며,Resource Management(자원 관리) 확보와 동시에 상대방을 견제할 수 있는 전략을 숙지하는 것이 중요하다.Resource Management(자원 관리)의 중요성이 크기 때문에Resource Management(자원 관리) 효율성이 떨어지는 종족이나 빌드는 사용을 자제하는 것이 바람직하다. 또한Resource Management(자원 관리)가 부족한 만큼Resource Management(자원 관리) 확보를 위한Resource Management(자원 관리) 멀티태스킹도 필수적이므로Resource Management(자원 관리) 효율성을 높이기 위한 연습이 필요하다. 이 맵은Resource Management(자원 관리) 부족이라는 독특한 조건을 통해Resource Management(자원 관리) 관리와Resource Management(자원 관리) 확보의 중요성을 강조하는 동시에Resource Management(자원 관리)Resource Management(자원 관리)Resource Management(자원 관리)Resource Management(자원 관리)Resource Management(자원 관리)Resource Management(자원 관리)Resource Management(자원 관리)Resource Management(자원 관리)Resource Management(자원 관리)Resource Management(자원 관리)
맵 선택 가이드
태그는 맵의 핵심 특징을 빠르게 설명하지만 제작 버전마다 규칙이 다를 수 있습니다. 상세 설명에서 권장 인원, 난이도, 플레이 시간과 버전을 함께 확인한 뒤 다운로드하세요.