
7인 전투 스타크래프트 맵 모음
'7인 전투' 태그가 등록된 맵을 모았습니다. 장르 하나로 찾기 어려운 플레이 방식, 난이도와 특징을 중심으로 인기 맵과 최신 맵을 비교해 보세요.
- 등록 맵
- 4개
- 누적 다운로드
- 0
- 누적 조회
- 31
인기 맵
다운로드와 조회 반응이 높은 맵입니다.
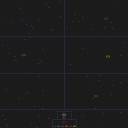
드로잉 콘테스트 EMACULATE (Drawing Contest EMACULATE)
스타크래프트 브루드워의 다중 전투가 가능한 아레나 맵인 ‘드로잉 콘테스트 EMACULATE’는 7명의 플레이어가 동시에 참여할 수 있는 대형 맵이다. 맵의 구조는 중앙에 커다란 원형 전투장이 있으며, 외곽으로 갈수록 넓은 통로와 소규모 batalha point가 배치되어 있어 전투의 흐름을 다양하게 연출할 수 있다. 맵의 해상도가 4096x4096으로 상당히 크며, 황무지 타일셋을 활용해 황량한 전장 feel을 강조하고 있다. 제작자는 ‘MilleniumArmy’로 알려져 있으며, 2006년 ‘FireXtol’에 의해 개선된 버전인 이 맵은 타이머가 없고 점수 감점 시스템이 추가되어 전략적 플레이를 유도한다. 맵의 이름에서 알 수 있듯이 ‘드로잉 콘테스트’는 예술적 요소를 내포하고 있지만, 실제 플레이에서는 전투와 아레나 전투에 특화된 구조를 자랑한다. 전투는 주로 중앙 원형 구역에서 벌어지며, 외곽의 좁은 길목이나 소규모 지형지물들이 부활점과 연계되어 전술적 선택을 강제한다. 맵의 가장 큰 특징은 ‘NO TIMER’와 ‘BIGGEST arenas’라는 문구에서 알 수 있듯이 제한 시간을 없애고 넓은 전투 공간을 제공하여 플레이어 간의 긴장감과 실력 발휘를 극대화했다는 점이다. 또한, 점수 감점 시스템이 도입되어 실수나 전투 실패 시 페널티가 적용되므로 신중한 플레이가 요구된다. 이 맵은 특히 실력 있는 플레이어들이 자신의 전투력을 뽐내고 싶어하는 유저들에게 적합하며, 팀전보다는 개인전 위주의 플레이 스타일을 선호하는 유저들에게 추천할 만한 맵이다. 플레이 전에는 맵의 중앙 전투 구역과 외곽의 좁은 길목, 부활 지점의 위치를 숙지하고 전투 시에는 중앙과 외곽을 오가는 전략적 움직임을 연습하는 것이 중요하다. 또한, 점수 감점 시스템을 고려해 실수를 최소화하는 플레이가 필요하다는 점을 명심해야 한다. StarCraft: Brood War’s multi-combat arena map, *Drawing Contest EMACULATE*, is a large-scale map that supports up to seven players at once. The map features a central circular arena surrounded by wide outer corridors and small battle points, allowing for dynamic combat flow. With a high resolution of 4096x4096, it uses a wasteland tileset to emphasize the barren battlefield atmosphere. The creator, MilleniumArmy, is known for this design, and the map was later refined in 2006 by FireXtol, removing the timer and introducing a score deduction system to encourage strategic play. As the name suggests, *Drawing Contest* carries an artistic touch, but its actual gameplay is built around intense arena combat. Battles primarily unfold in the central circular zone, while narrow outer paths and small terrain features force tactical decisions in coordination with respawn points. The map’s defining features—"NO TIMER" and "BIGGEST arenas"—highlight its emphasis on unlimited time and expansive combat spaces, maximizing tension and player skill expression. The score deduction system penalizes mistakes or combat failures, demanding careful play. This map is ideal for skilled players looking to showcase their combat prowess, particularly those who prefer solo play over team-based strategies. Before starting, it’s crucial to memorize the central arena, outer corridors, and respawn locations, and to practice shifting between central and outer zones during combat. Additionally, players should keep the score deduction system in mind, prioritizing minimal mistakes to avoid penalties.
![할로 매드니스 vFinal (Halo Madness v[Final]) 맵 미리보기](https://cdn-star-data.huzy.net/thumbnail_4f82465f605844dbbfdafbb7f2ca4e18.jpg)
할로 매드니스 vFinal (Halo Madness v[Final])
《Halo Madness v[Final]》는 스타크래프트: 브루드워의 유명한 UMS(유즈맵) 시리즈 중 하나로, 기존 ‘Madness’ 시리즈의 발전을 목표로 제작된 맵입니다. 이 맵은 7명의 플레이어가 동시에 경쟁하는 대형 전투 시스템을 기반으로 하며, ‘Halo’라는 이름에서 느껴지듯 전장의 규모와 긴장감이 돋보이는 디자인으로 구성되어 있습니다. 맵 중앙에는 거대한 원형 전투장이 펼쳐져 있으며, 각 플레이어는 고유한 시작 지점과 자원 기지를 확보할 수 있습니다. 전투는 동일하게 시작되지만, 맵 여기저기에 흩어져 있는 보너스 자원과 전략적 요충지를 차지하는 것이 승리의 관건입니다. 특히 맵의 대칭성과 타일셋(사막)이 주는 분위기가 전쟁터의 한복판에 서 있는 듯한 몰입감을 높여줍니다. 시작부터 끝까지 끊임없는 전투가 지속되며,Resource Management와 Positioning이 핵심 전략이 됩니다. 초보자들이 플레이하기에는 다소 복잡할 수 있지만, 팀 플레이보다는 개인전 성향이 강하다는 점에서 경쟁심과 전략적 사고를 동시에 요구합니다. 맵 구조를 숙지하는 데 다소 시간이 걸리지만, 한 번 익숙해지면 그 긴장감과 박진감 넘치는 전투가 중독성을 불러일으킵니다. 특히 대규모 전투가 벌어지는 맵 중앙의 교전 지역은 시야를 가리는 언덕과 협곡으로 가득해, 치밀한 시야 관리와 순간적인 판단이 승리를 좌우합니다. 이 맵은 ‘100% 밸런스’를 내세운 만큼, 모든 플레이어에게 동등한 기회를 제공한다는 점에서 공정성을 중시하는 유저들에게 인기가 많습니다. 또한, 사막 타일셋을 활용한 황량한 분위기가 전장의 처절함을 한층 더 강조합니다. 플레이 전 반드시 확인해야 할 사항은 시작 위치의 자원 분배와 맵 중앙의 주요Resources 위치입니다. 각 플레이어의 시작 지점이 다르기 때문에, 초반 자원 확보와 방어 전략 수립이 승패를 가르는 결정적 요소가 됩니다. 이 맵은 7인용 대형 전투 맵으로, 동시 접속이 가능한 인원이 많을수록 더 흥미로운 전투가 펼쳐질 수 있습니다. 특히 대규모 유즈맵 커뮤니티에서 인기를 끌었던 맵인 만큼, 경쟁심을 불태우고 싶거나 전략적인 전투를 즐기는 유저들에게 강력히 추천합니다. 맵의 특징을 최대한 살리려면, 팀 플레이보다는 솔로 플레이를 지향하는 것이 좋습니다. 팀전으로 플레이할 경우, 각 팀원의 역할 분배와 협동이 필수적이므로 전략적 깊이가 더해질 수 있습니다. 그러나 기본적으로는 개인전 성향이 강하므로, 개인의 실력이 승패를 가르는 경우가 많습니다. 이 맵을 즐기기 위해서는 브루드워의 기본 컨트롤뿐만 아니라,Resource Management와 Positioning에 대한 이해가 필요합니다. 또한, 맵의 구조를 외우고 있으면 예상치 못한 상황에서도 빠르게 대응할 수 있어, 반복 플레이가 도움이 됩니다. 이 맵은 스타크래프트 유즈맵의 역사에서 중요한 위치를 차지하고 있으며, 대규모 전투와 전략적 깊이를 동시에 추구하는 유저들에게는 필수적으로 플레이해 볼 만한 작품입니다. 특히 ‘Madness’ 시리즈의 팬이라면, 이 최종 버전에서 제공되는 새로운 요소와 밸런스 조정에 주목해 보세요. 맵의 디자인과 플레이 스타일이 주는 긴장감과 몰입감을 한 번 경험해 본다면, 이 맵이 제공하는 즐거움을 쉽게 잊지 못할 것입니다. 이 맵을 플레이하기 전, 맵 에디터에서 제공하는 내부 설명이나 밸런스 관련 공지를 꼼꼼히 읽어보는 것이 좋습니다. 특히 ‘100% 밸런스’라는 문구는 단순히 표면적인 말이 아니라, 실제 플레이에서도 체감할 수 있는 균형감을 제공한다는 점에서 주목할 만합니다. 이러한 특징들로 인해, 《Halo Madness v[Final]》는 스타크래프트 유즈맵의 걸작 중 하나로 손꼽힐 만한 작품입니다. 《Halo Madness v[Final]》 is a renowned UMS (user-made map) series in *StarCraft: Brood War*, designed as an evolution of the classic *Madness* series. The map features a large-scale combat system where seven players compete simultaneously, with a design that emphasizes the vast scale and intensity of the battlefield, as suggested by its name, "Halo." At the center of the map lies a massive circular arena, and each player starts with their own unique spawn location and resource base. While the game begins on equal footing, securing scattered bonus resources and controlling strategic chokepoints becomes crucial to victory. The symmetrical layout and desert-themed tileset immerse players in the heart of the battlefield. The game is relentless from start to finish, making Resource Management and Positioning key strategic elements. Though it may be complex for beginners, its individual-focused nature demands both competitive spirit and tactical thinking rather than teamwork. Mastering the map layout takes time, but once familiar, the tense and adrenaline-packed battles create a highly addictive experience. The central combat zone, filled with obstructed sightlines and ravines, requires sharp vision control and quick decision-making to secure victory. Marketed as "100% balanced," the map ensures equal opportunities for all players, appealing to those who value fairness. The barren desert aesthetic further amplifies the brutal atmosphere of the battlefield. Before playing, it's essential to check the starting resource distribution and the locations of major resources in the map's center. Since each player's starting position differs, early resource gathering and defensive strategies often determine the outcome. Designed for seven players, the experience becomes even more thrilling with more participants online. Given its popularity in the large user-made map community, it's highly recommended for players seeking intense competition or strategic battles. To fully enjoy the map's features, playing solo is preferable over team-based matches, though team play can add depth with coordinated roles and cooperation. However, as the map leans heavily toward individual performance, personal skill often dictates the result. Success here requires not only basic *Brood War* controls but also a strong grasp of Resource Management and Positioning. Memorizing the map layout allows for quick reactions to unexpected situations, and repeated playthroughs help refine strategies. 《Halo Madness v[Final]》 holds a significant place in *StarCraft* user-made map history, offering a must-play experience for those who crave large-scale battles and deep strategy. Fans of the *Madness* series will appreciate the new elements and balance adjustments in this final version. The tension, immersion, and thrilling combat it delivers make it unforgettable. Before diving in, reviewing the internal map editor notes or balance announcements is wise, as the "100% balanced" claim reflects a real sense of equilibrium in gameplay. For these reasons, *Halo Madness v[Final]* stands as one of the finest works in the *StarCraft* user-made map genre.
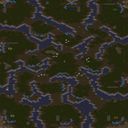
스타크래프트 쿠파 최강전 (Starcraft Koopa Final Version)
스타크래프트 브루드워의 고전 유즈맵으로 유명한 〈Starcraft Koopa Final Version〉은 7명의 플레이어가 참여하는 대규모 전투형 맵입니다. 내부 맵 제목과 설명에서 확인할 수 있듯이, 말 그대로 '전쟁을 즐기라'는 메시지와 함께 펼쳐지는 전투가 특징입니다. 맵의 배경은 사막 타일셋으로 구성되어 있으며, 넓은 평야와 요충지를 중심으로 전투가 펼쳐집니다. 맵의 크기가 1024x1024에 해상도 4096x4096, 타일 단위 128x128로 상당히 큰 규모를 자랑합니다. 이 덕분에 전투는 광범위한 전장에서 펼쳐지며, 자원 관리보다는 순수한 전투와 전략이 중시됩니다. 이 맵은 7명이 동시에 플레이할 수 있도록 설계되어 있으며, 각 플레이어는 독립된 기지로 시작해 자원을 채취하며 병력을 생산하고, 상대방을 공격하거나 방어하는 방식으로 진행됩니다. 맵의 특징은 대규모 전투가 가능하다는 점으로, 소규모 전투나 협동보다는 다수의 플레이어가 참여하는 총력전이 주가 됩니다. 맵의 구조는 중앙 평야를 중심으로 요충지가 배치되어 있어, 초반에는 자원 확보와 병력 생산에 집중해야 하고, 중반부터는 teritorial control을 두고 치열한 전투가 벌어질 가능성이 높습니다. 〈Starcraft Koopa Final Version〉은 특히 한국 커뮤니티에서 오랫동안 사랑받아온 맵으로, 오랫동안 검증된 밸런스와 플레이abilidad로 정평이 나 있습니다. 초보자도 쉽게 접근할 수 있지만, 7명이 참여하는 만큼 팀워크와 전략적 협동이 중요해지는 맵이기 때문에 숙련자들도 즐겁게 플레이할 수 있는 요소들이 가득합니다. 맵을 플레이하기 전에는 자원 분배와 병력 생산 타이밍, 요충지 점령 전략을 미리 계획해두는 것이 좋습니다. 또한, 맵의 크기가 크기 때문에 빠른 이동과 시야 확보는 필수적입니다. This classic Brood War custom map, Starcraft Koopa Final Version, is a large-scale battle-oriented UMS title designed for up to 7 players. The map features a desert tileset with expansive terrain, emphasizing wide-area combat over resource management. Designed for 7 players, each starts with their own base where they gather resources, train units, and engage in either offensive or defensive strategies. The map's layout centers around a vast plain with strategic chokepoints, making early resource gathering and unit production crucial, while mid-to-late game involves territorial control and large-scale battles. Starcraft Koopa Final Version has long been a beloved map in Korean Brood War communities, praised for its balanced gameplay and replayability. While accessible to beginners, the 7-player format demands teamwork and strategic coordination, offering depth that seasoned players will appreciate. Before playing, it's advisable to plan resource allocation, unit production timing, and control of strategic points. Due to the map's size, quick movement and vision control are essential for success.
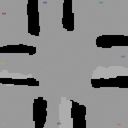
파괴전 (Destruction War)
스타크래프트 브루드워의 유즈맵 <Rz.Yx.* fen shi zhan fa>는 7인용 전투 중심의 맵으로, 내부 제목과 설명이 간결한 편이지만 플레이어 간의 긴장감과 전략적 선택이 요구되는 디펜스 장르의 핵심을 담아내고 있다. 맵 상단과 하단에 배치된 주요 건물 지역은 각각의 플레이어가 방어와 공격을 동시에 고려해야 하는 공간으로 구성되어 있으며, 중앙 통로는 좁고 복잡한 구조를 띄고 있어 병력의 집중과 후퇴가 전략적으로 중요하다. 중앙 지형을 따라 배치된 자원 지역은 전투 중에도 확보 가능한 요소로, 자원 확보 타이밍이 승패를 좌우할 수 있는 변수가 될 것으로 추정된다. 전체적으로 맵은 방어선을 구축할 수 있는 공간과 기동성을 위한 넓은 통로가 조화롭게 배치되어 있으며, 특히 좁은 길목에서 벌어지는 난전은 시원한 전투감을 제공할 것이다. 다만, 7인이라는 다인용 구조상 개개인의 역할 분배와 팀워크가 필수적이며, 초보 플레이어의 경우 기본적인 컨트롤과 전략 수립이 다소 어렵게 느껴질 수 있다. 맵을 플레이하기 전에는 각 플레이어의 시작 위치와 주요 자원 분포를 미리 숙지하고, 방어선을 구축할 수 있는 최적의 위치를 선정하는 것이 중요하다. 또한, 좁은 통로에서 벌어질 수 있는 병력 뭉침 현상을 방지하기 위해 적절한 스플래시 유닛의 활용과 컨트롤 연습을 미리 해두는 것이 좋다. 이 맵은 디펜스와 전투가 혼합된 유즈맵을 선호하는 플레이어들에게 특히 추천되며, 전략적 깊이와 긴장감 있는 전투를 동시에 경험하고자 하는 경우 도전해볼 만한 작품이다. Rz.Yx.* fen shi zhan fa is a 7-player combat-focused custom map in StarCraft: Brood War, where the internal title and description are minimal but effectively convey the core of a defense genre requiring strategic choices and tense player interactions. The map features main building areas at the top and bottom, each demanding simultaneous attention to both attack and defense. The central passage is narrow and complex, making troop concentration and retreat crucial tactical decisions. Resource areas along the central path can be secured during combat, making resource timing a potential deciding factor in victory. The map balances defensive structures with wide corridors for mobility, offering intense battles particularly in narrow chokepoints. With a 7-player setup, individual roles and teamwork are essential, and beginners may find basic control and strategy formulation challenging. Before playing, it is important to familiarize yourself with each player's starting position and key resource distribution, and to choose optimal defensive locations. To avoid troop congestion in tight corridors, practicing splash unit usage and control beforehand is recommended. This map is especially recommended for players who enjoy defense and combat hybrid custom maps, offering both strategic depth and high-tension battles.
최근 등록된 맵
새로 추가된 파일과 버전을 확인하세요.
파괴전 (Destruction War)
스타크래프트 브루드워의 유즈맵 <Rz.Yx.* fen shi zhan fa>는 7인용 전투 중심의 맵으로, 내부 제목과 설명이 간결한 편이지만 플레이어 간의 긴장감과 전략적 선택이 요구되는 디펜스 장르의 핵심을 담아내고 있다. 맵 상단과 하단에 배치된 주요 건물 지역은 각각의 플레이어가 방어와 공격을 동시에 고려해야 하는 공간으로 구성되어 있으며, 중앙 통로는 좁고 복잡한 구조를 띄고 있어 병력의 집중과 후퇴가 전략적으로 중요하다. 중앙 지형을 따라 배치된 자원 지역은 전투 중에도 확보 가능한 요소로, 자원 확보 타이밍이 승패를 좌우할 수 있는 변수가 될 것으로 추정된다. 전체적으로 맵은 방어선을 구축할 수 있는 공간과 기동성을 위한 넓은 통로가 조화롭게 배치되어 있으며, 특히 좁은 길목에서 벌어지는 난전은 시원한 전투감을 제공할 것이다. 다만, 7인이라는 다인용 구조상 개개인의 역할 분배와 팀워크가 필수적이며, 초보 플레이어의 경우 기본적인 컨트롤과 전략 수립이 다소 어렵게 느껴질 수 있다. 맵을 플레이하기 전에는 각 플레이어의 시작 위치와 주요 자원 분포를 미리 숙지하고, 방어선을 구축할 수 있는 최적의 위치를 선정하는 것이 중요하다. 또한, 좁은 통로에서 벌어질 수 있는 병력 뭉침 현상을 방지하기 위해 적절한 스플래시 유닛의 활용과 컨트롤 연습을 미리 해두는 것이 좋다. 이 맵은 디펜스와 전투가 혼합된 유즈맵을 선호하는 플레이어들에게 특히 추천되며, 전략적 깊이와 긴장감 있는 전투를 동시에 경험하고자 하는 경우 도전해볼 만한 작품이다. Rz.Yx.* fen shi zhan fa is a 7-player combat-focused custom map in StarCraft: Brood War, where the internal title and description are minimal but effectively convey the core of a defense genre requiring strategic choices and tense player interactions. The map features main building areas at the top and bottom, each demanding simultaneous attention to both attack and defense. The central passage is narrow and complex, making troop concentration and retreat crucial tactical decisions. Resource areas along the central path can be secured during combat, making resource timing a potential deciding factor in victory. The map balances defensive structures with wide corridors for mobility, offering intense battles particularly in narrow chokepoints. With a 7-player setup, individual roles and teamwork are essential, and beginners may find basic control and strategy formulation challenging. Before playing, it is important to familiarize yourself with each player's starting position and key resource distribution, and to choose optimal defensive locations. To avoid troop congestion in tight corridors, practicing splash unit usage and control beforehand is recommended. This map is especially recommended for players who enjoy defense and combat hybrid custom maps, offering both strategic depth and high-tension battles.
스타크래프트 쿠파 최강전 (Starcraft Koopa Final Version)
스타크래프트 브루드워의 고전 유즈맵으로 유명한 〈Starcraft Koopa Final Version〉은 7명의 플레이어가 참여하는 대규모 전투형 맵입니다. 내부 맵 제목과 설명에서 확인할 수 있듯이, 말 그대로 '전쟁을 즐기라'는 메시지와 함께 펼쳐지는 전투가 특징입니다. 맵의 배경은 사막 타일셋으로 구성되어 있으며, 넓은 평야와 요충지를 중심으로 전투가 펼쳐집니다. 맵의 크기가 1024x1024에 해상도 4096x4096, 타일 단위 128x128로 상당히 큰 규모를 자랑합니다. 이 덕분에 전투는 광범위한 전장에서 펼쳐지며, 자원 관리보다는 순수한 전투와 전략이 중시됩니다. 이 맵은 7명이 동시에 플레이할 수 있도록 설계되어 있으며, 각 플레이어는 독립된 기지로 시작해 자원을 채취하며 병력을 생산하고, 상대방을 공격하거나 방어하는 방식으로 진행됩니다. 맵의 특징은 대규모 전투가 가능하다는 점으로, 소규모 전투나 협동보다는 다수의 플레이어가 참여하는 총력전이 주가 됩니다. 맵의 구조는 중앙 평야를 중심으로 요충지가 배치되어 있어, 초반에는 자원 확보와 병력 생산에 집중해야 하고, 중반부터는 teritorial control을 두고 치열한 전투가 벌어질 가능성이 높습니다. 〈Starcraft Koopa Final Version〉은 특히 한국 커뮤니티에서 오랫동안 사랑받아온 맵으로, 오랫동안 검증된 밸런스와 플레이abilidad로 정평이 나 있습니다. 초보자도 쉽게 접근할 수 있지만, 7명이 참여하는 만큼 팀워크와 전략적 협동이 중요해지는 맵이기 때문에 숙련자들도 즐겁게 플레이할 수 있는 요소들이 가득합니다. 맵을 플레이하기 전에는 자원 분배와 병력 생산 타이밍, 요충지 점령 전략을 미리 계획해두는 것이 좋습니다. 또한, 맵의 크기가 크기 때문에 빠른 이동과 시야 확보는 필수적입니다. This classic Brood War custom map, Starcraft Koopa Final Version, is a large-scale battle-oriented UMS title designed for up to 7 players. The map features a desert tileset with expansive terrain, emphasizing wide-area combat over resource management. Designed for 7 players, each starts with their own base where they gather resources, train units, and engage in either offensive or defensive strategies. The map's layout centers around a vast plain with strategic chokepoints, making early resource gathering and unit production crucial, while mid-to-late game involves territorial control and large-scale battles. Starcraft Koopa Final Version has long been a beloved map in Korean Brood War communities, praised for its balanced gameplay and replayability. While accessible to beginners, the 7-player format demands teamwork and strategic coordination, offering depth that seasoned players will appreciate. Before playing, it's advisable to plan resource allocation, unit production timing, and control of strategic points. Due to the map's size, quick movement and vision control are essential for success.
할로 매드니스 vFinal (Halo Madness v[Final])
《Halo Madness v[Final]》는 스타크래프트: 브루드워의 유명한 UMS(유즈맵) 시리즈 중 하나로, 기존 ‘Madness’ 시리즈의 발전을 목표로 제작된 맵입니다. 이 맵은 7명의 플레이어가 동시에 경쟁하는 대형 전투 시스템을 기반으로 하며, ‘Halo’라는 이름에서 느껴지듯 전장의 규모와 긴장감이 돋보이는 디자인으로 구성되어 있습니다. 맵 중앙에는 거대한 원형 전투장이 펼쳐져 있으며, 각 플레이어는 고유한 시작 지점과 자원 기지를 확보할 수 있습니다. 전투는 동일하게 시작되지만, 맵 여기저기에 흩어져 있는 보너스 자원과 전략적 요충지를 차지하는 것이 승리의 관건입니다. 특히 맵의 대칭성과 타일셋(사막)이 주는 분위기가 전쟁터의 한복판에 서 있는 듯한 몰입감을 높여줍니다. 시작부터 끝까지 끊임없는 전투가 지속되며,Resource Management와 Positioning이 핵심 전략이 됩니다. 초보자들이 플레이하기에는 다소 복잡할 수 있지만, 팀 플레이보다는 개인전 성향이 강하다는 점에서 경쟁심과 전략적 사고를 동시에 요구합니다. 맵 구조를 숙지하는 데 다소 시간이 걸리지만, 한 번 익숙해지면 그 긴장감과 박진감 넘치는 전투가 중독성을 불러일으킵니다. 특히 대규모 전투가 벌어지는 맵 중앙의 교전 지역은 시야를 가리는 언덕과 협곡으로 가득해, 치밀한 시야 관리와 순간적인 판단이 승리를 좌우합니다. 이 맵은 ‘100% 밸런스’를 내세운 만큼, 모든 플레이어에게 동등한 기회를 제공한다는 점에서 공정성을 중시하는 유저들에게 인기가 많습니다. 또한, 사막 타일셋을 활용한 황량한 분위기가 전장의 처절함을 한층 더 강조합니다. 플레이 전 반드시 확인해야 할 사항은 시작 위치의 자원 분배와 맵 중앙의 주요Resources 위치입니다. 각 플레이어의 시작 지점이 다르기 때문에, 초반 자원 확보와 방어 전략 수립이 승패를 가르는 결정적 요소가 됩니다. 이 맵은 7인용 대형 전투 맵으로, 동시 접속이 가능한 인원이 많을수록 더 흥미로운 전투가 펼쳐질 수 있습니다. 특히 대규모 유즈맵 커뮤니티에서 인기를 끌었던 맵인 만큼, 경쟁심을 불태우고 싶거나 전략적인 전투를 즐기는 유저들에게 강력히 추천합니다. 맵의 특징을 최대한 살리려면, 팀 플레이보다는 솔로 플레이를 지향하는 것이 좋습니다. 팀전으로 플레이할 경우, 각 팀원의 역할 분배와 협동이 필수적이므로 전략적 깊이가 더해질 수 있습니다. 그러나 기본적으로는 개인전 성향이 강하므로, 개인의 실력이 승패를 가르는 경우가 많습니다. 이 맵을 즐기기 위해서는 브루드워의 기본 컨트롤뿐만 아니라,Resource Management와 Positioning에 대한 이해가 필요합니다. 또한, 맵의 구조를 외우고 있으면 예상치 못한 상황에서도 빠르게 대응할 수 있어, 반복 플레이가 도움이 됩니다. 이 맵은 스타크래프트 유즈맵의 역사에서 중요한 위치를 차지하고 있으며, 대규모 전투와 전략적 깊이를 동시에 추구하는 유저들에게는 필수적으로 플레이해 볼 만한 작품입니다. 특히 ‘Madness’ 시리즈의 팬이라면, 이 최종 버전에서 제공되는 새로운 요소와 밸런스 조정에 주목해 보세요. 맵의 디자인과 플레이 스타일이 주는 긴장감과 몰입감을 한 번 경험해 본다면, 이 맵이 제공하는 즐거움을 쉽게 잊지 못할 것입니다. 이 맵을 플레이하기 전, 맵 에디터에서 제공하는 내부 설명이나 밸런스 관련 공지를 꼼꼼히 읽어보는 것이 좋습니다. 특히 ‘100% 밸런스’라는 문구는 단순히 표면적인 말이 아니라, 실제 플레이에서도 체감할 수 있는 균형감을 제공한다는 점에서 주목할 만합니다. 이러한 특징들로 인해, 《Halo Madness v[Final]》는 스타크래프트 유즈맵의 걸작 중 하나로 손꼽힐 만한 작품입니다. 《Halo Madness v[Final]》 is a renowned UMS (user-made map) series in *StarCraft: Brood War*, designed as an evolution of the classic *Madness* series. The map features a large-scale combat system where seven players compete simultaneously, with a design that emphasizes the vast scale and intensity of the battlefield, as suggested by its name, "Halo." At the center of the map lies a massive circular arena, and each player starts with their own unique spawn location and resource base. While the game begins on equal footing, securing scattered bonus resources and controlling strategic chokepoints becomes crucial to victory. The symmetrical layout and desert-themed tileset immerse players in the heart of the battlefield. The game is relentless from start to finish, making Resource Management and Positioning key strategic elements. Though it may be complex for beginners, its individual-focused nature demands both competitive spirit and tactical thinking rather than teamwork. Mastering the map layout takes time, but once familiar, the tense and adrenaline-packed battles create a highly addictive experience. The central combat zone, filled with obstructed sightlines and ravines, requires sharp vision control and quick decision-making to secure victory. Marketed as "100% balanced," the map ensures equal opportunities for all players, appealing to those who value fairness. The barren desert aesthetic further amplifies the brutal atmosphere of the battlefield. Before playing, it's essential to check the starting resource distribution and the locations of major resources in the map's center. Since each player's starting position differs, early resource gathering and defensive strategies often determine the outcome. Designed for seven players, the experience becomes even more thrilling with more participants online. Given its popularity in the large user-made map community, it's highly recommended for players seeking intense competition or strategic battles. To fully enjoy the map's features, playing solo is preferable over team-based matches, though team play can add depth with coordinated roles and cooperation. However, as the map leans heavily toward individual performance, personal skill often dictates the result. Success here requires not only basic *Brood War* controls but also a strong grasp of Resource Management and Positioning. Memorizing the map layout allows for quick reactions to unexpected situations, and repeated playthroughs help refine strategies. 《Halo Madness v[Final]》 holds a significant place in *StarCraft* user-made map history, offering a must-play experience for those who crave large-scale battles and deep strategy. Fans of the *Madness* series will appreciate the new elements and balance adjustments in this final version. The tension, immersion, and thrilling combat it delivers make it unforgettable. Before diving in, reviewing the internal map editor notes or balance announcements is wise, as the "100% balanced" claim reflects a real sense of equilibrium in gameplay. For these reasons, *Halo Madness v[Final]* stands as one of the finest works in the *StarCraft* user-made map genre.
드로잉 콘테스트 EMACULATE (Drawing Contest EMACULATE)
스타크래프트 브루드워의 다중 전투가 가능한 아레나 맵인 ‘드로잉 콘테스트 EMACULATE’는 7명의 플레이어가 동시에 참여할 수 있는 대형 맵이다. 맵의 구조는 중앙에 커다란 원형 전투장이 있으며, 외곽으로 갈수록 넓은 통로와 소규모 batalha point가 배치되어 있어 전투의 흐름을 다양하게 연출할 수 있다. 맵의 해상도가 4096x4096으로 상당히 크며, 황무지 타일셋을 활용해 황량한 전장 feel을 강조하고 있다. 제작자는 ‘MilleniumArmy’로 알려져 있으며, 2006년 ‘FireXtol’에 의해 개선된 버전인 이 맵은 타이머가 없고 점수 감점 시스템이 추가되어 전략적 플레이를 유도한다. 맵의 이름에서 알 수 있듯이 ‘드로잉 콘테스트’는 예술적 요소를 내포하고 있지만, 실제 플레이에서는 전투와 아레나 전투에 특화된 구조를 자랑한다. 전투는 주로 중앙 원형 구역에서 벌어지며, 외곽의 좁은 길목이나 소규모 지형지물들이 부활점과 연계되어 전술적 선택을 강제한다. 맵의 가장 큰 특징은 ‘NO TIMER’와 ‘BIGGEST arenas’라는 문구에서 알 수 있듯이 제한 시간을 없애고 넓은 전투 공간을 제공하여 플레이어 간의 긴장감과 실력 발휘를 극대화했다는 점이다. 또한, 점수 감점 시스템이 도입되어 실수나 전투 실패 시 페널티가 적용되므로 신중한 플레이가 요구된다. 이 맵은 특히 실력 있는 플레이어들이 자신의 전투력을 뽐내고 싶어하는 유저들에게 적합하며, 팀전보다는 개인전 위주의 플레이 스타일을 선호하는 유저들에게 추천할 만한 맵이다. 플레이 전에는 맵의 중앙 전투 구역과 외곽의 좁은 길목, 부활 지점의 위치를 숙지하고 전투 시에는 중앙과 외곽을 오가는 전략적 움직임을 연습하는 것이 중요하다. 또한, 점수 감점 시스템을 고려해 실수를 최소화하는 플레이가 필요하다는 점을 명심해야 한다. StarCraft: Brood War’s multi-combat arena map, *Drawing Contest EMACULATE*, is a large-scale map that supports up to seven players at once. The map features a central circular arena surrounded by wide outer corridors and small battle points, allowing for dynamic combat flow. With a high resolution of 4096x4096, it uses a wasteland tileset to emphasize the barren battlefield atmosphere. The creator, MilleniumArmy, is known for this design, and the map was later refined in 2006 by FireXtol, removing the timer and introducing a score deduction system to encourage strategic play. As the name suggests, *Drawing Contest* carries an artistic touch, but its actual gameplay is built around intense arena combat. Battles primarily unfold in the central circular zone, while narrow outer paths and small terrain features force tactical decisions in coordination with respawn points. The map’s defining features—"NO TIMER" and "BIGGEST arenas"—highlight its emphasis on unlimited time and expansive combat spaces, maximizing tension and player skill expression. The score deduction system penalizes mistakes or combat failures, demanding careful play. This map is ideal for skilled players looking to showcase their combat prowess, particularly those who prefer solo play over team-based strategies. Before starting, it’s crucial to memorize the central arena, outer corridors, and respawn locations, and to practice shifting between central and outer zones during combat. Additionally, players should keep the score deduction system in mind, prioritizing minimal mistakes to avoid penalties.
맵 선택 가이드
태그는 맵의 핵심 특징을 빠르게 설명하지만 제작 버전마다 규칙이 다를 수 있습니다. 상세 설명에서 권장 인원, 난이도, 플레이 시간과 버전을 함께 확인한 뒤 다운로드하세요.