
7 vs 1 스타크래프트 맵 모음
'7 vs 1' 태그가 등록된 맵을 모았습니다. 장르 하나로 찾기 어려운 플레이 방식, 난이도와 특징을 중심으로 인기 맵과 최신 맵을 비교해 보세요.
- 등록 맵
- 5개
- 누적 다운로드
- 0
- 누적 조회
- 213
인기 맵
다운로드와 조회 반응이 높은 맵입니다.
7인 대 프로토스 AI (7Human Vs 1Protoss AI)
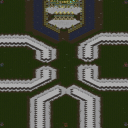
스타크래프트: 브루드워의 흥미로운 유즈맵인 <7Human Vs 1Protoss AI>는 7명의 플레이어가 하나의 AI Protoss를 상대로 대결하는 독특한 구도를 자랑한다. 이 맵은 4명의 테란과 3명의 저그 플레이어가 연합하여 Protoss AI의 공격과 방어 능력을 시험하는 구조로, 협동의 중요성과 전략적 대결을 동시에 경험할 수 있도록 설계되었다. 맵 중앙에는 Protoss AI의 본진이 자리 잡고 있으며, 주변으로 7명의 인간 플레이어들이 각각의 진영을 구축할 수 있는 공간이 마련되어 있다. AI Protoss는 주기적으로 공격을 가하거나 방어 태세를 갖추며, 플레이어들은 이를 저지하거나 AI의 자원 및 건물을 파괴하는 데 집중해야 한다. 전체적으로 맵의 지형은 비교적 평지 위주지만, 곳곳에 언덕과 협곡이 배치되어 있어 시야 확보와 기지 방어에 strategic depth를 제공한다. 특히 AI Protoss의 공격 루트는 중앙 통로와 양측 언덕을 따라 나뉘어 있어, 플레이어들은 각자의 위치와 역할에 맞게 방어를 분담하거나 협력해야 한다. 맵의 규모는 4096x4096로 꽤 넓지만, AI Protoss의 공격 주기가 비교적 일정하여 플레이어들이 실시간으로 대응할 수 있는 시간적 여유가 존재한다. 또한, 테란과 저그의 조합을 고려한 플레이어들은 서로의 장점을 살려 AI Protoss의 방어선을 공략하거나, 반대로 AI의 공격으로부터 아군을 보호하는 임무를 수행하게 된다. 이 맵은 협동과 전략이 필수적인 만큼, 초보자보다는 중급 이상의 플레이어들에게 더 적합할 것으로 보인다. 특히 Protoss AI의 공격 패턴을 숙지하고, 테란과 저그의 유닛 조합을 최적화하는 능력이 요구된다. 또한, 7명의 플레이어 간 원활한 의사소통과 역할 분담이 없다면 AI Protoss를 이기기 어려운 구조이므로, 팀워크가 중요한 맵으로 평가할 수 있다. 마지막으로, AI Protoss의 난이도가 조절 가능한지 여부에 따라 플레이 경험이 크게 달라질 수 있으니, 사전 점검을 통해 적절한 난이도를 설정하는 것이 중요하다. 이 맵을 즐기기 위해서는 Protoss AI의 공격 루트를 미리 파악하고, 각 플레이어의 진영이 AI의 공격 경로에 노출되지 않도록 대비해야 한다. 또한, 테란과 저그의 유닛을 조합하여 AI Protoss의 방어선을 공략하는 전략을 세우는 것이 핵심이다. AI Protoss의 공격 타이밍을 예측하고, 각 플레이어가 맡은 역할을 충실히 수행한다면 흥미로운 대결을 즐길 수 있을 것이다. This interesting custom map in *StarCraft: Brood War*, *7 Humans vs 1 Protoss AI*, offers a unique setup where seven players team up against a single AI Protoss opponent. The map pits four Terran and three Zerg players against an AI Protoss, testing their combined offensive and defensive capabilities while emphasizing teamwork and strategic play. At the center sits the Protoss AI’s main base, surrounded by spaces for the seven human players to establish their own bases. The AI Protoss launches periodic attacks or shifts into defensive stances, forcing players to either fend off its assaults or focus on destroying its resources and structures. The terrain is mostly flat but features strategic hills and ravines that enhance visibility and base defense. The AI’s attack routes split along the central path and the flanking hills, requiring players to coordinate their defenses based on their positions and roles. While the map spans a large 4096x4096 area, the AI’s predictable attack cycles give players enough time to react in real time. Given the combination of Terran and Zerg units, players must leverage their strengths—either breaking through the AI’s defenses or shielding allies from its advances. Designed for teamwork and strategy, this map is better suited for intermediate to advanced players. Success hinges on understanding the Protoss AI’s attack patterns and optimizing unit compositions between Terran and Zerg. Without clear communication and role distribution among the seven players, defeating the AI becomes nearly impossible, making teamwork essential. Additionally, the overall experience can vary greatly depending on whether the AI Protoss’s difficulty can be adjusted, so checking and setting the appropriate level beforehand is crucial. To enjoy this map, players should first identify the Protoss AI’s attack routes and prepare defenses to prevent their bases from being exposed. Developing a strategy that combines Terran and Zerg units to dismantle the AI’s defenses is key. Predicting the AI’s attack timing and executing assigned roles diligently will turn the match into an engaging and rewarding challenge.
뉴 임파스 시나리오 7 vs 1 (NEW imposs scenario 7 V 1)
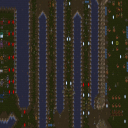
스타크래프트: 브루드워의 유즈맵 ‘뉴 임파스 시나리오 7 vs 1(NEW imposs scenario 7 V 1)’은 ‘GET to the end Destroy all enemy!’라는 캐치프레이즈처럼 7명의 플레이어가 한 명의 적을 상대로 치열한 전투를 펼치는 극단적인 밸런스의 디펜스 맵입니다. 맵의 이름은 ‘상상도 불가능한 시나리오’라는 뜻의 ‘Impossible Scenario’를 연상케 하지만, 실상은 7:1이라는 극심한 수적 열세를 극복하기 위한 전략과 운이 요구되는 흥미로운 게임플레이가 특징입니다. 맵의 핵심은 좁고 긴 사막 타일셋으로 이루어진 지형으로, 중앙 통로와 양측의 기지 구조가 비교적 단순하면서도 적의 공격을 효과적으로 방어할 수 있는 요충지가 곳곳에 배치되어 있습니다. 플레이어들은 좁은 길목을 중심으로 방어선을 구축하거나, 소수 정예 병력으로 적의 본진을 급습하는 등 다양한 전술을 구사해야 합니다. 특히 7명이 동시에 협동하며 한 명의 적을 공격하고 방어해야 한다는 점에서 팀워크와 순발력이 요구되며, 적의 전략에 따라 게임의 양상이 급격히 바뀌는 재미가 있습니다. 맵의 난이도는 플레이어들의 손싸움과 맵 리딩 능력에 따라 크게 좌우되며, 초보자의 경우 방어에 치중하다가도 적의 기습 공격에 허무하게 무너질 수 있어 전략적 사고가 필수입니다. 반면 숙련된 플레이어들은 적의 움직임을 예상하고, 다수의 병력을 효율적으로 운용하여 승리를 차지할 수 있습니다. 이 맵은 주로 다인 멀티플레이 환경에서 즐기기 적합하며, 친구들끼리 또는 온라인 커뮤니티에서 경쟁적으로 플레이하는 경우가 많습니다. 맵의 구조상 사막 타일셋의 황량한 분위기와 긴장감이 어우러져 atmosferic한 전투를 즐길 수 있다는 점도 큰 매력입니다. 플레이 전에는 팀원 간의 호흡을 맞추는 연습을 하거나, 적의 공격 패턴을 미리 예상해보는 시간을 가져보는 것이 좋습니다. 또한, 좁은 길목에서 벌어지는 전투에서 생존력을 높이기 위해 방어 건물이나 유닛 조합을 신중히 선택해야 합니다. 이 맵은 7:1이라는 극단적 밸런스로 인해 기존 밀리 맵과는 완전히 다른 재미를 제공하며, 특히 ‘승리’를 목표로 한 전략적 플레이를 즐기는 유저들에게 강력히 추천합니다. NEW imposs scenario 7 V 1 is a unique StarCraft: Brood War custom map where seven players team up against a single opponent in an intense 7 vs 1 battle, as suggested by its tagline 'GET to the end Destroy all enemy!'. The map's name hints at its 'impossible scenario' nature, but the real challenge lies in overcoming severe numerical disadvantage through strategy and quick reflexes. Set in a desert tile-based terrain, the map features a narrow central corridor flanked by player bases, creating a battlefield where defense and offense must be carefully balanced. Players must either fortify choke points or launch swift attacks on the enemy's main base, depending on the evolving situation. The map demands strong teamwork and adaptability, as a single mistake can lead to a swift defeat. Beginners may struggle with coordination and defense tactics, while experienced players can exploit enemy patterns to secure victory. Designed for multiplayer environments, this map thrives in both casual and competitive settings, offering a fresh experience distinct from traditional melee maps. The desert atmosphere adds to the immersive and tense combat experience. Before playing, it's advisable to practice team strategies and anticipate enemy movements. Special attention should be given to unit compositions and defensive structures to maximize survival in tight corridors. This map stands out for its extreme balance and strategic depth, making it a must-try for players seeking a unique and challenging StarCraft experience.
7 vs 1 하드 컴퓨터 (영웅) (7 vs 1 Hard Computer w/Heroes)
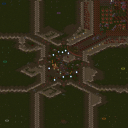
스타크래프트 브루드워의 고난이도 컴까기 디펜스 맵으로, 7명의 플레이어가 단일 영웅 캐릭터로 강력한 컴퓨터 AI를 상대하는 하드코어한 유즈맵이다. 맵 제목에서 알 수 있듯이 '7 vs 1 Hard Computer w/Heroes'라는 컨셉으로, 초반 빠른 기지 건설과 영웅 디펜스가 필수적인 구조로 설계되었다. 내부 맵 설명에 따르면 'Build D quick or u will probably die'라는 문구에서 볼 수 있듯이, 방어 타워를 빠르게 건설하지 않으면 초반 러시에서 무너지기 십상인 극한의 난이도를 자랑한다. 영웅 시스템이 추가되면서 개별 플레이어의 전략적 선택과 조합 능력이 중요해졌으며, 맵 중앙에 위치한 영웅 선택 창에서 다양한 영웅을 골라 사용할 수 있다. 고정된 5명의 영웅 외에도 추가로 영웅이 제공된다는 설명에서 영웅 간의 시너지와 조합 플레이가 핵심 전략 요소로 부각된다. 이러한 구조는 플레이어들에게 끊임없는 긴장감과 전략적 깊이를 요구하며, 컴퓨터 AI의 끊임없는 공격 패턴과 영웅의 스킬 활용을 통해 플레이어의 실력을 시험하는 데 중점을 두고 있다. 초보자보다는 어느 정도 스타크래프트 경험이 있는 플레이어들에게 추천되며, 특히 영웅 간의 조합과 빠른 판단력이 요구되는 맵으로, 한 판 한 판이 긴장감 넘치는 전투로 구성되어 있다. 맵의 디자인상으로는 사막 타일셋을 사용하여 건조한 환경이 연출되며, 방어 건물을 건설할 수 있는 공간과 초반 자원 확보가 가능한 위치가 strategic 하게 배치되어 있다. 이 맵을 플레이하기 위해서는 빠른 기지 건설과 영웅 관리, 그리고 컴퓨터의 다양한 공격 패턴에 대응할 수 있는 역량이 필요하다. 무엇보다도, 한 번 실수하면 게임이 급격히 불리해질 수 있는 구조이기 때문에, 신중한 플레이와 전략적 사고가 무엇보다 중요하다. This is a hardcore UMS defense map in StarCraft: Brood War where seven players control individual hero units against a powerful AI opponent. The map's title, '7 vs 1 Hard Computer w/Heroes,' immediately signals its punishing difficulty and unique hero-based gameplay. The internal description emphasizes the need for rapid base construction with the warning 'Build D quick or u will probably die,' highlighting the map's brutal early-game rush mechanics. The addition of a hero system allows players to select from various unique characters, each with distinct abilities, adding a layer of strategic depth. The map's notes mention at least five fixed heroes, with additional options provided by the 'agm_ultimatex' mod, encouraging players to experiment with synergies and team compositions. This setup demands constant vigilance, as the AI's relentless assaults test both individual skill and coordinated teamwork. The desert-themed tileset enhances the map's tense atmosphere, while the strategic placement of resource nodes and defensive structures ensures that every decision—from tower placement to hero selection—carries significant weight. While accessible to intermediate players familiar with StarCraft mechanics, the map's punishing difficulty and reliance on micro-management and quick decision-making make it unsuitable for beginners. Success hinges on adaptability, precise base building, and efficient hero utilization to counter the AI's evolving strategies.
7 vs 1 인세인 컴 (7 vs 1 insane comp)
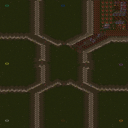
스타크래프트 브루드워의 디펜스 장르 유즈맵인 〈7 vs 1 insane comp〉는 7명의 플레이어가 한 팀으로 뭉쳐 단일 컴퓨터를 상대로 방어전을 펼치는 구조로, 난이도와 밸런스가 극한으로 조정된 플레이 경험을 제공한다. 맵은 사막 타일셋으로 구성되어 있으며, 중앙에 위치한 플레이어 기지 주변으로 다수의 적 기지가 배치되어 있다. 적군은 멀티컴퓨터 시스템으로 구동되어 플레이어의 공격 패턴에 따라 가변적으로 대응하며, 특정 지역 공격과 멀티 지역 확장을 통해 지속적인 압박을 가한다. 내부 맵 설명에서 언급된 100% 한글화 수정과 2003년 3월 28일 버전 정보는 구형 유즈맵의 특성을 엿보이게 하지만, 맵 자체는 현대에도 충분히 재밌는 플레이가 가능하다. 플레이어는 제한된 리소스와 자원 관리 속에서 방어선을 구축해야 하며, 적군의 다중 공격 루트를 예측하고 방어시설을 효율적으로 배치하는 전략이 요구된다. 맵의 핵심은 '필요 없는 모든 것을 제거'라는 컨셉에 맞게 불필요한 요소 없이 공격과 방어가 순수하게 맞물려 돌아가도록 설계되어 있다. 7 대 1이라는 비대칭적인 구도에서 오는 긴장감과, 적군이 끊임없이 전진하는 멀티컴퓨터의 공격 패턴은 초보자는 물론이고 숙련자들도 긴장감을 놓칠 수 없게 만든다. 특히 적군의 공격 루트가 랜덤하게 변동되는 듯한 움직임은 플레이어의 대처 능력을 끊임없이 시험한다. 이 맵은 디펜스 장르의 기본 틀을 유지하면서도, 극한의 난이도와 단순하면서도 깊은 전략적 요소를 결합해 유즈맵의 진수를 보여준다. 방어에 특화된 플레이어는 물론, 공격적인 플레이 스타일을 선호하는 유저들도 한 번쯤 도전해볼 만한 가치가 있는 작품이다. 다만, 맵의 난이도가 높아 초보자에게는 다소 버겁게 느껴질 수 있으며, 적군의 공격 패턴을 숙지하기까지 시간이 필요하다는 점을 감안해야 한다. 플레이 전에는 맵의 구조와 적군의 공격 루트를 미리 파악해 두는 것이 좋다. The Brood War Defense genre custom map *7 vs 1 Insane Comp* in StarCraft: Brood War pits seven players against a single AI opponent in a cooperative defense, offering an extreme challenge with meticulously balanced difficulty. The map features a desert tileset, with multiple enemy bases surrounding the players' central starting position. The enemy is controlled by a multi-computer system that dynamically adapts to the players' strategies, applying constant pressure through targeted attacks and aggressive multi-expansion. While the map’s internal description mentions a 100% Korean localization patch and a version from March 28, 2003—hinting at its vintage roots—it remains a thoroughly engaging experience even by modern standards. Players must construct defenses under tight resource constraints, predicting enemy attack routes and strategically placing defensive structures. The map’s core design strips away unnecessary elements, focusing purely on the interplay between offense and defense. The asymmetrical 7v1 setup creates intense pressure, while the AI’s relentless, forward-moving attack patterns keep both beginners and veterans on edge. The enemy’s seemingly randomized attack routes continuously test the players’ adaptability. This map exemplifies the essence of custom Defense maps by blending extreme difficulty with streamlined yet deep strategic gameplay. It’s a worthwhile challenge not only for defensive specialists but also for players who prefer aggressive playstyles. However, its high difficulty may overwhelm newcomers, and mastering the AI’s attack patterns requires time. Before jumping in, it’s best to study the map layout and familiarize yourself with the enemy’s attack routes.
7 vs 1 컴프 프롬 헬 (7 vs 1 Comp from Hell)
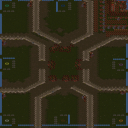
스타크래프트 브루드워의 치열한 디펜스 장르 유즈맵인 〈7 vs 1 Comp from Hell〉은 한 명의 플레이어가 7명의 컴퓨터 유닛을 상대로 끊임없이 밀려드는 공격을 방어해야 하는 극한의 전략 대결 맵이다. 맵은 넓은 사막 타일셋으로 구성되어 있으며, 중앙에는 방어의 핵심인 건물이 배치되어 있다. 플레이어는 제한된 자원으로 끊임없이 쏟아지는 적의 공격을 막아내야 하며, 특히 건물 주변을 에워싸고 있는 벽과 방어 건물들은 전략적으로 배치되어 있어 공략 난이도를 더욱 높인다. 내부 맵 설명에서도 강조하듯, 컴퓨터의 조합과 공격 패턴을 과소평가하면 안 되며, 자신의 능력도 과대평가해서는 안 된다는 경고가 인상적이다. 이 맵은 디펜스 장르의 정수를 느낄 수 있을 뿐 아니라, 방어 전략의 중요성과 자원 관리 능력을 극한까지 시험하는 경험을 제공한다. 초보자는 물론이고 숙련자도 쉽게 클리어하지 못할 정도의 도전적인 난이도가 특징이며, 특히 7명의 컴퓨터가 동시에 협공하는 상황에서는 순간적인 판단과 대처가 요구된다. 맵의 구조상 방어 건물과 자원 분배가 매우 중요하며, 플레이어는 끊임없이 몰려드는 적을 상대로 효율적인 자원 활용과 방어 라인 구축에 집중해야 한다. 이 맵을 플레이하기 전에는 컴퓨터의 공격 패턴과 방어 건물의 배치, 자원 확보 전략을 미리 숙지하는 것이 필수적이다. 또한, 한 번의 실수가 치명적인 결과를 초래할 수 있으므로 신중한 플레이가 요구된다. 이 맵은 디펜스 장르의 매력을 극대화한 작품으로, 스타크래프트의 전략성을 한층 더 깊게 느낄 수 있는佳作라 할 수 있다. This Brood War custom map, 〈7 vs 1 Comp from Hell〉, delivers a high-stakes defense experience where a single player must hold back waves from seven AI-controlled opponents on a sprawling desert-themed battlefield. The core structure centers on a critical base building surrounded by strategically placed walls and defensive structures, forcing the player to manage limited resources while fending off relentless assaults. The internal description’s warning—“Do not underestimate comp. Never overestimate your ability”—underscores the map’s punishing difficulty, where even seasoned players struggle against coordinated AI attacks. The challenge lies not only in surviving waves but also in mastering resource allocation and adapting to unpredictable enemy strategies. Each playthrough demands sharp decision-making, as a single misstep can cascade into defeat. With no room for error, this map epitomizes the tension and depth of defense UMS, appealing to players seeking a true test of skill and endurance in the Brood War universe. Its design rewards patience and precision, making it a standout title for those who crave strategic depth in custom maps.
최근 등록된 맵
새로 추가된 파일과 버전을 확인하세요.
뉴 임파스 시나리오 7 vs 1 (NEW imposs scenario 7 V 1)
스타크래프트: 브루드워의 유즈맵 ‘뉴 임파스 시나리오 7 vs 1(NEW imposs scenario 7 V 1)’은 ‘GET to the end Destroy all enemy!’라는 캐치프레이즈처럼 7명의 플레이어가 한 명의 적을 상대로 치열한 전투를 펼치는 극단적인 밸런스의 디펜스 맵입니다. 맵의 이름은 ‘상상도 불가능한 시나리오’라는 뜻의 ‘Impossible Scenario’를 연상케 하지만, 실상은 7:1이라는 극심한 수적 열세를 극복하기 위한 전략과 운이 요구되는 흥미로운 게임플레이가 특징입니다. 맵의 핵심은 좁고 긴 사막 타일셋으로 이루어진 지형으로, 중앙 통로와 양측의 기지 구조가 비교적 단순하면서도 적의 공격을 효과적으로 방어할 수 있는 요충지가 곳곳에 배치되어 있습니다. 플레이어들은 좁은 길목을 중심으로 방어선을 구축하거나, 소수 정예 병력으로 적의 본진을 급습하는 등 다양한 전술을 구사해야 합니다. 특히 7명이 동시에 협동하며 한 명의 적을 공격하고 방어해야 한다는 점에서 팀워크와 순발력이 요구되며, 적의 전략에 따라 게임의 양상이 급격히 바뀌는 재미가 있습니다. 맵의 난이도는 플레이어들의 손싸움과 맵 리딩 능력에 따라 크게 좌우되며, 초보자의 경우 방어에 치중하다가도 적의 기습 공격에 허무하게 무너질 수 있어 전략적 사고가 필수입니다. 반면 숙련된 플레이어들은 적의 움직임을 예상하고, 다수의 병력을 효율적으로 운용하여 승리를 차지할 수 있습니다. 이 맵은 주로 다인 멀티플레이 환경에서 즐기기 적합하며, 친구들끼리 또는 온라인 커뮤니티에서 경쟁적으로 플레이하는 경우가 많습니다. 맵의 구조상 사막 타일셋의 황량한 분위기와 긴장감이 어우러져 atmosferic한 전투를 즐길 수 있다는 점도 큰 매력입니다. 플레이 전에는 팀원 간의 호흡을 맞추는 연습을 하거나, 적의 공격 패턴을 미리 예상해보는 시간을 가져보는 것이 좋습니다. 또한, 좁은 길목에서 벌어지는 전투에서 생존력을 높이기 위해 방어 건물이나 유닛 조합을 신중히 선택해야 합니다. 이 맵은 7:1이라는 극단적 밸런스로 인해 기존 밀리 맵과는 완전히 다른 재미를 제공하며, 특히 ‘승리’를 목표로 한 전략적 플레이를 즐기는 유저들에게 강력히 추천합니다. NEW imposs scenario 7 V 1 is a unique StarCraft: Brood War custom map where seven players team up against a single opponent in an intense 7 vs 1 battle, as suggested by its tagline 'GET to the end Destroy all enemy!'. The map's name hints at its 'impossible scenario' nature, but the real challenge lies in overcoming severe numerical disadvantage through strategy and quick reflexes. Set in a desert tile-based terrain, the map features a narrow central corridor flanked by player bases, creating a battlefield where defense and offense must be carefully balanced. Players must either fortify choke points or launch swift attacks on the enemy's main base, depending on the evolving situation. The map demands strong teamwork and adaptability, as a single mistake can lead to a swift defeat. Beginners may struggle with coordination and defense tactics, while experienced players can exploit enemy patterns to secure victory. Designed for multiplayer environments, this map thrives in both casual and competitive settings, offering a fresh experience distinct from traditional melee maps. The desert atmosphere adds to the immersive and tense combat experience. Before playing, it's advisable to practice team strategies and anticipate enemy movements. Special attention should be given to unit compositions and defensive structures to maximize survival in tight corridors. This map stands out for its extreme balance and strategic depth, making it a must-try for players seeking a unique and challenging StarCraft experience.
7 vs 1 하드 컴퓨터 (영웅) (7 vs 1 Hard Computer w/Heroes)
스타크래프트 브루드워의 고난이도 컴까기 디펜스 맵으로, 7명의 플레이어가 단일 영웅 캐릭터로 강력한 컴퓨터 AI를 상대하는 하드코어한 유즈맵이다. 맵 제목에서 알 수 있듯이 '7 vs 1 Hard Computer w/Heroes'라는 컨셉으로, 초반 빠른 기지 건설과 영웅 디펜스가 필수적인 구조로 설계되었다. 내부 맵 설명에 따르면 'Build D quick or u will probably die'라는 문구에서 볼 수 있듯이, 방어 타워를 빠르게 건설하지 않으면 초반 러시에서 무너지기 십상인 극한의 난이도를 자랑한다. 영웅 시스템이 추가되면서 개별 플레이어의 전략적 선택과 조합 능력이 중요해졌으며, 맵 중앙에 위치한 영웅 선택 창에서 다양한 영웅을 골라 사용할 수 있다. 고정된 5명의 영웅 외에도 추가로 영웅이 제공된다는 설명에서 영웅 간의 시너지와 조합 플레이가 핵심 전략 요소로 부각된다. 이러한 구조는 플레이어들에게 끊임없는 긴장감과 전략적 깊이를 요구하며, 컴퓨터 AI의 끊임없는 공격 패턴과 영웅의 스킬 활용을 통해 플레이어의 실력을 시험하는 데 중점을 두고 있다. 초보자보다는 어느 정도 스타크래프트 경험이 있는 플레이어들에게 추천되며, 특히 영웅 간의 조합과 빠른 판단력이 요구되는 맵으로, 한 판 한 판이 긴장감 넘치는 전투로 구성되어 있다. 맵의 디자인상으로는 사막 타일셋을 사용하여 건조한 환경이 연출되며, 방어 건물을 건설할 수 있는 공간과 초반 자원 확보가 가능한 위치가 strategic 하게 배치되어 있다. 이 맵을 플레이하기 위해서는 빠른 기지 건설과 영웅 관리, 그리고 컴퓨터의 다양한 공격 패턴에 대응할 수 있는 역량이 필요하다. 무엇보다도, 한 번 실수하면 게임이 급격히 불리해질 수 있는 구조이기 때문에, 신중한 플레이와 전략적 사고가 무엇보다 중요하다. This is a hardcore UMS defense map in StarCraft: Brood War where seven players control individual hero units against a powerful AI opponent. The map's title, '7 vs 1 Hard Computer w/Heroes,' immediately signals its punishing difficulty and unique hero-based gameplay. The internal description emphasizes the need for rapid base construction with the warning 'Build D quick or u will probably die,' highlighting the map's brutal early-game rush mechanics. The addition of a hero system allows players to select from various unique characters, each with distinct abilities, adding a layer of strategic depth. The map's notes mention at least five fixed heroes, with additional options provided by the 'agm_ultimatex' mod, encouraging players to experiment with synergies and team compositions. This setup demands constant vigilance, as the AI's relentless assaults test both individual skill and coordinated teamwork. The desert-themed tileset enhances the map's tense atmosphere, while the strategic placement of resource nodes and defensive structures ensures that every decision—from tower placement to hero selection—carries significant weight. While accessible to intermediate players familiar with StarCraft mechanics, the map's punishing difficulty and reliance on micro-management and quick decision-making make it unsuitable for beginners. Success hinges on adaptability, precise base building, and efficient hero utilization to counter the AI's evolving strategies.
7인 대 프로토스 AI (7Human Vs 1Protoss AI)
스타크래프트: 브루드워의 흥미로운 유즈맵인 <7Human Vs 1Protoss AI>는 7명의 플레이어가 하나의 AI Protoss를 상대로 대결하는 독특한 구도를 자랑한다. 이 맵은 4명의 테란과 3명의 저그 플레이어가 연합하여 Protoss AI의 공격과 방어 능력을 시험하는 구조로, 협동의 중요성과 전략적 대결을 동시에 경험할 수 있도록 설계되었다. 맵 중앙에는 Protoss AI의 본진이 자리 잡고 있으며, 주변으로 7명의 인간 플레이어들이 각각의 진영을 구축할 수 있는 공간이 마련되어 있다. AI Protoss는 주기적으로 공격을 가하거나 방어 태세를 갖추며, 플레이어들은 이를 저지하거나 AI의 자원 및 건물을 파괴하는 데 집중해야 한다. 전체적으로 맵의 지형은 비교적 평지 위주지만, 곳곳에 언덕과 협곡이 배치되어 있어 시야 확보와 기지 방어에 strategic depth를 제공한다. 특히 AI Protoss의 공격 루트는 중앙 통로와 양측 언덕을 따라 나뉘어 있어, 플레이어들은 각자의 위치와 역할에 맞게 방어를 분담하거나 협력해야 한다. 맵의 규모는 4096x4096로 꽤 넓지만, AI Protoss의 공격 주기가 비교적 일정하여 플레이어들이 실시간으로 대응할 수 있는 시간적 여유가 존재한다. 또한, 테란과 저그의 조합을 고려한 플레이어들은 서로의 장점을 살려 AI Protoss의 방어선을 공략하거나, 반대로 AI의 공격으로부터 아군을 보호하는 임무를 수행하게 된다. 이 맵은 협동과 전략이 필수적인 만큼, 초보자보다는 중급 이상의 플레이어들에게 더 적합할 것으로 보인다. 특히 Protoss AI의 공격 패턴을 숙지하고, 테란과 저그의 유닛 조합을 최적화하는 능력이 요구된다. 또한, 7명의 플레이어 간 원활한 의사소통과 역할 분담이 없다면 AI Protoss를 이기기 어려운 구조이므로, 팀워크가 중요한 맵으로 평가할 수 있다. 마지막으로, AI Protoss의 난이도가 조절 가능한지 여부에 따라 플레이 경험이 크게 달라질 수 있으니, 사전 점검을 통해 적절한 난이도를 설정하는 것이 중요하다. 이 맵을 즐기기 위해서는 Protoss AI의 공격 루트를 미리 파악하고, 각 플레이어의 진영이 AI의 공격 경로에 노출되지 않도록 대비해야 한다. 또한, 테란과 저그의 유닛을 조합하여 AI Protoss의 방어선을 공략하는 전략을 세우는 것이 핵심이다. AI Protoss의 공격 타이밍을 예측하고, 각 플레이어가 맡은 역할을 충실히 수행한다면 흥미로운 대결을 즐길 수 있을 것이다. This interesting custom map in *StarCraft: Brood War*, *7 Humans vs 1 Protoss AI*, offers a unique setup where seven players team up against a single AI Protoss opponent. The map pits four Terran and three Zerg players against an AI Protoss, testing their combined offensive and defensive capabilities while emphasizing teamwork and strategic play. At the center sits the Protoss AI’s main base, surrounded by spaces for the seven human players to establish their own bases. The AI Protoss launches periodic attacks or shifts into defensive stances, forcing players to either fend off its assaults or focus on destroying its resources and structures. The terrain is mostly flat but features strategic hills and ravines that enhance visibility and base defense. The AI’s attack routes split along the central path and the flanking hills, requiring players to coordinate their defenses based on their positions and roles. While the map spans a large 4096x4096 area, the AI’s predictable attack cycles give players enough time to react in real time. Given the combination of Terran and Zerg units, players must leverage their strengths—either breaking through the AI’s defenses or shielding allies from its advances. Designed for teamwork and strategy, this map is better suited for intermediate to advanced players. Success hinges on understanding the Protoss AI’s attack patterns and optimizing unit compositions between Terran and Zerg. Without clear communication and role distribution among the seven players, defeating the AI becomes nearly impossible, making teamwork essential. Additionally, the overall experience can vary greatly depending on whether the AI Protoss’s difficulty can be adjusted, so checking and setting the appropriate level beforehand is crucial. To enjoy this map, players should first identify the Protoss AI’s attack routes and prepare defenses to prevent their bases from being exposed. Developing a strategy that combines Terran and Zerg units to dismantle the AI’s defenses is key. Predicting the AI’s attack timing and executing assigned roles diligently will turn the match into an engaging and rewarding challenge.
7 vs 1 인세인 컴 (7 vs 1 insane comp)
스타크래프트 브루드워의 디펜스 장르 유즈맵인 〈7 vs 1 insane comp〉는 7명의 플레이어가 한 팀으로 뭉쳐 단일 컴퓨터를 상대로 방어전을 펼치는 구조로, 난이도와 밸런스가 극한으로 조정된 플레이 경험을 제공한다. 맵은 사막 타일셋으로 구성되어 있으며, 중앙에 위치한 플레이어 기지 주변으로 다수의 적 기지가 배치되어 있다. 적군은 멀티컴퓨터 시스템으로 구동되어 플레이어의 공격 패턴에 따라 가변적으로 대응하며, 특정 지역 공격과 멀티 지역 확장을 통해 지속적인 압박을 가한다. 내부 맵 설명에서 언급된 100% 한글화 수정과 2003년 3월 28일 버전 정보는 구형 유즈맵의 특성을 엿보이게 하지만, 맵 자체는 현대에도 충분히 재밌는 플레이가 가능하다. 플레이어는 제한된 리소스와 자원 관리 속에서 방어선을 구축해야 하며, 적군의 다중 공격 루트를 예측하고 방어시설을 효율적으로 배치하는 전략이 요구된다. 맵의 핵심은 '필요 없는 모든 것을 제거'라는 컨셉에 맞게 불필요한 요소 없이 공격과 방어가 순수하게 맞물려 돌아가도록 설계되어 있다. 7 대 1이라는 비대칭적인 구도에서 오는 긴장감과, 적군이 끊임없이 전진하는 멀티컴퓨터의 공격 패턴은 초보자는 물론이고 숙련자들도 긴장감을 놓칠 수 없게 만든다. 특히 적군의 공격 루트가 랜덤하게 변동되는 듯한 움직임은 플레이어의 대처 능력을 끊임없이 시험한다. 이 맵은 디펜스 장르의 기본 틀을 유지하면서도, 극한의 난이도와 단순하면서도 깊은 전략적 요소를 결합해 유즈맵의 진수를 보여준다. 방어에 특화된 플레이어는 물론, 공격적인 플레이 스타일을 선호하는 유저들도 한 번쯤 도전해볼 만한 가치가 있는 작품이다. 다만, 맵의 난이도가 높아 초보자에게는 다소 버겁게 느껴질 수 있으며, 적군의 공격 패턴을 숙지하기까지 시간이 필요하다는 점을 감안해야 한다. 플레이 전에는 맵의 구조와 적군의 공격 루트를 미리 파악해 두는 것이 좋다. The Brood War Defense genre custom map *7 vs 1 Insane Comp* in StarCraft: Brood War pits seven players against a single AI opponent in a cooperative defense, offering an extreme challenge with meticulously balanced difficulty. The map features a desert tileset, with multiple enemy bases surrounding the players' central starting position. The enemy is controlled by a multi-computer system that dynamically adapts to the players' strategies, applying constant pressure through targeted attacks and aggressive multi-expansion. While the map’s internal description mentions a 100% Korean localization patch and a version from March 28, 2003—hinting at its vintage roots—it remains a thoroughly engaging experience even by modern standards. Players must construct defenses under tight resource constraints, predicting enemy attack routes and strategically placing defensive structures. The map’s core design strips away unnecessary elements, focusing purely on the interplay between offense and defense. The asymmetrical 7v1 setup creates intense pressure, while the AI’s relentless, forward-moving attack patterns keep both beginners and veterans on edge. The enemy’s seemingly randomized attack routes continuously test the players’ adaptability. This map exemplifies the essence of custom Defense maps by blending extreme difficulty with streamlined yet deep strategic gameplay. It’s a worthwhile challenge not only for defensive specialists but also for players who prefer aggressive playstyles. However, its high difficulty may overwhelm newcomers, and mastering the AI’s attack patterns requires time. Before jumping in, it’s best to study the map layout and familiarize yourself with the enemy’s attack routes.
7 vs 1 컴프 프롬 헬 (7 vs 1 Comp from Hell)
스타크래프트 브루드워의 치열한 디펜스 장르 유즈맵인 〈7 vs 1 Comp from Hell〉은 한 명의 플레이어가 7명의 컴퓨터 유닛을 상대로 끊임없이 밀려드는 공격을 방어해야 하는 극한의 전략 대결 맵이다. 맵은 넓은 사막 타일셋으로 구성되어 있으며, 중앙에는 방어의 핵심인 건물이 배치되어 있다. 플레이어는 제한된 자원으로 끊임없이 쏟아지는 적의 공격을 막아내야 하며, 특히 건물 주변을 에워싸고 있는 벽과 방어 건물들은 전략적으로 배치되어 있어 공략 난이도를 더욱 높인다. 내부 맵 설명에서도 강조하듯, 컴퓨터의 조합과 공격 패턴을 과소평가하면 안 되며, 자신의 능력도 과대평가해서는 안 된다는 경고가 인상적이다. 이 맵은 디펜스 장르의 정수를 느낄 수 있을 뿐 아니라, 방어 전략의 중요성과 자원 관리 능력을 극한까지 시험하는 경험을 제공한다. 초보자는 물론이고 숙련자도 쉽게 클리어하지 못할 정도의 도전적인 난이도가 특징이며, 특히 7명의 컴퓨터가 동시에 협공하는 상황에서는 순간적인 판단과 대처가 요구된다. 맵의 구조상 방어 건물과 자원 분배가 매우 중요하며, 플레이어는 끊임없이 몰려드는 적을 상대로 효율적인 자원 활용과 방어 라인 구축에 집중해야 한다. 이 맵을 플레이하기 전에는 컴퓨터의 공격 패턴과 방어 건물의 배치, 자원 확보 전략을 미리 숙지하는 것이 필수적이다. 또한, 한 번의 실수가 치명적인 결과를 초래할 수 있으므로 신중한 플레이가 요구된다. 이 맵은 디펜스 장르의 매력을 극대화한 작품으로, 스타크래프트의 전략성을 한층 더 깊게 느낄 수 있는佳作라 할 수 있다. This Brood War custom map, 〈7 vs 1 Comp from Hell〉, delivers a high-stakes defense experience where a single player must hold back waves from seven AI-controlled opponents on a sprawling desert-themed battlefield. The core structure centers on a critical base building surrounded by strategically placed walls and defensive structures, forcing the player to manage limited resources while fending off relentless assaults. The internal description’s warning—“Do not underestimate comp. Never overestimate your ability”—underscores the map’s punishing difficulty, where even seasoned players struggle against coordinated AI attacks. The challenge lies not only in surviving waves but also in mastering resource allocation and adapting to unpredictable enemy strategies. Each playthrough demands sharp decision-making, as a single misstep can cascade into defeat. With no room for error, this map epitomizes the tension and depth of defense UMS, appealing to players seeking a true test of skill and endurance in the Brood War universe. Its design rewards patience and precision, making it a standout title for those who crave strategic depth in custom maps.
맵 선택 가이드
태그는 맵의 핵심 특징을 빠르게 설명하지만 제작 버전마다 규칙이 다를 수 있습니다. 상세 설명에서 권장 인원, 난이도, 플레이 시간과 버전을 함께 확인한 뒤 다운로드하세요.