
6인 협동 스타크래프트 맵 모음
'6인 협동' 태그가 등록된 맵을 모았습니다. 장르 하나로 찾기 어려운 플레이 방식, 난이도와 특징을 중심으로 인기 맵과 최신 맵을 비교해 보세요.
- 등록 맵
- 3개
- 누적 다운로드
- 0
- 누적 조회
- 179
인기 맵
다운로드와 조회 반응이 높은 맵입니다.
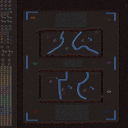
日디펜스 (Nichi Defence)
스타크래프트 브루드워의 유즈맵 ‘日defence’는 일본풍 배경의 디펜스 장르로, 6명의 플레이어가 협력하여 끊임없이 몰려드는 적을 상대로 넥서스를 방어하는 구조를 가지고 있다. 맵 중앙에는 플레이어 기지가 위치하며, 주위 8방향에서 적 유닛이 끊임없이 스폰되어 방어선을 형성해야 한다. 맵의 특징은 일본 전통 건축물을 연상시키는 붉은 기와 지붕과 푸른 벽돌 구조물이 주위에 배치되어 atmosferic한 일본 분위기를 자아낸다는 점이다. 특히, 맵 테두리에는 세로로 긴Japan의 한자 ‘日’가 거대하게 배치되어 있어 시각적 포인트가 되고 있다. 방어에 성공하면 맵 상단에 위치한 ‘DEFENCE SUCCESS’라는 메시지가 표시되며, 실패 시 ‘DEFENCE FAIL’이라는 메시지가 출력된다. 플레이어는 스타팅 위치에서 제공되는 기본 병력으로 시작하며, 맵 곳곳에 배치된 미네랄과 가스를 채취하여 유닛을 보충하거나 강화할 수 있다. 맵의 난이도는 적의 스폰 주기와 유닛 조합에 따라 변동되며, 초보자는 기본 병력만으로는 버티기 어려운 구조를 가지고 있어 전략적 판단이 요구된다. 추천되는 플레이 방식은 초기 방어선을 구축한 후, 자원 수급을 안정화하여 후반부 적의 대규모 공세를 효율적으로 방어하는 것이다. 이 맵은 일본 문화에 관심이 있는 유저뿐만 아니라, 디펜스 장르의 전략적 깊이를 즐기고자 하는 모든 플레이어에게 적합하다. 특히, 협력 플레이를 선호하는 그룹 활동에 최적화되어 있으며, 맵의 분위기와 시스템이 어우러져 몰입감을 높이는 데 초점을 맞추고 있다. StarCraft: Brood War's custom map '日Defence' is a defense genre set in a Japanese-themed background where six players must work together to defend their nexuses against endless waves of enemies. The map centers around the players' base, with enemies spawning continuously from all eight directions, requiring them to establish and maintain a defensive line. The map's visual design features red tiled roofs and blue brick structures reminiscent of traditional Japanese architecture, creating an atmospheric Japanese ambiance. A prominent feature is the large vertical kanji '日' (meaning 'sun' or 'day') from Japan, placed along the map's edges, serving as a striking visual focal point. Upon successfully defending, the message 'DEFENCE SUCCESS' appears at the top of the screen, while failure triggers 'DEFENCE FAIL.' Players begin with basic units at their starting positions and can gather minerals and gas scattered throughout the map to reinforce or upgrade their forces. The difficulty varies based on enemy spawn intervals and unit compositions, making it challenging for beginners who rely solely on starting units without strategic planning. Recommended strategies involve establishing an initial defense line early, stabilizing resource collection, and efficiently countering large enemy assaults in the late game. This map is ideal not only for players interested in Japanese culture but also for those who enjoy the strategic depth of defense genres. It is particularly well-suited for group activities that favor cooperative play, with its immersive atmosphere and well-integrated mechanics designed to enhance player engagement.
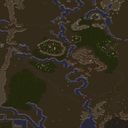
로드 오브 더 링즈: 미르크우드 침략 (Lord of the Rings: Bedim of Mirkwood)
《로드 오브 더 링즈: 미르크우드 침략 (Lord of the Rings: Bedim of Mirkwood)》는 스타크래프트 브루드워의 유즈맵으로, 반지의 제왕 세계관을 배경으로 한 컴까기 스타일의 디펜스 게임이다. 맵은 6인용으로 설계되었으며, 디자인된 시기는 제3시대 반지전쟁 직전으로 설정되어 있어 원작 팬들에게 친숙한 분위기를 제공한다. 맵의 전체 크기는 8192x8192로 넓은 영역을 활용한 구조가 특징이며, 사막 타일셋을 사용하여 건조한 Middle-earth의 분위기를 연출하고 있다. 플레이어는 각각의 진영을 맡아 미르크우드의 어둠이 퍼지는 것을 막기 위해 방어선을 구축하고, 끊임없이 몰려오는 적을 상대로 teritorial을 사수해야 한다. 맵의 진행은 크게 세 단계로 나뉘며, 각 단계마다 새로운 적 유닛과 방어 구조물이 등장하여 전략의 변화를 요구한다. 초반에는 약한 적들이 끊임없이 공격해오지만, 중반부로 접어들수록 강력한 유닛들이 등장해 방어의 난이도가 급격히 상승한다. 방어에 성공하면 새로운 방어 건물을 짓거나 업그레이드할 수 있는 자원을 획득할 수 있으며, 이를 통해 후반부의 강력한 적을 상대할 준비를 할 수 있다. 맵의 특징 중 하나는 맵의 중앙에 위치한 '미르크우드'라는 거대한 숲 지형으로, 이 지역을 중심으로 적의 공격 루트가 집중된다. 플레이어는 이 숲을 보호하면서도, 때로는 숲을 이용해 적의 움직임을 제한하는 전략을 구사할 수 있다. 또한, 맵 곳곳에 숨겨진 자원 지점이 존재해, 이를 확보하면 방어력을 강화하거나 새로운 유닛을 생산할 수 있는 등 다양한 선택지를 제공한다. 이 맵은 원작의 분위기를 잘 살린 그래픽과 함께, 디펜스 게임의 재미를 극대화하기 위해 철저한 밸런스 설계가 이루어졌으며, 특히 6인 동시 플레이가 가능한 구조로 팀워크와 전략적 의사결정이 중요한 요소로 작용한다. 초보 플레이어의 경우 초반 방어에 치중하다가 중반 이후부터는 자원의 확보와 업그레이드에 주력하는 것이 중요하며, 숙련된 플레이어는 방어 라인을 효율적으로 배치하고 자원의 흐름을 최적화하는 데 주력해야 한다. 맵을 플레이하기 전에는 자신의 진영이 맡은 방어 구역을 미리 확인하고, 맵의 주요 자원 지점을 파악하는 것이 좋다. 또한, 맵의 중앙 숲 지형을 어떻게 활용할 것인지에 대한 전략을 미리 세워두면 게임 진행이 훨씬 수월해질 것이다. 이 맵은 반지의 제왕 팬이 아니더라도 디펜스 게임과 전략 게임을 좋아하는 플레이어라면 충분히 즐길 수 있는 작품으로, 특히 팀플레이를 선호하는 유저들에게 추천할 만한佳作이다. 맵의 난이도는 대체로 '보통' 수준으로, 초보자가 처음 플레이하기에도 무리가 없으나, 후반부로 갈수록 전략의 깊이가 깊어지기 때문에 꾸준한 연습이 필요하다. 맵의 디자인과 분위기가 뛰어나며, 원작의 분위기를 잘 살린 점도 이 맵의 큰 장점 중 하나다. 만약 당신이 스타크래프트 유즈맵을 любите하고 디펜스 게임의 묘미를 즐기고 싶다면, 《로드 오브 더 링즈: 미르크우드 침략》을 반드시 한 번 시도해 보길 바란다. 이 맵은 단순한 디펜스가 아니라, 전략과 팀워크가 어우러진 진정한 협동의 묘미를 느낄 수 있는佳品이다. Lord of the Rings: Bedim of Mirkwood is a StarCraft: Brood War custom map that immerses players in a defense-style game within the iconic Lord of the Rings universe. Designed for 6 players, the map recreates the arid and mystical landscapes of Middle-earth using a desert tileset, set in the Third Age just before the Battle of the Five Armies. Players take on the role of guardians tasked with defending the borders of Mirkwood against relentless waves of enemies. The gameplay unfolds in distinct phases, with early waves featuring weaker units that escalate in difficulty as the game progresses. Players must strategically build and upgrade defensive structures, secure hidden resource points scattered across the map, and manage territorial control to maximize efficiency. A standout feature is the central Mirkwood forest, which not only serves as a focal point for enemy attacks but also as a strategic asset players can utilize to restrict enemy movements. The map emphasizes teamwork and tactical decision-making, as success hinges on balancing immediate defense with long-term resource management and upgrades. Beginners are advised to focus on early-game defense and resource gathering, while experienced players will find greater challenge in optimizing upgrade paths and streamlining defensive layouts. It’s crucial to familiarize yourself with the assigned defense zones and resource locations before starting. The map’s difficulty is rated as moderate, making it accessible to newcomers while offering depth for veterans seeking a strategic challenge. Its faithful adaptation of the Lord of the Rings aesthetic and immersive atmosphere make it a standout title, appealing not only to fans of the franchise but also to fans of defense and strategy games. Whether you're coordinating with teammates or refining your solo strategy, Bedim of Mirkwood delivers a rich, collaborative experience that rewards foresight and adaptability. For those who love StarCraft custom maps and the thrill of cooperative defense, this title is a must-play gem in the genre.
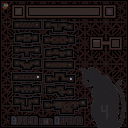
Bound and Defend 4
스타크래프트 브루드워의 디펜스 장르 유즈맵인 <Bound and Defend 4>는 6명의 플레이어가 한 팀으로 모여 적의 끊임없는 공격을 방어해내는 컴까기 유형의 맵이다. 정글 타일셋으로 구성된 넓은 맵 중앙에는 플레이어의 넥서스가 위치하며, 사방에서 몰려드는 저글링, 히드라, 울트라리스크 등 다양한 종족 유닛을 상대해야 한다. 맵 곳곳에 흩어져 있는 방어 건물이나 보너스 지역을 활용해 전략적으로 대처할 수 있도록 설계되어 있으며, 적의 공격을 막아내면서 동시에 자원을 모아 병력을 보강하는 균형 잡힌 플레이가 요구된다. 초반에는 상대적으로 약한 적이 등장하지만, 시간이 지날수록 점점 강력한 조합의 적군이 등장해 난이도가 높아진다. 플레이어는 맵의 구조를 잘 활용해 방어선을 구축하고, 자원과 병력을 효율적으로 관리해야 한다. 특히, 좁은 길목을 막아 적을 소모시키는 전술이 중요하며, 보너스 건물이나 아이템을 획득해 일시적인 우위를 점할 수도 있다. 맵의 테두리에는 여러 개의 입구가 존재해 적의 공격 루트가 다양하다는 점도 특징으로, 이를 고려한 대비를 해야 한다. 이 맵은 초보자부터 숙련자까지 모두 즐길 수 있도록 제작되었지만, 특히 디펜스와 컴까기 경험이 있는 플레이어에게 추천한다. 방어 건물의 배치와 병력 조합을 끊임없이 고민하게 만들며, 긴장감 넘치는 전투를 즐길 수 있다. 또한, 15레벨이라는 내구도가 설정되어 있어 초반에 실수하더라도 다시 도전해 볼 수 있는 구조로 되어 있다. 맵을 플레이하기 전에는 방어 건물의 위치와 적의 공격 패턴을 숙지하는 것이 중요하다. 초반 자원 확보와 방어선 구축에 실패하면 게임이 쉽게 무너질 수 있기 때문이다. 꾸준한 연습과 전략을 통해 점차 실력을 키워 나가도록 하자. Bound and Defend 4 is a defense-themed UMS custom map for StarCraft: Brood War where 6 players work together as a single team to defend against relentless enemy waves. Set in a jungle tile, the large central map features the players' nexus at its heart, surrounded by entry points where Zerg units like zerglings, hydralisks, and ultralisks continuously spawn. The map incorporates defensive structures and bonus areas to strategically counter incoming attacks while managing resources to reinforce forces. Early waves consist of weaker enemies, but the difficulty escalates as stronger enemy compositions appear over time. Players must establish effective defensive lines, utilize map structures to their advantage, and balance resource collection with unit production. Narrow pathways act as choke points to slow enemy advances, and temporary power-ups or item pickups can provide crucial advantages. Multiple entry points along the map edges ensure varied attack routes, requiring adaptive strategies. Designed for both beginners and experienced players, this map rewards tactical thinking and efficient resource management. While accessible to newcomers, those familiar with defense or tower-defense mechanics will find it particularly engaging. The map's 15-level durability system allows for learning from mistakes and retrying, though careful attention to initial resource gathering and defensive layouts is essential to avoid early-game collapse. Consistent practice and strategic refinement are key to mastering the challenges Bound and Defend 4 offers.
최근 등록된 맵
새로 추가된 파일과 버전을 확인하세요.
로드 오브 더 링즈: 미르크우드 침략 (Lord of the Rings: Bedim of Mirkwood)
《로드 오브 더 링즈: 미르크우드 침략 (Lord of the Rings: Bedim of Mirkwood)》는 스타크래프트 브루드워의 유즈맵으로, 반지의 제왕 세계관을 배경으로 한 컴까기 스타일의 디펜스 게임이다. 맵은 6인용으로 설계되었으며, 디자인된 시기는 제3시대 반지전쟁 직전으로 설정되어 있어 원작 팬들에게 친숙한 분위기를 제공한다. 맵의 전체 크기는 8192x8192로 넓은 영역을 활용한 구조가 특징이며, 사막 타일셋을 사용하여 건조한 Middle-earth의 분위기를 연출하고 있다. 플레이어는 각각의 진영을 맡아 미르크우드의 어둠이 퍼지는 것을 막기 위해 방어선을 구축하고, 끊임없이 몰려오는 적을 상대로 teritorial을 사수해야 한다. 맵의 진행은 크게 세 단계로 나뉘며, 각 단계마다 새로운 적 유닛과 방어 구조물이 등장하여 전략의 변화를 요구한다. 초반에는 약한 적들이 끊임없이 공격해오지만, 중반부로 접어들수록 강력한 유닛들이 등장해 방어의 난이도가 급격히 상승한다. 방어에 성공하면 새로운 방어 건물을 짓거나 업그레이드할 수 있는 자원을 획득할 수 있으며, 이를 통해 후반부의 강력한 적을 상대할 준비를 할 수 있다. 맵의 특징 중 하나는 맵의 중앙에 위치한 '미르크우드'라는 거대한 숲 지형으로, 이 지역을 중심으로 적의 공격 루트가 집중된다. 플레이어는 이 숲을 보호하면서도, 때로는 숲을 이용해 적의 움직임을 제한하는 전략을 구사할 수 있다. 또한, 맵 곳곳에 숨겨진 자원 지점이 존재해, 이를 확보하면 방어력을 강화하거나 새로운 유닛을 생산할 수 있는 등 다양한 선택지를 제공한다. 이 맵은 원작의 분위기를 잘 살린 그래픽과 함께, 디펜스 게임의 재미를 극대화하기 위해 철저한 밸런스 설계가 이루어졌으며, 특히 6인 동시 플레이가 가능한 구조로 팀워크와 전략적 의사결정이 중요한 요소로 작용한다. 초보 플레이어의 경우 초반 방어에 치중하다가 중반 이후부터는 자원의 확보와 업그레이드에 주력하는 것이 중요하며, 숙련된 플레이어는 방어 라인을 효율적으로 배치하고 자원의 흐름을 최적화하는 데 주력해야 한다. 맵을 플레이하기 전에는 자신의 진영이 맡은 방어 구역을 미리 확인하고, 맵의 주요 자원 지점을 파악하는 것이 좋다. 또한, 맵의 중앙 숲 지형을 어떻게 활용할 것인지에 대한 전략을 미리 세워두면 게임 진행이 훨씬 수월해질 것이다. 이 맵은 반지의 제왕 팬이 아니더라도 디펜스 게임과 전략 게임을 좋아하는 플레이어라면 충분히 즐길 수 있는 작품으로, 특히 팀플레이를 선호하는 유저들에게 추천할 만한佳作이다. 맵의 난이도는 대체로 '보통' 수준으로, 초보자가 처음 플레이하기에도 무리가 없으나, 후반부로 갈수록 전략의 깊이가 깊어지기 때문에 꾸준한 연습이 필요하다. 맵의 디자인과 분위기가 뛰어나며, 원작의 분위기를 잘 살린 점도 이 맵의 큰 장점 중 하나다. 만약 당신이 스타크래프트 유즈맵을 любите하고 디펜스 게임의 묘미를 즐기고 싶다면, 《로드 오브 더 링즈: 미르크우드 침략》을 반드시 한 번 시도해 보길 바란다. 이 맵은 단순한 디펜스가 아니라, 전략과 팀워크가 어우러진 진정한 협동의 묘미를 느낄 수 있는佳品이다. Lord of the Rings: Bedim of Mirkwood is a StarCraft: Brood War custom map that immerses players in a defense-style game within the iconic Lord of the Rings universe. Designed for 6 players, the map recreates the arid and mystical landscapes of Middle-earth using a desert tileset, set in the Third Age just before the Battle of the Five Armies. Players take on the role of guardians tasked with defending the borders of Mirkwood against relentless waves of enemies. The gameplay unfolds in distinct phases, with early waves featuring weaker units that escalate in difficulty as the game progresses. Players must strategically build and upgrade defensive structures, secure hidden resource points scattered across the map, and manage territorial control to maximize efficiency. A standout feature is the central Mirkwood forest, which not only serves as a focal point for enemy attacks but also as a strategic asset players can utilize to restrict enemy movements. The map emphasizes teamwork and tactical decision-making, as success hinges on balancing immediate defense with long-term resource management and upgrades. Beginners are advised to focus on early-game defense and resource gathering, while experienced players will find greater challenge in optimizing upgrade paths and streamlining defensive layouts. It’s crucial to familiarize yourself with the assigned defense zones and resource locations before starting. The map’s difficulty is rated as moderate, making it accessible to newcomers while offering depth for veterans seeking a strategic challenge. Its faithful adaptation of the Lord of the Rings aesthetic and immersive atmosphere make it a standout title, appealing not only to fans of the franchise but also to fans of defense and strategy games. Whether you're coordinating with teammates or refining your solo strategy, Bedim of Mirkwood delivers a rich, collaborative experience that rewards foresight and adaptability. For those who love StarCraft custom maps and the thrill of cooperative defense, this title is a must-play gem in the genre.
Bound and Defend 4
스타크래프트 브루드워의 디펜스 장르 유즈맵인 <Bound and Defend 4>는 6명의 플레이어가 한 팀으로 모여 적의 끊임없는 공격을 방어해내는 컴까기 유형의 맵이다. 정글 타일셋으로 구성된 넓은 맵 중앙에는 플레이어의 넥서스가 위치하며, 사방에서 몰려드는 저글링, 히드라, 울트라리스크 등 다양한 종족 유닛을 상대해야 한다. 맵 곳곳에 흩어져 있는 방어 건물이나 보너스 지역을 활용해 전략적으로 대처할 수 있도록 설계되어 있으며, 적의 공격을 막아내면서 동시에 자원을 모아 병력을 보강하는 균형 잡힌 플레이가 요구된다. 초반에는 상대적으로 약한 적이 등장하지만, 시간이 지날수록 점점 강력한 조합의 적군이 등장해 난이도가 높아진다. 플레이어는 맵의 구조를 잘 활용해 방어선을 구축하고, 자원과 병력을 효율적으로 관리해야 한다. 특히, 좁은 길목을 막아 적을 소모시키는 전술이 중요하며, 보너스 건물이나 아이템을 획득해 일시적인 우위를 점할 수도 있다. 맵의 테두리에는 여러 개의 입구가 존재해 적의 공격 루트가 다양하다는 점도 특징으로, 이를 고려한 대비를 해야 한다. 이 맵은 초보자부터 숙련자까지 모두 즐길 수 있도록 제작되었지만, 특히 디펜스와 컴까기 경험이 있는 플레이어에게 추천한다. 방어 건물의 배치와 병력 조합을 끊임없이 고민하게 만들며, 긴장감 넘치는 전투를 즐길 수 있다. 또한, 15레벨이라는 내구도가 설정되어 있어 초반에 실수하더라도 다시 도전해 볼 수 있는 구조로 되어 있다. 맵을 플레이하기 전에는 방어 건물의 위치와 적의 공격 패턴을 숙지하는 것이 중요하다. 초반 자원 확보와 방어선 구축에 실패하면 게임이 쉽게 무너질 수 있기 때문이다. 꾸준한 연습과 전략을 통해 점차 실력을 키워 나가도록 하자. Bound and Defend 4 is a defense-themed UMS custom map for StarCraft: Brood War where 6 players work together as a single team to defend against relentless enemy waves. Set in a jungle tile, the large central map features the players' nexus at its heart, surrounded by entry points where Zerg units like zerglings, hydralisks, and ultralisks continuously spawn. The map incorporates defensive structures and bonus areas to strategically counter incoming attacks while managing resources to reinforce forces. Early waves consist of weaker enemies, but the difficulty escalates as stronger enemy compositions appear over time. Players must establish effective defensive lines, utilize map structures to their advantage, and balance resource collection with unit production. Narrow pathways act as choke points to slow enemy advances, and temporary power-ups or item pickups can provide crucial advantages. Multiple entry points along the map edges ensure varied attack routes, requiring adaptive strategies. Designed for both beginners and experienced players, this map rewards tactical thinking and efficient resource management. While accessible to newcomers, those familiar with defense or tower-defense mechanics will find it particularly engaging. The map's 15-level durability system allows for learning from mistakes and retrying, though careful attention to initial resource gathering and defensive layouts is essential to avoid early-game collapse. Consistent practice and strategic refinement are key to mastering the challenges Bound and Defend 4 offers.
日디펜스 (Nichi Defence)
스타크래프트 브루드워의 유즈맵 ‘日defence’는 일본풍 배경의 디펜스 장르로, 6명의 플레이어가 협력하여 끊임없이 몰려드는 적을 상대로 넥서스를 방어하는 구조를 가지고 있다. 맵 중앙에는 플레이어 기지가 위치하며, 주위 8방향에서 적 유닛이 끊임없이 스폰되어 방어선을 형성해야 한다. 맵의 특징은 일본 전통 건축물을 연상시키는 붉은 기와 지붕과 푸른 벽돌 구조물이 주위에 배치되어 atmosferic한 일본 분위기를 자아낸다는 점이다. 특히, 맵 테두리에는 세로로 긴Japan의 한자 ‘日’가 거대하게 배치되어 있어 시각적 포인트가 되고 있다. 방어에 성공하면 맵 상단에 위치한 ‘DEFENCE SUCCESS’라는 메시지가 표시되며, 실패 시 ‘DEFENCE FAIL’이라는 메시지가 출력된다. 플레이어는 스타팅 위치에서 제공되는 기본 병력으로 시작하며, 맵 곳곳에 배치된 미네랄과 가스를 채취하여 유닛을 보충하거나 강화할 수 있다. 맵의 난이도는 적의 스폰 주기와 유닛 조합에 따라 변동되며, 초보자는 기본 병력만으로는 버티기 어려운 구조를 가지고 있어 전략적 판단이 요구된다. 추천되는 플레이 방식은 초기 방어선을 구축한 후, 자원 수급을 안정화하여 후반부 적의 대규모 공세를 효율적으로 방어하는 것이다. 이 맵은 일본 문화에 관심이 있는 유저뿐만 아니라, 디펜스 장르의 전략적 깊이를 즐기고자 하는 모든 플레이어에게 적합하다. 특히, 협력 플레이를 선호하는 그룹 활동에 최적화되어 있으며, 맵의 분위기와 시스템이 어우러져 몰입감을 높이는 데 초점을 맞추고 있다. StarCraft: Brood War's custom map '日Defence' is a defense genre set in a Japanese-themed background where six players must work together to defend their nexuses against endless waves of enemies. The map centers around the players' base, with enemies spawning continuously from all eight directions, requiring them to establish and maintain a defensive line. The map's visual design features red tiled roofs and blue brick structures reminiscent of traditional Japanese architecture, creating an atmospheric Japanese ambiance. A prominent feature is the large vertical kanji '日' (meaning 'sun' or 'day') from Japan, placed along the map's edges, serving as a striking visual focal point. Upon successfully defending, the message 'DEFENCE SUCCESS' appears at the top of the screen, while failure triggers 'DEFENCE FAIL.' Players begin with basic units at their starting positions and can gather minerals and gas scattered throughout the map to reinforce or upgrade their forces. The difficulty varies based on enemy spawn intervals and unit compositions, making it challenging for beginners who rely solely on starting units without strategic planning. Recommended strategies involve establishing an initial defense line early, stabilizing resource collection, and efficiently countering large enemy assaults in the late game. This map is ideal not only for players interested in Japanese culture but also for those who enjoy the strategic depth of defense genres. It is particularly well-suited for group activities that favor cooperative play, with its immersive atmosphere and well-integrated mechanics designed to enhance player engagement.
맵 선택 가이드
태그는 맵의 핵심 특징을 빠르게 설명하지만 제작 버전마다 규칙이 다를 수 있습니다. 상세 설명에서 권장 인원, 난이도, 플레이 시간과 버전을 함께 확인한 뒤 다운로드하세요.