
6인 멀티 스타크래프트 맵 모음
'6인 멀티' 태그가 등록된 맵을 모았습니다. 장르 하나로 찾기 어려운 플레이 방식, 난이도와 특징을 중심으로 인기 맵과 최신 맵을 비교해 보세요.
- 등록 맵
- 27개
- 누적 다운로드
- 0
- 누적 조회
- 737
인기 맵
다운로드와 조회 반응이 높은 맵입니다.
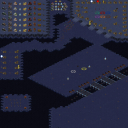
골라서 입구뚫기 (Choose Entrance Break)
‘골라서 입구뚫기’는 스타크래프트 브루드워 유즈맵 장르 중에서도 입구막기 형식의 디펜스 게임으로, 6명의 플레이어가 각자 선택한 종족으로 시작해 중앙에 위치한 ‘입구’를 방어하는 동시에 상대의 입구를 뚫고 파괴하는 동시에 진행되는 공격과 수비의 균형이 중요한 맵이다. 맵의 중앙에는 두 개의 입구가 있으며, 각각의 입구는 플레이어의 기지 입구 역할을 한다. 맵 구조는 대칭형으로 설계되어 있어 모든 플레이어가 동일한 조건에서 게임을 시작할 수 있으며, 입구 주변에는 방어 건물과 자원이 배치되어 있다. 플레이어는 초반에 자원을 확보해 방어 건물을 건설하거나, 상대를 공격해 자원을 빼앗거나 입구를 파괴하는 전략을 세워야 한다. 게임의 진행 방식은 선택한 종족에 따라 달라지는데, 테란의 경우 벙커와Siege Tank, 저그의 경우 성큰 콜로니와 러커, 프로토스의 경우 포톤 캐논과 리버가 주요 방어 수단이 된다. 공격 수단으로는 유닛 생산을 통한 진출이나 건물 파괴가 있으며, 맵 곳곳에 scattered하게 배치된 미네랄과 가스는 자원 확보 경쟁을 유도한다. 게임의 핵심은 입구를 방어하는 동시에 상대의 입구를 뚫는 균형 감각으로, 초반의 자원 관리와 유닛 생산 타이밍이 승패를 좌우할 가능성이 높다. 특히 입구 주변의 좁은 길목은 방어에 유리한 반면, 넓은 공간은 대규모 병력 진출에 용이하여 맵의 지형이 전략적 선택을 강제한다. 이 맵은 6인 멀티플레이를 기반으로 설계되었으므로, 팀 플레이보다는 각 플레이어의 개별 역량이 중요하며, 상대의 동선을 예측하고 입구를 방어하거나 공격하는 타이밍을 잘 잡아야 한다. 초보자도 쉽게 접근할 수 있는 구조이지만, 종족별 특성과 맵의 지형을 익히지 않으면 역전하기 어려운 Situational한 상황이 자주 발생할 수 있다. 따라서 이 맵을 처음 플레이하는 유저는 방어 건물의 위치와 유닛 생산 우선순위를 숙지한 뒤, 상대의 전략을 유추해가며 게임을 진행하는 것이 좋다. 입구막기 형식의 디펜스 게임을 선호하는 유저라면 단기전부터 장기전까지 다양한 전술적 선택이 가능한 재미있는 경험을 제공할 것이다. "Choose and Break In" is a defense game in the *StarCraft: Brood War* custom map genre where players must block entrances, featuring six players who start as their chosen race to defend their central "entrance" while simultaneously attacking and destroying opponents' entrances. The map has two central entrances, each serving as the base entrance for players, and is designed symmetrically so all players begin under equal conditions. Around the entrances are defensive structures and resources. Players must secure early resources to build defenses, steal resources from opponents, or destroy their entrances. Strategies vary by race: Terran rely on bunkers and Siege Tanks, Zerg on Sunken Colonies and Lurkers, and Protoss on Photon Cannons and Reavers for defense. Offensive options include unit production and building destruction, with scattered minerals and gas across the map fueling resource competition. The key to victory lies in balancing defense with offensive pressure—early resource management and unit production timing heavily influence outcomes. Narrow pathways near entrances favor defense, while open spaces allow for large-scale advances, forcing strategic terrain choices. Designed for six-player multiplayer, individual skill matters more than teamwork, requiring players to anticipate opponents' movements and time their defenses or attacks carefully. While the map is accessible to beginners, mastering race-specific traits and terrain is crucial, as situational advantages can make comebacks difficult. New players should familiarize themselves with defensive structure placements and unit priorities, adapting their strategies based on opponents' tactics. For fans of entrance-blocking defense games, this map offers an engaging experience with diverse tactical options from quick skirmishes to prolonged battles.
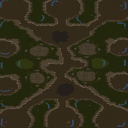
드래곤 루인스 (Dragon Ruins)
드래곤 루인스는 스타크래프트: 브루드워의 대규모 맵으로, 6인 멀티 플레이에 특화된 구도로 제작되었습니다. 건물이 거의 존재하지 않고 넓은 개활지가 펼쳐진 이 맵은, 유저들 간의 전투가 중심이 되는 밀리 스타일을 그대로 살리면서도 독특한 지형을 제공합니다. 맵 중앙에는 거대한 드래곤 형상의 지형물이 자리 잡고 있으며, 이 드래곤의 머리와 꼬리 부분은 각 플레이어의 시작 지점과 연결되는 주요 통로 역할을 합니다. 이러한 구조는 전투가 벌어질 수 있는 주요 핫스팟을 자연스럽게 형성하며, 초반부터 적극적인 러시나 방어전을 유도합니다. 맵의 특징은 무엇보다도 넓은 개활지와 제한된 건물 공간에 있습니다. 플레이어는 시작 지점에서 드래곤의 몸통을 따라 좁은 길목을 지나 중앙 광장으로 연결되며, 이곳에서 적과의 조우가 빈번하게 발생합니다. 또한 드래곤의 몸통 양옆에는 작은 언덕과 협곡이 있어, 시즈 탱크나 고스트의 락다운 같은 전략적 활용이 가능합니다. 맵의 전체적인 밸런스는 중앙 지역을 두고 벌어지는 전투가 승패를 좌우할 가능성이 높으며, 초반Resource gathering(미네랄 및 가스 수집)은 필수적이지만, 동시에 빠른 타이밍 러시가 가능한 구조로 설계되었습니다. 특히 스타팅 포인트 간의 거리가 비교적 가까워서, 초반부터 치열한 교전이 벌어질 수 있는 환경입니다. 이 맵은 멀티 플레이 중심의 밀리 경험을 원하는 유저들에게 적합합니다. 넓은 시야와 다양한 전술적 선택지가 제공되며, 특히 드래곤 형상의 지형을 활용한 플레이가Highlight(주목)할 만한 요소입니다. 초보자에게는 다소 어려운 구조일 수 있지만, 넓은 개활지에서 벌어지는 전투는 실력 향상에 도움이 될 것입니다. 또한, 팀플레이가 가능한 맵으로, 각 플레이어의 역할 분담과 협력이 중요해집니다. 맵을 플레이하기 전에는Resource gathering(자원 채집)과 초기 빌드 오더를 철저히 준비해, 빠른 타이밍 러시나 안정적인 테크 트리를 확보하는 것이 중요합니다. 드래곤 루인스는 넓은 시야와 개활지에서의 전투를 즐기는 유저들에게 강력히 추천할 만한 맵입니다. Dragon Ruins is a large-scale StarCraft: Brood War map designed specifically for 6-player multiplayer matches. The map features a minimalistic design with almost no buildings, emphasizing open terrain where player battles take center stage. Dominating the center is a massive dragon-shaped terrain formation, with the head and tail connecting to each player's starting locations. This unique structure naturally creates key hotspots for combat, encouraging early rushes or defensive strategies from the outset. The map's defining characteristics lie in its vast open spaces and limited building areas. Players must navigate narrow paths along the dragon's body to reach the central plaza, where frequent encounters with opponents occur. Additionally, the dragon's sides are dotted with small hills and ravines, allowing strategic use of siege tanks or ghost lockdown abilities. The overall balance of the map hinges on battles in the central region, making early resource gathering essential, though the map's design also accommodates fast-paced timing rushes. The starting points are relatively close to one another, ensuring intense early-game skirmishes. This map is ideal for players seeking a multiplayer-focused melee experience. It offers wide visibility and diverse tactical options, with the dragon-shaped terrain serving as a standout feature. While beginners might find the open layout challenging, the arena-style combat is excellent for skill development. The map also supports team play, where role distribution and coordination are crucial. Before playing, thorough preparation of resource gathering and early build orders is recommended to secure either a quick timing rush or a stable tech path. Dragon Ruins is highly recommended for players who enjoy open-field battles and wide visibility in their matches.
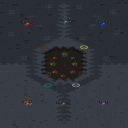
이볼브스 6웨이 v.2 (E V O L V E S 6 W A Y v.2)
스타크래프트: 브루드워의 유즈맵 ‘이볼브스 6웨이 v.2’는 3대3 팀전 구도로 펼쳐지는 흥미로운 디펜스 및 생존형 맵이다. 맵의 중심에는 커다란 큐브 형태의 섬이 있으며, 이 섬을 중심으로 여섯 방향의 길목이 뻗어 있어 각 팀이 중앙을 차지하기 위해 경쟁하는 구조다. 각 길목은 좁고 복잡한 지형을 이루고 있어 방어와 진격이 동시에 고려되어야 한다. 맵의 이름은 ‘E V O L V E S 6 W A Y’라는 제목에서 유추할 수 있듯이, 진화와 변화의 6방향 진행을 테마로 삼고 있는 듯하다. 플레이어는 각 팀의 일원으로서 중앙의 리소스를 확보하거나 상대방을 제압하면서 승리를 노리게 된다. 맵의 디자인상으로는 우주 테마가 적용되어 있으며, 타일셋과 배경이 어두운 톤으로 이루어져 우주 공간 feel을 강조하고 있다. 각 길목은 좁고 구불구불한 구조로 인해 전략적인 움직임이 요구되며, 중앙의 큐브는 여러 개의 소규모 건물을 배치할 수 있는 공간으로 보인다. 맵의 난이도는 팀 간의 균형과 플레이어의 숙련도에 따라 달라질 수 있으며, 초보 플레이어의 경우 중앙 점령과 방어에 어려움을 느낄 수 있다. 경험이 많은 유저라면 중앙의 리소스를 빠르게 확보하고, 상대방의 진격을 효율적으로 차단할 수 있는 전략을 세울 수 있을 것이다. 특히, 좁은 길목을 활용한 매복이나 sudden push는 이 맵의 주요 재미 요소로 작용한다. 추천 대상은 팀 플레이를 즐기는 유저나 디펜스 및 점령형 맵을 선호하는 플레이어들이다. 중앙의 리소스 관리와 길목 방어에 중점을 둔 플레이 스타일이 매력적으로 느껴질 것이다. 다만, 넓은 맵 크기 대비 좁은 길목으로 인해 팀 간의 소통과 협력이 매우 중요하다는 점을 염두에 두어야 한다. 플레이 전에는 각 길목의 지형과 중앙의 공간 활용 가능성을 미리 확인하는 것이 좋다. 또한, 팀원 간의 역할 분배(공격수, 방어수, 탐색자 등)를 명확히 하는 것이 승리에 도움이 될 것이다. 이 맵은 브루드워의 유즈맵 커뮤니티에서 상대적으로 마이너한 장르이지만, 전략성과 팀워크를 강조하는 맵으로 충분히 재밌게 즐길 수 있다. StarCraft: Brood War's custom map "Evolves 6 Way v.2" is a thrilling defense and survival-style team game set in a 3v3 format. At the center of the map lies a large cube-shaped island, with six narrow paths branching out in different directions, forcing teams to compete for control of the middle. The maze-like paths demand both defensive positioning and strategic advances. As the title "E V O L V E S 6 W A Y" suggests, the map revolves around themes of evolution and progression in six distinct directions. Players work as a team to secure central resources or eliminate opponents to secure victory. The map features a cosmic theme, with dark-toned tiles and backgrounds enhancing the sense of space. The winding, cramped paths require careful maneuvering, while the central cube offers space for multiple small structures. Difficulty varies depending on team balance and player skill—beginners may struggle with securing and defending the center, while experienced players can quickly claim resources and block enemy advances. Narrow paths make ambushes and sudden pushes key elements of fun, rewarding players who master the terrain. Ideal for team players or fans of defense and control maps, the map shines when focusing on resource management and path defense. However, the map's wide-open spaces paired with tight pathways make communication and coordination essential. Before playing, it's wise to scout the paths and central layout, and assigning clear roles (attacker, defender, scout, etc.) among teammates will greatly improve chances of winning. Though not a mainstream genre in Brood War’s custom map community, this map delivers strong strategy and teamwork, making it a fun and engaging experience.
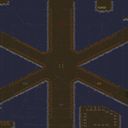
썬크랜드 식스웨이 (Sunkend Six Way)
스타크래프트 브루드워의 유즈맵 <썬크랜드 식스웨이>(SUNKEND6WAY)는 6명의 플레이어가 섬 형태의 지형에서 대결을 펼치는 디펜스 장르의 맵이다. 맵의 중앙에는 거대한 해저 지형과 육지가 혼재된 구조로, 각 플레이어는 자신의 섬에 건물을 건설하고 자원을 확보하며 방어선을 구축해야 한다. 섬과 육지 사이는 좁은 통로로 연결되어 있어 적의 침공을 막기 위한 전략적 요충지가 된다. 맵의 특징은 해저 지형이 시각적으로 두드러지며, 섬의 경계가 명확하게 나뉘어 있어 각자의 영역을 방어하는 재미가 있다. 또한, 맵의 중앙에는 붉은색으로 표시된 요충지가 있어 이 곳을 차지하기 위한 경쟁이 치열해질 수 있다. 전체적인 분위기는 사막 타일셋을 기반으로 한 어두운 톤의 해저 세계로, 플레이어는 자신의 영토를 지키며 자원을 모아 적을 압도하는 전략을 펼치게 된다. 이 맵은 6명의 플레이어가 각각 독립된 영토를 확보하고, 상대방의 영토를 공격하거나 방어하는 방식으로 진행되며, 자원 관리와 위치 선정이 핵심 포인트다. 초보자는 섬의 경계와 통로의 중요성을 파악하기 어려울 수 있어, 방어선을 구축하는 데 어려움을 느낄 수 있다. 반면, 경험이 있는 플레이어는 중앙 요충지를 선점하거나 통로를 차단하는 전략을 구사할 수 있어 전략적 깊이가 있는 맵으로 평가된다. 특히, 팀플레이가 필요한 경우 각자의 역할 분배가 중요해지며, 혼자서 모든 영토를 방어하기에는 무리가 따른다. 맵을 플레이하기 전에는 자신의 영토에 건물을 배치할 수 있는 공간과 자원 확보 경로를 미리 확인하는 것이 좋다. 또한, 통로와 요충지의 위치를 숙지하여 빠른 대처가 가능한지 점검해야 한다. 이 맵은 디펜스와 전략적 대결을 동시에 즐길 수 있는 요소로 구성되어 있어, 스타크래프트 유즈맵의 매력을 느낄 수 있는 작품 중 하나로 손꼽힌다. 적절한 난이도 조절이 가능한 맵이므로, 초보자와 숙련자 모두 즐길 수 있는 균형 잡힌 구성을 갖추고 있다. StarCraft: Brood War’s custom map <SUNKEND6WAY> is a defense genre map where six players battle on island terrain. The map features a central underwater landscape interspersed with land, where each player must construct buildings, secure resources, and build defenses on their respective islands. Narrow passages connect the islands and mainland, serving as strategic chokepoints to block enemy advances. The map’s standout feature is its visually prominent underwater terrain, with clearly defined island borders that enhance the enjoyment of defending one’s territory. At the center, a red-marked strategic point intensifies competition for control. The overall atmosphere is a dark, underwater world based on a desert tile set, where players must protect their territory, gather resources, and overwhelm opponents with strategy. The game unfolds as six players secure independent territories, attacking or defending against rivals, with resource management and positioning as key factors. Beginners may struggle to grasp the importance of island borders and passageways, making it difficult to establish defenses. Experienced players, however, can employ strategies like seizing the central point or blocking chokepoints, giving the map strategic depth. In team play, role distribution is crucial, as defending all territories alone is impractical. Before playing, it’s wise to confirm available building space and resource collection routes in your territory and familiarize yourself with chokepoint and strategic point locations for quick responses. Combining defense and strategic combat, this map showcases the charm of StarCraft custom maps and is praised as a well-balanced work suitable for both beginners and veterans, offering adjustable difficulty.
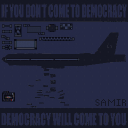
민주주의의 굴레 (Democracy Bound Ver. 1.0)
‘민주주의는 위험한 겁니다(DEMOCRACY IS DANGEROUS)’가 경고하듯, 이 스타크래프트 브루드워 유즈맵 ‘민주주의의 굴레(Democracy Bound Ver. 1.0)’는 플레이어가 민주주의의 이면—선거, 언론, 시민의 참여, 권력의 집중에 이르기까지—을 게임 속에서 직접 체험하고, 때로는 조종하며 진행하는 독특한 디자인으로 주목받는 맵이다. 맵은 중앙의 거대한 ‘민주주의’라는 글자를 상징하듯 거대한 광장으로 구성되어 있으며, 각 플레이어는 자신의 구역에서 시작해 시민을 모아 선거운동을 펼치거나 언론을 조작해 여론을 형성할 수 있는 시스템이 보인다. 맵 곳곳에 배치된 ‘언론사’, ‘정당’, ‘시민단체’ 건물은 각각의 역할이 있으며, 이를 통해 선거 결과와 시민의 지지를 좌우하는 전략적 요소가 강조된다. 특히 맵의 좌측 상단과 우측 하단에는 ‘선거 결과 발표’와 ‘시민 반응’이라는 알림 창이 보이며, 이는 실시간으로 플레이어의 선택이 어떻게 결과로 이어지는지를 보여주는 인터페이스로 추정된다. 맵의 분위기는 화산 타일셋을 활용해 다소 어두운 느낌을 주지만, 그 속에서 벌어지는 권력 게임은 흥미로움을 더한다. 이 맵은 단순히 미니어처 디펜스를 넘어서, 플레이어가 민주주의의 메커니즘을 ‘플레이’할 수 있도록 설계된 정치 시뮬레이션에 가깝다. 플레이어는 각자의 구역에서 시민을 생산하고, 이를 기반으로 선거운동을 펼치거나 언론을 통제해 여론을 조작하는 방식으로 승리를 노린다. 맵의 구조상으로는 중앙 광장이 주요 교전 지역으로 보이며, 각 플레이어는 자신의 영토를 확장하거나 타 플레이어의 선거운동을 방해하는 등 다양한 전략을 구사할 수 있다. 특히 시민의 수가 선거 결과에 직접적인 영향을 미치므로, 자원 관리와 시민 생산의 균형이 핵심 포인트로 보인다. 또한, 맵의 하단에 위치한 ‘시민 반응’ 창은 플레이어의 행동에 따라 실시간으로 변화하는 것으로 보이며, 이는 게임의 긴장감을 높이는 요소로 작용할 것이다. 이 맵은 정치에 관심이 있는 유저뿐만 아니라, 전략적 깊이가 있는 유즈맵을 찾는 플레이어에게 추천할 만하다. 특히 6인 멀티 플레이를 전제로 제작된 것으로 보이며, 각 플레이어의 역할과 전략이 결과에 직결되는 구조는 반복 플레이의 재미를 더할 것으로 예상된다. 플레이 전에는 시민 생산 속도, 선거 시스템, 언론 조작 가능 여부 등을 미리 확인해 전략을 세워야 한다. This StarCraft: Brood War custom map, Democracy Bound Ver. 1.0, offers a unique political simulation experience where players engage in a high-stakes game of democracy, media manipulation, and public opinion control. Set against the backdrop of a sprawling plaza symbolizing 'democracy,' the map places each player in a starting zone where they recruit citizens, campaign through 'media outlets' and 'political parties,' and strategically influence election outcomes. The volcanic tileset adds a dramatic, almost ominous atmosphere, contrasting with the intellectual challenge of navigating the map’s mechanics. The game transcends typical custom maps by immersing players in the mechanics of democracy itself. Each player must balance resource management, citizen production, and media control to sway election results, creating a dynamic environment where strategy and adaptability are key. Central to the experience is the plaza, which likely serves as a critical battleground for territorial control and election interference. The real-time 'citizen response' system, visible in the bottom section of the map, reacts to player actions, adding tension and urgency. Designed for six players, the map encourages diverse strategies, from aggressive expansion to subtle media manipulation. Players interested in deep strategy, political themes, or unique custom maps will find Democracy Bound both engaging and thought-provoking. Before diving in, it’s worth checking the citizen production rates, election mechanics, and media influence rules to tailor your approach effectively.
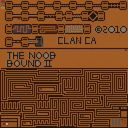
더 노브 바운드 2 베타 (The Noob Bound 2 beta)
스타크래프트 브루드워의 대표적인 UMS(유즈맵) 장르 중 하나로 손꼽히는 <b>The Noob Bound 2 beta</b>는 초보자부터 숙련자까지 폭넓은 플레이어층을 아우르는 디펜스형 맵이다. 맵의 전체적인 구조는 중앙에 위치한 넓은 전장과 그 주변을 둘러싼 방어 기지들로 구성되어 있으며, 적의Wave 시스템에 맞서 건물을 건설하고 유닛을 배치하는 방식으로 진행된다. 특히 중앙 전장은 각 플레이어의 본진과 직접 연결되어 있어 전략적 요충지로 작용하며, 방어선 구축과 자원 관리가 동시에 요구되는 점이 이 맵의 큰 특징이다. 전투는 주로 6명의 플레이어가 동시에 참여하는 방식으로 이루어지며, 각 플레이어는 자신의 본진에서 시작해 점차 확장해 나가며 적을 방어하거나 공격을 감행해야 한다. 맵의 디자인상으로는 황혼 타일셋을 사용하여 시각적 안정감을 제공하며, 넓은 공간 활용과 길찾기 알고리즘이 원활하게 동작할 수 있도록 배치되어 있다. 플레이어는 초반 자원 수급과 건물을 배치하는 타이밍을 어떻게 잡느냐에 따라 게임의 흐름이 크게 달라지기 때문에, 전략적 사고와 순간적인 판단력이 요구되는 맵으로 평가된다. 또한, 맵의 이름에서 유추할 수 있듯이 초보자를 배려한 디자인 요소도 포함되어 있어, 스타크래프트 초보자들도 쉽게 접근할 수 있도록 배려된 구조로 보인다. 진행 중에는 예상치 못한 웨이브나 적의 기습 공격이 빈번하게 발생할 수 있으므로, 항상 변수에 대응할 수 있는 유연성을 갖추는 것이 중요하다. 이 맵을 플레이하기 전에는 최소한의 빌드 오더와 유닛 조합에 대한 이해가 필요하며, 특히 방어 건물의 배치와 업그레이드 타이밍을 철저히 계획할 필요가 있다. 초보자의 경우 추천 빌드가 제공되는 맵이지만, 숙련자라면 보다 공격적인 전략으로 게임을 lead할 수도 있다. 6인 멀티플레이가 기본이므로 팀워크와 커뮤니케이션도 중요한 포인트로 작용할 것이다. 전체적으로는 디펜스와 전략의 조합을 즐기고자 하는 플레이어들에게 강력히 추천할 만한 맵이다. The Noob Bound 2 beta is a classic UMS (User-Made Scenario) map in StarCraft: Brood War, designed to cater to both beginners and experienced players alike. The map features a central battlefield surrounded by defensive bases, where players must construct buildings and deploy units to fend off waves of enemies. The central battlefield serves as a strategic hub, connecting each player's starting base and requiring simultaneous resource management and defense planning. The map supports six players competing simultaneously, with each starting in their own base and expanding outward while defending against enemy attacks. The design utilizes the Twilight tileset, offering visual cohesion and clarity, while the expansive layout ensures smooth pathfinding and strategic maneuvering. Success on this map hinges on timing—players must balance early resource gathering with optimal building placement to shape the game's trajectory. As suggested by its name, the map is beginner-friendly, incorporating intuitive mechanics that ease newcomers into the genre. However, the dynamic nature of enemy waves and surprise attacks demands adaptability and quick decision-making. Players are advised to familiarize themselves with basic build orders and unit compositions before diving in, with a particular focus on defensive structure placement and upgrade timing. While beginners may benefit from pre-recommended builds, experienced players can experiment with more aggressive strategies. Teamwork and communication are also critical, given the six-player multiplayer format. Overall, The Noob Bound 2 beta is a highly recommended choice for those seeking a blend of defense and strategy in a StarCraft: Brood War UMS map.
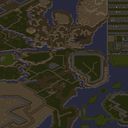
RP 나루토 질풍전: 죽음 (RP Naruto Shippuden Death)
RP 나루토 질풍전: 죽음(RP Naruto Shippuden Death)은 나루토 질풍전 세계관을 배경으로 한 스타크래프트 브루드워 유즈맵으로, 플레이어는 각자 나루토 세계의 캐릭터나 세력을 선택해 전투를 펼치며 스토리를 따라가는 진행형 디펜스 장르의 맵이다. 맵은 거대한 사막 지형을 기반으로 구축되어 있으며, 중앙의 넓은 평원과 주변의 협곡, 절벽 지형이 특징적으로 배치되어 있다. 전투는 주로 중앙 평원과 협곡 일원에서 벌어지며, 각 플레이어는 고유한 스킬과 전투력을 지닌 캐릭터로 전투를 치르게 된다. 맵의 구조상 멀티 지역은 협곡 쪽에 배치되어 있어, 중앙 평원에서 전투가 벌어지는 동안 후방에서 자원 채취와 테크트리를 올리는 플레이가 요구된다. 전투는 서바이벌과 디펜스 요소가 강하게 결합되어 있으며, 적의 공격을 방어하면서 동시에 상대방을 쓰러뜨려야 하는 방식으로 진행된다. 플레이어는 각자의 위치에서 시작하며, 맵 곳곳에 숨겨진 보너스 아이템이나 회복 지점이 있어 전략적 플레이가 가능하다. 특히, 협곡과 절벽 지형은 기습 공격이나 후방 침투에 유리한 지형으로 활용될 수 있어, 플레이어 간의 심리전이 중요하다. 맵의 디자인상으로는 전투가 치열해질수록 시야가 좁아지는 절벽이나 협곡이 주요 전투 공간으로 활용되며, 넓은 평원은 주로 대규모 전투가 벌어지는 장소로 사용된다. 이 맵의 가장 큰 특징은 나루토 세계관의 캐릭터와 스토리를 반영한 전투 시스템과 맵 디자인에 있다. 각 캐릭터의 특성에 맞는 스킬과 전투 스타일이 반영되어 있어, 플레이어는 자신의 캐릭터에 맞는 전략을 세워야 한다. 또한, 맵 곳곳에 숨겨진 이스터 에그나 스토리상의 중요 지점이 있어, 단순히 전투뿐만 아니라 스토리 진행을 즐기는 플레이어에게도 매력적인 요소로 작용한다. 다만, 맵의 복잡한 지형과 다양한 전투 방식은 초보자의 경우 진입 장벽이 높을 수 있어, 사전 캐릭터 분석이나 전략 연구가 필수적이다. 이 맵은 나루토 팬이라면もちろん, 디펜스와 서바이벌 장르를 좋아하는 스타크래프트 유즈맵 플레이어에게도 강력히 추천할 만한 작품이다. RP Naruto Shippuden: Death is a Brood War custom map set in the Naruto Shippuden universe where players choose characters or factions from the series to engage in combat while following an evolving story. The map is built around a vast desert terrain, featuring a central open plain surrounded by canyons and cliffside areas. Battles primarily take place on the central plain and within the canyons, with each player controlling a unique character boasting distinct skills and combat abilities. Due to the map's structure, multi-bases are positioned along the canyons, requiring players to gather resources and advance their tech trees from the rear while combat rages in the central area. The gameplay blends survival and defense mechanics, where players must defend their positions while simultaneously defeating opponents. Each player starts in their designated area, and hidden bonus items or recovery points scattered across the map allow for strategic depth. The canyons and cliffs are particularly advantageous for ambushes or flanking maneuvers, making psychological warfare between players a key factor. As combat intensifies, narrow canyons or cliffside areas become the primary battlefields, while the open plain serves as the main stage for large-scale confrontations. The map’s standout feature is its integration of Naruto’s characters and lore into both its combat system and design. Each character’s abilities and fighting style are tailored to reflect their in-universe traits, encouraging players to adopt strategies suited to their chosen fighter. Additionally, hidden Easter eggs and story-critical locations add layers of depth beyond mere combat, appealing to players who enjoy narrative progression. However, the map’s intricate terrain and varied combat mechanics may pose a steep learning curve for beginners, making prior character analysis and strategy research essential. Whether you're a Naruto fan or a Brood War custom map enthusiast who enjoys defense and survival genres, this is a highly recommended experience.
![게이트 오브 에인션트 5.0 [Fixed] (Gate of Ancient 5.0 [Fixed]) 맵 미리보기](https://cdn-star-data.huzy.net/thumbnail_21a97b98d3e14258941df21b2520d268.jpg)
게이트 오브 에인션트 5.0 [Fixed] (Gate of Ancient 5.0 [Fixed])
게이트 오브 에인션트 5.0[Fixed]는 스타크래프트 브루드워의 유즈맵으로, 고대 유적의 문을 배경으로 한 영웅 대 영웅 전투가 펼쳐지는 맵이다. 맵의 핵심은 중앙에 위치한 고대 오브젝트를 먼저 파괴하는 전략으로, 플레이어는 각자 마음에 드는 영웅을 선택해 적군 영웅을 제압하고 전술을 펼치며 승리를 쟁취해야 한다. 맵의 구조는 사막 테마의 넓은 필드와 구릉지형을 바탕으로 이루어져 있으며, 각 플레이어의 시작 지점은 맵의 외곽에 배치되어 있어 중앙으로의 진격이 필수적이다. 맵의 특징은 영웅의 선택과 전술적 움직임이 승패를 좌우한다는 점으로, 단순히 공격만 하는 것이 아니라 적군의 움직임을 예측하고 오브젝트 파괴를 위한 최적의 타이밍을 잡아야 한다. 또한, 맵 곳곳에는 다양한 지형적 장애물이 존재해 전략적인 우위를 점할 수 있는 요소가 많다. 이 맵은 6명의 플레이어가 참여할 수 있으며, 각 플레이어는 개별적으로 영웅을 조종해 팀의 승리를 이끌어야 한다. 맵의 난이도는 영웅의 선택과 팀워크에 따라 달라질 수 있어, 초보 플레이어는 기본 영웅으로 시작해 점차 전략을 익히기에 적합하고, 숙련자는 다양한 영웅의 조합과 전술을 시도해 볼 수 있다.Gate of Ancient 5.0[Fixed] is a custom Starcraft: Brood War map set in an ancient ruin-themed battlefield where players engage in hero-to-hero combat. The core objective is to destroy the ancient object located deep within the enemy's formation. Players choose their preferred hero and use various tactics to defeat enemy heroes while advancing toward their goal. The map features a desert terrain with wide-open fields and hilly areas, with starting positions positioned around the outer edges of the map, forcing players to move toward the center. The key to victory lies in strategic hero selection and movement, requiring players to anticipate enemy actions and time their offensive strikes on the object. Additionally, the map includes terrain obstacles that can be leveraged to gain a tactical advantage. Designed for six players, each controlling an individual hero, the difficulty varies based on hero choice and teamwork. Beginners can start with basic heroes to learn the mechanics, while experienced players can experiment with advanced combinations and strategies.
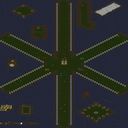
스타 포톤 디펜스 V 3.6 (Star Photon Defense V 3.6)
스타크래프트 브루드워의 대표적인 디펜스 장르 유즈맵인 〈스타 포톤 디펜스 V 3.6〉는 플레이어들이 포톤 캐논과 운석을 조합하여 끊임없이 몰려오는 적을 방어하는 전략적 재미를 제공합니다. 맵 중앙의 거대한 운석이 주기적으로 지상으로 떨어져 파괴되면서 발생하는 파편을 포톤 캐논으로 요격하는 방식인데, 운석이 떨어지는 위치는 랜덤으로 설정되어 있어 매 플레이마다 다른 전술을 요구합니다. 맵 구조는 대칭형으로 설계되어 모든 플레이어가 동일한 조건에서 시작할 수 있으며, 운석을 직접 파괴하거나 파편을 요격하는 두 가지 전략을 구사할 수 있습니다. 특히 적의 공격 패턴이 점점 강해지는 점진적인 난이도 시스템이 특징으로, 초반에는 소수의 소형 운석만 떨어지지만 후반부로 갈수록 대형 운석과 속도가 빠른 파편이 등장해 방어선을 유지하기가 increasingly 어려워집니다. 맵 상단과 하단에 위치한 자원 지대에서는 미네랄과 가스를 채취할 수 있지만, 자원 수집보다는 포톤 캐논의 배치와 운석 요격이 주된 플레이 포인트입니다. 맵의 중앙 통로와 측면 통로는 방어선을 구축하기에 적합한 위치로, 플레이어는 자신이 맡은 구역을 효율적으로 방비해야 합니다. 맵의 특징인 '플레이어 이탈 시 남은 자원 공유' 시스템은 팀플레이에서 특히 빛을 발하는데, 한 명이 게임을 포기하더라도 다른 플레이어들에게 자원이 돌아가면서 게임을 지속할 수 있도록 설계되어 있습니다. 또한 추가된 수송선 시스템을 활용하면 운석을 미리 파괴하거나 파편을 빠르게 처리할 수 있어 전략의 다양성을 높였습니다. 초보자는 운석이 떨어지는 타이밍을 익히는 데 집중하고, 숙련자는 자원 관리와 포톤 캐논의 최적 배치에 중점을 두며 플레이할 수 있습니다. 이 맵은 6인 멀티플레이를 기반으로 하며, 한 팀당 1~3명의 플레이어가 참여할 수 있어 팀원 간의 의사소통과 역할 분담이 중요합니다. 맵의 밸런스는 오랜 기간 개선되어 왔으며, 특히 V3.6 버전에서는 이전보다 더 안정적인 게임플레이를 제공하는 것으로 알려져 있습니다. 플레이 전에는 포톤 캐논의 사정거리와 운석의 파괴 패턴을 숙지하는 것이 중요하며, 자원 배분을 신중히 결정해야 합니다.总的来说,이 맵은 단순한 디펜스 게임을 넘어 전략적 사고와 팀워크를 동시에 요구하는 고차원적인 유즈맵으로, 스타크래프트의 디펜스 장르를 대표하는 작품 중 하나로 손꼽힙니다. 꾸준한 인기를 얻고 있는 만큼, 디펜스 장르에 익숙한 플레이어뿐만 아니라 새로운 유저들에게도 충분히 매력적인 경험을 제공할 것입니다. StarCraft: Brood War’s classic defense genre custom map, *Star Photon Defense V 3.6*, offers players strategic fun by combining photon cannons with falling meteors to fend off endless waves of enemies. The core mechanic involves intercepting debris created when massive meteors periodically crash down in random locations across the map, forcing different tactics with every playthrough. Designed symmetrically, the map ensures all players start on equal footing, and offers two main strategies—directly destroying meteors or intercepting their fragments. A standout feature is its progressive difficulty system, where early stages feature small, infrequent meteors but later escalate to large, fast-moving debris that strains defenses. While mineral and gas deposits at the top and bottom of the map allow resource gathering, the focus remains on cannon placement and meteor interception. Central corridors and side paths provide ideal spots for building defensive lines, and players must efficiently fortify their assigned zones. A unique "shared resources on player exit" system enhances team play, allowing the game to continue even if a teammate quits by redistributing their resources. The added transport ship system lets players preemptively destroy meteors or quickly clear fragments, adding depth to strategies. Beginners should focus on timing their reactions to meteor impacts, while veterans prioritize resource management and optimal cannon positioning. Designed for six-player multiplayer, teams can field one to three players each, making communication and role division essential. Balanced through years of refinement, version 3.6 delivers smoother gameplay than earlier iterations. Before playing, mastering the photon cannon’s range and meteor destruction patterns is key, along with careful resource allocation. Ultimately, this map transcends simple defense games, demanding strategic thinking and teamwork—making it a standout in StarCraft’s defense genre and an appealing experience for both seasoned players and newcomers alike.
에어 이볼브드 매스 어택 (AirEvolves-MassAttack v3.0)
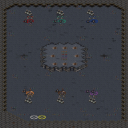
에어 이볼브드 매스 어택(AirEvolves-MassAttack v3.0)은 스타크래프트 브루드워의 유즈맵으로, 공중 유닛 중심의 전술을 활용하는 전략형 디펜스 장르에 속한다. 맵의 핵심은 '에어 이볼브'라는 2배 텔레포트 기능을 활용한 대규모 공중 공격과 방어 시스템에 있다. 플레이어는 초기 자원과 병력을 확보한 뒤, 공중 유닛을 집중 배치하여 적의 지상/공중 공격을 방어해야 한다. 맵 곳곳에 흩어져 있는 보급고나 자원 지대를 차지하여 자원을 확보하는 동시에, 공중 유닛의 업그레이드와 생산을 지속적으로 진행해야 한다. 특히 맵 중앙에 위치한 대규모 자원 지대는 필수적으로 확보해야 하며, 이곳을 방어하는 것이 게임의 승패를 좌우할 수 있다. 공중 유닛의 특성상 지상 유닛에 취약하므로, 방어 병력의 균형을 맞추는 것이 중요하다. 게임은 실시간으로 진행되며, 플레이어는 적의 공격을 저지하면서 동시에 반격을 감행해야 한다. 맵의 구조상 공중 유닛의 이동 경로가 제한적이므로, 이를 고려한 배치와 전략이 요구된다. 초보자는 공중 유닛의 기본적인 운용법과 방어 전술을 익히는 데 집중해야 하며, 숙련자는 자원 관리와 병력 조합을 최적화하여 더 높은 난이도에서도 안정적으로 승리할 수 있다. 맵의 특징인 2배 텔레포트 기능은 공중 유닛의 기동력을 극대화하므로, 이를 적극 활용한 전략 수립이 필수적이다. 또한, 맵 곳곳에 배치된 함정이나 보급고의 위치를 정확히 파악하여 자원과 병력을 효율적으로 배치해야 한다. 이 맵은 공중 유닛을 선호하는 플레이어에게 특히 추천되며, 전략적 사고와 빠른 판단력이 요구되는 플레이 스타일을 지향한다. 맵의 밸런스는 공중 유닛의 강세와 약점을 고려하여 설계되었으므로, 이를 충분히 숙지하고 플레이하는 것이 중요하다. 마지막으로, 맵의 난이도는 플레이어의 실력에 따라 크게 달라질 수 있으므로, 반복 플레이를 통해 전략을 다듬는 것이 좋다. AirEvolves-MassAttack v3.0 is a StarCraft: Brood War custom map that falls under the strategy defense genre, focusing on aerial unit tactics. The core mechanic revolves around the 'Air Evolves' feature, which enables 2x teleportation for large-scale aerial assaults and defensive operations. Players begin by securing initial resources and units, then strategically deploy air forces to fend off enemy ground and air attacks. The map features scattered resource depots and supply points, which must be captured to sustain unit production and upgrades. Central resource zones, particularly those in the mid-map, are critical and must be defended to avoid losing a decisive advantage. Air units, while powerful, are vulnerable to ground attacks, so balancing defensive units is essential. The game progresses in real-time, requiring players to both thwart enemy advances and launch counterattacks. The map's layout restricts air unit movement, demanding careful positioning and strategic foresight. Beginners should focus on mastering air unit control and basic defense tactics, while experienced players can optimize resource management and unit combinations for higher difficulty challenges. The 2x teleportation feature enhances air unit mobility, making it a key strategic element. Traps and supply points scattered across the map must be identified and utilized efficiently. This map is highly recommended for players who prefer air units, as it emphasizes strategic thinking and quick decision-making. The balance is designed with air unit strengths and weaknesses in mind, so understanding these dynamics is crucial. Due to varying difficulty, players are encouraged to refine their strategies through repeated gameplay.
Neo 커스텀 히어로 워즈 (Neo Custom Hero Wars)
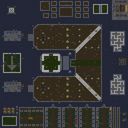
스타크래프트: 브루드워의 유즈맵 장르 중에서도 독특한 ‘커스텀 히어로’ 스타일을 도입한 ‘Neo Custom Hero Wars’는 플레이어가 직접 영웅을 육성하고 전투에 투입하는 전략형 디펜스 게임이다. 맵의 중앙에는 넓은 전투장이 펼쳐져 있으며, 그 주변으로 플레이어별 기지 구역이 배치되어 있다. 각 플레이어는 시작 시점에서 기본 영웅을 선택하거나 커스텀한 영웅을 사용할 수 있으며, 게임이 진행되면서 경험치와 자원을 획득해 영웅의 스킬과 장비를 강화할 수 있다. 전투는 실시간으로 벌어지며, 상대의 기지 건물을 파괴하거나 모든 적을 전멸시키는 것이 승리 조건으로 보인다. 맵의 구조는 비교적宽敞하여 시야 확보가 용이하고, 주요 전투 지역은 중앙의 넓은 평야로 집중되어 있어 다수의 유닛이 한꺼번에 전투를 벌일 수 있는 환경을 제공한다. 또한, 곳곳에 scattered resources가 배치되어 있어 자원 수집과 방어 시설 건설도 전략의 핵심 요소로 작용할 것으로 추정된다. 초보자도 쉽게 접근할 수 있는 간단한 조작 체계와 조합 가능한 스킬 시스템이 특징이며, 팀플레이 시에는 각 플레이어의 영웅이 보유한 특성에 따라 역할 분담을 자연스럽게 유도하는 구조로 구현되어 있다. 다만, 맵의 난이도와 밸런스는 제작자의 의도에 따라 크게 달라질 수 있으므로, 플레이 전 커스텀 옵션(영웅 선택, 스킬 밸런스, 자원 분배 등)을 꼼꼼히 확인하는 것이 중요하다. 또한, 맵 내부에 배치된 다양한 전투 지역과 장애물을 활용해 입체적인 전투를 펼칠 수 있도록 전략을 세우는 것이 승리의 열쇠가 될 것이다. 특히, 상대방의 기지 방어 시설을 무력화하기 위한 침투 루트나, 자원 확보를 위한 루트를 미리 계획해두면 게임의 흐름을 지배할 수 있을 것이다. Neo Custom Hero Wars stands out in the StarCraft: Brood War custom map genre with its unique 'Custom Hero' style, blending strategy and defense gameplay. The map features a central battlefield surrounded by player bases, where each player starts with a basic hero or a custom-built one. As the game progresses, players earn experience points and resources to upgrade their hero's skills and equipment. Battles unfold in real-time, with victory achievable by destroying the enemy's base structures or eliminating all opponents. The map's layout is spacious, offering clear sightlines and a vast central plain ideal for large-scale engagements. Scattered resources across the map encourage strategic resource collection and defensive structure placement. The simple control scheme and skill combination system make it accessible for beginners, while team play naturally encourages role division based on each hero's unique traits. However, difficulty and balance heavily depend on the creator's design choices, so players should carefully review custom options—such as hero selection, skill balance, and resource distribution—before starting. The map also features diverse combat zones and obstacles that enable dynamic, multi-layered battles. Planning invasion routes to disable enemy defenses or securing resource paths can give players a significant strategic advantage. Mastering these elements will be key to dominating the game’s flow and securing victory.
뉴! Evolves Madness 3 (Evolves Madness 3)
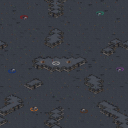
스타크래프트 브루드워의 유즈맵 ‘뉴! Evolves Madness 3’는 6인용 맵으로, 우주 테마의 넓은 맵 위에서 펼쳐지는 독특한 디펜스 및 서바이벌 장르의 유즈맵이다. 맵은 중앙에 거대한 우주 정거장과 같은 구조물이 자리 잡고 있으며, 이를 둘러싼 6개의 기지 구역이 각 플레이어에게 할당되어 있다. 각 구역은 고유한 방어 시설과 자원 포인트를 보유하고 있어, 단순한 디펜스뿐만 아니라 자원 관리와 전략적 확장이 동시에 요구된다. 맵 이미지에서는 각 플레이어의 기지 주변으로 다수의 유닛과 건물이 배치되어 있으며, 특히 중앙 구조물은 여러 플레이어의 공격과 방어가 집중되는 핵심 지역으로 추정된다. 플레이어는 맵 곳곳에 흩어진 자원을 수집하고, 방어선을 구축하며, 때로는 중앙을 공격하거나 방어하는 등 다층적인 전략을 펼치게 된다. 맵의 밸런스는 각 구역의 접근성과 자원 밀도에 따라 크게 좌우될 것으로 보이며, 초보 플레이어는 방어 위주의 플레이가 강제되지만 숙련자는 자원 확보와 공격 타이밍을 조절하며 승부를 결정짓게 된다. 맵의 진행은 일정 시간 동안 생존하거나 특정 목표를 달성하는 방식으로 추정되며, 중앙 구조물의 파괴 또는 모든 플레이어의 기지 파괴가 승리 조건으로 보인다. 이 맵은 넓은 맵과 다수의 플레이어 수 덕분에 긴장감 있는 대결을 즐길 수 있으며, 특히 우주 테마의 시각적 요소와 함께 전략적 깊이가 돋보이는 작품이다. 추천 대상은 스타크래프트 유즈맵을 즐기는 플레이어이며, 특히 디펜스와 서바이벌 장르에 관심이 있는 유저들에게 적합할 것으로 보인다. 플레이 전에는 각 구역의 지형과 자원 분포를 미리 확인하여, 방어 계획과 자원 수집 루트를 계획해두는 것이 중요하다. 또한 중앙 구조물의 역할과 접근성에 따라 전략의 변화가 크므로, 초반 развед와 정찰을 게을리하지 않도록 주의해야 한다. This StarCraft: Brood War custom map, 'NEW! Evolves Madness 3,' is a 6-player map featuring a unique defense and survival genre set in a vast space-themed landscape. The map centers around a massive structure resembling a space station, surrounded by six distinct player starting zones. Each zone includes unique defensive facilities and resource points, requiring players to balance resource management with strategic expansion. The map image shows numerous units and buildings around each player's base, with the central structure likely serving as a high-priority target for both attack and defense. Players must gather scattered resources, build defenses, and time their attacks on the center or opponents' bases to gain an advantage. The balance of the map depends heavily on each zone's accessibility and resource density, with beginners forced into defensive play while advanced players can control resource gathering and attack timing. The gameplay likely involves surviving for a set duration or achieving specific objectives, such as destroying the central structure or eliminating all opponents' bases. With its expansive layout and multiple players, the map delivers intense battles and deep strategic gameplay, enhanced by its space theme and visual elements. This map is recommended for StarCraft custom map enthusiasts, particularly those interested in defense and survival genres. Before playing, it’s crucial to study each zone’s terrain and resource distribution to plan defenses and gathering routes. Players should also pay close attention to the central structure’s role and accessibility, as it significantly influences overall strategy and requires early scouting to avoid setbacks.
최근 등록된 맵
새로 추가된 파일과 버전을 확인하세요.
게이트 오브 에인션트 5.0 [Fixed] (Gate of Ancient 5.0 [Fixed])
게이트 오브 에인션트 5.0[Fixed]는 스타크래프트 브루드워의 유즈맵으로, 고대 유적의 문을 배경으로 한 영웅 대 영웅 전투가 펼쳐지는 맵이다. 맵의 핵심은 중앙에 위치한 고대 오브젝트를 먼저 파괴하는 전략으로, 플레이어는 각자 마음에 드는 영웅을 선택해 적군 영웅을 제압하고 전술을 펼치며 승리를 쟁취해야 한다. 맵의 구조는 사막 테마의 넓은 필드와 구릉지형을 바탕으로 이루어져 있으며, 각 플레이어의 시작 지점은 맵의 외곽에 배치되어 있어 중앙으로의 진격이 필수적이다. 맵의 특징은 영웅의 선택과 전술적 움직임이 승패를 좌우한다는 점으로, 단순히 공격만 하는 것이 아니라 적군의 움직임을 예측하고 오브젝트 파괴를 위한 최적의 타이밍을 잡아야 한다. 또한, 맵 곳곳에는 다양한 지형적 장애물이 존재해 전략적인 우위를 점할 수 있는 요소가 많다. 이 맵은 6명의 플레이어가 참여할 수 있으며, 각 플레이어는 개별적으로 영웅을 조종해 팀의 승리를 이끌어야 한다. 맵의 난이도는 영웅의 선택과 팀워크에 따라 달라질 수 있어, 초보 플레이어는 기본 영웅으로 시작해 점차 전략을 익히기에 적합하고, 숙련자는 다양한 영웅의 조합과 전술을 시도해 볼 수 있다.Gate of Ancient 5.0[Fixed] is a custom Starcraft: Brood War map set in an ancient ruin-themed battlefield where players engage in hero-to-hero combat. The core objective is to destroy the ancient object located deep within the enemy's formation. Players choose their preferred hero and use various tactics to defeat enemy heroes while advancing toward their goal. The map features a desert terrain with wide-open fields and hilly areas, with starting positions positioned around the outer edges of the map, forcing players to move toward the center. The key to victory lies in strategic hero selection and movement, requiring players to anticipate enemy actions and time their offensive strikes on the object. Additionally, the map includes terrain obstacles that can be leveraged to gain a tactical advantage. Designed for six players, each controlling an individual hero, the difficulty varies based on hero choice and teamwork. Beginners can start with basic heroes to learn the mechanics, while experienced players can experiment with advanced combinations and strategies.
가족놀이 나라짓고 놀기 (Family Game: Build Your Country)
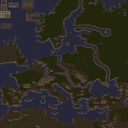
스타크래프트 브루드워의 유즈맵 『가족놀이』나라_짓고 놀기 는 6인용으로 설계된 전략형 디펜스 맵으로, 플레이어는 각자 맵의 일정 구역을 차지하고 자원을 모아 건물을 건설하는 동시에 외부에서 끊임없이 몰려오는 적을 방어해야 한다. 맵 중앙의 넓은 평야와 구불구불한 언덕 지형이 특징으로, 각 플레이어의 시작 구역은 비교적 평탄한 지대와 좁은 통로로 연결되어 있어 초반 방어와 자원 확보가 관건이다. 맵의 구석구석에 배치된 반경 지대와 협소한 길목은 적의 진격을 지연시키는 주요 지점으로, 이를 활용한 방어 전략이 승패를 좌우할 수 있다. 건물 건설은 기본적인 자원 채집과 더불어 방어 시설 및 생산 건물을 조합하여 적의 끊임없는 공세를 버텨내야 하며, 특히Resource의 균형 있는 활용과 건물을 배치하는 위치가 중요하다. 맵 곳곳에 흩어져 있는 미네랄과 가스 채취 지대는 한정된 자원으로 경쟁을 유발하며, 이는 자연스럽게 플레이어 간 협력 또는 대립을 이끌어낸다. 또한, 맵의 지형적 특징상 일부 구역은 방어하기 쉽지만 다른 구역은 상대적으로 취약한데, 이를 노린 전략적 플레이가 요구된다. 이 맵은 단순히 방어에만 그치지 않고, 각 플레이어의 건물 구축과 자원 관리가 승리 조건에 직결되므로 경제적 판단력과 공간 활용 능력이 필수적이다. 6인까지 동시에 플레이할 수 있어 팀 플레이와 개인 플레이 모두 가능하며, 특히 초보자와 숙련자 모두 즐길 수 있도록 설계된 것으로 보인다. 하지만 맵의 복잡한 지형과 상대의 전략적 대응을 고려할 때, 난이도는 초보자에게 다소 어려운 편에 속할 수 있다. 플레이 전에는 반드시 맵의 주요 자원 지대와 방어 거점을 사전에 파악하고, 빠른 건물 건설과 효율적인 자원 관리를 연습할 필요가 있다. 이 맵을 즐기기 위해서는 게임 시작 전 커스텀 게임 설정에서 맵을 선택하고, 플레이어 수를 6명으로 맞춰야 하며, 맵의 특성에 맞는 빌드 오더와 전략을 미리 준비하는 것이 중요하다. 또한, 적의 공격을 효과적으로 방어하기 위해 방어 건물의 종류와 배치 위치를 신중히 결정해야 한다. 맵의 난이도와 전략적 깊이를 고려할 때, 혼자서 모든 적을 상대하기보다는 팀원과의 협력이 승리를 좌우할 가능성이 높다. This StarCraft: Brood War custom map, Family Game: Build Your Country, is a 6-player strategy defense map where each player must gather resources, construct buildings, and defend against waves of enemies while expanding their territory. The map features a mix of flat plains and winding hill terrain, with each player’s starting zone connected by narrow paths and chokepoints that are critical for early defense and resource control. Central to the gameplay is the balance between resource management and defensive positioning. Scattered mineral and gas deposits create competition for resources, while the map’s terrain offers both strategic high ground and vulnerable low points. Players must carefully decide where to place their buildings and defenses to maximize efficiency and survivability against relentless enemy assaults. The map encourages both cooperative and competitive play, as players can either work together to fend off waves or compete for limited space and resources. While accessible to newcomers, the complexity of terrain and enemy strategies may pose a challenge for casual players. Before starting, it’s essential to scout key resource areas and defensive chokepoints, and to prepare a solid build order to ensure quick expansion and defense. To play, set up a custom game with 6 players and select this map. Success depends on efficient resource gathering, strategic building placement, and teamwork—especially when facing coordinated enemy waves. Mastering the terrain and adapting to enemy tactics will be crucial for victory.
더 노브 바운드 2 베타 (The Noob Bound 2 beta)
스타크래프트 브루드워의 대표적인 UMS(유즈맵) 장르 중 하나로 손꼽히는 <b>The Noob Bound 2 beta</b>는 초보자부터 숙련자까지 폭넓은 플레이어층을 아우르는 디펜스형 맵이다. 맵의 전체적인 구조는 중앙에 위치한 넓은 전장과 그 주변을 둘러싼 방어 기지들로 구성되어 있으며, 적의Wave 시스템에 맞서 건물을 건설하고 유닛을 배치하는 방식으로 진행된다. 특히 중앙 전장은 각 플레이어의 본진과 직접 연결되어 있어 전략적 요충지로 작용하며, 방어선 구축과 자원 관리가 동시에 요구되는 점이 이 맵의 큰 특징이다. 전투는 주로 6명의 플레이어가 동시에 참여하는 방식으로 이루어지며, 각 플레이어는 자신의 본진에서 시작해 점차 확장해 나가며 적을 방어하거나 공격을 감행해야 한다. 맵의 디자인상으로는 황혼 타일셋을 사용하여 시각적 안정감을 제공하며, 넓은 공간 활용과 길찾기 알고리즘이 원활하게 동작할 수 있도록 배치되어 있다. 플레이어는 초반 자원 수급과 건물을 배치하는 타이밍을 어떻게 잡느냐에 따라 게임의 흐름이 크게 달라지기 때문에, 전략적 사고와 순간적인 판단력이 요구되는 맵으로 평가된다. 또한, 맵의 이름에서 유추할 수 있듯이 초보자를 배려한 디자인 요소도 포함되어 있어, 스타크래프트 초보자들도 쉽게 접근할 수 있도록 배려된 구조로 보인다. 진행 중에는 예상치 못한 웨이브나 적의 기습 공격이 빈번하게 발생할 수 있으므로, 항상 변수에 대응할 수 있는 유연성을 갖추는 것이 중요하다. 이 맵을 플레이하기 전에는 최소한의 빌드 오더와 유닛 조합에 대한 이해가 필요하며, 특히 방어 건물의 배치와 업그레이드 타이밍을 철저히 계획할 필요가 있다. 초보자의 경우 추천 빌드가 제공되는 맵이지만, 숙련자라면 보다 공격적인 전략으로 게임을 lead할 수도 있다. 6인 멀티플레이가 기본이므로 팀워크와 커뮤니케이션도 중요한 포인트로 작용할 것이다. 전체적으로는 디펜스와 전략의 조합을 즐기고자 하는 플레이어들에게 강력히 추천할 만한 맵이다. The Noob Bound 2 beta is a classic UMS (User-Made Scenario) map in StarCraft: Brood War, designed to cater to both beginners and experienced players alike. The map features a central battlefield surrounded by defensive bases, where players must construct buildings and deploy units to fend off waves of enemies. The central battlefield serves as a strategic hub, connecting each player's starting base and requiring simultaneous resource management and defense planning. The map supports six players competing simultaneously, with each starting in their own base and expanding outward while defending against enemy attacks. The design utilizes the Twilight tileset, offering visual cohesion and clarity, while the expansive layout ensures smooth pathfinding and strategic maneuvering. Success on this map hinges on timing—players must balance early resource gathering with optimal building placement to shape the game's trajectory. As suggested by its name, the map is beginner-friendly, incorporating intuitive mechanics that ease newcomers into the genre. However, the dynamic nature of enemy waves and surprise attacks demands adaptability and quick decision-making. Players are advised to familiarize themselves with basic build orders and unit compositions before diving in, with a particular focus on defensive structure placement and upgrade timing. While beginners may benefit from pre-recommended builds, experienced players can experiment with more aggressive strategies. Teamwork and communication are also critical, given the six-player multiplayer format. Overall, The Noob Bound 2 beta is a highly recommended choice for those seeking a blend of defense and strategy in a StarCraft: Brood War UMS map.
![썬컨 6웨이 8.0 [시크릿] (Sunken 6 Way 8.0 [Secret]) 맵 미리보기](https://cdn-star-data.huzy.net/thumbnail_0bd2f0baaf924dff977a861795304993.jpg)
썬컨 6웨이 8.0 [시크릿] (Sunken 6 Way 8.0 [Secret])
‘썬컨 6웨이 8.0[Secret]’은 스타크래프트 브루드워 유즈맵의 한 종류로, 여섯 명의 플레이어가 경쟁하는 디펜스 기반의 맵이다. 맵의 특징은 이름에서부터 드러나듯 여섯 갈래 길이 해저 지형을 타고 흐르며, 각 플레이어는 자신의 기지에서 시작해 끊임없이 밀려드는 적들을 방어해야 한다. 맵의 전체적인 분위기는 어두운 해저 지형과 붉은, 푸른 빛을 내는 오브젝트로 구성되어 있어 분위기 있는 전투를 연출한다. 플레이어는 시작 지점에서 가까운 해저 동굴과 지상 기지를 오가며, 적의 공격을 차단하고 자원을 확보하는 동시에 아군을 지원하는 전략을 세워야 한다. 맵의 구조상 각 플레이어의 거리는 멀지 않지만, 여섯 갈래 길로 인해 전략적으로는 서로의 위치를 파악하기 어려워져 예측하지 못한 전투가 자주 발생한다. 또한, 맵의 해상도와 타일셋을 고려했을 때, 시야 확보와 기지 방어에 신경을 써야 하며, особенно 맵의 중앙 지형이 복잡하여 시야 싸움에서 우위를 점하는 것이 중요해 보인다. 이 맵은 초보보다는 적어도 기본적인 스타크래프트의 유즈맵을 몇 번 플레이해 본 유저들에게 적합하며, 팀플레이보다는 1:1:1:1:1:1의 개인전 혹은 2:2:2 팀전으로 플레이하는 경우가 많다. 맵의 승리 조건은 아직 명확히 확인되지 않았지만, 일반적으로는 마지막까지 살아남거나 특정 목표를 완수하는 방식으로 진행되는 경우가 많다. 플레이 전에는 맵의 오브젝트와 구조, 그리고 각 갈래 길의 지형 특성을 숙지하는 것이 필수다. 맵의 난이도는 맵의 버전과 사용자 커스텀에 따라 다르겠지만, ‘8.0’이라는 버전명을 고려했을 때 비교적 정교한 밸런스가 잡혀 있는 것으로 추정된다. 이 맵을 즐기기 위해서는 스타크래프트의 기본적인 조작과 유즈맵의 특성을 이해하고 있어야 하며, 특히 방어와 자원 관리에 대한 전략적 사고가 요구된다. 맵의 복잡한 구조는 플레이어의 집중력을Test 테스트로 높이는 동시에, 예측하지 못한 상황에서의 빠른 대처 능력을 키워줄 수 있는 장점이 있다. ‘Sunken 6-Way 8.0 [Secret]’ is a custom *StarCraft: Brood War* defense-based map where six players compete against waves of enemies. As the name suggests, the map features six branching paths winding through an underwater terrain, with each player starting in their own base and defending against relentless enemy assaults. The overall atmosphere is dark and immersive, enhanced by underwater scenery and glowing red and blue objects that create a striking visual effect during battles. Players must navigate between nearby underwater caves and ground bases, balancing defense, resource gathering, and support for allies. While the map’s layout keeps players relatively close, the six-way branching paths make it difficult to track opponents’ positions, leading to frequent unpredictable encounters. Given the map’s resolution and tile set, securing vision and reinforcing base defenses are critical, especially with the central terrain’s complexity favoring players who dominate sightlines. This map is best suited for users who have experience with *StarCraft* custom maps rather than absolute beginners. It’s commonly played either as a free-for-all (1v1v1v1v1v1) or in 2v2v2 team matches. While the exact victory conditions aren’t officially confirmed, players typically win by surviving until the end or completing a specific objective. Before playing, it’s essential to study the map’s objects, structure, and terrain features of each branching path. Though difficulty varies depending on the version and custom settings, the ‘8.0’ designation suggests a relatively well-balanced design. To fully enjoy the map, players should be familiar with basic *StarCraft* controls and custom map mechanics, with a strong emphasis on defense and resource management strategies. The map’s intricate layout sharpens focus and cultivates quick decision-making in unexpected situations.
특수부대 전설들 (Special Forces LeGenDs)
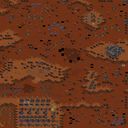
스타크래프트 브루드워의 유즈맵인 ‘Special Forces LeGenDs’는 6명의 플레이어가 참여하는 전투형 맵으로, 각각의 플레이어가 특수 부대를 지휘하는 구조를 가지고 있다. 맵의 중앙에 위치한 거대 기지가 주요 전투 공간으로, 이곳에서 플레이어들은 자원을 채취하고 병력을 생산하여 적을 공격하거나 방어해야 한다. 맵의 디자인은 황혼 타일셋을 기반으로 하며, 전체적인 색상과 구조가 전쟁과 전략의 분위기를 조성한다. 맵의 크기는 3072x3072로 비교적 넓은 편이지만, 중앙 기지 주변의 지형이 복잡하지 않아 전투가 집중되는 지역은 상대적으로 협소한 편이다. 플레이어들은 각자 고유한 시작 지점을 가지고 있으며, 이 지점에서 병력을 생산하고 자원을 관리하는 동시에 적의 공격을 방어하거나 teritorry를 확장하는 전략을 구사해야 한다. 맵의 진행은 실시간으로 이루어지며, 자원 관리와 병력 운용의 밸런스가 중요한 포인트로 작용한다. 초보자는 병력 생산과 자원 수급의 기본을 익히는 데 집중해야 하며, 숙련자는 적의 전략을 예측하고 대처하는 데 중점을 둔다. 추천 플레이 시간은 약 30분 정도로 예상되며, 난이도는 보통 수준으로 설정되어 있다. 이 맵은 실전적인 전투와 전략이 결합된 유즈맵으로써, 브루드워의 기본 메커니즘을 활용한 유연한 플레이가 가능한 것이 특징이다. 특히, 팀플레이보다는 각 플레이어의 독립적인 전략이 중요시되는 구조로, 경쟁적이고 역동적인 전투 경험을 제공한다. 플레이 전에는 각 플레이어의 시작 지점과 주요 자원 위치를 확인하고, 병력 생산 라인과 방어선 구축 계획을 미리 세워두는 것이 좋다. 또한, 맵의 중앙에 위치한 주요 거점이 전투의 핵심임을 감안하여, 이곳의 점유 여부가 승패를 좌우할 수 있음을 명심해야 한다. Special Forces LeGenDs is a 6-player combat-focused custom map in StarCraft: Brood War where each participant commands a specialized unit. The map centers around a massive base in the middle, serving as the primary battleground where players gather resources and produce units to attack or defend. Built on the Twilight tileset, the map’s visual design enhances the war and strategy atmosphere with its earthy tones and structured layout. Spanning 3072x3072, the map offers ample space, though combat is concentrated in the narrow central region around the main base. Each player begins in a unique starting location where they must balance resource management and unit production while fending off enemy attacks or expanding territory. Gameplay unfolds in real-time, with resource management and troop coordination emerging as critical factors. Beginners should focus on mastering basic unit production and resource collection, while experienced players can dedicate their strategy to predicting and countering enemy moves. The recommended playtime is around 30 minutes, with a moderate difficulty level ensuring accessibility without oversimplification. This map stands out for blending real-time combat with strategic depth, leveraging Brood War’s core mechanics for dynamic and flexible gameplay. The structure emphasizes individual strategy over teamwork, delivering a competitive and engaging experience. Before playing, it’s essential to map out starting positions and key resource locations, then plan production lines and defensive setups. Given the central base’s pivotal role, controlling this area often determines victory or defeat, making early strategic positioning crucial.
썬크랜드 식스웨이 (Sunkend Six Way)
스타크래프트 브루드워의 유즈맵 <썬크랜드 식스웨이>(SUNKEND6WAY)는 6명의 플레이어가 섬 형태의 지형에서 대결을 펼치는 디펜스 장르의 맵이다. 맵의 중앙에는 거대한 해저 지형과 육지가 혼재된 구조로, 각 플레이어는 자신의 섬에 건물을 건설하고 자원을 확보하며 방어선을 구축해야 한다. 섬과 육지 사이는 좁은 통로로 연결되어 있어 적의 침공을 막기 위한 전략적 요충지가 된다. 맵의 특징은 해저 지형이 시각적으로 두드러지며, 섬의 경계가 명확하게 나뉘어 있어 각자의 영역을 방어하는 재미가 있다. 또한, 맵의 중앙에는 붉은색으로 표시된 요충지가 있어 이 곳을 차지하기 위한 경쟁이 치열해질 수 있다. 전체적인 분위기는 사막 타일셋을 기반으로 한 어두운 톤의 해저 세계로, 플레이어는 자신의 영토를 지키며 자원을 모아 적을 압도하는 전략을 펼치게 된다. 이 맵은 6명의 플레이어가 각각 독립된 영토를 확보하고, 상대방의 영토를 공격하거나 방어하는 방식으로 진행되며, 자원 관리와 위치 선정이 핵심 포인트다. 초보자는 섬의 경계와 통로의 중요성을 파악하기 어려울 수 있어, 방어선을 구축하는 데 어려움을 느낄 수 있다. 반면, 경험이 있는 플레이어는 중앙 요충지를 선점하거나 통로를 차단하는 전략을 구사할 수 있어 전략적 깊이가 있는 맵으로 평가된다. 특히, 팀플레이가 필요한 경우 각자의 역할 분배가 중요해지며, 혼자서 모든 영토를 방어하기에는 무리가 따른다. 맵을 플레이하기 전에는 자신의 영토에 건물을 배치할 수 있는 공간과 자원 확보 경로를 미리 확인하는 것이 좋다. 또한, 통로와 요충지의 위치를 숙지하여 빠른 대처가 가능한지 점검해야 한다. 이 맵은 디펜스와 전략적 대결을 동시에 즐길 수 있는 요소로 구성되어 있어, 스타크래프트 유즈맵의 매력을 느낄 수 있는 작품 중 하나로 손꼽힌다. 적절한 난이도 조절이 가능한 맵이므로, 초보자와 숙련자 모두 즐길 수 있는 균형 잡힌 구성을 갖추고 있다. StarCraft: Brood War’s custom map <SUNKEND6WAY> is a defense genre map where six players battle on island terrain. The map features a central underwater landscape interspersed with land, where each player must construct buildings, secure resources, and build defenses on their respective islands. Narrow passages connect the islands and mainland, serving as strategic chokepoints to block enemy advances. The map’s standout feature is its visually prominent underwater terrain, with clearly defined island borders that enhance the enjoyment of defending one’s territory. At the center, a red-marked strategic point intensifies competition for control. The overall atmosphere is a dark, underwater world based on a desert tile set, where players must protect their territory, gather resources, and overwhelm opponents with strategy. The game unfolds as six players secure independent territories, attacking or defending against rivals, with resource management and positioning as key factors. Beginners may struggle to grasp the importance of island borders and passageways, making it difficult to establish defenses. Experienced players, however, can employ strategies like seizing the central point or blocking chokepoints, giving the map strategic depth. In team play, role distribution is crucial, as defending all territories alone is impractical. Before playing, it’s wise to confirm available building space and resource collection routes in your territory and familiarize yourself with chokepoint and strategic point locations for quick responses. Combining defense and strategic combat, this map showcases the charm of StarCraft custom maps and is praised as a well-balanced work suitable for both beginners and veterans, offering adjustable difficulty.
![[PADO] MAP ver1.0 (Beta) (팟도맵 ver1.0 베타) 맵 미리보기](https://cdn-star-data.huzy.net/thumbnail_3ff96a5353174af79fbf78932a7dbaec.jpg)
[PADO] MAP ver1.0 (Beta) (팟도맵 ver1.0 베타)
이 맵은 스타크래프트 브루드워의 유즈맵으로, 기존 밀리 전투의 틀을 유지하면서도 독특한 구조와 진행 방식을 보여준다. 맵의 중앙에는 커다란 X자 형태의 지형이 펼쳐져 있으며, 각 플레이어는 이 X자의 네 꼭짓점에 위치한 시작 지점에서 출발한다. X자 중앙에는 넓은 평지가 있어 병력 집결과 전투가 자연스럽게 이루어진다. 맵의 가장자리는 언덕 지형으로 둘러싸여 있어 시야가 제한되며, 전략적인 배치와 기동이 중요해진다. 맵의Nome 'PADOMAP'은 제작자의 아이덴티티가 담긴 것으로 보이며, 'beta'라는 표시로 개발 중인 버전을 유추할 수 있다. 내부 메모에는 'Destroy all enemy buildings'라는 문구가 있어, 목표는 적 건물 파괴로 추정된다. 좁은 시야와 복잡한 지형은 근접전을 강제하며, 치고 빠지는 전술을 요구한다. 6인 플레이를 상정한 만큼 팀플레이보다는 개인전이나 소규모 팀전 성격을 띨 가능성이 높다. 제작자의 이름 'Yang. Chae Kyu'와 제작 장소 '등촌동'이 기입되어 있어 한국인 제작자의 작품임을 유추할 수 있다. 이 맵은 밀리 전투의 기본 틀을 따르지만, 중앙 X자 지형과 언덕 시야 차단 등으로 인해 일반적인 밀리 맵과는 구별되는 전략적 깊이를 제공한다. 좁은 시야와 복잡한 지형은 유닛의 기동성과 컨트롤 능력을 시험하며, 특히 테란의 경우 지형을 활용한 벙커링이나 시즈 탱크 활용이 중요해질 것으로 보인다. 프로토스의 경우 시야 확보와 빠른 아칸 전환이, 저그의 경우 빠른 확장을 통한 자원 우위 확보가 관건이 될 것이다. 맵의 중앙 X자 지형은 전투의 무대가 되며, 각 플레이어는 이 지형을 둘러싼 언덕이나 고지대를 점령해 전략적 우위를 점할 수 있다. 제작자의 'vol.3-1wide one'이라는 메모는 시리즈물의 한 부분으로 보이지만, 구체적인 스토리나 설정은 제공되지 않는다. 전체적으로는 밀리 전투의 기본 뼈대를 유지하면서도, 지형과 시야를 통한 전략적 깊이를 추구한 유즈맵으로 평가된다. 6인 플레이를 상정하고 있지만, 팀 구성이 없으므로 1:1:1:1:1:1 또는 2:2:2 형태로도 플레이가 가능할 것으로 보인다. This StarCraft: Brood War custom map reimagines the classic melee format with a distinct X-shaped terrain design at its core. Players start at the four corners of the X, with a wide open plateau in the center serving as the primary battlefield. The surrounding hills limit visibility, forcing strategic positioning and close-quarters combat. The map's name 'PADOMAP' likely reflects the creator's signature style, while the beta tag suggests it's still in development. The internal note 'Destroy all enemy buildings' implies the victory condition involves total map destruction, though the exact win condition remains unspecified. Designed for six players, the narrow sightlines and complex terrain create a high-pressure environment where unit mobility and micro-management are critical. Terran players may benefit from bunker rushes or siege tank positioning, Protoss will need to prioritize vision control and fast archon transitions, and Zerg should focus on rapid expansions to secure resource advantages. The central X serves as both a battleground and a strategic chokepoint, with high ground positions offering significant tactical value. While the creator's note 'vol.3-1wide one' hints at a series, no narrative context is provided. Overall, this is a melee-style custom map that enhances traditional StarCraft combat with terrain-driven depth and strategic positioning challenges, suitable for players seeking a fresh take on classic BW mechanics.
스타 포톤 디펜스 V 3.6 (Star Photon Defense V 3.6)
스타크래프트 브루드워의 대표적인 디펜스 장르 유즈맵인 〈스타 포톤 디펜스 V 3.6〉는 플레이어들이 포톤 캐논과 운석을 조합하여 끊임없이 몰려오는 적을 방어하는 전략적 재미를 제공합니다. 맵 중앙의 거대한 운석이 주기적으로 지상으로 떨어져 파괴되면서 발생하는 파편을 포톤 캐논으로 요격하는 방식인데, 운석이 떨어지는 위치는 랜덤으로 설정되어 있어 매 플레이마다 다른 전술을 요구합니다. 맵 구조는 대칭형으로 설계되어 모든 플레이어가 동일한 조건에서 시작할 수 있으며, 운석을 직접 파괴하거나 파편을 요격하는 두 가지 전략을 구사할 수 있습니다. 특히 적의 공격 패턴이 점점 강해지는 점진적인 난이도 시스템이 특징으로, 초반에는 소수의 소형 운석만 떨어지지만 후반부로 갈수록 대형 운석과 속도가 빠른 파편이 등장해 방어선을 유지하기가 increasingly 어려워집니다. 맵 상단과 하단에 위치한 자원 지대에서는 미네랄과 가스를 채취할 수 있지만, 자원 수집보다는 포톤 캐논의 배치와 운석 요격이 주된 플레이 포인트입니다. 맵의 중앙 통로와 측면 통로는 방어선을 구축하기에 적합한 위치로, 플레이어는 자신이 맡은 구역을 효율적으로 방비해야 합니다. 맵의 특징인 '플레이어 이탈 시 남은 자원 공유' 시스템은 팀플레이에서 특히 빛을 발하는데, 한 명이 게임을 포기하더라도 다른 플레이어들에게 자원이 돌아가면서 게임을 지속할 수 있도록 설계되어 있습니다. 또한 추가된 수송선 시스템을 활용하면 운석을 미리 파괴하거나 파편을 빠르게 처리할 수 있어 전략의 다양성을 높였습니다. 초보자는 운석이 떨어지는 타이밍을 익히는 데 집중하고, 숙련자는 자원 관리와 포톤 캐논의 최적 배치에 중점을 두며 플레이할 수 있습니다. 이 맵은 6인 멀티플레이를 기반으로 하며, 한 팀당 1~3명의 플레이어가 참여할 수 있어 팀원 간의 의사소통과 역할 분담이 중요합니다. 맵의 밸런스는 오랜 기간 개선되어 왔으며, 특히 V3.6 버전에서는 이전보다 더 안정적인 게임플레이를 제공하는 것으로 알려져 있습니다. 플레이 전에는 포톤 캐논의 사정거리와 운석의 파괴 패턴을 숙지하는 것이 중요하며, 자원 배분을 신중히 결정해야 합니다.总的来说,이 맵은 단순한 디펜스 게임을 넘어 전략적 사고와 팀워크를 동시에 요구하는 고차원적인 유즈맵으로, 스타크래프트의 디펜스 장르를 대표하는 작품 중 하나로 손꼽힙니다. 꾸준한 인기를 얻고 있는 만큼, 디펜스 장르에 익숙한 플레이어뿐만 아니라 새로운 유저들에게도 충분히 매력적인 경험을 제공할 것입니다. StarCraft: Brood War’s classic defense genre custom map, *Star Photon Defense V 3.6*, offers players strategic fun by combining photon cannons with falling meteors to fend off endless waves of enemies. The core mechanic involves intercepting debris created when massive meteors periodically crash down in random locations across the map, forcing different tactics with every playthrough. Designed symmetrically, the map ensures all players start on equal footing, and offers two main strategies—directly destroying meteors or intercepting their fragments. A standout feature is its progressive difficulty system, where early stages feature small, infrequent meteors but later escalate to large, fast-moving debris that strains defenses. While mineral and gas deposits at the top and bottom of the map allow resource gathering, the focus remains on cannon placement and meteor interception. Central corridors and side paths provide ideal spots for building defensive lines, and players must efficiently fortify their assigned zones. A unique "shared resources on player exit" system enhances team play, allowing the game to continue even if a teammate quits by redistributing their resources. The added transport ship system lets players preemptively destroy meteors or quickly clear fragments, adding depth to strategies. Beginners should focus on timing their reactions to meteor impacts, while veterans prioritize resource management and optimal cannon positioning. Designed for six-player multiplayer, teams can field one to three players each, making communication and role division essential. Balanced through years of refinement, version 3.6 delivers smoother gameplay than earlier iterations. Before playing, mastering the photon cannon’s range and meteor destruction patterns is key, along with careful resource allocation. Ultimately, this map transcends simple defense games, demanding strategic thinking and teamwork—making it a standout in StarCraft’s defense genre and an appealing experience for both seasoned players and newcomers alike.
맵 선택 가이드
태그는 맵의 핵심 특징을 빠르게 설명하지만 제작 버전마다 규칙이 다를 수 있습니다. 상세 설명에서 권장 인원, 난이도, 플레이 시간과 버전을 함께 확인한 뒤 다운로드하세요.