
5인 플레이 스타크래프트 맵 모음
'5인 플레이' 태그가 등록된 맵을 모았습니다. 장르 하나로 찾기 어려운 플레이 방식, 난이도와 특징을 중심으로 인기 맵과 최신 맵을 비교해 보세요.
- 등록 맵
- 61개
- 누적 다운로드
- 1
- 누적 조회
- 2,234
인기 맵
다운로드와 조회 반응이 높은 맵입니다.
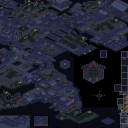
왕의기사 Antibirth
스타크래프트 브루드워의 대표적인 타워 디펜스 유즈맵인 '왕의기사 Antibirth'는 화산 테마의 광활한 맵 위에서 펼쳐지는 전략적 방어전을 경험할 수 있는 작품이다. 맵은 중앙의 넓은 평야를 중심으로 양측에서 끊임없이 몰려드는 적의 웨이브를 막아내는 구조로 설계되어 있으며, 플레이어는 각자의 위치에서 타워를 건설하고 업그레이드하여 방어선을 구축해야 한다. 맵 중앙에는 넓은 통로와 협소한 틈새가 조화롭게 배치되어 있어, 적의 공격 패턴에 따라 타워 배치 전략을 유동적으로 변경할 수 있다. 특히, 맵 좌우측에는Resource가 배치된 지역이 보이며, 이를 활용한 자원 수집과 타워 건설의 균형이 게임의 핵심 포인트로 작용한다. 맵의 난이도는 상대적으로 높은 편으로, 초보자가 처음 접하기에는 다소 어려운 구조를 가지고 있어 충분한 사전 숙지가 필요하다. 또한, 맵의 진행 방식은 웨이브가 점점 강해지는 방식으로, 후속 웨이브에서 등장하는 적의 종류와 수가 점차 증가하여 플레이어의 긴장감을 지속적으로 유도한다. 추천 대상은 타워 디펜스 장르를 즐기는 플레이어이며, 특히 전략적 사고와 빠른 판단력이 요구되는 맵을 선호하는 경우 필수적으로 플레이해볼 만한 작품이다. 플레이 전에는 맵의Resource 배치와 주요 통로, 그리고 적의 웨이브 패턴을 미리 숙지하는 것이 좋으며, 타워의 효율적인 배치와 업그레이드 타이밍을 carefully 계획해야 한다. 맵의 난이도를 낮추기 위해 초반에는 방어에 중점을 두고, 자원을 충분히 확보한 후 강력한 타워를 건설하는 전략을 추천한다. Starcraft: Brood War's iconic tower defense custom map, "King's Knight Antibirth," offers a strategic defensive battle set across a vast volcanic-themed map. Designed with a central open plain, the map challenges players to defend against endless waves of enemies approaching from both sides, requiring them to construct and upgrade towers from their respective positions. The map balances wide pathways and narrow gaps, allowing for flexible tower placement strategies depending on enemy attack patterns. Notably, resource-rich areas on the left and right sides of the map play a crucial role, as balancing resource gathering with tower construction becomes a key aspect of gameplay. The difficulty is relatively high, with a structure that may be challenging for beginners, necessitating thorough preparation beforehand. The progression system escalates with increasingly powerful waves, where later stages introduce more numerous and varied enemies to keep players on edge. This map is highly recommended for fans of the tower defense genre, especially those who enjoy maps demanding strategic thinking and quick decision-making. Before playing, it's advisable to familiarize yourself with resource distribution, key pathways, and enemy wave patterns. Efficient tower placement and timely upgrades are essential, so planning ahead is crucial. For a smoother experience, prioritize defense early on, secure ample resources, and then focus on building powerful towers.
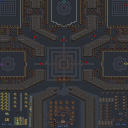
BT5v3 3.11-50000
스타크래프트 브루드워의 대표적인 컴까기 맵인 BT5v3 3.11-50000은 5명의 플레이어가 한 팀으로 모여 endless wave의 적절한 공격을 방어해내는 전략형 디펜스 유즈맵이다. 맵 전체가 테란 스타포트와 사이언스 퍼실리티를 연상시키는 독특한 구조로 구성되어 있으며, 중앙의 넓은 길목을 중심으로 다수의 전투 유닛이 끊임없이 쏟아져 나온다. 맵의 외곽은 복잡한 지형과 장애물로 둘러싸여 있어 후방에서 오는 적군을 효과적으로 차단할 수 있으며, 플레이어는 이를 활용해 방어 라인을 구축하고 전략적으로 병력을 배치해야 한다. 맵 곳곳에 배치된 다수의 미네랄과 베스핀 가스는 자원 관리와 유닛 생산의 밸런스를 맞추는 데 중요한 역할을 한다. BT5v3 시리즈의 특성상 난이도와 파워가 조절 가능한 시스템이 탑재되어 있어, 초보부터 숙련자까지 폭넓은 플레이어층이 즐길 수 있도록 설계되었다. 특히 endless wave가 끝난 후의 보상 시스템과 업그레이드 메커니즘이 맵의 긴장감을 한층 높이며, 팀워크와 전략적 협동이 필수적인 요소로 작용한다. BT5v3 3.11-50000은 단순히 적을 막아내는 것에서 그치지 않고, 끊임없는 공세 속에서 자원과 병력을 효율적으로 관리하며 승리를 이끌어내야 하는 도전적인 경험을 제공한다. 맵의 구조상 중앙 길목이 공격의 주요 경로가 되므로, 초반 방어 라인 구축과 자원 확보가 승패를 좌우할 가능성이 크며, 지속적인 업그레이드와 병력 조합을 통해 적절한 타이밍에 반격을 펼칠 수 있어야 한다. BT5v3 시리즈는 오랜 기간 동안 많은 플레이어들에게 사랑받아온 맵으로, 그 시스템과 밸런스가 검증된 만큼 누구나 즐길 수 있는 매력적인 디펜스 유즈맵이라고 할 수 있다. 플레이 전에는 반드시 팀원 간의 역할 분배와 공격 타이밍을 사전에 협의하는 것이 중요하며, 자원과 병력의 균형을 맞추는 연습이 필요하다는 점도 유념해야 한다. Brood War's classic Zerg rush defense map, BT5v3 3.11-50000, is a strategic team-based defense game where five players work together to fend off endless waves of enemies. The map features a unique layout resembling Terran Starports and Science Facilities, with a wide central path where waves of combat units continuously spawn. The outer edges are surrounded by complex terrain and obstacles, allowing players to block rear attacks effectively while building defensive lines and strategically positioning their forces. Scattered mineral patches and vespene geysers throughout the map play a crucial role in balancing resource management and unit production. The BT5v3 series incorporates an adjustable difficulty and power system, making it accessible to players of all skill levels, from beginners to experts. The reward system and upgrade mechanics after each endless wave heighten the tension, with teamwork and strategic coordination being essential. BT5v3 3.11-50000 challenges players not just to hold back enemies but to efficiently manage resources and forces under constant pressure to secure victory. Given the map's structure, the central path is the primary route for attacks, so early defense setup and resource control often determine the outcome. Players must also balance upgrades and unit compositions to launch timely counterattacks. As a long-standing favorite among many players, the BT5v3 series offers an appealing defense custom map with proven systems and balance. Before playing, it's important to discuss team roles and attack timing beforehand, and players should practice maintaining a balance between resources and forces.
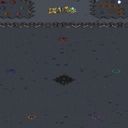
언리얼 토너먼트 매드니스 (Unreal Tournament Madness)
스타크래프트 브루드워의 유즈맵 중 하나로, 총격전과 전투를 중심으로 펼쳐지는 서바이벌 디펜스 장르의 맵이다. 내부 제목과 설명에서 확인할 수 있듯 ‘Kill...Kill...Kill...’이라는 슬로건이 강조되며, 플레이어는 끊임없이 몰려드는 적군 유닛을 상대로 teritorry를 방어하거나 공격해야 한다. 맵의 주요 특징은 우주 테마의 타일셋을 활용한 어두운 분위기와 더불어, 화면 중앙에 배치된 광범위한 전투 지역이 시각적 포커스를 잡아낸다는 점이다. 맵 상단과 하단에 배치된 플레이어 진영은 각각의 기지 역할을 하며, 적군의 끊임없는wave가 쉴 새 없이 몰려온다. 전투는 주로 근접과 원거리 공격이 혼합된 형태로 진행되며, 플레이어는 각자의 전략과 컨트롤을 바탕으로 적군을 제압해야 한다. 맵의 구조는 비교적 간단한 편이지만, 적이 끊임없이 쏟아져 나오는 난전 속에서 생존과 승리를 위한 타이밍과 자원 관리 능력이 중요하다. 초보자보다는 전투와 디펜스 경험이 어느 정도 있는 플레이어에게 더 적합한 맵으로 보이며, 난이도는 보통 수준으로 추정된다. 특히, 중앙 전투 지역에서의 컨트롤과 순간적인 판단력이 승리를 가를 수 있는 열쇠가 될 것이다. 플레이 전에는 자신의 진영과 기지 구조를 충분히 숙지하고, 적군의 공격 패턴을 미리 예측하는 연습이 필요하다. 맵의 우주 테마와 전투 중심의 진행 방식은 마치 ‘언리얼 토너먼트’와 같은 분위기를 연상시키며, 유즈맵으로서의 개성 있는 재미를 제공한다. 다만, 맵 설명에 기재된 웹사이트 링크가 현재 유효한지는 확인되지 않았으므로, 추가적인 정보가 필요한 경우 관련 커뮤니티나 아카이브를 참고하는 것이 좋다. 전체적으로는 전투와 디펜스를 좋아하는 유저들에게 추천할 만한 맵이며, 특히 서바이벌과 디펜스 장르를 선호하는 플레이어라면 충분히 즐길 수 있을 것이다. 전투가 지속되면서 몰려오는 적군을 상대로 어떻게 전략을 세우고 자원을 관리할 것인지에 따라 결과가 크게 달라질 수 있으므로, 다양한 시도를 해보면서 맵에 익숙해지는 것이 중요하다. This is a user-created map from *StarCraft: Brood War*, classified as a survival defense game focused on gunfights and battles. As suggested by the map's title and description, the slogan "Kill...Kill...Kill..." is prominently featured, where players must defend or attack territory against waves of enemy units that continuously pour in. The map's key features include its dark, space-themed tile set, which sets a moody atmosphere, and a vast combat zone centrally located on the screen that draws visual focus. Player bases, positioned at the top and bottom of the map, serve as their respective starting points, while enemy forces relentlessly assault in waves. Battles primarily involve a mix of melee and ranged combat, requiring players to suppress enemies using their own strategies and control. While the map's structure is relatively simple, survival and victory hinge on timing and resource management amid the constant chaos of enemy waves. It seems more suited for players with some experience in combat and defense rather than beginners, with an estimated difficulty level of moderate. Success often depends on precise control and quick decision-making in the central combat zone. Before playing, it's essential to thoroughly understand your base layout and practice predicting enemy attack patterns. The space-themed aesthetic and battle-focused progression evoke a vibe similar to *Unreal Tournament*, offering a unique and engaging experience as a custom map. However, since the website link provided in the map description may no longer be valid, those seeking additional information should check relevant communities or archives. Overall, this map is recommended for players who enjoy combat and defense games, particularly those who prefer survival and defense genres. The outcome heavily depends on how well you strategize and manage resources against the relentless enemy waves, so experimenting and becoming familiar with the map is key to mastering it.
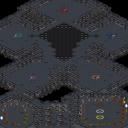
젤다99 매드니스 (Zelda99 Madness v0.1)
스타크래프트 브루드워의 유즈맵 <젤다99 매드니스>는 젤다 시리즈의 분위기와 액션 어드벤처 요소를 접목한 흥미로운 콘텐츠로, 플레이어는 맵 중앙의 거대한 구조물을 surrounded by 다양한 적들과 함정들을 상대하며 진행하는 구조를 가지고 있다. 맵은 우주 테마의 타일셋으로 구성되어 있으며, 젤다64 시리즈를 연상시키는 그래픽과 연출이 특징적이다. 맵의 중심부에는 보스전 또는 핵심 목표 지점이 위치하고 있으며, 주변에는 다수의 적 유닛과 기지 건물이 배치되어 있어 디펜스와 공격이 혼합된 플레이가 요구된다. 맵의 중앙에는 거대한 원형 구조물이 눈에 띄며, 이 주변으로 좁은 통로가 이어져 있어 전술적인 움직임이 중요해 보인다. 또한, 맵의 외곽에는Resource가 풍부한 지역이 배치되어 있어 자원 관리와 확장 전략도 고려해야 할 요소로 보인다. 이 맵은 5인 플레이를 전제로 제작되었으나, 현재 제공된 정보만으로는 팀 구성이나 승리 조건을 명확히 확인할 수 없다. 플레이어는 맵 중앙으로 몰려드는 적들을 상대하며, 맵 곳곳에 숨겨진 아이템이나 보너스 지역을 탐색할 수 있는 가능성이 있어 재방문 가치를 높인다. 맵의 구조상 플레이 시간이 길어질 가능성이 높으며, 특히 보스전이나 핵심 목표phase에서 난이도가 급격히 상승할 것으로 추정된다. 추천 대상은 젤다 시리즈의 팬, 액션 어드벤처와 디펜스를 좋아하는 스타크래프트 유즈맵 플레이어, 그리고 팀워크와 전략적 플레이를 즐기는 유저들이다. 플레이 전에는 맵의 중앙 구조물과 주변 지역을 미리 살펴보는 것이 중요하며, 자원 분배와 적 유닛의 배치 패턴을 숙지하는 것이 성공의 열쇠가 될 것이다. StarCraft: Brood War's custom map *Zelda99 Madness* blends the atmosphere and action-adventure elements of the *Zelda* series into an engaging experience. Players navigate a massive central structure surrounded by various enemies and traps. The map features a space-themed tileset with graphics and effects reminiscent of *Zelda 64*, and its core area houses either a boss battle or a key objective. Surrounding this zone are numerous enemy units and base structures, demanding a mix of defense and offense. A prominent circular structure dominates the center of the map, connected by narrow pathways that emphasize tactical movement. The outer edges contain resource-rich areas, adding resource management and expansion strategies to the challenge. Designed for five players, the exact team composition and victory conditions aren’t fully clear from the available details. Players must contend with waves of enemies converging on the center, while hidden items or bonus areas scattered throughout the map encourage return visits. The layout suggests longer playtimes, with difficulty spikes likely during boss battles or critical phases. This map is ideal for *Zelda* fans, players who enjoy action-adventure and defense-focused custom maps, and those who appreciate teamwork and strategic gameplay. Before diving in, it’s crucial to scout the central structure and surrounding areas, master resource distribution, and learn enemy unit placement patterns to secure victory.
뉴 포커 디펜스 0.777 (New Poker Defence 0.777)
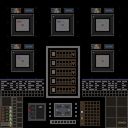
스타크래프트 브루드워의 유즈맵 장르 중에서도 독특한 재미를 선사하는 ‘뉴 포커 디펜스’는 마치 카드 게임과 디펜스 장르가 만나 탄생한 듯한 매력이 인상적인 맵이다. 맵의 구조는 중앙에 위치한 넓은 평야와 그 주변을 둘러싼 좁은 길로 구성되어 있으며, 플레이어는 이 좁은 길에서 쏟아져 나오는 적 유닛을 efficiently 처리하면서 기지를 지켜내야 한다. 제목을 통해 짐작할 수 있듯, 포커와 같은 운과 전략이 조화를 이루는 시스템이 포함된 것으로 보이며, 이는 단순히 적을 막는 것만이 아니라 리소스 관리와 타이밍 조절 또한 중요시함을 의미한다. 맵의 분위기는 어두운 톤과 붉은 빛이 돋보이는 디자인으로, 긴장감을 조성하며 플레이어의 집중력을 요구한다. 특히 맵의 좌우 대칭 구조는 시야를 넓게 활용할 수 있도록 돕고, 중앙의 넓은 공간은 다양한 전술적 선택지를 제공한다. 이 맵은 5인까지 플레이할 수 있도록 설계되어 있으며, 각 플레이어는 개별적으로 기지를 방어해야 하지만, 때로는 팀웍이 요구되는 순간도 있을 것으로 추정된다. 뉴 포커 디펜스 0.777 버전은 아직 개발 초기 단계로 보이며, 향후 업데이트를 통해 밸런스와 재미 요소가 더 보완될 가능성이 크다. 플레이 전에는 맵의 구조와 적의 패턴을 숙지하는 것이 중요하며, 특히 좁은 길목에서의 전투에서 ресур스를 효율적으로 활용하는 방법을 연습할 필요가 있다. 이 맵은 디펜스 장르에 익숙한 플레이어뿐만 아니라, 새로운 경험을 추구하는 유즈맵爱好者들에게도 강추할 만한 작품이다. 특히 카드 게임의 요소가 포함되었다면, 운과 전략의 조합으로 예측하지 못한 반전을 즐길 수 있을 것이다. New Poker Defence 0.777 is a unique StarCraft: Brood War custom map that blends the strategic depth of defense games with the unpredictable elements of poker. The map features a central open area surrounded by narrow pathways, where players must defend their bases from waves of incoming enemy units. As hinted by its title, the game likely incorporates poker-like mechanics involving luck and strategy, adding an extra layer of decision-making beyond simple unit management. The dark, red-tinged aesthetic sets a tense atmosphere, demanding focus and adaptability from players. The symmetrical layout of the map allows for strategic planning, while the central open space offers flexibility in positioning units. Designed for up to five players, this map encourages individual base defense with potential moments of team coordination. As version 0.777 suggests, the map is still in early development, leaving room for future balance adjustments and refinements. Players are advised to familiarize themselves with the map’s layout and enemy patterns, particularly focusing on efficient resource management in tight spaces. Whether you're a seasoned defense-game enthusiast or someone looking for a fresh experience, New Poker Defence offers a compelling mix of strategy and unpredictability, especially if poker mechanics are integrated as expected.
![블록 더 게이트 [2] (Block The Gate [2]) 맵 미리보기](https://cdn-star-data.huzy.net/thumbnail_a16402008b2b4d9695a8cb8808ba223a.jpg)
블록 더 게이트 [2] (Block The Gate [2])
《Block The Gate [2]》는 스타크래프트 브루드워의 유즈맵으로, 입구막기 형식의 디펜스 장르에 속하는 맵이다. 맵 제목에서 유추할 수 있듯이, ‘The Gate’라는 명칭이 시사하듯 플레이어는 입구를 forsvars하기 위해 중앙의 좁은 통로를 막아내야 한다. 화산 타일셋을 활용한 지형이 인상적인 이 맵은 좁고 긴 통로를 중심으로 양쪽에서 몰려오는 적군을 방어하는 것이 주된 목표로 보인다. 적군은 주로 맵의 좌우 양쪽에서 끊임없이 쏟아져 나오며, 좁은 통로에서 유닛들이 밀집되어 전투가 벌어지는 구조다. 맵의 중앙 통로는 좁아 유닛들이 자연스럽게 밀집되면서 방어가 수월해지지만, 반대로 좁은 통로의 양쪽 끝은 넓은 개활지이기 때문에 방어선이 뚫릴 위험도 상존한다. 맵의 가장자리와 통로의 연결부에는 빈 공간이 적절히 배치되어 있어 방어 유닛을 배치하고 보급로를 확보하기 용이하다. 또한, 맵 곳곳에 흩어져 있는 잔디와 바위 등은 시야를 차단하거나 전략적 요충지를 제공하여 플레이어의 전술을 다양화할 수 있도록 돕는다. 이 맵은 주로 5인 플레이를 상정하고 제작된 것으로 보이며, 각 플레이어는 독립된 기지에서 시작해 중앙 통로로 이어지는 길을 지켜내야 한다. 방어에 실패하면 적군이 통로를 통과해 기지로 침입하는 구조로 추정된다. 초보자부터 숙련자까지 즐길 수 있도록 난이도를 조절할 수 있는 요소들이 포함되어 있을 가능성이 높으며, 특히 좁은 통로의 장벽을 어떻게 구축하고 유닛을 배치하느냐가 승패를 좌우할 것이다. 이 맵을 플레이하기 전에 방어에 특화된 빌드와 유닛 조합을 연습하는 것이 좋으며, 통로 양쪽의 넓은 개활지에서 벌어지는 전투를 대비한 대처법도 숙지해야 한다. 또한, 맵의 타일셋이 화산이기 때문에 지형 특성상 언덕이나 계단 구조가 일부 존재할 수 있으며, 이는 시야와 공격 범위에 영향을 미칠 수 있으니 주의가 필요하다. 이 맵은 특히 입문자들에게 좁은 공간에서의 유닛 컨트롤과 방어 전략을 배울 수 있는 좋은 기회가 될 것이다. 《Block The Gate [2]》 is a user-made map for *StarCraft: Brood War*, falling under the defense genre in the "block the entrance" style. As the title suggests, players must defend the entrance by blocking the central narrow passage, referred to as "The Gate." This map features striking volcanic terrain, with gameplay centered around defending a long, narrow corridor from waves of enemies approaching from both sides. Enemies primarily spawn continuously from the left and right edges of the map, clashing in dense formations within the tight passage. While the central corridor's narrowness naturally concentrates units for easier defense, the wide open areas at both ends pose a risk of the defensive line being breached. The map strategically includes small gaps along the edges and at the corridor's junctions, making it easier to position defensive units and secure supply lines. Scattered grass and rocks throughout the map not only obstruct vision but also provide strategic vantage points, allowing for diverse tactical approaches. Designed primarily for five players, each starts in an independent base and must protect the path leading to the central corridor. Failure to defend results in enemies breaking through and invading the base. The map likely includes adjustable difficulty elements to cater to both beginners and experienced players, with victory hinging on how effectively players construct barriers and position units in the narrow passage. Before playing, it's advisable to practice defense-focused builds and unit compositions, as well as prepare for battles in the wide open areas on either side of the corridor. Given the volcanic tile set, some sections may feature hills or stair-like structures that affect visibility and attack range, so players should remain mindful of these terrain features. This map offers an excellent opportunity for newcomers to learn unit control and defensive strategies in confined spaces.
Silent Hill online v.4
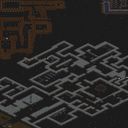
《Silent Hill Online v.4》는 공포 분위기를 강조한 스타크래프트: 브루드워 유즈맵으로, 5인용 팀플레이 디펜스 장르에 속한다. 이 맵은 플레이어가 새로운 고등학교로 가는 도중 겪는 공포스러운 상황을 재현하며, 맵 곳곳에 배치된 적들을 상대로 방어전을 펼치는 것이 주요 목표로 보인다. 맵의 어두운 조명과 붉은 색조의 배경은 공포감을 조성하며, 특히 왼쪽 상단과 오른쪽 상단에 펼쳐진 넓은 평원과 언덕 지형은 시야를 제한하고 공포감을 배가시킨다. 맵의 구조는 크게 세 부분으로 나뉜다. 중앙에는 넓은 평원이 펼쳐져 있으며, 이곳을 통과하는 길이 주요 이동 경로로 추정된다. 이 평원의 좌측과 우측에는 언덕 지형이 위치해 있어, 적들의 접근을 예상하고 방어선을 구축할 수 있는 요충지가 된다. 맵의 가장자리에는 높은 절벽이 둘러싸고 있어, 플레이어들이 외부로부터의 침입을 차단할 수 있도록 돕는 구조로 보인다. 맵 중앙의 넓은 공간은 전투의 주요 무대가 될 것으로 예상되며, 이곳에서 플레이어들은 협력하여 적들을 물리치고 생존해야 한다. 공포 디펜스라는 장르적 특징상, 이 맵은 단순히 적을 물리치는 것뿐만 아니라 공포감을 조성하는 요소들이 중요하다. 어두운 조명과 함께 맵 곳곳에 배치된 오브젝트들은 플레이어들에게 긴장감을 안겨줄 것이며, 이러한 요소들은 공포 디펜스 장르의 핵심을 구성한다. 또한, 5인용 팀플레이라는 점에서 팀원 간의 협력이 필수적이며, 개개인의 실력뿐만 아니라 전략적인 플레이가 요구될 것으로 보인다. 이 맵은 공포 분위기를 즐기는 플레이어들에게 특히 추천되며, 팀원들과의 긴밀한 협력을 통해 공포스러운 상황을 극복하는 재미를 느낄 수 있을 것이다. 또한, 디펜스 장르에 익숙한 플레이어들에게는 새로운 경험을 제공할 것으로 기대된다. 플레이 전에는 맵의 구조와 공포 분위기를 최대한 활용할 수 있는 전략을 미리 세워두는 것이 중요할 것이다. 특히, 언덕 지형과 절벽을 활용한 방어선 구축은 성공의 열쇠가 될 것이다. 《Silent Hill Online v.4》 is a StarCraft: Brood War custom map that emphasizes a horror atmosphere, falling under the 5-person teamplay defense genre. The map recreates the terrifying situations players face on their way to a new high school, with the main objective being to defend against waves of enemies scattered throughout the map. The dim lighting and reddish color palette enhance the sense of dread, while the vast plains and hilly terrain in the top-left and top-right corners restrict visibility and amplify the horror. The map is divided into three main sections. At its center lies a wide plain, likely serving as the primary route for movement. Surrounding this plain are hilly areas on both the left and right, ideal for setting up defensive lines and anticipating enemy approaches. The outer edges of the map are bordered by steep cliffs, which help block external threats. The central open space will likely serve as the main battleground, where players must work together to eliminate enemies and survive. As a horror defense map, its success hinges not just on defeating enemies but on creating an oppressive atmosphere. The dim lighting and scattered objects scattered throughout the map will heighten tension, embodying the core of the horror defense genre. With a team of five players, cooperation is essential, requiring not just individual skill but also strategic play. This map is especially recommended for players who enjoy horror-themed experiences, offering the thrill of overcoming terrifying scenarios through close teamwork. It also promises fresh challenges for those familiar with defense maps. Before playing, it’s crucial to devise a strategy that leverages the map’s structure and horror elements. Successfully building defensive lines using the hilly terrain and cliffs will be key to victory.
스타쉽 트루퍼스 어드밴스드 5.64 (Starship Troopers Advanced 5.64)
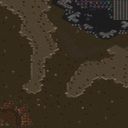
스타크래프트 브루드워의 대표적인 디펜스 유즈맵인 <스타쉽 트루퍼스 어드밴스드 5.64>는 5명의 플레이어가 한 팀을 이뤄 끊임없이 몰려오는 적 웨이브를 방어하는 전략적 디펜스 장르의 맵이다. 황무지 타일셋을 기반으로 한 넓은 맵 중앙에는 방어 거점이 배치되어 있으며, 각 플레이어는 자신의 기지 주변에 방어 시설을 설치하고 자원을 모아 병력을 강화할 수 있다. 맵은 4096x4096 크기로 상당히 넓은데, 이는 디펜스와 동시에 맵 곳곳의 자원 수집과 기지 확장을 고려한 설계로 보인다. 적의 공격 패턴은 일정 주기로 강화되어 초반에는 약한 저글링 위주였다가 후반에는 테란의 바이크, 프로토스의 질럿, 저그의 뮤탈리스크가 혼합된 조합으로 변모한다. 플레이어는 자원을 효율적으로 분배하여 방어 타워나 병력을 업그레이드하고, 팀원 간 협력이 필수적이다. 특히 맵 중앙의 주요 거점을 방어하는 동시에 외곽의 자원 지역을 확보하는 전략이 중요하며, 한 명이 무너지면 전체 팀의 방어선이 무너질 위험이 크다. 초보 플레이어는 방어 라인 구축과 자원 관리에서 어려움을 느낄 수 있지만, 팀원 간의 원활한 의사소통과 역할 분담이 승패를 좌우한다. 이 맵은 디펜스 장르에 익숙한 플레이어뿐 아니라 전략적 팀 플레이를 즐기는 유저들에게도 추천할 만한 작품으로, 특히 협동 플레이의 묘미를 느낄 수 있는 맵이다. 플레이 전에는 팀원과의 전략 협의와 자원 분배 계획을 미리 세워두는 것이 중요하다. 또한, 맵의 넓은 크기 때문에 미니맵을 적극 활용하여 적의 웨이브 이동 경로를 예측하는 것이 관건이다. StarCraft: Brood War’s classic defense custom map, *Starship Troopers Advanced 5.64*, is a strategic defense game where five players team up to fend off endless enemy waves. Set on a wasteland tile, the expansive central map features defensive strongpoints, while each player can build defenses around their base and gather resources to strengthen their forces. At 4096x4096, the map is quite large, designed to accommodate both defense and resource collection across its terrain for base expansion. Enemy attacks escalate in waves—starting with weak zerglings and evolving into mixed compositions of Terran vultures, Protoss zealots, and Zerg mutalisks by the late game. Players must allocate resources wisely, upgrading towers or units, and teamwork is essential. A key strategy involves defending central strongpoints while securing resource-rich outer areas, as the collapse of one player can jeopardize the entire team’s defense. Beginners may struggle with base layout and resource management, but smooth communication and clear role assignments among teammates often decide victory. This map is great for both defense veterans and those who enjoy strategic team play, offering a satisfying cooperative experience. Before starting, agree on a shared strategy and resource distribution plan. Given the map’s size, using the minimap effectively to track enemy wave movements is crucial.
HELL 생존 시험 (Test of Survival - HELL)
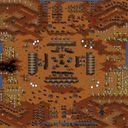
스타크래프트의 ‘Test of Survival - HELL’은 이름에서부터 느껴지듯 극한의 서바이벌 환경을 제공하는 유즈맵이다. 시작과 동시에 벙커로 진입하라는 지시가 있으며, 외부에서는 끊임없이 저글링과 질럿이 무한 스폰되어 플레이어를 압박한다. 맵 중앙의 성큰 콜로니가 방어의 핵심으로, 이를 중심으로 전진배치된 저글링 무리들을 상대하며 건물을 파괴하고 컴퓨터 유닛을 섬멸하는 것이 주요 목표로 보인다. 황혼 타일셋의 어두운 분위기와 붉은 색조가 맵의 긴장감을 한층 더해주며, 특히 성큰 주변의 지형이 복잡하게 배치되어 방어 라인을 구축하기 어렵게 만든다. 벙커와 성큰을 적절히 활용하지 않으면 순식간에 밀려나는 플레이가 예상되며, 끊임없는 적의 물량 공세 속에서Resource management와 위치 선정 능력이 중요할 것으로 추정된다. 초보자에게는 다소 난해할 수 있지만, 숙련된 플레이어라면 이 맵의 치밀한 구조와 전략적 깊이를 즐길 수 있을 것이다. 맵의 난이도는 대체로 높은 수준으로 보이며, 특히 성큰 주변의 좁은 길목에서 벌어지는 전투가 관건일 가능성이 크다. 5인 플레이를 상정하고 제작된 맵으로 보이나, 팀전보다는 개인전 또는 코옵 플레이에 최적화되어 있는 구조다. 플레이 전 반드시 벙커 내부 배치와 성큰의 위치를 숙지하고, 자원 확보 및 방어 전략을 미리 세워두는 것이 중요하다. 이 맵은 순수한 서바이벌 요소와 디펜스 요소가 혼합되어 있으며, 끊임없는 압박 속에서 생존과 공격의 균형을 잡아야 한다. 맵의 분위기와 장르 특성상 긴장감과 몰입도를 중시하는 플레이어에게 강추한다. 맵을 처음 플레이한다면 예상 플레이 시간은 30분 내외로 예상되지만, 난이도에 따라 크게 달라질 수 있으니 주의가 필요하다. StarCraft’s *Test of Survival - HELL* is a custom map that delivers an extreme survival experience, as the name suggests. Right from the start, players are instructed to enter a bunker, while outside, zerglings and zealots spawn endlessly, relentlessly pressuring the player. The core of the defense revolves around the sunkens at the map’s center, where players must fight through waves of zerglings, destroy buildings, and eliminate computer-controlled units. The twilight-themed tileset, with its dark atmosphere and red hues, amplifies the map’s tension, while the complex terrain around the sunkens makes establishing a solid defense line challenging. Without proper use of bunkers and sunkens, players will quickly get overwhelmed by the constant enemy waves. Resource management and strategic positioning are likely key factors in surviving this relentless onslaught. While the map may be difficult for beginners, experienced players will appreciate its intricate design and strategic depth. The difficulty is generally high, with the tight passages around the sunkens likely serving as critical battle points. Though designed with five players in mind, the map is better suited for solo or cooperative play rather than team battles. Before playing, it’s crucial to familiarize yourself with the bunker’s interior layout and the sunkens’ positions, and to plan out resource gathering and defense strategies ahead of time. This map blends pure survival and defense elements, requiring players to balance survival and offense under constant pressure. Given its tense and immersive atmosphere, it’s highly recommended for players who enjoy high-stakes, survival-focused gameplay. If you’re playing for the first time, expect a session to last around 30 minutes, though the difficulty may significantly alter this.
더 그레이트 이블 RPG (The Great Evil RPG)
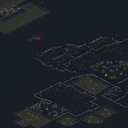
스타크래프트 브루드워의 〈더 그레이트 이블 RPG(The Great Evil RPG)〉는 우주 정거장을 배경으로 한 오리지널 RPG 유즈맵이다. 플레이어는 인간 종족의 마지막 생존자로서 ‘대악마(Great Evil)’의 침공을 막아야 하며, 미로와 같은 맵 곳곳에 흩어진 적들을 처치하고 보스를 물리치는 것이 주 목표로 보인다. 맵의 중앙부는 넓은 통로와 방으로 구성되어 있으며, 외곽으로 갈수록 복잡한 지형과 장애물이 배치되어 있어 전략적인 이동과 전투가 요구된다. 적군은 주로 저글링, 히드라리스크, 울트라리스크 등 저그의 유닛으로 구성되어 있으며, 플레이어는 테란과 프로토스의 유닛을 조합해 전투를 진행하는 것으로 추정된다. 맵 곳곳에는 아이템이나 회복 지점이 배치되어 있어 장비 강화와 체력 관리가 중요할 것으로 보인다. 5인 플레이가 가능한 이 맵은 긴장감 넘치는 서바이벌 요소와 RPG의 성장 시스템이 결합된 하이브리드 장르로, 팀 플레이보다는 개인 혹은 협력 플레이에 중점을 둔 구조로 보인다. 초보자보다는 게임 경험이 어느 정도 있는 플레이어에게 추천되며, 난이도는 맵의 복잡성과 적 배치로 보아 보통 수준일 것으로 예상된다. 플레이 전 맵의 구조와 적 배치 패턴을 숙지하는 것이 승리의 열쇠가 될 것이다. 또한, 맵의 타일셋이 설원이기 때문에 시야 확보와 이동 경로 선택이 더욱 중요해질 수 있다. 스타크래프트의 〈더 그레이트 이블 RPG〉는 우주 정거장을 무대로 한 오리지널 RPG 유즈맵으로, 플레이어는 마지막 인간 생존자로서 ‘대악마’의 침공을 저지해야 한다. 맵은 넓은 통로와 복잡한 방으로 구성되어 있으며, 외곽으로 갈수록 장애물과 적이 증가하는 구조로 보인다. 전투는 테란과 프로토스의 유닛을 조합해 진행하며, 저그의 유닛들이 적으로 등장하는 것으로 추정된다. 맵 곳곳에는 아이템과 회복 지점이 배치되어 있어 전투 중 장비 강화와 체력 관리가 필수적이다. 5인 플레이가 가능한 이 맵은 서바이벌과 RPG 요소가 결합된 하이브리드 장르로, 팀보다는 개인이나 협력 플레이에 중점을 둔 구조로 보인다. 초보자가 아닌 경험 있는 플레이어에게 적합하며, 난이도는 보통 수준으로 예상된다. 플레이 전 맵의 구조와 적 배치 패턴을 미리 숙지하는 것이 승리의 핵심이다. 설원 타일셋 덕분에 시야 확보와 이동 경로 선택이 더욱 중요해질 수 있다. StarCraft: Brood War’s *The Great Evil RPG* is an original RPG custom map set in a space station. Players take on the role of the last surviving human fighting back against the invasion of the ‘Great Evil,’ clearing scattered enemies across a maze-like map and defeating bosses as their main objective. The central area features wide corridors and rooms, while the outer sections become increasingly complex with terrain obstacles, demanding strategic movement and combat. Enemy forces consist primarily of Zerg units like Zerglings, Hydralisks, and Ultralisks, and players are expected to combine Terran and Protoss units in battle. Scattered throughout the map are items and healing points, making equipment upgrades and health management crucial. Designed for up to five players, this map blends tense survival elements with RPG progression systems, focusing more on solo or cooperative play rather than team dynamics. It’s best suited for players with some experience rather than beginners, and the difficulty is likely to be moderate due to the map’s complexity and enemy placements. Familiarizing yourself with the map layout and enemy patterns before playing will be key to victory. Additionally, the snowy tile set may limit visibility and require careful consideration when choosing paths.
골렘 매드니스 SE (Golem Madness SE)
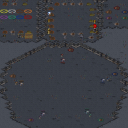
‘골렘 매드니스 SE(Golem Madness SE)’는 스타크래프트: 브루드워의 UMS 유즈맵으로, 5명의 플레이어가 각각의 요새를 지키며 적의 거점을 파괴하는 디펜스 장르의 맵이다. 맵은 우주 타일셋을 기반으로 2048x2048 크기의 넓은 필드에서 펼쳐지며, 중앙을 가로지르는 거대한 강과 그 주변의 좁은 통로가 주요 전투 공간으로 보인다. 플레이어는 각자의 시작 지점에서 자원을 확보하고, 강력한 골렘 유닛을 중심으로 방어선을 구축해야 한다. 적의 공격을 방어하면서 동시에 상대방의 요새를 공격하는 교전 양상이 인상적이다. 맵의 특징은 강을 건너는 교량 역할을 하는 좁은 길목으로, 이곳에서 전투가 집중되며 전략적 위치로 활용된다. 또한 맵 상단과 하단에 위치한 두 번째 길목도 교전 포인트로 작용할 수 있어, 후방 침투를 통한 기습이 가능한 구조다. 맵의 내구도 시스템을 고려한 배치와 더불어, 골렘 유닛의 특성상 체력 관리가 중요해진다. 플레이어는 자원 수급과 유닛 생산을 조율하면서도, 상대방의 움직임을 끊임없이 주시해야 한다. 맵의 난이도는 중간 수준으로, 골렘의 생산과 방어 전략을 얼마나 잘 구사하느냐에 따라 승부가 갈린다. 초보자는 골렘의 특성과 맵의 교전 포인트를 숙지하는 데 집중해야 하며, 숙련자는 자원 관리와 기습 타이밍을 노려야 한다. 맵을 플레이하기 전, 골렘의 스킬과 맵의 주요 교량 위치를 미리 확인해두는 것이 좋다. 전체적으로는 긴장감 넘치는 디펜스 경험을 제공하는 맵으로, 전략과 타이밍을 요구하는 고품질의 유즈맵이다. 5인까지 참여 가능한 구조로, 팀플레이보다는 개인전 성향이 강하지만, 협동이 필요한 순간도 존재한다. 맵의 재출시 버전으로 ‘SE’가 붙어 있어, 원작의 버그 수정과 밸런스 개선이 반영된 것으로 추정된다. 마스터 버전답게 난이도와 몰입도가 뛰어난 맵으로, 디펜스 장르를 любите하는 플레이어들에게 강력히 추천한다. Golem Madness SE is a UMS custom map for StarCraft: Brood War, where five players defend their fortresses while attempting to destroy the enemy strongholds, offering a defensive gameplay experience. The map utilizes a space-themed tileset and spans a large 2048x2048 battlefield, with a prominent river bisecting the field and narrow pathways serving as critical combat zones. Players must gather resources from their starting points and build defense lines centered around powerful golem units. The map’s key feature is the narrow bridge crossing the river, where most battles occur, along with secondary pathways at the top and bottom that allow for potential flank attacks. The durable structure of the map and the unique properties of the golem units make resource management and health control essential. Players must balance resource collection with unit production while constantly monitoring enemy movements. The difficulty is moderate, with victory often hinging on the player’s ability to effectively deploy golem units and defend strategic positions. Beginners should focus on understanding golem mechanics and key battle points, while advanced players can exploit resource management and ambush timing. Before playing, it’s advisable to familiarize yourself with golem skills and the map’s bridge locations. Overall, this map delivers an intense defensive experience requiring strategic planning and precise timing. Designed for up to five players, it leans toward individual play but includes moments where teamwork is necessary. The SE re-release suggests bug fixes and balance improvements, making it a high-quality choice for fans of defense-themed maps.
중국 방어전 (Chinese Defense)
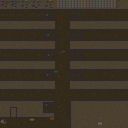
스타크래프트 브루드워의 고전 디펜스 유즈맵인 <Chinese Defense>는 방어전 중심의 전략적 재미를 제공하는 맵으로, 플레이어는 적 건물들을 파괴하는 동시에 방어선을 구축해야 한다. 맵은 황무지 타일셋을 기반으로 4096x4096 크기의 넓은 공간에서 펼쳐지며, 중앙을 가로지르는 긴 통로가 주요 전투 지역으로 기능한다. 적절한 길목에 방어 건물을 배치하고, 소환되는 유닛을 효율적으로 컨트롤하는 것이 핵심인데, 특히 5인 플레이를 상정하고 설계되어 있어 팀워크와 전략적 협력이 요구된다. 한국 유즈맵 커뮤니티에서 오랜 사랑을 받은 이 맵은 단순하면서도 깊이 있는 디펜스 구조로 무장한 맵으로, 초보자와 숙련자 모두에게 적합한 난이도를 제공한다. 방어 건물의 배치와 리소스 관리, 그리고 유닛의 효율적 활용을 통해 플레이어는 끊임없이 변하는 전투 상황에 대응해야 한다. 맵의 승리 조건은 적 건물의 완전 파괴로, 이를 위해 플레이어는 끊임없이 전략을 갱신하고, 적의 공격 패턴을 분석해야 한다. 넓은 맵의 공간을 활용한 진형 싸움과 긴장감 넘치는 전투가 특징이며, 특히 팀플레이 시에는 역할 분담이 더욱 중요해진다. 플레이 전 미리 확인해야 할 점은 방어 건물의 종류와 배치 가능한 위치다. 맵 곳곳에 흩어져 있는 건설 가능한 공간을 확인하고, 적의 주요 공격 루트를 예상하여 최적의 방어선을 구축하는 것이 중요하다. 또한, 유닛의 생산과 업그레이드는 리소스 관리와 밀접한 관련이 있으므로, 초기 자원 확보와 생산 우선순위를 신중히 결정해야 한다. 이 맵은 단순한 디펜스가 아니라, 전략적 사고와 팀워크가 요구되는 고난이도 유즈맵으로, 오랜 시간 동안 많은 플레이어들에게 사랑을 받았다. Chinese Defense is a classic defense-based custom map in StarCraft: Brood War, offering strategic fun centered on destruction and defense. The map, built on a wasteland tileset within a 4096x4096 space, features a long central corridor as the primary battle zone. Players must strategically place defensive structures along key pathways and control summoned units effectively, with the design optimized for 5-player matches requiring teamwork and strategy. A long-time favorite in the Korean custom map community, this map provides a simple yet deep defense structure suitable for both beginners and veterans. Players must continuously adapt to changing battle situations through strategic placement of defenses, resource management, and efficient unit control. The victory condition revolves around completely destroying enemy buildings, demanding constant strategy updates and analysis of enemy attack patterns. The map's wide space allows for positional warfare and tense combat, with team play emphasizing the importance of role distribution. Before playing, it's crucial to check the types of defensive structures and their placements. Identifying available construction spaces scattered across the map and anticipating enemy attack routes are key to building optimal defensive lines. Unit production and upgrades are closely tied to resource management, so careful decisions on initial resource allocation and production priorities are essential. This map transcends simple defense, evolving into a high-difficulty custom map that demands strategic thinking and teamwork, beloved by players for years.
최근 등록된 맵
새로 추가된 파일과 버전을 확인하세요.
기억력의 한계 (Memory Limit)
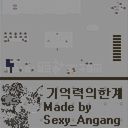
이 맵은 «기억력의 한계»라는 이름으로 배포된 유즈맵으로, 플레이어의 집중력과 기억력을 시험하는 독특한 디펜스 장르에 속한다. 스타크래프트 브루드워의 유즈맵답게 섬세한 맵 디자인과 전략적 요소가 결합되어 있으며, 특히 «Sexy_Angang»이라는 제작자의 개성이 반영된 것으로 보인다. 5인 플레이를 지원하는 이 맵은 중앙에 위치한 넓은 본진 지역과 각 플레이어의 시작 지점 사이에 복잡한 구조물이 배치되어 있어, 공격로와 방어선의 설계가 핵심 전략 포인트가 된다. 게임의 핵심은 «기억력»이라는 콘셉트에 맞춰, 플레이어는 맵 곳곳에 흩어진 단서나 패턴을 기억하고 이를 바탕으로 적의 공격을 방어하거나 역공을 펼쳐야 한다. 맵 이미지 상으로는 중앙 본진 주변에 방어 건물이나 장애물이 밀집되어 있는 것으로 보이며, 각 플레이어의 시작 지역은 상대적으로 안전하지만 외부 연결 지점이 좁아 전략적 접근이 제한적이다. 특히 «Asia»와 같은 지역별 커뮤니티에서 인기를 얻었던 맵으로 추정되며, «Mapside.net»에서 배포되었을 가능성이 있어 관련 커뮤니티의 피드백을 참고할 수 있었을 것이다. 이 맵을 플레이할 때는 «Let's Play»라는 제작자의 메시지가 포함되어 있어, 단순히 방어만을 목표로 하지 않고 «플레이» 자체의 재미를 강조하는 방식으로 구성되었을 가능성이 크다. 또한 «naver.com» 이메일이 기재되어 있어 한국 커뮤니티를 타겟으로 삼았음을 짐작할 수 있다. 플레이어는 각자의 시작 지역에서 자원을 모아 방어선을 구축하거나, 중앙을 점령하는 등 다양한 전략을 시도할 수 있지만, «기억력»이라는 콘셉트에 따라 특정 패턴이나 타이밍을 외워야만 안정적인 방어가 가능하다. 이 맵은 초보 플레이어에게는 다소 난해할 수 있지만, 디펜스와 기억력 훈련을 동시에 즐기고 싶은 유저들에게는 훌륭한 선택지가 될 것이다. 또한 팀플레이가 가능한 구조로 보이나, 팀원 간의 커뮤니케이션이 필수적일 것으로 예상된다. 맵의 복잡한 구조는 «一進一退»의 긴장감을 유지하며, «기억력의 한계»라는 제목답게 플레이어의 인내심과 전략적 사고를 동시에 요구한다. This custom map, distributed under the name "Memory Limit," is a unique defense genre map that tests players' focus and memory. As expected from a StarCraft: Brood War custom map, it combines intricate map design with strategic elements, reflecting the creator "Sexy_Angang's" signature style. Designed for five players, the map features a spacious main base in the center and complex structures between each player's starting location, making the design of attack routes and defensive lines a key strategic focus. The core gameplay revolves around the concept of "memory," where players must remember clues or patterns scattered across the map to defend against enemy attacks or launch counterattacks. The map appears to have dense defensive structures and obstacles around the central main base, while each player's starting area is relatively safe but has narrow external connections that limit strategic access. It was likely popular in regional communities like "Asia" and may have been distributed on "Mapside.net," allowing for feedback from related communities. The map includes a message from the creator, "Let's Play," suggesting it emphasizes the fun of "playing" itself rather than just defense. Additionally, the inclusion of a "naver.com" email indicates it was targeted at the Korean community. Players can gather resources from their starting areas to build defenses or attempt to seize the center, but stable defense requires memorizing specific patterns or timings due to the "memory" concept. While this map may be challenging for beginners, it serves as an excellent choice for players who want to enjoy defense and memory training simultaneously. The structure also appears to support team play, though communication between teammates is essential. The map's complex layout maintains a tense "ebb and flow," demanding both patience and strategic thinking, fitting its title "Memory Limit."
언리얼 토너먼트 매드니스 (Unreal Tournament Madness)
스타크래프트 브루드워의 유즈맵 중 하나로, 총격전과 전투를 중심으로 펼쳐지는 서바이벌 디펜스 장르의 맵이다. 내부 제목과 설명에서 확인할 수 있듯 ‘Kill...Kill...Kill...’이라는 슬로건이 강조되며, 플레이어는 끊임없이 몰려드는 적군 유닛을 상대로 teritorry를 방어하거나 공격해야 한다. 맵의 주요 특징은 우주 테마의 타일셋을 활용한 어두운 분위기와 더불어, 화면 중앙에 배치된 광범위한 전투 지역이 시각적 포커스를 잡아낸다는 점이다. 맵 상단과 하단에 배치된 플레이어 진영은 각각의 기지 역할을 하며, 적군의 끊임없는wave가 쉴 새 없이 몰려온다. 전투는 주로 근접과 원거리 공격이 혼합된 형태로 진행되며, 플레이어는 각자의 전략과 컨트롤을 바탕으로 적군을 제압해야 한다. 맵의 구조는 비교적 간단한 편이지만, 적이 끊임없이 쏟아져 나오는 난전 속에서 생존과 승리를 위한 타이밍과 자원 관리 능력이 중요하다. 초보자보다는 전투와 디펜스 경험이 어느 정도 있는 플레이어에게 더 적합한 맵으로 보이며, 난이도는 보통 수준으로 추정된다. 특히, 중앙 전투 지역에서의 컨트롤과 순간적인 판단력이 승리를 가를 수 있는 열쇠가 될 것이다. 플레이 전에는 자신의 진영과 기지 구조를 충분히 숙지하고, 적군의 공격 패턴을 미리 예측하는 연습이 필요하다. 맵의 우주 테마와 전투 중심의 진행 방식은 마치 ‘언리얼 토너먼트’와 같은 분위기를 연상시키며, 유즈맵으로서의 개성 있는 재미를 제공한다. 다만, 맵 설명에 기재된 웹사이트 링크가 현재 유효한지는 확인되지 않았으므로, 추가적인 정보가 필요한 경우 관련 커뮤니티나 아카이브를 참고하는 것이 좋다. 전체적으로는 전투와 디펜스를 좋아하는 유저들에게 추천할 만한 맵이며, 특히 서바이벌과 디펜스 장르를 선호하는 플레이어라면 충분히 즐길 수 있을 것이다. 전투가 지속되면서 몰려오는 적군을 상대로 어떻게 전략을 세우고 자원을 관리할 것인지에 따라 결과가 크게 달라질 수 있으므로, 다양한 시도를 해보면서 맵에 익숙해지는 것이 중요하다. This is a user-created map from *StarCraft: Brood War*, classified as a survival defense game focused on gunfights and battles. As suggested by the map's title and description, the slogan "Kill...Kill...Kill..." is prominently featured, where players must defend or attack territory against waves of enemy units that continuously pour in. The map's key features include its dark, space-themed tile set, which sets a moody atmosphere, and a vast combat zone centrally located on the screen that draws visual focus. Player bases, positioned at the top and bottom of the map, serve as their respective starting points, while enemy forces relentlessly assault in waves. Battles primarily involve a mix of melee and ranged combat, requiring players to suppress enemies using their own strategies and control. While the map's structure is relatively simple, survival and victory hinge on timing and resource management amid the constant chaos of enemy waves. It seems more suited for players with some experience in combat and defense rather than beginners, with an estimated difficulty level of moderate. Success often depends on precise control and quick decision-making in the central combat zone. Before playing, it's essential to thoroughly understand your base layout and practice predicting enemy attack patterns. The space-themed aesthetic and battle-focused progression evoke a vibe similar to *Unreal Tournament*, offering a unique and engaging experience as a custom map. However, since the website link provided in the map description may no longer be valid, those seeking additional information should check relevant communities or archives. Overall, this map is recommended for players who enjoy combat and defense games, particularly those who prefer survival and defense genres. The outcome heavily depends on how well you strategize and manage resources against the relentless enemy waves, so experimenting and becoming familiar with the map is key to mastering it.
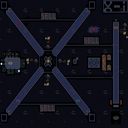
X-i 디펜스 (X-i Defense)
‘X-i Defense’는 스타크래프트 브루드워의 대표적인 디펜스 장르 유즈맵으로, 플레이어는 끊임없이 밀려오는 적의 웨이브를 방어해야 한다. 맵은 중앙에 플레이어의 기지를 배치하고, 사방에서 적 유닛이 끊임없이 등장하는 구조로 되어 있어, 전략적 배치와 자원 관리, 순간적인 판단력이 요구된다. 맵의 디자인 특성은 화산 타일셋을 활용한 붉은 색감과 rugged한 지형으로, 적의 공격이 임박했을 때의 긴장감을 배가시킨다. 특히, 기지 주변의 좁은 길목과 요새화된 포인트들이 다수의 적을 한꺼번에 상대해야 하는 순간을 만들어내며, 이는 디펜스 맵에서 흔히 느낄 수 있는 긴박감을 극대화한다. 플레이 방식은 단순하면서도 깊이 있는 전략을 요구한다. 초반에는 적은 소규모의 웨이브로 시작하지만, 시간이 지나면서 다수의 고급 유닛이 포함된 공격이 반복된다. 플레이어는 방어 타워를 건설하고, 유닛을 생산하여 배치하는 동시에, 자원 채집과 기지 확장을 병행해야 한다. 맵의 지형적 특징인 계단식 구조와 좁은 통로들은 효율적인 방어선을 구축할 수 있는 포인트를 제공하며, 잘못된 배치나 자원의 오버스펜딩은 곧 게임의 패배로 이어질 수 있다. 또한, 맵 곳곳에 숨겨진 보너스 자원 포인트와 추가 방어 시설들이 배려되어 있어, 숙련된 플레이어는 이를 활용한 역습 전략을 구사할 수 있다. 이 맵을 추천하는 대상은 디펜스 장르에 익숙한 플레이어부터, 전략적 사고와 순간 판단력이 뛰어난 유저까지 폭넓다. 특히, 스타크래프트의 기본 메커니즘을 이해하고 있다면 누구나 쉽게 접근할 수 있지만, 고득점을 노리려면 여러 번의 재도전과 전략의 최적화가 필수적이다. 단, 맵의 난이도가 높지 않지만, 지속적인 공격과 예기치 못한 돌파구에 대응해야 하므로, 긴장감을 유지하며 플레이할 수 있는 유저에게 적합하다. 마지막으로, 맵의 볼륨이 크고 디자인도 세밀하기 때문에, 한 번 플레이한 후에도 재방문해 새로운 전략을 모색해 볼 만한 가치가 충분하다. 준비된 플레이어라면, 이 맵을 통해 디펜스 장르의 깊이를 제대로 느낄 수 있을 것이다. This map, X-i Defense, stands out as a classic Defense genre custom map in StarCraft: Brood War, where players must withstand relentless waves of enemy attacks. The map is structured around a central base with a rugged volcanic tile set, enhancing the visual tension as enemies approach. The terrain features narrow pathways and fortified points, forcing players to make strategic decisions about tower placement and unit production. Resources are scarce, requiring careful management to balance defense and expansion. The gameplay is straightforward yet demands deep tactical thinking. Early waves are manageable, but as time progresses, the enemy sends stronger, more varied units, testing the player's adaptability. Narrow passages and stair-like formations create choke points where efficient tower placement can turn the tide. Hidden resource points and defensive structures add layers to the strategy, allowing skilled players to execute counterattacks or reinforce weak spots. While accessible to newcomers familiar with StarCraft's mechanics, mastering high scores requires repeated attempts and refined tactics. This map is ideal for players who enjoy the Defense genre and those who thrive under pressure, needing quick reflexes and strategic foresight. Though not overly difficult, the constant pressure and unpredictable enemy breakthroughs demand sustained focus. Its large scale and detailed design make it worth revisiting, offering new challenges with each playthrough. For those seeking depth and excitement in Defense maps, X-i Defense delivers a satisfying and engaging experience.
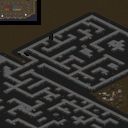
더 블러드 아레나 3.1 (The Blood Arena 3.1)
스타크래프트 브루드워의 대표적인 아레나형 유즈맵 중 하나인 〈더 블러드 아레나 3.1〉은 플레이어가 적 유닛을 처치하고 살아남는 전투 중심의 맵으로, 생존과 공격의 균형을 맞춰야 하는 긴장감 넘치는 플레이가 특징이다. 맵 중앙의 넓은 공간은 전투가 벌어지는 주요 무대로, 적의 끊임없는 웨이브를 상대하며 아군의 영웅 유닛을 강화하거나 보호하는 전략이 요구된다. 이미지 상으로는 넓은 황무지 지형에 다양한 구조물이 배치되어 있으며, 전투가 치열해질수록 맵의 복잡한 지형이 플레이어의 움직임을 제약하거나 보호하는 역할을 한다. 맵의 가장자리에는 보호막이나 힐링 존으로 추정되는 지역이 보이며, 이를 활용해 체력을 회복하거나 후방에서 지원하는 플레이가 가능하다. 또한, 맵의 상단과 좌측에 위치한 보스 생성 지역은 강력한 적을 소환해 전투의 난이도를 한층 높이는 요소로, 보스를 efficiently 처리하는 것이 승리 조건의 핵심으로 보인다. 이 맵은 5명의 플레이어가 동시에 참여하는 대형 전투 형식으로, 각 플레이어의 협력과 개별 실력이 승패를 좌우한다. 초보자도 쉽게 접근할 수 있지만, 고수와의 대결에서는 섬세한 컨트롤과 전략적 판단이 필수적이다. 전투가 지속되면서 맵의 Herex와 같은 구조물이 파괴되거나 변화하는 메커니즘이 포함되어 있는지는 이미지만으로는 확인되지 않지만, 맵의 복잡한 구조는 이러한 동적 요소가 있을 가능성을 시사한다. 〈더 블러드 아레나 3.1〉은 밀리 기반의 아레나 장르에 속하지만, 유닛의 강화와 보호, 웨이브 형식의 적 출현 등 유즈맵 특유의 시스템이 결합되어 있어 순수한 밀리와는 차별화된 경험을 제공한다. 특히 적의 공격을 방어하거나 보스를 쓰러뜨리는 과정에서 얻는 보상 시스템이 존재할 가능성이 높으며, 이는 플레이어의 성장과 전략 변화를 유도하는 주요 메커니즘으로 추정된다. 맵의 제목과 설명에서 'Kill Enemys', 'Heals', 'Protectors', 'Boss'라는 키워드가 반복적으로 등장하는 점은 전투와 생존, 그리고 보스전을 중심으로 한 플레이 스타일을 강조한다. 이러한 요소들은 〈더 블러드 아레나 3.1〉이 단순히 적을 죽이는 것에 그치지 않고, 생존과 전략적 선택이 뒤섞인 복잡한 전투 경험을 제공함을 보여준다. 이 맵을 플레이하기 전에는 맵의 중앙 지형과 보스 생성 지역, 그리고 회복 구역의 위치를 정확히 파악하는 것이 중요하다. 또한, 아군의 영웅 유닛이 어떤 능력을 보유하고 있는지, 적의 웨이브 패턴이 어떤지 등을 사전 점검하면 보다 안정적인 전투를 펼칠 수 있을 것이다. 맵의 넓고 복잡한 지형은 때로는 플레이어에게 유리한 위치를 제공하기도 하지만, 반대로 적의 다굴 앞에 무방비 상태로 노출될 위험도 내포하고 있어 신중한 움직임이 요구된다. 〈더 블러드 아레나 3.1〉은 스릴 넘치는 전투와 전략적 깊이를 동시에 추구하는 플레이어들에게 강력히 추천할 만한 맵으로, 특히 아레나 장르를 любить하는 유저라면 큰 재미를 느낄 수 있을 것이다. 맵의 지속적인 업데이트와 밸런스 조정을 통해 더 많은 플레이어들이 즐길 수 있도록 제작된 이 작품은, 스타크래프트 유즈맵의Classic한魅力을 여실히 보여준다. One of the most iconic arena-style custom maps in *StarCraft: Brood War*, *The Blood Arena 3.1* is a combat-focused game where players battle to survive by defeating enemy units, striking a balance between survival and offense in high-tension gameplay. The map’s wide central area serves as the primary battlefield, where players must strategize—strengthening or protecting their hero units—while fending off relentless enemy waves. Visually, the vast wasteland terrain is dotted with structures that influence movement, either hindering or shielding players as combat intensifies. Along the map’s edges are what appear to be shield or healing zones, allowing players to recover health or provide support from the rear. At the top and left sides of the map are boss spawn locations, which summon powerful enemies to escalate the challenge; efficiently eliminating these bosses is likely a key condition for victory. Designed for five players in a large-scale battle format, *The Blood Arena 3.1* hinges on teamwork and individual skill to determine the outcome. While accessible to beginners, high-level play demands precise control and strategic decision-making. The map’s dynamic structures, such as the *Herex*, may change or be destroyed over time, though this isn’t confirmed from visuals alone—the complex layout suggests such evolving mechanics could exist. Though rooted in the standard *StarCraft* arena genre, *The Blood Arena 3.1* stands out with its custom systems, including unit upgrades, hero protection, and wave-based enemy spawns, offering a distinct experience beyond pure *StarCraft* gameplay. Reward systems likely tied to defense and boss defeats may further enhance player progression and strategic adaptation. The repeated keywords in the title and description—*"Kill Enemys," "Heals," "Protectors,"* and *"Boss"*—highlight a playstyle centered on combat, survival, and boss battles, blending these elements into a layered and engaging experience. Before playing, it’s crucial to familiarize yourself with the central terrain, boss spawn zones, and healing areas. Checking your hero unit’s abilities and enemy wave patterns in advance can lead to smoother, more stable battles. While the map’s expansive and intricate terrain offers advantageous positions, it also exposes players to ambushes or overwhelming enemy forces, making cautious movement essential. *The Blood Arena 3.1* is a must-try for those seeking thrilling combat and deep strategy, especially fans of the arena genre who will likely find it highly enjoyable. Continuously updated and balanced for accessibility, this work embodies the timeless charm of *StarCraft* custom maps, ensuring an experience that resonates with both new and veteran players.
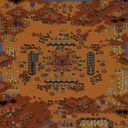
테스트 오브 서바이벌 (eins) Ver1.11 (Test of survival (eins) Ver1.11)
스타크래프트 브루드워 유즈맵 ‘Test of survival (eins) Ver1.11’을 리뷰합니다. 이 맵은 총 5명의 플레이어가 함께하는 서바이벌 장르의 유즈맵으로, 내부 설명에 적힌 ‘Kill the overmind’에서 알 수 있듯이 오버마인드를 무찌르며 살아남아야 하는 목표를 가지고 있습니다. 황혼 타일셋을 기반으로 한 어두운 분위기의 맵은 플레이어들에게 긴장감을 조성하며, 맵 중앙에 위치한 오버마인드를 중심으로 펼쳐지는 전투가 주요 볼거리입니다. 서바이벌 장르답게 끊임없는 적의 웨이브가 몰아치는 가운데, 플레이어들은 지속적으로Resources를 확보하고 Upgrade를 진행해야 합니다. 맵의 구조는 비교적 개방적이지만, 오버마인드 주변에는 방어선을 구축할 수 있는 공간이 마련되어 있어 전략적인 플레이가 가능합니다. 특히 ‘eins’라는 버전명에서 유추해 볼 때, 이 맵은 시리즈물의 중간 버전으로 보이며, 이전 버전들보다 밸런스가 개선되었을 가능성이 큽니다. 플레이어들은 각자의 스타일을 살려서 정예 유닛을 키우거나, 다수의 병력을 꾸려서 오버마인드를 향해 진격할 수 있습니다. 이 맵의 가장 큰 특징은 끊임없는 적의 공격과 제한된 리소스 사이에서 균형을 맞추는 것입니다. 초보자들은Resources 관리와 Upgrade 우선순위를 잘못 설정해 쉽게 무너질 수 있지만, 숙련자라면 효율적인Resource 활용과 타이밍을 잡는 데 중점을 둬야 합니다. 또한, 팀 플레이가 가능하다는 점에서 친구들과의 협동 플레이도 추천할 만합니다. 다만, 오버마인드를 무찌르는 것이 목표지만, 적의 패턴이나 맵의 디자인 변화가 시리즈를 거듭할수록 어떻게 달라질지 궁금증을 자아냅니다. 이 맵을 즐기기 위해서는 최소 5명의 플레이어가 필요하며, 예상 플레이 시간은 30분에서 1시간 정도로 추정됩니다. 초보자의 경우 난이도가 다소 높을 수 있으므로, 먼저 튜토리얼이나 쉬운 난이도의 유즈맵으로 연습을 거친 뒤 도전하는 것이 좋습니다. Test of survival (eins) Ver1.11 is a survival-style custom map for StarCraft: Brood War where up to five players must survive endless waves of enemies and ultimately defeat the Overmind. Set against the backdrop of the Twilight tileset, the map’s dark and immersive atmosphere heightens the tension as players scramble to gather resources, upgrade their forces, and defend against relentless assaults. The game revolves around protecting the central Overmind while expanding outward to secure key strategic points. Players can choose between a rush strategy, overwhelming the enemy with sheer numbers, or a more methodical approach, building elite units and fortifications. The ‘eins’ in the title suggests this is part of a series, likely refining mechanics and balance with each iteration, though the core survival gameplay remains consistent. One of the map’s standout features is its resource management challenge. Players must carefully balance income, spending, and upgrades to avoid being overwhelmed by the enemy’s persistent waves. Novices may struggle with prioritization, while experienced players will focus on optimizing their build orders and timing. Cooperative play is highly recommended, as teamwork and communication can mean the difference between survival and defeat. Given its survival mechanics, players should expect a dynamic and challenging experience that tests their adaptability. A full game typically lasts between 30 minutes to an hour, depending on player skill and strategy. Beginners are advised to practice with simpler custom maps or tutorials before tackling this intense challenge.
HELL 생존 시험 (Test of Survival - HELL)
스타크래프트의 ‘Test of Survival - HELL’은 이름에서부터 느껴지듯 극한의 서바이벌 환경을 제공하는 유즈맵이다. 시작과 동시에 벙커로 진입하라는 지시가 있으며, 외부에서는 끊임없이 저글링과 질럿이 무한 스폰되어 플레이어를 압박한다. 맵 중앙의 성큰 콜로니가 방어의 핵심으로, 이를 중심으로 전진배치된 저글링 무리들을 상대하며 건물을 파괴하고 컴퓨터 유닛을 섬멸하는 것이 주요 목표로 보인다. 황혼 타일셋의 어두운 분위기와 붉은 색조가 맵의 긴장감을 한층 더해주며, 특히 성큰 주변의 지형이 복잡하게 배치되어 방어 라인을 구축하기 어렵게 만든다. 벙커와 성큰을 적절히 활용하지 않으면 순식간에 밀려나는 플레이가 예상되며, 끊임없는 적의 물량 공세 속에서Resource management와 위치 선정 능력이 중요할 것으로 추정된다. 초보자에게는 다소 난해할 수 있지만, 숙련된 플레이어라면 이 맵의 치밀한 구조와 전략적 깊이를 즐길 수 있을 것이다. 맵의 난이도는 대체로 높은 수준으로 보이며, 특히 성큰 주변의 좁은 길목에서 벌어지는 전투가 관건일 가능성이 크다. 5인 플레이를 상정하고 제작된 맵으로 보이나, 팀전보다는 개인전 또는 코옵 플레이에 최적화되어 있는 구조다. 플레이 전 반드시 벙커 내부 배치와 성큰의 위치를 숙지하고, 자원 확보 및 방어 전략을 미리 세워두는 것이 중요하다. 이 맵은 순수한 서바이벌 요소와 디펜스 요소가 혼합되어 있으며, 끊임없는 압박 속에서 생존과 공격의 균형을 잡아야 한다. 맵의 분위기와 장르 특성상 긴장감과 몰입도를 중시하는 플레이어에게 강추한다. 맵을 처음 플레이한다면 예상 플레이 시간은 30분 내외로 예상되지만, 난이도에 따라 크게 달라질 수 있으니 주의가 필요하다. StarCraft’s *Test of Survival - HELL* is a custom map that delivers an extreme survival experience, as the name suggests. Right from the start, players are instructed to enter a bunker, while outside, zerglings and zealots spawn endlessly, relentlessly pressuring the player. The core of the defense revolves around the sunkens at the map’s center, where players must fight through waves of zerglings, destroy buildings, and eliminate computer-controlled units. The twilight-themed tileset, with its dark atmosphere and red hues, amplifies the map’s tension, while the complex terrain around the sunkens makes establishing a solid defense line challenging. Without proper use of bunkers and sunkens, players will quickly get overwhelmed by the constant enemy waves. Resource management and strategic positioning are likely key factors in surviving this relentless onslaught. While the map may be difficult for beginners, experienced players will appreciate its intricate design and strategic depth. The difficulty is generally high, with the tight passages around the sunkens likely serving as critical battle points. Though designed with five players in mind, the map is better suited for solo or cooperative play rather than team battles. Before playing, it’s crucial to familiarize yourself with the bunker’s interior layout and the sunkens’ positions, and to plan out resource gathering and defense strategies ahead of time. This map blends pure survival and defense elements, requiring players to balance survival and offense under constant pressure. Given its tense and immersive atmosphere, it’s highly recommended for players who enjoy high-stakes, survival-focused gameplay. If you’re playing for the first time, expect a session to last around 30 minutes, though the difficulty may significantly alter this.
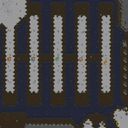
팀 캐논 디펜스 v7.0 (Team Cannon Defense v7.0)
‘팀 캐논 디펜스 v7.0’은 스타크래프트 브루드워의 대표적인 디펜스 유즈맵으로, 플레이어가 포지션을 차지하고 적의 공격을 방어하는 방식의 맵이다. 맵의 핵심은 ‘캐논’이라는 유닛을 배치하여 적의 공격을 차단하고, 이를 바탕으로 지속적인 수비와 공격을 조율하는 데 있다. 맵은 넓은 평지를 기반으로 하며, 중앙에 위치한 방어 포인트를 중심으로 적의 웨이브가 끊임없이 몰려온다. 플레이어는 각 포지션에 배치된 캐논을 업그레이드하고, 추가 병력을 조합하여 방어선을 구축해야 하는데, 특히 ‘WALL FRIENDLY’라는 특징 덕분에 벽을 활용한 방어 전략이 수월하다. 이 맵의 가장 큰 특징은 ‘캐논’이라는 유닛에 특화되어 있다는 점이다. 일반적인 디펜스 맵에서 흔히 볼 수 있는 히드라리스크나 저글링 같은 유닛 대신, 캐논을 적극적으로 활용해야 하며, 이는 맵의 전략적 깊이를 크게 높인다. 또한, 맵의 규모가 크고 타일셋이 플랫폼 기반인 만큼, 맵 디자인 자체가 방어 구조를 고려해 최적화되어 있어, 플레이어는 자연스럽게 방어 포지션을 잡게 된다. 맵의 진행은 웨이브 형식으로, 일정 주기마다 적의 대규모 공격이 시작되는데, 이 공격이 끝나면 일시적인 휴식 시간이 주어지며,在此期间 플레이어는 자원을 모아 방어력을 강화하거나 추가 병력을 생산할 수 있다. 이 맵을 즐기기 위해서는 캐논의 특성과 배치 위치를 숙지하는 것이 중요하다. 캐논은 사정거리와 공격력이 높지만, 이동이 불가능하다는 한계가 있어, 적절한 위치에 미리 배치하는 것이 필수적이다. 또한, 맵의 난이도는 웨이브의 강도와 적의 조합에 따라 달라지는데, 초반에는 비교적 수월하지만, 후반으로 갈수록 적의 공격 패턴이 복잡해지고, 방어 라인을 유지하는 것이 어려워진다. 따라서, 팀원 간의 협력이 무엇보다 중요하며, 각 포지션의 역할 분담을 clearly 해야만 안정적인 방어가 가능하다. 이 맵은 주로 5인 이상의 팀 플레이를 상정하고 있지만, 혼자서도 도전해 볼 수 있는 구조로 되어 있어, 다양한 플레이 스타일을 시도해 볼 수 있다. 특히, 방어와 공격의 밸런스를 맞추는 것이 핵심 포인트이며, 이는 맵의 재미를 크게 좌우한다. 이 맵을 추천하는 대상은 디펜스 유즈맵愛好者, 특히 캐논을 중심으로 한 전략적 플레이를 즐기는 유저들에게 적합하다. 또한, 팀 플레이를 통해 협동의 중요성을 느낄 수 있어, 친구들과 함께 플레이하기에 좋은 맵이다. 플레이 전에는 캐논의 배치 위치와 업그레이드 우선순위를 미리 계획해 두는 것이 좋으며, 팀원과의 커뮤니케이션을 통해 방어 라인을 효율적으로 구성하는 것이 성공의 열쇠가 될 것이다. ‘Team Cannon Defense v7.0’ is a classic defense custom map in *StarCraft: Brood War*, where players occupy positions and defend against waves of enemy attacks. The core of the map revolves around placing and upgrading ‘Cannons’ to block enemy forces while coordinating continuous defense and offense. The map features a wide open field with a central defensive point, where enemy waves relentlessly surge in. Players must upgrade Cannons stationed at each position, combine additional forces, and fortify their defenses—especially with the map’s ‘WALL FRIENDLY’ design, making wall-based defensive strategies much easier to execute. What sets this map apart is its heavy focus on ‘Cannons’ as the primary unit. Unlike typical defense maps that rely on units like Hydralisks or Zerglings, success here hinges on effectively utilizing Cannons, which significantly deepens the strategic layer. The large scale and platform-based tileset are also optimized for defense, naturally guiding players toward strong defensive positions. The gameplay follows a wave-based structure, where massive enemy attacks occur at set intervals. After each wave, players receive a brief respite to gather resources, reinforce defenses, or produce additional troops. To master this map, understanding the properties and optimal placement of Cannons is crucial. While Cannons boast long range and high firepower, they are immobile, so pre-positioning them strategically is essential. The difficulty escalates as waves intensify and enemy compositions grow more complex, making late-game defense increasingly challenging. Teamwork is vital, and clearly defined roles for each position are necessary to maintain a stable defense. Though designed primarily for teams of five or more, the map can also be tackled solo, offering diverse playstyles to explore. Balancing defense and offense is key to success—and to the map’s overall enjoyment. This map is perfect for fans of defense custom maps, especially those who enjoy strategic play centered around Cannons. It also shines in team settings, highlighting the importance of cooperation, making it a great choice for playing with friends. Before jumping in, plan your Cannon placements and upgrade priorities, and communicate effectively with teammates to optimize your defensive setup—this will be the key to victory.
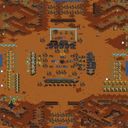
TOS - Virtuoso - Beta 6
‘TOS - Virtuoso - Beta 6’는 스타크래프트: 브루드워의 유즈맵으로, 다섯 명의 플레이어가 한 팀을 이루어 진행하는 전략 디펜스 장르의 맵이다. 맵 중앙에는 거대한 구조물이 자리 잡고 있으며, 주변으로 적의Wave가 끊임없이 몰려드는 구조가 특징이다. 플레이어는 시작 지점에서 자원을 모아 건물을 건설하고 유닛을 생산하여 방어선을 구축해야 한다. 맵의 핵심은 ‘Virtuoso’라는 이름 그대로 섬세한 미세 컨트롤과 리소스 관리, 그리고 타워와 유닛의 조합을 통한 최적의 방어 전략을 요구한다는 점이다. 특히, 맵의 지형이 복잡하고 좁은 길목이 많아 유닛 배치와 진형이 승패를 좌우할 수 있다. 또한, 중앙 구조물을 둘러싼 지역은 방어 포인트가 밀집되어 있어, 이곳을 얼마나 잘 방어하는지가 게임의 흐름을 결정짓는다. 초반에는 소규모의 적이 등장하지만, 후반부로 갈수록 적의 Wave가 increasingly 강력해지며, 특히 보스급 유닛이 등장하는 시점이 관건이다. 플레이어 간 협력이 필수적이며, 개인이 스노우볼링을 일으키기보다는 팀의 전체적인 밸런스를 맞추는 데 중점을 둬야 한다. 맵의 분위기는 SF풍으로, 건물이 고층 구조물로 디자인되어 있어 시각적으로도 흥미로운 요소가 많다. 이 맵을 즐기기 위해서는 최소 5인 이상의 플레이어가 필요하며, 특히 디펜스와 전략적 플레이를 좋아하는 유저들에게 추천된다. 초보자의 경우, 타워의 배치와 리소스 관리에 대한 기본적인 이해가 필요하며, 팀원과의 원활한 소통이 성공의 열쇠가 될 것이다. 맵을 시작하기 전, UI와 건물이 나타내는 기능을 숙지하는 것이 중요하다. 또한, 적의 Wave 패턴을 미리 확인하고, 방어 타워의 종류와 효율적인 배치 방법을 익혀두면 게임에서 훨씬 유리한 고지를 점할 수 있다. ‘TOS - Virtuoso - Beta 6’는 단순히 방어와 공격의 반복이 아닌, 전략적 깊이가 있는 맵으로, 여러 번의 플레이를 통해 숙련도를 높일 수 있는 장점이 있다. 맵의 난이도는 중간 정도로, 초반에는 수월하게 느껴지지만 후반부로 갈수록 적의 공격 패턴이 복잡해지며, 이를 극복하기 위한 전략적 사고가 요구된다. 다양한 빌드를 시도해 보며, 자신의 플레이 스타일에 맞는 전략을 개발하는 것이 이 맵의 묘미 중 하나다. ‘TOS - Virtuoso - Beta 6’ is a user-made map for *StarCraft: Brood War* where five players team up in a strategic defense genre. At the center of the map lies a massive structure, surrounded by a constant stream of enemy waves. Players gather resources from the starting area, construct buildings, and produce units to build a defensive line. True to its name, “Virtuoso,” the map demands precise micro-control, careful resource management, and an optimal mix of towers and units for defense. The terrain is intricate, with narrow passages that make unit positioning and formations critical to victory. The area around the central structure is densely packed with defensive points, and how well players defend this zone largely determines the game’s outcome. Early waves are small, but as the game progresses, enemy attacks grow increasingly powerful—especially when boss-level units appear. Teamwork is essential; rather than letting individuals snowball, players should focus on maintaining a balanced team strategy. The map has a sci-fi aesthetic, featuring towering high-rise structures that add visual interest. It requires at least five players and is best suited for those who enjoy defense and strategic play. Beginners should familiarize themselves with tower placement and resource management, and communication with teammates is key to success. Before starting, players should understand the UI and the functions of each building. Studying enemy wave patterns and learning how to efficiently place defensive towers will give teams a significant advantage. ‘TOS - Virtuoso - Beta 6’ is more than just repeated attack and defense—it offers deep strategic gameplay that rewards repeated plays and skill development. While the difficulty is moderate—feeling manageable at first—the later stages introduce complex enemy attack patterns that demand strategic thinking to overcome. Experimenting with different builds and developing a strategy that fits your playstyle is part of what makes this map so enjoyable.
맵 선택 가이드
태그는 맵의 핵심 특징을 빠르게 설명하지만 제작 버전마다 규칙이 다를 수 있습니다. 상세 설명에서 권장 인원, 난이도, 플레이 시간과 버전을 함께 확인한 뒤 다운로드하세요.