
5인 스타크래프트 맵 모음
'5인' 태그가 등록된 맵을 모았습니다. 장르 하나로 찾기 어려운 플레이 방식, 난이도와 특징을 중심으로 인기 맵과 최신 맵을 비교해 보세요.
- 등록 맵
- 57개
- 누적 다운로드
- 0
- 누적 조회
- 2,053
인기 맵
다운로드와 조회 반응이 높은 맵입니다.
파일런 디펜스 v5.05 (Pylon Defense v5.05)
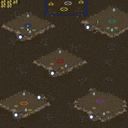
사막 한복판에 세워진 수정탑을 끝까지 지켜내는 것이 목표인 5인 협동 디펜스 맵이다. 제목에서 풍기듯 수호해야 할 핵심 구조물은 프로토스의 수정탑이며, 이 수정탑이 파괴되면 게임이 종료되는 전형적인 생존형 디펜스 장르에 속한다. 플레이어 다섯 명은 각자 지정된 지역에서 몰려오는 적 유닛의 파도를 협력하여 막아내야 하며, 한 명이라도 방어선이 뚫리면 공동의 목표가 위험해질 수 있기 때문에 끊임없는 소통과 역할 분담이 중요하게 작용한다. 사막 타일셋 특유의 탁 트인 시야와 황량한 분위기는 전장의 긴장감을 한층 끌어올리며, 좁은 골목이나 언덕을 활용한 시야 싸움보다는 넓은 평지에서 다수의 병력을 운용하는 대규모 전투에 초점이 맞춰져 있다. 맵은 초반부터 후반까지 적 유닛의 구성과 물량이 점진적으로 강해지는 전형적인 웨이브 방식을 채택하고 있다. 초반에는 저글링이나 마린 같은 기본 유닛이 몰려오지만, 회차가 거듭될수록 고위 기사, 울트라리스크, 배틀크루저 같은 고급 유닛이 등장하며 플레이어의 대응력을 시험한다. 특정 구간에서는 적의 공성 전차나 리버가 원거리에서 수정탑을 직접 타격하려 하기 때문에 단순히 병력을 전방에 쌓아두는 것만으로는 버티기 어렵고, 적의 공격 경로를 예측해 기동성 있는 유닛으로 빠르게 차단하는 전술적 판단이 요구된다. 플레이어별로 주어지는 자원과 건설 가능한 지역은 제한되어 있어, 초반 빌드 오더와 유닛 조합을 어떻게 가져가느냐에 따라 중후반 안정성이 크게 갈린다. 테란의 시즈 탱크와 벌처, 저그의 럴커와 디파일러, 프로토스의 리버와 하이 템플러 등 종족별 핵심 유닛을 적재적소에 배치하는 재미가 상당하다. 이 맵은 특히 스타크래프트 디펜스 장르에 익숙한 플레이어들에게 강력히 추천할 만하다. 웨이브 패턴을 외우고 최적의 방어 라인을 구축하는 과정에서 오는 성취감이 뚜렷하며, 다섯 명이 함께 호흡을 맞춰야 하므로 친구들과의 파티 플레이에서 진가를 발휘한다. 다만 입문자에게는 후반으로 갈수록 쏟아지는 고급 유닛의 압박이 다소 가혹하게 느껴질 수 있으므로, 초반 방어에 실패하더라도 빠르게 재정비할 수 있도록 팀원 간의 백업 전략을 미리 상의해두는 것이 좋다. 플레이 전에 반드시 확인해야 할 점은, 이 맵이 일반적인 밀리나 유즈맵과 달리 수정탑의 체력이 공유되지 않는다는 사실이다. 즉 한 명의 구역이 뚫려 수정탑이 파괴되면 그 즉시 게임이 끝나므로, 모든 플레이어가 균등하게 성장해야 한다는 부담감이 존재한다. 따라서 특정 유저에게 자원을 몰아주는 전략보다는 전원이 고르게 강해지는 방향으로 협력하는 것이 클리어의 핵심이다. This is a five-player cooperative defense map where the core objective is to protect a Pylon standing in the middle of a desert wasteland. As the title suggests, the Pylon is the vital structure that must survive at all costs, and if it is destroyed, the game ends immediately, placing this squarely in the classic survival defense genre. Five players each hold their designated zones against waves of incoming enemies, and because a single breach can jeopardize the entire team's goal, constant communication and clear role distribution are essential. The open sightlines and desolate atmosphere of the Desert tileset heighten the tension on the battlefield, shifting the focus away from narrow chokepoint vision play toward large-scale engagements that require managing massed armies across wide open spaces. The map follows a typical wave-based progression where enemy composition and volume gradually intensify from start to finish. Early waves send basic units like Zerglings and Marines, but as the rounds advance, high-tier threats such as High Templars, Ultralisks, and Battlecruisers appear to test the players' adaptability. Certain segments introduce long-range siege units like Siege Tanks or Reavers that can strike the Pylon directly from a distance, making it insufficient to simply stack forces at the front line; instead, tactical decisions involving mobile interception units are required to block their attack paths quickly. Each player receives limited resources and a restricted building area, so the chosen build order and unit composition in the early game heavily influence mid-to-late game stability. The enjoyment of deploying race-specific core units such as Terran Siege Tanks and Vultures, Zerg Lurkers and Defilers, or Protoss Reavers and High Templars in the right positions is a major highlight. This map is highly recommended for players already familiar with the StarCraft defense genre. The satisfaction derived from memorizing wave patterns and constructing the optimal defensive line is substantial, and the necessity of five-player synchronization makes it shine in party play with friends. However, for beginners, the sheer volume of advanced enemy units in the later stages can feel overwhelming, so it is advisable to discuss backup strategies among team members beforehand to recover quickly from early defensive failures. A critical point to check before playing is that the Pylon's health is not shared; if one player's sector is breached and the Pylon is destroyed, the game ends instantly for everyone. This creates a strong pressure for all players to grow evenly, making a balanced cooperative approach where everyone strengthens together far more effective for clearing the map than funneling resources into a single player.
Unlikely Hero's Rpg 2 (Final)
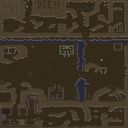
스타크래프트 브루드워 유즈맵 RPG 장르에서 시리즈물로 제작된 'Unlikely Hero's Rpg 2 (Final)'는 전작의 이야기를 잇는 후속작 맵이다. 내부 맵 설명에 따르면 이 맵은 'Unlikely Hero's RPG'의 파트 2에 해당하며, 최종 완성본임을 알 수 있다. 192×192 타일의 넓은 황무지 타일셋을 배경으로 설계되어, 플레이어는 5인 협동 플레이를 통해 영웅의 여정을 이어가게 된다. 맵의 구조는 전형적인 스토리 기반 RPG 진행 방식을 따르는 것으로 추정된다. 단일 캐릭터를 조작하며 주어진 퀘스트를 수행하고, 필드를 탐험하며 몬스터를 처치하는 방식으로 전개될 가능성이 높다. 전작의 흐름을 고려할 때, 이번 파트에서는 새로운 지역과 더 강력한 적, 그리고 영웅 성장의 클라이맥스가 펼쳐질 것으로 기대된다. 5인 플레이에 최적화된 점이 특징이며, 각 플레이어가 역할을 분담하거나 함께 전투에 임하는 협동 플레이 경험을 제공한다. 플레이 경험 측면에서는 RPG 특유의 성장 재미와 협동의 손맛을 동시에 느낄 수 있는 구성으로 보인다. 대규모 맵 크기를 활용한 넓은 필드와 다양한 오브젝트 배치는 탐험의 재미를 높이며, 황무지 타일셋이 주는 황량한 분위기는 스토리 몰입에 도움을 준다. 다만, 맵 내부에 트리거나 특수 시스템에 대한 상세 정보가 없어, 정확한 게임 진행 방식과 밸런스는 실제 플레이를 통해 확인해야 한다. RPG 유즈맵에 익숙한 유저라면 무난하게 적응할 수 있지만, 초보자에게는 난이도가 다소 부담스러울 수 있어 팀원 간의 소통과 역할 분담이 중요할 것으로 예상된다. 이 맵은 전작을 클리어한 유저에게 특히 추천하며, 협동 RPG를 즐기는 그룹에게도 좋은 선택이 될 것이다. This StarCraft Brood War UMS RPG map, titled 'Unlikely Hero's Rpg 2 (Final)', is a sequel that continues the story from its predecessor. According to the internal map description, it serves as Part 2 of 'Unlikely Hero's RPG' and is marked as the final version. Built on a 192×192 tile Badlands tileset, the map is designed for 5-player cooperative play, allowing participants to progress their hero's journey together. The structure appears to follow a traditional story-driven RPG format, where players control a single character to complete quests, explore the terrain, and defeat monsters. Given the series' continuity, this installment likely introduces new areas, stronger enemies, and a climactic phase of hero development. The 5-player optimization suggests a focus on cooperative combat, with each player possibly taking on distinct roles. The large map size and varied object placement enhance the sense of exploration, while the desolate Badlands atmosphere supports narrative immersion. However, without detailed trigger information, the exact mechanics and balance must be verified through actual gameplay. Experienced RPG map players should adapt easily, but beginners might find the difficulty challenging, making team communication essential. This map is highly recommended for those who completed the first part and for groups who enjoy cooperative RPG experiences.
컴까기2005 5:3 MereTossF
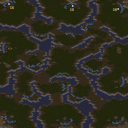
스타크래프트 유즈맵 '컴까기2005 5:3 MereTossF'는 5명의 플레이어가 한 팀이 되어 강화된 컴퓨터 3명을 상대하는 전형적인 컴까기 장르의 맵입니다. 사막 타일셋으로 구성된 128x128 크기의 대형 전장에서 펼쳐지며, 맵 제목과 파일명에 '컴까기2005'와 '메어토스F'가 명시되어 있어 2005년경 제작된 시리즈의 최종 버전으로 추정됩니다. 내부 설명에 '드디어 최종버전이군요'라는 제작자 코멘트가 있어 완성도를 높인 버전임을 암시합니다. 플레이 방식은 5명의 플레이어가 서로 다른 스타팅 포인트에서 시작해, 공격적으로 몰려오는 3명의 컴퓨터 세력을 방어하고 격파하는 구조로 보입니다. 맵 중앙과 진출로 곳곳에 자원 멀티가 배치되어 있어, 초반부터 적극적으로 멀티를 확보하고 물량전을 준비해야 합니다. 컴퓨터는 일반 밀리 인공지능보다 강화된 병력 생산 패턴을 보이며, 주기적으로 대규모 공격을 감행할 가능성이 높습니다. 자원 채취 속도와 유닛 생산 속도가 빠르게 설정되어 있어, 초반 방어가 실패하면 순식간에 밀릴 수 있는 긴장감 있는 전투가 특징입니다. 이 맵은 친구들과 협력해 컴퓨터를 상대하는 재미를 원하는 플레이어에게 추천합니다. 특히 혼자서는 버거운 인공지능을 여럿이서 전략적으로 막아내는 과정에서 팀워크와 자원 분배의 중요성을 체험할 수 있습니다. 플레이 전 확인할 점은, 5명 모두가 어느 정도 밀리 실력을 갖추고 있어야 재미를 느낄 수 있다는 점입니다. 한 명이라도 빨리 무너지면 전선이 뚫리기 쉬워, 초보자보다는 중급자 이상의 협동 플레이에 적합합니다. 'Comp Stomp 2005 5:3 MereTossF' is a classic StarCraft Use Map Settings (UMS) map where 5 players team up against 3 enhanced computer opponents. Built on a Desert tileset across a 128x128 large-scale battleground, the title and internal name '컴까기2005 5:3 MereTossF' suggest this is a final version of a series created around 2005. The internal description mentions 'finally the final version,' hinting at a polished build. The gameplay involves 5 players starting at different locations, working together to defend against and eventually crush 3 aggressive computer forces. Multiple resource expansions are scattered across the map, encouraging early multi-taking and large-scale macro play. The AI likely features boosted unit production compared to standard melee, launching massive periodic assaults. Resource collection and unit production speeds appear accelerated, making early defense critical—failure to hold the line can lead to a quick collapse. This map is recommended for players who enjoy cooperative play against powerful AI. It emphasizes teamwork and resource management, offering a satisfying challenge for groups. However, all 5 players need a solid grasp of melee fundamentals to have fun. If one player falls too early, the defensive line can break, so it is best suited for intermediate-level cooperative sessions rather than complete beginners.
(1) Final Destiny RPG
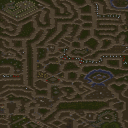
파이널 데스티니 RPG는 5인 협동 플레이를 전제로 한 시나리오형 RPG 유즈맵이다. 맵 크기 256×256 타일의 사막 타일셋 위에서 제노스 제국 멸망 후의 세계관을 무대로 삼으며, 아이스-인페르노-X3 프로덕션이라는 제작진명이 설명에 명시되어 있다. 플레이어는 평화로운 세계의 운명을 지키는 임무를 맡게 되며, 일반적인 밀리 대전이 아닌 퀘스트 진행, 캐릭터 성장, 스토리 이벤트 중심으로 흘러간다. 5인 인원수는 파티 구성을 염두에 둔 설계로 보이며, 탱커·딜러·힐러 등 역할 분담이 자연스럽게 요구될 것으로 보인다. 사막 지형 특성상 시야 확보와 이동 경로 제약이 전투 난이도에 영향을 줄 수 있다. cp949 인코딩으로 저장되어 한국어 환경에서 제목과 설명이 정상 표시되며, 파일명에 'Final'이 붙어 최종 버전일 가능성이 높다. RPG 장르 입문자부터 스토리 몰입을 원하는 유저까지 폭넓게 권장되며, 플레이 전 파티원 간 직업 조합과 저장 슬롯 여부를 확인하는 것이 좋다. Final Destiny RPG is a scenario-driven RPG use-map designed for 5-player cooperative play. Set on a 256×256 tile desert tileset, the map takes place after the fall of the Xenos Empire, with the description crediting Ice-Inferno-X3 Production. Players are tasked with safeguarding the destiny of this newly peaceful world. Unlike standard melee matches, progression revolves around quests, character growth, and story events. The 5-player limit suggests balanced party composition, likely requiring natural role division such as tank, damage dealer, and healer. The desert terrain may affect vision and movement paths, influencing combat difficulty. Saved in cp949 encoding, Korean titles and descriptions display correctly, and the filename's 'Final' suffix hints at a final release version. Recommended for both RPG newcomers and players seeking narrative immersion; before starting, verify party job composition and save slot availability.
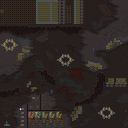
Carnage2 v2.2 Hard
카니지 2 v2.2 하드는 5인 협동 플레이를 전제로 한 유즈맵으로, 정글 타일셋 위에서 언데드 템플러라는 강력한 보스를 처치하는 것이 핵심 목표다. 맵 크기 128x128 타일 규모에서 펼쳐지는 진행은 일반적인 밀리 대전이 아닌, 정해진 보스 몬스터를 상대로 플레이어들이 힘을 합쳐 공략하는 보스 레이드 형식을 띤다. 내부 설명에 따르면 '언데드 템플러를 처치하라'는 단일 승리 조건이 제시되어 있어, 맵 전체가 해당 보스와의 결전에 집중되도록 설계된 것으로 보인다. 하드 난이도가 명시된 만큼 보스의 체력과 공격력, 스킬 구성이 상당히 까다로울 것으로 추정되며, 5인 파티의 역할 분담과 컨트롤, 아이템 파밍이나 업그레이드 선택이 승패를 가를 전망이다. 정글 지형 특성상 시야 확보와 이동 경로 제약이 변수로 작용할 수 있으며, 맵 곳곳에 숨겨진 트리거나 이벤트가 보스전 전개에 영향을 줄 가능성이 있다. 입문자보다는 유즈맵 협동 플레이 경험이 있고, 고난도 보스 공략을 즐기는 유저에게 적합하다. 플레이 전에는 버전 표기(v2.2)가 최신인지, 추가 패치나 밸런스 조정 내역이 있는지 확인하고 파티원을 모집하는 것이 좋다. Carnage2 v2.2 Hard is a UMS map designed for 5-player cooperative play, where the core objective is to defeat a powerful boss named the Undead Templar on a jungle tileset. The 128x128 tile map does not follow standard melee mechanics; instead, it adopts a boss raid format where players must combine forces to take down a predetermined boss monster. The internal description states a single victory condition—'kill the Undead Templar'—indicating the entire map is structured around this climactic encounter. With 'Hard' explicitly in the title, the boss's health, damage, and skill set are expected to be highly challenging, making role assignment, micro control, and item/upgrade choices among the five players critical to success. The jungle terrain may introduce variables such as limited vision and restricted movement paths, and hidden triggers or events scattered across the map could influence the boss fight progression. This map is better suited for players with experience in cooperative UMS content and those who enjoy high-difficulty boss encounters rather than beginners. Before playing, it is advisable to verify whether v2.2 is the latest version and check for any additional patches or balance changes before assembling a party.
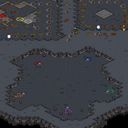
NBA
스타크래프트: 브루드워의 유즈맵 장르 중에서도 특색 있는 콘텐츠를 찾는 플레이어라면 <NBA (NBA.scx)>를 주목해 볼 필요가 있습니다. 내부 설명에 따르면 '최초의 NBA 맵'으로 기록된 이 맵은 농구 경기장을 재현한 디펜스형 맵으로, 5명의 플레이어가 한 팀을 이루어 상대 팀을 상대로 승부를 펼치는 구조를 갖추고 있습니다. 맵 중앙에는 농구 골대가 설치되어 있으며, 골대 주변은 미니맵에서도 한 눈에 들어오는 특징적인 디자인으로 구성되어 있습니다. 플레이어는 각자 맡은 포지션에 따라 공격과 수비를 번갈아 수행해야 하며, 팀워크와 전략적 움직임이 승패를 좌우하는 핵심 요소로 보입니다. 맵의 공간 구성은 다소 협소한 편으로, 빠른 판단력과 정확한 컨트롤이 요구되는 플레이 스타일이 예상됩니다. 내부 설명에 '수정 시 크레딧을 주세요'라는 문구가 포함된 점으로 미루어 보아, 커뮤니티에서 일부 수정이 있었거나 공유 및 개작이 이루어진 것으로 추정됩니다. 디펜스와 아레나 요소가 혼합된 듯한 이 맵은 농구라는 소재를 게임화했다는 점에서 독특한 매력이 있습니다. 다만, 맵의 구체적인 승리 조건이나 세부 규칙은 제공된 정보만으로는 명확하지 않으며, 플레이 전 맵 내부에 숨겨진 트리거나 추가 조건을 확인하는 것이 중요할 것으로 보입니다. 추천 대상은 스타크래프트 유즈맵의 다양한 장르를 탐험하고 싶어 하는 플레이어이며, 특히 팀플레이와 전략적 협동이 필요한 콘텐츠를 선호하는 유저들에게 적합할 것입니다. 플레이 전 맵의 트리거나 승리 조건을 미리 숙지하고, 팀원 간의 역할 분담을 명확히 하는 것이 원활한 진행을 위한 필수 조건으로 보입니다. 또한, 맵의 공간이 다소 협소하다는 점을 고려하여, 빠른 판단과 정확한 컨트롤을 연습하는 것이 필요할 수 있습니다. For players seeking distinctive content in the custom map genre of *StarCraft: Brood War*, *NBA (NBA.scx)* is worth your attention. According to its internal description, this map is recorded as the "first NBA map," recreating a basketball arena as a defensive-style game. Five players form a team and compete against the opposing team, alternating between offense and defense based on their assigned positions. A basketball hoop is placed at the center of the map, surrounded by a design that stands out even on the minimap. The map’s compact layout demands quick decision-making and precise control, with teamwork and strategic movement determining victory. The internal description includes the phrase "please give credit when modifying," suggesting that the community has made some revisions or shared and remade the map. Blending defensive and arena elements, this map stands out for its unique take on basketball. However, the exact victory conditions and detailed rules aren’t fully clear from the provided information, so checking hidden triggers or additional conditions within the map before playing is essential. This map is recommended for players who enjoy exploring diverse *StarCraft* custom map genres, especially those who prefer team-based gameplay and strategic coordination. Before playing, familiarize yourself with the map’s triggers or victory conditions and clearly assign roles among teammates for smooth progression. Given the map’s compact space, practicing quick judgments and precise controls may also be necessary.
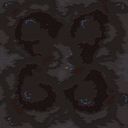
Scourcher
스타크래프트 브루드워의 고전 맵 ‘Scourcher’는 5인용 밀리 맵으로, 타일셋은 정글을 배경으로 하고 있다. 맵 크기는 6144x6144로 대규모 전투를 위한 넓은 공간이 특징이며, 192x192 타일 단위로 디자인되어 있다. 맵의 주요 목표는 상대방의 모든 건물을 파괴하는 것으로, 밀리 장르의 기본 틀을 따르지만 맵 구조가 다소 복잡한 편이다. 중앙에 위치한 넓은 평원과 주위에 펼쳐진 숲 지형이 시야를 가리며, 이로 인해 초보자들이 맵을 익히는 데 다소 시간이 걸릴 수 있다. 또한, 맵 양측에 위치한 자원 지역은 중앙보다 상대적으로 협소하여 Mineral Field가 밀집되어 있어 빠른 자원 확보가 중요하다. 이 맵은 5:5 대칭 구조로 디자인되어 있지만, 일꾼의 자원 채취 efficiency를 고려할 때 중앙 자원 지역을 두고 벌어지는 전투가 승패를 가를 가능성이 높다. 초보자들은 이 맵을 플레이하기 전에 ‘Scourcher’라는 맵명이 주는 ‘불타는 듯한 파괴’라는 느낌에 주목하고, 넓은 시야와 자원 분배를 신중히 계획해야 한다. 또한, 맵의 대칭성과 자원 밀집도를 고려해 초반 빌드 오더를 철저히 준비하는 것이 중요하다. 이 맵은 상대방을 빠르게 몰아붙이는 공격형 전략보다는 자원 확보와 건물 방어에 중점을 둔 안정적인 플레이를 요구한다. 특히, Mineral Field가 풍부한 중앙 지역을 장악하는 플레이어가 경기의 흐름을 주도할 가능성이 크므로, 초반 확장과 방어 시설을 구축하는 타이밍을 잘 조율해야 한다. 이 맵은 5인 밀리 대전에서의 전략적 깊이를 제공하며, 팀워크와 개개인의 판단력이 요구되는 맵으로 평가된다. 다만, 맵의 복잡한 지형으로 인해 초보자들은 맵을 충분히 익히지 않고 플레이하면 불리한 상황으로 치닫기 쉽다. 따라서, 이 맵을 처음 플레이하는 유저는 맵의 주요 길목과 자원 위치를 숙지한 뒤, 안정적인 빌드와 방어 전략을 우선적으로 고려하는 것이 좋다. 이 맵은 밀리 장르의 기본기를 연마하고자 하는 유저들에게 좋은 연습용 맵으로도 활용될 수 있다. Scourcher is a classic Brood War melee map designed for 5 players, featuring a jungle tileset. The map spans 6144x6144, offering ample space for large-scale battles, and is built on a 192x192 tile grid. The objective is straightforward—destroy all enemy structures—but the map’s complex layout adds strategic depth. Central open plains surrounded by dense forests restrict visibility, making it challenging for beginners to navigate. Resource distribution is asymmetrical, with mineral fields clustered closer to the center, emphasizing the importance of early-game expansion and efficient resource gathering. The 5v5 symmetrical design forces players to balance aggression with economy, as controlling the central mineral-rich area often dictates the game’s outcome. Players should prioritize scouting and adaptable strategies, as the map’s terrain favors those who secure resources early while maintaining defensive structures. For newcomers, mastering the map’s choke points and resource zones is crucial to avoid falling behind. While Scourcher rewards teamwork and macro-management, its intricate layout can overwhelm inexperienced players. It serves as an excellent training ground for refining build orders and defensive playstyles in melee scenarios, though players should invest time in learning the map’s nuances before jumping into competitive matches.
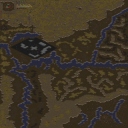
나크수스의 강림 RPG V.4 (The Coming of Naxus RPG - V.4)
스타크래프트 브루드워 유즈맵 'The Coming of Naxus RPG - V.4'는 5인 협력 플레이를 전제로 한 정통 RPG 장르 맵이다. 황무지 타일셋 위에 256×256 타일, 전체 8192×8192 크기로 펼쳐진 광활한 필드는 탐험과 전투, 퀘스트 진행이 유기적으로 얽히도록 설계되어 있다. 내부 설명인 'You must stop the coming of Naxus...'가 암시하듯, 플레이어들은 각자 고유한 영웅 유닛을 육성하며 네이버스(Naxus)라는 강력한 보스의 강림을 저지하는 서사를 따라간다. 맵 진행은 필드 곳곳에 배치된 트리거 이벤트와 대화, 아이템 획득, 레벨업 시스템을 통해 자연스럽게 이어지며, 파티원 간 역할 분담과 스킬 연계가 생존의 열쇠가 된다. 난이도는 초반 성장 구간에서 완만하게 시작해 중반 이후 보스전과 다중 웨이브 구간에서 급격히 상승하는 구조로 보인다. 5인 풀파티 기준 예상 플레이 타임은 60~90분 내외로 추정되며, 솔로 또는 인원 미달 시 난이도가 기하급수적으로 오르므로 정원 매칭을 권장한다. 맵 파일명에 '(5)' 표기가 있어 최대 5인 전용으로 보이며, 팀 수는 단일 협력 팀으로 구성된다. 버전 표기 V.4는 지속적인 밸런스 패치와 버그 수정이 이루어졌음을 시사한다. 입문자는 영웅별 스킬 트리와 아이템 조합을 사전에 숙지하고, 파티 구성 시 탱커·딜러·힐러 역할 분배를 논의한 뒤 진입하는 것이 좋다. 고전 RPG 유즈맵 특유의 느린 템포와 스토리 몰입감을 즐기는 유저에게 적합하며, 빠른 액션이나 경쟁전을 선호하는 플레이어에게는 맞지 않을 수 있다. The Coming of Naxus RPG - V.4 is a classic cooperative RPG map for StarCraft: Brood War designed for five players. Built on the Badlands tileset with a 256×256 tile grid spanning 8192×8192, the vast field intertwines exploration, combat, and quest progression. As the internal description 'You must stop the coming of Naxus...' suggests, players develop unique hero units to follow a narrative that tasks them with preventing the arrival of the powerful boss Naxus. Progression flows naturally through trigger events, dialogue, item acquisition, and a level-up system scattered across the map, making party role assignment and skill synergy essential for survival. Difficulty appears to start gently in the early growth phase before spiking sharply during mid-to-late boss encounters and multi-wave sections. Estimated playtime for a full five-player party is roughly 60–90 minutes; solo or undermanned attempts increase difficulty exponentially, so full-party matchmaking is recommended. The '(5)' prefix in the filename indicates a five-player maximum, with a single cooperative team structure. The V.4 version tag implies ongoing balance patches and bug fixes. Newcomers should study each hero's skill tree and item combinations beforehand, and discuss tank, damage, and healer roles before entering. This map suits players who enjoy the deliberate pacing and story immersion of classic RPG UMS maps, but may not appeal to those seeking fast-paced action or competitive play.
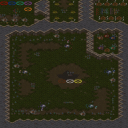
골렘 매드니스 매스 어택 v10.0 (Golem Madness Mass Attack v10.0)
《골렘 매드니스 매스 어택 v10.0》은 사막 타일셋의 2048×2048 대형 맵에서 최대 5인이 함께 즐기는 유즈맵이다. 제목과 내부 설명이 일치하며, '골렘을 파괴하고 건설한다'는 핵심 규칙과 '4가지 골렘 파츠 조합'이라는 독자적인 업그레이드 시스템을 내세운다. 맵 크기가 넓어 자원 확보와 기지 확장이 자유롭고, 매스 어택(Mass Attack)이라는 명칭답게 다수의 골렘 유닛을 모아 적진을 압도하는 대규모 전투가 주를 이룬다. 진행 방식은 아군 진영에서 골렘을 생산·조합해 몰려오는 적 웨이브를 막아내거나, 반대로 적 기지를 향해 대군세를 밀어붙이는 양상으로 펼쳐진다. 파츠 조합 시스템 덕분에 같은 자원으로도 공격형·방어형·특수 능력형 등 다양한 빌드를 시도할 수 있으며, 5인 협력 플레이 시 역할 분담(자원 담당, 생산 담당, 전선 담당)이 자연스럽게 이루어진다. 난이도는 버전 10.0까지 업그레이드되면서 밸런스 조정이 거듭된 것으로 보이나, 정확한 트리거나 승리 조건은 공개되지 않았다. 추천 대상은 '컴까기' 스타일의 협력 디펜스를 선호하거나, 유닛 조합·대군세 운영의 재미를 찾는 유저다. 플레이 전 확인할 점은 5인 풀파티 권장, 버전 표기(v10.0) 외 별도 패치 여부, 그리고 맵 설명에 명시된 'Golem.Master' 제작자 버전인지 여부다. 대규모 골렘 전투의 쾌감을 원한다면 부담 없이 도전해 볼 만한 맵이다. Golem Madness Mass Attack v10.0 is a UMS map for up to five players on a 2048×2048 desert tileset. The site title matches the internal title, and the core rule—"destroy and build Golems"—is paired with a unique upgrade system of "four Golem part combos." The spacious map allows free resource gathering and base expansion, and true to the "Mass Attack" name, gameplay revolves around amassing large Golem armies to overwhelm the enemy. Players produce and combine Golems to defend against incoming waves or push massive forces into the enemy base. The part-combo system enables diverse builds—offensive, defensive, or utility—from the same resources, and five-player cooperation naturally creates roles such as economy, production, and frontline. Difficulty appears to have been tuned through ten versions, though exact triggers and win conditions are not disclosed. Recommended for fans of cooperative "comp stomp" defense maps and those who enjoy unit-combination and death-ball management. Before playing, verify a full five-player party, any patches beyond v10.0, and whether the map is the author "Golem.Master" version. If you crave the thrill of massive Golem battles, this map is worth a try.
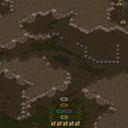
피용 D! ~알파 랜드~!엑스퍼트! (Pylon D! ~Alpha Land~!Xpert!)
스타크래프트 브루드워의 유즈맵 <피용 D! ~알파 랜드~!엑스퍼트!>는 디펜스 장르의 정교한 맵으로, 플레이어들이 ‘피용’이라는 струк처널 요소를 방어하며 적의 공격을 막아내는 구조를 갖추고 있다. 맵의 중앙에 위치한 주요 방어 지점 주위에 다수의 경로가 배치되어 있으며, 입구와 길목마다 적절한 방어 타워나 건물을 건설할 수 있는 공간이 확보되어 있다. 맵의 테마는 사막 타일셋을 기반으로 하며, 건조한 지형과 붉은 모래가 특징적인 배경 속에서 진행된다. 맵의 이름은 ‘피용’이라는 독특한 명칭을 사용하며, ‘엑스퍼트’라는 표기는 난이도나 숙련도와 관련된 요소를 암시하는 것으로 보인다. 플레이 방식은 기본적으로 정해진 경로로 밀려오는 적들을 방어하는 것이 주목적이지만, 맵의 구조상 중앙 방어 지점뿐만 아니라 다수의 보조 거점도 존재한다. 각 거점은 자체적인 방어선을 구축할 수 있으며, 일부 구간에서는 적의 진로가 분기되어 있어 전략적인 대처가 요구된다. 맵의 대규모 크기(2048x2048)와 타일셋의 특성상 넓은 시야를 확보할 수 있지만, 동시에 많은 수의 유닛을 동시에 상대해야 하는 تحدی도 존재한다. 맵의 난이도는 ‘엑스퍼트’라는 명칭에 걸맞게 높은 편으로 추정되며, 특히 후반부로 갈수록 적의 공격 빈도와 강도가 증가하는 구조를 갖추고 있는 것으로 보인다. 이 맵은 주로 5명의 플레이어가 참여하는 구조이며, 각자 맡은 구역에서 방어 임무를 수행하거나 협력하여 중앙 거점을 보호해야 한다. 맵의 진행은 비교적 장기전에 걸맞으며, 예상 플레이 시간은 30분 내외로 예상된다. 디펜스 성향이 강하지만, 맵의 복잡한 구조와 다수의 분기점 덕분에 단순한 타워 디펜스보다는 전략적인 요소와 팀워크가 중요한 맵으로 분류된다. 초보 플레이어보다는 어느 정도 경험이 있는 유저들이 즐기기에 적합하며, 맵의 난이도와 복잡성 때문에 반복 플레이를 통해 점차 숙련도를 높이는 것이 권장된다. 주요 추천 대상은 디펜스 맵을 선호하는 플레이어들이며, 특히 팀플레이와 전략적 사고가 필요한 맵을 찾는 유저들에게 어울린다. 맵의 규모와 구조상 게임 내적인 밸런스나 밸런스 조정 요소는 내장되어 있을 가능성이 높지만, 그 내용은 맵 설명이나 트리거를 직접 확인해야만 알 수 있다. 플레이 전에는 맵의 주요 경로와 방어 거점을 미리 파악하여, 적의 공격 패턴에 대응할 수 있는 준비를 갖추는 것이 중요하다. 또한, 맵의 이름은 다소 복잡한 ‘피용’이라는 명칭과 특이한 기호(‘!’)로 구성되어 있어, 처음 접하는 플레이어는 맵의 특성을 유추하기 어려울 수 있으므로, 맵 소개글이나Community Tip을 참고하는 것이 도움이 될 수 있다. This StarCraft: Brood War custom map, <Pylon D! ~Alpha Land~!Xpert!>, is a meticulously designed defense game where players must protect structural elements called "Pylon" from relentless enemy attacks. The map features a desert-themed terrain with reddish sand and dry landscapes, providing a visually distinct backdrop for the strategic gameplay. The name "Pylon D! ~Alpha Land~!Xpert!" suggests a focus on advanced or expert-level challenges, with "Pylon" likely referring to key defensive structures that must be safeguarded. The gameplay revolves around defending multiple pathways and control points against waves of enemies. The central area houses the primary defense zone, but with several secondary strongholds scattered throughout the map, players must strategically allocate resources to fortify each location. The large map size (2048x2048) allows for expansive vision control, but it also demands efficient resource management and unit coordination to handle simultaneous threats. The "Xpert!" designation implies a higher difficulty level, with enemy aggression intensifying as the game progresses, requiring players to adapt their strategies dynamically. Designed for five players, the map encourages teamwork and role specialization, as each participant typically guards a specific sector while collaborating to defend critical areas. The gameplay duration is estimated to be around 30 minutes, given the map's scale and the pace of enemy waves. While categorized as a defense map, its complex layout with multiple branching paths elevates it beyond a typical tower defense scenario, emphasizing strategic planning and cooperative play. This map is ideal for players who enjoy challenging defense scenarios and are looking for a map that rewards strategic thinking and teamwork. Beginners may find the complexity overwhelming, but experienced players will appreciate the depth and replayability. Prior to playing, it's recommended to study the map's key routes and defensive points to devise an effective counter-strategy against enemy patterns. The unconventional name and symbols (e.g., "!" and "~") might initially confuse new players, so reviewing the map's description or community tips could enhance the gaming experience.
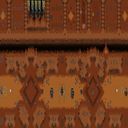
스타 워즈 - 아트 오브 더 리퍼블릭: 카오스 (Star Wars - AotR ChAoS)
스타크래프트 브루드워의 대표적인 전략형 유즈맵 "스타 워즈 - 아트 오브 더 리퍼블릭: 카오스"는 5명의 플레이어가 각자 세력을 이끌고 우주를 지배하기 위한 전쟁을 펼치는 컴까기 장르의 명작으로, 스타크래프트 유즈맵 역사상 손꼽히는 전략성과 긴장감을 자랑하는 맵입니다. 이 맵은 스타 워즈 세계관을 배경으로 하며, 플레이어는 각기 다른 조직을 선택하고 자신의 영웅 유닛을 키워나가면서 상대 조직을 전멸시키는 것이 목표입니다. 맵 중앙의 거대한 우주 공간은 전투의 무대가 되며, 각 플레이어의 기지는 화면 하단에 배치되어 있습니다. 전투는 근접전 위주로 진행되며, 영웅 유닛의 육성과 전략적 전투 배치, 자원 관리 등이 핵심 포인트로, 초보자는 물론 숙련자까지 오랜 시간 몰입할 수 있는 깊이 있는 게임 경험을 제공합니다. 특히, 맵의 넓고 복잡한 지형은 전투의 변수를 극대화하며, 한 번의 실수가 전체 게임의 흐름을 뒤집을 수 있는 치열한 긴장감을 선사합니다. 이 맵은 5인 플레이를 전제로 제작되어 있으며, 각 플레이어의 선택에 따라 게임의 양상이 완전히 달라질 수 있어 리플레이 가치가 매우 높습니다. 또한, 맵의 배경 음악과 효과음, 그리고 스타 워즈 특유의 분위기는 플레이어에게 몰입감을 더해줍니다. 추천하는 대상은 전략적 사고와 긴장감을 즐기는 플레이어이며, 특히 스타크래프트의 기본 전략을 숙지하고 있는 유저에게 최적의 경험을 제공합니다. 플레이 전에는 반드시 각 조직의 특성과 영웅의 스킬을 숙지하고, 맵의 지형과 자원 분포를 확인하는 것이 좋습니다. 또한, 팀 플레이가 아닌 개인전을 전제로 한 맵이므로, 타 플레이어와의 협력보다는 경쟁을 중시하는 플레이 스타일이 필요합니다. This classic Brood War custom map, "Star Wars - AotR ChAoS," stands out as a quintessential competitive elimination game where five players command unique factions in a galactic war to dominate the universe. Set against the Star Wars universe, this map offers an intense strategic experience, blending hero unit progression, resource management, and tactical combat in a sprawling battlefield. The central open space serves as the primary arena, while each player's base occupies the bottom of the screen, creating a dynamic vertical battlefield. Combat revolves around melee engagements, with players leveraging hero unit upgrades and strategic positioning to outmaneuver opponents. The map's vast and intricate terrain amplifies unpredictability, ensuring every decision carries significant weight. Designed specifically for five-player matches, the gameplay shifts dramatically depending on faction and hero choices, offering high replay value. The immersive atmosphere is enhanced by the iconic Star Wars soundtrack and sound effects, appealing to fans and strategy enthusiasts alike. Ideal for players who thrive on strategic depth and high-stakes tension, this map demands familiarity with Brood War mechanics and a competitive mindset over cooperative play. Before diving in, players should study each faction's strengths, hero abilities, and map layouts to optimize their strategies. The absence of team mechanics means individual prowess and adaptability are key to securing victory.
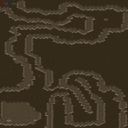
Left 4 Dead (좀비 생존) (Left 4 Dead (Zombie Survival))
‘Left 4 Dead’는 스타크래프트: 브루드워의 유즈맵으로, 좀비 아포칼립스 속에서 살아남기 위한 서바이벌 디펜스 장르의 맵이다. 플레이어는 안전가옥에서 출발해 외부로 진입한 뒤 무전기로 구조 요청 신호를 보내야 하며, 신호를 활성화하는 순간부터 5분 동안 끊임없는 좀비 웨이브에 맞서 싸워야 한다. 맵의 핵심은 ‘생존’과 ‘자원 관리’로, 체력 팩과 아이템을 확보해가며 버텨야 한다. 보안에 신경 쓴 디자인으로, 좁은 통로와 협소한 공간이 좀비의 밀집을 강제해 전략적 대처가 필요하며, 좁은 길목을 방어하는 재미가 돋보인다. 좀비의 공격 패턴은 무작위성이 강하기 때문에 예측이 쉽지 않으며, 이를 극복하기 위한 팀워크가 중요하다. 특히 맵 곳곳에 배치된 체력 팩과 아이템을 빠르게 확보하는 것이 관건이다. 이 맵은 생존 디펜스 유즈맵의 정석을 보여주며, 5명의 플레이어가 한 팀을 이루어 협력하는 방식으로 진행된다. 구조 신호를 활성화한 후 5분의 긴박한 시간 동안 버텨야 하는 구조상, 플레이어들은 적절한 위치를 선정해 방어선을 구축하고, 좀비의 공격 타이밍을 계산해가며 아이템을 확보해야 한다. 맵의 디자인도 깔끔하게 짜여 있어, 좁은 복도나 통로가 좀비의 움직임을 제어하는 데 효과적으로 활용된다. 다만, 체력 관리와 아이템 확보 타이밍을 놓치면 순식간에 위험에 처할 수 있어, 초보자들은 적응하는 데 시간이 걸릴 수 있다. 초보자도 적응할 수 있도록 천천히 난이도를 조절해가며 플레이할 수 있지만, 숙련자들은 좀비의 패턴을 예측해 좀 더 효율적으로 대처할 수 있다. 이 맵을 추천하는 대상은 팀워크와 전략적 플레이를 즐기는 유저들로, 특히 디펜스 장르에 익숙한 플레이어라면 더욱 흥미롭게 즐길 수 있을 것이다. 다만, 체력과 아이템 관리를 소홀히 하면 쉽게 패배할 수 있으니, 신중한 플레이가 요구된다. 맵의 구조상 좁은 공간이 많기 때문에, 넓은 맵을 선호하는 플레이어보다는 협소한 공간에서 전략을 펼치는 것을 좋아하는 유저에게 어울린다. 마지막으로, 이 맵은 5명의 플레이어가 한 팀을 이루어 진행되므로, 팀원 간의 원활한 소통과 협력이 필수적임을 명심하자. “Left 4 Dead” is a user-made map for StarCraft: Brood War that falls under the survival-defense genre, set during a zombie apocalypse. Players start in a safe house, venture outside, and must send a distress signal via radio; once activated, they have five minutes of nonstop zombie waves to endure. The core mechanics revolve around survival and resource management—securing health packs and items while holding the line. The map’s design smartly funnels zombies through tight corridors and cramped spaces, forcing strategic positioning and rewarding clever defense of choke points. Zombie behavior is highly unpredictable, so teamwork becomes essential to adapt on the fly. Quickly grabbing scattered health packs and items is often the deciding factor in tough spots. This map exemplifies the survival-defense user-map archetype, played as a five-player team. After activating the distress signal, the team must hold out for five tense minutes by establishing defensive lines, timing their movements, and managing limited resources. The layout is meticulously structured—narrow hallways and corridors naturally guide zombie movement, giving players control over engagements. However, neglecting health or item collection can spell instant doom, so newcomers should expect a learning curve before mastering the flow. The difficulty ramps up gradually, allowing beginners to ease in while veterans can leverage zombie-pattern prediction for sharper tactics. This map shines for players who love teamwork and strategic depth, especially those already fond of defense-oriented games. Still, reckless play will lead to quick defeats, so careful management is a must. Because the map is packed with tight spaces, it suits those who prefer cramped, tactical arenas over sprawling open fields. Keep in mind that success hinges on seamless communication and cooperation among the five teammates.
최근 등록된 맵
새로 추가된 파일과 버전을 확인하세요.
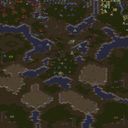
컴까기 헌터 (영웅) 완 (Hero Hunter Speed Up)
이 맵은 스타크래프트 브루드워 유즈맵 중에서도 컴퓨터 상대 액션성이 강조된 컴까기 장르에 속한다. 내부 맵 제목과 설명에는 ‘헌터’라는 표현이 사용되었고, 제목에 ‘영웅’과 ‘속도업’이 명시되어 있어 일반 유닛이 아닌 영웅 유닛을 조종하며 빠른 템포로 컴퓨터를 사냥하는 구성임을 직관적으로 알 수 있다. 플레이 인원은 5인으로 설정되어 있어 소규모 파티 플레이에 적합하며, 사막 타일셋 위에 펼쳐진 128x128 규모의 전장은 시야 확보와 기동성 중심의 교전이 이루어질 것으로 보인다. ‘속도업’이 강조된 점은 영웅 유닛의 이동 및 공격 속도가 상향되었거나, 게임 자체의 진행 속도가 빠르게 조정되었을 가능성을 시사한다. 내부 설명에 ‘돈 999999’라고 적힌 것에서 시작 시 자원이 풍족하게 지급되는 구조임을 짐작할 수 있으며, 이는 초반부터 영웅 유닛을 확보하고 즉시 교전에 돌입하는 플레이 흐름을 유도한다. 컴퓨터를 사냥하는 방식은 맵 곳곳에 배치된 적 유닛이나 건물을 제거하는 방식으로 진행될 것으로 추정되며, 영웅 유닛 특유의 강력한 스킬과 높은 체력을 활용한 다대다 난전이 주된 재미를 형성할 것이다. 다만 트리거 기반의 이벤트나 보스 라운드 여부는 이미지나 메타데이터만으로 확인되지 않으므로, 실제 플레이 시에는 예상치 못한 패턴이 등장할 수 있다. 친구들과 함께 가볍게 즐기기에 적합한 맵이며, 복잡한 성장 요소보다는 직관적인 전투 쾌감을 선호하는 유저에게 추천한다. 플레이 전에는 플레이어 슬롯 배치와 영웅 선택 방식, 승리 조건을 미리 확인하는 것이 좋다. This StarCraft Brood War UMS map is built around the concept of hunting down computer opponents with hero units. The internal title and description include the word “Hunter,” while the modifiers “Hero” and “Speed Up” clearly indicate that players control hero units with enhanced mobility in a fast-paced combat environment. Designed for five players, the map uses a desert tileset over a 128x128 battlefield, which suggests open sightlines and rapid engagements. The “Speed Up” label hints at increased movement or attack speed for hero units, or an overall accelerated game pace. The description line “Money 999999” implies that players start with abundant resources, allowing immediate access to hero units and early aggression. The core objective appears to involve hunting down computer-controlled units and structures scattered across the map, with hero abilities and high durability shaping chaotic, multi-party skirmishes. Since trigger-driven events or boss rounds cannot be confirmed from the available data, players may encounter unexpected patterns during actual play. This map suits casual cooperative sessions with friends and appeals to those who value straightforward combat thrills over complex progression systems. Before starting, it is advisable to check player slot assignments, hero selection rules, and victory conditions.
파일런 디펜스 v5.05 (Pylon Defense v5.05)
사막 한복판에 세워진 수정탑을 끝까지 지켜내는 것이 목표인 5인 협동 디펜스 맵이다. 제목에서 풍기듯 수호해야 할 핵심 구조물은 프로토스의 수정탑이며, 이 수정탑이 파괴되면 게임이 종료되는 전형적인 생존형 디펜스 장르에 속한다. 플레이어 다섯 명은 각자 지정된 지역에서 몰려오는 적 유닛의 파도를 협력하여 막아내야 하며, 한 명이라도 방어선이 뚫리면 공동의 목표가 위험해질 수 있기 때문에 끊임없는 소통과 역할 분담이 중요하게 작용한다. 사막 타일셋 특유의 탁 트인 시야와 황량한 분위기는 전장의 긴장감을 한층 끌어올리며, 좁은 골목이나 언덕을 활용한 시야 싸움보다는 넓은 평지에서 다수의 병력을 운용하는 대규모 전투에 초점이 맞춰져 있다. 맵은 초반부터 후반까지 적 유닛의 구성과 물량이 점진적으로 강해지는 전형적인 웨이브 방식을 채택하고 있다. 초반에는 저글링이나 마린 같은 기본 유닛이 몰려오지만, 회차가 거듭될수록 고위 기사, 울트라리스크, 배틀크루저 같은 고급 유닛이 등장하며 플레이어의 대응력을 시험한다. 특정 구간에서는 적의 공성 전차나 리버가 원거리에서 수정탑을 직접 타격하려 하기 때문에 단순히 병력을 전방에 쌓아두는 것만으로는 버티기 어렵고, 적의 공격 경로를 예측해 기동성 있는 유닛으로 빠르게 차단하는 전술적 판단이 요구된다. 플레이어별로 주어지는 자원과 건설 가능한 지역은 제한되어 있어, 초반 빌드 오더와 유닛 조합을 어떻게 가져가느냐에 따라 중후반 안정성이 크게 갈린다. 테란의 시즈 탱크와 벌처, 저그의 럴커와 디파일러, 프로토스의 리버와 하이 템플러 등 종족별 핵심 유닛을 적재적소에 배치하는 재미가 상당하다. 이 맵은 특히 스타크래프트 디펜스 장르에 익숙한 플레이어들에게 강력히 추천할 만하다. 웨이브 패턴을 외우고 최적의 방어 라인을 구축하는 과정에서 오는 성취감이 뚜렷하며, 다섯 명이 함께 호흡을 맞춰야 하므로 친구들과의 파티 플레이에서 진가를 발휘한다. 다만 입문자에게는 후반으로 갈수록 쏟아지는 고급 유닛의 압박이 다소 가혹하게 느껴질 수 있으므로, 초반 방어에 실패하더라도 빠르게 재정비할 수 있도록 팀원 간의 백업 전략을 미리 상의해두는 것이 좋다. 플레이 전에 반드시 확인해야 할 점은, 이 맵이 일반적인 밀리나 유즈맵과 달리 수정탑의 체력이 공유되지 않는다는 사실이다. 즉 한 명의 구역이 뚫려 수정탑이 파괴되면 그 즉시 게임이 끝나므로, 모든 플레이어가 균등하게 성장해야 한다는 부담감이 존재한다. 따라서 특정 유저에게 자원을 몰아주는 전략보다는 전원이 고르게 강해지는 방향으로 협력하는 것이 클리어의 핵심이다. This is a five-player cooperative defense map where the core objective is to protect a Pylon standing in the middle of a desert wasteland. As the title suggests, the Pylon is the vital structure that must survive at all costs, and if it is destroyed, the game ends immediately, placing this squarely in the classic survival defense genre. Five players each hold their designated zones against waves of incoming enemies, and because a single breach can jeopardize the entire team's goal, constant communication and clear role distribution are essential. The open sightlines and desolate atmosphere of the Desert tileset heighten the tension on the battlefield, shifting the focus away from narrow chokepoint vision play toward large-scale engagements that require managing massed armies across wide open spaces. The map follows a typical wave-based progression where enemy composition and volume gradually intensify from start to finish. Early waves send basic units like Zerglings and Marines, but as the rounds advance, high-tier threats such as High Templars, Ultralisks, and Battlecruisers appear to test the players' adaptability. Certain segments introduce long-range siege units like Siege Tanks or Reavers that can strike the Pylon directly from a distance, making it insufficient to simply stack forces at the front line; instead, tactical decisions involving mobile interception units are required to block their attack paths quickly. Each player receives limited resources and a restricted building area, so the chosen build order and unit composition in the early game heavily influence mid-to-late game stability. The enjoyment of deploying race-specific core units such as Terran Siege Tanks and Vultures, Zerg Lurkers and Defilers, or Protoss Reavers and High Templars in the right positions is a major highlight. This map is highly recommended for players already familiar with the StarCraft defense genre. The satisfaction derived from memorizing wave patterns and constructing the optimal defensive line is substantial, and the necessity of five-player synchronization makes it shine in party play with friends. However, for beginners, the sheer volume of advanced enemy units in the later stages can feel overwhelming, so it is advisable to discuss backup strategies among team members beforehand to recover quickly from early defensive failures. A critical point to check before playing is that the Pylon's health is not shared; if one player's sector is breached and the Pylon is destroyed, the game ends instantly for everyone. This creates a strong pressure for all players to grow evenly, making a balanced cooperative approach where everyone strengthens together far more effective for clearing the map than funneling resources into a single player.
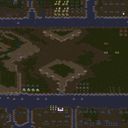
30분 디펜스 버전 F (30 Minutes Defence Ver F)
사막 한복판에 자리한 좁은 방어선에서 다섯 명의 플레이어가 몰려드는 적을 상대로 30분 동안 버티는 클래식한 유즈맵이다. 맵의 구조는 직관적이면서도 긴장감을 극대화하도록 설계되었다. 중앙 기지 주변은 사막 타일셋 특유의 탁 트인 시야와 제한된 지형지물로 이루어져 있어 초반부터 방어 라인을 어떻게 구축하느냐가 생존의 핵심으로 작용한다. 입구가 여러 방향으로 뚫려 있어 병력을 분산 배치해야 하며, 특정 지점에 지나치게 집중하면 반대편에서 밀려드는 공세에 쉽게 무너질 수 있다. 따라서 팀원 간의 역할 분담과 실시간 소통이 매우 중요하게 느껴진다. 초반에는 소수의 유닛으로 버티며 자원을 모으고, 중반 이후에는 강력한 광역 공격 유닛이나 방어 건물을 조합해 점점 거세지는 공격 파도를 상대하게 된다. 특히 후반으로 갈수록 적의 체력과 물량이 급격히 증가하기 때문에 지속적으로 진영을 보강하지 않으면 순식간에 전선이 붕괴되는 짜릿한 압박감을 경험할 수 있다. 이 맵은 단순한 버티기 이상의 재미를 제공한다. 제한된 자원과 공간 안에서 유닛 배치, 건물 시야 확보, 병력 회전 타이밍을 끊임없이 고민하게 만든다. 사막 타일셋의 황량한 분위기는 고립된 전장의 느낌을 잘 살렸으며, 시각적으로도 적의 움직임을 쉽게 구분할 수 있게 도와준다. 5인 플레이에 최적화되어 있어 한 명이라도 빨리 무너지면 주변 라인까지 연쇄적으로 위험해지기 때문에, 서로의 방어 구역을 커버해주는 플레이가 자연스럽게 요구된다. 난이도는 초보자가 혼자 도전하기에는 다소 가혹한 편이지만, 친구들이나 공개방에서 호흡을 맞추면 성취감이 크다. 플레이 전에는 반드시 팀원과 간단한 전략을 공유하고, 각자 맡을 방향과 유닛 조합을 미리 상의하는 것이 좋다. 또한 후반부로 갈수록 컴퓨터 사양에 따라 렉이 발생할 수 있으니, 그래픽 설정을 낮추거나 불필요한 이펙트를 최소화하는 것이 안정적인 플레이에 도움이 된다. 고전 유즈맵 특유의 거친 완성도가 느껴지지만, 30분이라는 명확한 목표와 끊임없이 몰려오는 적을 막아내는 손맛은 지금 다시 즐겨도 충분히 매력적이다. In the middle of a desert, five players hold a narrow defensive line against relentless enemy waves for thirty minutes in this classic use map setting. The layout is straightforward yet designed to maximize tension. The open sightlines and sparse terrain features of the desert tileset force you to think carefully about where to place your first defensive structures, making early line construction the key to survival. Because the base is exposed from multiple directions, you must spread your forces thinly. Focusing too heavily on one spot often leads to a quick collapse when the opposite side gets overwhelmed. This makes real-time coordination and clear role division among team members feel essential. In the early game you survive with a handful of units while gathering resources, and by the mid-game you gradually add powerful area-damage units or defensive buildings to handle the increasingly intense attack waves. As the timer ticks toward the later stages, enemy health and numbers spike dramatically, so if you neglect to constantly reinforce your position, the frontline crumbles within seconds, delivering a sharp sense of pressure. This map offers more than just a simple holdout experience. The limited space and time force you to constantly rethink unit positioning, building placement, and rotation timing. The barren desert tileset enhances the feeling of isolation and also makes enemy movements easy to track visually. Optimized for five players, the design ensures that if one person falls too early, the neighboring lanes become dangerously exposed, which naturally pushes the team to cover each other’s defensive zones. The difficulty can feel harsh for a solo beginner, but the sense of achievement is high when playing with friends or in a public lobby. Before starting, it is wise to share a rough strategy with teammates and agree on who covers which angle and what unit compositions to aim for. In the late game, performance may drop depending on your computer, so adjusting graphic settings or minimizing unnecessary effects helps maintain stability. While it carries the rough charm of an old-school Umez map, the clear thirty-minute goal and the satisfying feel of holding off endless enemies remain genuinely appealing even when revisited today.
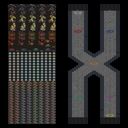
Level Defense 40 (X디펜_업글1원)
우주 정거장을 배경으로 한 협동 디펜스 맵으로, 다섯 명의 플레이어가 각자 독립된 구역을 방어하는 구조를 가지고 있다. 파일명에 포함된 업글1원이라는 단서에서 알 수 있듯이, 업그레이드 비용이 1 미네랄로 설정되어 있어 초반부터 빠르게 유닛 성능을 끌어올리는 독특한 진행 방식을 경험할 수 있다. 플레이어들은 좁은 통로와 넓은 개활지가 교차하는 우주 타일셋의 지형 위에서 끊임없이 밀려오는 적 유닛을 막아내야 하며, 각 웨이브가 끝날 때마다 주어지는 미네랄로 개별 유닛의 공격력과 방어력을 지속적으로 강화해 나가게 된다. 맵의 구조는 다섯 명이 각자 맡은 구역을 수비하는 분산형 디펜스 형태를 띠고 있으며, 가운데 중앙 통로나 공용 수비 라인 같은 개념은 관찰되지 않는다. 따라서 한 명의 실수가 전체 방어선 붕괴로 이어질 가능성이 높아, 모든 플레이어가 각자 위치에서 일정 수준 이상의 방어력을 유지해야 하는 긴장감이 상시 존재한다. 업그레이드 비용이 극도로 낮다는 점은 초반 진입 장벽을 낮추는 장점이지만, 후반으로 갈수록 자원이 남아도는 현상이 발생하여 긴장감이 다소 떨어질 수 있다. 적 유닛의 구성은 단순한 양적 증가에 의존하는 경향이 있어, 웨이브가 거듭될수록 전술적 고민보다는 반복적인 클릭과 업그레이드 작업이 주를 이룬다. 플레이 경험 측면에서는 초반 10여 레벨까지의 빠른 성장 구간이 가장 큰 재미를 제공한다. 저렴한 업그레이드 비용 덕분에 유닛이 눈에 띄게 강해지는 성취감을 빠르게 맛볼 수 있고, 특히 테란의 시즈 탱크나 프로토스의 리버처럼 강력한 스플래시 유닛을 확보한 순간에는 상대를 쓸어내는 시원한 타격감이 살아난다. 하지만 레벨 20을 넘어서면 업그레이드가 거의 완료되어 더 이상 성장할 여지가 줄어들고, 적 유닛의 체력만 기하급수적으로 증가하는 단조로운 패턴이 반복된다. 이 시점부터는 방어가 안정화된 상태에서 단순히 시간을 버티는 작업으로 성격이 변질되기 때문에, 후반부까지 지루함 없이 즐기기 위해서는 동료들과의 대화나 자체적인 목표 설정이 필요하다. 이 맵은 복잡한 전략이나 세밀한 컨트롤보다는, 가볍게 대화를 나누며 협력하는 캐주얼한 플레이를 원하는 유저들에게 적합하다. 초보자도 부담 없이 참여할 수 있고, 업그레이드의 재미가 극대화된 초반 구간은 누구나 쉽게 몰입할 수 있다. 다만 플레이 전에 모든 참여자가 업그레이드 비용이 1원이라는 점을 인지하고 있어야 하며, 그렇지 않을 경우 초반 자원 관리에 혼란이 올 수 있다. 또한 후반으로 갈수록 반복적인 성격이 강해지므로, 긴 플레이 시간을 예상하고 시작하기보다는 가볍게 한두 판 즐긴다는 마음으로 접근하는 것이 좋다. 전체적으로 독창적인 업그레이드 시스템이 돋보이는 맵이지만, 후반부의 지루함을 어떻게 극복하느냐가 이 맵을 즐기는 핵심 관건이 될 것이다. This is a cooperative defense map set on a space station where five players each defend their own isolated sector. As hinted by the map's filename, upgrade costs are set to a single mineral, allowing players to rapidly enhance their units from the very beginning. On the space tileset terrain, which mixes narrow corridors with open platforms, players must repel endless waves of enemy units and continuously spend the minerals earned after each wave to boost individual unit attack and defense. The layout follows a distributed defense model with no central corridor or shared kill zone, meaning a single player's mistake can quickly lead to a total collapse, creating constant tension for everyone involved. The extremely low upgrade cost lowers the early entry barrier, but as the game progresses, surplus resources can accumulate, causing the sense of urgency to fade. Enemy wave composition tends to rely heavily on sheer numbers rather than tactical variety, so the later stages often revolve more around repetitive clicking and upgrading than strategic decision making. The most enjoyable phase is the rapid growth during the first ten to fifteen levels. The cheap upgrades deliver a fast and satisfying sense of progression, and the moment you acquire powerful splash damage units like Terran Siege Tanks or Protoss Reavers, the visceral thrill of sweeping away enemy clusters truly comes alive. However, beyond level thirty, upgrades are mostly maxed out, growth stagnates, and the enemy's health begins to scale exponentially, turning the experience into a repetitive grind where you simply hold the line with little variation. At this point, the mode shifts from active defense to passive endurance, and sustaining enjoyment requires conversation with teammates or self-imposed challenges. This map suits players looking for a casual, cooperative experience that favors light conversation over complex strategy or micro management. Beginners can jump in without pressure, and the early upgrade rush is engaging for anyone. Before starting, every participant should be aware of the one-mineral upgrade rule to avoid early resource confusion. Given the repetitive nature of the later stages, it is best approached with the mindset of a short, relaxing session rather than a marathon. The unique upgrade system is the map's standout feature, but overcoming the mid-to-late game monotony will ultimately define your experience.
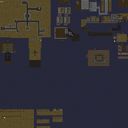
군인놀이 0.4 (Military Play 0.4)
스타크래프트 브루드워의 유즈맵 '군인놀이 0.4'는 5명의 플레이어가 참여하는 컴까기 장르의 맵으로, 플레이어는 각각의 팀으로 나뉘어 전투를 펼치며 승리를 목표로 한다. 맵은 황무지 타일셋을 기반으로 설계되어 있으며, 넓은 평지 위에 다양한 건물이 배치되어 있고, 중앙에는 관물대가 위치한 구조로 보인다. 게임의 목표는 상대방의 건물을 파괴하거나 적군을 전멸시키는 방식으로 추정된다. 맵의 특징은 넓은 시야와 넓은 전투 공간으로, 플레이어는 중앙이나 측면을 통해 진격하거나 방어할 수 있는 전략적 선택지가 제공된다. 관물대 주변은 전투가 집중될 가능성이 높은데, 이는 관물대를 중심으로 방어선이나 공격 루트가 형성될 수 있기 때문이다. 맵의 균형과 난이도는 플레이어 수에 따라 달라질 수 있으며, 팀 플레이가 중요할 것으로 보인다. 특히 관물대 주변의 자원이나 건물을 방어하는 전략이 승패를 좌우할 수 있다. 이 맵은 초보와 숙련자 모두 즐길 수 있도록 중간 정도의 난이도로 설계되었을 가능성이 있으며, 넓은 맵 특성상 긴 플레이 시간이 예상된다. 추천 대상은 스타크래프트의 유즈맵을 즐기는 플레이어, 특히 팀 전투를 선호하는 유저들에게 적합할 것이다. 플레이 전에는 관물대 주변의 배치와 맵의 주요 통로를 미리 숙지하는 것이 중요하다. 또한, 팀 간의 협력이 필수적이므로 사전 전략 회의가 도움이 될 수 있다. This StarCraft: Brood War custom map, '군인놀이 0.4' (Military Play 0.4), is a team-based combat (컴까기) UMS map designed for 5 players. The map, built on a desert tileset, features a large open battlefield with scattered buildings and a central '관물대' (likely a resource or key building). Players are divided into teams and must strategize to destroy enemy structures or eliminate opposing forces. The map's design emphasizes wide visibility and expansive combat zones, allowing for both frontal assaults and flanking maneuvers. The area around the 관물대 is likely a hotspot for battles, as it may serve as a defensive or resource-rich zone. The balance and difficulty are expected to vary by player count, with teamwork playing a crucial role. Strategies focusing on controlling the central area or key resources will likely determine victory. With its expansive layout, the map may require extended playtime. This map is ideal for StarCraft UMS enthusiasts, especially those who enjoy team-based combat. Players should familiarize themselves with the central area and major pathways before starting. Pre-game strategy discussions among teammates are highly recommended for optimal performance.
미로 컴까기 (Maze Comp.)
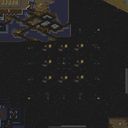
‘미로 컴까기’는 5명의 플레이어가 한 팀으로 적 3명의 컴을 상대로 미로를 돌파하며 자원을 확보하는 디펜스 유즈맵으로, 좁은 통로와 복잡한 구조가 특징인 맵입니다. 플레이어는 시작 지점에서 출발해 맵 여기저기에 흩어져 있는 미네랄과 가스를 확보해야 하며, 상대 컴을 제압하는 동시에 자원 수집을 방해하는 전략이 중요합니다. 맵 중앙에는 넓은 공간이 펼쳐져 있어 일시적인 교전이나 자원 확보가 가능하지만, 좁은 입구와 통로는 적의 기습을 받기 쉽기 때문에 신중한 길찾기와 자원 관리가 필요합니다. 입구는 총 2중으로 설계되어 있어 처음 진입할 때 혼란을 줄 수 있지만, 맵을 숙지하면 효율적인 루트를 찾을 수 있습니다. 맵의 디자인상 초반에는 자원 확보가 어렵지 않지만, 후반으로 갈수록 적의 압박이 심해지며, 특히 좁은 통로에서 벌어지는 전투는 치열할 수밖에 없습니다. 맵의 구조상 플레이어끼리 협력이 필수적이며, 자원을 둘러싼 경쟁이 게임의 긴장감을 높이는 요소로 작용합니다. 이 맵은 초보자와 숙련자 모두 즐길 수 있지만, 복잡한 미로 구조와 빠른 판단력이 요구되기 때문에 어느 정도의 게임 이해도가 필요합니다. 특히 입구 near에서 시작하는 플레이어는 빠르게 자원을 확보하지 않으면 불리해질 수 있어 초기 전략 수립이 중요합니다. 또한, 팀원 간의 원활한 소통과 역할 분담이 승패를 좌우할 수 있습니다. 맵의 디자인상 자원 확보 루트가 제한적이며, 상대 컴을 효율적으로 제압하지 못하면 자원 부족으로 게임을 이어가기 어려운 구조입니다. 따라서 자원 확보와 방어 전략을 동시에 고려해야 합니다. 이 맵은 디펜스와 컴까기 요소가 혼합된 하이브리드 장르로, 자원 관리와 전투력이 균형을 이뤄야 합니다. 맵의 복잡한 구조는 플레이어의 집중력과 순발력을 요구하며, 특히 좁은 공간에서의 전투는 긴장감을 더합니다. 추천 대상은 스타크래프트의 기본 메커니즘을 이해하고 있으며, 팀플레이를 즐기는 유저들입니다. 또한, 디펜스와 전략 게임을 좋아하는 플레이어들에게도 적합한 맵입니다. 게임을 시작하기 전, 맵의 통로와 자원 위치, 상대 컴의 위치를 미리 숙지하는 것이 중요합니다. 또한, 팀원과의 역할 분담을 미리 정해두면 게임 진행이 원활해질 수 있습니다. ‘Maze Rush’ is a defense-style custom map where five players work as a team to break through three enemy bases while securing resources. The map features narrow corridors and complex layouts. Players must gather scattered minerals and gas from various locations while suppressing enemy bases and disrupting their resource collection. While the central area provides open space for temporary engagements or resource gathering, the tight entrances and passages make ambushes likely, requiring careful pathfinding and resource management. The map has double-layered entrances, which can cause confusion at first but allow for efficient routes once familiar. While resource collection is relatively easy early on, enemy pressure intensifies later, especially in narrow corridors where battles become intense. The map’s design makes teamwork essential, and competition over resources heightens the tension throughout the game. This map is enjoyable for both beginners and experienced players, though it demands a solid understanding of the game due to its maze-like structure and need for quick decision-making. Players starting near the entrance must secure resources quickly or risk falling behind, making early strategy crucial. Smooth communication and role distribution among teammates can determine victory or defeat. Since resource-gathering paths are limited and failing to efficiently suppress enemy bases can lead to resource shortages, players must balance resource management and defense strategies. A hybrid of defense and base-breaking mechanics, the map requires a balance of resource control and combat prowess. Its intricate layout tests players’ focus and reflexes, with battles in tight spaces adding to the tension. Recommended for users who understand StarCraft’s core mechanics and enjoy team play, it also suits fans of defense and strategy games. Before starting, players should familiarize themselves with the corridors, resource locations, and enemy base positions. Pre-defining roles with teammates can also streamline gameplay.
Unlikely Hero's Rpg 2 (Final)
스타크래프트 브루드워 유즈맵 RPG 장르에서 시리즈물로 제작된 'Unlikely Hero's Rpg 2 (Final)'는 전작의 이야기를 잇는 후속작 맵이다. 내부 맵 설명에 따르면 이 맵은 'Unlikely Hero's RPG'의 파트 2에 해당하며, 최종 완성본임을 알 수 있다. 192×192 타일의 넓은 황무지 타일셋을 배경으로 설계되어, 플레이어는 5인 협동 플레이를 통해 영웅의 여정을 이어가게 된다. 맵의 구조는 전형적인 스토리 기반 RPG 진행 방식을 따르는 것으로 추정된다. 단일 캐릭터를 조작하며 주어진 퀘스트를 수행하고, 필드를 탐험하며 몬스터를 처치하는 방식으로 전개될 가능성이 높다. 전작의 흐름을 고려할 때, 이번 파트에서는 새로운 지역과 더 강력한 적, 그리고 영웅 성장의 클라이맥스가 펼쳐질 것으로 기대된다. 5인 플레이에 최적화된 점이 특징이며, 각 플레이어가 역할을 분담하거나 함께 전투에 임하는 협동 플레이 경험을 제공한다. 플레이 경험 측면에서는 RPG 특유의 성장 재미와 협동의 손맛을 동시에 느낄 수 있는 구성으로 보인다. 대규모 맵 크기를 활용한 넓은 필드와 다양한 오브젝트 배치는 탐험의 재미를 높이며, 황무지 타일셋이 주는 황량한 분위기는 스토리 몰입에 도움을 준다. 다만, 맵 내부에 트리거나 특수 시스템에 대한 상세 정보가 없어, 정확한 게임 진행 방식과 밸런스는 실제 플레이를 통해 확인해야 한다. RPG 유즈맵에 익숙한 유저라면 무난하게 적응할 수 있지만, 초보자에게는 난이도가 다소 부담스러울 수 있어 팀원 간의 소통과 역할 분담이 중요할 것으로 예상된다. 이 맵은 전작을 클리어한 유저에게 특히 추천하며, 협동 RPG를 즐기는 그룹에게도 좋은 선택이 될 것이다. This StarCraft Brood War UMS RPG map, titled 'Unlikely Hero's Rpg 2 (Final)', is a sequel that continues the story from its predecessor. According to the internal map description, it serves as Part 2 of 'Unlikely Hero's RPG' and is marked as the final version. Built on a 192×192 tile Badlands tileset, the map is designed for 5-player cooperative play, allowing participants to progress their hero's journey together. The structure appears to follow a traditional story-driven RPG format, where players control a single character to complete quests, explore the terrain, and defeat monsters. Given the series' continuity, this installment likely introduces new areas, stronger enemies, and a climactic phase of hero development. The 5-player optimization suggests a focus on cooperative combat, with each player possibly taking on distinct roles. The large map size and varied object placement enhance the sense of exploration, while the desolate Badlands atmosphere supports narrative immersion. However, without detailed trigger information, the exact mechanics and balance must be verified through actual gameplay. Experienced RPG map players should adapt easily, but beginners might find the difficulty challenging, making team communication essential. This map is highly recommended for those who completed the first part and for groups who enjoy cooperative RPG experiences.
타락한 영혼 RPG (The Corrupted Soul RPG)
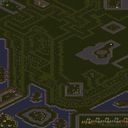
스타크래프트 브루드워 유즈맵 'The Corrupted Soul RPG'는 제작자 DOOM_TO_YOU가 만든 5인 협력 RPG 맵이다. 사막 타일셋을 기반으로 192x192 타일, 6144x6144 픽셀의 넓은 전장을 제공하며, '타락한 영혼(The Corrupted Soul)과 그의 수하들을 찾아 파괴해 그의 정신을 해방시키라'는 명확한 목표를 제시한다. 일반적인 디펜스나 아레나류와 달리 탐색과 전투, 캐릭터 성장이 결합된 시나리오형 진행 방식을 취한다. 맵에 진입하면 플레이어는 각자 영웅 유닛을 조종해 필드 곳곳에 흩어진 적 세력을 소탕하고, 보스급인 타락한 영혼을 공략해야 한다. 맵 크기가 큰 만큼 지역별로 난이도가 다르게 배치되어 있으며, 초반에는 비교적 약한 몬스터로 레벨업과 아이템 파밍을 하고 중반 이후 본격적인 보스전과 이벤트 구간으로 이어지는 흐름이 예상된다. 5인 파티 구성이 기본이므로 역할 분담(탱커, 딜러, 힐러 등)과 협동이 필수적이며, 솔로 플레이는 난이도가 급격히 상승할 것으로 보인다. 진행 방식은 선형적 퀘스트라인을 따라가되, 맵 곳곳에 숨겨진 사이드 요소나 선택지가 있을 가능성이 있다. 'new_colors'라는 파일명 접미사는 시각적 가독성 개선이나 분위기 연출을 위한 컬러 팔레트 수정이 있었음을 시사한다. cp949 인코딩으로 한글 설명이 정상 표시되며, 내부 제목과 설명이 영문으로 되어 있어 글로벌 배포를 염두에 둔 제작으로 보인다. 추천 대상은 스토리 기반 RPG 유즈맵을 즐기는 4~5인 고정 파티, 장시간 협력 플레이를 선호하는 유저다. 난이도는 '보통~어려움' 사이로 추정되며, 초보자는 파티원과의 호흡이 중요하다. 플레이 전 확인 포인트는 5인 풀파티 구성 여부, 음성 채팅 등 의사소통 수단 확보, 그리고 맵 용량이 큰 편이므로 로딩 시간과 렉 여부를 미리 테스트하는 것이다. 밀리전이나 속전속결 미니게임을 찾는 유저보다는, 천천히 맵을 탐험하며 성장하는 재미를 원하는 이에게 적합하다. The Corrupted Soul RPG is a 5-player cooperative RPG map for StarCraft: Brood War, created by DOOM_TO_YOU. Built on the Desert tileset with a vast 192x192 tile (6144x6144 pixel) battlefield, it presents a clear objective: find and destroy the Corrupted Soul and his minions to free his mind. Unlike typical defense or arena maps, it follows a scenario-driven progression combining exploration, combat, and character growth. Upon entering, each player controls a hero unit to eliminate enemy forces scattered across the field and ultimately defeat the boss-grade Corrupted Soul. Given the map size, regions appear to have varying difficulty levels—early areas feature weaker monsters for leveling and item farming, while mid-to-late game transitions into full-scale boss battles and event sequences. The default 5-party composition makes role assignment (tank, DPS, healer, etc.) and cooperation essential; solo play would likely spike the difficulty significantly. Progression follows a linear questline, though hidden side elements or branching choices may exist throughout the map. The 'new_colors' suffix in the filename suggests a visual update—likely a color palette revision for readability or atmosphere. CP949 encoding ensures Korean text displays correctly, while the internal title and description being in English indicate global distribution intent. Recommended for fixed 4-5 player parties who enjoy story-based RPG UMS maps and prefer extended cooperative sessions. Estimated difficulty ranges from Normal to Hard, with team coordination being critical for beginners. Pre-play checks: confirm full 5-player party, secure voice chat or communication tools, and test loading times and lag since the map file is relatively large. This map suits players who want to slowly explore and grow, rather than those seeking melee matches or quick mini-games.
맵 선택 가이드
태그는 맵의 핵심 특징을 빠르게 설명하지만 제작 버전마다 규칙이 다를 수 있습니다. 상세 설명에서 권장 인원, 난이도, 플레이 시간과 버전을 함께 확인한 뒤 다운로드하세요.