
4vs4 스타크래프트 맵 모음
'4vs4' 태그가 등록된 맵을 모았습니다. 장르 하나로 찾기 어려운 플레이 방식, 난이도와 특징을 중심으로 인기 맵과 최신 맵을 비교해 보세요.
- 등록 맵
- 6개
- 누적 다운로드
- 0
- 누적 조회
- 85
인기 맵
다운로드와 조회 반응이 높은 맵입니다.
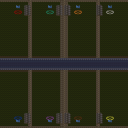
4vs4Micro Ais들 (4vs4 Micro Aisles)
스타크래프트 브루드워의 4vs4Micro Aisles는 8명의 플레이어가 좁은 복도와 미로를 중심으로 전투를 펼치는 밀리 맵으로, 좁은 공간에서 벌어지는 치열한 접전과 전략적인 자원 관리, 기지 방어가 핵심인 맵이다. 맵의 이름에서 느껴지듯 'Micro Aisles'는 좁은 복도나 통로를 뜻하며, 실제로 맵 전체가 좁은 길과 복잡한 배치로 이루어져 있어 플레이어 간의 충돌이 자주 발생한다. 내부 맵 설명에서도 'Small and close, for those who like it Tight'라고 언급된 것처럼, 좁고 밀집된 공간에서 펼쳐지는 전투가 맵의 특징이다. 베스핀 가스와 미네랄의 배치가 5V5 기준으로 균형 잡혀 있지만, 좁은 공간으로 인해 자원 채취가 다소 제한적으로 느껴질 수 있으며, 이는 플레이어 간의 초반Resource Rush(자원 쟁탈전)를 유도한다. 복도와 미로형 구조는 유닛의 움직임을 제한하고, 좁은 길목에서 벌어지는 전투는 개개인의 컨트롤과 micro 컨트롤 능력을 시험한다. 특히 지상 유닛이 주로 활약하는 맵이기 때문에 테란의 시즈 탱크, 프로토스의 드라군, 저그의 뮤탈리스크 등 중장거리 유닛의 활용이 중요하다. 또한 좁은 공간에서 벌어지는 전투는 시야 확보와 컨트롤 미스에 대한 페널티가 크기 때문에, 플레이어는 유닛의 이동 경로와 전투 배치에 신중한 전략을 세워야 한다. 맵의 균형 잡힌 자원 배치는 초반 접전을 격화시키고, 자원 전쟁이 끝난 후에는 본격적인 기지 방어와 확장 전략으로 이어진다. 이 맵은 좁은 공간에서 벌어지는 치열한 전투와Micro 컨트롤을 즐기는 플레이어에게 적합하며, 특히 4vs4라는 팀 기반의 협동이 중요한 맵이기 때문에 팀워크와 전략적 협력이 필수적이다. 또한 좁은 공간에서 벌어지는 전투는 초보자와 숙련자의 실력 격차를 드러내기도 하는데, 특히 좁은 길목에서 벌어지는 전투에서 micro 컨트롤이 부족한 경우 큰 피해를 입을 수 있다. 따라서 이 맵을 플레이하기 전에는 좁은 공간에서 벌어지는 전투와 micro 컨트롤에 대한 연습이 필요하며, 팀원과의 호흡을 맞추는 것이 중요하다. 또한 맵의 좁은 공간은 시야 확보와 유닛의 이동 경로를 빠르게 파악하는 능력이 요구되므로, 맵을 미리 숙지하고 전투 배치에 대한 전략을 세우는 것이 좋다. 4vs4Micro Aisles는 좁은 공간에서 벌어지는 치열한 전투와Micro 컨트롤을 즐기는 플레이어들에게 추천할 만한 맵으로, 특히 팀 기반의 협동과 전략적 깊이가 있는 플레이를 선호하는 유저들에게 적합하다. 좁은 공간에서 펼쳐지는 전투는 실력과 전략이 모두 요구되는 만큼, 이 맵을 통해 플레이어 간의 실력 차이를 느낄 수 있으며, 좁은 공간에서의 전투 능력을 키우기에도 좋은 맵이다. StarCraft: Brood War’s 4 vs. 4 Micro Aisles is a 1v1v1v1v1v1v1v1 map where eight players fight in tight corridors and mazes, emphasizing intense close-quarters combat, strategic resource management, and base defense. As the name suggests, "Micro Aisles" refers to narrow passages, and the entire map is structured with cramped corridors and complex layouts, leading to frequent player collisions. Described in its internal map notes as "Small and close, for those who like it Tight," the map’s defining feature is combat unfolding in confined, densely packed spaces. While the distribution of Vespene gas and minerals is balanced for a 5v5 format, the tight spaces make resource gathering feel restricted, often sparking early Resource Rushes (resource races) among players. The corridor and maze-like design restricts unit movement, and battles in tight passages test individual control and micro-management skills. Since ground units dominate this map, key units like Terran Siege Tanks, Protoss Dragoons, and Zerg Mutalisks play crucial roles. Fights in narrow spaces also heavily penalize poor positioning and control mistakes, forcing players to carefully plan unit paths and battle formations. The map’s balanced resource layout intensifies early clashes, and once the resource war subsides, players shift focus to base defense and expansion strategies. This map is ideal for players who enjoy high-stakes combat in tight spaces and micro-management, especially in a team-based 4v4 setting where coordination and strategy are essential. The confined environment also highlights skill gaps between beginners and veterans—players lacking micro-control in narrow passages often suffer heavy losses. Before playing, it’s important to practice fighting in tight spaces and refining micro-skills, as well as syncing with teammates. The map’s tight layout demands quick awareness of sightlines and unit movement paths, so familiarizing yourself with the terrain and planning battle formations in advance is key. 4 vs. 4 Micro Aisles is a recommended map for players who thrive on intense close-quarters combat and micro-management, particularly those who prefer team-based coordination and strategic depth. With battles requiring both skill and strategy, the map effectively showcases player skill differences while helping players improve their ability to fight in confined spaces.
4vs4 컴까기 고대의 신전
4vs4 컴까기 고대의 신전은 고대 유적을 배경으로 한 4대 4 전투형 컴퓨터 상대 전용 유즈맵이다. 맵 전체가 6144×6144 타일로 구성되어 있어 넓은 전장과 복잡한 지형이 특징이며, 황무지 타일셋을 사용해 고대 신전의 돌계단과 폐허가 자연스럽게 배치되어 있다. 플레이어는 7업까지 성장할 수 있는 제한된 레벨 범위 안에서 자원을 확보하고, 방어 시설을 적절히 배치해 상대의 공격을 차단한다. 초기 자원 배치는 균등하게 제공되지만, 맵 중앙에 위치한 신전 입구 주변에 높은 지대와 좁은 통로가 있어 초반 라인전이 치열하게 전개된다. 특히, 방어 타워와 벽을 건설해 적의 진입을 지연시키는 디펜스 요소가 강조되며, 동시에 적군을 직접 추격해 전투를 유도하는 컴까기 스타일이 혼합돼 있다. 플레이 경험은 전투와 방어 사이의 균형을 맞추는 것이 핵심이며, 초반에 방어 라인을 빠르게 구축하고 중반에 적을 몰아붙이는 타이밍을 잡는 것이 승패를 좌우한다. 추천 대상은 1대 1 혹은 2대 2보다 4대 4 팀플레이를 선호하는 플레이어이며, 특히 방어 건설과 적 추격을 동시에 즐기는 유저에게 적합하다. 플레이 전 확인해야 할 포인트는 레벨 제한(7업)과 자원 배분, 그리고 신전 입구 주변의 지형 특성을 파악해 방어 위치를 미리 선정하는 것이다. The map "4vs4 컴까기 고대의 신전" is a 4‑vs‑4 custom map set in an ancient ruin, designed for computer‑opponent skirmishes. Its large 6144×6144 layout uses the Wasteland tileset, creating stone stairways and broken temples that form a sprawling battlefield. Players can advance only up to level 7, forcing quick resource gathering and strategic placement of defensive structures. Resources start evenly, but the central temple entrance features high ground and narrow passages, leading to intense early‑game lane fights. While defensive towers and walls are crucial for delaying enemy advances, the map also encourages aggressive rush tactics—typical of a "컴까기" style—by allowing players to chase opponents after establishing a solid defense. Success hinges on balancing fortification with timely attacks: building a strong early defense, then transitioning to pressure the enemy in mid‑game. This map suits players who enjoy both base defense and active raiding, especially in full 4‑vs‑4 team matches rather than smaller skirmishes. Before playing, note the level cap (7), resource distribution, and the terrain around the temple entrance to plan optimal defensive positions.
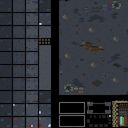
제르나가 D (Xel'Naga D (( 4vs4.max )))
스타크래프트 브루드워의 고전 유즈맵으로, ‘Xel'Naga D (( 4vs4.max ))’는 4인 대 4인 팀전 구조를 기반으로 한 전략 디펜스 장르의 맵입니다. 맵의 이름과 파일명에서 확인할 수 있듯이, 젤나가 테마의 우주 배경 위에 4개의 플레이어가 각각의 진영을 구성해 적대 세력을 상대로 버티며 승리를 쟁취하는 전투가 펼쳐집니다. 내부 맵 제목과 설명에 등장하는 ‘Mr.Hiroko’와 ‘version: 1.3’이라는 정보는 개발자 및 업데이트 내역을 짐작케 하지만, 공식적인 스토리나 승리 조건은 제공되지 않아 맵의 순수한 구조와 진행 방식에 집중해야 합니다. 맵의 크기는 1024x1024 타일로 우주 타일셋을 활용해 넓은 시야와 전략적 공간감을 제공하며, 4096x4096 해상도와 128x128 타일 단위는 스타크래프트의 맵 디자인 표준에 부합합니다. 이 맵의 핵심은 ‘4vs4’라는 팀전 구조에 있습니다. 각 팀은 중앙의 넥서스와 미네랄, 가스를 확보한 채 초반을 버티며, 적의 공격을 방어하는 동시에 자원을 확보해 병력을 양성해야 합니다. 맵의 배치상으로는 각 진영이 비교적 대칭적으로 구성되어 있어 밸런스가 잘 맞춰졌을 것으로 추정됩니다. 또한, 우주 배경의 특성상 지형은 평지형에 가까우며, 주요 방어 거점인 넥서스 주변에는 테란의 건물을 보호할 수 있는 요충지가 존재할 가능성이 있습니다. 맵의 이름에서 ‘D’는 방어(Defense)를 의미할 가능성이 높으며, 이는 맵의 장르가 디펜스임을 암시합니다. 플레이어는 초반 자원 확보와 초반 방어선 구축이 매우 중요하다는 점을 유념해야 합니다. 초반 러시나 조기 공격에 취약한 구조일 수 있으므로, 빠른 미네랄 확보와 방어 건물 배치, 그리고 효율적인 병력 운용이 승리의 관건이 될 것입니다. 또한, 맵의 크기가 넓어 정찰과 시야 확보가 중요하다는 점도 고려해야 합니다. 맵의 배경이 우주이므로,Dark Swarm이나 Disruption Web 같은 스킬 사용이 제한적이거나 특수한 조건이 필요할 수 있어, 맵의 특성을 잘 이해하고 플레이하는 것이 중요합니다. 이 맵은 초보 플레이어보다는 중수 이상의 유저들에게 적합할 것으로 보이며, 팀워크와 전략적 사고가 요구되는 맵입니다. 특히, 팀원 간의 호흡이 중요하기 때문에 사전 협의와 전략 수립이 필수적입니다. 맵의 난이도는 ‘어려움’ 정도로 예상되며, 예상 플레이 시간은 각 팀의 전략과 실력에 따라 30분에서 60분 정도로 잡을 수 있습니다. 맵의 버전은 1.3으로, 개발자에 의해 지속적인 버그 픽스가 이루어졌을 가능성이 높아 안정성이 확보되어 있을 것으로 보입니다. 이 맵을 플레이하기 전에는 맵의 특성과 자신의 팀원과 충분히 상의하여 전략을 수립하는 것이 좋습니다. 또한, 초기 자원 확보와 방어선 구축에 집중하며, 적의 공격을 예상해 대비하는 것이 중요합니다. 맵의 우주 배경과 젤나가 테마는 시각적인 흥미를 더해주며, 넓은 시야와 전략적 공간감은 플레이어의 몰입도를 높이는 요소로 작용할 것입니다. A classic custom map from *StarCraft: Brood War*, *Xel'Naga D ((4vs4.max))* is a strategy defense game built around a 4v4 team battle format. As the name and filename suggest, it unfolds on a space-themed Zel’Naga setting where four players each establish their own base and fight to survive against hostile forces. References to “Mr. Hiroko” and “version: 1.3” in the internal map title and description hint at the developer and update history, but the map provides no official storyline or victory conditions, so the focus remains purely on its structure and gameplay. The map spans 1024×1024 tiles, using a space-themed tileset to deliver wide visibility and a strong sense of strategic space. At 4096×4096 resolution and with a 128×128 tile unit, it conforms to *StarCraft*’s standard map design conventions. At its core, the map revolves around the 4v4 team structure. Each team starts by securing a central Nexus along with minerals and gas, holding the early game while gathering resources to build an army. The layout appears fairly symmetrical, suggesting a well-balanced experience. Given the space setting, the terrain is mostly flat, and key defensive chokepoints around the Nexus likely offer natural protection for Terran structures. The “D” in the map name likely stands for “Defense,” underscoring its defense-focused genre. Players should prioritize early resource collection and base fortification, as the map’s layout may leave it vulnerable to early rushes or aggressive pushes. Fast mineral gathering, smart defensive building placement, and efficient troop management become critical to victory. With its expansive scale, scouting and vision control matter just as much. Because the backdrop is space, abilities like Dark Swarm or Disruption Web may be restricted or require special conditions, so understanding the map’s mechanics is essential. This map is better suited to intermediate or advanced players who can coordinate effectively. Teamwork and strategic planning are vital, and a pre-game discussion to align tactics is strongly recommended. The difficulty is high, with typical matches lasting between 30 and 60 minutes depending on team strategy and skill. Version 1.3 suggests ongoing bug fixes by the developer, promising a stable experience. Before jumping in, review the map’s traits with your teammates and agree on a game plan. Focus on early resource control and base defense while preparing countermeasures against likely enemy attacks. The cosmic Zel’Naga theme adds visual appeal, and the open sightlines and strategic space heighten player immersion.
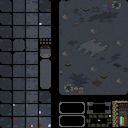
제라툴의 분노 (Xel'Naga D (( 4vs4.Final )))
스타크래프트 브루드워의 유즈맵 'Xel'Naga D (( 4vs4.Final ))'는 4대4 대칭형 멀티플레이 전용으로 설계된 고전적인 UMS 맵입니다. 우주 타일셋을 기반으로 제작된 이 맵은 1024×1024 크기의 정사각형 맵으로, 중앙에 위치한 Xel'Naga 테라진(terrazine) 광맥과 그 주변을 중심으로 symmetrical(대칭) 구조가 돋보입니다. 네 개의 플레이어는 각자 128×128 크기의 균등한 시작 지역을 차지하며, 중앙 광맥을 둘러싼 광물과 가스 광산이 고르게 분배되어 있어 초기 자원 확보 경쟁이 치열해질 가능성이 높습니다. 맵의 가장 큰 특징은 4vs4 팀플레이에 최적화된 배치로, 각 팀은 서로 마주보는 위치에 배치되어 있어 전략적 협력과 대결이 자연스럽게 펼쳐질 수 있도록 구성되어 있습니다. 특히, 광물과 가스가 맵 중앙을 기준으로 대칭으로 배치되어 있어 모든 플레이어가 동일한 시작 조건을 확보할 수 있도록 배려된 점이 인상적입니다. 또한, 우주 타일셋의 어두운 배경과 푸른빛의 테라진 광맥, 그리고 붉은 가스 광산이 어우러져 시각적 조화를 이루며, 플레이어의 집중력을 높이는 데 도움이 됩니다. 이 맵은 초기 버전부터 여러 차례 버그 픽스가 진행된 Final 버전으로, 밸런스와 플레이 안정성을 높이는 데 중점을 두고 있습니다. 4vs4 팀플레이를 즐기는 유저들에게는 전략적 협동과 경쟁이 동시에 요구되는 흥미로운 경험을 제공할 것입니다. 특히, symmetrical 구조와 균등한 자원 분배는 초보자도 쉽게 접근할 수 있도록 돕지만, 팀 간의 협력과 타이밍을 요구하는 요소들이 존재해 깊은 전략을 필요로 합니다. 플레이 전에 확인해야 할 점은 중앙 광맥 주변의 광물과 가스 광산이 빠르게 고갈될 가능성이 높다는 점입니다. 따라서 초반 자원 확보와 중앙 지역 장악이 승패를 좌우할 수 있으므로, 빠른 확장을 계획하거나 방어 전략을 세우는 것이 중요합니다. 또한, 팀원과의 원활한 커뮤니케이션을 통해 전략을 조율하는 것이 필수적입니다. 이 맵은 symmetrical 구조와 팀플레이 특성상 밸런스가 잘 잡혀 있으며, 특히 4vs4 팀플레이를 즐기는 유저들에게 추천할 만한佳作입니다. symmetrical 맵의 장점인 공정한 시작 조건과 전략적 깊이를 동시에 느낄 수 있는 작품으로, 여러 번의 플레이를 통해 새로운 전략을 발견할 수 있을 것입니다. The *StarCraft: Brood War* custom map *Xel'Naga D ((4vs4.Final))* is a classic UMS (Use Map Settings) map designed exclusively for 4v4 symmetrical multiplayer battles. Crafted on a space-themed tileset, this 1024×1024 square map features a striking symmetrical layout centered around the Xel'Naga terrazine mineral field and its surrounding area. Each of the four players starts in an equal 128×128 starting zone, with minerals and gas deposits evenly distributed around the central terrazine, making early resource competition intense. The map’s defining trait is its 4v4 teamplay-focused layout, placing opposing teams directly across from each other to naturally facilitate strategic cooperation and rivalry. The symmetrical distribution of resources ensures all players begin on equal footing, while the dark space-themed backdrop, glowing blue terrazine, and red gas fields create a visually cohesive atmosphere that enhances player focus. Having undergone multiple bug fixes since its initial release, the Final version prioritizes balance and gameplay stability, offering 4v4 team players an engaging experience that demands both strategic collaboration and competitive tactics. While the symmetrical structure and fair resource allocation make it accessible to newcomers, the need for team coordination and precise timing introduces depth for experienced players. Before playing, note that the central terrazine minerals and gas fields may deplete quickly, making early resource control and securing the center pivotal to victory. Players should plan rapid expansions or defensive strategies accordingly, while effective communication with teammates is essential for success. Thanks to its balanced design and teamplay focus, *Xel'Naga D* is a standout choice for 4v4 battles, allowing players to appreciate the strengths of symmetrical maps—fair starting conditions and strategic complexity—while discovering new tactics through repeated play.
4vs4 PeninsuLa
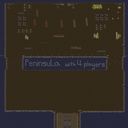
스타크래프트 브루드워의 4vs4 팀전 유즈맵인 <4vs4 PeninsuLa>는 좁고 복잡한 반도 지형을 배경으로 한 팀 기반의 전투 맵으로, 방어와 공격의 균형을 중시하는 전략적인 플레이가 요구된다. 맵 중앙에 위치한 좁은 길목과 주변의 섬 지역들이 주요 교전 포인트로, 각 팀은 좁은 통로를 통해 적과 맞닥뜨릴 수밖에 없는 구조다. 내부 설명에서도 언급된 ‘지구’를 지키며 ‘헌터’를 제거해야 한다는 설정은 맵의 핵심 목표를 보여준다. 좁은 공간에서 벌어지는 밀집 전투와 섬 지역을 활용한 기습 플레이가 주요 특징이며, 팀워크와 빠른 판단력이 승리의 열쇠가 된다. 맵의 황무지 타일셋은 황량한 분위기를 강조하며, 복잡한 지형은 시야 확보와 병력 이동에 영향을 미친다. 초보 유저는 좁은 길목에서 벌어지는 전투에서 당황할 수 있지만, 익숙해지면 섬 지역을 활용한 전략적 우위를 점할 수 있다. 한정된 공간에서 벌어지는 전투는 맵의 긴장감을 높이며, 팀 간 협력이 필수적임을 강조한다. 이 맵은 팀전 특화 유즈맵으로, 4명의 플레이어가 각자의 역할을 맡아 방어와 공격을 동시에 수행해야 한다. 맵의 복잡한 지형은 전략적 깊이를 더하며, 섬 지역을 점령하거나 지키는 플레이도 중요하다. 플레이 전에는 팀원 간의 역할 분배와 섬 지역 점령 전략을 사전에 논의하는 것이 좋다. 또한, 좁은 길목에서 벌어지는 전투에서는 병력 생산과 업그레이드 타이밍을 잘 조율해야 한다. 이 맵은 팀전 경험이 있는 유저에게 적합하며, 좁은 공간에서의 전투와 섬 지역 활용에 익숙해지면 더 높은 승률을 기대할 수 있다. 이처럼 <4vs4 PeninsuLa>는 좁고 복잡한 지형을 활용한 전략적인 팀전 유즈맵으로, 팀워크와 빠른 대처가 승리를 좌우하는 맵이다. <4vs4 PeninsuLa> is a 4vs4 team-based custom map in *StarCraft: Brood War* set on a narrow, intricate peninsula. The map emphasizes balanced offense and defense, requiring strategic play to succeed. Key engagement points revolve around the central bottleneck and surrounding island regions, forcing teams into close-quarters combat through tight corridors. The in-game lore of defending the "Earth" while eliminating the "Hunters" highlights the map’s core objective. The map’s standout features include dense battles in confined spaces and ambush tactics leveraging the islands. Teamwork and quick decision-making are crucial for victory. The barren tile set enhances the desolate atmosphere, while the complex terrain impacts vision and troop movement. Novices may struggle with the tight choke points, but mastering the islands can provide a strategic edge. The limited space heightens tension, underscoring the necessity of teamwork. Designed for team play, the map requires four players to balance defense and offense simultaneously. The intricate terrain adds depth, making island control or defense vital. Before playing, teams should discuss role assignments and island strategies. In choke points, coordinating unit production and upgrades is essential. This map suits experienced team players, and proficiency in close-quarters combat and island tactics can significantly boost win rates. Ultimately, <4vs4 PeninsuLa> is a strategic team-based custom map that leverages its narrow, complex terrain, where teamwork and rapid responses determine victory.
4vs4 컴까기 스타쉽 v11 255업 (4vs4 Compakgi Starship v11 255up)
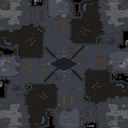
스타크래프트 브루드워의 인기 유즈맵 중 하나인 <4vs4 컴까기 스타쉽 v11 255업>은 다수의 플레이어가 팀을 이루어 전투를 펼치는 전형적인 '컴퓨터 상대 유즈맵' 장르로, 4명의 플레이어가 각각 1팀을 구성해 AI가 조종하는 적군과의 전투에서 승리를 차지해야 하는 플레이 방식이다. 맵은 우주 테마의 타일셋을 기반으로 제작되어 전장 전체가 어두운 우주 공간으로 둘러싸여 있으며, 중앙에 위치한 행성을 배경으로 한 전투가 펼쳐진다. 맵의 구조는 비교적 평평한 지형 위에 적군의 기지나 주요 건물이 배치되어 있어, 플레이어는 이들을 파괴하거나 방어선을 구축하는 동시에 자원 관리와 유닛 조합을 신중히 고려해야 한다. 이 맵의 특징은 '스타쉽'이라는 이름에서 알 수 있듯이, 우주를 배경으로 한 전투가 전개된다는 점이다. 플레이어는 테란, 프로토스, 저그 중 하나를 선택해 전투에 임하며, 각 종족의 특성을 살린 유닛 조합과 전략을 구사해야 한다. 맵의 난이도는 '255업'이라는 버전명에서 짐작할 수 있듯이 상당히 높은 편으로, AI의 공격 패턴이 강력하고Resource Management가 중요해진다. 초보자의 경우 쉽게 적응하기 어려운 구조이지만, 숙련된 플레이어들에게는 치밀한 전략과 빠른 판단력이 요구되는 흥미로운 전투를 제공한다. 전체적인 플레이 흐름은 AI와 대결하는 형태로 진행되며, 승리 조건은 상대의 주요 건물을 파괴하는 것이다. 맵의 맵핵(핵심 전략)을 파악하는 것이 중요하며, 특히 초반의 자원 확보와 유닛 생산 타이밍을 맞추는 것이 승리의 열쇠가 된다. 맵의 구조상 중앙 지역이 전투의 핵심으로 작용하며, 이곳에서의 전투에서 우위를 점해야만 전체적인 승리를 이끌어낼 수 있다. 또한, 맵의 크기가 1024x1024로 비교적 넓은 편이기 때문에, 넓은 시야를 바탕으로 한 전략적 움직임이 필요하다. 이 맵은 특히 '컴퓨터 상대'라는 특징 때문에, 혼자서 또는 팀원들과 함께 AI를 상대로 실력을 겨루는 재미가 있다. 다수의 플레이어가 참여할수록 전략의 다양성이 높아지며, 팀워크가 중요한 포인트로 작용한다. 하지만 AI의 난이도가 높아 초보자에게는 다소 어려운 편이므로, 게임에 익숙해질 때까지는 연습 모드나 쉬운 난이도에서 플레이를 추천한다. 또한, 맵의 버전이 'v11'로 업데이트가 자주 이루어졌다는 점에서, 제작자와 수정자의 지속적인 노력으로 맵의 밸런스가 개선되어 왔다는 것도 특징 중 하나다. One of the most popular user-made maps in *StarCraft: Brood War*, *4vs4 Comp Stomp Starship v11 255up*, is a classic "AI opponent" map where multiple players team up to battle against AI-controlled enemies. Four players form a team and must defeat AI-controlled forces to achieve victory. The map features a space-themed tileset, with the battlefield set against a dark cosmic backdrop centered around a planet. The terrain is relatively flat, with enemy bases and key structures scattered across the map, requiring players to destroy enemy buildings or build defensive lines while carefully managing resources and unit compositions. As the name "Starship" suggests, the map centers on space-themed combat. Players choose between the Terran, Protoss, or Zerg races, each requiring unique unit combinations and strategies tailored to their strengths. The difficulty, as indicated by "255up," is quite high, featuring powerful AI attack patterns and demanding precise resource management. While beginners may struggle to adapt, experienced players will enjoy the intense battles that demand sharp strategy and quick decision-making. The gameplay revolves around defeating AI opponents, with victory achieved by destroying the enemy’s main structures. Understanding the map’s key strategies is crucial, particularly securing early resources and timing unit production correctly. The central area serves as the focal point of combat, and gaining control here is vital to securing overall victory. With a map size of 1024x1024, players must also rely on wide vision and strategic positioning. The "AI opponent" nature of the map makes it enjoyable to test skills alone or with teammates against AI. More players mean greater strategic variety and stronger emphasis on teamwork. However, due to the high AI difficulty, beginners may find it challenging, so practicing on easier difficulties or in custom modes is recommended. Additionally, frequent updates to version 11 highlight the creators’ and modifiers’ ongoing efforts to refine the map’s balance.
최근 등록된 맵
새로 추가된 파일과 버전을 확인하세요.
4vs4 컴까기 스타쉽 v11 255업 (4vs4 Compakgi Starship v11 255up)
스타크래프트 브루드워의 인기 유즈맵 중 하나인 <4vs4 컴까기 스타쉽 v11 255업>은 다수의 플레이어가 팀을 이루어 전투를 펼치는 전형적인 '컴퓨터 상대 유즈맵' 장르로, 4명의 플레이어가 각각 1팀을 구성해 AI가 조종하는 적군과의 전투에서 승리를 차지해야 하는 플레이 방식이다. 맵은 우주 테마의 타일셋을 기반으로 제작되어 전장 전체가 어두운 우주 공간으로 둘러싸여 있으며, 중앙에 위치한 행성을 배경으로 한 전투가 펼쳐진다. 맵의 구조는 비교적 평평한 지형 위에 적군의 기지나 주요 건물이 배치되어 있어, 플레이어는 이들을 파괴하거나 방어선을 구축하는 동시에 자원 관리와 유닛 조합을 신중히 고려해야 한다. 이 맵의 특징은 '스타쉽'이라는 이름에서 알 수 있듯이, 우주를 배경으로 한 전투가 전개된다는 점이다. 플레이어는 테란, 프로토스, 저그 중 하나를 선택해 전투에 임하며, 각 종족의 특성을 살린 유닛 조합과 전략을 구사해야 한다. 맵의 난이도는 '255업'이라는 버전명에서 짐작할 수 있듯이 상당히 높은 편으로, AI의 공격 패턴이 강력하고Resource Management가 중요해진다. 초보자의 경우 쉽게 적응하기 어려운 구조이지만, 숙련된 플레이어들에게는 치밀한 전략과 빠른 판단력이 요구되는 흥미로운 전투를 제공한다. 전체적인 플레이 흐름은 AI와 대결하는 형태로 진행되며, 승리 조건은 상대의 주요 건물을 파괴하는 것이다. 맵의 맵핵(핵심 전략)을 파악하는 것이 중요하며, 특히 초반의 자원 확보와 유닛 생산 타이밍을 맞추는 것이 승리의 열쇠가 된다. 맵의 구조상 중앙 지역이 전투의 핵심으로 작용하며, 이곳에서의 전투에서 우위를 점해야만 전체적인 승리를 이끌어낼 수 있다. 또한, 맵의 크기가 1024x1024로 비교적 넓은 편이기 때문에, 넓은 시야를 바탕으로 한 전략적 움직임이 필요하다. 이 맵은 특히 '컴퓨터 상대'라는 특징 때문에, 혼자서 또는 팀원들과 함께 AI를 상대로 실력을 겨루는 재미가 있다. 다수의 플레이어가 참여할수록 전략의 다양성이 높아지며, 팀워크가 중요한 포인트로 작용한다. 하지만 AI의 난이도가 높아 초보자에게는 다소 어려운 편이므로, 게임에 익숙해질 때까지는 연습 모드나 쉬운 난이도에서 플레이를 추천한다. 또한, 맵의 버전이 'v11'로 업데이트가 자주 이루어졌다는 점에서, 제작자와 수정자의 지속적인 노력으로 맵의 밸런스가 개선되어 왔다는 것도 특징 중 하나다. One of the most popular user-made maps in *StarCraft: Brood War*, *4vs4 Comp Stomp Starship v11 255up*, is a classic "AI opponent" map where multiple players team up to battle against AI-controlled enemies. Four players form a team and must defeat AI-controlled forces to achieve victory. The map features a space-themed tileset, with the battlefield set against a dark cosmic backdrop centered around a planet. The terrain is relatively flat, with enemy bases and key structures scattered across the map, requiring players to destroy enemy buildings or build defensive lines while carefully managing resources and unit compositions. As the name "Starship" suggests, the map centers on space-themed combat. Players choose between the Terran, Protoss, or Zerg races, each requiring unique unit combinations and strategies tailored to their strengths. The difficulty, as indicated by "255up," is quite high, featuring powerful AI attack patterns and demanding precise resource management. While beginners may struggle to adapt, experienced players will enjoy the intense battles that demand sharp strategy and quick decision-making. The gameplay revolves around defeating AI opponents, with victory achieved by destroying the enemy’s main structures. Understanding the map’s key strategies is crucial, particularly securing early resources and timing unit production correctly. The central area serves as the focal point of combat, and gaining control here is vital to securing overall victory. With a map size of 1024x1024, players must also rely on wide vision and strategic positioning. The "AI opponent" nature of the map makes it enjoyable to test skills alone or with teammates against AI. More players mean greater strategic variety and stronger emphasis on teamwork. However, due to the high AI difficulty, beginners may find it challenging, so practicing on easier difficulties or in custom modes is recommended. Additionally, frequent updates to version 11 highlight the creators’ and modifiers’ ongoing efforts to refine the map’s balance.
4vs4 PeninsuLa
스타크래프트 브루드워의 4vs4 팀전 유즈맵인 <4vs4 PeninsuLa>는 좁고 복잡한 반도 지형을 배경으로 한 팀 기반의 전투 맵으로, 방어와 공격의 균형을 중시하는 전략적인 플레이가 요구된다. 맵 중앙에 위치한 좁은 길목과 주변의 섬 지역들이 주요 교전 포인트로, 각 팀은 좁은 통로를 통해 적과 맞닥뜨릴 수밖에 없는 구조다. 내부 설명에서도 언급된 ‘지구’를 지키며 ‘헌터’를 제거해야 한다는 설정은 맵의 핵심 목표를 보여준다. 좁은 공간에서 벌어지는 밀집 전투와 섬 지역을 활용한 기습 플레이가 주요 특징이며, 팀워크와 빠른 판단력이 승리의 열쇠가 된다. 맵의 황무지 타일셋은 황량한 분위기를 강조하며, 복잡한 지형은 시야 확보와 병력 이동에 영향을 미친다. 초보 유저는 좁은 길목에서 벌어지는 전투에서 당황할 수 있지만, 익숙해지면 섬 지역을 활용한 전략적 우위를 점할 수 있다. 한정된 공간에서 벌어지는 전투는 맵의 긴장감을 높이며, 팀 간 협력이 필수적임을 강조한다. 이 맵은 팀전 특화 유즈맵으로, 4명의 플레이어가 각자의 역할을 맡아 방어와 공격을 동시에 수행해야 한다. 맵의 복잡한 지형은 전략적 깊이를 더하며, 섬 지역을 점령하거나 지키는 플레이도 중요하다. 플레이 전에는 팀원 간의 역할 분배와 섬 지역 점령 전략을 사전에 논의하는 것이 좋다. 또한, 좁은 길목에서 벌어지는 전투에서는 병력 생산과 업그레이드 타이밍을 잘 조율해야 한다. 이 맵은 팀전 경험이 있는 유저에게 적합하며, 좁은 공간에서의 전투와 섬 지역 활용에 익숙해지면 더 높은 승률을 기대할 수 있다. 이처럼 <4vs4 PeninsuLa>는 좁고 복잡한 지형을 활용한 전략적인 팀전 유즈맵으로, 팀워크와 빠른 대처가 승리를 좌우하는 맵이다. <4vs4 PeninsuLa> is a 4vs4 team-based custom map in *StarCraft: Brood War* set on a narrow, intricate peninsula. The map emphasizes balanced offense and defense, requiring strategic play to succeed. Key engagement points revolve around the central bottleneck and surrounding island regions, forcing teams into close-quarters combat through tight corridors. The in-game lore of defending the "Earth" while eliminating the "Hunters" highlights the map’s core objective. The map’s standout features include dense battles in confined spaces and ambush tactics leveraging the islands. Teamwork and quick decision-making are crucial for victory. The barren tile set enhances the desolate atmosphere, while the complex terrain impacts vision and troop movement. Novices may struggle with the tight choke points, but mastering the islands can provide a strategic edge. The limited space heightens tension, underscoring the necessity of teamwork. Designed for team play, the map requires four players to balance defense and offense simultaneously. The intricate terrain adds depth, making island control or defense vital. Before playing, teams should discuss role assignments and island strategies. In choke points, coordinating unit production and upgrades is essential. This map suits experienced team players, and proficiency in close-quarters combat and island tactics can significantly boost win rates. Ultimately, <4vs4 PeninsuLa> is a strategic team-based custom map that leverages its narrow, complex terrain, where teamwork and rapid responses determine victory.
제라툴의 분노 (Xel'Naga D (( 4vs4.Final )))
스타크래프트 브루드워의 유즈맵 'Xel'Naga D (( 4vs4.Final ))'는 4대4 대칭형 멀티플레이 전용으로 설계된 고전적인 UMS 맵입니다. 우주 타일셋을 기반으로 제작된 이 맵은 1024×1024 크기의 정사각형 맵으로, 중앙에 위치한 Xel'Naga 테라진(terrazine) 광맥과 그 주변을 중심으로 symmetrical(대칭) 구조가 돋보입니다. 네 개의 플레이어는 각자 128×128 크기의 균등한 시작 지역을 차지하며, 중앙 광맥을 둘러싼 광물과 가스 광산이 고르게 분배되어 있어 초기 자원 확보 경쟁이 치열해질 가능성이 높습니다. 맵의 가장 큰 특징은 4vs4 팀플레이에 최적화된 배치로, 각 팀은 서로 마주보는 위치에 배치되어 있어 전략적 협력과 대결이 자연스럽게 펼쳐질 수 있도록 구성되어 있습니다. 특히, 광물과 가스가 맵 중앙을 기준으로 대칭으로 배치되어 있어 모든 플레이어가 동일한 시작 조건을 확보할 수 있도록 배려된 점이 인상적입니다. 또한, 우주 타일셋의 어두운 배경과 푸른빛의 테라진 광맥, 그리고 붉은 가스 광산이 어우러져 시각적 조화를 이루며, 플레이어의 집중력을 높이는 데 도움이 됩니다. 이 맵은 초기 버전부터 여러 차례 버그 픽스가 진행된 Final 버전으로, 밸런스와 플레이 안정성을 높이는 데 중점을 두고 있습니다. 4vs4 팀플레이를 즐기는 유저들에게는 전략적 협동과 경쟁이 동시에 요구되는 흥미로운 경험을 제공할 것입니다. 특히, symmetrical 구조와 균등한 자원 분배는 초보자도 쉽게 접근할 수 있도록 돕지만, 팀 간의 협력과 타이밍을 요구하는 요소들이 존재해 깊은 전략을 필요로 합니다. 플레이 전에 확인해야 할 점은 중앙 광맥 주변의 광물과 가스 광산이 빠르게 고갈될 가능성이 높다는 점입니다. 따라서 초반 자원 확보와 중앙 지역 장악이 승패를 좌우할 수 있으므로, 빠른 확장을 계획하거나 방어 전략을 세우는 것이 중요합니다. 또한, 팀원과의 원활한 커뮤니케이션을 통해 전략을 조율하는 것이 필수적입니다. 이 맵은 symmetrical 구조와 팀플레이 특성상 밸런스가 잘 잡혀 있으며, 특히 4vs4 팀플레이를 즐기는 유저들에게 추천할 만한佳作입니다. symmetrical 맵의 장점인 공정한 시작 조건과 전략적 깊이를 동시에 느낄 수 있는 작품으로, 여러 번의 플레이를 통해 새로운 전략을 발견할 수 있을 것입니다. The *StarCraft: Brood War* custom map *Xel'Naga D ((4vs4.Final))* is a classic UMS (Use Map Settings) map designed exclusively for 4v4 symmetrical multiplayer battles. Crafted on a space-themed tileset, this 1024×1024 square map features a striking symmetrical layout centered around the Xel'Naga terrazine mineral field and its surrounding area. Each of the four players starts in an equal 128×128 starting zone, with minerals and gas deposits evenly distributed around the central terrazine, making early resource competition intense. The map’s defining trait is its 4v4 teamplay-focused layout, placing opposing teams directly across from each other to naturally facilitate strategic cooperation and rivalry. The symmetrical distribution of resources ensures all players begin on equal footing, while the dark space-themed backdrop, glowing blue terrazine, and red gas fields create a visually cohesive atmosphere that enhances player focus. Having undergone multiple bug fixes since its initial release, the Final version prioritizes balance and gameplay stability, offering 4v4 team players an engaging experience that demands both strategic collaboration and competitive tactics. While the symmetrical structure and fair resource allocation make it accessible to newcomers, the need for team coordination and precise timing introduces depth for experienced players. Before playing, note that the central terrazine minerals and gas fields may deplete quickly, making early resource control and securing the center pivotal to victory. Players should plan rapid expansions or defensive strategies accordingly, while effective communication with teammates is essential for success. Thanks to its balanced design and teamplay focus, *Xel'Naga D* is a standout choice for 4v4 battles, allowing players to appreciate the strengths of symmetrical maps—fair starting conditions and strategic complexity—while discovering new tactics through repeated play.
제르나가 D (Xel'Naga D (( 4vs4.max )))
스타크래프트 브루드워의 고전 유즈맵으로, ‘Xel'Naga D (( 4vs4.max ))’는 4인 대 4인 팀전 구조를 기반으로 한 전략 디펜스 장르의 맵입니다. 맵의 이름과 파일명에서 확인할 수 있듯이, 젤나가 테마의 우주 배경 위에 4개의 플레이어가 각각의 진영을 구성해 적대 세력을 상대로 버티며 승리를 쟁취하는 전투가 펼쳐집니다. 내부 맵 제목과 설명에 등장하는 ‘Mr.Hiroko’와 ‘version: 1.3’이라는 정보는 개발자 및 업데이트 내역을 짐작케 하지만, 공식적인 스토리나 승리 조건은 제공되지 않아 맵의 순수한 구조와 진행 방식에 집중해야 합니다. 맵의 크기는 1024x1024 타일로 우주 타일셋을 활용해 넓은 시야와 전략적 공간감을 제공하며, 4096x4096 해상도와 128x128 타일 단위는 스타크래프트의 맵 디자인 표준에 부합합니다. 이 맵의 핵심은 ‘4vs4’라는 팀전 구조에 있습니다. 각 팀은 중앙의 넥서스와 미네랄, 가스를 확보한 채 초반을 버티며, 적의 공격을 방어하는 동시에 자원을 확보해 병력을 양성해야 합니다. 맵의 배치상으로는 각 진영이 비교적 대칭적으로 구성되어 있어 밸런스가 잘 맞춰졌을 것으로 추정됩니다. 또한, 우주 배경의 특성상 지형은 평지형에 가까우며, 주요 방어 거점인 넥서스 주변에는 테란의 건물을 보호할 수 있는 요충지가 존재할 가능성이 있습니다. 맵의 이름에서 ‘D’는 방어(Defense)를 의미할 가능성이 높으며, 이는 맵의 장르가 디펜스임을 암시합니다. 플레이어는 초반 자원 확보와 초반 방어선 구축이 매우 중요하다는 점을 유념해야 합니다. 초반 러시나 조기 공격에 취약한 구조일 수 있으므로, 빠른 미네랄 확보와 방어 건물 배치, 그리고 효율적인 병력 운용이 승리의 관건이 될 것입니다. 또한, 맵의 크기가 넓어 정찰과 시야 확보가 중요하다는 점도 고려해야 합니다. 맵의 배경이 우주이므로,Dark Swarm이나 Disruption Web 같은 스킬 사용이 제한적이거나 특수한 조건이 필요할 수 있어, 맵의 특성을 잘 이해하고 플레이하는 것이 중요합니다. 이 맵은 초보 플레이어보다는 중수 이상의 유저들에게 적합할 것으로 보이며, 팀워크와 전략적 사고가 요구되는 맵입니다. 특히, 팀원 간의 호흡이 중요하기 때문에 사전 협의와 전략 수립이 필수적입니다. 맵의 난이도는 ‘어려움’ 정도로 예상되며, 예상 플레이 시간은 각 팀의 전략과 실력에 따라 30분에서 60분 정도로 잡을 수 있습니다. 맵의 버전은 1.3으로, 개발자에 의해 지속적인 버그 픽스가 이루어졌을 가능성이 높아 안정성이 확보되어 있을 것으로 보입니다. 이 맵을 플레이하기 전에는 맵의 특성과 자신의 팀원과 충분히 상의하여 전략을 수립하는 것이 좋습니다. 또한, 초기 자원 확보와 방어선 구축에 집중하며, 적의 공격을 예상해 대비하는 것이 중요합니다. 맵의 우주 배경과 젤나가 테마는 시각적인 흥미를 더해주며, 넓은 시야와 전략적 공간감은 플레이어의 몰입도를 높이는 요소로 작용할 것입니다. A classic custom map from *StarCraft: Brood War*, *Xel'Naga D ((4vs4.max))* is a strategy defense game built around a 4v4 team battle format. As the name and filename suggest, it unfolds on a space-themed Zel’Naga setting where four players each establish their own base and fight to survive against hostile forces. References to “Mr. Hiroko” and “version: 1.3” in the internal map title and description hint at the developer and update history, but the map provides no official storyline or victory conditions, so the focus remains purely on its structure and gameplay. The map spans 1024×1024 tiles, using a space-themed tileset to deliver wide visibility and a strong sense of strategic space. At 4096×4096 resolution and with a 128×128 tile unit, it conforms to *StarCraft*’s standard map design conventions. At its core, the map revolves around the 4v4 team structure. Each team starts by securing a central Nexus along with minerals and gas, holding the early game while gathering resources to build an army. The layout appears fairly symmetrical, suggesting a well-balanced experience. Given the space setting, the terrain is mostly flat, and key defensive chokepoints around the Nexus likely offer natural protection for Terran structures. The “D” in the map name likely stands for “Defense,” underscoring its defense-focused genre. Players should prioritize early resource collection and base fortification, as the map’s layout may leave it vulnerable to early rushes or aggressive pushes. Fast mineral gathering, smart defensive building placement, and efficient troop management become critical to victory. With its expansive scale, scouting and vision control matter just as much. Because the backdrop is space, abilities like Dark Swarm or Disruption Web may be restricted or require special conditions, so understanding the map’s mechanics is essential. This map is better suited to intermediate or advanced players who can coordinate effectively. Teamwork and strategic planning are vital, and a pre-game discussion to align tactics is strongly recommended. The difficulty is high, with typical matches lasting between 30 and 60 minutes depending on team strategy and skill. Version 1.3 suggests ongoing bug fixes by the developer, promising a stable experience. Before jumping in, review the map’s traits with your teammates and agree on a game plan. Focus on early resource control and base defense while preparing countermeasures against likely enemy attacks. The cosmic Zel’Naga theme adds visual appeal, and the open sightlines and strategic space heighten player immersion.
4vs4Micro Ais들 (4vs4 Micro Aisles)
스타크래프트 브루드워의 4vs4Micro Aisles는 8명의 플레이어가 좁은 복도와 미로를 중심으로 전투를 펼치는 밀리 맵으로, 좁은 공간에서 벌어지는 치열한 접전과 전략적인 자원 관리, 기지 방어가 핵심인 맵이다. 맵의 이름에서 느껴지듯 'Micro Aisles'는 좁은 복도나 통로를 뜻하며, 실제로 맵 전체가 좁은 길과 복잡한 배치로 이루어져 있어 플레이어 간의 충돌이 자주 발생한다. 내부 맵 설명에서도 'Small and close, for those who like it Tight'라고 언급된 것처럼, 좁고 밀집된 공간에서 펼쳐지는 전투가 맵의 특징이다. 베스핀 가스와 미네랄의 배치가 5V5 기준으로 균형 잡혀 있지만, 좁은 공간으로 인해 자원 채취가 다소 제한적으로 느껴질 수 있으며, 이는 플레이어 간의 초반Resource Rush(자원 쟁탈전)를 유도한다. 복도와 미로형 구조는 유닛의 움직임을 제한하고, 좁은 길목에서 벌어지는 전투는 개개인의 컨트롤과 micro 컨트롤 능력을 시험한다. 특히 지상 유닛이 주로 활약하는 맵이기 때문에 테란의 시즈 탱크, 프로토스의 드라군, 저그의 뮤탈리스크 등 중장거리 유닛의 활용이 중요하다. 또한 좁은 공간에서 벌어지는 전투는 시야 확보와 컨트롤 미스에 대한 페널티가 크기 때문에, 플레이어는 유닛의 이동 경로와 전투 배치에 신중한 전략을 세워야 한다. 맵의 균형 잡힌 자원 배치는 초반 접전을 격화시키고, 자원 전쟁이 끝난 후에는 본격적인 기지 방어와 확장 전략으로 이어진다. 이 맵은 좁은 공간에서 벌어지는 치열한 전투와Micro 컨트롤을 즐기는 플레이어에게 적합하며, 특히 4vs4라는 팀 기반의 협동이 중요한 맵이기 때문에 팀워크와 전략적 협력이 필수적이다. 또한 좁은 공간에서 벌어지는 전투는 초보자와 숙련자의 실력 격차를 드러내기도 하는데, 특히 좁은 길목에서 벌어지는 전투에서 micro 컨트롤이 부족한 경우 큰 피해를 입을 수 있다. 따라서 이 맵을 플레이하기 전에는 좁은 공간에서 벌어지는 전투와 micro 컨트롤에 대한 연습이 필요하며, 팀원과의 호흡을 맞추는 것이 중요하다. 또한 맵의 좁은 공간은 시야 확보와 유닛의 이동 경로를 빠르게 파악하는 능력이 요구되므로, 맵을 미리 숙지하고 전투 배치에 대한 전략을 세우는 것이 좋다. 4vs4Micro Aisles는 좁은 공간에서 벌어지는 치열한 전투와Micro 컨트롤을 즐기는 플레이어들에게 추천할 만한 맵으로, 특히 팀 기반의 협동과 전략적 깊이가 있는 플레이를 선호하는 유저들에게 적합하다. 좁은 공간에서 펼쳐지는 전투는 실력과 전략이 모두 요구되는 만큼, 이 맵을 통해 플레이어 간의 실력 차이를 느낄 수 있으며, 좁은 공간에서의 전투 능력을 키우기에도 좋은 맵이다. StarCraft: Brood War’s 4 vs. 4 Micro Aisles is a 1v1v1v1v1v1v1v1 map where eight players fight in tight corridors and mazes, emphasizing intense close-quarters combat, strategic resource management, and base defense. As the name suggests, "Micro Aisles" refers to narrow passages, and the entire map is structured with cramped corridors and complex layouts, leading to frequent player collisions. Described in its internal map notes as "Small and close, for those who like it Tight," the map’s defining feature is combat unfolding in confined, densely packed spaces. While the distribution of Vespene gas and minerals is balanced for a 5v5 format, the tight spaces make resource gathering feel restricted, often sparking early Resource Rushes (resource races) among players. The corridor and maze-like design restricts unit movement, and battles in tight passages test individual control and micro-management skills. Since ground units dominate this map, key units like Terran Siege Tanks, Protoss Dragoons, and Zerg Mutalisks play crucial roles. Fights in narrow spaces also heavily penalize poor positioning and control mistakes, forcing players to carefully plan unit paths and battle formations. The map’s balanced resource layout intensifies early clashes, and once the resource war subsides, players shift focus to base defense and expansion strategies. This map is ideal for players who enjoy high-stakes combat in tight spaces and micro-management, especially in a team-based 4v4 setting where coordination and strategy are essential. The confined environment also highlights skill gaps between beginners and veterans—players lacking micro-control in narrow passages often suffer heavy losses. Before playing, it’s important to practice fighting in tight spaces and refining micro-skills, as well as syncing with teammates. The map’s tight layout demands quick awareness of sightlines and unit movement paths, so familiarizing yourself with the terrain and planning battle formations in advance is key. 4 vs. 4 Micro Aisles is a recommended map for players who thrive on intense close-quarters combat and micro-management, particularly those who prefer team-based coordination and strategic depth. With battles requiring both skill and strategy, the map effectively showcases player skill differences while helping players improve their ability to fight in confined spaces.
4vs4 컴까기 고대의 신전
4vs4 컴까기 고대의 신전은 고대 유적을 배경으로 한 4대 4 전투형 컴퓨터 상대 전용 유즈맵이다. 맵 전체가 6144×6144 타일로 구성되어 있어 넓은 전장과 복잡한 지형이 특징이며, 황무지 타일셋을 사용해 고대 신전의 돌계단과 폐허가 자연스럽게 배치되어 있다. 플레이어는 7업까지 성장할 수 있는 제한된 레벨 범위 안에서 자원을 확보하고, 방어 시설을 적절히 배치해 상대의 공격을 차단한다. 초기 자원 배치는 균등하게 제공되지만, 맵 중앙에 위치한 신전 입구 주변에 높은 지대와 좁은 통로가 있어 초반 라인전이 치열하게 전개된다. 특히, 방어 타워와 벽을 건설해 적의 진입을 지연시키는 디펜스 요소가 강조되며, 동시에 적군을 직접 추격해 전투를 유도하는 컴까기 스타일이 혼합돼 있다. 플레이 경험은 전투와 방어 사이의 균형을 맞추는 것이 핵심이며, 초반에 방어 라인을 빠르게 구축하고 중반에 적을 몰아붙이는 타이밍을 잡는 것이 승패를 좌우한다. 추천 대상은 1대 1 혹은 2대 2보다 4대 4 팀플레이를 선호하는 플레이어이며, 특히 방어 건설과 적 추격을 동시에 즐기는 유저에게 적합하다. 플레이 전 확인해야 할 포인트는 레벨 제한(7업)과 자원 배분, 그리고 신전 입구 주변의 지형 특성을 파악해 방어 위치를 미리 선정하는 것이다. The map "4vs4 컴까기 고대의 신전" is a 4‑vs‑4 custom map set in an ancient ruin, designed for computer‑opponent skirmishes. Its large 6144×6144 layout uses the Wasteland tileset, creating stone stairways and broken temples that form a sprawling battlefield. Players can advance only up to level 7, forcing quick resource gathering and strategic placement of defensive structures. Resources start evenly, but the central temple entrance features high ground and narrow passages, leading to intense early‑game lane fights. While defensive towers and walls are crucial for delaying enemy advances, the map also encourages aggressive rush tactics—typical of a "컴까기" style—by allowing players to chase opponents after establishing a solid defense. Success hinges on balancing fortification with timely attacks: building a strong early defense, then transitioning to pressure the enemy in mid‑game. This map suits players who enjoy both base defense and active raiding, especially in full 4‑vs‑4 team matches rather than smaller skirmishes. Before playing, note the level cap (7), resource distribution, and the terrain around the temple entrance to plan optimal defensive positions.
맵 선택 가이드
태그는 맵의 핵심 특징을 빠르게 설명하지만 제작 버전마다 규칙이 다를 수 있습니다. 상세 설명에서 권장 인원, 난이도, 플레이 시간과 버전을 함께 확인한 뒤 다운로드하세요.