
4인 플레이 스타크래프트 맵 모음
'4인 플레이' 태그가 등록된 맵을 모았습니다. 장르 하나로 찾기 어려운 플레이 방식, 난이도와 특징을 중심으로 인기 맵과 최신 맵을 비교해 보세요.
- 등록 맵
- 56개
- 누적 다운로드
- 4
- 누적 조회
- 2,046
인기 맵
다운로드와 조회 반응이 높은 맵입니다.
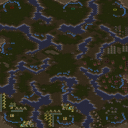
4 슈퍼 캠퍼스 (4 super compus)
‘4 super compus’는 스타크래프트 브루드워의 유즈맵으로, 사막 타일셋을 배경으로 펼쳐지는 디펜스 장르의 맵이다. 맵 제목에서 유추할 수 있듯이 4명의 플레이어가 각자 한 팀을 이뤄 적의 공격을 방어하는 구조를 갖추고 있다. 맵의 중앙에는 공중 유닛이 접근할 수 있는 넓은 길이 있으며, 양쪽의 언덕 지형은 지상 유닛이 배치하기에 적합한 지점으로 보인다. 플레이어는 맵의 외곽에 위치한 본진에서 시작하며, 적의 공세가 끊임없이 밀려오는 가운데 주요 건물을 보호해야 한다. 맵의 특징으로는 사막 지형이 주는 넓은 시야와 평탄한 지형의 조합으로, 공중 유닛과 지상 유닛의 조합을 고려한 전략적 플레이가 요구된다. 또한, 맵의 이름 ‘compus’는 ‘compus’ 또는 ‘campus’를 연상시키며, 다인 플레이와 팀워크가 중요한 요소로 작용할 것으로 추정된다. 플레이어는 맵의 구조를 활용해 방어선을 구축하고, 자원 관리와 유닛 조합을 최적화해야 하며, 적의 공세를 예측해 포지션을 조정하는 능력이 필요하다. 이 맵은 초보자의 경우 방어선을 구축하는 방법과 유닛의 효율적인 활용법을 익히는 데 도움이 될 수 있으며, 숙련자의 경우 더 빠른 판단과 전략적 플레이를 요구할 것으로 보인다. 맵의 난이도는 맵 내의 배치와 적의 공격 패턴에 따라 달라질 수 있으므로, 플레이 전에 맵의 구조를 충분히 숙지하는 것이 중요하다. This StarCraft: Brood War user-made map, titled ‘4 super compus’, is a defense genre map set against a desert tileset. As the name suggests, the map features a structure where four players form teams to defend against enemy attacks. The map’s center has a wide path accessible to air units, while the hill terrain on both sides appears suitable for positioning ground units. Players start at their bases on the map’s outskirts, protecting key buildings from relentless enemy waves. The desert terrain offers wide visibility and flat areas, making it ideal for balancing air and ground unit strategies. The name ‘compus’ hints at a focus on teamwork and multiplayer dynamics. Players must build defensive lines, manage resources, and optimize unit combinations while predicting enemy attacks to adjust positions. Beginners can use this map to learn base-building and unit efficiency, while experienced players will need quick decision-making and advanced strategies. Difficulty varies based on map layout and enemy patterns, so familiarizing yourself with the terrain beforehand is key.
디지몬 운빨 디펜스 (Digimon Lucky Defense)
‘디지몬 운빨 디펜스’는 스타크래프트: 브루드워의 유즈맵으로, 디지몬 시리즈의 캐릭터들이 등장하는 디펜스 장르의 맵이다. 맵의 중앙은 넓은 길로 연결된 채널 구조로 이루어져 있으며, 플레이어는 이 길 위로 몰려오는 적들을 막아내야 한다. 맵 좌측 하단과 우측 상단에는 각각의 시작 지역이 배치되어 있어, 4명의 플레이어가 각각의 진영에서 시작해 협력하거나 경쟁하며 진행하는 방식이다. 적의 웨이브는 랜덤하게 소환되며, 플레이어는 제한된 자원으로 디지몬을 진화시키거나 스킬을 사용해 방어선을 구축할 수 있다. 맵의 배경은 사막 타일셋을 활용해 건조한 사막 지형을 연출하며, 길 양측으로는 지형적 요충지가 배치되어 있어 방어 포인트를 설정하기 용이하다. 플레이어는 게임 시작 전, 각자 보유한 디지몬의 초기 등급과 스킬을 고려해 전략을 세워야 하며, 랜덤한 진화 시스템과 운빨 요소가 게임의 재미를 더한다. 특히, 적의 웨이브가 지속적으로 밀려오므로 빠른 판단과 효율적인 자원 관리가 필수적이다. 맵의 구조상 길목이 좁아져 있는 지점들이 있어, 방어 포인트를 잘 선정하면 적은 피해로도 웨이브를 막아낼 수 있다. 반면, 방어선을 잘못 세우면 적의 공격에 vulnerable해질 수 있으므로 신중한 플레이가 요구된다. 이 맵은 디지몬 팬뿐만 아니라 디펜스 장르를 즐기는 플레이어들에게도 매력적이다. 디지몬의 다양한 진화 루트와 스킬을 활용한 전략적 플레이가 가능하며, 랜덤한 요소 덕분에 매번 다른 플레이 경험을 제공한다. 초보자도 쉽게 접근할 수 있지만, 고수들은 더욱 정교한 전략을 구사할 수 있어 다양한 층위의 플레이가 가능하다. 다만, 랜덤 요소로 인한 불공정함이 발생할 수 있으므로, 플레이 전 규칙과 밸런스에 대한 사전 확인을 권장한다. 추천 대상은 디지몬 팬, 디펜스 장르 애호가, 그리고 팀플레이를 즐기는 유저들이다. 특히 4인 플레이 시 팀 간의 협력이 중요해지므로, 커뮤니케이션이 원활한 그룹에서 즐기면 더욱 재미있다. 맵의 난이도는 초보자도 쉽게 접근할 수 있도록 설계되었지만, 고난이도 웨이브에서는 숙련된 플레이가 필요하다. 플레이 전 디지몬의 진화 루트와 스킬을 숙지하고, 맵의 주요 방어 포인트를 미리 확인해 두는 것이 좋다. "Digimon Fortune Defense" is a StarCraft: Brood War custom map featuring characters from the Digimon series in a defense genre. The map consists of a central channel structure with wide paths connecting different areas, where players must defend against waves of enemies advancing along these paths. Starting zones are placed at the bottom-left and top-right corners, allowing four players to begin in their respective factions and either cooperate or compete as the game progresses. Enemy waves spawn randomly, and players must use limited resources to evolve their Digimon or activate skills to build defensive lines. The map employs a desert tileset to create a dry, arid terrain, with strategic chokepoints along the paths making it easier to establish strong defensive positions. Before starting, players should strategize based on their initial Digimon ranks and available skills, as the random evolution system and luck-based elements add to the game's appeal. Since enemy waves continuously push forward, quick decision-making and efficient resource management are crucial. The map features narrow passages where chokepoints can be set up, allowing players to repel waves with minimal damage if positioned well. However, poor defensive line placement can leave players vulnerable to enemy attacks, making careful planning essential. This map appeals not only to Digimon fans but also to players who enjoy defense games. Its variety of Digimon evolution paths and skill-based strategies offer deep tactical gameplay, while the random elements ensure a fresh experience each time. While accessible to beginners, skilled players can employ more refined tactics, catering to a wide range of skill levels. That said, the random elements may lead to occasional unfairness, so it's advisable to check the rules and balance beforehand. The map is recommended for Digimon fans, defense genre enthusiasts, and those who enjoy team play. Cooperation between teammates becomes especially important in 4-player mode, making it ideal for groups with good communication. While designed to be approachable for beginners, higher difficulty waves require experienced play. Before starting, it's helpful to familiarize yourself with Digimon evolution paths and skills, as well as identify key defensive chokepoints on the map.
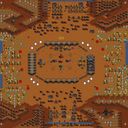
테스트 오브 서바이벌: 아포칼립스 (Test of Survival: Apocalypse)
스타크래프트 브루드워의 ‘테스트 오브 서바이벌: 아포칼립스(Test of Survival: Apocalypse)’는 이름 그대로 생존을Theme 중심 스토리와 전투를 조합한 서바이벌형 유즈맵으로, 황혼 테마의 넓은 맵에서 펼쳐지는 끊임없는 적의 습격과 리소스 관리를 통해 플레이어의 생존력을 시험합니다. 맵 중앙에는 거대한 오브젝트가 위치하고 있으며, 주변을 둘러싼 적 건물과 유닛들이 끊임없이 스폰되는 구조로, 플레이어는 초반 자원 수집과 방어선을 구축하는 동시에 지속적으로 몰려오는 적을 상대해야 합니다. 특히 맵의 가장자리에는 각 플레이어별로Resource가 배치된 베이스가 있으며, 이를 바탕으로 방어탑 건설, 유닛 생산, 혹은 맵 곳곳의 숨겨진 보급 기지를 확보하는 등 전략적 선택이 중요합니다. 맵 내부는 복잡한 지형과 장애물이 배치되어 있어, 맵을 충분히 숙지하지 않으면 예상치 못한 적의 기습을 당할 수 있습니다. 또한, 맵의 이름에서 알 수 있듯이 ‘아포칼립스’라는 테마에 맞게, 게임이 진행될수록 적의 공격 강도와 종류가 점차 강화되는 듯한 느낌이 들며, 이는 플레이어에게 긴장감을 고조시키는 요소로 작용합니다. 초보자의 경우 적의 공격 패턴과 맵의Resource 분포를 파악하는 데 어려움을 겪을 수 있으며, 방어선을 얼마나 효율적으로 구축하느냐가 승패를 좌우할 가능성이 큽니다. 반면,Resource 관리와 유닛 컨트롤에 익숙한 플레이어라면 비교적 수월하게 진행할 수 있을 것입니다. 이 맵은 한정된 자원과 끊임없는 위협 속에서 스스로 생존 전략을 세우고, 게임이 진행됨에 따라 점차 어려워지는 난이도를 즐길 수 있는, 진정한 서바이벌 경험을 제공합니다. 특히 4인 협동 플레이를 권장하며, 팀원 간의 실시간 소통과 역할 분배가 성공의 열쇠가 될 것입니다. 맵을 처음 플레이한다면,Resource가 풍부한 베이스를 최대한 활용하고, 맵 곳곳의 보급 기지를 확보하는 데 집중하는 것이 좋습니다. 또한, 적의 공격 패턴을 분석하여 방어 시설을 효율적으로 배치하는 것도 중요합니다. 이러한 요소들이 결합되어 ‘테스트 오브 서바이벌: 아포칼립스’는 단순한 디펜스가 아니라, 전략과 생존력의 균형을 요구하는 매력적인 서바이벌 유즈맵으로 자리매김하고 있습니다. StarCraft: Brood War’s *Test of Survival: Apocalypse* lives up to its name as a survival-focused custom map that blends thematic storytelling with intense combat. Set on a vast twilight-themed battlefield, players face relentless enemy waves while managing resources, testing their ability to endure under pressure. At the heart of the map lies a massive central structure, surrounded by enemy buildings and units that continuously spawn, forcing players to balance early resource collection with fortifying defenses against waves of attackers. Each player starts with a base at the map’s edge, stocked with resources, where strategic decisions—such as building defensive towers, training units, or securing hidden supply outposts scattered across the terrain—become crucial. The interior is packed with complex terrain and obstacles, making it easy to fall victim to unexpected ambushes if the map isn’t thoroughly explored. True to its *Apocalypse* theme, the difficulty escalates as the game progresses, with enemy attacks growing stronger and more varied, heightening tension and challenge. Beginners may struggle to grasp enemy attack patterns and resource distribution, where the effectiveness of their defenses often determines victory or defeat. However, players experienced in resource management and unit control will find progression smoother. This map delivers a true survival experience, rewarding those who adapt their strategies to limited resources and mounting threats while enjoying the increasing difficulty. Cooperative play for four players is highly recommended, as real-time communication and role distribution among teammates are key to success. If playing for the first time, prioritize maximizing the use of your resource-rich starting base and securing supply outposts across the map. Analyzing enemy attack patterns to optimize defensive structures is equally important. These elements come together to make *Test of Survival: Apocalypse* more than just a defense game—it’s a compelling survival custom map that demands a balance of strategy and resilience.
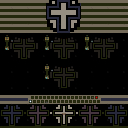
갓 타워 디펜스3 Vx164 (God Tower Defense 3 Vx164)
갓 타워 디펜스3 Vx164는 스타크래프트: 브루드워의 대표적인 타워 디펜스 장르 맵으로, 적의 끊임없는 웨이브를 방어하면서 전략적으로 타워를 건설하고 업그레이드하는 재미가 일품인 유즈맵이다. 맵 중앙을 가로지르는 긴 길과 그 양옆의 빈 공간이 주요 전투 공간으로, 플레이어는 출발점에서부터 다가오는 적 유닛들을 효과적으로 저지하기 위해 타워 배치와 자원 관리, 방어 라인 구축에 집중해야 한다. 맵의 경우 사막 테마의 타일셋이 적용되어 있으며, 사막 지형과 오아시스 같은 지형적 특징이 시각적으로 맵의 분위기를 살린다. 맵 내부에서는 다양한 종류의 적이 등장하며, 초반에는 약한 저글링이나 히드라리스크가 주로 공격해 오지만, 중반부터는 뮤탈리스크, 울트라리스크, 캐리어 등 강력한 유닛들이 등장하여 방어 난이도가 급격히 상승한다. 특히 4인 플레이가 권장되는 이 맵은 각 플레이어가 독립된 출발점에서 시작하여 중앙 길로 진입하는 적을 막아내야 하며, 팀워크와 개별적인 전략이 조화를 이뤄야만 높은 단계까지 도달할 수 있도록 설계되어 있다. 맵의 난이도는 초반에는 비교적 평이하지만, 후반부로 갈수록 적의 공격 패턴과 조합이 다양해지면서 복잡한 전략이 요구되며, 이를 위해 플레이어는 자원 확보와 타워의 효율적인 배치 및 업그레이드에 신경을 써야 한다. 갓 타워 디펜스3 Vx164는 특히 타워 디펜스 장르에 익숙한 플레이어들에게 강렬한 긴장감과 성취감을 선사하는 맵으로, 반복 플레이를 통해 더욱 정교한 방어 전략을 구상하고자 하는 유저들에게 추천할 만한佳作다. 또한, 맵의 길고 좁은 통로가 적의 진격을 지연시키는 효과를 내면서 전략적 깊이를 더하고, 플레이어 간의 경쟁과 협력을 동시에 느낄 수 있는 구조로 구성되어 있다. 초보자의 경우 타워의 기본 배치와 자원 관리부터 숙지해야 하며, 중간 난이도 이상을 목표로 한다면 적의 공격 패턴과 약점을 분석하는 능력이 필수적이다. 맵의 시각적 구성은 단순하면서도 효과적으로 전투 공간을 구분 짓고 있어, 플레이어는 각자의 위치에서 최적의 방어 라인을 구축하고 적절한 타이밍에 타워를 업그레이드하는 전략적 사고를 발휘할 수 있다. 갓 타워 디펜스3 Vx164는 스타크래프트 유즈맵의 역사를 함께한 장수맵으로, 타워 디펜스 장르의 정수를 보여주는 동시에 지속적인 업데이트와 개선을 거치며 많은 플레이어들에게 사랑받아 왔다. 맵의 구조적 특징상, 중앙 통로에 타워를 집중 배치하는 동시에, 측면을 보완하는 보조 라인을 구축하는 것이 핵심 전략으로, 이를 통해 적의 다양한 공격 패턴에 대처할 수 있다. 또한, 맵의 길이가 길고 좁은 특성상, 적의 이동 경로를 효과적으로 차단하는 것이 무엇보다 중요하며, 이를 위해 플레이어는 맵의 지형적 장점을 최대한 활용해야 한다. 맵의 난이도는 초반에는 비교적 쉽게 느껴질 수 있지만, 후반부로 갈수록 적의 조합과 공격력이 강력해지면서 난이도가 급격히 상승하므로, 꾸준한 연습과 전략 수정이 필요하다. 갓 타워 디펜스3 Vx164는 타워 디펜스 장르의 진수를 경험하고자 하는 플레이어들에게 필수적으로 추천할 만한 맵으로, 전략적 깊이와 긴장감 넘치는 전투가 조화를 이룬佳作 임에 틀림없다. 플레이어는 맵의 각 구간에서 발생하는 적의 공격을 효과적으로 방어하면서도, 자원의 효율적 사용을 통해 타워를 지속적으로 업그레이드해야 하며, 이러한 과정이 반복되면서 맵의 전체적인 전략적 깊이가 한층 더해진다. God Tower Defense 3 Vx164 is a standout tower defense custom map in *StarCraft: Brood War*, offering a thrilling experience where players strategically build and upgrade towers to fend off endless waves of enemies. The map features a long central path flanked by open spaces, serving as the primary battleground where players must focus on tower placement, resource management, and constructing defensive lines to block advancing enemy units from their starting points. With its desert-themed tileset, the map's visual atmosphere is enhanced by the arid terrain and oasis-like features. The map introduces a variety of enemies, starting with weaker units like Zerglings and Hydralisks in the early stages, but escalating to powerful threats such as Mutalisks, Ultralisks, and Carriers as the game progresses, sharply increasing the difficulty. Designed for four players, each starts at an independent spawn point and must work together to block enemies advancing along the central path. Teamwork and individual strategy must align perfectly to progress through higher stages. While the early game is relatively straightforward, the later stages demand complex strategies as enemy attack patterns and unit combinations grow more diverse, requiring players to carefully manage resources, optimize tower placement, and prioritize upgrades. God Tower Defense 3 Vx164 delivers intense tension and a strong sense of achievement, particularly appealing to players familiar with the tower defense genre. It’s a recommended choice for those looking to refine and perfect their defensive strategies through repeated play. The map’s long, narrow corridors naturally slow enemy advances, adding strategic depth while fostering both competition and cooperation among players. Beginners should first master basic tower placement and resource management, while intermediate and advanced players must analyze enemy attack patterns and exploit weaknesses to succeed. Visually, the map is cleanly designed, clearly separating combat zones so players can focus on building optimal defensive lines and timing tower upgrades. As a long-standing classic in the *StarCraft* custom map scene, God Tower Defense 3 Vx164 showcases the essence of the tower defense genre, continuously updated and refined to maintain its popularity among players. Its core strategy revolves around concentrating towers along the central path while reinforcing side flanks, enabling players to counter a wide range of enemy assaults. Given the map’s long, narrow layout, effectively blocking enemy movement paths is crucial, and players must fully leverage the terrain’s advantages. Though the early game feels manageable, the difficulty spikes dramatically in later stages as enemy compositions and firepower intensify, necessitating consistent practice and adaptive strategies. A must-play for anyone seeking to experience the pinnacle of tower defense, God Tower Defense 3 Vx164 masterfully blends strategic depth with heart-pounding combat, rewarding players who refine their resource efficiency and tower upgrades across each segment of the map, ultimately deepening the overall strategic experience.
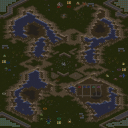
판타지 매직 배틀 에디션 (Fantasy Magic Battle Editon)
《Fantasy Magic Battle Editon》은 스타크래프트 브루드워의 유즈맵으로, 마법과 자원 관리, 유닛 조합을 핵심으로 하는 전략형 디펜스 게임이다. 맵의 중심에는 ‘초식’이란 이름의 희귀 자원이 분포되어 있으며, 플레이어는 이 자원을 채취해 강력한 유닛을 제작하고 전투를 승리로 이끄는 빌더 오더를 완성해야 한다. 맵은 사막 타일셋으로 구성되어 있으며, 중앙의 넓은 평야와 주변의 언덕 지형이 전투의 무대가 된다. 맵의 핵심 메커니즘은 자원 수집과 유닛 강화로, 초식 채취량을 늘리고 전략적인 유닛 조합을 통해 방어선을 구축하는 것이 중요하다. 전투는 맵의 여러 전장에서 벌어지며, 적의 침공을 방어하거나 역공을 펼치는 플레이가 요구된다. 맵의 난이도는 초식의 배치와 적의 공격 패턴에 따라 크게 달라지므로, 자원 관리와 빌더 오더의 타이밍을 잘 조율해야 한다. 특히 초보 플레이어는 자원 채취 속도와 유닛 조합의 균형을 맞추는 데 주의를 기울여야 하며, 숙련자들은 자원 우선순위를 빠르게 판단해 빌더 오더를 최적화할 수 있다. 맵의Durata는 약 20~30분 정도로 예상되며, 4인 플레이를 기준으로 설계되었지만 1~2인 플레이도 충분히 즐길 수 있는 구조다. 맵의 특성은 전략적 깊이가 깊고, 자원 관리와 유닛 조합의 재미가 돋보이는 반면, 초식의 배치에 따라 운적인 요소가 강할 수 있어 숙련자용으로 분류된다. 추천 대상은 전략 게임을 좋아하는 플레이어, 특히 자원 관리와 빌더 오더가 매력적인 유즈맵을 선호하는 게이머들에게 적합하다. 플레이 전에는 맵의 초식 분포와 적의 배치 위치를 미리 확인해 전략을 세우는 것이 중요하다. 또한, 빌더 오더의 순서를 숙지하고 유닛의 강화를 위한 자원 확보를 우선시하는 플레이가 필요하다. 맵의 특성상 초식의 희귀성과 배치에 따라 게임의 흐름이 크게 달라지므로, 여러 번 플레이하며 전략을 다듬는 것이 좋다. 《Fantasy Magic Battle Editon》 is a custom StarCraft: Brood War map that combines magic, resource management, and unit composition into a strategic defense game. At the center of the map lies a rare resource called "Chosik," which players gather to construct powerful units and fulfill builder orders to secure victory. The map features a desert tileset, with a vast central plain and surrounding hills serving as the battleground. The core mechanics revolve around resource collection and unit upgrades, emphasizing efficient Chosik harvesting and strategic unit combinations to fortify defenses. Battles unfold across multiple fronts, requiring players to either defend against enemy invasions or launch counterattacks. The difficulty varies significantly based on Chosik distribution and enemy attack patterns, making careful resource management and timing of builder orders essential. For beginners, balancing resource gathering speed with unit composition is crucial, while experienced players can quickly optimize builder orders by prioritizing resources. The game typically lasts 20 to 30 minutes and is designed for four players, though it can also be enjoyed solo or in pairs. The map stands out for its deep strategy, rewarding skillful resource management and unit synergy, though its reliance on Chosik placement introduces a strong element of luck, classifying it as an advanced-level map. It’s recommended for players who enjoy strategy games, particularly those who appreciate resource management and builder orders in custom maps. Before playing, it’s important to study the Chosik distribution and enemy placements to plan your strategy. Familiarizing yourself with the builder order sequence and prioritizing resource accumulation for unit upgrades will greatly improve your chances. Since the flow of the game can shift dramatically depending on Chosik rarity and placement, refining your strategies through repeated play is highly encouraged.
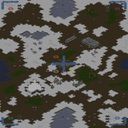
공격형 섬멸 (Offensive Strike)
스타크래프트 브루드워의 대표적인 서바이벌 형식 유즈맵인 <b>-- Offensive Strike --</b>는 적 건물 파괴를 목표로 하는 공격형 맵으로, 제한된 시간을 활용해 적 기지를 철저히 파괴해야 한다. 맵은 4인 플레이를 기반으로 설계되어 있으며, 각 레벨이 진행될수록 적의 방어력이 강화되는 구조를 가지고 있다. 내부 설명에 따르면 'Ultimate Survival' 제작자인 SentryIII에 의해 제작되었으며, 최종 버전으로 배포되었다고 명시되어 있다. 맵의 핵심은 타이머가 만료되기 전에 모든 적 건물(넥서스, 커맨드 센터 등)을 파괴하는 것이며, 각 레벨은 난이도가 상승하는 방식으로 구성되어 있다. 맵의 전체 크기는 3072x3072 타일로, 플랫폼 타일셋을 사용하여 넓은 공간에서 전투가 펼쳐진다. 플레이어는 초반에는 상대적으로 여유로운 맵 구석에 자리잡고 시작하지만, 점차 중앙으로 진출하며 적과의 교전을 피할 수 없게 된다. 맵의 symmetrical(대칭) 구조는 밸런스를 유지하며, 각 플레이어는 동일한 시작 조건을 제공받는다. 서바이벌 장르답게 지속적인 압박과 시간 제한이 긴장감을 조성하며, 특히 후반부로 갈수록 다수의 적 유닛과 방어 시설물이 가동되어 전략적 접근이 요구된다. 초보자의 경우 레벨 1-2에서 기본적인 전략을 익히고, 숙련자는 고레벨에서 효율적인 자원 관리와 병력 운용을 통해 승리를 노려야 한다. 맵의 핵심 전략은 빠른 초기 진출과 동시에 적의 주요 건물에 대한 집중 공격을 우선시하는 것이며, 특히 프로토스 맵의 특징상 셔틀 테크나 다크 아칸의 활용이 유리할 수 있다. 추천 대상으로는 스타크래프트 유즈맵을 즐기는 플레이어, 특히 공격형 서바이벌 맵을 선호하는 게이머들에게 적합하다. 플레이 전에는 맵의 대칭 구조와 각 레벨별 적의 배치 변화를 숙지하고, 자원 수집보다는 빠르게 병력을 모아 적 기지로 돌진하는 플레이 스타일을 준비하는 것이 중요하다. 또한, 타이머 관리를 소홀히 하지 않도록 주의해야 한다. 이 맵은 긴장감 넘치는 서바이벌 경험을 제공하며, 특히 팀플레이보다는 1대1 또는 4인 동시 대전에 최적화되어 있다. 플레이 시간은 약 20~30분 정도로 예상되며, 각 레벨의 난이도 상승을 고려해 초보자는 쉬운 레벨부터, 숙련자는 고난이도 레벨을 도전하는 것을 권장한다. Offensive Strike is a renowned survival-style custom map in StarCraft: Brood War, designed for offensive destruction of enemy bases within a strict time limit. The map supports up to 4 players and features progressively increasing difficulty across levels, as indicated by its internal description mentioning 'Ultimate Survival' creator SentryIII and its final version release. The primary objective is to destroy all enemy structures (such as Nexuses or Command Centers) before the timer expires, with each level introducing stronger enemy defenses. The symmetrical design ensures balanced gameplay, with players starting in corner positions before advancing toward the center. The map’s large 3072x3072 tile layout, using a platform tileset, provides ample space for strategic maneuvering and large-scale battles. Early levels allow for a more relaxed start, but later levels demand rapid expansion and coordinated attacks to overcome reinforced enemy forces. For beginners, mastering basic strategies in Levels 1-2 is crucial, while advanced players should focus on efficient resource management and targeted assaults on key enemy buildings. Protoss players may find shuttle or Dark Archon tactics particularly effective. This map is ideal for StarCraft custom map enthusiasts who enjoy high-pressure survival scenarios, especially those favoring offensive gameplay. Players should familiarize themselves with the symmetrical layout and enemy placements per level, prioritizing quick unit production over resource accumulation. Effective timer management is essential to avoid failure. With an expected playtime of 20-30 minutes, beginners are advised to start with easier levels, while veterans can tackle higher difficulty tiers for a challenging experience.
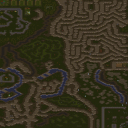
다크 포스 RPG V1.0 (Dark Force RPG V1.0)
‘Dark Force RPG V1.0’은 스타크래프트: 브루드워의 유즈맵으로, 4인 협동 플레이가 가능한 RPG 장르의 맵이다. 내부 맵 설명에 따르면 ‘다크 포스를 물리치라’는 목표를 제시하며, 제작자 ‘ZergSlayer’와 감수자 ‘NutHead88’, ‘Xzibit14’의 손을 거쳐 완성되었다. 맵은 사막 타일셋을 기반으로 디자인되었으며, 8192x8192의 거대한 맵 크기에서 펼쳐지는Sector들은 플레이어들에게 긴장감과 몰입감을 동시에 제공한다. 지형은 건조한 사막 지대와 오아시스 지역, 이따금씩 등장하는 바위 언덕 등으로 구성되어 있으며, 이러한 환경은 RPG다운 분위기를 조성하는 데 한몫한다. 맵의 구조상으로는 주요 적대 세력인 ‘다크 포스’를 물리치기 위한 다양한 퀘스트 라인이 존재할 것으로 추정되며, 플레이어들은 각자 고유한 역할을 맡아 협력해야 한다. 맵의 UI나 시스템은 확인되지 않지만, 제목과 설명, 그리고 타일셋만으로도 RPG다운 스토리텔링과 진행 방식이 예상된다. 특히 사막 배경은 RPG의 세계관 구축에 효과적으로 활용될 수 있으며, 광활한 맵 크기는 다양한 이벤트와 미션의 기회를 제공할 것으로 보인다. 하지만 맵의 구체적인 시스템이나 승리 조건, 스킬 트리 등은 제공되지 않아 명확히 판단하기는 어렵다.尽管如此, Dark Force RPG는 협동과 전략적 플레이가 요구되는 RPG 유즈맵으로, 4인 플레이어가 모여 다크 포스를 물리치는 모험을 즐길 수 있는 구조로 보인다. 사막이라는 배경은 고독하고 긴장감 있는 분위기를 조성하며, 플레이어들은 각자의 역할을 다해 목표를 달성해야 할 것이다. 맵을 플레이하기 전에는 내부를 탐험하여 맵의 주요 지점과 이벤트 위치를 미리 파악하는 것이 중요할 것으로 보인다. 또한, 팀원 간의 원활한 의사소통이 필수적일 것으로 예상되며, 각 플레이어의 역할 분배가 승패를 좌우할 수 있다. 이러한 점에서 Dark Force RPG는 전략적 사고와 협동심을 키우기에 좋은 맵이라 할 수 있다. Dark Force RPG V1.0 is a custom map for StarCraft: Brood War, designed as an RPG (Role-Playing Game) for 4-player cooperative play. According to the internal map description, the objective is to "vanquish the Dark Force," created by 'ZergSlayer' with contributions from 'NutHead88' and 'Xzibit14.' The map utilizes a desert tileset, set across an expansive 8192x8192 grid, which enhances the immersive RPG atmosphere. The terrain features arid desert zones, scattered oases, and rocky hills, creating a visually engaging environment that fits the RPG genre. While the exact quest lines, enemy AI, or victory conditions are not specified, the title and description strongly suggest a narrative-driven experience where players must collaborate to defeat the Dark Force. The desert setting provides a fitting backdrop for an RPG, offering opportunities for diverse events and missions within its vast layout. However, without additional details on the map's mechanics or systems, the full scope of gameplay remains speculative. Despite this, Dark Force RPG appears to be a well-structured cooperative RPG map where players must strategize and work together to overcome challenges. The desert theme fosters a sense of isolation and tension, while the need for teamwork and role assignment among players will likely be crucial to success. Before diving into the adventure, players should explore the map to identify key locations and events. Effective communication and clear role distribution among teammates will be essential, making this map an excellent choice for those looking to develop strategic thinking and collaboration skills in an RPG setting.
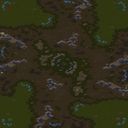
드림 오브 발해 (Dream of Balhae)
‘드림 오브 발해’는 고구려의 후예인 대조영이 발해를 건국한 역사적 배경을 바탕으로 한 스타크래프트 브루드워 유즈맵입니다. 이 맵은 밀리 기반의 맵으로 보이며, 4명의 플레이어가 각자의 기지에서 시작해 자원을 채취하고 병력을 양성하는 동시에 상대방을 공격하는 전략적 대결을 펼치게 됩니다. 맵의 배경은 사막 타일셋으로 구성되어 있으며, 넓은 평야와 구릉지가 펼쳐져 있어 전장 확장이 용이합니다. 맵 중앙에는 거대한 고구가 자리 잡고 있어 전략적 요충지로 기능할 가능성이 높습니다. 플레이 방식은 기본적인 밀리전과 유사하지만, 맵의 역사적 배경에 맞게 ‘발해’라는 테마가 반영된 디자인과 네이밍이 특징적입니다. 맵의 구조상으로는 중앙 고구가 초반 전투의 핵심 포인트가 될 수 있으며, 이를 둘러싼 협소한 길목은 병력 이동과 방어 라인을 세우는 데 중요한 역할을 할 것으로 보입니다. 또한, 맵의 크기가 4096x4096으로 상당히 넓기 때문에 자원 채취와 테란의 경우 멀티 기지 운영이 필수적일 수 있습니다. 프로토스의 경우 초반부터 병력 동원력이 우수하다는 점을 활용해 중앙을 선점하는 전략이 유효할 것이며, 저그의 경우 빠른 러시나 바퀴를 통한 조이기 플레이가 효과적일 것으로 예상됩니다. 이 맵은 역사적 테마와 밀리 기반의 전략적 플레이가 조화를 이룬 유즈맵으로, 특히 발해라는 독특한 테마에 관심이 있는 플레이어나 밀리전 실력을 연마하고 싶은 초보자와 중급자들에게 추천할 만합니다. 다만, 맵의 밸런스는 제작자의 의도나 테스트 여부에 따라 크게 달라질 수 있으므로, 플레이 전 직접 테스트해보는 것이 좋습니다. 특히 중앙 고구 주변의 통행로와 멀티 지역 간의 거리, 자원 배치 등을 꼼꼼히 확인해 전략을 수립하는 것이 중요합니다. 이 맵은 스타크래프트 브루드워의 사막 타일셋을 활용해 시각적 몰입감을 높였으며, 역사적 스토리를 게임에 접목시키고자 한 점이 돋보입니다. 다만, 맵의 설명에 따르면 시나리오 버전 1.0으로 표기되어 있지만, 실제 게임 플레이 방식은 밀리 기반임을 감안할 때, 제작자가 밀리맵으로 의도한 것으로 보입니다. 플레이어는 이 점을 참고해 실전 전략을 준비하는 것이 좋습니다. "Dream of Balhae" is a StarCraft: Brood War custom map based on the historical background of Dae Jo-yeong, a descendant of Goguryeo who founded the Balhae kingdom. The map appears to be a melee-based design where four players start from their own bases, gather resources, train armies, and engage in strategic battles against opponents. The battlefield features a desert tileset with vast plains and hills, making expansion easy. At the center of the map lies a massive ancient fortress, which could serve as a key strategic point. The gameplay is similar to standard melee but stands out with its Balhae-themed design and naming. Structurally, the central fortress could be a focal point for early battles, while the narrow paths surrounding it play a crucial role in troop movement and defense lines. Given the map's large size (4096x4096), resource gathering and, for Terran players, multi-base operations may be essential. Protoss players could benefit from early aggression to secure the center, while Zerg players might find quick rushes or siege play with roaches effective. This custom map blends historical themes with melee-based strategy, making it a great choice for players interested in the Balhae theme or those looking to improve their melee skills, including beginners and intermediate players. However, the balance heavily depends on the creator's intent and testing, so it's best to try it out yourself before diving in. Pay close attention to the paths around the central fortress, the distances between multi bases and resource locations, and plan your strategy accordingly. The map leverages Brood War's desert tileset to enhance immersion and successfully incorporates historical storytelling into gameplay. Though labeled as version 1.0, the actual gameplay is melee-based, suggesting the creator intended it as a melee map. Players should keep this in mind when preparing their strategies.
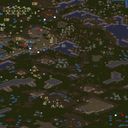
The Crimson Meadow (붉은 초원)
스타크래프트: 브루드워의 디펜스 장르 유즈맵인 〈The Crimson Meadow〉는 사막 지형을 배경으로 한 협동형 맵으로, 플레이어는 동맹과 힘을 합쳐 적의 핵심 건물을 파괴하는 목표를 달성해야 한다. 맵은 4명의 플레이어가 각각 분리된 시작 구역에서 출발하며, 각 구역은 좁은 길로 연결되어 동맹 간의 협력이 필수적이다. 중앙 지형은 넓은 평원과 오아시스 형태로 구성되어 있어 시야 확보와 기지 방어가 중요하며, 맵 곳곳에 위치한 특수 건물들은 파괴 시 보너스 자원이나 추가 유닛을 제공하는 것으로 추정된다. 적 진영은 맵 최상단에 위치하며, 방어탑과 병력이 배치되어 있어 신중한 전략과 동맹 간의 실시간 협력이 요구된다. 맵의 디자인상으로는 지형을 활용한 진격로 차단이나 기습 공격이 가능하도록 배치되어 있으며, 특히 오아시스 주변의 좁은 길은 방어의 요충지로 작용할 가능성이 크다. 플레이어는 각자의 시작 구역에서 자원을 채집하거나 유닛을 생산할 수 있으며, 동맹과 협력하여 적의 방어선을 돌파하거나 핵심 건물을 파괴하는 데 집중해야 한다. 맵의 분위기는 사막의 황량한 느낌을 살리면서도 협동과 전략적 플레이를 강조하는 디자인으로 구성되어 있다. 추천 대상은 디펜스와 협동 플레이를 좋아하는 스타크래프트 유저로, 특히 4인 플레이 시 동맹 간의 커뮤니케이션과 역할 분담이 중요하다. 플레이 전에는 맵의 주요 길목과 오아시스 주변의 방어 포인트를 미리 확인하고, 동맹과 협의하여 공격 루트와 방어 전략을 세워두는 것이 좋다. 또한, 특수 건물의 파괴 여부와 보상 효과를 사전에 파악하면 전략적 우위를 점할 수 있을 것이다. The Crimson Meadow is a cooperative defense-style custom map in StarCraft: Brood War, set against a desert backdrop where players must work together to destroy the enemy's special buildings. The map features four players starting in separate zones connected by narrow paths, emphasizing alliance coordination. The central terrain includes wide plains and oases, which likely serve as critical points for vision control and base defense. Special buildings scattered across the map presumably offer bonuses like resources or additional units upon destruction. The enemy base is located at the top of the map, fortified with defensive towers and units, requiring careful strategy and real-time teamwork. The map's design allows for terrain-based blocking or ambush tactics, with narrow paths around oases acting as chokepoints. Players can gather resources or produce units in their starting zones, collaborating to break through enemy defenses or target core structures. The atmosphere blends the barren feel of a desert with a focus on cooperation and strategic play. This map is ideal for players who enjoy defense mechanics and teamwork, especially in 4-player matches where communication and role allocation are key. Before playing, it’s wise to scout major routes and oasis chokepoints, establish attack and defense plans with allies, and understand the rewards tied to destroying special buildings for a strategic edge.
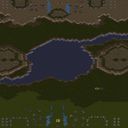
스타크라 ইন퀴시토러스 3 (Stella Inquisitorus 3)
스타크래프트 브루드워의 유즈맵 ‘Stella Inquisitorus 3’는 사막 지형을 배경으로 펼쳐지는 유저 대 컴퓨터 전투형 맵으로, 4인 플레이가 가능한 UMS 장르의 유즈맵이다. 내부 맵 제목과 설명에 따르면 캠페인 형식으로 제작된 이 맵은 ‘3번째 파트를 진행하는’ 구조로 보이며, 플레이어는 각각의 팀으로 나뉘어 컴퓨터 상대와 전투를 펼치게 된다. 맵의 전체적인 분위기는 사막의 황량한 지형과 오브젝트가 어우러져 있으며, 중앙에는 넓은 평야가 펼쳐져 있어 전면전을 펼치기 용이하다. 맵 상단과 하단에는 각각의 시작 지역이 배치되어 있으며, 시작 지역 주변에는 방어 시설이 배치되어 있어 초반 공격을 방어할 수 있는 구조로 보인다. 맵의 왼쪽과 오른쪽에는 넓은 평지가 펼쳐져 있어 병력을 모아 대규모 공격을 펼치기에 적합한 환경으로 추정된다. 이 맵은 디펜스와 공격의 균형을 맞추는 것이 핵심으로 보이며, 컴퓨터의 공격 패턴과 맵의 지형적 특성을 잘 활용해야만 승리를 이끌어낼 수 있을 것이다. 초보 플레이어보다는 경험이 있는 플레이어에게 더 적합한 맵으로 보이며, 팀워크와 전략적인 플레이가 요구되는 장르이기 때문에 협동 플레이를 선호하는 유저에게 추천할 만하다. 또한, 맵의 사막 타일셋과 넓은 개활지는 시야 확보와 기동성에 중점을 둔 플레이를 유도할 것으로 예상된다. 플레이 전에는 맵의 시작 지역과 주요 길목을 미리 확인하여 초기 방어선을 구축하는 것이 중요하다. 또한, 컴퓨터의 공격 루트를 예상하고 주요據點을 방어하는 전략을 세우는 것이 승리의 열쇠가 될 것이다. 맵의 구조상 넓은 개활지가 많기 때문에 스플래시 데미지를 주는 유닛이나 공성 유닛을 활용하는 것이 효과적일 수 있다. 마지막으로, 팀 간의 의사소통을 원활히 하고, 각 플레이어의 역할 분담을 clearly하게 정하는 것이 원활한 플레이에 도움이 될 것이다. 이 맵은 유즈맵 특유의 창의성과 전략성을 모두 즐길 수 있는 매력이 있으며, 특히 사막 배경의 웅장함이 플레이어의 몰입감을 높이는 요소로 작용할 것이다. Stella Inquisitorus 3 is a custom map from StarCraft: Brood War set in a desert terrain, featuring player versus computer combat designed for four players in the UMS genre. According to the internal map title and description, this map appears to be structured as a campaign, progressing through a "third part," where players are divided into teams and engage in battles against the AI. The overall atmosphere blends the barren desert landscape and objects, with a vast plain at the center ideal for large-scale confrontations. The top and bottom of the map feature starting zones, each surrounded by defensive structures to fend off early attacks. Wide plains extend to the left and right, providing an environment conducive to gathering forces for massive assaults. The key to success lies in balancing defense and offense, utilizing the AI's attack patterns and the map's terrain strategically. This map seems better suited for experienced players rather than beginners, requiring teamwork and strategic play—making it a great choice for those who prefer cooperative gameplay. The desert tileset and open areas encourage a playstyle focused on vision control and mobility. Before starting, it's crucial to scout the starting zones and main paths to establish initial defenses, while anticipating the AI's attack routes and strategizing to defend key positions. Due to the map's expansive open areas, units with splash damage or siege capabilities can be particularly effective. Lastly, smooth communication and clearly defined roles among teammates will enhance overall performance. This map offers the unique creativity and strategy typical of custom maps, with the grandeur of the desert setting further immersing players in the experience.
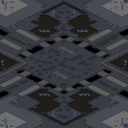
뉴 리모트 아웃포스트 (New Remote Outpost)
스타크래프트: 브루드워의 유즈맵으로, 「New Remote Outpost GameRu」는 우주 테마의 넓은 평면 지형을 바탕으로 한 디펜스 및 전략형 맵입니다. 맵의 중심부는 거대한 중앙 건물이 자리 잡고 있으며, 이를 둘러싼 4개의 외곽 지역이 각각의 기지 역할을 수행합니다. 각 기지는 프로토스, 테란, 저그, 그리고 제3세력의 건물로 구성되어 있으며, 맵의 구조상 symmetrical(대칭) 디자인으로 균형 잡힌 전투가 가능합니다. 플레이어는 각자 고유한 시작 자원과 건물을 보유한 채 상대방을 제압하거나 중앙 건물을 점령하는 전략을 펼치게 됩니다. 맵의 특징은 넓은 시야와 복잡한 길목으로, 빠른 판단과micro컨트롤이 요구되는 전투가 자주 벌어집니다. 또한, 중앙 건물을 두고 벌어지는 대치전은 맵의 하이라이트로, 이를 차지하는 플레이어가 우위를 점할 가능성이 높습니다. 초보자는 다소 어렵게 느낄 수 있지만, symmetrical 디자인 덕분에 밸런스가 잘 잡혀 있어 반복 플레이를 통해 전략을 다듬기에 적합한 맵입니다. 추천하는 플레이 방식은 초반 자원 확보와 중앙 건물 장악에 중점을 두는 것이며, 상대방의 움직임을 유심히 관찰하며 대비를 준비하는 것이 중요합니다. 맵의 난이도는 보통 수준으로, 초보자와 숙련자 모두 즐길 수 있지만, symmetrical 구조를 적극 활용하는 전략적 플레이가 필요합니다. StarCraft: Brood War's custom map, "New Remote Outpost GameRu," is a defense and strategy map set on a vast, space-themed flat terrain. At the center of the map stands a massive central building, surrounded by four outer regions that each function as a base. These bases are composed of buildings from the Protoss, Terran, Zerg, and a third faction, and the map's symmetrical design ensures balanced combat. Players begin with unique starting resources and structures, employing strategies to either eliminate opponents or seize control of the central building. The map features wide visibility and intricate pathways, often leading to fast-paced battles that demand quick judgment and precise micro-management. The standout moments occur during the tense standoffs over the central building, with the player who claims it gaining a significant advantage. While beginners may find it challenging, the symmetrical design ensures strong balance, making it ideal for refining strategies through repeated play. Recommended strategies focus on securing early resources and controlling the central building, with careful observation of opponents' movements and preparation for counterplay. The map offers moderate difficulty, enjoyable for both beginners and experts, though effective use of the symmetrical structure requires strategic play.
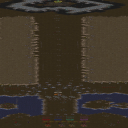
브레이크 더 콘돔 V2 (Break The Condom V2)
스타크래프트 브루드워의 독특한 유즈맵인 '브레이크 더 콘돔 V2(Break The Condom V2)'는 이름 그대로 Pregnancy(임신) 테마를 기반으로 한 미니게임으로, 플레이어는 콘돔을 파괴하고 알(egg)에 도달하는 것이 목표다. 맵은 가로로 긴 직사각형 형태로 펼쳐지며, 중앙에 위치한 알을 향해 각 플레이어가 콘돔으로 보호된 통로를 뚫고 나아가야 한다. 콘돔은 일종의 장애물로, 이를 파괴하기 위해서는 일정 시간 동안 지속적인 공격을 가하거나 특정 조건을 충족해야 한다. 맵 특유의 긴 구조와 좁은 통로, 그리고 제한된 시간(15분)으로 인해 긴장감이 지속되는 것이 특징이다. 게임플레이는 주로 오르가즘 타임(Orgasm Time)으로 명명된 오르가즘 효과를 연출하는 연출 scena가 포함되어 있으며, 이는 맵의 재미 요소가 된다. 또한 개선된 게임플레이가 적용되어 조작성이나 밸런스가 다소 개선된 버전으로 추정된다. 이 맵은 4인의 플레이어를 대상으로 하며, 각 플레이어는 자신만의 경로와 콘돔을 두고 경쟁하게 된다. 콘돔 파괴는 단순한 클릭이나 스킬이 아니라, 지속적인 공격과 전략적인 움직임을 요구하기 때문에 초보자보다는 어느 정도의 게임 이해도가 있는 플레이어에게 더 적합할 수 있다. 또한, 맵 자체가 워낙 독특한 테마와 연출을 지니고 있어 호불호가 갈릴 수 있는 점도 감안해야 한다. 플레이 전에는 콘돔 파괴를 위해 필요한 스킬이나 공격 패턴, 그리고 맵의 좁은 통로에서 발생할 수 있는 실수 가능성을 미리 숙지하는 것이 중요하다. 특히 맵의 긴 구조와 제한된 시간은 플레이어 간의 긴장감을 높이는 요소로 작용할 수 있다. 이 맵은 스타크래프트 유즈맵의 색다른 재미를 추구하는 플레이어들에게 강력히 추천할 만한 작품이다. 다만, 자극적인 테마와 연출로 인해 민감한 플레이어는 주의를 요한다. Break The Condom V2 is a unique StarCraft: Brood War custom map that centers around a Pregnancy-themed mini-game. Players aim to break condoms and reach an egg, with the map featuring a long rectangular layout. Condoms act as obstacles that must be destroyed through sustained attacks or by meeting specific conditions. The gameplay is characterized by its tense atmosphere, driven by narrow passages and a 15-minute time limit. The map includes unique scenes labeled "Orgasm Time," adding an entertaining element to the experience. This version appears to feature improved gameplay mechanics, enhancing balance and player control. Designed for four players, each navigates their own path while competing to break condoms first. The destruction of condoms requires strategic attacks rather than simple clicks, making the map more suitable for players with some prior experience. Due to its distinctive theme and scenes, the map may not appeal to everyone. Before playing, it’s advisable to understand the required attack patterns and potential pitfalls in the narrow pathways. The map’s elongated structure and time constraint heighten tension among players, making it an excellent choice for those seeking unconventional fun in StarCraft custom maps. However, players sensitive to provocative themes should approach with caution.
최근 등록된 맵
새로 추가된 파일과 버전을 확인하세요.
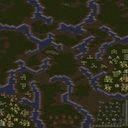
헌터스 Z 터보! 히어로 버전 (Hunters Z Turbo! Hero Version)
스타크래프트 브루드워의 유즈맵 중 하나로 renowned된 ‘헌터스 Z’ 시리즈의 후속작인 ‘헌터스 Z 터보! 히어로 버전’이 제공하는 짜릿한 속도감과 전략적 긴장감을 경험해 보세요. 이 맵은 4명의 플레이어가 각자의 영웅 유닛을 조종하며 적의 공격으로부터 살아남아야 하는 서바이벌 디펜스 장르의 유즈맵으로, 빠른 판단력과 효율적인 자원 관리가 핵심인 작품입니다. 맵 곳곳에 배치된 방어 건물과 지형적 요소들을 활용해 적의 물량을 막아내야 하며, 영웅 유닛의 스킬을 적재적소에 활용하는 것이 승리의 열쇠가 됩니다. 특히 ‘터보’라는 이름답게 맵의 진행 속도가 타 디펜스 유즈맵에 비해 상당히 빠른 편으로, 초반부터 끊임없이 밀려오는 적을 상대해야 하는 긴장감이 특징입니다. 맵의 배경은 사막 타일셋으로 구성되어 있어 건조한 분위기가 독특한 플레이 감각을 더해줍니다. 초보 플레이어는 영웅의 스킬과 방어 건물의 조합을 익히느라 다소 어려운 느낌을 받을 수 있지만, 익숙해지면 긴장감 넘치는 전투를 즐길 수 있는 매력이 있는 맵입니다. рекомен드 플레이 전에는 영웅의 스킬셋과 방어 건물의 배치 위치를 숙지하고, 자원 수집과 방어 라인의 균형을 맞추는 연습을 해두는 것이 좋습니다. 빠른 패턴을 요구하는 만큼, 맵의 흐름을 미리 예측하고 대응하는 능력이 중요합니다. 이 맵은 주로 4인 협동 플레이를 상정하고 제작되었지만, AI 적의 난이도나 맵의 배치에 따라 싱글 플레이로도 충분히 즐길 수 있는 구조로 보입니다. 특히 ‘히어로 버전’이라는 타이틀답게 영웅 유닛의 개성과 스토리성이 강조된 부분이 특징적입니다. 이처럼 헌터스 Z 터보!는 속도감과 전략성이 조화를 이룬 디펜스 유즈맵으로, 스타크래프트 유즈맵의 매력을 한층 깊게 느낄 수 있는 작품입니다. 초보자도 꾸준한 연습으로 적응할 수 있지만, 숙련자라면 더 높은 난이도에서 새로운 전략을 발휘할 수 있는 매력이 있습니다. Experience the thrilling speed and strategic tension of *Hunters Z Turbo! Hero Version*, the latest installment in the renowned *Hunters Z* series of Brood War custom maps. In this survival defense game, four players each control their own hero units, fighting to survive relentless enemy waves. Quick decision-making and efficient resource management are key, as you must use strategically placed defensive structures and terrain to fend off waves of enemies while deploying your hero’s abilities at the right moments for victory. True to its name, *Turbo!* features a much faster pace than typical defense maps, with enemies constantly assaulting from the very beginning, keeping the tension high. The map’s desert tile set adds a dry, immersive atmosphere that enhances the unique play experience. While beginners may struggle at first as they learn to combine hero skills with defensive structures, once mastered, the map offers an exhilarating combat experience. Before jumping into a recommended playthrough, it’s wise to familiarize yourself with each hero’s skill set and the placement of defensive buildings, as well as practice balancing resource collection and maintaining your defensive lines. Since the map demands quick reactions, the ability to anticipate and adapt to its flow is crucial. Designed primarily for four-player cooperative play, *Hunters Z Turbo!* can also be enjoyed solo, depending on the AI difficulty and map layout—especially with its *Hero Version* focus, which emphasizes the personality and narrative of each hero unit. *Hunters Z Turbo!* strikes a perfect balance between speed and strategy, offering a deeper dive into the charm of StarCraft custom maps. While newcomers can adapt with practice, seasoned players will find new strategies to explore at higher difficulty levels.
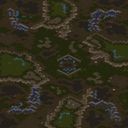
(GGL) 정글 스토리 (Jungle Story)
‘(GGL) 정글 스토리(Jungle Story)’는 스타크래프트 브루드워의 유즈맵으로, 4명의 플레이어가 한 팀을 이루어 정글 속의 적대 세력을 물리치는 디펜스 형식의 맵이다. 맵 중앙에 위치한 넥서스와 같은 건물을 보호하면서, 주기적으로 몰려오는 적군 유닛을 상대로 방어전을 펼치며 포인트를 획득하는 방식이다. 맵은 사막 타일셋을 활용해 건조한 정글 분위기를 연출하며, 넓은 평야와 조밀한 나무 지형이 어우러져 시야 확보와 진형 구축에 전략적인 깊이를 더한다. 특히, 맵 중앙의 넓은 개활지는 빠른 기동력과 시야 확보가 필수적이며, 주변의 협곡과 숲 지대는 잠복이나 기습 플레이를 가능케 한다. 적군은 다수의 저글링, 히드라리스크, 울트라리스크 등으로 구성되어 있으며, 난이도는 중간 정도로 설정되어 초보자와 숙련자 모두 즐길 수 있도록 배려되었다. 그러나 맵의 광활한 크기는 초보자의 경우 적의 위치를 빠르게 파악하지 못해 당황할 수 있으니, 미리 맵의 지형을 숙지하고 시야 확보를 위한 오버로드나 스캔 활용을 연습할 필요가 있다. 또한, 팀원과의 소통을 통한 역할 분담이 승리의 열쇠가 되므로, 협동 플레이가 중요하다. 이 맵은 주로 컴퓨터 상대 디펜스 게임으로 즐기지만, 멀티플레이를 지원한다면 팀워크와 전략적 사고를 키울 수 있는 훌륭한 연습 무대가 될 것이다. 정글의 숨막히는 분위기와 긴장감 넘치는 전투가 어우러진 이 맵은, 스타크래프트 유즈맵의 정수를 느껴보고 싶은 플레이어들에게 강력히 추천한다. 특히, 디펜스 장르에 익숙하지 않은 플레이어는 난이도를 낮게 설정하고 플레이해보는 것도 좋은 방법일 것이다. ‘(GGL) Jungle Story’ is a custom StarCraft: Brood War map where four players team up to defend a central structure against waves of enemy units in a jungle-themed defense format. The goal is to protect a Nexus-like building in the center while fending off periodically spawning enemies to earn points. The map uses a desert tileset to create a dry jungle atmosphere, blending wide plains and dense forests that add strategic depth to vision control and formation building. The central open area demands quick mobility and sightlines, while the surrounding canyons and forested zones allow for ambushes and hit-and-run tactics. The enemy forces consist of large numbers of Zerglings, Hydralisks, and Ultralisks, with a moderate difficulty level designed to be enjoyable for both beginners and experienced players. However, the map’s vast size may overwhelm newcomers who struggle to track enemy positions, so familiarizing yourself with the terrain and practicing vision control with Overlords or scans is essential. Communication and role assignment among teammates are also key to victory, making teamwork crucial. While the map is primarily designed for single-player defense against AI, it can serve as an excellent training ground for teamwork and strategic thinking if multiplayer is supported. With its oppressive jungle ambiance and intense battles, this map is highly recommended for players looking to experience the essence of StarCraft custom maps. Beginners unfamiliar with defense games may want to start with a lower difficulty setting.
스타크라 ইন퀴시토러스 3 (Stella Inquisitorus 3)
스타크래프트 브루드워의 유즈맵 ‘Stella Inquisitorus 3’는 사막 지형을 배경으로 펼쳐지는 유저 대 컴퓨터 전투형 맵으로, 4인 플레이가 가능한 UMS 장르의 유즈맵이다. 내부 맵 제목과 설명에 따르면 캠페인 형식으로 제작된 이 맵은 ‘3번째 파트를 진행하는’ 구조로 보이며, 플레이어는 각각의 팀으로 나뉘어 컴퓨터 상대와 전투를 펼치게 된다. 맵의 전체적인 분위기는 사막의 황량한 지형과 오브젝트가 어우러져 있으며, 중앙에는 넓은 평야가 펼쳐져 있어 전면전을 펼치기 용이하다. 맵 상단과 하단에는 각각의 시작 지역이 배치되어 있으며, 시작 지역 주변에는 방어 시설이 배치되어 있어 초반 공격을 방어할 수 있는 구조로 보인다. 맵의 왼쪽과 오른쪽에는 넓은 평지가 펼쳐져 있어 병력을 모아 대규모 공격을 펼치기에 적합한 환경으로 추정된다. 이 맵은 디펜스와 공격의 균형을 맞추는 것이 핵심으로 보이며, 컴퓨터의 공격 패턴과 맵의 지형적 특성을 잘 활용해야만 승리를 이끌어낼 수 있을 것이다. 초보 플레이어보다는 경험이 있는 플레이어에게 더 적합한 맵으로 보이며, 팀워크와 전략적인 플레이가 요구되는 장르이기 때문에 협동 플레이를 선호하는 유저에게 추천할 만하다. 또한, 맵의 사막 타일셋과 넓은 개활지는 시야 확보와 기동성에 중점을 둔 플레이를 유도할 것으로 예상된다. 플레이 전에는 맵의 시작 지역과 주요 길목을 미리 확인하여 초기 방어선을 구축하는 것이 중요하다. 또한, 컴퓨터의 공격 루트를 예상하고 주요據點을 방어하는 전략을 세우는 것이 승리의 열쇠가 될 것이다. 맵의 구조상 넓은 개활지가 많기 때문에 스플래시 데미지를 주는 유닛이나 공성 유닛을 활용하는 것이 효과적일 수 있다. 마지막으로, 팀 간의 의사소통을 원활히 하고, 각 플레이어의 역할 분담을 clearly하게 정하는 것이 원활한 플레이에 도움이 될 것이다. 이 맵은 유즈맵 특유의 창의성과 전략성을 모두 즐길 수 있는 매력이 있으며, 특히 사막 배경의 웅장함이 플레이어의 몰입감을 높이는 요소로 작용할 것이다. Stella Inquisitorus 3 is a custom map from StarCraft: Brood War set in a desert terrain, featuring player versus computer combat designed for four players in the UMS genre. According to the internal map title and description, this map appears to be structured as a campaign, progressing through a "third part," where players are divided into teams and engage in battles against the AI. The overall atmosphere blends the barren desert landscape and objects, with a vast plain at the center ideal for large-scale confrontations. The top and bottom of the map feature starting zones, each surrounded by defensive structures to fend off early attacks. Wide plains extend to the left and right, providing an environment conducive to gathering forces for massive assaults. The key to success lies in balancing defense and offense, utilizing the AI's attack patterns and the map's terrain strategically. This map seems better suited for experienced players rather than beginners, requiring teamwork and strategic play—making it a great choice for those who prefer cooperative gameplay. The desert tileset and open areas encourage a playstyle focused on vision control and mobility. Before starting, it's crucial to scout the starting zones and main paths to establish initial defenses, while anticipating the AI's attack routes and strategizing to defend key positions. Due to the map's expansive open areas, units with splash damage or siege capabilities can be particularly effective. Lastly, smooth communication and clearly defined roles among teammates will enhance overall performance. This map offers the unique creativity and strategy typical of custom maps, with the grandeur of the desert setting further immersing players in the experience.
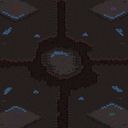
토렌츠 오브 워 (Torrents of War)
이 맵은 스타크래프트 브루드워의 대표적인 유즈맵 중 하나로, 플레이어 각자가 자신의 본진을 차지하고 Isle of Fire(불의 섬)을 둘러싼 strategic point를 확보하는 것을 목표로 한다. 맵 중앙에는 거대한 강이 흐르며, 강을 경계로 나뉜 네 개의 지역이 각각 플레이어의 시작 지점으로 할당되어 있다. 이 강은 단순한 장식이 아니라, 게임 내 주요 자원과 방어 포인트로 기능하는 key area로 활용된다. 맵의 가장 큰 특징은 강을 건너는 다리 역할을 하는 narrow path와, 강 중앙에 위치한 Isle of Fire다. Isle of Fire는 맵의 핵심으로, 이곳을 점령하거나 방어하는 것이 승리를 좌우하는 중요한 포인트로 보인다. 강 양쪽으로 펼쳐진 넓은 평지는 초반 전투와 자원 확보를 위한 주요 공간이며, 미네랄과 가스 멀티가 적절히 배치되어 있어 자원의 활용도와 전략적 선택이 중요하다. 초반에는 본진 방어와 멀티 확보가 우선시되며, Isle of Fire를 둘러싼 territoriyal control이 게임의 판도를 결정짓는 주요 요소가 된다. 맵의 밸런스는 각 플레이어의 시작 위치가 대칭적으로 배치되어 있어, 초보자와 숙련자 모두에게 공정한 경쟁이 가능하도록 설계된 것으로 추정된다. 다만, Isle of Fire의 중요도가 너무 크거나 자원 분배가 불균등하면 밸런스가 무너질 수 있으므로, 플레이 전에 맵의 특성을 충분히 숙지하고 전략을 세우는 것이 중요하다. 이 맵은 1vs1, 2vs2, 4인 자유-for-all 등 다양한 팀 구도로 즐길 수 있으며, 특히 4인 플레이 시 각 플레이어의 협력과 경쟁이Highlighted by the central river and the Isle of Fire, which serves as a critical strategic point. The narrow paths crossing the river act as chokepoints, forcing players to make tactical decisions about when and how to traverse them. Early game revolves around securing mineral lines and gas geysers near the starting bases, while mid-to-late game shifts focus to controlling the Isle of Fire and the surrounding territories. The symmetry of the starting positions ensures balanced gameplay, though the central river and Isle of Fire introduce unique challenges and opportunities for strategic depth. Players must balance expansion with defense, as controlling the river crossings and the Isle of Fire can dictate the flow of the game. This map offers versatility in game modes, including 1v1, 2v2, and 4-player free-for-all, making it suitable for both casual and competitive play, especially when played with a solid understanding of the map's mechanics and potential imbalances.
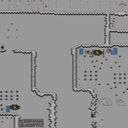
트라이브스 II RPG (Tribes II RPG)
스타크래프트 브루드워의 유즈맵 «Tribes II RPG»는 4인 플레이를 전제로 한 RPG 장르의 맵으로, 내부 제목과 파일명에서도 확인되는 것처럼 RPG(역할 수행 게임) 특성을 강하게 띄고 있다. 맵 이미지를 살펴보면 중앙에 거대한 구조물이耸立하고 있으며, 주변으로는 다양한 지형과 건물이 배치되어 있어 탐험과 전투를 동시에 즐길 수 있는 공간으로 구성되어 있다. 지형은 평탄한 평지부터 언덕, 물가까지 다양하게 분포되어 있으며, 각 구역은 색상과 기호로 구분되어 있어 플레이어가 목적지를 쉽게 찾을 수 있도록 디자인된 것으로 보인다. 또한 맵 곳곳에 배치된 기지나 건물을 통해 진행 상황을 판단할 수 있을 것으로 추정된다. 이 맵의 핵심은无疑히 RPG 요소다. 플레이어는 각자의 역할을 맡아 퀘스트를 수행하거나 적대 세력과 전투를 벌이며 스토리를 진행할 것으로 보인다. 맵의 구조상으로는 중앙 광장과 같은 공간이 있어 모든 플레이어가 한곳에 모일 수 있는 구조로 보이며, 각 플레이어의 위치나 진영은 색상과 기호로 구분되어 있어 팀 간 구분이 용이할 것으로 예상된다. 또한 맵의 크기가 6144x6144로 상당히 크기 때문에, 단순히 전투뿐만 아니라 탐험과 자원 수집, 건물 건설과 같은 다양한 활동도 가능할 것으로 보인다. 특히, 맵의 타일셋이 플랫폼으로 설정되어 있어 건물 디자인이나 지형 묘사가 비교적 깔끔한 편이며, 이는 플레이어의 몰입감을 높이는 데 기여할 것이다. RPG 장르의 특성상, 이 맵은 스토리 진행이나 캐릭터 성장 요소가 포함되어 있을 가능성이 높다. 맵의 구조상으로는 중앙에 위치한 구조물이 주요 스토리 진행 장소일 가능성이 있으며, 주변의 건물이 퀘스트나 보상 수집 장소로 활용될 것으로 보인다. 또한, 맵 곳곳에 배치된 적대적인 유닛이나 구조물은 전투를 유도할 것이며, 이를 통해 플레이어는 경험치나 아이템을 획득할 수 있을 것이다. 이러한 요소들은 RPG 장르의 정석적인 진행 방식과 유사하며, 플레이어는 각자 맡은 역할을 수행하면서 점차 stronger한 캐릭터로 성장할 수 있을 것이다. 이 맵을 즐기기 위해서는 사전 준비가 필요하다. 우선, 팀원 간의 역할 분배가 무엇보다 중요하다. 각 플레이어는 탱커, 딜러, 힐러, 서포터 등 다양한 역할을 맡아 팀의 균형을 맞추어야 한다. 또한, 맵의 구조를 미리 숙지하고 각 구역의 특징을 파악해 두는 것이 중요하다. 예를 들어, 중앙 광장은 전투가 벌어질 가능성이 높으므로 미리 진영을 구축하거나 방어 시설을 설치하는 것이 좋다. 또한, 맵 곳곳에 흩어져 있는 자원이나 아이템을 수집하는 것도 중요하며, 이를 위해 탐험을 적극적으로 해야 한다. 마지막으로, 팀원과의 원활한 소통이 필수적이며, 이를 통해 전략을 수립하고 위기 상황에 대처할 수 있어야 한다. 이 맵은 특히 RPG 장르에 관심 있는 플레이어나 팀 플레이를 선호하는 유저들에게 추천할 만하다. 또한, 스토리나 캐릭터 성장 요소가 포함되어 있어 긴 플레이 시간을 즐길 수 있으며, 맵의 규모가 크기 때문에 여러 번 플레이해도 질리지 않을 것이다. 다만, 맵의 난이도가 높을 경우 초보자에게는 다소 어려울 수 있으므로, 팀원과의 협력이 무엇보다 중요하다. 또한, 맵의 구조가 복잡한 만큼, 첫 플레이 시에는 지도나 메모를 활용해 전략을 세우는 것이 좋다. Tribes II RPG is a UMS-style map designed for four players, clearly categorized as an RPG (Role-Playing Game) based on its internal title and file name. The map features a sprawling layout with a massive central structure dominating the scene, surrounded by diverse terrain and buildings that encourage exploration and combat. The terrain includes flat plains, hills, and water bodies, all clearly demarcated with colors and symbols to guide players to their objectives. The large scale of 6144x6144 tiles ensures ample space for activities beyond mere combat, such as resource gathering, base construction, and quest completion. The RPG mechanics are central to this map, with players likely assigned distinct roles to fulfill quests, engage in battles, and progress through a narrative. The central plaza-like area suggests a gathering point for all players, with color-coded locations and symbols facilitating team differentiation. The clean design of the platform tileset enhances visual clarity, contributing to an immersive experience. The map's size and structure imply that exploration and strategic planning will be key components, allowing players to engage in activities typical of RPG genres, such as leveling up, acquiring items, and completing objectives. To fully enjoy Tribes II RPG, players should prepare by defining roles within the team, such as tank, damage dealer, healer, or supporter, to maintain balance. Familiarizing oneself with the map's layout is crucial, as understanding the characteristics of different zones—such as the central plaza being a hotspot for combat—enables better preparation, like setting up defenses or gathering resources. Active exploration is essential for collecting scattered items and resources, while effective communication with teammates is vital for strategy formulation and crisis management. This map is highly recommended for players who enjoy RPG elements or prefer team-based gameplay. Its expansive design and potential for deep narrative and character progression ensure long play sessions with replay value. However, its complexity might pose challenges for beginners, making teamwork and preparation critical. For first-time players, using in-game maps or notes to strategize is advisable to navigate the map's intricacies smoothly.
테스트 오브 서바이벌: 아포칼립스 (Test of Survival: Apocalypse)
스타크래프트 브루드워의 ‘테스트 오브 서바이벌: 아포칼립스(Test of Survival: Apocalypse)’는 이름 그대로 생존을Theme 중심 스토리와 전투를 조합한 서바이벌형 유즈맵으로, 황혼 테마의 넓은 맵에서 펼쳐지는 끊임없는 적의 습격과 리소스 관리를 통해 플레이어의 생존력을 시험합니다. 맵 중앙에는 거대한 오브젝트가 위치하고 있으며, 주변을 둘러싼 적 건물과 유닛들이 끊임없이 스폰되는 구조로, 플레이어는 초반 자원 수집과 방어선을 구축하는 동시에 지속적으로 몰려오는 적을 상대해야 합니다. 특히 맵의 가장자리에는 각 플레이어별로Resource가 배치된 베이스가 있으며, 이를 바탕으로 방어탑 건설, 유닛 생산, 혹은 맵 곳곳의 숨겨진 보급 기지를 확보하는 등 전략적 선택이 중요합니다. 맵 내부는 복잡한 지형과 장애물이 배치되어 있어, 맵을 충분히 숙지하지 않으면 예상치 못한 적의 기습을 당할 수 있습니다. 또한, 맵의 이름에서 알 수 있듯이 ‘아포칼립스’라는 테마에 맞게, 게임이 진행될수록 적의 공격 강도와 종류가 점차 강화되는 듯한 느낌이 들며, 이는 플레이어에게 긴장감을 고조시키는 요소로 작용합니다. 초보자의 경우 적의 공격 패턴과 맵의Resource 분포를 파악하는 데 어려움을 겪을 수 있으며, 방어선을 얼마나 효율적으로 구축하느냐가 승패를 좌우할 가능성이 큽니다. 반면,Resource 관리와 유닛 컨트롤에 익숙한 플레이어라면 비교적 수월하게 진행할 수 있을 것입니다. 이 맵은 한정된 자원과 끊임없는 위협 속에서 스스로 생존 전략을 세우고, 게임이 진행됨에 따라 점차 어려워지는 난이도를 즐길 수 있는, 진정한 서바이벌 경험을 제공합니다. 특히 4인 협동 플레이를 권장하며, 팀원 간의 실시간 소통과 역할 분배가 성공의 열쇠가 될 것입니다. 맵을 처음 플레이한다면,Resource가 풍부한 베이스를 최대한 활용하고, 맵 곳곳의 보급 기지를 확보하는 데 집중하는 것이 좋습니다. 또한, 적의 공격 패턴을 분석하여 방어 시설을 효율적으로 배치하는 것도 중요합니다. 이러한 요소들이 결합되어 ‘테스트 오브 서바이벌: 아포칼립스’는 단순한 디펜스가 아니라, 전략과 생존력의 균형을 요구하는 매력적인 서바이벌 유즈맵으로 자리매김하고 있습니다. StarCraft: Brood War’s *Test of Survival: Apocalypse* lives up to its name as a survival-focused custom map that blends thematic storytelling with intense combat. Set on a vast twilight-themed battlefield, players face relentless enemy waves while managing resources, testing their ability to endure under pressure. At the heart of the map lies a massive central structure, surrounded by enemy buildings and units that continuously spawn, forcing players to balance early resource collection with fortifying defenses against waves of attackers. Each player starts with a base at the map’s edge, stocked with resources, where strategic decisions—such as building defensive towers, training units, or securing hidden supply outposts scattered across the terrain—become crucial. The interior is packed with complex terrain and obstacles, making it easy to fall victim to unexpected ambushes if the map isn’t thoroughly explored. True to its *Apocalypse* theme, the difficulty escalates as the game progresses, with enemy attacks growing stronger and more varied, heightening tension and challenge. Beginners may struggle to grasp enemy attack patterns and resource distribution, where the effectiveness of their defenses often determines victory or defeat. However, players experienced in resource management and unit control will find progression smoother. This map delivers a true survival experience, rewarding those who adapt their strategies to limited resources and mounting threats while enjoying the increasing difficulty. Cooperative play for four players is highly recommended, as real-time communication and role distribution among teammates are key to success. If playing for the first time, prioritize maximizing the use of your resource-rich starting base and securing supply outposts across the map. Analyzing enemy attack patterns to optimize defensive structures is equally important. These elements come together to make *Test of Survival: Apocalypse* more than just a defense game—it’s a compelling survival custom map that demands a balance of strategy and resilience.
The Mass Attack Game (더 마스 어택 게임)
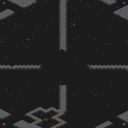
이 맵은 스타크래프트: 브루드워의 유즈맵 중 하나로, 디펜스와 공격형 플레이가 조화를 이룬 ‘컴까기’ 장르에 속합니다. 맵의 중앙을 가로지르는 넓은 통로와 양쪽에 배치된 건물들이 특징적이며, 플레이어는 이 통로를 따라 적과 교전하거나 방어선을 구축해야 합니다. 내부 설명이 ‘모든 적 건물 파괴’를 목표로 명시하고 있어, 적을 섬멸하거나 넥서스를 파괴하는 방식으로 승리할 수 있는 구조로 보입니다. 특히 맵의 중앙 통로가 좁고 길쭉한 형태라서 소수 정예 유닛이나 방어 건물로 상대를 효과적으로 막아낼 수 있으며, 반대로 넓은 공간을 활용한 다수의 유닛 운용도 고려해야 합니다. 황무지 타일셋을 사용한 덕분에 시각적으로는 황량한 전투가 펼쳐지는 분위기가 연출됩니다. 플레이어는 4인의 인원이 참여하는 구조로 보이며, 각 플레이어는 독립된 기지를 확보한 상태로 시작합니다. 맵의 중앙 통로에서 발생하는 전투가 게임의 핵심으로, 초반에는 자원 수급과 유닛 생산에 주력하며, 중반부터는 통로Points를 활용한 공격과 방어가 활발해질 것으로 예상됩니다. 게임의 진행 방식은 밀리전보다는 유즈맵 특유의 전략적 플레이가 강조되며, 특히 ‘컴까기’ 장르답게 AI 상대의 방어선을 무너뜨리고 본진을 공략하는 재미가 있을 것입니다. 다만, 맵의 난이도나 밸런스에 대한 정보는 제공되지 않아, 초보 플레이어는 다소 어려움을 느낄 수 있습니다. 이 맵을 추천하는 대상은 스타크래프트 유즈맵을 즐기는 모든 플레이어입니다. 특히 디펜스와 공격형 플레이를 좋아하는 분들에게 적합하며, 4인 대전이 가능한 맵 구조를 활용해 친구들과의 팀 플레이도 즐길 수 있습니다. 플레이 전에는 맵의 중앙 통로가 좁다는 점을 고려해, 유닛 조합과 방어 건물의 배치에 신경을 써야 할 것입니다. 또한, 자원 수급과 유닛 생산 속도를 조절해 게임의 흐름을 읽는 연습도 필요할 것입니다. This map is a classic UMS (Use Map Settings) custom map for StarCraft: Brood War, blending defense and offensive mechanics in a 'computer-killing' (comp-kki) genre. The map features a long, narrow central corridor flanked by player bases, where players must either push through enemy lines or establish defensive perimeters. The internal description states the objective is to 'destroy all enemy buildings,' suggesting a victory condition centered on eradication or Nexus destruction. The narrow central pathway favors elite unit compositions or strategic defensive structures, while the open flanks allow for large-scale unit engagements. The map appears designed for four players, each starting with a separate base. The central corridor serves as the primary battlefield, where early-game resource gathering and unit production transition into mid-game clashes for control of key Points. Unlike traditional melee, this map emphasizes strategic depth typical of UMS maps, with a focus on dismantling AI defenses and raiding enemy bases—a hallmark of the 'comp-kki' genre. However, without explicit balance or difficulty data, beginners may find the experience challenging. This map is recommended for players who enjoy StarCraft custom maps, particularly those who favor defense-oriented and aggressive playstyles. The four-player setup allows for team-based matches with friends, making it ideal for group sessions. Before playing, consider the narrow central corridor—unit composition and defensive structure placement are critical. Additionally, mastering resource management and production timing will be key to controlling the game's flow.
The Crimson Meadow (붉은 초원)
스타크래프트: 브루드워의 디펜스 장르 유즈맵인 〈The Crimson Meadow〉는 사막 지형을 배경으로 한 협동형 맵으로, 플레이어는 동맹과 힘을 합쳐 적의 핵심 건물을 파괴하는 목표를 달성해야 한다. 맵은 4명의 플레이어가 각각 분리된 시작 구역에서 출발하며, 각 구역은 좁은 길로 연결되어 동맹 간의 협력이 필수적이다. 중앙 지형은 넓은 평원과 오아시스 형태로 구성되어 있어 시야 확보와 기지 방어가 중요하며, 맵 곳곳에 위치한 특수 건물들은 파괴 시 보너스 자원이나 추가 유닛을 제공하는 것으로 추정된다. 적 진영은 맵 최상단에 위치하며, 방어탑과 병력이 배치되어 있어 신중한 전략과 동맹 간의 실시간 협력이 요구된다. 맵의 디자인상으로는 지형을 활용한 진격로 차단이나 기습 공격이 가능하도록 배치되어 있으며, 특히 오아시스 주변의 좁은 길은 방어의 요충지로 작용할 가능성이 크다. 플레이어는 각자의 시작 구역에서 자원을 채집하거나 유닛을 생산할 수 있으며, 동맹과 협력하여 적의 방어선을 돌파하거나 핵심 건물을 파괴하는 데 집중해야 한다. 맵의 분위기는 사막의 황량한 느낌을 살리면서도 협동과 전략적 플레이를 강조하는 디자인으로 구성되어 있다. 추천 대상은 디펜스와 협동 플레이를 좋아하는 스타크래프트 유저로, 특히 4인 플레이 시 동맹 간의 커뮤니케이션과 역할 분담이 중요하다. 플레이 전에는 맵의 주요 길목과 오아시스 주변의 방어 포인트를 미리 확인하고, 동맹과 협의하여 공격 루트와 방어 전략을 세워두는 것이 좋다. 또한, 특수 건물의 파괴 여부와 보상 효과를 사전에 파악하면 전략적 우위를 점할 수 있을 것이다. The Crimson Meadow is a cooperative defense-style custom map in StarCraft: Brood War, set against a desert backdrop where players must work together to destroy the enemy's special buildings. The map features four players starting in separate zones connected by narrow paths, emphasizing alliance coordination. The central terrain includes wide plains and oases, which likely serve as critical points for vision control and base defense. Special buildings scattered across the map presumably offer bonuses like resources or additional units upon destruction. The enemy base is located at the top of the map, fortified with defensive towers and units, requiring careful strategy and real-time teamwork. The map's design allows for terrain-based blocking or ambush tactics, with narrow paths around oases acting as chokepoints. Players can gather resources or produce units in their starting zones, collaborating to break through enemy defenses or target core structures. The atmosphere blends the barren feel of a desert with a focus on cooperation and strategic play. This map is ideal for players who enjoy defense mechanics and teamwork, especially in 4-player matches where communication and role allocation are key. Before playing, it’s wise to scout major routes and oasis chokepoints, establish attack and defense plans with allies, and understand the rewards tied to destroying special buildings for a strategic edge.
맵 선택 가이드
태그는 맵의 핵심 특징을 빠르게 설명하지만 제작 버전마다 규칙이 다를 수 있습니다. 상세 설명에서 권장 인원, 난이도, 플레이 시간과 버전을 함께 확인한 뒤 다운로드하세요.