
4인 멀티 스타크래프트 맵 모음
'4인 멀티' 태그가 등록된 맵을 모았습니다. 장르 하나로 찾기 어려운 플레이 방식, 난이도와 특징을 중심으로 인기 맵과 최신 맵을 비교해 보세요.
- 등록 맵
- 11개
- 누적 다운로드
- 0
- 누적 조회
- 443
인기 맵
다운로드와 조회 반응이 높은 맵입니다.
드래곤 오브 레전드 1.6v (Dragon of Legend 1.6v)
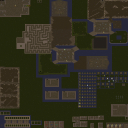
《드래곤 오브 레전드 1.6v》는 스타크래프트: 브루드워의 유즈맵으로, 전설의 용을 둘러싼 전략적 전투와Resource Management를 중심으로 설계된 디펜스 장르의 정석에 가까운 작품이다. 맵은 사막 테마의 넓은 평야와 고저차가 있는 지형을 활용하여 플레이어에게 전략적 깊이를 제공하며, 4명의 플레이어가 협력하거나 경쟁하며 진행된다. 맵 중앙에는 거대한 드래곤이 등장하며, 이는 맵의 핵심 목표로 추정된다. 플레이어는Resource를 확보하고, 방어선을 구축하며, 드래곤의 공격을 방어하거나 이를 활용하여 상대방을 압박하는 방식으로 진행할 수 있는 것으로 보인다. 맵의 구조는 용의 등장 시점과 진행 방식에 따라 크게 변화하는 방식으로, 전략적 선택과 타이밍이 게임의 승패를 좌우할 가능성이 크다. 또한, 맵의 히든 요소가 존재한다는 설명으로 미루어 볼 때, 숨겨진 미션이나 보너스 목표가 포함되어 있어 재플레이성을 높일 수 있는 설계가 적용되었을 것으로 추정된다. 밸런스 수정이 여러 차례 진행되었다는 점은 제작자의 노력이 반영된 결과물임을 시사하며, 특히 '피쉬'와 'Kai_oR'가 수정에 관여했다는 점은 커뮤니티 내에서의 피드백을 적극 반영했다는 증거로 보인다. 이 맵은Resource 관리와 방어 전략에 중점을 둔 만큼,Resource 확보의 중요성을 이해하고, 효율적인 방어선을 구축하는 데 중점을 둔 플레이어에게 적합한 작품이다. 또한, 4인 멀티 플레이를 전제로 설계되었으므로, 팀워크와 전략적 협력이 요구되는 맵으로, 개인전보다는 팀전 또는 협동 플레이를 선호하는 유저들에게 추천할 만하다. 맵을 플레이하기 전에는Resource 확보 방법, 드래곤의 등장 타이밍, 그리고 방어선의 중요성을 숙지하고,Resource 확보와 방어 전략을 균형 있게 운영할 수 있는 준비를 갖추는 것이 중요하다. 특히,Resource가 부족한 초기 단계에서Resource 확보를 소홀히 하면, 이후 드래곤의 공격이나 상대방의 압박에 대응하기 어려워질 수 있으므로,Resource 확보의 우선순위를 높게 두는 것이 좋다. 《Dragon of Legend 1.6v》 is a custom map for *StarCraft: Brood War*, designed as a quintessential defense genre title centered around strategic battles and resource management revolving around legendary dragons. The map leverages a vast desert-themed plain with varied terrain to offer players strategic depth, where four players either cooperate or compete. A massive dragon appears at the center of the map, serving as the core objective. Players secure resources, build defensive lines, and either defend against the dragon's attacks or use it to pressure opponents. The map's structure dynamically changes based on the dragon's appearance and progression, making strategic choices and timing crucial to victory. Given the mention of hidden elements, it likely includes secret missions or bonus objectives to enhance replayability. The multiple balance adjustments suggest the creator's dedication, with contributions from 'Fish' and 'Kai_oR' indicating active community feedback integration. Tailored for players who emphasize resource management and defense strategies, this map is best suited for those who prioritize efficient resource gathering and solid defensive setups. Designed for four-player multiplayer, it demands teamwork and strategic coordination, making it ideal for users who prefer team or cooperative play over solo matches. Before playing, it's essential to understand resource acquisition methods, the dragon's appearance timing, and the importance of defensive lines, ensuring a balanced approach to resource management and defense. Neglecting resource gathering in the early stages can leave players vulnerable to the dragon's attacks or enemy pressure, so prioritizing resource acquisition is key.
그린 에이커스 (Green Acres)
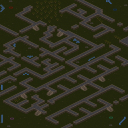
스타크래프트: 브루드워의 유즈맵으로 추정되는 이 맵은 내부 설명에도 나타나듯이 적 건물 파괴를 목표로 삼는 전형적인 '디펜스' 장르의 맵으로 보인다. 맵 이름은 'Green Acres.scm'이지만 내부 메타데이터와 사이트 제목은 'Untitled Scenario'로 기재되어 있어 혼란을 주는데, 이는 파일명과 맵 제목 간의 불일치로 인해 발생한 것으로 추정된다. 맵의 전체적인 배경은 사막 타일셋을 기반으로 하며, 4096x4096의 넓은 맵 크기와 128x128의 타일 단위는 대규모 전투와 건물 배치에 최적화된 환경을 제공한다. 맵의 구조는 중앙에 넓은 평원과 주변에 건물 배치 공간이 있는 형태로, 플레이어 간의 초반 전투와 자원 확보를 위한 움직임이 중요할 것으로 보인다. 디펜스 장르답게 적 건물 파괴가 승리 조건으로 보이며, 플레이어는 초반 자원 확보와 병력 구성을 통해 상대방을 압박하거나 방어선을 구축해야 한다. 맵의 넓은 공간 덕분에 기동성과 전략적 요소가 강조될 가능성이 높으며, 특히 초반 멀티 확보와 확장 전략이 승패를 좌우할 것으로 예상된다. 다만, 내부 설명이 간단하고 맵의 구체적인 밸런스나 트리거가 명시되어 있지 않아, 실제 게임 진행 시 균형 잡힌 공방전이 가능한지에 대해서는 확인할 수 없다. 이 맵은 스타크래프트 브루드워의 유즈맵으로서, 밀리 기반의 전투보다는 디펜스 또는 컴까기 형태로 플레이될 가능성이 높다. 따라서 밀리 장르로 분류되어 있지만, 실제로는 디펜스 또는 컴까기 장르에 가깝다는 점을 고려해야 한다. 초보 플레이어보다는 중급 이상의 플레이어에게 적합할 것으로 보이며, 넓은 맵과 전략적 요소로 인해 플레이 시간은 30분에서 45분 정도 소요될 것으로 추정된다. 플레이 전 미리 확인해야 할 요소는 초기 자원 분배와 멀티 확보 전략, 그리고 상대방과의 초반 전투 배치이다. 또한, 맵의 넓은 공간을 활용한 기습 공격이나 방어선 구축이 승패를 가를 수 있으므로, 맵의 지형을 충분히 숙지하는 것이 중요하다. This map appears to be a *StarCraft: Brood War* custom map, likely falling under the "defense" genre where the objective is to destroy enemy buildings. While its filename is *Green Acres.scm*, the internal metadata and site title are listed as *Untitled Scenario*, creating confusion due to the mismatch between the file name and map title. The map is set in a desert tileset, spanning a large 4096x4096 area with 128x128 tile units, making it well-suited for large-scale battles and strategic building placement. Its layout features a wide central plain surrounded by designated areas for building construction, emphasizing early-game combat and resource management. As a defense-focused map, victory is likely achieved by destroying enemy structures, requiring players to secure early resources, build forces, and either pressure opponents or establish defensive lines. The expansive space suggests a strong emphasis on mobility and strategy, with early multi-base expansion and expansion tactics potentially determining the outcome. However, the lack of detailed internal descriptions, balance notes, or trigger information makes it unclear whether the map offers a well-balanced offensive-defensive experience in actual gameplay. While classified under the *StarCraft: Brood War* custom maps, it leans more toward defense or tower-rush mechanics rather than standard melee combat. Thus, it may be more suited for intermediate to advanced players rather than beginners. Due to its large scale and strategic depth, matches are expected to last between 30 to 45 minutes. Before playing, key considerations include initial resource distribution, multi-base expansion strategies, and early combat positioning. Additionally, leveraging the map’s vast space for ambushes or defensive setups could be decisive, so thoroughly understanding the terrain is essential.
고르키 파크 (Gorky Park)
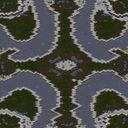
‘고르키 파크(Gorky Park)’는 스타크래프트 브루드워의 공식 대회 맵으로도 활용된 4인용 밀리 맵이다. 중앙에 위치한 넓은 평야와 양쪽 언덕으로 나뉜 테란과 프로토스, 저그의 본진 구조는 classic한 밸런스를 자랑하며, 테란의 경우 지형을 활용한 벙커링이나 사이언스 베슬의 디펜시브 매트릭스 활용이 중요해진다. 프로토스의 경우 초반 광전사 러시나 아둔의 창을 통한 아비터 활용이 승패를 가를 수 있으며, 반대로 저그의 경우 초반 러커 활용이나 뮤탈리스크 컨트롤로 상대의 건물을 견제하는 전략이 유효하다. 맵의 주요 특징은 중앙의 ‘공원’ 지역으로, 넓은 개활지와 언덕 지형이 맞물려 다양한 전술적 선택지를 제공한다는 점이다. 또한, 각 진영의 본진 입구와 미네랄 멀티 사이에는 언덕 지형이 많기 때문에, 시야 싸움과 드랍 플레이가 빈번히 발생한다. 초보자들은 본진 방어와 멀티 확보에 치중하겠지만, 숙련자들은 중앙 교전이나 상대 본진 후방 교란을 시도할 수 있는 구조다. 맵의szer 초반 러시 타이밍과 멀티 타이밍을 정확히 계산하는 능력이 중요하며, 특히 테란의 경우 포토캐논이나 시즈 탱크 배치로 언덕을 장악하는 플레이가 승률을 높이는 핵심 포인트다. 프로토스의 경우 아둔의 창을 통한 아비터 활용이나, 저그의 경우 뮤탈리스크와 러커의 조합을 통한 압박이 관건이다. 이 맵은 classic한 밸런스와 더불어 다양한 전략적 선택지를 제공하기 때문에, 스타크래프트 밀리 유저라면 한 번쯤 플레이해볼 만한 가치가 있는 맵으로 평가된다. 특히, 대회나 래더에서만큼은 아니지만, 친선전이나 연습용으로도 충분히 활용할 수 있는Classic한 구조를 갖추고 있다. ‘Gorky Park’ is a four-player melee map from *StarCraft: Brood War* that has also been used in official tournament play. The classic balanced design features a wide central plain flanked by hills, with the Terran, Protoss, and Zerg starting bases separated by terrain. For Terran players, controlling key positions with bunkers or using Science Vessels’ Defensive Matrix becomes crucial, while Protoss can swing the game with early Zealot rushes or strategic Arbiter play via the Dark Templar. Zerg, in turn, can pressure opponents with early Lurkers or Mutalisk control to disrupt buildings. The map’s defining feature is the central "park" area—a mix of open ground and elevated terrain that opens up diverse tactical options. With numerous elevated zones between main entrances and mineral expansions, vision control and drop plays frequently decide engagements. Beginners may focus on defending their bases and securing expansions, but skilled players can dictate the flow by contesting the center or launching raids on the opponent’s rear. Success hinges on precise timing for early rushes and multi expansions, especially for Terran, where locking down key hills with Siege Tanks or Photon Cannons can swing the tide. Protoss must leverage Arbiters effectively, while Zerg thrives with coordinated Mutalisk-Lurker pressure. Offering both classic balance and a wealth of strategic depth, *Gorky Park* is a map well worth playing for any *StarCraft* melee enthusiast, and its straightforward yet flexible structure makes it ideal for casual matches or practice sessions alike.
스플래터스케이프 (Splatterscape)
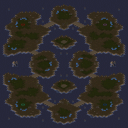
《Splatterscape》는 스타크래프트: 브루드워의 사막 타일셋을 배경으로 한 밀리 맵으로, 섬으로 이루어진 군도 지형을 중심으로 펼쳐지는 대규모 전투가 특징입니다. 맵 중앙의 네 개의 섬을 연결하는 좁은 통로와 넓은 개활지가 균형을 이루며, 각 플레이어는 서로 다른 섬에서 시작해 자원을 확보하고 전투를 펼칩니다. 섬 사이의 다리 역할을 하는 좁은 길목은 치열한 교전과 기습의 장소가 되며, 넓은 바다와 해안가 지역은 기동성과 전략적 선택을 요구합니다. 맵의 구조는 기본적으로 1v1v1v1 또는 2v2v2v2 팀전 구도로도 활용할 수 있지만, 섬 간의 격리된 시작 위치와 중앙 자원 지대의 분포로 인해 개인의 전투력과 판단력이 중요시되는 구조입니다. 사막 타일셋의 황량한 분위기는 맵의 전략적 깊이를 한층 더해주며, 특히 바다와 해안가 지역은 시야 확보와 기동성 측면에서 차별화된 플레이를 유도합니다. 이 맵은 섬 간의 이동이 제한적이기 때문에 초반 자원 확보와 방어선 구축이 승패를 가를 수 있으며, 중앙의 넓은 개활지는 대규모 병력 충돌과 포위 작전의 무대가 됩니다. 또한, 섬의 지형적 특징을 살린 기습과 후방 교란이 victory 조건을 좌우할 가능성이 큽니다. 추천하는 플레이 방식은 각 섬의 시작 지점에서 빠르게 자원을 확보한 뒤, 중앙으로 진출하여 상대방을 압박하거나 방어선을 구축하는 것입니다. 초보자는 섬 간의 이동과 자원 관리에서 어려움을 느낄 수 있지만, 중간 수준의 플레이어는 섬의 지형을 활용한 기동전과 포위 전략으로 재미를 느낄 수 있습니다. 숙련된 플레이어는 섬 간의 이동과 해안가 기습을 통해 상대방을 혼란에 빠뜨릴 수 있는 기회를 노릴 수 있습니다. 플레이 전에는 섬 간의 연결 다리 수를 확인하고, 중앙 자원 지대의 위치와 각 섬의 시작 지점 주변의 방어력을 미리 점검하는 것이 중요합니다. 또한, 바다와 해안가 지역을 적극적으로 활용하여 기동성을 극대화하는 전략을 준비해야 합니다. 맵의 지형적 특징을 충분히 이해하고, 각 섬의 특성과 중앙 자원 지대의 분포를 파악한다면, 《Splatterscape》는 스타크래프트의 밀리 장르에서 전략적이고 재미있는 경험을 제공할 것입니다. 《Splatterscape》 is a *StarCraft: Brood War* melee map set in a desert tile theme, centered around an archipelago of islands where large-scale battles unfold. The map balances narrow pathways connecting four central islands with expansive open areas. Each player starts on a separate island, securing resources and engaging in combat. The narrow bridges between islands serve as hotspots for intense skirmishes and ambushes, while the vast sea and coastal regions demand mobility and strategic decision-making. Though the layout supports 1v1v1v1 or 2v2v2v2 team formats, the isolated starting positions and distribution of central resources emphasize individual skill and tactical judgment. The arid aesthetic of the desert tile set enhances the map’s strategic depth, particularly in the sea and coastal zones, which encourage unique playstyles centered on vision control and movement. With limited mobility between islands, early resource gathering and defensive positioning often determine victory or defeat. The central open areas become arenas for large-scale engagements and encirclement tactics, while the islands’ terrain lends itself to ambushes and rear-area disruption that can sway the outcome. Recommended play revolves around quickly securing resources from each island’s starting point, then pushing toward the center to pressure opponents or fortify defenses. Beginners may struggle with inter-island movement and resource management, but intermediate players can enjoy dynamic maneuvering and encirclement strategies. Advanced players can exploit the islands’ connections and coastal ambush routes to destabilize opponents. Before playing, check the number of connecting bridges between islands and scout the central resource distribution and defensive layouts around starting positions. Leveraging the sea and coastal zones to maximize mobility is key. Fully grasping the map’s terrain, island characteristics, and resource placement ensures 《Splatterscape》 delivers a rich and engaging strategic experience within *StarCraft*’s melee genre.
BWL - The Lost Temple
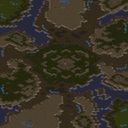
스타크래프트: 브루드워의 공식 래더 맵으로 유명한 ‘BWL - The Lost Temple’는 사막 테마의 넓은 평야와 중앙에 위치한 고대 신전 구조물이 특징적인 유즈맵입니다. 맵의 symmetrical(대칭) 구조는 양측 플레이어가 동일한 조건에서 시작할 수 있도록 설계되어 있으며, 주요 자원 지역인 미네랄 멀티와 가스 멀티가 중앙 신전 주변에 밀집되어 있어Resource Denial(자원 봉쇄)와 Micro Control(미세 컨트롤)이 중요한 전략적 선택지를 제공합니다. 맵의 지형은 비교적 평탄한 편이지만, 신전 내부와 외곽의 좁은 통로, 언덕 지형은 시야 확보와 병력 진형의 변화에 영향을 미치며, 이는 곧 전투의 승패를 가르는 요인으로 작용합니다. 특히, 4인 멀티플레이 환경에서 각 플레이어는 초기 본진과 멀티 지역을 확보하는 동시에 중앙 신전에서 벌어지는 전투에서 우위를 점하기 위해 끊임없이 자원 관리와 병력 구성을 고려해야 합니다. 이 맵은 초보자부터 숙련자까지 폭넓은 플레이어들에게 즐길 수 있도록 밸런스가 잘 잡혀 있으며, 특히 중앙 신전 주변의 좁은 길목에서 벌어지는 소규모 전투는 브루드워의 기본 메카닉인 컨트롤 능력을 자연스럽게 연습할 수 있는 기회를 제공합니다. 또한, symmetrical 구조 덕분에 양측의 실력이 비슷할 경우 긴장감 있는 접전으로 이어질 가능성이 높아, 경쟁심을 자극하는 요소로 작용합니다. 맵을 플레이하기 전에는 중앙 자원의 확보 가능성, 언덕 지형의 시야 장악력, 그리고 멀티 지역으로의 진출 타이밍을 신중히 판단해야 하며, 이는 곧 승리 가능성을 크게 좌우할 수 있습니다. 이 맵은 브루드워의 기본기를 다지기에 최적의 맵으로, 특히 팀플레이보다는 1vs1 또는 4인 자유 플레이에서 그 진가를 발휘합니다. BWL - The Lost Temple is a well-known official ladder map from StarCraft: Brood War, featuring a desert-themed wide plain and an ancient temple structure at the center. The map's symmetrical design ensures both players start under identical conditions, with major resource areas like mineral patches and gas geysers clustered around the central temple, creating strategic choices around resource denial and micro management. The terrain is relatively flat but includes narrow passages and elevated areas, influencing vision control and troop positioning, which often determine the outcome of battles. In a 4-player multiplayer setting, each player must secure their starting base and expansion while considering how to gain an advantage in the central temple battles through resource management and army composition. Designed for a broad range of players from beginners to experts, the map offers well-balanced gameplay, especially in small-scale skirmishes around the temple’s narrow paths, which naturally reinforce Brood War’s fundamental mechanics like unit control. The symmetrical layout also fosters tense, close matches when both sides are evenly matched, making it a great choice for competitive play. Before playing, it's crucial to assess the accessibility of central resources, the control of vision on elevated terrain, and the timing for expanding to multi bases, as these decisions significantly impact the chances of victory. This map is ideal for honing Brood War basics, particularly excelling in 1v1 or 4-player free-for-all modes rather than team play.
Misplaced Defense X v2.3 (미스플레이스드 디펜스 X v2.3)
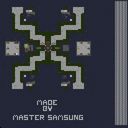
‘Misplaced Defense X v2.3’는 스타크래프트 브루드워의 classic 디펜스 장르 유즈맵으로, 플레이어는 선택한 영웅을 육성하고 적의 웨이브를 막아내며 생존을 도모하는 구조를 갖추고 있다. 맵 중앙에 위치한 방어 지점을 지키며, 각 웨이브마다 쏟아지는 적 유닛을 상대로 영웅의 스킬과 아이템, 업그레이드를 활용해 전략을 펼쳐야 한다. 영웅의 능력치를 강화하거나 아이템을 구매할 수 있는 시스템이 있어, 플레이어는 게임을 진행하면서 자신의 스타일을 맞추며 효율적인 방어 전략을 구축할 수 있다. 다양한 난이도 선택이 가능하다는 점에서 초보부터 숙련자까지 폭넓은 플레이어층을 아우르며, 특히 영웅의 육성과 아이템 구매가 게임의 핵심을 차지하기 때문에 반복 플레이를 통한 최적화와 전술적인 선택이 중요하다. 맵은 4인 동시 플레이가 가능하며, 팀 플레이보다는 개인의 전략과 판단력이 승패를 좌우하는 구조로 보인다. 적의 웨이브가 점점 강해지는 progressive한 진행 방식이 특징으로, 초반에는 비교적 수월하게 느껴지지만 후반으로 갈수록 난이도가 급상승해 긴장감을 높인다. 플레이 전에는 영웅의 스킬과 아이템 시스템을 충분히 숙지하는 것이 중요하며, 특히 영웅의 업그레이드와 아이템 조합에 따라 방어 성공률이 크게 달라질 수 있다. 또한, 웨이브 간 텀을 활용해 아이템을 구매하거나 영웅을 업그레이드할 시간을 확보하는 것이 관건이다. 맵의 구조는 비교적 단순하지만, 영웅의 육성과 아이템 시스템이 얽혀 있어 전략적인 깊이가 느껴진다. 추천 대상은 디펜스 장르를 люби하는 플레이어뿐만 아니라, 영웅 육성과 아이템 시스템을 좋아하는 유저들에게도 suitable할 것이다. 다만, 난이도 선택이 있음에도 불구하고 후반 웨이브의 난이도가 높아질 수 있어, 초보자의 경우 난이도 설정을 신중히 해야 한다. ‘Misplaced Defense X v2.3’ is a classic defense genre custom map in StarCraft: Brood War, where players train their chosen hero and survive by defending against enemy waves. The core gameplay involves protecting a defense point located at the center of the map, using the hero’s skills, items, and upgrades to strategize against each incoming wave of enemy units. Players can strengthen their hero’s stats or purchase items, allowing them to tailor their playstyle and build effective defense strategies as the game progresses. The map accommodates a wide range of players, from beginners to experts, thanks to its adjustable difficulty settings. Since hero training and item purchases are central to the game, optimizing builds and making tactical choices through repeated play are key to success. The map supports four players simultaneously, with victory or defeat determined more by individual strategy and judgment than teamwork. A progressive difficulty system gradually intensifies the enemy waves, making the early stages feel manageable while sharply increasing the challenge in later waves, raising the tension. Before playing, it’s important to fully understand the hero’s skill and item systems, as the choices in upgrades and item combinations can significantly impact defense success. Managing the downtime between waves to buy items or upgrade the hero is also crucial. While the map’s structure is relatively simple, the intertwined systems of hero training and item management add strategic depth. It’s recommended not only for fans of the defense genre but also for players who enjoy hero progression and item systems. However, even with difficulty options, the later waves can become extremely challenging, so beginners should carefully select their difficulty settings.
메이즈 스파이럴 디펜스 2 (Maze Spiral Defense 2)
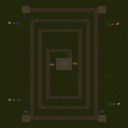
스타크래프트 브루드워의 유즈맵 ‘메이즈 스파이럴 디펜스 2’는 디펜스 장르의 맵으로, 맵의 중앙에 위치한 나선형 미로를 중심으로 적의 공격을 방어하는 것이 주요 목표다. 맵은 4096x4096 크기의 사막 타일셋으로 구성되어 있으며, 플레이어는 4인으로 구성된 팀을 이루어 각자 지정된 구역에서 자원을 확보하고 건물을 건설해 적의 웨이브를 막아내야 한다. 맵의 중앙에 위치한 나선형 구조는 적의 이동 경로를 복잡하게 만들어 방어선을 구축하기 용이하도록 설계되어 있으며, 각 플레이어의 구역은 명확히 구분되어 있어 자원 관리와 건물 배치 전략이 중요하다. 내부 맵 설명에서도 언급된 것처럼, ‘다른 구역에 침범하지 말고 업그레이드를 통해 yourself를 유지하라’는 메시지가 플레이어들에게 개별 구역 내에서의 플레이를 강조하고 있다. 맵의 분위기는 사막 환경답게 건조하고 열악한 느낌을 주며, 이는 방어전에 집중력을 높이는 데 도움을 준다. 방어전을 중심으로 한 전략적 플레이가 필요한 이 맵은, 특히 디펜스 장르를 좋아하는 플레이어들에게 적합하며, 맵의 복잡한 구조와 제한된 자원 속에서 어떻게 효율적으로 방어선을 구축하는지가 핵심 포인트다. 플레이 전에는 각 구역의 자원 분배와 건물 배치, 그리고 업그레이드 우선순위를 미리 계획해두는 것이 승리의 열쇠가 될 것이다. 또한, 맵의 나선형 구조상 중앙을 장악하는 것이 상대방의 공격을 효과적으로 저지할 수 있는 열쇠가 되므로, 중앙 지역을 둘러싼 방어 시설의 배치에 신경을 써야 한다. 사막 타일셋의 특성상 시야가 제한되는 경우가 많아, 시야 확보를 위한 건물이나 유닛의 활용도 전략적으로 고려해야 한다. StarCraft: Brood War’s custom map *Maze Spiral Defense 2* is a defense-oriented map where the core objective is to defend against enemy waves centered around a spiral maze located in the middle of the map. The 4096x4096 desert-themed tileset challenges players to gather resources, construct buildings, and hold off enemy assaults in teams of four, each assigned to a distinct sector. The spiral structure in the center is designed to force enemies into convoluted paths, making it easier to establish defensive lines, while each player’s zone is clearly demarcated, emphasizing the importance of resource management and strategic building placement. As highlighted in the in-game description, the map reinforces the rule: *“Don’t trespass into other zones—maintain your strength through upgrades,”* urging players to focus on their individual sectors. The arid, harsh desert atmosphere enhances concentration during the defense-focused gameplay. Given its heavy emphasis on strategic defense, this map is ideal for players who enjoy the genre, where the challenge lies in efficiently fortifying defenses within the maze’s complexity and limited resources. Success hinges on pre-planning resource distribution, building layouts, and upgrade priorities before engaging. Given the spiral structure, controlling the central area is crucial for effectively blocking enemy advances, so careful placement of defensive structures around the core is essential. The desert tileset’s limited visibility also means players must strategically use buildings or units to secure vision, adding another layer of tactical depth.
크로스파이어 (Crossfire)
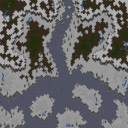
《크로스파이어》는 스타크래프트 브루드워의 클래식 밀리 맵으로, 4인용 대칭형 전투 공간을 제공하는 입구막기 장르의 대표작 중 하나다. 미니맵 상단과 좌측, 우측에 각각 1시, 7시, 11시 방향에 위치한 플레이어 기지들은 좁은 입구와 다수의 언덕, 뒷마당으로 구성되어 있어 초보자와 숙련자 모두에게 전략적 깊이를 요구한다. 맵 중앙에는 거대한 산책로가 있으며, 양측 기지에서 발사되는 레이저나 포격은 맵 전체를 아우르는 교전 지역을 형성한다. 특히 맵 좌측과 우측에 배치된 커다란 바위 구조물은 시야 차단과 지형 전략을 제공하며, 중앙 언덕은 전면전과 기습 타이밍을 조율할 수 있는 핵심 포인트로 작용한다. 전투는 주로 기지 입구와 중앙 언덕을 중심으로 벌어지며, stray weapon fire(빗나간 무기 공격)가 맵 전체에 영향을 미치므로 미묘한 위치 선정과 타이밍이 승패를 가른다. 맵의 대칭 구조는 공정한 경쟁을 보장하지만, 입구막기 요소와 중앙 자원 분포가 균형을 맞추도록 설계되어 있어 공방전이나 래더에서 자주 활용된다. 초보자는 좁은 입구와 언덕 지형을 활용한 수비 전략에 익숙해지는 것이 중요하며, 숙련자는 중앙 언덕이나 후방 기습을 통한 심리전을 구사할 수 있다. 맵의 인기 비결은 단순하면서도 깊은 전략성, 그리고 스타크래프트의 클래식한 전투감각을 유지한다는 점에서 찾을 수 있다. 플레이 전에는 기지 입구의 언덕 배치와 중앙 자원 분포를 숙지하고, stray weapon fire의 위험성을 항상 염두에 두어야 한다. 특히 2인 플레이 모드에서는 Allied Play 설정을 통해 팀전을 즐길 수 있으며, 4인 플레이와는 또 다른 전략적 변수를 제공한다. Crossfire is a classic StarCraft: Brood War melee map renowned for its 4-player symmetrical battlefield designed for entrance-blocking gameplay. The player bases are positioned at 1, 7, and 11 o’clock, each featuring tight entrances, elevated terrain, and backyards that demand tactical depth from both beginners and veterans. The map’s central promenade connects the bases, while stray weapon fire from long-range attacks—whether lasers or artillery—creates a dynamic engagement zone across the entire battlefield. The large rock formations on the left and right sides serve as key vantage points for vision control and ambush tactics, while the central hill acts as a critical timing and positioning hub for both frontal assaults and flanking maneuvers. Combat primarily revolves around base entrances and the central hill, with the stray weapon fire mechanic adding an unpredictable layer that influences unit positioning and timing. The symmetrical layout ensures balanced competition, while the distribution of resources around the central area maintains strategic depth in both public and ladder matches. Beginners should focus on mastering defensive strategies using the tight entrances and elevated terrain, while advanced players can leverage the central hill and rear approaches for psychological warfare. The map’s enduring appeal lies in its blend of simplicity and tactical complexity, preserving the quintessential StarCraft combat experience. Before playing, familiarize yourself with the hill placements near the entrances and the central resource distribution. In 2-player mode, the Allied Play setting allows for team-based strategies, offering a different dynamic compared to the standard 4-player experience.
불가능 흙 (Impossible Dirt v2)
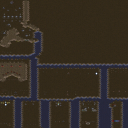
《Impossible Dirt v2》는 스타크래프트: 브루드워 유즈맵으로, دش가치 4명의 플레이어가 함께 도전하는 디펜스 장르의 맵이다. 황무지 테마의 황량한 지형 위에 흙먼지가 끊임없이 침투해오는 것을 막아내는 것이 핵심 목표로 보인다. 맵 중앙에 위치한 주요 방어 지점을 중심으로 적의 공격로를 차단하거나, 보조 건물을 건설하여 방어선을 구축해야 한다. 흙먼지가 점차 밀려오는 방식이므로, 초반에 빠르게 방어 시설을 구축하지 않으면 점차 압박이 심해지는 구조로 추정된다. 흙먼지가 맵 가장자리로부터 서서히 퍼져나오는 연출이 인상적이며, 방어에 실패할 경우 맵이 점차 황폐해지는 듯한 시각적 변화를 기대할 수 있을 듯하다. 플레이 방식은 건물을 짓고 유닛을 생산하여 방어선을 구축하는 전통적인 디펜스와 유사하지만, 흙먼지가 지속적으로 확산되는 특수 조건으로 인해 방어 전략의 유연성이 요구된다. 흙먼지가 침투하는 속도나 패턴이 일정하지 않다면, 실시간으로 대처해야 하는 상황도 발생할 수 있어 게임의 긴장감을 높이는 요소로 작용할 것으로 보인다. 또한, 흙먼지가 맵 여기저기로 퍼지면서 방어 포인트가 여러 곳으로 분산될 가능성도 있어, 다중 방어선 구축이 필요할 수 있다. 이 맵은 초보자보다는 어느 정도 스타크래프트 경험이 있는 플레이어에게 적합할 것으로 예상된다. 특히 디펜스 장르에 익숙하지 않다면, 흙먼지의 확산 패턴을 파악하고 방어 시설을 효율적으로 배치하는 데 어려움을 느낄 수 있을 것이다. 반면, 디펜스 장르를 즐기는 유저라면 새로운 변수를 제공하는 흙먼지 시스템에 흥미를 느낄 가능성이 크다. 맵의 난이도는 제작자의 의도대로 ‘불가능’이라는 이름에 걸맞게 어려울 가능성이 높으므로, 충분한 연습을 거친 후 도전하는 것이 바람직하다. 흙먼지의 확산 속도를 조절할 수 있는 설정이나, 방어에 성공했을 때의 보상 시스템이 있다면 더 흥미로운 플레이가 가능했을 텐데 아쉬운 점으로 남는다. 이 맵을 플레이하기 전에는 흙먼지의 확산 패턴을 미리 확인하고, 방어에 필요한 자원과 유닛의 생산량을 꼼꼼히 계획하는 것이 중요하다. 또한, 흙먼지가 침투하는 주요 경로를 사전에 예측하여 방어 시설을 배치한다면, 보다 안정적으로 게임을 진행할 수 있을 것이다. 흙먼지가 맵 여기저기로 퍼지는 특성상, 너무 한 곳에 집중하지 말고 전방위적인 대비를 갖추는 것이 성공의 열쇠가 될 가능성이 높다. 흙먼지가 점차 맵을 뒤덮는 시각적 변화도 게임의 몰입감을 높이는 요소이므로, 이를 즐기며 플레이한다면 더 풍부한 경험을 얻을 수 있을 것이다. 《Impossible Dirt v2》 is a *StarCraft: Brood War* custom map where four players team up to tackle a defense-style challenge. The core objective appears to be preventing dust from continuously seeping into the desolate terrain centered around a key defensive point. Players must block enemy pathways by constructing buildings and reinforcing defenses, as the encroaching dust gradually intensifies pressure if early fortifications aren’t established. The visual effect of dust slowly spreading from the map’s edges is striking, and failing to defend would likely result in the map appearing increasingly barren over time. While the gameplay resembles traditional defense maps—where players build structures and produce units to hold the line—the ever-expanding dust adds a unique twist, demanding flexible strategies. If the dust spreads at inconsistent speeds or follows unpredictable patterns, players may need to adapt in real time, heightening the game’s tension. Additionally, as dust infiltrates various areas, defense points could scatter, requiring multiple lines of reinforcement. This map seems better suited for players with some *StarCraft* experience rather than beginners. Those unfamiliar with defense genres might struggle to grasp the dust’s spread patterns or optimize defensive structures efficiently. However, fans of defense maps would likely find the dust system’s variables intriguing. Given the map’s difficulty—aptly reflected in its name—it’s advisable to practice thoroughly before attempting a run. It’s a shame the dust’s spread speed isn’t adjustable or that there’s no reward system for successful defenses, as those features could have added more depth. Before playing, it’s crucial to study the dust’s spread patterns and meticulously plan resource allocation and unit production. Predicting the dust’s primary entry points and strategically placing defenses can lead to smoother gameplay. Since the dust permeates the entire map, avoiding over-concentration in one area and preparing for all directions will likely be key to success. The gradual visual transformation as dust overtakes the terrain also enhances immersion, so embracing those changes could enrich the overall experience.
늪지 전투 (Swamp Bath)
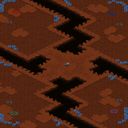
스타크래프트 브루드워의 숨은 보석 유즈맵으로 꼽히는 〈Swamp Bath〉는 초보자와 숙련자 모두 즐길 수 있는 밀리 계열 맵이다. 맵 이름은 ‘늪지 목욕’이란 뜻으로, 맵 전체가 어두운 녹색과 회색 톤의 늪지대 테마로 구성되어 있어 시각적 몰입감을 높인다. 내부 맵 설명에도 ‘늪지 한 전투’라는 표현이 등장하는데, 이는 맵의 분위기와 플레이 스타일을 잘 반영하고 있다. 1024x1024 크기의 정사각형 맵에서 4인의 플레이어가 경쟁을 펼치게 되며, 황혼 타일셋을 활용한 어두운 분위기의 늪지대 지형이 플레이어의 전략적 선택을 유도한다. 맵의 구조는 중앙의 넓은 늪지를 중심으로 각 플레이어의 기지가 배치되어 있으며, 좁은 길목과 교량을 통해 상대방 기지로 접근할 수 있도록 설계되어 있다. 이러한 지형적 특징은—前과 후방의 균형을 맞추는 운영 능력을 요구하며, 초보자에게는 길 찾기부터 전략 수립까지 여러 난관을 제공한다. 맵의 이름은 다소 독특할 수 있지만, 맵의 분위기와 플레이 스타일을 고려할 때 ‘늪지 전투’라는 한글화된 이름이 자연스럽다. 4인 멀티플레이를 기반으로 한 이 맵은 밀리 계열의 기본적인 규칙을 따르지만, 늪지대 특유의 장애물과 좁은 통로가 전술을 복잡하게 만들고, 시야가 제한된 늪지대에서Resource gathering과 전투가 동시에 이뤄져야 하므로Resource management와 micro control 능력이 중요하다. 초보자는 각 진영의 기본 유닛 조합과 맵의 지형적 특징을 숙지한 후 플레이하는 것이 좋으며, 숙련자는Resource location과 진영별 특성을 활용한 다각적인 전략을 구사할 수 있다. 맵의 난이도는 별도로 명시되지 않았지만, 4인 멀티플레이 특성과 늪지대라는 특수한 환경 때문에 초보자가 처음 플레이한다면 다소 어려운 느낌을 받을 수 있다. 또한, 맵의 어두운 색상과 복잡한 지형 때문에 시야 확보가 중요하므로, minimap 사용과 빠른 유닛 컨트롤이 필수적이다. 〈Swamp Bath〉는 단순히Resource gathering과 전투를 반복하는 밀리 맵이 아니라, 늪지대라는 독특한 환경에서Resource management와 micro control 능력을 시험하는 맵으로 평가할 수 있다. 4인 플레이를 전제로 한 이 맵은 친구들과의 친선전이나 온라인 멀티플레이에서 인기 있는 유즈맵 중 하나로, 균형 잡힌 맵 디자인과 독특한 분위기가 매력 포인트다. 특히Resource gathering과 전투가 동시에 이뤄지는 늪지대 특성상,Resource location을 둘러싼 초반 전투가 승패를 가르는 경우가 많으므로Resource gathering을 효율적으로 수행하는 것이 중요하다. 초보자는Resource gathering에만 집중하지 말고,Resource gathering과Resource gathering을 병행하는 방법을 익히는 것이 좋다. 또한,Resource gathering을 위해Resource gathering을 수행하는 동안Resource gathering을 확보하는 전략도 고려해볼 만하다. 이러한 점들을 고려할 때, 〈Swamp Bath〉는Resource gathering과Resource gathering의 균형을 맞추는 전략적 사고를 요구하는 맵으로,Resource gathering과Resource gathering에 능숙한 플레이어라면 더욱 재미있게 즐길 수 있을 것이다.
스타크래프트 배틀 ABTN (StarCraft Battle ABTN)
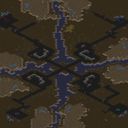
스타크래프트 브루드워의 유즈맵인 <StarCraft Battle ABTN>은 4인 멀티플레이에 최적화된 밀리 기반 맵으로, ‘A Bridge Too Near’라는 이름에서 알 수 있듯이 좁은 다리 형태의 좁은 길목을 중심으로 전투가 벌어지는 구조가 특징이다. 맵 중앙에 위치한 다리 지형은 좁고 복잡한 경로를 제공하여 전면전을 펼치기보다는 치밀한 컨트롤과 위치 선점이 승패를 좌우할 가능성이 높다. 황무지 타일셋을 기반으로 한 어두운 분위기의 맵은 시야를 제한하는 요소로 작용할 수 있어, 조명과 시야 관리 능력이 중요한 포인트가 될 것으로 보인다. 특히 ‘Unbeated Players Intelligence’가Rebuild한 이 맵은 기존의 ‘A Bridge Too Near’ 맵을 재구축했다는 설명에서 알 수 있듯이, 좁은 공간에서의 전략적 전투와 맵 장악력을 강화하는 방향으로 디자인되었을 가능성이 크다. 플레이어는 좁은 통로를 활용해 적군에게서 우위를 점하거나, 반대로 넓은 지역에서 화력을 집중하는 전술을 활용할 수 있을 것이다. 초보자보다는 중급 이상의 플레이어에게 적합한 맵으로, 맵의 복잡한 지형과 좁은 길목을 활용한 치고 빠지는 플레이가 주요 전략 포인트가 될 것이다. 또한, 맵 특성상 테란의 벙커링이나 프로토스의 광자포 방어 등 방어형 빌드도 유효할 것으로 보이며, 다리 중앙에서의 소규모 교전과 후방에서의 기습 공격이 승부를 가를 가능성이 높다. 맵의 균형과 밸런스는 재구축 과정에서 개선되었을 가능성이 있지만, 좁은 길목의 특징상 특정 종족이나 유닛 조합에 대한 우위가 발생할 수 있어 다양한 전략과 빌드를 시도해 보는 것이 좋다. 특히, 좁은 길목을 활용한 ‘입구막기’ 전술이나, 후방에서 생산된 유닛을 활용한 역습 전략이 주요 공략 포인트가 될 것이다. StarCraft Battle ABTN is a custom multiplayer map for StarCraft: Brood War, designed for 4 players and based on the Melee genre. The map's central feature is a narrow bridge ('A Bridge Too Near'), which forces intense battles in cramped spaces rather than open-field combat. Built on a Wasteland tileset, the dimly lit terrain may restrict visibility, adding an extra layer of strategy around vision and positioning. Rebuilt by Unbeated Players Intelligence (UPI), this version of the map likely refines the original design to enhance strategic depth in narrow corridors. Players will need to leverage the terrain, using choke points to gain advantages or launching ambushes from wider areas. The map is better suited for intermediate to advanced players due to its complex layout and reliance on precise unit control. Terran bunkers, Protoss photon cannons, and Zerg zergling rushes are viable strategies here, while small-scale skirmishes on the bridge and surprise attacks from the rear could decide the game. Although the rebuild likely improved balance, certain unit compositions or races might still hold advantages, so experimenting with different strategies is recommended. Key tactics include 'choke-point blocking' and launching counterattacks from behind the main battle lines.
최근 등록된 맵
새로 추가된 파일과 버전을 확인하세요.
스타크래프트 배틀 ABTN (StarCraft Battle ABTN)
스타크래프트 브루드워의 유즈맵인 <StarCraft Battle ABTN>은 4인 멀티플레이에 최적화된 밀리 기반 맵으로, ‘A Bridge Too Near’라는 이름에서 알 수 있듯이 좁은 다리 형태의 좁은 길목을 중심으로 전투가 벌어지는 구조가 특징이다. 맵 중앙에 위치한 다리 지형은 좁고 복잡한 경로를 제공하여 전면전을 펼치기보다는 치밀한 컨트롤과 위치 선점이 승패를 좌우할 가능성이 높다. 황무지 타일셋을 기반으로 한 어두운 분위기의 맵은 시야를 제한하는 요소로 작용할 수 있어, 조명과 시야 관리 능력이 중요한 포인트가 될 것으로 보인다. 특히 ‘Unbeated Players Intelligence’가Rebuild한 이 맵은 기존의 ‘A Bridge Too Near’ 맵을 재구축했다는 설명에서 알 수 있듯이, 좁은 공간에서의 전략적 전투와 맵 장악력을 강화하는 방향으로 디자인되었을 가능성이 크다. 플레이어는 좁은 통로를 활용해 적군에게서 우위를 점하거나, 반대로 넓은 지역에서 화력을 집중하는 전술을 활용할 수 있을 것이다. 초보자보다는 중급 이상의 플레이어에게 적합한 맵으로, 맵의 복잡한 지형과 좁은 길목을 활용한 치고 빠지는 플레이가 주요 전략 포인트가 될 것이다. 또한, 맵 특성상 테란의 벙커링이나 프로토스의 광자포 방어 등 방어형 빌드도 유효할 것으로 보이며, 다리 중앙에서의 소규모 교전과 후방에서의 기습 공격이 승부를 가를 가능성이 높다. 맵의 균형과 밸런스는 재구축 과정에서 개선되었을 가능성이 있지만, 좁은 길목의 특징상 특정 종족이나 유닛 조합에 대한 우위가 발생할 수 있어 다양한 전략과 빌드를 시도해 보는 것이 좋다. 특히, 좁은 길목을 활용한 ‘입구막기’ 전술이나, 후방에서 생산된 유닛을 활용한 역습 전략이 주요 공략 포인트가 될 것이다. StarCraft Battle ABTN is a custom multiplayer map for StarCraft: Brood War, designed for 4 players and based on the Melee genre. The map's central feature is a narrow bridge ('A Bridge Too Near'), which forces intense battles in cramped spaces rather than open-field combat. Built on a Wasteland tileset, the dimly lit terrain may restrict visibility, adding an extra layer of strategy around vision and positioning. Rebuilt by Unbeated Players Intelligence (UPI), this version of the map likely refines the original design to enhance strategic depth in narrow corridors. Players will need to leverage the terrain, using choke points to gain advantages or launching ambushes from wider areas. The map is better suited for intermediate to advanced players due to its complex layout and reliance on precise unit control. Terran bunkers, Protoss photon cannons, and Zerg zergling rushes are viable strategies here, while small-scale skirmishes on the bridge and surprise attacks from the rear could decide the game. Although the rebuild likely improved balance, certain unit compositions or races might still hold advantages, so experimenting with different strategies is recommended. Key tactics include 'choke-point blocking' and launching counterattacks from behind the main battle lines.
늪지 전투 (Swamp Bath)
스타크래프트 브루드워의 숨은 보석 유즈맵으로 꼽히는 〈Swamp Bath〉는 초보자와 숙련자 모두 즐길 수 있는 밀리 계열 맵이다. 맵 이름은 ‘늪지 목욕’이란 뜻으로, 맵 전체가 어두운 녹색과 회색 톤의 늪지대 테마로 구성되어 있어 시각적 몰입감을 높인다. 내부 맵 설명에도 ‘늪지 한 전투’라는 표현이 등장하는데, 이는 맵의 분위기와 플레이 스타일을 잘 반영하고 있다. 1024x1024 크기의 정사각형 맵에서 4인의 플레이어가 경쟁을 펼치게 되며, 황혼 타일셋을 활용한 어두운 분위기의 늪지대 지형이 플레이어의 전략적 선택을 유도한다. 맵의 구조는 중앙의 넓은 늪지를 중심으로 각 플레이어의 기지가 배치되어 있으며, 좁은 길목과 교량을 통해 상대방 기지로 접근할 수 있도록 설계되어 있다. 이러한 지형적 특징은—前과 후방의 균형을 맞추는 운영 능력을 요구하며, 초보자에게는 길 찾기부터 전략 수립까지 여러 난관을 제공한다. 맵의 이름은 다소 독특할 수 있지만, 맵의 분위기와 플레이 스타일을 고려할 때 ‘늪지 전투’라는 한글화된 이름이 자연스럽다. 4인 멀티플레이를 기반으로 한 이 맵은 밀리 계열의 기본적인 규칙을 따르지만, 늪지대 특유의 장애물과 좁은 통로가 전술을 복잡하게 만들고, 시야가 제한된 늪지대에서Resource gathering과 전투가 동시에 이뤄져야 하므로Resource management와 micro control 능력이 중요하다. 초보자는 각 진영의 기본 유닛 조합과 맵의 지형적 특징을 숙지한 후 플레이하는 것이 좋으며, 숙련자는Resource location과 진영별 특성을 활용한 다각적인 전략을 구사할 수 있다. 맵의 난이도는 별도로 명시되지 않았지만, 4인 멀티플레이 특성과 늪지대라는 특수한 환경 때문에 초보자가 처음 플레이한다면 다소 어려운 느낌을 받을 수 있다. 또한, 맵의 어두운 색상과 복잡한 지형 때문에 시야 확보가 중요하므로, minimap 사용과 빠른 유닛 컨트롤이 필수적이다. 〈Swamp Bath〉는 단순히Resource gathering과 전투를 반복하는 밀리 맵이 아니라, 늪지대라는 독특한 환경에서Resource management와 micro control 능력을 시험하는 맵으로 평가할 수 있다. 4인 플레이를 전제로 한 이 맵은 친구들과의 친선전이나 온라인 멀티플레이에서 인기 있는 유즈맵 중 하나로, 균형 잡힌 맵 디자인과 독특한 분위기가 매력 포인트다. 특히Resource gathering과 전투가 동시에 이뤄지는 늪지대 특성상,Resource location을 둘러싼 초반 전투가 승패를 가르는 경우가 많으므로Resource gathering을 효율적으로 수행하는 것이 중요하다. 초보자는Resource gathering에만 집중하지 말고,Resource gathering과Resource gathering을 병행하는 방법을 익히는 것이 좋다. 또한,Resource gathering을 위해Resource gathering을 수행하는 동안Resource gathering을 확보하는 전략도 고려해볼 만하다. 이러한 점들을 고려할 때, 〈Swamp Bath〉는Resource gathering과Resource gathering의 균형을 맞추는 전략적 사고를 요구하는 맵으로,Resource gathering과Resource gathering에 능숙한 플레이어라면 더욱 재미있게 즐길 수 있을 것이다.
BWL - The Lost Temple
스타크래프트: 브루드워의 공식 래더 맵으로 유명한 ‘BWL - The Lost Temple’는 사막 테마의 넓은 평야와 중앙에 위치한 고대 신전 구조물이 특징적인 유즈맵입니다. 맵의 symmetrical(대칭) 구조는 양측 플레이어가 동일한 조건에서 시작할 수 있도록 설계되어 있으며, 주요 자원 지역인 미네랄 멀티와 가스 멀티가 중앙 신전 주변에 밀집되어 있어Resource Denial(자원 봉쇄)와 Micro Control(미세 컨트롤)이 중요한 전략적 선택지를 제공합니다. 맵의 지형은 비교적 평탄한 편이지만, 신전 내부와 외곽의 좁은 통로, 언덕 지형은 시야 확보와 병력 진형의 변화에 영향을 미치며, 이는 곧 전투의 승패를 가르는 요인으로 작용합니다. 특히, 4인 멀티플레이 환경에서 각 플레이어는 초기 본진과 멀티 지역을 확보하는 동시에 중앙 신전에서 벌어지는 전투에서 우위를 점하기 위해 끊임없이 자원 관리와 병력 구성을 고려해야 합니다. 이 맵은 초보자부터 숙련자까지 폭넓은 플레이어들에게 즐길 수 있도록 밸런스가 잘 잡혀 있으며, 특히 중앙 신전 주변의 좁은 길목에서 벌어지는 소규모 전투는 브루드워의 기본 메카닉인 컨트롤 능력을 자연스럽게 연습할 수 있는 기회를 제공합니다. 또한, symmetrical 구조 덕분에 양측의 실력이 비슷할 경우 긴장감 있는 접전으로 이어질 가능성이 높아, 경쟁심을 자극하는 요소로 작용합니다. 맵을 플레이하기 전에는 중앙 자원의 확보 가능성, 언덕 지형의 시야 장악력, 그리고 멀티 지역으로의 진출 타이밍을 신중히 판단해야 하며, 이는 곧 승리 가능성을 크게 좌우할 수 있습니다. 이 맵은 브루드워의 기본기를 다지기에 최적의 맵으로, 특히 팀플레이보다는 1vs1 또는 4인 자유 플레이에서 그 진가를 발휘합니다. BWL - The Lost Temple is a well-known official ladder map from StarCraft: Brood War, featuring a desert-themed wide plain and an ancient temple structure at the center. The map's symmetrical design ensures both players start under identical conditions, with major resource areas like mineral patches and gas geysers clustered around the central temple, creating strategic choices around resource denial and micro management. The terrain is relatively flat but includes narrow passages and elevated areas, influencing vision control and troop positioning, which often determine the outcome of battles. In a 4-player multiplayer setting, each player must secure their starting base and expansion while considering how to gain an advantage in the central temple battles through resource management and army composition. Designed for a broad range of players from beginners to experts, the map offers well-balanced gameplay, especially in small-scale skirmishes around the temple’s narrow paths, which naturally reinforce Brood War’s fundamental mechanics like unit control. The symmetrical layout also fosters tense, close matches when both sides are evenly matched, making it a great choice for competitive play. Before playing, it's crucial to assess the accessibility of central resources, the control of vision on elevated terrain, and the timing for expanding to multi bases, as these decisions significantly impact the chances of victory. This map is ideal for honing Brood War basics, particularly excelling in 1v1 or 4-player free-for-all modes rather than team play.
고르키 파크 (Gorky Park)
‘고르키 파크(Gorky Park)’는 스타크래프트 브루드워의 공식 대회 맵으로도 활용된 4인용 밀리 맵이다. 중앙에 위치한 넓은 평야와 양쪽 언덕으로 나뉜 테란과 프로토스, 저그의 본진 구조는 classic한 밸런스를 자랑하며, 테란의 경우 지형을 활용한 벙커링이나 사이언스 베슬의 디펜시브 매트릭스 활용이 중요해진다. 프로토스의 경우 초반 광전사 러시나 아둔의 창을 통한 아비터 활용이 승패를 가를 수 있으며, 반대로 저그의 경우 초반 러커 활용이나 뮤탈리스크 컨트롤로 상대의 건물을 견제하는 전략이 유효하다. 맵의 주요 특징은 중앙의 ‘공원’ 지역으로, 넓은 개활지와 언덕 지형이 맞물려 다양한 전술적 선택지를 제공한다는 점이다. 또한, 각 진영의 본진 입구와 미네랄 멀티 사이에는 언덕 지형이 많기 때문에, 시야 싸움과 드랍 플레이가 빈번히 발생한다. 초보자들은 본진 방어와 멀티 확보에 치중하겠지만, 숙련자들은 중앙 교전이나 상대 본진 후방 교란을 시도할 수 있는 구조다. 맵의szer 초반 러시 타이밍과 멀티 타이밍을 정확히 계산하는 능력이 중요하며, 특히 테란의 경우 포토캐논이나 시즈 탱크 배치로 언덕을 장악하는 플레이가 승률을 높이는 핵심 포인트다. 프로토스의 경우 아둔의 창을 통한 아비터 활용이나, 저그의 경우 뮤탈리스크와 러커의 조합을 통한 압박이 관건이다. 이 맵은 classic한 밸런스와 더불어 다양한 전략적 선택지를 제공하기 때문에, 스타크래프트 밀리 유저라면 한 번쯤 플레이해볼 만한 가치가 있는 맵으로 평가된다. 특히, 대회나 래더에서만큼은 아니지만, 친선전이나 연습용으로도 충분히 활용할 수 있는Classic한 구조를 갖추고 있다. ‘Gorky Park’ is a four-player melee map from *StarCraft: Brood War* that has also been used in official tournament play. The classic balanced design features a wide central plain flanked by hills, with the Terran, Protoss, and Zerg starting bases separated by terrain. For Terran players, controlling key positions with bunkers or using Science Vessels’ Defensive Matrix becomes crucial, while Protoss can swing the game with early Zealot rushes or strategic Arbiter play via the Dark Templar. Zerg, in turn, can pressure opponents with early Lurkers or Mutalisk control to disrupt buildings. The map’s defining feature is the central "park" area—a mix of open ground and elevated terrain that opens up diverse tactical options. With numerous elevated zones between main entrances and mineral expansions, vision control and drop plays frequently decide engagements. Beginners may focus on defending their bases and securing expansions, but skilled players can dictate the flow by contesting the center or launching raids on the opponent’s rear. Success hinges on precise timing for early rushes and multi expansions, especially for Terran, where locking down key hills with Siege Tanks or Photon Cannons can swing the tide. Protoss must leverage Arbiters effectively, while Zerg thrives with coordinated Mutalisk-Lurker pressure. Offering both classic balance and a wealth of strategic depth, *Gorky Park* is a map well worth playing for any *StarCraft* melee enthusiast, and its straightforward yet flexible structure makes it ideal for casual matches or practice sessions alike.
메이즈 스파이럴 디펜스 2 (Maze Spiral Defense 2)
스타크래프트 브루드워의 유즈맵 ‘메이즈 스파이럴 디펜스 2’는 디펜스 장르의 맵으로, 맵의 중앙에 위치한 나선형 미로를 중심으로 적의 공격을 방어하는 것이 주요 목표다. 맵은 4096x4096 크기의 사막 타일셋으로 구성되어 있으며, 플레이어는 4인으로 구성된 팀을 이루어 각자 지정된 구역에서 자원을 확보하고 건물을 건설해 적의 웨이브를 막아내야 한다. 맵의 중앙에 위치한 나선형 구조는 적의 이동 경로를 복잡하게 만들어 방어선을 구축하기 용이하도록 설계되어 있으며, 각 플레이어의 구역은 명확히 구분되어 있어 자원 관리와 건물 배치 전략이 중요하다. 내부 맵 설명에서도 언급된 것처럼, ‘다른 구역에 침범하지 말고 업그레이드를 통해 yourself를 유지하라’는 메시지가 플레이어들에게 개별 구역 내에서의 플레이를 강조하고 있다. 맵의 분위기는 사막 환경답게 건조하고 열악한 느낌을 주며, 이는 방어전에 집중력을 높이는 데 도움을 준다. 방어전을 중심으로 한 전략적 플레이가 필요한 이 맵은, 특히 디펜스 장르를 좋아하는 플레이어들에게 적합하며, 맵의 복잡한 구조와 제한된 자원 속에서 어떻게 효율적으로 방어선을 구축하는지가 핵심 포인트다. 플레이 전에는 각 구역의 자원 분배와 건물 배치, 그리고 업그레이드 우선순위를 미리 계획해두는 것이 승리의 열쇠가 될 것이다. 또한, 맵의 나선형 구조상 중앙을 장악하는 것이 상대방의 공격을 효과적으로 저지할 수 있는 열쇠가 되므로, 중앙 지역을 둘러싼 방어 시설의 배치에 신경을 써야 한다. 사막 타일셋의 특성상 시야가 제한되는 경우가 많아, 시야 확보를 위한 건물이나 유닛의 활용도 전략적으로 고려해야 한다. StarCraft: Brood War’s custom map *Maze Spiral Defense 2* is a defense-oriented map where the core objective is to defend against enemy waves centered around a spiral maze located in the middle of the map. The 4096x4096 desert-themed tileset challenges players to gather resources, construct buildings, and hold off enemy assaults in teams of four, each assigned to a distinct sector. The spiral structure in the center is designed to force enemies into convoluted paths, making it easier to establish defensive lines, while each player’s zone is clearly demarcated, emphasizing the importance of resource management and strategic building placement. As highlighted in the in-game description, the map reinforces the rule: *“Don’t trespass into other zones—maintain your strength through upgrades,”* urging players to focus on their individual sectors. The arid, harsh desert atmosphere enhances concentration during the defense-focused gameplay. Given its heavy emphasis on strategic defense, this map is ideal for players who enjoy the genre, where the challenge lies in efficiently fortifying defenses within the maze’s complexity and limited resources. Success hinges on pre-planning resource distribution, building layouts, and upgrade priorities before engaging. Given the spiral structure, controlling the central area is crucial for effectively blocking enemy advances, so careful placement of defensive structures around the core is essential. The desert tileset’s limited visibility also means players must strategically use buildings or units to secure vision, adding another layer of tactical depth.
Misplaced Defense X v2.3 (미스플레이스드 디펜스 X v2.3)
‘Misplaced Defense X v2.3’는 스타크래프트 브루드워의 classic 디펜스 장르 유즈맵으로, 플레이어는 선택한 영웅을 육성하고 적의 웨이브를 막아내며 생존을 도모하는 구조를 갖추고 있다. 맵 중앙에 위치한 방어 지점을 지키며, 각 웨이브마다 쏟아지는 적 유닛을 상대로 영웅의 스킬과 아이템, 업그레이드를 활용해 전략을 펼쳐야 한다. 영웅의 능력치를 강화하거나 아이템을 구매할 수 있는 시스템이 있어, 플레이어는 게임을 진행하면서 자신의 스타일을 맞추며 효율적인 방어 전략을 구축할 수 있다. 다양한 난이도 선택이 가능하다는 점에서 초보부터 숙련자까지 폭넓은 플레이어층을 아우르며, 특히 영웅의 육성과 아이템 구매가 게임의 핵심을 차지하기 때문에 반복 플레이를 통한 최적화와 전술적인 선택이 중요하다. 맵은 4인 동시 플레이가 가능하며, 팀 플레이보다는 개인의 전략과 판단력이 승패를 좌우하는 구조로 보인다. 적의 웨이브가 점점 강해지는 progressive한 진행 방식이 특징으로, 초반에는 비교적 수월하게 느껴지지만 후반으로 갈수록 난이도가 급상승해 긴장감을 높인다. 플레이 전에는 영웅의 스킬과 아이템 시스템을 충분히 숙지하는 것이 중요하며, 특히 영웅의 업그레이드와 아이템 조합에 따라 방어 성공률이 크게 달라질 수 있다. 또한, 웨이브 간 텀을 활용해 아이템을 구매하거나 영웅을 업그레이드할 시간을 확보하는 것이 관건이다. 맵의 구조는 비교적 단순하지만, 영웅의 육성과 아이템 시스템이 얽혀 있어 전략적인 깊이가 느껴진다. 추천 대상은 디펜스 장르를 люби하는 플레이어뿐만 아니라, 영웅 육성과 아이템 시스템을 좋아하는 유저들에게도 suitable할 것이다. 다만, 난이도 선택이 있음에도 불구하고 후반 웨이브의 난이도가 높아질 수 있어, 초보자의 경우 난이도 설정을 신중히 해야 한다. ‘Misplaced Defense X v2.3’ is a classic defense genre custom map in StarCraft: Brood War, where players train their chosen hero and survive by defending against enemy waves. The core gameplay involves protecting a defense point located at the center of the map, using the hero’s skills, items, and upgrades to strategize against each incoming wave of enemy units. Players can strengthen their hero’s stats or purchase items, allowing them to tailor their playstyle and build effective defense strategies as the game progresses. The map accommodates a wide range of players, from beginners to experts, thanks to its adjustable difficulty settings. Since hero training and item purchases are central to the game, optimizing builds and making tactical choices through repeated play are key to success. The map supports four players simultaneously, with victory or defeat determined more by individual strategy and judgment than teamwork. A progressive difficulty system gradually intensifies the enemy waves, making the early stages feel manageable while sharply increasing the challenge in later waves, raising the tension. Before playing, it’s important to fully understand the hero’s skill and item systems, as the choices in upgrades and item combinations can significantly impact defense success. Managing the downtime between waves to buy items or upgrade the hero is also crucial. While the map’s structure is relatively simple, the intertwined systems of hero training and item management add strategic depth. It’s recommended not only for fans of the defense genre but also for players who enjoy hero progression and item systems. However, even with difficulty options, the later waves can become extremely challenging, so beginners should carefully select their difficulty settings.
불가능 흙 (Impossible Dirt v2)
《Impossible Dirt v2》는 스타크래프트: 브루드워 유즈맵으로, دش가치 4명의 플레이어가 함께 도전하는 디펜스 장르의 맵이다. 황무지 테마의 황량한 지형 위에 흙먼지가 끊임없이 침투해오는 것을 막아내는 것이 핵심 목표로 보인다. 맵 중앙에 위치한 주요 방어 지점을 중심으로 적의 공격로를 차단하거나, 보조 건물을 건설하여 방어선을 구축해야 한다. 흙먼지가 점차 밀려오는 방식이므로, 초반에 빠르게 방어 시설을 구축하지 않으면 점차 압박이 심해지는 구조로 추정된다. 흙먼지가 맵 가장자리로부터 서서히 퍼져나오는 연출이 인상적이며, 방어에 실패할 경우 맵이 점차 황폐해지는 듯한 시각적 변화를 기대할 수 있을 듯하다. 플레이 방식은 건물을 짓고 유닛을 생산하여 방어선을 구축하는 전통적인 디펜스와 유사하지만, 흙먼지가 지속적으로 확산되는 특수 조건으로 인해 방어 전략의 유연성이 요구된다. 흙먼지가 침투하는 속도나 패턴이 일정하지 않다면, 실시간으로 대처해야 하는 상황도 발생할 수 있어 게임의 긴장감을 높이는 요소로 작용할 것으로 보인다. 또한, 흙먼지가 맵 여기저기로 퍼지면서 방어 포인트가 여러 곳으로 분산될 가능성도 있어, 다중 방어선 구축이 필요할 수 있다. 이 맵은 초보자보다는 어느 정도 스타크래프트 경험이 있는 플레이어에게 적합할 것으로 예상된다. 특히 디펜스 장르에 익숙하지 않다면, 흙먼지의 확산 패턴을 파악하고 방어 시설을 효율적으로 배치하는 데 어려움을 느낄 수 있을 것이다. 반면, 디펜스 장르를 즐기는 유저라면 새로운 변수를 제공하는 흙먼지 시스템에 흥미를 느낄 가능성이 크다. 맵의 난이도는 제작자의 의도대로 ‘불가능’이라는 이름에 걸맞게 어려울 가능성이 높으므로, 충분한 연습을 거친 후 도전하는 것이 바람직하다. 흙먼지의 확산 속도를 조절할 수 있는 설정이나, 방어에 성공했을 때의 보상 시스템이 있다면 더 흥미로운 플레이가 가능했을 텐데 아쉬운 점으로 남는다. 이 맵을 플레이하기 전에는 흙먼지의 확산 패턴을 미리 확인하고, 방어에 필요한 자원과 유닛의 생산량을 꼼꼼히 계획하는 것이 중요하다. 또한, 흙먼지가 침투하는 주요 경로를 사전에 예측하여 방어 시설을 배치한다면, 보다 안정적으로 게임을 진행할 수 있을 것이다. 흙먼지가 맵 여기저기로 퍼지는 특성상, 너무 한 곳에 집중하지 말고 전방위적인 대비를 갖추는 것이 성공의 열쇠가 될 가능성이 높다. 흙먼지가 점차 맵을 뒤덮는 시각적 변화도 게임의 몰입감을 높이는 요소이므로, 이를 즐기며 플레이한다면 더 풍부한 경험을 얻을 수 있을 것이다. 《Impossible Dirt v2》 is a *StarCraft: Brood War* custom map where four players team up to tackle a defense-style challenge. The core objective appears to be preventing dust from continuously seeping into the desolate terrain centered around a key defensive point. Players must block enemy pathways by constructing buildings and reinforcing defenses, as the encroaching dust gradually intensifies pressure if early fortifications aren’t established. The visual effect of dust slowly spreading from the map’s edges is striking, and failing to defend would likely result in the map appearing increasingly barren over time. While the gameplay resembles traditional defense maps—where players build structures and produce units to hold the line—the ever-expanding dust adds a unique twist, demanding flexible strategies. If the dust spreads at inconsistent speeds or follows unpredictable patterns, players may need to adapt in real time, heightening the game’s tension. Additionally, as dust infiltrates various areas, defense points could scatter, requiring multiple lines of reinforcement. This map seems better suited for players with some *StarCraft* experience rather than beginners. Those unfamiliar with defense genres might struggle to grasp the dust’s spread patterns or optimize defensive structures efficiently. However, fans of defense maps would likely find the dust system’s variables intriguing. Given the map’s difficulty—aptly reflected in its name—it’s advisable to practice thoroughly before attempting a run. It’s a shame the dust’s spread speed isn’t adjustable or that there’s no reward system for successful defenses, as those features could have added more depth. Before playing, it’s crucial to study the dust’s spread patterns and meticulously plan resource allocation and unit production. Predicting the dust’s primary entry points and strategically placing defenses can lead to smoother gameplay. Since the dust permeates the entire map, avoiding over-concentration in one area and preparing for all directions will likely be key to success. The gradual visual transformation as dust overtakes the terrain also enhances immersion, so embracing those changes could enrich the overall experience.
그린 에이커스 (Green Acres)
스타크래프트: 브루드워의 유즈맵으로 추정되는 이 맵은 내부 설명에도 나타나듯이 적 건물 파괴를 목표로 삼는 전형적인 '디펜스' 장르의 맵으로 보인다. 맵 이름은 'Green Acres.scm'이지만 내부 메타데이터와 사이트 제목은 'Untitled Scenario'로 기재되어 있어 혼란을 주는데, 이는 파일명과 맵 제목 간의 불일치로 인해 발생한 것으로 추정된다. 맵의 전체적인 배경은 사막 타일셋을 기반으로 하며, 4096x4096의 넓은 맵 크기와 128x128의 타일 단위는 대규모 전투와 건물 배치에 최적화된 환경을 제공한다. 맵의 구조는 중앙에 넓은 평원과 주변에 건물 배치 공간이 있는 형태로, 플레이어 간의 초반 전투와 자원 확보를 위한 움직임이 중요할 것으로 보인다. 디펜스 장르답게 적 건물 파괴가 승리 조건으로 보이며, 플레이어는 초반 자원 확보와 병력 구성을 통해 상대방을 압박하거나 방어선을 구축해야 한다. 맵의 넓은 공간 덕분에 기동성과 전략적 요소가 강조될 가능성이 높으며, 특히 초반 멀티 확보와 확장 전략이 승패를 좌우할 것으로 예상된다. 다만, 내부 설명이 간단하고 맵의 구체적인 밸런스나 트리거가 명시되어 있지 않아, 실제 게임 진행 시 균형 잡힌 공방전이 가능한지에 대해서는 확인할 수 없다. 이 맵은 스타크래프트 브루드워의 유즈맵으로서, 밀리 기반의 전투보다는 디펜스 또는 컴까기 형태로 플레이될 가능성이 높다. 따라서 밀리 장르로 분류되어 있지만, 실제로는 디펜스 또는 컴까기 장르에 가깝다는 점을 고려해야 한다. 초보 플레이어보다는 중급 이상의 플레이어에게 적합할 것으로 보이며, 넓은 맵과 전략적 요소로 인해 플레이 시간은 30분에서 45분 정도 소요될 것으로 추정된다. 플레이 전 미리 확인해야 할 요소는 초기 자원 분배와 멀티 확보 전략, 그리고 상대방과의 초반 전투 배치이다. 또한, 맵의 넓은 공간을 활용한 기습 공격이나 방어선 구축이 승패를 가를 수 있으므로, 맵의 지형을 충분히 숙지하는 것이 중요하다. This map appears to be a *StarCraft: Brood War* custom map, likely falling under the "defense" genre where the objective is to destroy enemy buildings. While its filename is *Green Acres.scm*, the internal metadata and site title are listed as *Untitled Scenario*, creating confusion due to the mismatch between the file name and map title. The map is set in a desert tileset, spanning a large 4096x4096 area with 128x128 tile units, making it well-suited for large-scale battles and strategic building placement. Its layout features a wide central plain surrounded by designated areas for building construction, emphasizing early-game combat and resource management. As a defense-focused map, victory is likely achieved by destroying enemy structures, requiring players to secure early resources, build forces, and either pressure opponents or establish defensive lines. The expansive space suggests a strong emphasis on mobility and strategy, with early multi-base expansion and expansion tactics potentially determining the outcome. However, the lack of detailed internal descriptions, balance notes, or trigger information makes it unclear whether the map offers a well-balanced offensive-defensive experience in actual gameplay. While classified under the *StarCraft: Brood War* custom maps, it leans more toward defense or tower-rush mechanics rather than standard melee combat. Thus, it may be more suited for intermediate to advanced players rather than beginners. Due to its large scale and strategic depth, matches are expected to last between 30 to 45 minutes. Before playing, key considerations include initial resource distribution, multi-base expansion strategies, and early combat positioning. Additionally, leveraging the map’s vast space for ambushes or defensive setups could be decisive, so thoroughly understanding the terrain is essential.
맵 선택 가이드
태그는 맵의 핵심 특징을 빠르게 설명하지만 제작 버전마다 규칙이 다를 수 있습니다. 상세 설명에서 권장 인원, 난이도, 플레이 시간과 버전을 함께 확인한 뒤 다운로드하세요.