
25레벨 스타크래프트 맵 모음
'25레벨' 태그가 등록된 맵을 모았습니다. 장르 하나로 찾기 어려운 플레이 방식, 난이도와 특징을 중심으로 인기 맵과 최신 맵을 비교해 보세요.
- 등록 맵
- 2개
- 누적 다운로드
- 0
- 누적 조회
- 118
인기 맵
다운로드와 조회 반응이 높은 맵입니다.
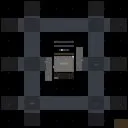
썬큰 디펜스 10웨이 14.9 임파서블 (SunkenD 10Way 14.9 Impossible)
스타크래프트 브루드워의 유즈맵 장르 중에서도 어려운 난이도로 정평이 난 디펜스형 맵 ‘썬큰 디펜스 10웨이 14.9 임파서블(SunkenD 10Way 14.9 Impossible)’은 여섯 명의 플레이어가 한 팀으로 뭉쳐 상대를 몰아붙이는 ‘컴퓨터 상대 디펜스’ 유형의 맵이다. 이 맵은 총 스물다섯 개의 레벨을 제공하며, 후반부로 갈수록 난이도가 급격히 상승하는 구조로 구성되어 있다. 초반에는 비교적 손쉽게 넘길 수 있는 웨이브들이 등장하지만, 중반부부터는 ‘MidImpossible’이라는 설명이 말해주듯 중급자도 버겁기 시작하며, 후반부에서는 ‘Backwash’라도 살아남을 수 없을 정도의 극악한 상황에 직면하게 된다. 맵의 중앙부는 넓은 평지로 펼쳐져 있으며, 외곽을 따라 방어 건물을 배치할 수 있는 공간이 마련되어 있다. 플레이어들은 이 공간을 활용해 방어선을 구축하고, 끊임없이 몰려오는 적들을 상대로 버티며 레벨을 클리어해야 한다. 맵의 분위기는 우주 테마로 설정되어 있으며, 어두운 배경에 빛나는 지형지물이 어우러져 atmospherically한 분위기를 연출한다. 이 맵은 초보가 쉽게 접근할 수 있는 난이도는 아니며, 적어도 중간 정도의 실력을 갖춘 플레이어들이 도전해야만 제 궤도에 오를 수 있다. 특히 방어 건물의 배치와 자원 관리에 신경을 써야 하며, 각 레벨의 특징을 숙지하고 대응 전략을 세우는 것이 관건이다. 초반에는 자원을 넉넉히 확보해 방어 건물과 유닛을 빠르게 확보하는 것이 중요하며, 중반부부터는 적의 웨이브 패턴을 분석해 방어 라인을 효율적으로 조정해야 한다. 이 맵은 디펜스 매니아뿐만 아니라, 스타크래프트의 전략적 깊이를 경험하고 싶은 플레이어들에게도 추천할 만한佳作이다. 다만, 이 맵은 난이도가 상당히 높기 때문에 처음 도전하는 플레이어는 낮은 레벨부터 시작해 점차 실력을 쌓아나가는 것이 좋다. 맵의 구조상 중앙 평지가 넓기 때문에 방어 건물의 배치에 따라 난이도가 크게 달라질 수 있으므로, 각 레벨의 특성을 잘 살려 전략을 세우는 것이 필수적이다. StarCraft: Brood War's custom map genre includes "Sunken Defense 10Way 14.9 Impossible," a notoriously difficult defense-style map where six players team up to fend off relentless waves of enemies. The map features 25 levels, with difficulty escalating sharply as you progress. Early waves are manageable, but mid-game introduces "MidImpossible" waves that even intermediate players struggle with, while late-game pushes reach "Backwash" levels of brutality. The central area is a vast open plain, flanked by outer zones where defensive structures can be placed to build your perimeter. Set in a cosmic theme, the map’s dark backdrop and glowing terrain create an atmospheric experience. This isn’t a beginner-friendly challenge—players need at least intermediate skill to tackle it effectively. Success hinges on smart building placement, resource management, and adapting to each wave’s patterns. Early levels demand securing resources quickly to reinforce defenses, while later stages require analyzing enemy attack routes to optimize your lines. A standout title for defense enthusiasts and those seeking deeper strategic challenges in StarCraft, it’s best approached gradually. The wide central plain means defensive setups can make or break your run, so tailoring strategies to each level’s quirks is essential.
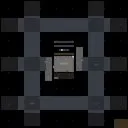
썬큰D 10웨이 14.8 임파서블 (SunkenD 10Way 14.8 Impossible)
스타크래프트 브루드워의 유즈맵으로 유명한 '썬큰D 10웨이 14.8 임파서블(SunkenD 10Way 14.8 Impossible)'은 디펜스 장르의 고난이도 맵으로, 총 25개의 레벨로 구성되어 있는 것이 특징이다. 이 맵은 특히 'Mid' 레벨에서도 클리어하기 어려운 '임파서블' 난이도를 자랑하며, 저그 유닛인 러커(Lurker)가 추가되어 더 어려운 전투를 요구한다. 맵 제목에 포함된 '10Way'는 10방향의 웨이브(웨이브 공격)가 발생한다는 의미로, 플레이어는 끊임없이 밀려오는 적군을 상대해야 한다. 맵 테마는 우주 타일셋을 기반으로 하며, 전체 맵 크기는 4096 x 4096의 대형 맵으로 구성되어 있다. 플레이 방식은 기본적으로 디펜스에 속하지만, 10방향에서 동시에 공격이 오기 때문에 아군의 배치와 방어 전략이 매우 중요하다. 레벨이 진행될수록 적의 조합과 수가 증가하며, 후반부로 갈수록 러커의 비중이 높아지므로 러커의 사정거리와 공격 패턴을 숙지해야 한다. 또한 'Backwash(배큐시)'라는 특수 효과가 적용되어 있어, 일부 공격이 플레이어에게 역으로 피해를 입히지 않도록 주의해야 한다. 맵의 난이도가 'MidImpossible'로 명시된 만큼 초보자는 클리어하기 어려우며, 팀 플레이보다는 개인 플레이에 초점을 맞추고 있는 맵이다. 맵의 내부 설명에서 'BW Version'이라는 표기가 포함된 점으로 보아, 브루드워 버전으로 제작된 맵임을 확인할 수 있다. 이 맵을 플레이하기 전에는 러커의 특성과 공격 패턴을 충분히 이해하고, 아군의 배치와 리소스 관리(미네랄, 가스)의 균형을 맞추는 연습이 필요하다. 또한 10방향의 웨이브를 동시에 처리해야 하므로, 멀티태스킹 능력이 요구된다. 맵의 난이도가 높아질수록 전략의 유연성과 즉각적인 대응이 승패를 좌우하므로, 꾸준한 연습과 경험이 필수적이다. '썬큰D 10웨이 14.8 임파서블'은 디펜스 장르의 끝판왕이라 불릴 만큼 도전적인 요소와 전략적 깊이를 제공하는 맵으로, 디펜스 마니아들에게는 필수적으로 도전해볼 만한 작품이다. Famous as a StarCraft: Brood War custom map, "SunkenD 10Way 14.8 Impossible" is a high-difficulty defense-style map featuring 25 levels. The map is particularly known for its "Impossible" difficulty even on the 'Mid' level, requiring tougher battles with the addition of Zerg units like the Lurker. The "10Way" in the title indicates that waves of enemies attack from 10 different directions, forcing players to constantly fend off relentless assaults. The map uses a space-themed tileset and spans a large 4096 x 4096 grid. While fundamentally a defense map, its core challenge lies in handling simultaneous attacks from all 10 directions, making unit positioning and defensive strategies crucial. As levels progress, enemy compositions and numbers grow, with Lurkers becoming more prominent in later stages—players must learn their attack range and patterns. A special mechanic called "Backwash" is also in play, so be careful not to take friendly fire from certain attacks. Labeled as "MidImpossible," this map is extremely tough for beginners and is designed more for solo play than team-based strategies. The "BW Version" marking in the map’s internal description confirms it was made for Brood War. Before playing, thoroughly understand Lurker behavior and attack patterns, and practice balancing unit placement with resource management (minerals and gas). Handling 10 simultaneous waves demands strong multitasking skills. As difficulty rises, adaptability and quick decision-making determine success, so consistent practice is essential. "SunkenD 10Way 14.8 Impossible" stands as the ultimate challenge in the defense genre, offering deep strategy and tough obstacles—making it a must-try for hardcore defense map fans.
최근 등록된 맵
새로 추가된 파일과 버전을 확인하세요.
썬큰 디펜스 10웨이 14.9 임파서블 (SunkenD 10Way 14.9 Impossible)
스타크래프트 브루드워의 유즈맵 장르 중에서도 어려운 난이도로 정평이 난 디펜스형 맵 ‘썬큰 디펜스 10웨이 14.9 임파서블(SunkenD 10Way 14.9 Impossible)’은 여섯 명의 플레이어가 한 팀으로 뭉쳐 상대를 몰아붙이는 ‘컴퓨터 상대 디펜스’ 유형의 맵이다. 이 맵은 총 스물다섯 개의 레벨을 제공하며, 후반부로 갈수록 난이도가 급격히 상승하는 구조로 구성되어 있다. 초반에는 비교적 손쉽게 넘길 수 있는 웨이브들이 등장하지만, 중반부부터는 ‘MidImpossible’이라는 설명이 말해주듯 중급자도 버겁기 시작하며, 후반부에서는 ‘Backwash’라도 살아남을 수 없을 정도의 극악한 상황에 직면하게 된다. 맵의 중앙부는 넓은 평지로 펼쳐져 있으며, 외곽을 따라 방어 건물을 배치할 수 있는 공간이 마련되어 있다. 플레이어들은 이 공간을 활용해 방어선을 구축하고, 끊임없이 몰려오는 적들을 상대로 버티며 레벨을 클리어해야 한다. 맵의 분위기는 우주 테마로 설정되어 있으며, 어두운 배경에 빛나는 지형지물이 어우러져 atmospherically한 분위기를 연출한다. 이 맵은 초보가 쉽게 접근할 수 있는 난이도는 아니며, 적어도 중간 정도의 실력을 갖춘 플레이어들이 도전해야만 제 궤도에 오를 수 있다. 특히 방어 건물의 배치와 자원 관리에 신경을 써야 하며, 각 레벨의 특징을 숙지하고 대응 전략을 세우는 것이 관건이다. 초반에는 자원을 넉넉히 확보해 방어 건물과 유닛을 빠르게 확보하는 것이 중요하며, 중반부부터는 적의 웨이브 패턴을 분석해 방어 라인을 효율적으로 조정해야 한다. 이 맵은 디펜스 매니아뿐만 아니라, 스타크래프트의 전략적 깊이를 경험하고 싶은 플레이어들에게도 추천할 만한佳作이다. 다만, 이 맵은 난이도가 상당히 높기 때문에 처음 도전하는 플레이어는 낮은 레벨부터 시작해 점차 실력을 쌓아나가는 것이 좋다. 맵의 구조상 중앙 평지가 넓기 때문에 방어 건물의 배치에 따라 난이도가 크게 달라질 수 있으므로, 각 레벨의 특성을 잘 살려 전략을 세우는 것이 필수적이다. StarCraft: Brood War's custom map genre includes "Sunken Defense 10Way 14.9 Impossible," a notoriously difficult defense-style map where six players team up to fend off relentless waves of enemies. The map features 25 levels, with difficulty escalating sharply as you progress. Early waves are manageable, but mid-game introduces "MidImpossible" waves that even intermediate players struggle with, while late-game pushes reach "Backwash" levels of brutality. The central area is a vast open plain, flanked by outer zones where defensive structures can be placed to build your perimeter. Set in a cosmic theme, the map’s dark backdrop and glowing terrain create an atmospheric experience. This isn’t a beginner-friendly challenge—players need at least intermediate skill to tackle it effectively. Success hinges on smart building placement, resource management, and adapting to each wave’s patterns. Early levels demand securing resources quickly to reinforce defenses, while later stages require analyzing enemy attack routes to optimize your lines. A standout title for defense enthusiasts and those seeking deeper strategic challenges in StarCraft, it’s best approached gradually. The wide central plain means defensive setups can make or break your run, so tailoring strategies to each level’s quirks is essential.
썬큰D 10웨이 14.8 임파서블 (SunkenD 10Way 14.8 Impossible)
스타크래프트 브루드워의 유즈맵으로 유명한 '썬큰D 10웨이 14.8 임파서블(SunkenD 10Way 14.8 Impossible)'은 디펜스 장르의 고난이도 맵으로, 총 25개의 레벨로 구성되어 있는 것이 특징이다. 이 맵은 특히 'Mid' 레벨에서도 클리어하기 어려운 '임파서블' 난이도를 자랑하며, 저그 유닛인 러커(Lurker)가 추가되어 더 어려운 전투를 요구한다. 맵 제목에 포함된 '10Way'는 10방향의 웨이브(웨이브 공격)가 발생한다는 의미로, 플레이어는 끊임없이 밀려오는 적군을 상대해야 한다. 맵 테마는 우주 타일셋을 기반으로 하며, 전체 맵 크기는 4096 x 4096의 대형 맵으로 구성되어 있다. 플레이 방식은 기본적으로 디펜스에 속하지만, 10방향에서 동시에 공격이 오기 때문에 아군의 배치와 방어 전략이 매우 중요하다. 레벨이 진행될수록 적의 조합과 수가 증가하며, 후반부로 갈수록 러커의 비중이 높아지므로 러커의 사정거리와 공격 패턴을 숙지해야 한다. 또한 'Backwash(배큐시)'라는 특수 효과가 적용되어 있어, 일부 공격이 플레이어에게 역으로 피해를 입히지 않도록 주의해야 한다. 맵의 난이도가 'MidImpossible'로 명시된 만큼 초보자는 클리어하기 어려우며, 팀 플레이보다는 개인 플레이에 초점을 맞추고 있는 맵이다. 맵의 내부 설명에서 'BW Version'이라는 표기가 포함된 점으로 보아, 브루드워 버전으로 제작된 맵임을 확인할 수 있다. 이 맵을 플레이하기 전에는 러커의 특성과 공격 패턴을 충분히 이해하고, 아군의 배치와 리소스 관리(미네랄, 가스)의 균형을 맞추는 연습이 필요하다. 또한 10방향의 웨이브를 동시에 처리해야 하므로, 멀티태스킹 능력이 요구된다. 맵의 난이도가 높아질수록 전략의 유연성과 즉각적인 대응이 승패를 좌우하므로, 꾸준한 연습과 경험이 필수적이다. '썬큰D 10웨이 14.8 임파서블'은 디펜스 장르의 끝판왕이라 불릴 만큼 도전적인 요소와 전략적 깊이를 제공하는 맵으로, 디펜스 마니아들에게는 필수적으로 도전해볼 만한 작품이다. Famous as a StarCraft: Brood War custom map, "SunkenD 10Way 14.8 Impossible" is a high-difficulty defense-style map featuring 25 levels. The map is particularly known for its "Impossible" difficulty even on the 'Mid' level, requiring tougher battles with the addition of Zerg units like the Lurker. The "10Way" in the title indicates that waves of enemies attack from 10 different directions, forcing players to constantly fend off relentless assaults. The map uses a space-themed tileset and spans a large 4096 x 4096 grid. While fundamentally a defense map, its core challenge lies in handling simultaneous attacks from all 10 directions, making unit positioning and defensive strategies crucial. As levels progress, enemy compositions and numbers grow, with Lurkers becoming more prominent in later stages—players must learn their attack range and patterns. A special mechanic called "Backwash" is also in play, so be careful not to take friendly fire from certain attacks. Labeled as "MidImpossible," this map is extremely tough for beginners and is designed more for solo play than team-based strategies. The "BW Version" marking in the map’s internal description confirms it was made for Brood War. Before playing, thoroughly understand Lurker behavior and attack patterns, and practice balancing unit placement with resource management (minerals and gas). Handling 10 simultaneous waves demands strong multitasking skills. As difficulty rises, adaptability and quick decision-making determine success, so consistent practice is essential. "SunkenD 10Way 14.8 Impossible" stands as the ultimate challenge in the defense genre, offering deep strategy and tough obstacles—making it a must-try for hardcore defense map fans.
맵 선택 가이드
태그는 맵의 핵심 특징을 빠르게 설명하지만 제작 버전마다 규칙이 다를 수 있습니다. 상세 설명에서 권장 인원, 난이도, 플레이 시간과 버전을 함께 확인한 뒤 다운로드하세요.