스타휴지 StarCraft HUZY 스타크래프트 유즈맵 맵 다운로드 커뮤니티
한국어

1v1 대전 스타크래프트 맵 모음

'1v1 대전' 태그가 등록된 맵을 모았습니다. 장르 하나로 찾기 어려운 플레이 방식, 난이도와 특징을 중심으로 인기 맵과 최신 맵을 비교해 보세요.

등록 맵
1
누적 다운로드
0
누적 조회
0

인기 맵

다운로드와 조회 반응이 높은 맵입니다.

전체 보기
1v1 올아웃 워 v1 (1v1 All Out War v1) 맵 미리보기

1v1 올아웃 워 v1 (1v1 All Out War v1)

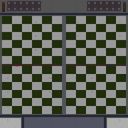
스타크래프트 브루드워의 1:1 대결을 중심으로 설계된 유즈맵 '1v1 All Out War v1'은 상대방의 벙커를 파괴하는 것이 승리 조건인 전략형 대전 맵이다. 맵은 좁고 밀폐된 공간이 아닌, 넓은 평야와 복잡한 고지대 지형을 갖추고 있어 양쪽의 병력이 자유롭게 기동할 수 있도록 배치되어 있다. 내부 맵 설명에서 확인할 수 있듯이 'Take Out Your Opponents Bunkers'라는 목표가 명확히 제시되어 있어, 플레이어는 초반부터 적극적인 정찰과 공격 루트를 설계해야 한다. 벙커는 맵의 양쪽 끝에 위치하며, 중앙에는 광물과 가스가 풍부한 멀티 지역이 있어 자원 확보와 진출 타이밍이 승패를 좌우할 수 있다. 맵의 특징은 상대방의 자원 라인을 재빨리 장악하거나, 벙커를 직접 공격할 수 있는 길을 마련하는 데 있다. 초보자는 안정적인 자원 관리와 방어에 집중해야 하며, 중수 이상의 플레이어는 빠른 진출과 압박 전략을 구사해야 한다. 특히 벙커는 고지대에 위치해 있어, 언덕을 이용한 공격 루트를 확보하는 것이 중요하다. 맵의 밸런스는 1:1 대전 특성상 양쪽의 자원과 진출로가 대칭적으로 배치되어 있으며, 초반부터 중간까지는 자원 확보와 병력 생산이, 후반에는 대규모 전투와 벙커 파괴가 관건이다. 이 맵은 1:1을 즐기는 유저들에게 전략적 깊이를 제공하며, 빠른 진행과 긴장감 있는 전투를 경험할 수 있도록 설계되었다. 플레이 전에는 상대방의 진출로와 벙커 위치를 정확히 파악하고, 초반 병력 조합과 진출 타이밍을 신중히 계획해야 한다. This StarCraft: Brood War custom map, '1v1 All Out War v1', is a strategic 1v1 duel designed around the core objective of destroying your opponent's bunkers. The map features a wide open battlefield with varied terrain, including elevated high grounds and strategic chokepoints, allowing both players to maneuver their forces effectively. As indicated by the internal map description 'Take Out Your Opponents Bunkers,' players must prioritize reconnaissance and offensive planning from the early game stages. Bunkers are positioned at opposite ends of the map, with a central mineral line providing a valuable multi location for resource control and timing pushes. The map's design emphasizes rapid resource expansion and map control, as securing the opponent's economy or directly assaulting their bunkers can dictate the flow of battle. Beginners should focus on stable resource management and defensive structures, while intermediate to advanced players can leverage early aggression and pressure strategies. Bunkers are elevated, requiring players to secure high ground paths for optimal attacking routes. The balance is symmetrical, ensuring fair resource distribution and symmetrical expansion routes. Early to mid-game revolves around resource gathering and army production, while the late-game shifts toward large-scale battles and bunker destruction. This map offers strategic depth for 1v1 enthusiasts, delivering intense and fast-paced combat. Before playing, it's crucial to scout the opponent's expansion routes and bunker positions, carefully planning initial army compositions and push timings to gain an early advantage.

다운로드 0 · 조회 0 · 댓글 0

최근 등록된 맵

새로 추가된 파일과 버전을 확인하세요.

1v1 올아웃 워 v1 (1v1 All Out War v1) 맵 미리보기

1v1 올아웃 워 v1 (1v1 All Out War v1)

스타크래프트 브루드워의 1:1 대결을 중심으로 설계된 유즈맵 '1v1 All Out War v1'은 상대방의 벙커를 파괴하는 것이 승리 조건인 전략형 대전 맵이다. 맵은 좁고 밀폐된 공간이 아닌, 넓은 평야와 복잡한 고지대 지형을 갖추고 있어 양쪽의 병력이 자유롭게 기동할 수 있도록 배치되어 있다. 내부 맵 설명에서 확인할 수 있듯이 'Take Out Your Opponents Bunkers'라는 목표가 명확히 제시되어 있어, 플레이어는 초반부터 적극적인 정찰과 공격 루트를 설계해야 한다. 벙커는 맵의 양쪽 끝에 위치하며, 중앙에는 광물과 가스가 풍부한 멀티 지역이 있어 자원 확보와 진출 타이밍이 승패를 좌우할 수 있다. 맵의 특징은 상대방의 자원 라인을 재빨리 장악하거나, 벙커를 직접 공격할 수 있는 길을 마련하는 데 있다. 초보자는 안정적인 자원 관리와 방어에 집중해야 하며, 중수 이상의 플레이어는 빠른 진출과 압박 전략을 구사해야 한다. 특히 벙커는 고지대에 위치해 있어, 언덕을 이용한 공격 루트를 확보하는 것이 중요하다. 맵의 밸런스는 1:1 대전 특성상 양쪽의 자원과 진출로가 대칭적으로 배치되어 있으며, 초반부터 중간까지는 자원 확보와 병력 생산이, 후반에는 대규모 전투와 벙커 파괴가 관건이다. 이 맵은 1:1을 즐기는 유저들에게 전략적 깊이를 제공하며, 빠른 진행과 긴장감 있는 전투를 경험할 수 있도록 설계되었다. 플레이 전에는 상대방의 진출로와 벙커 위치를 정확히 파악하고, 초반 병력 조합과 진출 타이밍을 신중히 계획해야 한다. This StarCraft: Brood War custom map, '1v1 All Out War v1', is a strategic 1v1 duel designed around the core objective of destroying your opponent's bunkers. The map features a wide open battlefield with varied terrain, including elevated high grounds and strategic chokepoints, allowing both players to maneuver their forces effectively. As indicated by the internal map description 'Take Out Your Opponents Bunkers,' players must prioritize reconnaissance and offensive planning from the early game stages. Bunkers are positioned at opposite ends of the map, with a central mineral line providing a valuable multi location for resource control and timing pushes. The map's design emphasizes rapid resource expansion and map control, as securing the opponent's economy or directly assaulting their bunkers can dictate the flow of battle. Beginners should focus on stable resource management and defensive structures, while intermediate to advanced players can leverage early aggression and pressure strategies. Bunkers are elevated, requiring players to secure high ground paths for optimal attacking routes. The balance is symmetrical, ensuring fair resource distribution and symmetrical expansion routes. Early to mid-game revolves around resource gathering and army production, while the late-game shifts toward large-scale battles and bunker destruction. This map offers strategic depth for 1v1 enthusiasts, delivering intense and fast-paced combat. Before playing, it's crucial to scout the opponent's expansion routes and bunker positions, carefully planning initial army compositions and push timings to gain an early advantage.

다운로드 0 · 조회 0 · 댓글 0
맵 선택 가이드

태그는 맵의 핵심 특징을 빠르게 설명하지만 제작 버전마다 규칙이 다를 수 있습니다. 상세 설명에서 권장 인원, 난이도, 플레이 시간과 버전을 함께 확인한 뒤 다운로드하세요.