
18방향 스타크래프트 맵 모음
'18방향' 태그가 등록된 맵을 모았습니다. 장르 하나로 찾기 어려운 플레이 방식, 난이도와 특징을 중심으로 인기 맵과 최신 맵을 비교해 보세요.
- 등록 맵
- 4개
- 누적 다운로드
- 0
- 누적 조회
- 112
인기 맵
다운로드와 조회 반응이 높은 맵입니다.
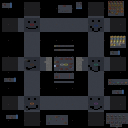
해피 페이스 디펜스 18웨이 (HAPPY FACE Defense 18-way)
스타크래프트 브루드워의 대표적인 디펜스 장르 유즈맵인 <b>HAPPY FACE Defense 18-way</b>는, 이름 그대로 웃는 얼굴 모양의 기지 구조를 기반으로 한 다방향 공격 디펜스 맵이다. 맵의 중앙에는 커다란 웃는 얼굴 형상이 배치되어 있으며, 이 얼굴의 주변으로 총 18개의 입구가 펼쳐져 있어 플레이어는 어디서든 공격을 받게 된다. 얼굴의 입술 부분은 주로 방어 포인트로 활용되며, 눈과 코는 추가 보호막 역할을 한다. 맵의 구조는 매우 독특한 디자인으로 인해 시각적으로도 흥미를 유발하며, 동시에 방어 전략을 짜기에도 흥미로운 요소들을 제공한다. 이 맵의 가장 큰 특징은 바로 18방향의 공격 루트인데, 이는 기존 디펜스 맵에서 흔히 볼 수 있는 8방향이나 12방향과는 차별화된 요소로, 공격의 난이도를 한층 높인다. 플레이어는 얼굴 주변의 입구를 효과적으로 방어하기 위해 멀티 포지션의 배치와 방어 건물의 최적화를 carefully plan해야 한다. 또한, 맵 곳곳에 배치된 미네랄과 가스 멀티는 자원 확보를 위한 공간으로도 활용되며, 이를 통해 지속적인 방어력을 유지할 수 있다. 그러나 너무 공격에 치중하다가 리소스가 부족해지면 방어가 허술해질 수 있으므로 자원 관리가 중요하다. 이 맵은 주로 혼자서 플레이하는 싱글 디펜스 형식으로 진행되며, 플레이어는 계속해서 몰려오는 적군 웨이브를 방어해야 한다. 적군은 대부분 저그 종족의 유닛으로 구성되어 있으며, 후반부로 갈수록 점점 강해지는 웨이브를 상대해야 한다. 따라서 초반의 방어가 얼마나 안정적으로 이루어지느냐가 전체적인 승패를 좌우한다. 또한, 맵의 특성상 방어 건물의 업그레이드와 유닛의 생산 타이밍을 잘 맞춰야 하며, 특히 입구가 많은 만큼 방어 건물의 배치와 수비 병력의 구성이 중요하다. 이 맵은 디펜스 장르의 전형적인 재미 요소인 '방어의 묘미'와 더불어, 독특한 시각적 디자인과 다방향 공격 시스템으로 인해 많은 플레이어들에게 사랑받고 있다. 특히 스타크래프트 유즈맵의 클래식한 장르인 디펜스에 익숙한 유저라면 새로운 경험을 느낄 수 있을 것이다. 추천 대상은 디펜스 장르를 좋아하는 플레이어들로, 특히 방어와 자원 관리에 중점을 두고 전략을 세우고 싶은 유저들에게 적합하다. 또한, 맵의 구조와 입구 수를 고려할 때, 초보 플레이어보다는 조금 경험이 있는 플레이어에게 더 어울릴 수 있다. 맵을 시작하기 전에 얼굴 주변의 입구 수와 방어 포인트를 미리 확인해 두는 것이 좋다. HAPPY FACE Defense 18-way is a classic defense-style custom map in StarCraft: Brood War, featuring a unique design based on a smiling face structure. The map's central area is shaped like a large smiley face, surrounded by 18 entry points from which enemies attack from all directions. The lips of the face serve as key defensive positions, while the eyes and nose provide additional protection. The visual design is eye-catching, and the strategic depth of positioning defensive structures is engaging for players. The standout feature of this map is its 18-directional attack routes, which significantly increase the challenge compared to traditional 8 or 12-direction defense maps. Players must carefully plan multi-position defenses and optimize building placements to cover all entry points effectively. The map also includes scattered mineral and gas patches near the face structure, allowing for resource collection to maintain defensive capabilities. However, players must balance between resource gathering and defense, as neglecting one can lead to vulnerabilities. The gameplay follows a single-player defense format where the player must continuously fend off waves of enemy units, primarily consisting of Zerg units. As the game progresses, the enemy waves become stronger, making early-game defense crucial for long-term success. Upgrading defensive structures and timing unit production are essential strategies. The abundance of entry points requires careful planning of building placements and defensive unit compositions to maximize efficiency. This map combines the classic appeal of defense games with a visually distinctive design and a multi-directional attack system, making it a favorite among StarCraft custom map enthusiasts. Players familiar with the defense genre will find this map particularly engaging, especially those who enjoy strategic resource management and defense planning. While beginners can try the map, its complexity makes it more suitable for players with some experience in defense-style maps. Before starting, it’s advisable to study the 18 entry points and defensive hotspots around the smiley face structure.
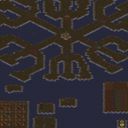
Lurker Defence 18wayv.1.13
스타크래프트 브루드워의 유즈맵 중에서도 독특한 개성을 지닌 〈Lurker Defence 18way v1.13〉는 이름에서도 알 수 있듯 18방향으로 배치된 러커를 중심으로 한 디펜스 장르의 맵이다. 맵의 중앙에는 광물이 풍부한 기지가 있으며, 이를 중심으로 18방향으로 러커가 배치되어 있다. 플레이어는 이 러커를 컨트롤하거나, 기지를 지켜내며 적의 공격을 방어하는 것이 주요 목표로 보인다. 맵의 구조는 대칭형으로 설계되어 있으며, 각 방향마다 러커가 배치되어 있어 방어 라인을 구축하거나, 러커를 적극 활용해 공격을 페이즈로 전환할 수 있는 기회를 제공한다. 러커의 특성상 근접 공격과 사정거리, 방어력 강화가 필수적으로 느껴지며, 이를 바탕으로 한 전략적 플레이가 요구된다. 맵의 전체적인 분위기는 황무지 타일셋을 사용해 황량한 전장 feel을 연출하며, 러커의 기습적 공격과 방어의 긴장감이 조화를 이룬다. 특히 18방향이라는 특징 덕분에 단순한 디펜스가 아니라 다방향에서 오는 위협을 효과적으로 대응해야 하는 전략적 깊이가 느껴진다. 초보 플레이어는 러커의 특성을 이해하지 못해 쉽게 무너질 수 있지만, 숙련자라면 러커의 장점을 살려 능동적인 플레이가 가능할 것이다. 맵의 난이도는 러커의 배치와 적의 공격 패턴에 따라 크게 달라지며, 방어 라인을 구축하는 동시에 러커를 효율적으로 활용하는 것이 관건이다. 플레이 전 반드시 러커의 특성과 배치 위치를 숙지하고, 각 방향의 취약점을 파악하는 것이 중요하다. 또한, 러커의 업그레이드와 유닛의 배치에 따라 전략이 달라질 수 있으므로, 다양한 시도를 해보며 최적의 전략을 찾는 것이 좋다. 이 맵은 러커를 좋아하는 유저들에게는 새로운 재미를 제공할 것이며, 디펜스 장르의 새로운 가능성을 보여주는 작품으로 평가된다. 특히 다방향에서 오는 위협을 동시에 처리해야 한다는 점에서 전략적 깊이가 깊고, 러커의 특성을 살린 플레이가 요구된다. 초보자는 러커의 특성을 충분히 이해한 후 시도하는 것이 좋으며, 숙련자라면 더욱 전략적인 플레이가 가능할 것이다. 맵의 난이도와 플레이 시간은 개인의 전략과 숙련도에 따라 크게 달라질 수 있으므로, 반복 플레이를 통해 자신만의 스타일을 개발하는 것이 중요하다. 맵의 구조와 러커의 특성을 잘 이해한다면, 단순히 방어만 하는 것이 아니라 공격과 방어의 균형을 맞춰 더 높은 점수를 노릴 수 있을 것이다. 이 맵은 러커를 중심으로 한 디펜스 장르의 새로운 장르를 개척했다는 점에서 주목받을 만한 작품으로, 스타크래프트 유즈맵의 다양성을 넓혀주는 데 큰 역할을 했다고 볼 수 있다. Lurker Defence 18way v1.13 is a unique user-made defense map in StarCraft: Brood War, featuring 18-directional lurkers as its core gameplay element. The map centers around a mineral-rich base with lurkers positioned in all 18 directions, requiring players to either control these lurkers or defend the base from enemy attacks. The symmetrical design ensures balanced gameplay, while the lurkers' placement allows for strategic defense lines or aggressive phase transitions. Given the lurkers' characteristics—melee attacks, range, and defensive upgrades—the map demands a blend of tactical awareness and adaptability. The wasteland tileset enhances the map's desolate battlefield atmosphere, where lurker ambushes and defensive maneuvers create a tense, dynamic experience. The 18-directional setup transforms a simple defense map into a multi-faceted challenge, where players must address threats from all sides. Beginners may struggle without a solid understanding of lurker mechanics, but experienced players can leverage lurkers' strengths for proactive play. Difficulty varies based on lurker placement and enemy attack patterns, emphasizing the need to fortify defense lines while utilizing lurkers effectively. Before playing, it's crucial to study lurker behaviors, assess directional weaknesses, and experiment with upgrades and unit placements to refine strategies. This map offers lurker enthusiasts a fresh challenge and showcases the depth of defense genre in StarCraft custom maps. The multi-directional threat system and lurker-centric mechanics provide strategic complexity, making it ideal for players seeking a deeper, more dynamic defense experience. Novices should first master lurker mechanics, while veterans can explore advanced strategies to balance offense and defense. The difficulty and playtime are highly subjective, depending on individual skill and approach, so repeated playthroughs are encouraged to develop a personalized style. Understanding the map's structure and lurker dynamics allows players to not only defend but also score higher by striking a balance between aggression and protection. As a pioneer in lurker-focused defense maps, this title expands the genre's possibilities within StarCraft custom maps.
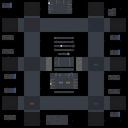
마린 D. 18-웨이 - ver. 9.2 (Marine D. 18-way - ver. 9.2)
‘마린 D. 18-웨이 - ver. 9.2’는 스타크래프트 브루드워의 대표적인 유즈맵 중 하나로, 18방향으로 균일한 전투 환경을 제공하는 독특한 디자인으로 유명하다. 이 맵은 기존의 4/8방향 전투가 아닌, 더 섬세한 조작과 전술적 선택을 요구하는 18방향 시스템을 도입해 전략적 깊이를 크게 높였다. 중앙에 위치한 넓은 평지 맵에서 펼쳐지는 전투는 마린, 파이어뱃, 고스트 등 다양한 유닛을 조합해 적을 제압하는 방식으로 진행되며, 맵의 대칭성과 넓은 시야가 균형을 맞추는 데 핵심 역할을 한다. 특히, 맵의 구조는 유닛의 이동과 공격 방향을 자연스럽게 분산시켜, 한쪽으로 몰리는 상황을 방지하고 플레이어의 창의적인 전술을 유도한다. 맵의 수정 버전인 만큼, 과거 버전과의 차이점은 없지만 18방향 시스템이 더욱 정교하게 개선되어 전투의 몰입감을 한층 끌어올렸다는 평가를 받는다. 이 맵은 초보자가 접근하기에는 다소 복잡할 수 있지만, 전술을 중시하는 플레이어에게는 매력적인 선택지가 될 것이다. 맵의 밸런스는 과거부터 꾸준히 개선되어 왔으며, 특히 중앙 평지의 넓이가 넓은 만큼 유닛의 움직임과 스킬 활용이 자유로운 편이다. 플레이 전에는 유닛의 조합과 맵의 방향성에 익숙해질 필요가 있으며, 18방향 시스템의 특성을 이해하면 더 전략적인 플레이가 가능할 것이다. 이 맵은 6인 대전이 주된 플레이 방식이므로, 팀워크와 협력이 중요한 요소로 작용한다. 또한, 맵의 대칭성과 넓은 시야가 균형을 맞추는 데 도움이 되므로, 초보자와 숙련자 모두에게 균등한 기회가 제공된다. 이 맵을 즐기기 위해서는 유닛의 특성과 맵의 구조를 충분히 숙지하는 것이 중요하다. 특히, 고스트의 EMP나 사이언스의 irradiated 같은 특수 유닛의 활용이 승패를 좌우할 수 있으므로, 이를 염두에 두고 전략을 짜는 것이 좋다. 맵의 디자인 자체가 전략적 깊이를 높이기 위해 설계되었으므로, 단순한 공격보다는 유닛의 움직임과 위치 선정을 중시하는 플레이가 권장된다. 이 맵은 팀플레이와 전술적 사고를 좋아하는 플레이어들에게 특히 추천할 만하다. 또한, 맵의 수정 버전이 여러 차례 업데이트되어 왔으므로, 최신 버전의 특징과 개선점을 숙지하는 것도 좋은 방법이다. 마지막으로, 이 맵은 넓은 시야와 대칭 구조 덕분에 다양한 전략을 시도해 볼 수 있는 공간이 풍부하다는 장점이 있다. 이러한 특징은 플레이어의 창의성을 자극하고, 게임의 재미를 한층 더 끌어올린다. 이 맵을 처음 플레이한다면, 유닛의 조합과 맵의 방향성을 충분히 이해한 후 도전하는 것이 좋다. 초보자의 경우, 기본적인 유닛 조합과 간단한 전략으로도 충분히 즐길 수 있지만, 숙련자들은 더 복잡한 전술을 구사해 볼 수 있다. 맵의 구조가 복잡하지 않으면서도 전략적 깊이가 충분하다는 점에서, 이 맵은 스타크래프트 유즈맵의 명작으로 손꼽힌다. 특히, 18방향 시스템은 다른 맵에서는 보기 힘든 독특한 요소로, 이 맵만의 매력을 잘 살려낸다. 이 맵을 플레이하면서 전술적 사고를 키우고, 다양한 유닛의 조합을 실험해 보는 것도 좋은 경험이 될 것이다. 마지막으로, 이 맵은 팀플레이와 협력이 중요한 만큼, 팀원과의 소통을 중시하는 플레이어가 더욱 즐길 수 있는 구조로 되어 있다. 이 맵을 통해 스타크래프트의 전략적 깊이를 한층 더 체험해 보길 바란다. ‘Marine D. 18-Way - ver. 9.2’ is one of the most iconic custom maps in *StarCraft: Brood War*, renowned for its unique design that provides a balanced combat environment across 18 directions. Unlike traditional 4/8-way directional maps, this version introduces a more refined 18-directional system, significantly increasing strategic depth by demanding finer control and tactical decision-making. Battles unfold on the map’s expansive central plain, where players combine units like Marines, Firebats, and Ghosts to dominate their opponents. The map’s symmetry and wide visibility play crucial roles in maintaining balance, while its structure naturally disperses unit movements and attack directions to prevent overcrowding and encourage creative play. As an updated version, it retains the core mechanics of past iterations but refines the 18-directional system for deeper immersion. While the complexity may pose a challenge for beginners, it offers a compelling choice for players who prioritize tactics. The map’s balance has been steadily improved over time, with the vast central terrain allowing for fluid unit positioning and skill execution. Before playing, it’s essential to familiarize yourself with unit combinations and the map’s directional system. Understanding the 18-direction mechanics enables more strategic gameplay. Designed primarily for 6-player team battles, the map emphasizes teamwork and cooperation, with its symmetry and visibility ensuring fair opportunities for both beginners and veterans. To fully enjoy the map, mastering unit traits and map layouts is key. Special units like the Ghost’s EMP or the Science Vessel’s Irradiate can be game-changers, so incorporating them into your strategy is highly recommended. The design itself encourages thoughtful positioning and movement over brute-force attacks, making it ideal for players who enjoy tactical depth. This map is especially recommended for those who love team-based play and strategic thinking. With multiple updates over time, keeping up with the latest version’s improvements can enhance the experience. Its wide visibility and symmetrical structure provide ample room for experimentation, fostering creativity and replayability. For newcomers, taking time to understand unit synergies and directional mechanics before diving in is advisable. While beginners can enjoy the map with basic strategies, experienced players can explore more advanced tactics. Its blend of accessibility and strategic depth solidifies its status as a masterpiece among *StarCraft* custom maps. The 18-directional system is a standout feature, offering a level of nuance rarely seen elsewhere, and it perfectly encapsulates the map’s unique appeal. Playing it not only sharpens tactical thinking but also invites experimentation with diverse unit compositions. Given its emphasis on teamwork and communication, those who prioritize coordination will find even greater enjoyment. Experience the deeper strategic layers of *StarCraft* through this map and discover why it remains a beloved classic in the custom map community.
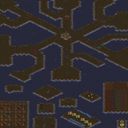
러커 디펜스 18웨이 v.5.2 (Lurker Defence 18 way v.5.2)
스타크래프트 브루드워 유즈맵 '러커 디펜스 18웨이 v.5.2'는 6인 협동으로 18개 방향에서 몰려드는 러커 무리를 막아내는 디펜스 맵이다. 황무지 타일셋의 128×128 타일 전장에서 플레이어는 중앙 기지를 중심으로 사방으로 뻗은 통로를 따라 접근하는 적을 상대한다. 맵 설명에 따르면 '30초 라운드' 시스템이 적용되어 라운드가 지날수록 적 유닛 수가 급격히 늘어나며, 업그레이드 최대치가 255로 설정되어 극후반에는 압도적인 화력전을 경험할 수 있다. 미네랄 채취 유닛이 별도로 제공되어 자원 관리의 부담을 덜어주고, 방어 건물과 유닛 생산에 집중할 수 있게 설계되었다. 18방향이라는 넓은 방어선을 커버하려면 플레이어 간 역할 분담과 실시간 병력 지원이 필수적이며, 러커의 은신 특성을 감안해 디텍터 확보와 지뢰·스캔 활용이 승패를 가른다. 초반에는 비교적 여유롭게 방어선을 구축하지만, 중반 이후 라운드 주기가 짧아지면서 밀려드는 물량에 허술한 구간이 뚫리기 쉽다. 고업그레이드 환경 덕분에 후반에는 캐리어, 배틀크루저, 울트라리스크 등 고티어 유닛을 대량 운용하는 재미가 크지만, 그만큼 인구수 200 제한과 자원 고갈과의 싸움이 병행된다. 협동 디펜스 장르 입문자보다는 물량전과 멀티태스킹에 익숙한 중급 이상 유저에게 적합하며, 6인 풀파티로 음성 채팅을 병행할 때 가장 이상적인 플레이가 가능하다. 플레이 전에는 맵 버전(v5.2) 확인과 함께 '업그레이드 255' 설정이 적용된 최신 버전인지, 러커 은신 대처용 디텍터 유닛을 각 종족별로 어떻게 확보할지 미리 논의하는 것이 좋다. Lurker Defence 18 way v.5.2 is a cooperative defense map for six players who must stop waves of Lurkers attacking from eighteen directions. On the Badlands tileset with a 128×128 tile layout, each player starts around a central base and guards the corridors radiating outward. The description notes a 30‑second round timer that causes enemy counts to surge each wave, while upgrades are capped at level 255, creating an extreme late‑game firepower spectacle. Dedicated mineral‑mining units are provided to ease economy management so players can focus on building defenses and producing units. Covering the wide eighteen‑front perimeter demands clear role assignment and real‑time troop support between allies; because Lurkers burrow, securing detectors and using scans or spider mines becomes critical. Early rounds allow a comfortable setup, but the shortening intervals soon overwhelm any weak sectors. The high upgrade ceiling lets players mass Carriers, Battlecruisers, Ultralisks and other top‑tier units for a satisfying power spike, yet the 200 supply cap and resource exhaustion add strategic tension. This map suits intermediate or advanced users familiar with large‑scale wave defense and multitasking rather than beginners, and it shines best with a full six‑person party using voice chat. Before starting, verify the map version (v5.2) and confirm the 255 upgrade setting is active, then discuss how each race will obtain detection to counter burrowed Lurkers.
최근 등록된 맵
새로 추가된 파일과 버전을 확인하세요.
마린 D. 18-웨이 - ver. 9.2 (Marine D. 18-way - ver. 9.2)
‘마린 D. 18-웨이 - ver. 9.2’는 스타크래프트 브루드워의 대표적인 유즈맵 중 하나로, 18방향으로 균일한 전투 환경을 제공하는 독특한 디자인으로 유명하다. 이 맵은 기존의 4/8방향 전투가 아닌, 더 섬세한 조작과 전술적 선택을 요구하는 18방향 시스템을 도입해 전략적 깊이를 크게 높였다. 중앙에 위치한 넓은 평지 맵에서 펼쳐지는 전투는 마린, 파이어뱃, 고스트 등 다양한 유닛을 조합해 적을 제압하는 방식으로 진행되며, 맵의 대칭성과 넓은 시야가 균형을 맞추는 데 핵심 역할을 한다. 특히, 맵의 구조는 유닛의 이동과 공격 방향을 자연스럽게 분산시켜, 한쪽으로 몰리는 상황을 방지하고 플레이어의 창의적인 전술을 유도한다. 맵의 수정 버전인 만큼, 과거 버전과의 차이점은 없지만 18방향 시스템이 더욱 정교하게 개선되어 전투의 몰입감을 한층 끌어올렸다는 평가를 받는다. 이 맵은 초보자가 접근하기에는 다소 복잡할 수 있지만, 전술을 중시하는 플레이어에게는 매력적인 선택지가 될 것이다. 맵의 밸런스는 과거부터 꾸준히 개선되어 왔으며, 특히 중앙 평지의 넓이가 넓은 만큼 유닛의 움직임과 스킬 활용이 자유로운 편이다. 플레이 전에는 유닛의 조합과 맵의 방향성에 익숙해질 필요가 있으며, 18방향 시스템의 특성을 이해하면 더 전략적인 플레이가 가능할 것이다. 이 맵은 6인 대전이 주된 플레이 방식이므로, 팀워크와 협력이 중요한 요소로 작용한다. 또한, 맵의 대칭성과 넓은 시야가 균형을 맞추는 데 도움이 되므로, 초보자와 숙련자 모두에게 균등한 기회가 제공된다. 이 맵을 즐기기 위해서는 유닛의 특성과 맵의 구조를 충분히 숙지하는 것이 중요하다. 특히, 고스트의 EMP나 사이언스의 irradiated 같은 특수 유닛의 활용이 승패를 좌우할 수 있으므로, 이를 염두에 두고 전략을 짜는 것이 좋다. 맵의 디자인 자체가 전략적 깊이를 높이기 위해 설계되었으므로, 단순한 공격보다는 유닛의 움직임과 위치 선정을 중시하는 플레이가 권장된다. 이 맵은 팀플레이와 전술적 사고를 좋아하는 플레이어들에게 특히 추천할 만하다. 또한, 맵의 수정 버전이 여러 차례 업데이트되어 왔으므로, 최신 버전의 특징과 개선점을 숙지하는 것도 좋은 방법이다. 마지막으로, 이 맵은 넓은 시야와 대칭 구조 덕분에 다양한 전략을 시도해 볼 수 있는 공간이 풍부하다는 장점이 있다. 이러한 특징은 플레이어의 창의성을 자극하고, 게임의 재미를 한층 더 끌어올린다. 이 맵을 처음 플레이한다면, 유닛의 조합과 맵의 방향성을 충분히 이해한 후 도전하는 것이 좋다. 초보자의 경우, 기본적인 유닛 조합과 간단한 전략으로도 충분히 즐길 수 있지만, 숙련자들은 더 복잡한 전술을 구사해 볼 수 있다. 맵의 구조가 복잡하지 않으면서도 전략적 깊이가 충분하다는 점에서, 이 맵은 스타크래프트 유즈맵의 명작으로 손꼽힌다. 특히, 18방향 시스템은 다른 맵에서는 보기 힘든 독특한 요소로, 이 맵만의 매력을 잘 살려낸다. 이 맵을 플레이하면서 전술적 사고를 키우고, 다양한 유닛의 조합을 실험해 보는 것도 좋은 경험이 될 것이다. 마지막으로, 이 맵은 팀플레이와 협력이 중요한 만큼, 팀원과의 소통을 중시하는 플레이어가 더욱 즐길 수 있는 구조로 되어 있다. 이 맵을 통해 스타크래프트의 전략적 깊이를 한층 더 체험해 보길 바란다. ‘Marine D. 18-Way - ver. 9.2’ is one of the most iconic custom maps in *StarCraft: Brood War*, renowned for its unique design that provides a balanced combat environment across 18 directions. Unlike traditional 4/8-way directional maps, this version introduces a more refined 18-directional system, significantly increasing strategic depth by demanding finer control and tactical decision-making. Battles unfold on the map’s expansive central plain, where players combine units like Marines, Firebats, and Ghosts to dominate their opponents. The map’s symmetry and wide visibility play crucial roles in maintaining balance, while its structure naturally disperses unit movements and attack directions to prevent overcrowding and encourage creative play. As an updated version, it retains the core mechanics of past iterations but refines the 18-directional system for deeper immersion. While the complexity may pose a challenge for beginners, it offers a compelling choice for players who prioritize tactics. The map’s balance has been steadily improved over time, with the vast central terrain allowing for fluid unit positioning and skill execution. Before playing, it’s essential to familiarize yourself with unit combinations and the map’s directional system. Understanding the 18-direction mechanics enables more strategic gameplay. Designed primarily for 6-player team battles, the map emphasizes teamwork and cooperation, with its symmetry and visibility ensuring fair opportunities for both beginners and veterans. To fully enjoy the map, mastering unit traits and map layouts is key. Special units like the Ghost’s EMP or the Science Vessel’s Irradiate can be game-changers, so incorporating them into your strategy is highly recommended. The design itself encourages thoughtful positioning and movement over brute-force attacks, making it ideal for players who enjoy tactical depth. This map is especially recommended for those who love team-based play and strategic thinking. With multiple updates over time, keeping up with the latest version’s improvements can enhance the experience. Its wide visibility and symmetrical structure provide ample room for experimentation, fostering creativity and replayability. For newcomers, taking time to understand unit synergies and directional mechanics before diving in is advisable. While beginners can enjoy the map with basic strategies, experienced players can explore more advanced tactics. Its blend of accessibility and strategic depth solidifies its status as a masterpiece among *StarCraft* custom maps. The 18-directional system is a standout feature, offering a level of nuance rarely seen elsewhere, and it perfectly encapsulates the map’s unique appeal. Playing it not only sharpens tactical thinking but also invites experimentation with diverse unit compositions. Given its emphasis on teamwork and communication, those who prioritize coordination will find even greater enjoyment. Experience the deeper strategic layers of *StarCraft* through this map and discover why it remains a beloved classic in the custom map community.
Lurker Defence 18wayv.1.13
스타크래프트 브루드워의 유즈맵 중에서도 독특한 개성을 지닌 〈Lurker Defence 18way v1.13〉는 이름에서도 알 수 있듯 18방향으로 배치된 러커를 중심으로 한 디펜스 장르의 맵이다. 맵의 중앙에는 광물이 풍부한 기지가 있으며, 이를 중심으로 18방향으로 러커가 배치되어 있다. 플레이어는 이 러커를 컨트롤하거나, 기지를 지켜내며 적의 공격을 방어하는 것이 주요 목표로 보인다. 맵의 구조는 대칭형으로 설계되어 있으며, 각 방향마다 러커가 배치되어 있어 방어 라인을 구축하거나, 러커를 적극 활용해 공격을 페이즈로 전환할 수 있는 기회를 제공한다. 러커의 특성상 근접 공격과 사정거리, 방어력 강화가 필수적으로 느껴지며, 이를 바탕으로 한 전략적 플레이가 요구된다. 맵의 전체적인 분위기는 황무지 타일셋을 사용해 황량한 전장 feel을 연출하며, 러커의 기습적 공격과 방어의 긴장감이 조화를 이룬다. 특히 18방향이라는 특징 덕분에 단순한 디펜스가 아니라 다방향에서 오는 위협을 효과적으로 대응해야 하는 전략적 깊이가 느껴진다. 초보 플레이어는 러커의 특성을 이해하지 못해 쉽게 무너질 수 있지만, 숙련자라면 러커의 장점을 살려 능동적인 플레이가 가능할 것이다. 맵의 난이도는 러커의 배치와 적의 공격 패턴에 따라 크게 달라지며, 방어 라인을 구축하는 동시에 러커를 효율적으로 활용하는 것이 관건이다. 플레이 전 반드시 러커의 특성과 배치 위치를 숙지하고, 각 방향의 취약점을 파악하는 것이 중요하다. 또한, 러커의 업그레이드와 유닛의 배치에 따라 전략이 달라질 수 있으므로, 다양한 시도를 해보며 최적의 전략을 찾는 것이 좋다. 이 맵은 러커를 좋아하는 유저들에게는 새로운 재미를 제공할 것이며, 디펜스 장르의 새로운 가능성을 보여주는 작품으로 평가된다. 특히 다방향에서 오는 위협을 동시에 처리해야 한다는 점에서 전략적 깊이가 깊고, 러커의 특성을 살린 플레이가 요구된다. 초보자는 러커의 특성을 충분히 이해한 후 시도하는 것이 좋으며, 숙련자라면 더욱 전략적인 플레이가 가능할 것이다. 맵의 난이도와 플레이 시간은 개인의 전략과 숙련도에 따라 크게 달라질 수 있으므로, 반복 플레이를 통해 자신만의 스타일을 개발하는 것이 중요하다. 맵의 구조와 러커의 특성을 잘 이해한다면, 단순히 방어만 하는 것이 아니라 공격과 방어의 균형을 맞춰 더 높은 점수를 노릴 수 있을 것이다. 이 맵은 러커를 중심으로 한 디펜스 장르의 새로운 장르를 개척했다는 점에서 주목받을 만한 작품으로, 스타크래프트 유즈맵의 다양성을 넓혀주는 데 큰 역할을 했다고 볼 수 있다. Lurker Defence 18way v1.13 is a unique user-made defense map in StarCraft: Brood War, featuring 18-directional lurkers as its core gameplay element. The map centers around a mineral-rich base with lurkers positioned in all 18 directions, requiring players to either control these lurkers or defend the base from enemy attacks. The symmetrical design ensures balanced gameplay, while the lurkers' placement allows for strategic defense lines or aggressive phase transitions. Given the lurkers' characteristics—melee attacks, range, and defensive upgrades—the map demands a blend of tactical awareness and adaptability. The wasteland tileset enhances the map's desolate battlefield atmosphere, where lurker ambushes and defensive maneuvers create a tense, dynamic experience. The 18-directional setup transforms a simple defense map into a multi-faceted challenge, where players must address threats from all sides. Beginners may struggle without a solid understanding of lurker mechanics, but experienced players can leverage lurkers' strengths for proactive play. Difficulty varies based on lurker placement and enemy attack patterns, emphasizing the need to fortify defense lines while utilizing lurkers effectively. Before playing, it's crucial to study lurker behaviors, assess directional weaknesses, and experiment with upgrades and unit placements to refine strategies. This map offers lurker enthusiasts a fresh challenge and showcases the depth of defense genre in StarCraft custom maps. The multi-directional threat system and lurker-centric mechanics provide strategic complexity, making it ideal for players seeking a deeper, more dynamic defense experience. Novices should first master lurker mechanics, while veterans can explore advanced strategies to balance offense and defense. The difficulty and playtime are highly subjective, depending on individual skill and approach, so repeated playthroughs are encouraged to develop a personalized style. Understanding the map's structure and lurker dynamics allows players to not only defend but also score higher by striking a balance between aggression and protection. As a pioneer in lurker-focused defense maps, this title expands the genre's possibilities within StarCraft custom maps.
러커 디펜스 18웨이 v.5.2 (Lurker Defence 18 way v.5.2)
스타크래프트 브루드워 유즈맵 '러커 디펜스 18웨이 v.5.2'는 6인 협동으로 18개 방향에서 몰려드는 러커 무리를 막아내는 디펜스 맵이다. 황무지 타일셋의 128×128 타일 전장에서 플레이어는 중앙 기지를 중심으로 사방으로 뻗은 통로를 따라 접근하는 적을 상대한다. 맵 설명에 따르면 '30초 라운드' 시스템이 적용되어 라운드가 지날수록 적 유닛 수가 급격히 늘어나며, 업그레이드 최대치가 255로 설정되어 극후반에는 압도적인 화력전을 경험할 수 있다. 미네랄 채취 유닛이 별도로 제공되어 자원 관리의 부담을 덜어주고, 방어 건물과 유닛 생산에 집중할 수 있게 설계되었다. 18방향이라는 넓은 방어선을 커버하려면 플레이어 간 역할 분담과 실시간 병력 지원이 필수적이며, 러커의 은신 특성을 감안해 디텍터 확보와 지뢰·스캔 활용이 승패를 가른다. 초반에는 비교적 여유롭게 방어선을 구축하지만, 중반 이후 라운드 주기가 짧아지면서 밀려드는 물량에 허술한 구간이 뚫리기 쉽다. 고업그레이드 환경 덕분에 후반에는 캐리어, 배틀크루저, 울트라리스크 등 고티어 유닛을 대량 운용하는 재미가 크지만, 그만큼 인구수 200 제한과 자원 고갈과의 싸움이 병행된다. 협동 디펜스 장르 입문자보다는 물량전과 멀티태스킹에 익숙한 중급 이상 유저에게 적합하며, 6인 풀파티로 음성 채팅을 병행할 때 가장 이상적인 플레이가 가능하다. 플레이 전에는 맵 버전(v5.2) 확인과 함께 '업그레이드 255' 설정이 적용된 최신 버전인지, 러커 은신 대처용 디텍터 유닛을 각 종족별로 어떻게 확보할지 미리 논의하는 것이 좋다. Lurker Defence 18 way v.5.2 is a cooperative defense map for six players who must stop waves of Lurkers attacking from eighteen directions. On the Badlands tileset with a 128×128 tile layout, each player starts around a central base and guards the corridors radiating outward. The description notes a 30‑second round timer that causes enemy counts to surge each wave, while upgrades are capped at level 255, creating an extreme late‑game firepower spectacle. Dedicated mineral‑mining units are provided to ease economy management so players can focus on building defenses and producing units. Covering the wide eighteen‑front perimeter demands clear role assignment and real‑time troop support between allies; because Lurkers burrow, securing detectors and using scans or spider mines becomes critical. Early rounds allow a comfortable setup, but the shortening intervals soon overwhelm any weak sectors. The high upgrade ceiling lets players mass Carriers, Battlecruisers, Ultralisks and other top‑tier units for a satisfying power spike, yet the 200 supply cap and resource exhaustion add strategic tension. This map suits intermediate or advanced users familiar with large‑scale wave defense and multitasking rather than beginners, and it shines best with a full six‑person party using voice chat. Before starting, verify the map version (v5.2) and confirm the 255 upgrade setting is active, then discuss how each race will obtain detection to counter burrowed Lurkers.
해피 페이스 디펜스 18웨이 (HAPPY FACE Defense 18-way)
스타크래프트 브루드워의 대표적인 디펜스 장르 유즈맵인 <b>HAPPY FACE Defense 18-way</b>는, 이름 그대로 웃는 얼굴 모양의 기지 구조를 기반으로 한 다방향 공격 디펜스 맵이다. 맵의 중앙에는 커다란 웃는 얼굴 형상이 배치되어 있으며, 이 얼굴의 주변으로 총 18개의 입구가 펼쳐져 있어 플레이어는 어디서든 공격을 받게 된다. 얼굴의 입술 부분은 주로 방어 포인트로 활용되며, 눈과 코는 추가 보호막 역할을 한다. 맵의 구조는 매우 독특한 디자인으로 인해 시각적으로도 흥미를 유발하며, 동시에 방어 전략을 짜기에도 흥미로운 요소들을 제공한다. 이 맵의 가장 큰 특징은 바로 18방향의 공격 루트인데, 이는 기존 디펜스 맵에서 흔히 볼 수 있는 8방향이나 12방향과는 차별화된 요소로, 공격의 난이도를 한층 높인다. 플레이어는 얼굴 주변의 입구를 효과적으로 방어하기 위해 멀티 포지션의 배치와 방어 건물의 최적화를 carefully plan해야 한다. 또한, 맵 곳곳에 배치된 미네랄과 가스 멀티는 자원 확보를 위한 공간으로도 활용되며, 이를 통해 지속적인 방어력을 유지할 수 있다. 그러나 너무 공격에 치중하다가 리소스가 부족해지면 방어가 허술해질 수 있으므로 자원 관리가 중요하다. 이 맵은 주로 혼자서 플레이하는 싱글 디펜스 형식으로 진행되며, 플레이어는 계속해서 몰려오는 적군 웨이브를 방어해야 한다. 적군은 대부분 저그 종족의 유닛으로 구성되어 있으며, 후반부로 갈수록 점점 강해지는 웨이브를 상대해야 한다. 따라서 초반의 방어가 얼마나 안정적으로 이루어지느냐가 전체적인 승패를 좌우한다. 또한, 맵의 특성상 방어 건물의 업그레이드와 유닛의 생산 타이밍을 잘 맞춰야 하며, 특히 입구가 많은 만큼 방어 건물의 배치와 수비 병력의 구성이 중요하다. 이 맵은 디펜스 장르의 전형적인 재미 요소인 '방어의 묘미'와 더불어, 독특한 시각적 디자인과 다방향 공격 시스템으로 인해 많은 플레이어들에게 사랑받고 있다. 특히 스타크래프트 유즈맵의 클래식한 장르인 디펜스에 익숙한 유저라면 새로운 경험을 느낄 수 있을 것이다. 추천 대상은 디펜스 장르를 좋아하는 플레이어들로, 특히 방어와 자원 관리에 중점을 두고 전략을 세우고 싶은 유저들에게 적합하다. 또한, 맵의 구조와 입구 수를 고려할 때, 초보 플레이어보다는 조금 경험이 있는 플레이어에게 더 어울릴 수 있다. 맵을 시작하기 전에 얼굴 주변의 입구 수와 방어 포인트를 미리 확인해 두는 것이 좋다. HAPPY FACE Defense 18-way is a classic defense-style custom map in StarCraft: Brood War, featuring a unique design based on a smiling face structure. The map's central area is shaped like a large smiley face, surrounded by 18 entry points from which enemies attack from all directions. The lips of the face serve as key defensive positions, while the eyes and nose provide additional protection. The visual design is eye-catching, and the strategic depth of positioning defensive structures is engaging for players. The standout feature of this map is its 18-directional attack routes, which significantly increase the challenge compared to traditional 8 or 12-direction defense maps. Players must carefully plan multi-position defenses and optimize building placements to cover all entry points effectively. The map also includes scattered mineral and gas patches near the face structure, allowing for resource collection to maintain defensive capabilities. However, players must balance between resource gathering and defense, as neglecting one can lead to vulnerabilities. The gameplay follows a single-player defense format where the player must continuously fend off waves of enemy units, primarily consisting of Zerg units. As the game progresses, the enemy waves become stronger, making early-game defense crucial for long-term success. Upgrading defensive structures and timing unit production are essential strategies. The abundance of entry points requires careful planning of building placements and defensive unit compositions to maximize efficiency. This map combines the classic appeal of defense games with a visually distinctive design and a multi-directional attack system, making it a favorite among StarCraft custom map enthusiasts. Players familiar with the defense genre will find this map particularly engaging, especially those who enjoy strategic resource management and defense planning. While beginners can try the map, its complexity makes it more suitable for players with some experience in defense-style maps. Before starting, it’s advisable to study the 18 entry points and defensive hotspots around the smiley face structure.
맵 선택 가이드
태그는 맵의 핵심 특징을 빠르게 설명하지만 제작 버전마다 규칙이 다를 수 있습니다. 상세 설명에서 권장 인원, 난이도, 플레이 시간과 버전을 함께 확인한 뒤 다운로드하세요.