
10웨이 스타크래프트 맵 모음
'10웨이' 태그가 등록된 맵을 모았습니다. 장르 하나로 찾기 어려운 플레이 방식, 난이도와 특징을 중심으로 인기 맵과 최신 맵을 비교해 보세요.
- 등록 맵
- 19개
- 누적 다운로드
- 0
- 누적 조회
- 786
인기 맵
다운로드와 조회 반응이 높은 맵입니다.
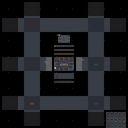
마린 디펜스 10 웨이 V 10 (Marine Defense10 Ways V 10)
마린 디펜스 10 웨이 V10은 6인 협동으로 진행되는 디펜스 유즈맵으로, 우주 타일셋 위에 10개의 진입로가 방사형으로 배치되어 있다. 각 플레이어는 마린 부대를 조종해 주기적으로 몰려오는 저그 및 프로토스 유닛 웨이브를 막아내야 하며, 중앙의 공용 업그레이드 구역에서 공격력, 방어력, 사거리 등을 강화할 수 있다. 맵은 초반 5분간 비교적 약한 유닛이 등장해 기본 조작과 자원 관리를 익히게 하고, 중반부터는 히드라리스크, 뮤탈리스크, 캐리어 등 고위험 유닛이 섞여 나와 팀원 간의 역할 분담과 타이밍 맞춤 업그레이드가 승패를 가른다. 10개의 길이 서로 독립적이면서도 중앙 보급로를 공유하므로 한 쪽이 무너지면 전체 전선이 흔들리는 구조적 긴장감이 특징이다. 추천 대상은 디펜스 장르를 즐기며 협동 플레이에 익숙한 중급 이상 유저이며, 초보자는 초반 웨이브 패턴을 익힌 뒤 본격적인 공략에 들어가는 것이 좋다. 플레이 전에는 각 진입로별 유닛 구성과 업그레이드 트리, 그리고 공용 자원 분배 규칙을 미리 숙지하면 진행이 한결 수월하다. 맵 크기는 128x128 타일로 구성되어 있으며, 시야 확보를 위한 감시 타워와 수리 베이가 각 진입로 초입에 배치되어 있어 초반 생존에 도움을 준다. 또한, 웨이브 간격은 약 45초로 고정되어 있어 타이머를 활용한 업그레이드 타이밍 계산이 핵심 전략 요소로 작용한다. 게임 종료 조건은 모든 웨이브를 클리어하거나 중앙 본진이 파괴될 때까지이며, 클리어 시 보너스 미션이 해금되어 재도전 가치를 높인다. Marine Defense 10 Ways V10 is a cooperative defense UMS map for six players, set on a space tileset with ten radially arranged entry lanes. Each player commands a marine squad to stop periodic waves of Zerg and Protoss units, while a central shared upgrade area lets the team enhance attack, armor, and range. The early game lasts about five minutes with relatively weak units, allowing players to learn basic control and resource management; mid‑game introduces high‑risk units such as Hydralisks, Mutalisks, and Carriers, making role assignment and timed upgrades decisive. Because the ten lanes operate independently yet share a central supply route, a breach on one flank jeopardizes the entire front line, creating structural tension. The map suits intermediate or higher players who enjoy defense genres and coordinated teamwork; beginners should first memorize early wave patterns before tackling full runs. Before playing, it is advisable to study each lane’s unit composition, upgrade tree, and the shared resource allocation rules. The map consists of 128×128 tiles, with watch towers and repair bays placed at each lane entrance to aid early survival. Wave intervals are fixed at roughly 45 seconds, so calculating upgrade timing with a timer becomes a core strategic element. Victory is achieved by clearing all waves or lost when the central base falls, and a bonus mission unlocks on clear, adding replay value.
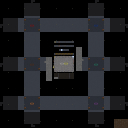
썬크 D 10웨이 하드 (SunkenD 10-Way Hard)
스타크래프트: 브루드워의 대표적인 디펜스 유즈맵인 '썬크 D 10웨이(10-Way)' 시리즈의 하드 난이도 버전으로, Sunken Defense 10-Way 시리즈의 최신작 중 하나로 추정된다. 이 맵은 중앙에 위치한 본진을 중심으로 10방향으로 뻗어나가는 길이 배치되어 있으며, 각 길마다 적절한 방어 포인트가 분배되어 있다. 플레이어는 본진에서 시작해 10개의 길 중 하나를 선택하여 적 유닛의 끊임없는 공세를 방어해야 한다. 맵의 특징인 '썬크(침수)'는 중앙 본진 주위에 물지형이 펼쳐져 있어 기지 방어와 길 선택의 전략적 고민을 유도한다. 플레이 방식은 기본적으로 컴까기(컴퓨터 상대 키우기) 형식으로, 10개의 길에서 등장하는 적들을 모두 격퇴해야만 승리할 수 있다. 각 길은 난이도별로 다른 패턴의 적이 등장하며, 하드 버전에서는 더 강력한 유닛 조합과 빠른 스폰 주기로 난이도가 급격히 상승한다. 중앙 본진의 보호 외에도 길 중간중간에 배치된 포인트 방어 타워나 유닛 생산 시설이 있어 전략의 다양성을 제공한다. 특히 물지형은 일정한 시간마다 상승하는 물결로 인해 기지 방어의 타이밍을 맞추는 것이 중요하다. 이 맵의 가장 큰 특징은 10개의 길 중 어느 곳을 선택하느냐에 따라 플레이 스타일이 완전히 달라진다는 점이다. 초반에는 중앙 본진의 방어에 집중해야 하지만, 시간이 지날수록 각 길의 중요도가 달라지며, 특정 길의 방어에 실패하면 전체적인 균형이 깨질 수 있다. 또한 하드 난이도에서는 적의 공격 패턴이 복잡해지고, 때로는 예상치 못한 방향으로의 공격을 감행하기 때문에 플레이어의 반사신경과 상황 판단력이 요구된다. 맵의 난이도 조절이 잘 되어 있어 초보자는 길 선택과 방어에 어려움을 겪지만, 숙련자는 효율적인 자원 관리와 타워 배치로 상대를 압도할 수 있다. 이 맵은 특히 디펜스 장르에 익숙한 플레이어들에게 강추하며, 타워 디펜스와 컴까기의 혼합형으로 전략적 깊이가 깊은 편이다. 다만 하드 난이도의 경우, 적의 공격력이 어느 수준 이상으로 상승하기 때문에 빠른 판단과 효율적인 자원 운용이 필수적이다. 맵의 구조상 중앙 본진을 중심으로 10개의 길로 나뉘어져 있어, 길 선택과 방어 전략에 대한 사전 학습이 도움이 된다. 맵을 플레이하기 전에는 본진 주변의 물지형 변화 패턴과 각 길이 연결되는 주요 포인트를 숙지하는 것이 중요하다. 또한 하드 버전에서는 적의 공격 주기가 짧아지기 때문에, 초반 자원 확보와 타워 건설 타이밍을 잘 맞추는 것이 승리의 관건이다. 이 맵은 시리즈 내에서도 하드 난이도답게 높은 난이도를 자랑하며, 디펜스 장르를 좋아하는 플레이어라면 도전해 볼 만한 가치가 충분하다. 맵의 난이도와 구조가 플레이어의 실력에 따라 차별화된 경험을 제공하기 때문에, 반복 플레이를 통해 전략을 다듬어나가는 재미가 있다. 특히 10개의 길 중 어느 곳을 선택하느냐에 따라 플레이 스타일이 완전히 달라지기 때문에, 다양한 전략을 연습할 수 있다. This is a hard-difficulty entry in the Sunken Defense 10-Way series, a renowned defense-style custom map for StarCraft: Brood War. The map features a central base surrounded by ten branching paths, each leading to different defensive zones where players must fend off relentless waves of enemy units. The defining characteristic of this series is the 'Sunken' terrain—flooded areas around the base that rise periodically, adding a layer of strategy to base defense timing. The gameplay follows a typical UMS (Use Map Settings) defense format, where players must protect their base from 10 distinct assault paths. In the hard version, enemies spawn more frequently and with stronger compositions, escalating the challenge significantly compared to easier difficulties. Players start at the central base but must strategically choose which paths to prioritize, as neglecting any path can lead to overwhelming pressure. The map’s water mechanics introduce dynamic elements, as rising tides periodically restrict movement and require precise timing for unit deployment and tower placement. One of the map’s standout features is its branching path design, which forces players to adapt their strategies based on their path selection. Early gameplay revolves around fortifying the base, but as the rounds progress, the importance of each path shifts, demanding constant evaluation. The hard difficulty ramps up the complexity with unpredictable enemy patterns, including sudden multi-directional attacks that test a player’s reflexes and decision-making. While beginners may struggle with the sheer number of variables, experienced players can optimize resource management and tower placement to dominate the game. This map is highly recommended for fans of the defense genre, especially those who enjoy a mix of tower defense and computer-raiding mechanics. The hybrid design offers deep strategic layers, though the hard version demands quick thinking and efficient resource allocation. Before diving in, players should familiarize themselves with the water terrain’s cycle and the key choke points along each path. Early-game priorities include securing resources and timing tower construction to counter the accelerated spawn rates of the hard difficulty. The map’s replayability lies in its ability to offer varied experiences based on path selection, making it a rewarding challenge for those willing to refine their strategies through repeated play.
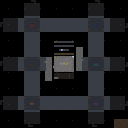
썬켄 하드 10웨이 (Sunken HARD 10Way)
**«썬켄 하드»** 은 스타크래프트 브루드워의 유즈맵으로, 디펜스 장르에 속하는 컴까기(컴퓨터 상대 디펜스) 형식의 맵이다. 맵 이름은 ‘썬켄(Sunken)’이지만, 실제로는 수중 보다는 우주 배경의 타일셋을 사용하여 넓은 평원과 섬 형태의 지형을 조망할 수 있다. 10웨이(10Way)라는 명칭에서 알 수 있듯이, 플레이어는 맵 중앙에 위치한 기지에서 출발하며, 주변 10방향으로 뻗어나오는 길목을 따라 끊임없이 몰려드는 적 유닛을 방어해야 한다. 맵의 구조는 중앙 기지 주변에 좁은 다리 형식의 통로와 넓은 평원이 번갈아 배치되어 있어, 적의 공세를 효율적으로 저지할 수 있도록 설계되었다. especially, 맵의 가장자리는 바다(또는 우주)로 둘러싸여 있어, 적의 우회를 방지하는 역할을 한다. 또한, 맵 곳곳에 배치된 미네랄과 가스 멀티는 자원 확보를 위한 추가적인 선택지를 제공하며, 플레이어는 이를 활용해 병력을 보강하거나 방어 시설을 강화할 수 있다. 이 맵의 특징 중 하나는 난이도 옵션이 여러 단계로 제공된다는 점이다. 내부 설명에 ‘levelsEven MidImpossible’이라는 문구가 포함되어 있는데, 이는 초보자부터 숙련자까지 다양한 난이도에서 즐길 수 있도록 구성되었음을 시사한다. 특히 ‘Impossible’이라는 레이팅은 극한의 난이도를 자랑하며, 숙련자들에게 도전과 성취감을 제공할 것으로 예상된다. 또한, ‘SY’라는 버전 표기는 개발자 또는 커뮤니티에서 지속적인 업데이트가 있었음을 나타내며, 맵의 안정성과 완성도를 높이는 데 기여했을 것이다. 플레이어는 맵의 중앙 기지에서 출발해 주변의 적을 섬멸하며, 기지의 방어 라인을 유지하는 것이 주요 목표이다. 적의 공세는 끊임없이 지속되므로, 순간적인 판단과 전략적 배치력이 요구된다. 또한, 링크드 리소스를 효율적으로 관리하지 않으면 기지 자체가 위험에 처할 수 있어, 자원 관리 역시 중요한 요소로 작용한다. **«Sunken HARD»** is a custom map for StarCraft: Brood War, classified under the UMS genre as a computer-vs-player defense type map. Despite its name ‘Sunken’, the map utilizes a space-themed tileset, offering a vast plain and island-like terrain. The ‘10Way’ in its name indicates that players start from a central base and must defend against endless waves of enemy units approaching from ten different directions. The map’s layout alternates between narrow bridge-like pathways and wide plains around the central base, allowing players to efficiently block enemy offensives. Notably, the map is bordered by sea (or space), preventing enemies from bypassing defenses. One of the map’s standout features is its multiple difficulty settings, as suggested by the internal description ‘levelsEven MidImpossible’. This implies the map caters to both beginners and advanced players, with ‘Impossible’ representing an extreme challenge for experienced players. The ‘SY’ in the version name (e.g., ‘SunkenD 10Way 14.5 SY.scm’) likely denotes a developer or community update, reflecting ongoing improvements to stability and content. Players start at the central base, eliminating surrounding enemies while maintaining defensive lines. Since enemy waves are relentless, quick decision-making and strategic positioning are crucial. Poor resource management can jeopardize the base’s integrity, making economic balance a key factor in survival.
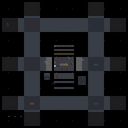
스택드 캐논 디펜스 10-웨이 (Stacked Cannon Defense 10-Way)
스타크래프트 브루드워의 대표적인 디펜스 유즈맵인 《스택드 캐논 디펜스 10-웨이(Stacked Cannon Defense 10-Way)》는 10방향에서 몰려오는 적을 방어하는 구조로, 중앙에 위치한 플레이어 기지 주변을 원형으로 둘러싼 다수의 캐논 포탑과 미네랄 라인이 특징적인 맵이다. 맵의 가장 큰 특징은 바로 ‘스택드(Stacked) 캐논’이라는 이름에서 알 수 있듯, 포탑이 여러 층으로 겹쳐져 설치되어 있다는 점이다. 이 덕분에 포탑의 공격력이 집중되어 강력한 대공 및 대지 방어가 가능하며, 특히 중반 이후에는 압도적인 화력으로 웨이브를 밀어낼 수 있다. 맵의 중앙에는 방어 타워와 함께 일꾼 유닛을 생산할 수 있는 커맨드 센터가 위치하고 있으며, 주변의 미네랄 라인에서는 꾸준히 자원을 채취할 수 있어 자원 관리의 중요성도 높다. 또한, 맵의 가장자리를 따라 배치된 ‘웨이(Way)’란 이름에 걸맞게 10개의 입구에서 동시에 적이 몰려오며, 각 웨이브는 일정 주기로 반복되어 플레이어의 집중력과 전략을 끊임없이 요구한다. 초반에는 소수의 적을 상대하며 포탑을 배치하고 자원을 모으는 것이 중요하며, 중반부터는 포탑을 업그레이드하거나 추가 포탑을 건설하여 방어선을 강화해야 한다. 후반으로 갈수록 적의 공격력이 강해지고 수가 많아지므로, 포탑의 효율적인 배치와 자원 관리가 승패를 가르는 핵심 요소로 작용한다. 이 맵은 오랜 시간 동안 디펜스 장르의 베스트셀러로 손꼽히며, 특히 ‘캐논 스택’이라는 독특한 시스템 덕분에 다른 디펜스 맵과 차별화된 플레이 경험을 제공한다. 또한, 10방향에서 동시에 적이 공격해 오기 때문에 전략적 깊이가 깊고, 포탑의 배치와 업그레이드 타이밍을 잘 조절해야만 안정적인 클리어를 노릴 수 있다. 초보 플레이어는 포탑을 과도하게 설치하지 않고, 자원 관리와 포탑의 효율적인 업그레이드를 우선시하는 것이 좋으며, 숙련된 플레이어는 더 빠른 클리어와 자원 최적화를 목표로 삼을 수 있다. 맵을 플레이하기 전에는 포탑의 공격 범위와 업그레이드 비용을 미리 확인하고, 각 웨이브의 패턴을 익히는 것이 중요하다. 특히, 자원 부족이나 포탑의 배치 실수로 인해 방어선이 무너지는 경우가 많으므로, 자원 채취와 포탑 건설의 균형을 carefully 관리해야 한다. Stacked Cannon Defense 10-Way is a classic defensive custom map in *StarCraft: Brood War* where players must fend off waves of enemies approaching from ten directions. The map is characterized by its circular layout centered around the player’s base, surrounded by multiple layers of stacked cannon turrets and mineral lines. As the name "Stacked Cannon" suggests, the turrets are arranged in overlapping layers, significantly boosting their firepower for both air and ground defense. This setup allows players to repel waves with overwhelming force, especially in the mid-to-late game. At the center of the map sits a Command Center, which not only serves as a defensive tower but also enables worker production. Surrounding mineral lines provide a steady income, making resource management a critical aspect of the game. The map’s edges feature ten designated entry points ("ways"), through which enemies surge in synchronized waves at regular intervals, testing the player’s focus and adaptability. In the early game, players must prioritize securing resources, placing initial turrets, and reinforcing defenses. As the game progresses, upgrading turrets and constructing additional defenses become essential to withstand increasingly powerful and numerous enemy attacks. Late-game success hinges on efficient turret placement and meticulous resource allocation. A long-standing bestseller in the defense genre, Stacked Cannon Defense 10-Way stands out for its unique "cannon stacking" system, offering a distinct gameplay experience compared to other defense maps. The simultaneous assaults from ten directions add strategic depth, requiring players to carefully time turret upgrades and placements for a stable clear. Novice players should focus on avoiding excessive turret placements, managing resources wisely, and prioritizing efficient upgrades, while experienced players can aim for faster clears and optimized resource use. Before playing, it’s crucial to study turret range and upgrade costs, as well as familiarize yourself with enemy wave patterns. Many failures stem from poor resource management or misplaced turrets, so balancing income collection and defensive construction is key to maintaining a strong defense line.
썬크 10웨이 어드밴스드 (Sunk 10-Way Advanced)
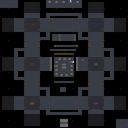
스타크래프트 브루드워의 유즈맵 ‘SuNkD10WaY =~*AdVaNcEd*~=’는 6인의 플레이어가 동시에 참여하는 고난이도 디펜스형 맵이다. 맵의 핵심은 중앙에 위치한 거대한 기지 구조물로, 플레이어는 이 기지의 입구와 내부 통로를 방어하며 끊임없이 밀려드는 적 유닛을 상대해야 한다. 맵의 특징은 지형이 복잡한 ‘10-웨이’라는 이름에서 알 수 있듯이, 총 10개의 입구가 존재한다는 점으로, 각 입구는 좁고 긴 통로로 연결되어 있어 방어 전술을 세우는 데 중점을 둔다. 특히 입구마다 배치된 트리거를 통해 적의 공격 타이밍과 패턴을 조절할 수 있도록 설계되어 있으며, 플레이어는 이를 바탕으로 병력을 배치하고 방어선을 구축해야 한다. 중앙 기지 내부는 넓은 개활지로, 다수의 건물이 밀집되어 있어 전략적 요충지가 된다. 방어에 성공하려면 입구별로 효율적인 유닛 배치를 고려해야 하며, 한 곳이라도 뚫리면 전력이 급격히 약화될 위험이 있다. 또한, 맵의 난이도는 입구 간 동시 공격 타이밍과 적의 조합에 따라 크게 달라지므로, 숙련된 플레이어에게 적합한 구조로 보인다. 초보자는 방어 라인을 구축하는 데 어려움을 겪을 수 있지만, 입구별로 나뉜 공격 패턴을 익히면 점차 안정적인 플레이가 가능해진다. 맵의 분위기는 어두운 우주 배경으로, 어두운 색상과 붉은 조명이 어우러져 긴장감을 조성한다. 플레이 전에는 맵의 입구 수와 통로 길이를 숙지하고, 방어에 필요한 유닛 조합을 미리 준비하는 것이 중요하다. 특히 입구가 좁아 적의 접근을 막기 쉬운 구조이지만, 동시에 한 번 돌파당하면 회복이 어려운 구조이므로 신중한 판단이 요구된다. 추천 대상은 디펜스 게임을 즐기는 플레이어이며, 팀 단위로 플레이할 경우 협력과 통신이 필수적이다. 맵의 장점은 입구 수가 많아 전략적 깊이가 깊고, 트리거를 통한 공격 패턴 변경으로 지루함을 느끼지 않을 수 있다는 점이다. 반면, 초보자는 방어 라인을 구축하는 데 시간이 걸릴 수 있어 난이도를 가늠해보아야 한다. overall, ‘SuNkD10WaY =~*AdVaNcEd*~=’는 고도의 전략성과 긴장감을 동시에 제공하는 디펜스형 유즈맵으로, 숙련된 플레이어들에게 강렬한 경험을 선사할 것이다. This StarCraft: Brood War custom map, ‘SuNkD10WaY =~*AdVaNcEd*~=’, is a high-difficulty defense-type UMS designed for six players. The map revolves around a massive central base structure, where players must defend multiple entry points—totaling ten narrow corridors—against relentless enemy waves. The core challenge lies in balancing defensive formations across these entry points, as each is linked to a trigger system controlling enemy attack timing and patterns. The central base features a wide open area densely packed with buildings, making it a critical strategic hub. Successfully defending requires meticulous unit placement at each entrance, as breaches can cripple a player's entire force. Difficulty escalates with simultaneous attacks and varied enemy compositions, demanding adaptability and quick decision-making. The dark cosmic theme, enhanced by eerie red lighting, amplifies the intense atmosphere. Beginners may struggle initially due to the map's complexity, but mastering entrance-specific tactics can lead to steady improvement. Pre-game preparation—such as understanding each entry's layout and assembling a balanced defense force—is crucial for success. This map is best suited for experienced players who enjoy strategic depth and high-stakes defense gameplay. While team coordination is essential, the ten-entry design ensures each player faces unique challenges, keeping the experience engaging. The primary strength lies in its strategic depth and dynamic enemy patterns, though new players may find the learning curve steep. Overall, ‘SuNkD10WaY =~*AdVaNcEd*~=’ delivers a thrilling, high-pressure defense experience tailored for seasoned StarCraft players seeking a challenge.
골리아스 디펜스 10웨이 히어로 40 (Goliath Defense 10-Way Hero 40)
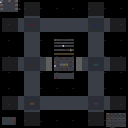
‘골리아스 디펜스 10웨이 히어로 40’은 스타크래프트: 브루드워의 대표적인 디펜스(방어)형 유즈맵으로, 플레이어들이 골리아스를 조종해 끊임없이 몰려드는 적군을 방어하는 것이 핵심 목표다. 맵의 구조는 중앙에 위치한 플레이어 기지 주변으로 10개의 진입로가 펼쳐져 있으며, 각 진입로마다 적의 공격 패턴과 규모가 조금씩 다르다. 초반에는 약한 저글링과 질럿이 주로 등장하지만, 웨이브가 진행될수록 하이템플러, 사이언스 베슬, 캐리어 등 강력한 유닛들이 포함된 혼성 부대가 몰려온다. 플레이어는 골리아스를 업그레이드해 방어력을 높이고, 전략적으로 유닛을 배치하거나 자원을 활용해 보조 병력을 보충해야 한다. 특히 40레벨까지의 성장 시스템은 단순히 방어만 하는 것이 아니라, 레벨업을 통해 스킬을 획득하거나 유닛을 강화하는 재미를 더한다. 맵의 볼륨이 크고 웨이브가 반복될수록 난이도가 급격히 상승하는 특징이 있어, 초보자는 초반 웨이브를 넘기는 데 집중해야 하며 숙련자는 효율적인 자원 관리와 스킬 활용을 요구한다. 6인까지 함께 플레이할 수 있지만, 팀 플레이보다는 각자의 골리아스를 강화하는 Individual 방식으로 진행된다. 맵의 밸런스는 웨이브 디자인과 골리아스의 성장 시스템에 달려 있으며, 적절한 난이도 조절과 반복 플레이를 통해 숙련도를 높일 수 있다. 플레이 전에는 골리아스의 스킬과 업그레이드 트리를 미리 숙지하고, 각 웨이브에서 등장하는 적 유닛의 조합을 분석하는 것이 중요하다. 맵 특유의 긴 플레이 시간과 높은 난이도는 숙련자들에게는 큰 도전 과제가 되지만, 초보자에게는 적응하기 버거운 구조이기도 하다. Goliath Defense10-WayHero40 is a classic defense-style custom map in StarCraft: Brood War, where players control a Goliath unit to defend against endless waves of enemy forces. The map features a central player base with ten distinct entry points, each presenting unique enemy attack patterns and compositions. Early waves consist of weaker units like Zerglings and Zealots, but as the game progresses, players face increasingly powerful forces including High Templars, Science Vessels, and Carriers. Upgrading the Goliath and strategically placing units or using resources to reinforce defenses are key to survival. The leveling system up to level 40 adds depth, allowing players to unlock skills or strengthen units, transforming the game from a simple defense task into a strategic challenge. While the map supports up to six players, it operates on an individual basis rather than team play. The difficulty ramps up quickly, making it crucial for beginners to focus on early waves, while experienced players must master resource management and skill utilization. Before playing, reviewing the Goliath's skill tree and analyzing enemy compositions per wave will greatly improve performance. Though the long playtime and high difficulty may intimidate newcomers, the map offers a rewarding experience for those seeking a tough challenge.
해병 디펜스 10웨이 영웅 60레벨 (Marine Defense 10-Way Hero 60 Levels)
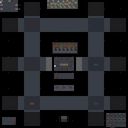
스타크래프트 브루드워의 디펜스 장르 유즈맵인 〈Marine Defense10-WayHero60lvl〉은 10개의 영웅을 조종하여 끊임없이 몰려오는 적들을 방어하는 재미와 긴장감이 가득한 콘텐츠다. 맵의 핵심은 60레벨까지 성장할 수 있는 영웅 시스템으로, 각 영웅은 고유한 스킬과 성장 포인트를 통해 전투력을 강화할 수 있다. 플레이어는 시작 지점에서 영웅을 선택한 뒤, 중앙에 위치한 기지나 주요 거점을 지키며 적의 공격 패턴을 분석하고 효율적인 스킬 사용법을 익혀야 한다. 공격이 아닌 수비에 중점을 둔 이 맵은 맵 곳곳에 배치된 방어 건물과 업그레이드 시스템을 활용해 적의 침공을 막아내야 한다. 특히 10개의 영웅이 각기 다른 역할을 맡아 조합을 짜는 재미가 있으며, 레벨업을 통해 스킬 트리를 선택할 수 있어 전략적인 플레이가 요구된다. 맵의 규모는 상당히 넓은 편으로, 적의 공격 루트와 기지 구조를 미리 파악하지 않으면 방어에 어려움을 겪을 수 있다. 또한, 적의 웨이브가 끊임없이 이어지므로 집중력을 유지하며 효율적인 자원 관리와 영웅 육성이 필수적이다. 이 맵은 초보자보다는 디펜스 장르에 익숙한 플레이어들에게 더 잘 맞을 것으로 보이며, 특히 영웅 육성과 스킬 조합에 대한 이해가 높을수록 더 높은 난이도에서 재미를 느낄 수 있다. 맵의 난이도는 영웅의 레벨과 선택한 스킬에 따라 크게 달라지므로, 여러 번 플레이해보며 최적의 전략을 찾는 것이 중요하다. 전체적으로 긴 플레이 시간과 반복 가능한 재미, 그리고 전략적인 선택의 중요성이 이 맵의 큰 장점으로 보인다. 플레이 전에는 미리 영웅의 스킬과 성장 루트를 숙지하고, 맵의 주요 거점과 방어 지점을 확인하는 것이 좋다. 또한, 적의 공격 패턴을 분석해 방어 건물의 배치와 업그레이드 우선순위를 정하는 전략을 세워두면 훨씬 수월하게 진행할 수 있을 것이다. StarCraft: Brood War’s defense-genre custom map *Marine Defense10-WayHero60lvl* lets players command ten unique heroes to fend off endless waves of enemies in a tense, action-packed experience. At its core is a hero system that grows up to level 60, where each hero unlocks distinct skills and growth points to boost combat power. After picking a hero at the starting point, players must defend the central base or key outposts, analyze enemy attack patterns, and learn to use skills effectively. Rather than focusing on offense, this map emphasizes defense by leveraging scattered defensive structures and an upgrade system to repel invasions. With ten heroes filling different roles, players can experiment with team compositions, and level-ups let them choose skill trees for strategic depth. The map sprawls across a large area, so failing to scout enemy routes and base layouts early can make defense much harder. Since enemy waves arrive nonstop, maintaining focus, managing resources wisely, and leveling heroes efficiently are all essential. This map is better suited to players already familiar with the defense genre than beginners, and the deeper your grasp of hero progression and skill synergies, the more rewarding—and challenging—it becomes. Difficulty scales dramatically with hero level and skill choices, so experimenting repeatedly to refine your strategy is key. Overall, the map stands out for its long play sessions, replayability, and the weight of strategic decisions. Before jumping in, study each hero’s skills and growth paths, and scope out the map’s key outposts and defensive zones. Analyzing enemy attack patterns in advance and planning where to place defenses and prioritize upgrades will make the experience far smoother.
썬컨D 10웨이 13.5 임파서블 (SunkenD 10Way 13.5 Impossible)
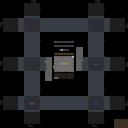
‘썬컨D 10웨이 13.5 임파서블(SunkenD 10Way 13.5 Impossible)’은 스타크래프트: 브루드워의 컴까기 장르 유즈맵으로, 중앙에 위치한 플레이어 기지에 10방향에서 끊임없이 몰려드는 적군 스폰 지역을 방어하는 디펜스 형식의 맵이다. 맵의 이름은 ‘썬컨D’라는 시리즈명과 ‘10Way’(10방향), ‘13.5’, ‘임파서블’이라는 난이도 표기가 조합되어 있는데, 특히 ‘13.5’는 맵의 규모나 난이도 레벨을 나타내는 것으로 추정된다. 내부 맵 설명에 ‘levelsEven MidImpossible’이 포함되어 있어 초중수와 중고수 사이의 난이도 구분이 있음을 유추할 수 있다. 이 맵의 핵심을 차지하는 것은 중앙 기지에서 펼쳐지는 디펜스 전투다. 플레이어는 스타크래프트의 종족 선택 없이 중립 건물인 ‘캐리어’와 ‘아비터’를 조종하며, 화면 중앙의 메인 기지에서 출발하는 적군 웨이브를 저지해야 한다. 맵의 구조는 완벽한 대칭형으로 설계되어 있어 10방향에서 동시 또는 순차적으로 적이 출현하는 방식으로 진행되며, 특히 ‘13.5’라는 숫자에서 보듯 기존 10웨이 시리즈보다 더 높은 밀도의 공격 패턴과 더 긴 플레이 지속 시간을 자랑한다. 적군은 주로 저글링, 히드라리스크, 뮤탈리스크, 울트라리스크 등 스타크래프트의 주요 공중/지상 유닛으로 구성되어 있으며, 플레이어는 제한된 자원과 건물을 활용해 이들을 방어해야 한다. 맵 중앙의 ‘캐리어’와 ‘아비터’는 공중 유닛을 주력으로 운용할 수 있도록 지원하며, 추가로 중앙에 위치한 ‘아둔의 성소’나 ‘네라짐 사원’과 같은 건물을 통해 추가적인 방어 수단을 확보할 수 있다. ‘썬컨D 10웨이 13.5 임파서블’의 가장 큰 특징은 ‘임파서블’이라는 이름에 걸맞게 초보 플레이어에게는 매우 어려운 난이도로 구성되어 있다는 점이다. 맵의 대칭성과 10방향 공격 패턴은 방어 전략의 수립을 요구하며, 특히 후반부로 갈수록 적군의 공격력이 급상승하는 구조로 인해 지속적인 스킬과 자원의 관리가 필수적이다. 또한, 맵의 크기가 4096x4096으로 상당히 넓고, 10개의 스폰 지역이 동시에 공격에 참여할 수 있어 전략적 선택과 집중력이 요구된다. 이 맵은 주로 6인용으로 설계되어 있으며, 팀플레이보다는 개인 플레이를 중시하는 구조로 보이나, 내부 설명에 ‘levelsEven’이라는 표현이 포함된 점으로 미루어 보아 난이도 조절을 통한 개인별 진행도 가능한 것으로 추정된다. 이 맵을 플레이하기에 앞서, 플레이어는 스타크래프트의 기본 조작법과 유닛의 특성을 충분히 숙지하고 있어야 한다. 캐리어의 인터셉터와 아비터의 스테이시스 필드, 리콜 등은 이 맵의 핵심 방어 수단이므로 이들의 활용법을 미리 연습해 두는 것이 좋다. 또한, 맵의 공격 패턴을 분석하고, 적군의 공격 타이밍에 맞춰 유닛을 배치하는 것이 중요하다. 맵의 난이도가 높기 때문에, 초보자의 경우 ‘12.x’ 버전이나 ‘13.x’ 버전의 하위 난이도 버전을 먼저 플레이해 보는 것도 하나의 방법이다. 마지막으로, 맵의 대칭성과 공격 패턴을 숙지한 후에는 중앙 기지 주변의 방어 건물을 효율적으로 배치하여 적군의 공격을 최대한 지연시키는 전략을 세워야 한다. 이 맵은 디펜스 장르의 정수를 보여주는 동시에, 플레이어의 전략적 사고와 순간 판단력을 시험하는 excellent한 경험을 제공할 것이다. This StarCraft: Brood War UMS map, ‘SunkenD 10Way 13.5 Impossible,’ is a defense-oriented mini-game where players must protect a central base against relentless waves of enemy units spawning from 10 different directions. The name ‘SunkenD’ suggests a series of defensive maps, while ‘10Way’ indicates the number of attack routes, and ‘13.5 Impossible’ hints at an extremely high difficulty level—likely a progression from earlier versions like ‘12.6’ or ‘12.9.’ The internal description, ‘levelsEven MidImpossible,’ further implies a balanced yet challenging experience for mid-level players. The core gameplay revolves around defending a central base using neutral structures such as the Carrier and Arbiter. Players control these units to fend off waves of enemy units, which escalate in both quantity and variety as the game progresses. The map’s symmetrical design ensures that enemies spawn simultaneously or in sequence from all 10 directions, creating a dynamic and strategic challenge. Players must manage limited resources and construct additional defensive buildings to counter the increasing threats. The Carrier and Arbiter provide aerial dominance, while structures like the ‘Temple of the Sun’ or ‘Nerazim Shrine’ offer supplementary defensive options. What sets ‘SunkenD 10Way 13.5 Impossible’ apart is its punishing difficulty, designed for experienced players. The sheer number of spawn points and the escalating enemy strength make it a test of both macro-management and quick decision-making. While the map is technically playable solo, its design suggests a focus on individual skill rather than team coordination. The large 4096x4096 map size and the need to monitor multiple attack vectors demand constant attention and adaptability. For players attempting this map, mastering the Carrier’s Interceptors and the Arbiter’s abilities like Recall and Stasis Field is crucial. Pre-game practice with unit control and positioning will significantly improve survival chances. Beginners may find it helpful to start with earlier versions of the map (e.g., ‘12.7’ or ‘12.9’) to acclimate to the mechanics before tackling the ‘13.5 Impossible’ challenge. Efficient base layout and strategic unit placement around the central base are key to delaying enemy advances. Ultimately, this map is a masterclass in defense strategy, pushing players to refine their tactics and reflexes in an unforgiving yet rewarding environment.
썬켄D 10웨이 14.8 임파서블 (SunkenD 10Way 14.8 Impossible)
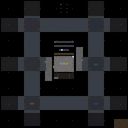
스타크래프트 브루드워의 유즈맵 중 하나인 <SunkenD 10Way 14.8 Impossible>은 25개의 레벨을 지닌 디펜스 장르의 도전형 맵이다. 맵 제목에서 짐작할 수 있듯이 '10Way'는 10방향의 유닛 진입로를, 'Impossible'은 그 이름 그대로 극한의 난이도를 자랑한다는 점을 강조한다. 맵의 중앙에 위치한 주 건물 주변으로 10개의 균일한 방향에서 적의 공격이 끊임없이 몰려오며, 플레이어는 주어진 자원으로 이 모든 공격을 방어해야 한다. 내부 설명에도 기록되어 있듯이, 심지어 'Backwash' 같은 극악의 맵조차도 이 맵의 난이도 앞에서는 무용지물일 정도로 높은 난이도를 자랑한다. 맵의 구조는 비교적 단순하지만, 그 단순함이 오히려 플레이어에게 끊임없는 긴장감을 안겨준다. 중앙 기지 주변으로 배치된 10개의 입구는 각각의 방향에서 다양한 조합의 적 유닛이 끊임없이 쏟아져 나오기 때문에, 한 번의 실수가 치명적인 결과를 초래할 수 있다. 특히 레벨이 높아질수록 적의 공격력이 가파르게 상승하고, 때로는 예상치 못한 조합의 유닛들이 등장하기도 한다. 이러한 점에서 이 맵은 단순히 유닛을 생산하고 방어하는 수준을 넘어, 전략적 사고와 빠른 판단력이 요구되는 고난이도 디펜스 게임으로 분류할 수 있다. 추천 대상으로는 스타크래프트 유즈맵의 난이도와 전략성을 즐기는 플레이어들이나, 디펜스 장르에 익숙한 유저들에게 적합하다. 초보자의 경우 난이도 때문에 쉽게 좌절할 수 있으므로, 기본적인 디펜스 맵을 몇 번 플레이한 후 도전하는 것이 좋다. 또한 이 맵은 6인 플레이를 기반으로 설계되어 있지만, 팀플레이보다는 솔로 플레이에 더 최적화되어 있다. 플레이 전에는 맵의 구조와 각 레벨별 특징을 미리 숙지하고, 자원 관리와 유닛 조합에 대한 전략을 세워두는 것이 중요하다. 특히 레벨 후반부로 갈수록 적의 공격 패턴이 복잡해지므로, 초기 레벨에서 충분한 연습을 쌓는 것이 필수적이다. SunkenD 10Way 14.8 Impossible is a defense-style user-made map in StarCraft: Brood War, featuring 25 challenging levels. The name '10Way' suggests that enemies attack from ten evenly distributed directions, while 'Impossible' signals an extreme difficulty level. Players must defend their central base against relentless waves of enemies pouring in from all sides, using their resources wisely to survive. The map’s structure is straightforward, yet this simplicity amplifies the tension as players face an endless stream of enemy units from every angle. As levels progress, enemy strength escalates rapidly, introducing unpredictable unit combinations that demand quick thinking and adaptability. This elevates the experience beyond basic defense mechanics, transforming it into a high-stakes strategic challenge. This map is ideal for players who enjoy the intricacies of StarCraft custom maps, particularly those who appreciate defense genres. Beginners may find the difficulty overwhelming, so it’s advisable to build experience with simpler defense maps first. Though designed for six players, the map is best suited for solo play rather than team-based strategies. Before starting, players should familiarize themselves with the map layout and each level’s unique challenges. Resource management and unit composition are crucial, especially as enemies grow more aggressive and unpredictable in later levels.
썬크렌 디펜스 10웨이 30레벨 (SunkenD10Way 30 Levels)
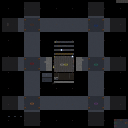
스타크래프트 브루드워의 유즈맵 중에서 독특한 디자인으로 주목받는 'SunkenD10WayEven Mid/30Lvls'는 10개의 웨이, 총 30레벨로 구성된 디펜스형 맵이다. 이 맵은 플레이어가 중앙 거점을 방어하며 적의 끊임없는 공격을 버텨내는 구조로, 맵의 중앙에 위치한 주요 건물을 중심으로 10방향으로 퍼져 있는 웨이에서 적들이 끊임없이 몰려온다. 각 웨이의 레벨이 3단계로 나뉘어 있어, 초반부터 후반까지 단계적인 난이도 상승을 느낄 수 있으며, 이는 플레이어의 전략적 대비를 요구한다. 맵의 타일셋은 우주 테마로 이루어져 있어, 우주 공간에서 펼쳐지는 방어전을 연상시키며, 전체 맵 크기는 4096x4096으로 넓은 공간을 제공하여 다양한 전술적 선택을 할 수 있도록 설계되었다. 특히, 10개의 웨이 각각의 레벨 디자인과 배치된 건물 및 방어 시설의 균형이 잘 잡혀 있어, 단순히 방어만 하는 것이 아니라 적절한 자원 관리와 유닛 배치 전략이 요구된다. 초보자의 경우 난이도가 다소 높게 느껴질 수 있지만, 반복 플레이를 통해 각 웨이의 특성을 익히고 방어 패턴을 숙지한다면 점차 안정적인 플레이가 가능해진다. 이 맵은 디펜스 장르를 선호하는 유저들에게 특히 추천되며, 특히 6인 플레이가 가능한 만큼 팀 플레이를 통한 전략적 협력이 중요한 요소로 작용한다. 또한, 30레벨에 걸쳐 단계적으로 어려움이 상승하는 구조는 플레이어의 숙련도를 자연스럽게 높이는 데 도움을 준다. 플레이 전에는 각 웨이의 레벨별 특성과 주요 방어 포인트를 미리 파악하는 것이 중요하며, 특히 자원 관리와 유닛 업그레이드 타이밍을 잘 조절해야만 후반부까지 버틸 수 있다. 이 맵은 디펜스 장르의 정석을 느낄 수 있는 작품으로, 브루드워 유즈맵의 매력을 제대로 체험하고자 한다면 반드시 한 번쯤 플레이해 볼 가치가 있다. Among the custom maps of *StarCraft: Brood War*, *SunkenD10WayEven Mid/30Lvls* stands out for its unique design—a defense-focused map featuring 10 distinct paths and a total of 30 levels. Players must defend the central base while enduring relentless waves of enemies, which emerge from the 10 directions radiating outward from the map’s core. Each path is divided into three stages, creating a gradual increase in difficulty from start to finish, forcing players to adapt their strategies accordingly. The map’s tile set adopts a space theme, evoking the feel of a battle unfolding in the cosmos, while its expansive 4096x4096 size offers ample room for tactical maneuvering. The balance of level designs, buildings, and defensive structures across the 10 paths ensures that success isn’t just about brute-force defense—it also demands smart resource management and precise unit placement. While beginners may find the difficulty steep at first, repeated play allows them to master each path’s nuances and defensive patterns, leading to steadier performance over time. This map is especially recommended for fans of the defense genre, and its six-player capacity makes teamwork and coordinated strategies essential. The 30-level progression naturally hones a player’s skills, while pre-game preparation—studying each path’s quirks, key defense points, and managing resources and upgrades—is crucial for lasting through the later stages. A quintessential example of the defense genre, this map perfectly captures the charm of *Brood War* custom maps and is well worth trying for anyone looking to experience the genre at its best.
선큰 10-웨이 엑스퍼츠 V.8 (Sunken 10-Way Xperts V.8)
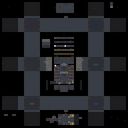
스타크래프트 브루드워 유즈맵 '선큰 10-웨이 엑스퍼츠 V.8(Sunken 10-Way Xperts V.8)'은 6인 협동 디펜스 장르의 대표적인 선큰 디펜스 맵이다. 우주 타일셋 위에서 10개 방향에서 몰려오는 적 웨이브를 선큰 콜로니와 업그레이드 유닛으로 막아내는 것이 핵심이다. 맵 크기는 128x128 타일로 구성되어 있으며, 10갈래 진입로가 중앙 기지를 향해 방사형으로 뻗어 있어 입구 막기와 병력 분배가 승패를 가른다. 엑스퍼츠 버전답게 일반판보다 웨이브 구성과 적 유닛 조합이 까다롭게 조정되어 있어, 초반 자원 관리와 업그레이드 타이밍, 후반 고급 유닛 대처까지 긴장감 있게 이어진다. 6인 전원이 한 팀으로 묶여 협동 플레이가 필수적이며, 음성 채팅이나 핑으로 진입로별 담당을 정하고 지원 병력을 주고받는 운영이 요구된다. 플레이 타임은 숙련도와 난이도에 따라 20분에서 40분 사이로 형성되며, 클리어 시 성취감이 큰 편이다. 선큰 디펜스 특유의 타워 디펜스 감각과 실시간 병력 컨트롤을 동시에 즐기고 싶은 유저, 높은 난이도의 협동전을 찾는 팀에게 추천한다. 플레이 전 버전 표기(v8.1)와 인원 수, 난이도 설정을 확인하고 시작하는 것이 좋다. 'Sunken 10-Way Xperts V.8' is a classic 6-player cooperative defense map in the Sunken Defense sub-genre. On a space tileset, players must stop enemy waves attacking from ten directions using Sunken Colonies and upgraded units. The 128x128 tile map features ten radial lanes converging on a central base, making choke-point control and force distribution critical. As an 'Xperts' edition, wave compositions and enemy unit mixes are tuned tougher than the standard version, demanding precise early economy, upgrade timing, and late-game tech responses. All six players share a single team, so coordination is mandatory—assigning lanes via voice or pings and sharing reinforcements decides survival. Playtime ranges from 20 to 40 minutes depending on skill and difficulty, delivering a strong sense of accomplishment on clear. Recommended for users who enjoy the tower-defense feel of Sunken maps combined with real-time micro, and for teams seeking a high-difficulty co-op challenge. Verify the version label (v8.1), player count, and difficulty setting before starting.
썬큰D 10웨이 13.1 임파서블 (SunkenD 10Way 13.1 Impossible)
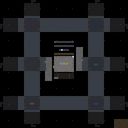
‘썬큰D 10웨이 13.1 임파서블’은 스타크래프트 브루드워의 유즈맵 시리즈 중에서도 손꼽히는 난이도와 긴장감을 자랑하는 디펜스 장르의 정점이라 할 수 있다. 맵의 핵심은 이름에서 짐작할 수 있듯 10방향으로 펼쳐진 입구에서 끊임없이 몰려드는 적들을 방어하는 것이며, 특히 ‘13.1’ 버전은 시리즈 내에서도 난이도가 ‘Even MidImpossible’로 표기될 정도로 극악의 난이도를 자랑한다. 맵은 우주 타일셋을 기반으로 하며, 중앙에 위치한 본진 건물을 중심으로 10개의 주요 입구가 방사형으로 배치되어 있다. 각 입구는 좁고 복잡한 통로를 거쳐 방어 타워가 설치 가능한 지점으로 이어지며, 방어 포인트를 놓치지 않고 최대한 효율적으로 배치해야만 살아남을 수 있는 구조로 설계되어 있다. 적들은 초반에는 약한 저글링과 히드라리스크로 시작하지만, 시간이 지날수록 스커지, 뮤탈리스크, 울트라리스크 등 고급 유닛들이 쏟아져 들어오며 플레이어의 대처 능력을 끊임없이 시험한다. 방어에 성공하려면 초반 자원 관리와 타워 배치 전략이 무엇보다 중요하며, 한 번의 실수가 모든 방어선을 무너뜨릴 수 있다. 맵의 특징 중 하나는 ‘10웨이’라는 이름에 걸맞게 모든 입구에서 동시다발적으로 공격이 들어오기 때문에 멀티태스킹 능력이 필수라는 점이다. 또한, 맵의 크기가 4096x4096으로 매우 크고 복잡한 구조를 가지고 있어, 초보자들은 난이도를 낮춰 연습 모드로 플레이하는 것이 좋겠다. 이 맵은 디펜스 유즈맵의 진수를 경험하고자 하는 숙련자들에게 강력히 추천하며, 특히 ‘임파서블’ 난이도에서 얻는 성취감은 상당한 가치를 지닌다. 플레이 전에는 본진과 주요 방어 포인트의 위치를 숙지하고, 자원과 유닛 생산을 효율적으로 관리할 수 있는 전략을 미리 세워두는 것이 중요하다. 한 번의 실수로 모든 노력이 물거품이 될 수 있기 때문이다. 이 맵은 스타크래프트 유즈맵의 역사에서 빼놓을 수 없는 명작으로, 디펜스 장르의 팬이라면 반드시 플레이해 볼 가치가 있다. This map, ‘SunkenD 10Way 13.1 Impossible,’ stands as one of the most challenging and intense defense-style custom maps in the StarCraft: Brood War modding community. The core gameplay revolves around defending your base from relentless waves of enemies approaching from 10 distinct directions, a concept reflected in both the title and the map’s design. The ‘13.1’ version is notably labeled as ‘Even MidImpossible,’ indicating an extreme difficulty tier that pushes even experienced players to their limits. The map utilizes a space-themed tileset, with your main base centrally located and connected to 10 radial entry points via narrow, maze-like corridors. Each entry point leads to strategic defensive positions where towers can be placed, requiring careful planning and resource management to maximize efficiency. While the early waves consist of weaker units like Zerglings and Hydralisks, the challenge escalates rapidly as time progresses, introducing advanced units such as Scourges, Mutalisks, and Ultralisks. Success hinges on early-game resource allocation and optimal tower placement, as even a single misstep can lead to a cascading failure across defensive lines. The ‘10Way’ aspect means enemies attack from all directions simultaneously, making multitasking a critical skill. The map’s massive 4096x4096 size and intricate layout demand thorough preparation, especially for newcomers who may benefit from practicing on lower difficulty settings first. This map is a must-play for defense genre enthusiasts seeking the ultimate challenge, particularly at the ‘Impossible’ difficulty level, where the sense of achievement is unparalleled. Before diving in, players should familiarize themselves with the base layout and key defensive points, ensuring they have a solid strategy for resource management and unit production. A single oversight can spell disaster, making every decision crucial in this unforgiving yet rewarding experience. ‘SunkenD 10Way 13.1 Impossible’ is a legendary custom map in the StarCraft modding scene, offering an unmatched test of skill and strategy for defense genre fans.
최근 등록된 맵
새로 추가된 파일과 버전을 확인하세요.
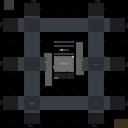
썬큰 디펜스 10웨이 17.9 임파서블 (SunkenD 10Way 17.9 Impossible)
스타크래프트 브루드워의 유즈맵 ‘썬큰 디펜스 10웨이 17.9 임파서블(SunkenD 10Way 17.9 Impossible)’은 디펜스 장르의 대표적인 ‘컴퓨터 상대 유즈맵’으로, 총 25단계에 이르는 난이도별 웨이브를 뚫고 최종 승리를 차지하는 것이 목표다. 맵의 중앙에 위치한 플레이어 기지 주변으로 10방향의 웨이브가 지속적으로 밀려오며, 각 웨이브마다 스캐럽, 뮤탈리스크, 울트라리스크, 가디언 등 다양한 저그 유닛들이 조합되어 공격을 펼쳐온다. 특히 17.9 버전부터는 저글러와 럴커의 조합이 강화되어 맵의 난이도가 한층 높아졌으며, 후속 버전인 12.9나 13.5와 비교했을 때도 피하기와 생존 전략이 더욱 중요해진다. 맵의 구조는 센터 기지에서 멀어질수록 방어가 약화되는 특징이 있어, 초반에는 기지에서 버티면서 자원을 확보하고, 중반부터는 멀티 테란, 멀티 저그 등 추가 기지를 확보하는 전략이 필수적이다. 또한, 맵 상단과 하단에 위치한 추가 멀티 지역은 자원 확보와 방어선을 넓히는 데 핵심적인 역할을 한다. 울트라리스크와 가디언의 조합이 강력한 15단계 이후로는 ‘백워시’ 지역에서도 공격을 방어해야 하며, 이 지역을 소홀히 하면 기지가 순식간에 무너질 수 있다. 초보자라면 10단계까지는 무리 없이 클리어할 수 있지만, 15단계 이후부터는 난이도가 급격히 상승하므로, 방어 건물의 배치와 유닛 조합을 신중히 계획해야 한다. 이 맵은 ‘컴퓨터 상대 디펜스’ 장르에 익숙한 플레이어에게는 훌륭한 도전 과제가 되며, 특히 10웨이의 균형 잡힌 공격 패턴과 단계별 난이도 상승이 흥미로운 플레이 경험을 제공한다. 하지만, 초보자의 경우 난이도 조절이 필요할 수 있으며, 방어塔의 업그레이드와 유닛의 효율적인 관리 전략을 익히는 것이 중요하다. 플레이 전에는 맵의 멀티 지역과 주요 공격 경로, 그리고 후속 웨이브의 유닛 조합을 미리 숙지하고 준비하는 것이 좋다. StarCraft: Brood War's custom map *Sunken Defense 10-Way 17.9 Impossible* is a standout among defense genre custom maps, where the objective is to survive 25 increasingly difficult waves and achieve final victory. Waves continuously assault the player's base from 10 directions around the central starting location, with each wave featuring diverse Zerg unit compositions such as Scourges, Mutalisks, Ultralisks, and Guardians. Starting with version 17.9, the inclusion of Zealots and Lurkers has significantly increased the map's difficulty, making evasion and survival strategies even more crucial compared to earlier versions like 12.9 or 13.5. The map's design weakens defenses the farther they are from the center, so early survival depends on holding the main base while securing resources. As the game progresses, expanding with additional Terran or Zerg bases becomes essential. The upper and lower sections of the map offer critical multi-resource areas that play a key role in resource gathering and expanding defensive lines. After wave 15, where Ultralisks and Guardians dominate, players must also defend the 'Backwash' area—neglecting it can lead to a swift base collapse. While beginners can typically clear up to wave 10 without much trouble, difficulty spikes sharply after wave 15, requiring careful planning of defensive structures and unit compositions. For players familiar with the *computer opponent defense* genre, this map offers an excellent challenge, especially with its balanced 10-way attack patterns and progressively escalating difficulty. However, newcomers may need to adjust the difficulty settings and focus on mastering turret upgrades and efficient unit management strategies. Before playing, it's advisable to familiarize yourself with the map's multi-resource areas, main attack paths, and upcoming wave compositions to prepare effectively.
썬켄D 10웨이 14.8 임파서블 (SunkenD 10Way 14.8 Impossible)
스타크래프트 브루드워의 유즈맵 중 하나인 <SunkenD 10Way 14.8 Impossible>은 25개의 레벨을 지닌 디펜스 장르의 도전형 맵이다. 맵 제목에서 짐작할 수 있듯이 '10Way'는 10방향의 유닛 진입로를, 'Impossible'은 그 이름 그대로 극한의 난이도를 자랑한다는 점을 강조한다. 맵의 중앙에 위치한 주 건물 주변으로 10개의 균일한 방향에서 적의 공격이 끊임없이 몰려오며, 플레이어는 주어진 자원으로 이 모든 공격을 방어해야 한다. 내부 설명에도 기록되어 있듯이, 심지어 'Backwash' 같은 극악의 맵조차도 이 맵의 난이도 앞에서는 무용지물일 정도로 높은 난이도를 자랑한다. 맵의 구조는 비교적 단순하지만, 그 단순함이 오히려 플레이어에게 끊임없는 긴장감을 안겨준다. 중앙 기지 주변으로 배치된 10개의 입구는 각각의 방향에서 다양한 조합의 적 유닛이 끊임없이 쏟아져 나오기 때문에, 한 번의 실수가 치명적인 결과를 초래할 수 있다. 특히 레벨이 높아질수록 적의 공격력이 가파르게 상승하고, 때로는 예상치 못한 조합의 유닛들이 등장하기도 한다. 이러한 점에서 이 맵은 단순히 유닛을 생산하고 방어하는 수준을 넘어, 전략적 사고와 빠른 판단력이 요구되는 고난이도 디펜스 게임으로 분류할 수 있다. 추천 대상으로는 스타크래프트 유즈맵의 난이도와 전략성을 즐기는 플레이어들이나, 디펜스 장르에 익숙한 유저들에게 적합하다. 초보자의 경우 난이도 때문에 쉽게 좌절할 수 있으므로, 기본적인 디펜스 맵을 몇 번 플레이한 후 도전하는 것이 좋다. 또한 이 맵은 6인 플레이를 기반으로 설계되어 있지만, 팀플레이보다는 솔로 플레이에 더 최적화되어 있다. 플레이 전에는 맵의 구조와 각 레벨별 특징을 미리 숙지하고, 자원 관리와 유닛 조합에 대한 전략을 세워두는 것이 중요하다. 특히 레벨 후반부로 갈수록 적의 공격 패턴이 복잡해지므로, 초기 레벨에서 충분한 연습을 쌓는 것이 필수적이다. SunkenD 10Way 14.8 Impossible is a defense-style user-made map in StarCraft: Brood War, featuring 25 challenging levels. The name '10Way' suggests that enemies attack from ten evenly distributed directions, while 'Impossible' signals an extreme difficulty level. Players must defend their central base against relentless waves of enemies pouring in from all sides, using their resources wisely to survive. The map’s structure is straightforward, yet this simplicity amplifies the tension as players face an endless stream of enemy units from every angle. As levels progress, enemy strength escalates rapidly, introducing unpredictable unit combinations that demand quick thinking and adaptability. This elevates the experience beyond basic defense mechanics, transforming it into a high-stakes strategic challenge. This map is ideal for players who enjoy the intricacies of StarCraft custom maps, particularly those who appreciate defense genres. Beginners may find the difficulty overwhelming, so it’s advisable to build experience with simpler defense maps first. Though designed for six players, the map is best suited for solo play rather than team-based strategies. Before starting, players should familiarize themselves with the map layout and each level’s unique challenges. Resource management and unit composition are crucial, especially as enemies grow more aggressive and unpredictable in later levels.
썬컨D 10웨이 13.5 임파서블 (SunkenD 10Way 13.5 Impossible)
‘썬컨D 10웨이 13.5 임파서블(SunkenD 10Way 13.5 Impossible)’은 스타크래프트: 브루드워의 컴까기 장르 유즈맵으로, 중앙에 위치한 플레이어 기지에 10방향에서 끊임없이 몰려드는 적군 스폰 지역을 방어하는 디펜스 형식의 맵이다. 맵의 이름은 ‘썬컨D’라는 시리즈명과 ‘10Way’(10방향), ‘13.5’, ‘임파서블’이라는 난이도 표기가 조합되어 있는데, 특히 ‘13.5’는 맵의 규모나 난이도 레벨을 나타내는 것으로 추정된다. 내부 맵 설명에 ‘levelsEven MidImpossible’이 포함되어 있어 초중수와 중고수 사이의 난이도 구분이 있음을 유추할 수 있다. 이 맵의 핵심을 차지하는 것은 중앙 기지에서 펼쳐지는 디펜스 전투다. 플레이어는 스타크래프트의 종족 선택 없이 중립 건물인 ‘캐리어’와 ‘아비터’를 조종하며, 화면 중앙의 메인 기지에서 출발하는 적군 웨이브를 저지해야 한다. 맵의 구조는 완벽한 대칭형으로 설계되어 있어 10방향에서 동시 또는 순차적으로 적이 출현하는 방식으로 진행되며, 특히 ‘13.5’라는 숫자에서 보듯 기존 10웨이 시리즈보다 더 높은 밀도의 공격 패턴과 더 긴 플레이 지속 시간을 자랑한다. 적군은 주로 저글링, 히드라리스크, 뮤탈리스크, 울트라리스크 등 스타크래프트의 주요 공중/지상 유닛으로 구성되어 있으며, 플레이어는 제한된 자원과 건물을 활용해 이들을 방어해야 한다. 맵 중앙의 ‘캐리어’와 ‘아비터’는 공중 유닛을 주력으로 운용할 수 있도록 지원하며, 추가로 중앙에 위치한 ‘아둔의 성소’나 ‘네라짐 사원’과 같은 건물을 통해 추가적인 방어 수단을 확보할 수 있다. ‘썬컨D 10웨이 13.5 임파서블’의 가장 큰 특징은 ‘임파서블’이라는 이름에 걸맞게 초보 플레이어에게는 매우 어려운 난이도로 구성되어 있다는 점이다. 맵의 대칭성과 10방향 공격 패턴은 방어 전략의 수립을 요구하며, 특히 후반부로 갈수록 적군의 공격력이 급상승하는 구조로 인해 지속적인 스킬과 자원의 관리가 필수적이다. 또한, 맵의 크기가 4096x4096으로 상당히 넓고, 10개의 스폰 지역이 동시에 공격에 참여할 수 있어 전략적 선택과 집중력이 요구된다. 이 맵은 주로 6인용으로 설계되어 있으며, 팀플레이보다는 개인 플레이를 중시하는 구조로 보이나, 내부 설명에 ‘levelsEven’이라는 표현이 포함된 점으로 미루어 보아 난이도 조절을 통한 개인별 진행도 가능한 것으로 추정된다. 이 맵을 플레이하기에 앞서, 플레이어는 스타크래프트의 기본 조작법과 유닛의 특성을 충분히 숙지하고 있어야 한다. 캐리어의 인터셉터와 아비터의 스테이시스 필드, 리콜 등은 이 맵의 핵심 방어 수단이므로 이들의 활용법을 미리 연습해 두는 것이 좋다. 또한, 맵의 공격 패턴을 분석하고, 적군의 공격 타이밍에 맞춰 유닛을 배치하는 것이 중요하다. 맵의 난이도가 높기 때문에, 초보자의 경우 ‘12.x’ 버전이나 ‘13.x’ 버전의 하위 난이도 버전을 먼저 플레이해 보는 것도 하나의 방법이다. 마지막으로, 맵의 대칭성과 공격 패턴을 숙지한 후에는 중앙 기지 주변의 방어 건물을 효율적으로 배치하여 적군의 공격을 최대한 지연시키는 전략을 세워야 한다. 이 맵은 디펜스 장르의 정수를 보여주는 동시에, 플레이어의 전략적 사고와 순간 판단력을 시험하는 excellent한 경험을 제공할 것이다. This StarCraft: Brood War UMS map, ‘SunkenD 10Way 13.5 Impossible,’ is a defense-oriented mini-game where players must protect a central base against relentless waves of enemy units spawning from 10 different directions. The name ‘SunkenD’ suggests a series of defensive maps, while ‘10Way’ indicates the number of attack routes, and ‘13.5 Impossible’ hints at an extremely high difficulty level—likely a progression from earlier versions like ‘12.6’ or ‘12.9.’ The internal description, ‘levelsEven MidImpossible,’ further implies a balanced yet challenging experience for mid-level players. The core gameplay revolves around defending a central base using neutral structures such as the Carrier and Arbiter. Players control these units to fend off waves of enemy units, which escalate in both quantity and variety as the game progresses. The map’s symmetrical design ensures that enemies spawn simultaneously or in sequence from all 10 directions, creating a dynamic and strategic challenge. Players must manage limited resources and construct additional defensive buildings to counter the increasing threats. The Carrier and Arbiter provide aerial dominance, while structures like the ‘Temple of the Sun’ or ‘Nerazim Shrine’ offer supplementary defensive options. What sets ‘SunkenD 10Way 13.5 Impossible’ apart is its punishing difficulty, designed for experienced players. The sheer number of spawn points and the escalating enemy strength make it a test of both macro-management and quick decision-making. While the map is technically playable solo, its design suggests a focus on individual skill rather than team coordination. The large 4096x4096 map size and the need to monitor multiple attack vectors demand constant attention and adaptability. For players attempting this map, mastering the Carrier’s Interceptors and the Arbiter’s abilities like Recall and Stasis Field is crucial. Pre-game practice with unit control and positioning will significantly improve survival chances. Beginners may find it helpful to start with earlier versions of the map (e.g., ‘12.7’ or ‘12.9’) to acclimate to the mechanics before tackling the ‘13.5 Impossible’ challenge. Efficient base layout and strategic unit placement around the central base are key to delaying enemy advances. Ultimately, this map is a masterclass in defense strategy, pushing players to refine their tactics and reflexes in an unforgiving yet rewarding environment.
썬큰D 10웨이 13.1 임파서블 (SunkenD 10Way 13.1 Impossible)
‘썬큰D 10웨이 13.1 임파서블’은 스타크래프트 브루드워의 유즈맵 시리즈 중에서도 손꼽히는 난이도와 긴장감을 자랑하는 디펜스 장르의 정점이라 할 수 있다. 맵의 핵심은 이름에서 짐작할 수 있듯 10방향으로 펼쳐진 입구에서 끊임없이 몰려드는 적들을 방어하는 것이며, 특히 ‘13.1’ 버전은 시리즈 내에서도 난이도가 ‘Even MidImpossible’로 표기될 정도로 극악의 난이도를 자랑한다. 맵은 우주 타일셋을 기반으로 하며, 중앙에 위치한 본진 건물을 중심으로 10개의 주요 입구가 방사형으로 배치되어 있다. 각 입구는 좁고 복잡한 통로를 거쳐 방어 타워가 설치 가능한 지점으로 이어지며, 방어 포인트를 놓치지 않고 최대한 효율적으로 배치해야만 살아남을 수 있는 구조로 설계되어 있다. 적들은 초반에는 약한 저글링과 히드라리스크로 시작하지만, 시간이 지날수록 스커지, 뮤탈리스크, 울트라리스크 등 고급 유닛들이 쏟아져 들어오며 플레이어의 대처 능력을 끊임없이 시험한다. 방어에 성공하려면 초반 자원 관리와 타워 배치 전략이 무엇보다 중요하며, 한 번의 실수가 모든 방어선을 무너뜨릴 수 있다. 맵의 특징 중 하나는 ‘10웨이’라는 이름에 걸맞게 모든 입구에서 동시다발적으로 공격이 들어오기 때문에 멀티태스킹 능력이 필수라는 점이다. 또한, 맵의 크기가 4096x4096으로 매우 크고 복잡한 구조를 가지고 있어, 초보자들은 난이도를 낮춰 연습 모드로 플레이하는 것이 좋겠다. 이 맵은 디펜스 유즈맵의 진수를 경험하고자 하는 숙련자들에게 강력히 추천하며, 특히 ‘임파서블’ 난이도에서 얻는 성취감은 상당한 가치를 지닌다. 플레이 전에는 본진과 주요 방어 포인트의 위치를 숙지하고, 자원과 유닛 생산을 효율적으로 관리할 수 있는 전략을 미리 세워두는 것이 중요하다. 한 번의 실수로 모든 노력이 물거품이 될 수 있기 때문이다. 이 맵은 스타크래프트 유즈맵의 역사에서 빼놓을 수 없는 명작으로, 디펜스 장르의 팬이라면 반드시 플레이해 볼 가치가 있다. This map, ‘SunkenD 10Way 13.1 Impossible,’ stands as one of the most challenging and intense defense-style custom maps in the StarCraft: Brood War modding community. The core gameplay revolves around defending your base from relentless waves of enemies approaching from 10 distinct directions, a concept reflected in both the title and the map’s design. The ‘13.1’ version is notably labeled as ‘Even MidImpossible,’ indicating an extreme difficulty tier that pushes even experienced players to their limits. The map utilizes a space-themed tileset, with your main base centrally located and connected to 10 radial entry points via narrow, maze-like corridors. Each entry point leads to strategic defensive positions where towers can be placed, requiring careful planning and resource management to maximize efficiency. While the early waves consist of weaker units like Zerglings and Hydralisks, the challenge escalates rapidly as time progresses, introducing advanced units such as Scourges, Mutalisks, and Ultralisks. Success hinges on early-game resource allocation and optimal tower placement, as even a single misstep can lead to a cascading failure across defensive lines. The ‘10Way’ aspect means enemies attack from all directions simultaneously, making multitasking a critical skill. The map’s massive 4096x4096 size and intricate layout demand thorough preparation, especially for newcomers who may benefit from practicing on lower difficulty settings first. This map is a must-play for defense genre enthusiasts seeking the ultimate challenge, particularly at the ‘Impossible’ difficulty level, where the sense of achievement is unparalleled. Before diving in, players should familiarize themselves with the base layout and key defensive points, ensuring they have a solid strategy for resource management and unit production. A single oversight can spell disaster, making every decision crucial in this unforgiving yet rewarding experience. ‘SunkenD 10Way 13.1 Impossible’ is a legendary custom map in the StarCraft modding scene, offering an unmatched test of skill and strategy for defense genre fans.
선큰 10-웨이 엑스퍼츠 V.8 (Sunken 10-Way Xperts V.8)
스타크래프트 브루드워 유즈맵 '선큰 10-웨이 엑스퍼츠 V.8(Sunken 10-Way Xperts V.8)'은 6인 협동 디펜스 장르의 대표적인 선큰 디펜스 맵이다. 우주 타일셋 위에서 10개 방향에서 몰려오는 적 웨이브를 선큰 콜로니와 업그레이드 유닛으로 막아내는 것이 핵심이다. 맵 크기는 128x128 타일로 구성되어 있으며, 10갈래 진입로가 중앙 기지를 향해 방사형으로 뻗어 있어 입구 막기와 병력 분배가 승패를 가른다. 엑스퍼츠 버전답게 일반판보다 웨이브 구성과 적 유닛 조합이 까다롭게 조정되어 있어, 초반 자원 관리와 업그레이드 타이밍, 후반 고급 유닛 대처까지 긴장감 있게 이어진다. 6인 전원이 한 팀으로 묶여 협동 플레이가 필수적이며, 음성 채팅이나 핑으로 진입로별 담당을 정하고 지원 병력을 주고받는 운영이 요구된다. 플레이 타임은 숙련도와 난이도에 따라 20분에서 40분 사이로 형성되며, 클리어 시 성취감이 큰 편이다. 선큰 디펜스 특유의 타워 디펜스 감각과 실시간 병력 컨트롤을 동시에 즐기고 싶은 유저, 높은 난이도의 협동전을 찾는 팀에게 추천한다. 플레이 전 버전 표기(v8.1)와 인원 수, 난이도 설정을 확인하고 시작하는 것이 좋다. 'Sunken 10-Way Xperts V.8' is a classic 6-player cooperative defense map in the Sunken Defense sub-genre. On a space tileset, players must stop enemy waves attacking from ten directions using Sunken Colonies and upgraded units. The 128x128 tile map features ten radial lanes converging on a central base, making choke-point control and force distribution critical. As an 'Xperts' edition, wave compositions and enemy unit mixes are tuned tougher than the standard version, demanding precise early economy, upgrade timing, and late-game tech responses. All six players share a single team, so coordination is mandatory—assigning lanes via voice or pings and sharing reinforcements decides survival. Playtime ranges from 20 to 40 minutes depending on skill and difficulty, delivering a strong sense of accomplishment on clear. Recommended for users who enjoy the tower-defense feel of Sunken maps combined with real-time micro, and for teams seeking a high-difficulty co-op challenge. Verify the version label (v8.1), player count, and difficulty setting before starting.
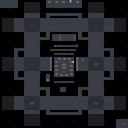
선크 10웨이 어드밴스드 (SuNk10WaY =~*AdVanCeD*=)
‘선크 10웨이 어드밴스드’(SuNk10WaY =~*AdVanCeD*~)는 스타크래프트 브루드워의 대표적인 디펜스형 유즈맵으로, 플레이어들이 10개의 다른 길을 따라 끊임없이 몰려오는 적을 막아내는 것이 주된 목표다. 맵 중앙의 본진에서 시작해 각 길목에 배치된 방어 건물과 유닛을 활용해 적의 공격을 버텨야 하며, 특히 좁은 길목과 복잡한 지형이 특징적이다. 맵의 구조는 중앙에서 10방향으로 뻗어나가는 길이 마치 해바라기 꽃잎처럼 펼쳐져 있어, ‘10웨이’라는 이름에 걸맞은 독특한 디자인으로 시선을 끈다. 각 길은 길이가 제각각이며, 일부 길목은 좁고 구불구불해 방어전을 펼치기 까다로운 반면, 일부는 비교적 넓고 직선적이어서 대형 유닛을 활용할 수 있는 장점이 있다. 방어에 실패하면 본진이 공격당해 게임이 종료되므로, 전략적인 유닛 배치와 자원 관리가 무엇보다 중요하다. 맵에는 기본적인 방어 건물 외에도 특수 건물이나 유닛이 배치되어 있어, 이를 적재적소에 활용하는 것이 승리의 열쇠가 된다. 특히 ‘어드밴스드’라는 명칭답게 원작에 비해 맵 구조가 개선되고, 방어 루트가 다양해지면서 초보자부터 숙련자까지 폭넓은 플레이어들이 즐길 수 있도록 설계되었다고 추정된다. 플레이 전에는 각 길목의 특성을 미리 숙지하고, 어떤 유닛을 배치할지 전략을 세우는 것이 중요하다. 또한, 적의 공격 패턴이 길목마다 다르므로, 특정 길목에 특화된 방어 전략을 준비하는 것이 좋다. 맵의 난이도는 길목에 따라 천차만별이므로, 초보자는 넓은 길목부터 시작해 점차 어려운 길목으로 도전하는 것이 추천된다. 맵의 전체적인 분위기는 중후하면서도 신비로운 우주 테마로, 어두침침한 색조와 함께 곳곳에 배치된 발광체들이 게임의 긴장감을 더해준다. ‘선크 10웨이 어드밴스드’는 디펜스 게임을 즐기는 플레이어들에게는 필수적으로 접해볼 만한 맵으로, 특히 다인 플레이에서 팀워크가 빛을 발하는 맵이다. 맵의 재플레이 가치를 높이기 위해 다양한 방어 빌드가 연구되어 있으므로, 반복 플레이를 통해 자신에게 맞는 전략을 찾아보는 것도 좋은 방법이다. 맵의 구조적 특징상, 한 번 실수하면 회복하기 어려운 구조이므로, 긴장감을 유지하며 플레이하는 것이 중요하다. ‘SuNk10WaY =~*AdVanCeD*~’ is a quintessential defense-style custom map in *StarCraft: Brood War*, where players must defend against endless waves of enemies advancing along ten distinct paths. Starting from the central main base, players rely on strategically placed defensive structures and units to withstand the assaults, with the map’s narrow chokepoints and intricate terrain adding to the challenge. The layout radiates outward from the center in ten directions like the petals of a sunflower, giving the map its namesake "10-way" design and a visually striking appearance. Each path varies in length—some are narrow and winding, making defense difficult, while others are wider and straighter, allowing for the deployment of large units. Failing to hold the line results in the main base being overrun, ending the game, so careful unit placement and resource management are critical. Beyond standard defenses, the map features special buildings and units that, when used effectively, can turn the tide in your favor. As suggested by the "Advanced" in its name, the map has been refined from the original, offering diverse defense routes that cater to both beginners and experienced players. Before diving in, it’s essential to study each path’s characteristics and plan your unit placements accordingly. Since enemy attack patterns differ per route, tailoring your strategy to specific paths is key. Difficulty varies drastically between paths, so beginners are advised to start with the wider routes before tackling the more challenging ones. The map’s overall aesthetic blends a somber, mysterious cosmic theme with dim lighting and glowing elements scattered throughout, heightening the tension. *SuNk10WaY =~*AdVanCeD*~* is a must-try for defense-map enthusiasts, especially in multiplayer, where teamwork shines. Numerous defensive builds have been developed to enhance replayability, so experimenting through repeated play can help you discover the strategy that suits you best. Given the map’s unforgiving structure—where mistakes are hard to recover from—maintaining focus and composure is vital throughout the game.
썬크 10웨이 어드밴스드 (Sunk 10-Way Advanced)
스타크래프트 브루드워의 유즈맵 ‘SuNkD10WaY =~*AdVaNcEd*~=’는 6인의 플레이어가 동시에 참여하는 고난이도 디펜스형 맵이다. 맵의 핵심은 중앙에 위치한 거대한 기지 구조물로, 플레이어는 이 기지의 입구와 내부 통로를 방어하며 끊임없이 밀려드는 적 유닛을 상대해야 한다. 맵의 특징은 지형이 복잡한 ‘10-웨이’라는 이름에서 알 수 있듯이, 총 10개의 입구가 존재한다는 점으로, 각 입구는 좁고 긴 통로로 연결되어 있어 방어 전술을 세우는 데 중점을 둔다. 특히 입구마다 배치된 트리거를 통해 적의 공격 타이밍과 패턴을 조절할 수 있도록 설계되어 있으며, 플레이어는 이를 바탕으로 병력을 배치하고 방어선을 구축해야 한다. 중앙 기지 내부는 넓은 개활지로, 다수의 건물이 밀집되어 있어 전략적 요충지가 된다. 방어에 성공하려면 입구별로 효율적인 유닛 배치를 고려해야 하며, 한 곳이라도 뚫리면 전력이 급격히 약화될 위험이 있다. 또한, 맵의 난이도는 입구 간 동시 공격 타이밍과 적의 조합에 따라 크게 달라지므로, 숙련된 플레이어에게 적합한 구조로 보인다. 초보자는 방어 라인을 구축하는 데 어려움을 겪을 수 있지만, 입구별로 나뉜 공격 패턴을 익히면 점차 안정적인 플레이가 가능해진다. 맵의 분위기는 어두운 우주 배경으로, 어두운 색상과 붉은 조명이 어우러져 긴장감을 조성한다. 플레이 전에는 맵의 입구 수와 통로 길이를 숙지하고, 방어에 필요한 유닛 조합을 미리 준비하는 것이 중요하다. 특히 입구가 좁아 적의 접근을 막기 쉬운 구조이지만, 동시에 한 번 돌파당하면 회복이 어려운 구조이므로 신중한 판단이 요구된다. 추천 대상은 디펜스 게임을 즐기는 플레이어이며, 팀 단위로 플레이할 경우 협력과 통신이 필수적이다. 맵의 장점은 입구 수가 많아 전략적 깊이가 깊고, 트리거를 통한 공격 패턴 변경으로 지루함을 느끼지 않을 수 있다는 점이다. 반면, 초보자는 방어 라인을 구축하는 데 시간이 걸릴 수 있어 난이도를 가늠해보아야 한다. overall, ‘SuNkD10WaY =~*AdVaNcEd*~=’는 고도의 전략성과 긴장감을 동시에 제공하는 디펜스형 유즈맵으로, 숙련된 플레이어들에게 강렬한 경험을 선사할 것이다. This StarCraft: Brood War custom map, ‘SuNkD10WaY =~*AdVaNcEd*~=’, is a high-difficulty defense-type UMS designed for six players. The map revolves around a massive central base structure, where players must defend multiple entry points—totaling ten narrow corridors—against relentless enemy waves. The core challenge lies in balancing defensive formations across these entry points, as each is linked to a trigger system controlling enemy attack timing and patterns. The central base features a wide open area densely packed with buildings, making it a critical strategic hub. Successfully defending requires meticulous unit placement at each entrance, as breaches can cripple a player's entire force. Difficulty escalates with simultaneous attacks and varied enemy compositions, demanding adaptability and quick decision-making. The dark cosmic theme, enhanced by eerie red lighting, amplifies the intense atmosphere. Beginners may struggle initially due to the map's complexity, but mastering entrance-specific tactics can lead to steady improvement. Pre-game preparation—such as understanding each entry's layout and assembling a balanced defense force—is crucial for success. This map is best suited for experienced players who enjoy strategic depth and high-stakes defense gameplay. While team coordination is essential, the ten-entry design ensures each player faces unique challenges, keeping the experience engaging. The primary strength lies in its strategic depth and dynamic enemy patterns, though new players may find the learning curve steep. Overall, ‘SuNkD10WaY =~*AdVaNcEd*~=’ delivers a thrilling, high-pressure defense experience tailored for seasoned StarCraft players seeking a challenge.
스택드 캐논 디펜스 10-웨이 (Stacked Cannon Defense 10-Way)
스타크래프트 브루드워의 대표적인 디펜스 유즈맵인 《스택드 캐논 디펜스 10-웨이(Stacked Cannon Defense 10-Way)》는 10방향에서 몰려오는 적을 방어하는 구조로, 중앙에 위치한 플레이어 기지 주변을 원형으로 둘러싼 다수의 캐논 포탑과 미네랄 라인이 특징적인 맵이다. 맵의 가장 큰 특징은 바로 ‘스택드(Stacked) 캐논’이라는 이름에서 알 수 있듯, 포탑이 여러 층으로 겹쳐져 설치되어 있다는 점이다. 이 덕분에 포탑의 공격력이 집중되어 강력한 대공 및 대지 방어가 가능하며, 특히 중반 이후에는 압도적인 화력으로 웨이브를 밀어낼 수 있다. 맵의 중앙에는 방어 타워와 함께 일꾼 유닛을 생산할 수 있는 커맨드 센터가 위치하고 있으며, 주변의 미네랄 라인에서는 꾸준히 자원을 채취할 수 있어 자원 관리의 중요성도 높다. 또한, 맵의 가장자리를 따라 배치된 ‘웨이(Way)’란 이름에 걸맞게 10개의 입구에서 동시에 적이 몰려오며, 각 웨이브는 일정 주기로 반복되어 플레이어의 집중력과 전략을 끊임없이 요구한다. 초반에는 소수의 적을 상대하며 포탑을 배치하고 자원을 모으는 것이 중요하며, 중반부터는 포탑을 업그레이드하거나 추가 포탑을 건설하여 방어선을 강화해야 한다. 후반으로 갈수록 적의 공격력이 강해지고 수가 많아지므로, 포탑의 효율적인 배치와 자원 관리가 승패를 가르는 핵심 요소로 작용한다. 이 맵은 오랜 시간 동안 디펜스 장르의 베스트셀러로 손꼽히며, 특히 ‘캐논 스택’이라는 독특한 시스템 덕분에 다른 디펜스 맵과 차별화된 플레이 경험을 제공한다. 또한, 10방향에서 동시에 적이 공격해 오기 때문에 전략적 깊이가 깊고, 포탑의 배치와 업그레이드 타이밍을 잘 조절해야만 안정적인 클리어를 노릴 수 있다. 초보 플레이어는 포탑을 과도하게 설치하지 않고, 자원 관리와 포탑의 효율적인 업그레이드를 우선시하는 것이 좋으며, 숙련된 플레이어는 더 빠른 클리어와 자원 최적화를 목표로 삼을 수 있다. 맵을 플레이하기 전에는 포탑의 공격 범위와 업그레이드 비용을 미리 확인하고, 각 웨이브의 패턴을 익히는 것이 중요하다. 특히, 자원 부족이나 포탑의 배치 실수로 인해 방어선이 무너지는 경우가 많으므로, 자원 채취와 포탑 건설의 균형을 carefully 관리해야 한다. Stacked Cannon Defense 10-Way is a classic defensive custom map in *StarCraft: Brood War* where players must fend off waves of enemies approaching from ten directions. The map is characterized by its circular layout centered around the player’s base, surrounded by multiple layers of stacked cannon turrets and mineral lines. As the name "Stacked Cannon" suggests, the turrets are arranged in overlapping layers, significantly boosting their firepower for both air and ground defense. This setup allows players to repel waves with overwhelming force, especially in the mid-to-late game. At the center of the map sits a Command Center, which not only serves as a defensive tower but also enables worker production. Surrounding mineral lines provide a steady income, making resource management a critical aspect of the game. The map’s edges feature ten designated entry points ("ways"), through which enemies surge in synchronized waves at regular intervals, testing the player’s focus and adaptability. In the early game, players must prioritize securing resources, placing initial turrets, and reinforcing defenses. As the game progresses, upgrading turrets and constructing additional defenses become essential to withstand increasingly powerful and numerous enemy attacks. Late-game success hinges on efficient turret placement and meticulous resource allocation. A long-standing bestseller in the defense genre, Stacked Cannon Defense 10-Way stands out for its unique "cannon stacking" system, offering a distinct gameplay experience compared to other defense maps. The simultaneous assaults from ten directions add strategic depth, requiring players to carefully time turret upgrades and placements for a stable clear. Novice players should focus on avoiding excessive turret placements, managing resources wisely, and prioritizing efficient upgrades, while experienced players can aim for faster clears and optimized resource use. Before playing, it’s crucial to study turret range and upgrade costs, as well as familiarize yourself with enemy wave patterns. Many failures stem from poor resource management or misplaced turrets, so balancing income collection and defensive construction is key to maintaining a strong defense line.
맵 선택 가이드
태그는 맵의 핵심 특징을 빠르게 설명하지만 제작 버전마다 규칙이 다를 수 있습니다. 상세 설명에서 권장 인원, 난이도, 플레이 시간과 버전을 함께 확인한 뒤 다운로드하세요.