
1인 플레이 스타크래프트 맵 모음
'1인 플레이' 태그가 등록된 맵을 모았습니다. 장르 하나로 찾기 어려운 플레이 방식, 난이도와 특징을 중심으로 인기 맵과 최신 맵을 비교해 보세요.
- 등록 맵
- 24개
- 누적 다운로드
- 4
- 누적 조회
- 975
인기 맵
다운로드와 조회 반응이 높은 맵입니다.
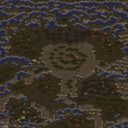
제로 캠페인: 테란#1 (Zero Campaign: TERRAN#1)
‘제로 캠페인: 테란#1(Zero Campaign : TERRAN#1)’은 스타크래프트 브루드워의 컴까기 형식 단편 캠페인 맵으로, 1인 플레이를 전제로 제작된 작품이다. 맵 제목에서 알 수 있듯이 테란 종족을 다루며, 동맹 난이도가 3/5로 설정되어 있어 초보자와 숙련자 모두 즐길 수 있도록 중간 수준의 밸런스를 갖추고 있다. 제작자 HeartKlass의 ‘Zero Campaign’ 시리즈 중 첫 번째 작품으로, 이후 후속작과의 연계성을 엿볼 수 있는 구조로 구성되어 있다. 맵의 전체적인 분위기는 사막 테마로, 사막 타일셋을 활용하여 건조하고 광활한 느낌을 강조하고 있다. 플레이 방식은 컴까기(컴퓨터 상대 키우기)로, 플레이어는 테란 종족을 선택하여 AI-controlled 적군과 전투를 벌이며 자원을 채취하고 유닛을 생산하는 방식으로 진행된다. 맵의 규모는 4096x4096 픽셀로 상당히 넓은 편이지만, 컴까기 형식의 특성상 필드 전체를 활용하는 것이 아니라 특정 구역에서 전투가 집중되는 구조를 띠고 있다. 맵의 vittoria 조건은 명확히 표시되지 않지만, 컴까기 맵의 일반적인 특징인 적의 모든 건물 파괴나 특정 목표 완수 등 목표 기반 승리 조건이 적용되었을 것으로 추정된다. 또한, 동맹 난이도가 3/5로 설정되어 있어 AI의 공격 패턴이나 자원 분배가 중간 수준으로 조절되어 있으며, 플레이어는 이를 고려하여 전략을 수립해야 한다. 이 맵의 가장 큰 특징은 ‘단편 캠페인’이라는 점이다. ‘제로 캠페인’ 시리즈는 각 맵이 독립된 스토리나 미션을 담고 있는 것이 아니라, 테란 종족을 중심으로 한 일련의 미션들이 연속적으로 연결되는 구조로 설계되어 있을 가능성이 높다. 이를 통해 플레이어는 하나의 긴 캠페인을 즐기며 점차적으로 난이도가 상승하는 경험을 할 수 있다. 또한, 제작자 HeartKlass가 네이버 카페 ‘에드엑스(EDAC)’에서 활동했다는 점에서, 해당 커뮤니티를 중심으로 맵의 인기와 평가가 형성되었을 것으로 추측된다. 맵의 전체적인 분위기는 스타크래프트의 클래식한 feel을 살리면서도, 컴까기 형식으로 재해석하여 새로운 재미를 제공하고 있다. 초보자의 경우 동맹 난이도가 중간 수준이므로 AI의 패턴을 익히며 천천히 적응해 나가는 것이 중요하며, 숙련자의 경우 효율적인 자원 관리와 전략 수립을 통해 빠르게 목표를 달성하는 데 중점을 두면 좋다. 맵을 플레이하기 전에는 설정된 동맹 난이도를 반드시 확인하고, 자신의 실력에 맞는 난이도를 선택하는 것이 좋다. 또한, 후속작과의 연계성을 고려해 맵의 구조와 vittoria 조건을 미리 숙지하는 것도 좋은 방법이다. ‘Zero Campaign: TERRAN#1’ is a single-player-focused short campaign map in the *StarCraft: Brood War* "comp stomp" (AI vs. player) format. As the title suggests, the map focuses on the Terran race, with its ally difficulty set to 3/5, making it accessible for both beginners and experienced players with a balanced mid-tier challenge. Created by HeartKlass, it’s the first installment in the *Zero Campaign* series, featuring a structure that hints at connections to future sequels. The map adopts a desert theme, utilizing desert tilesets to emphasize a vast, arid atmosphere. Gameplay follows the "comp stomp" (computer vs. player) style, where players choose the Terran faction and battle AI-controlled enemies, gathering resources and producing units. At 4096x4096 pixels, the map is quite large, but due to the comp stomp format, combat is concentrated in specific zones rather than spread across the entire field. While the victory conditions aren’t explicitly stated, they likely follow standard comp stomp conventions, such as destroying all enemy buildings or completing a set objective. The 3/5 ally difficulty ensures the AI’s attack patterns and resource distribution are moderate, requiring players to adapt their strategies accordingly. A key feature of this map is its "short campaign" structure. Rather than standalone missions or stories, the *Zero Campaign* series appears designed as a continuous sequence of Terran-focused missions that build upon one another, allowing players to experience a longer campaign with gradually increasing difficulty. Given that HeartKlass was active on the Naver café *EDAC (EdEx)*, the map’s popularity and reception were likely shaped within that community. While maintaining the classic *StarCraft* feel, the comp stomp format reinterprets it with fresh appeal. Beginners should take time to learn the AI’s patterns at the moderate difficulty, while experienced players can focus on efficient resource management and strategic execution to achieve objectives quickly. Before playing, it’s important to check the set ally difficulty and select one that matches your skill level. Familiarizing yourself with the map’s structure and potential victory conditions—especially in anticipation of sequels—can also enhance the experience.
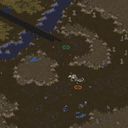
T1) 황무지 (T1) Wasteland)
‘T1) Wasteland’는 스타크래프트: 브루드워의 황무지 테마를 배경으로 한 유즈맵으로, 1인 플레이를 전제로 제작된 캠페인형 미션 맵이다. 내부 맵 제목과 설명에서 확인되는 ‘Office of the Colonial Magistrate’와 ‘Mar Sara Colony’의 설정은 테란 식민지 시대를 연상시키며, 임무 목표는 맵 이미지에서 확인되는 다수의 적 유닛과 건물을 상대하는 전투형으로 추정된다. 맵 중앙의 넓은 평야는 기동전을 펼칠 공간으로 보이며, 좌우 양측에 배치된 건물 지역은 전초기지나 방어 거점으로 활용 가능한 구조로 보인다. 황무지 타일셋의 황폐한 분위기는 플레이어에게 긴장감을 조성하며, 2048x2048의 넓은 맵 크기는 광활한 필드를 활용한 전략적 움직임을 요구할 것으로 예상된다. 이 맵의 가장 큰 특징은 1인 플레이를 전제로 한 캠페인 형식이라는 점이다. 테란의Magistrate(식민지 관리관) 역할을 맡아 식민지 마라 사라(Mar Sara Colony)를 방어하거나 적대 세력을 제압하는 스토리 라인이 있을 가능성이 높으며, 내부 설명에 언급된 ‘19:43 SCT, 12.12.2499’는 시간대와 날짜를 의미하는 것으로, 플레이어의 행동에 따라 스토리가 전개될 수 있는 시나리오형 구조로 보인다. 맵 이미지에서는 다수의 저글링, 히드라리스크, 울트라리스크가 보이며, 테란 유닛으로는 마린, 파이어뱃, 시즈 탱크 등이 배치되어 있는 것으로 확인된다. 이는 저그의 대규모 침공을 방어하거나, 반대로 적 기지를 공격하는 두 가지 방향의 플레이가 가능할 것으로 추정된다. 플레이어는 시작 지점에서 테란 커맨드 센터를 확보한 후, 자원 채취와 유닛 생산을 통해 세력을 확장해야 하며, 맵 곳곳에 흩어져 있는 미네랄과 베스핀 가스를 확보하는 것이 중요하다. 중앙 지역에는 다수의 적 건물이 밀집되어 있어, 이를 파괴하거나 방어선을 구축하는 것이 주요 과제가 될 것이다. 넓은 맵 특성상 초반에는 병력을 모아 한 곳에 집중시키는 것이 유리하며, 후반부로 갈수록 다수의 적 유닛을 상대해야 할 가능성이 크다. 난이도는 맵 내 적 배치와 유닛 종류를 고려할 때 ‘보통’ 수준으로 예상되며, 테란 유닛을 주로 사용하게 될 경우 시즈 탱크와 마린의 조합이 효과적일 것으로 보인다. 이 맵은 테란의 식민지 방어라는 스토리적 요소가 강하며, 광활한 필드를 활용한 전략적 전투가 핵심이다. 1인용 캠페인형 유즈맵으로써, 테란 유저뿐만 아니라 다양한 종족 유저에게도 흥미로운 플레이 경험을 제공할 가능성이 높다. 특히, 브루드워의 기본 메커니즘을 활용한 전략적 요소와 스토리텔링이 결합된 점이 특징으로, 스타크래프트의 팬이라면 한번쯤 시도해볼 만한 가치가 있는 맵이다. 다만, 넓은 맵 크기 때문에 초보 플레이어는 적의 공격을 받기 전에 충분히 준비를 갖추는 것이 중요할 것이다. ‘T1) Wasteland’ is a user-made StarCraft: Brood War map set in a wasteland theme, designed as a campaign-style mission map intended for single-player. The map title and description reference "Office of the Colonial Magistrate" and "Mar Sara Colony," evoking the Terran colonial era. The mission objectives appear to involve combat against numerous enemy units and structures, as seen in the map image. The central plain offers ample space for maneuver warfare, while the buildings positioned on the left and right sides suggest potential use as forward bases or defensive strongholds. The desolate atmosphere of the wasteland tileset creates tension, and the large 2048x2048 map size demands strategic movement across the vast battlefield. The standout feature of this map is its single-player campaign format. Players likely take on the role of a Terran Magistrate, defending Mar Sara Colony or suppressing hostile forces, with the internal description "19:43 SCT, 12.12.2499" indicating a specific time and date that could influence the unfolding story. The map image shows multiple Zerglings, Hydralisks, and Ultralisks, alongside Terran units like Marines, Firebats, and Siege Tanks, suggesting two possible playstyles: defending against a Zerg invasion or launching an assault on enemy bases. Players begin by securing a Terran Command Center, gathering resources, and expanding their forces. Securing scattered minerals and Vespene gas deposits is crucial. The central area contains dense enemy structures, making their destruction or the establishment of defensive lines a key challenge. Due to the map’s size, concentrating forces early is advantageous, while later stages may require handling large waves of enemies. Considering enemy placement and unit variety, the difficulty is likely moderate, with a Terran-focused strategy favoring combinations of Siege Tanks and Marines. This map strongly emphasizes the Terran colonial defense narrative, with strategic combat across vast terrain as its core. As a single-player campaign-style user map, it offers an engaging experience for Terran players and fans of other races alike. Its blend of strategic depth rooted in Brood War’s mechanics and storytelling makes it a worthwhile experience for StarCraft fans. However, due to the large map size, beginners should prepare thoroughly before facing enemy attacks.
![[20]最终决战B 맵 미리보기](https://cdn-star-data.huzy.net/thumbnail_18e4647175314c83af34bbe8a77d4b68.jpg)
[20]最终决战B
‘[20]最终决战B’는 남극의 군사 기지와 우주 정거장 입구, 그리고 이족의 침공 지역을 무대로 한 대규모 방어형 유즈맵이다. 플레이어는 한 명이지만, 맵 안에 배치된 여러 방어 포인트와 자동 방어 타워를 활용해 적군의 침공을 차단해야 한다. 초기 진입 지점은 남극 기지 내부이며, 여기서 자원을 확보하고 방어 구조물을 건설한다. 이후 우주 정거장 입구 쪽으로 진군하면서 적의 파동이 점차 강해지므로, 방어 라인을 재배치하고 업그레이드하는 것이 핵심이다. 맵은 크게 두 구역으로 나뉘어 있어, 각 구역마다 다른 지형과 장애물이 존재한다. 특히 눈덮인 지형은 시야를 제한하고 이동 속도를 감소시켜 전술적 선택을 요구한다. 플레이 경험은 방어 설계와 타이밍 조절에 집중되며, 초반에 방어 설비를 어떻게 배치하느냐에 따라 후반의 난이도가 크게 달라진다. 추천 대상은 방어 전략을 즐기는 유저와 1인 플레이에 최적화된 도전 과제를 찾는 플레이어이다. 플레이 전에는 자원 배치 위치와 자동 방어 타워의 사정거리를 미리 확인하고, 적의 진입 경로를 예측해 방어 라인을 미리 계획하는 것이 좋다. “Final Battle B” is a large‑scale defense‑type UMS map set on an Antarctic military base, a space‑station entrance, and an insect‑infested zone. Although it supports a single player, the map is filled with multiple defense points and automated towers that must be used to repel enemy waves. The player starts inside the Antarctic base, gathers resources, and builds defensive structures before advancing toward the space‑station entrance, where enemy attacks become progressively stronger, requiring repositioning and upgrading of defenses. The map is divided into two main areas, each with distinct terrain and obstacles; the snow‑covered region limits vision and slows movement, demanding careful tactical choices. Gameplay focuses on defense layout and timing, with early placement of defenses heavily influencing later difficulty. This map is recommended for players who enjoy strategic defense and solo challenges. Before playing, check resource spawn locations, tower ranges, and anticipate enemy paths to plan your defensive lines in advance.
최종 지점 (Final Point)
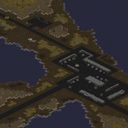
이 맵은 스타크래프트: 브루드워의 밀리 기반 유즈맵으로, 내부 제목과 파일명에서 확인되는 ‘Ôèíàëüíàÿ òî÷êà’는 러시아어로 ‘최종 지점’을 의미하는 듯하며, 이는 맵의 배경 스토리나 목표를 암시하는 것으로 추정된다. 4096x4096의 넓은 황무지 타일셋을 기반으로 한 맵 구조는 광활한 개방형 필드를 제공하며, 플레이어가 중앙에서 적대적인 유닛들과 교전하거나 거점 방어를 수행하는 방식으로 진행되는 것으로 보인다. 1인 플레이를 전제로 한 디자인이며, 플레이어는 제한된 자원과 유닛을 활용해 목표를 달성해야 하는 서바이벌 또는 디펜스 요소가 포함된 구조로 보이며, 제목과 번역된 설명의 분위기로 보아 진영 간의 전투보다는 단일 플레이어의 생존과 자원 관리, 또는 스킬 활용이 중점인 듯하다. 맵의 진행 방식은 다소 추상적이지만, 내부 설명의 ‘프랭크 반 플리트’와 ‘비누르스트 정부’에 대한 언급은 플레이어의 목표가 특정 세력의 명령을 수행하거나 방해하는 것일 가능성을 시사한다. 맵의 넓은 공간은 전략적 이동과 위치 선정을 강조하며, 유즈맵 특유의 다양한 트리거가 적용된 것으로 보이며, 플레이어는 맵 곳곳에 배치된 자원이나 건물을 확보해 성장하거나 방어전을 펼치는 방식으로 진행된다. 추천 대상은 밀리 기반 유즈맵에 익숙한 플레이어들로, 넓은 맵에서 전략적 사고와 빠른 판단력을 요구하는 맵을 선호하는 경우 즐길 수 있을 것이다. 플레이 전에는 맵의 승리 조건과 트리거 설정을 미리 확인하는 것이 중요하며, 특히 자원 관리와 유닛 배치에 대한 이해가 필요할 것으로 보인다. This map is a StarCraft: Brood War custom map based on the MELEE genre, with its internal title and filename ‘Ôèíàëüíàÿ òî÷êà’ likely translating to ‘Final Point’ in Russian, hinting at its thematic focus. The 4096x4096 vast wasteland tileset provides an open playing field, suggesting a design centered on survival, resource management, or defensive strategies for a single player. The map’s structure implies a progression where players must navigate central conflicts or defend key points against hostile forces. The gameplay appears to incorporate elements of survival and strategy, with the player’s objective potentially tied to completing missions related to the mentioned factions—‘Frank van Fleet’ and the ‘Vinurst government’—though the exact victory conditions remain unclear without further context. The expansive map layout emphasizes strategic movement, positioning, and resource control, typical of custom maps utilizing triggers for dynamic gameplay. Players familiar with MELEE-based custom maps will appreciate the strategic depth required to navigate the terrain, secure resources, and execute defensive or offensive maneuvers. Before playing, reviewing the map’s victory conditions and trigger settings is advisable, as the success heavily relies on efficient resource management and unit positioning. This map is recommended for those who enjoy large-scale custom maps with strategic and survival elements.
솔로 히어로 수켄 디펜스 1.0 (Solo Hero Sunken Defense 1.0)
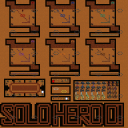
스타크래프트: 브루드워의 유즈맵 장르 중 디펜스 스타일의 맵으로, ‘Solo Hero Sunken Defense 1.0’이라는 제목에서 알 수 있듯이 1인 플레이를 주축으로 한 수비형 맵입니다. 맵의 외관은 황혼 테마의 타일셋을 기반으로 하며, 중앙에 위치한 구조물을 중심으로 적의 공격을 방어하는 구조로 보입니다. 이미지의 하단부에 있는 ‘SOLO HERO’라는 문구와 함께, 플레이어는 단일 영웅 유닛으로 다수의 적 웨이브를 상대로 버티며 생존을 목표로 해야 할 것으로 추정됩니다. 방어 구조는 중앙 요새 주변에 배치된 방어 타워나 장애물로 구성되어 있으며, 적의 공격 패턴은 맵 상단과 좌우측에서 주기적으로 등장하는 것으로 보입니다. 맵의 규모는 3072x3072로 상당히 넓지만, 수비에 집중된 구조상 플레이어는 요새 주변에 머무르며 전략을 펼칠 것으로 예상됩니다. 적의 공격은 초반부터 강도가 높아질 수 있으며, 방어 라인을 강화하거나 영웅의 스킬을 적재적소에 활용해야 합니다. 맵의 내구도나 승리 조건은 명확히 드러나지 않지만, ‘Stay alive’라는 내장 설명에서 알 수 있듯이 장기간의 생존이 핵심 목표일 가능성이 큽니다. 이 맵은 초보 플레이어에게는 다소 어려운 난이도를 가질 수 있지만, 수비형 유즈맵에 익숙한 유저라면 재미있게 즐길 수 있을 것입니다. 특히 1인 플레이에 특화되어 있어 혼자서도 충분히 긴장감 넘치는 플레이가 가능하다는 점이 특징입니다. 다만, 영웅의 능력치나 방어 시설의 배치에 따라 난이도가 크게 갈릴 수 있으므로, 사전 준비를 철저히 하는 것이 좋습니다. 또한, 맵의 구조상 적의 공격을 효과적으로 차단할 수 있는 포지셔닝이 중요하므로, 여러 번의 재시도를 통해 최적의 전략을 찾는 것이 중요합니다. 맵의 난이도는 보통으로 예상되지만, 숙련된 플레이어는 더 어려운 도전 과제를 설정할 수 있을 것입니다. Solo Hero Sunken Defense는 수비형 유즈맵을 좋아하는 플레이어들에게 рекомен할 만한 맵으로, 특히 1인 플레이를 선호하는 유저들에게 적합합니다. 맵의 구조와 진행 방식이 단순하면서도 전략적인 깊이를 제공하기 때문에, 반복 플레이를 통해 더욱 재미를 느낄 수 있을 것입니다. 또한, 황혼 테마의 시각적 요소와 함께 플레이어의 긴장감을 높이는 디자인도 인상적입니다. 맵을 플레이하기 전에는 방어 시설의 배치와 영웅의 스킬을 미리 확인하여, 보다 효과적인 플레이를 준비해야 합니다. 이 맵은 브루드워 유즈맵의 대표적인 수비형 장르를 잘 구현한 작품으로, 디펜스 매니아라면 꼭 시도해 볼 가치가 있습니다. This is a *StarCraft: Brood War* custom map in the defense genre, designed for solo play as indicated by its title, *Solo Hero Sunken Defense 1.0*. The map features a twilight-themed tileset, with a central structure that serves as the focal point for defending against waves of enemies. The "SOLO HERO" text at the bottom suggests that players must survive as a single hero unit against multiple enemy assaults. The defense system consists of towers and obstacles placed around the central fortress, while enemies spawn periodically from the top and sides of the map. Despite its large size (3072x3072), the map’s defensive focus means players will likely stay near the fortress to strategize. Enemy attacks intensify early on, requiring players to reinforce defenses or use their hero’s abilities effectively. While the exact durability or win conditions aren’t explicitly stated, the embedded description "Stay alive" strongly implies that prolonged survival is the core objective. This map may prove challenging for beginners, but experienced defense-map players will find it engaging. Its single-player focus allows for tense, self-contained gameplay, though difficulty can vary significantly depending on the hero’s stats and the placement of defensive structures. Thorough preparation is key, and mastering positioning to block enemy advances is crucial—experimentation and repeated attempts will help refine the best strategies. While the difficulty is generally moderate, skilled players can opt for harder challenges. *Solo Hero Sunken Defense* is a recommended pick for fans of defense-style custom maps, especially those who enjoy solo play. Its straightforward yet strategic design makes it replayable, and the twilight aesthetic enhances the immersive tension. Before playing, check the defensive layout and hero abilities to optimize your approach. As a well-executed example of Brood War’s defense genre, it’s a must-try for any defense-map enthusiast.
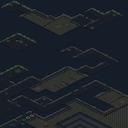
케이다린 수정 (Keidarin Crystal)
케이다린 수정은 스타크래프트: 브루드워의 유즈맵으로, 1인 디펜스 장르에 속하는 맵이다. 맵의 배경은 얼음으로 뒤덮인 혹한의 행성으로, 플레이어는 알다리스의 명령을 받은 집행관과 피닉스가 되어 이터니티 정거장에서 케이다린 수정 회수 임무를 수행해야 한다. 맵은 넓은 평야와 여기저기 흩어져 있는 기지 구조물로 구성되어 있으며, 적의 끊임없는 웨이브가 밀려오는 가운데 방어선을 구축하고 수정을 지켜내야 한다. 건물 배치와 자원 분포를 고려한 전략적 위치 선정이 핵심으로, 초반에는 자원 수집과 방어 시설 건설에 집중해야 한다. 적의 공격 패턴은 랜덤하게 발생하지만, 특정 지점에 집중되는 경향이 보이며, 이를 예측해 방어 타워나 유닛을 배치하는 것이 중요하다. 맵의 난이도는 보통 수준으로, 초반 자원 관리와 방어선 구축에 실패하면 쉽게 무너질 수 있으므로 신중한 플레이가 요구된다. 후반부로 갈수록 적의 공격 속도와 강도가 높아지므로, 지속적인 업그레이드와 자원 확보가 필수적이다. 맵의 분위기는 차갑고 삭막한 얼음 행성답게 조명이 어둡고 차가운 색조가 지배적이며, 이는 플레이어에게 긴장감을 조성하는 데 도움이 된다. 추천 대상은 디펜스 장르를 좋아하는 플레이어이며, 특히 1인 플레이를 선호하는 유저들에게 적합하다. 플레이 전에는 맵의 지형과 자원 분포를 숙지하고, 방어 시설의 배치 가능 위치를 미리 확인하는 것이 좋다. 또한, 적의 공격 패턴을 파악하기 위해 초반 웨이브를 주의 깊게 관찰하는 것도 중요하다. 이 맵은 디펜스 장르의 기본 틀을 지키면서도 전략적인 깊이를 더한 작품으로, 반복 플레이를 통해 최적의 방어 전략을 찾아낼 수 있다. Keidaran Crystal is a *StarCraft: Brood War* custom map in the one-player defense genre. Set on an ice-covered, harsh planet, players take on the roles of Executor Aldaris and Phoenix to retrieve the Keidaran Crystal from the Eternity Space Station. The map features vast plains interspersed with scattered base structures, where players must build defenses and hold off relentless enemy waves. Strategic positioning—considering building placement and resource distribution—is key, with early focus on gathering resources and constructing defensive facilities. Enemy attacks occur randomly but often concentrate on specific areas, so predicting these patterns and positioning defensive towers or units accordingly is crucial. The map is of moderate difficulty; poor early resource management or weak defenses can lead to quick defeats, demanding careful play. As the game progresses, enemy attacks grow faster and stronger, making continuous upgrades and resource gathering essential. The map’s atmosphere mirrors its frozen, desolate setting, with dim lighting and cold color tones enhancing tension. It’s ideal for players who enjoy defense games, especially those who prefer solo play. Before starting, familiarize yourself with the terrain and resource distribution, and scout possible defensive tower placements. Observing early enemy waves closely to identify attack patterns is also important. Keidaran Crystal stays true to defense game fundamentals while adding strategic depth, rewarding repeated play as you refine your optimal defense strategy.
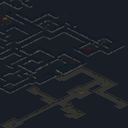
라 리브레asion 드 타싸다르 (La libération de Tassadar)
스타크래프트 브루드워의 유즈맵인 '라 리브레asion 드 타싸다르(La libération de Tassadar)'는 Jim Raynor와 UltraMarines가 지하에 갇힌 프로토스 테사다르를 구출하는 임무를 수행하는 디펜스형 UMS 맵이다. 맵은 설원 타일셋으로 구성되어 있으며, 어두운 분위기의 지하 통로와 미로 같은 구조가 특징적이다. 맵 중앙을 기준으로 다수의 적 기지가 배치되어 있어 플레이어는 끊임없이 몰려드는 저그 무리와 방어선을 구축해야 한다. 맵의 전체적인 레이아웃은 복잡하지 않지만, 곳곳에 위치한 좁은 통로와 십자형 교차로에서 적의 공격을 효과적으로 방어해야 한다. 특히, 맵의 상단과 하단에는 방어 거점이 마련되어 있어, 플레이어는 자원 채취와 방어 병력의 보강을 동시에 진행할 수 있다. 전투는 주로 프로토스와 테란 유닛이 혼합된 적군을 상대하게 되며, 랠리 포인트를 적절히 활용해 방어선을 유지하는 것이 핵심이다. 맵의 난이도는 적의 물량과 공격 패턴에 따라 크게 좌우되며, 초반 자원 확보와 유닛 생산 타이밍이 중요하다. 추천 대상은 디펜스와 UMS 맵을 선호하는 플레이어로, 긴장감 있는 전투와 전략적 방어 구축을 즐길 수 있다. 플레이 전에는 맵의 주요 교차로와 자원 지점을 미리 확인해 두는 것이 좋다. 특히, 좁은 길목에서는 탱크나 캐리어 같은 중장거리 유닛이 효과적이며, 빠른 스캔을 통해 적의 기습을 대비해야 한다. 맵의 분위기는 어두운 지하와 설원의 대조로 인해 긴장감을 높이며, 미로 같은 구조는 플레이어의 집중력을 요구한다. 전체적으로는 중규모 디펜스 맵으로, 1인 플레이에 최적화되어 있지만, 팀 플레이를 고려한 구조도 포함되어 있다. Jim Raynor and the UltraMarines must break through to rescue the Protoss hero Tassadar in *La Libération de Tassadar*, a defensive UMS map from StarCraft: Brood War. Set in a snowy tile theme, the map plunges players into a dimly lit underground maze of corridors and intersections. Enemy bases are scattered around the central area, forcing players to constantly fend off waves of Zerg while reinforcing their defenses. Though the layout is straightforward, tight passageways and crossroads demand careful positioning and smart rally-point use to hold the line. Secondary defensive hubs at the top and bottom let you harvest resources and reinforce troops simultaneously. Most engagements pit you against mixed Terran and Protoss armies, so timing your resource gathering and unit production is critical. The difficulty hinges on enemy numbers and attack patterns, rewarding players who adapt quickly. This map shines for fans of defensive UMS play, offering tense battles and strategic fortification. Before jumping in, scout the key choke points and resource zones—narrow corridors favor long-range units like Tanks or Carriers, while fast scans help counter surprise attacks. The contrast between the bleak underground and the snowy surface amplifies the atmosphere, and the maze-like design keeps you on your toes. Overall, it’s a mid-scale defensive challenge best suited for solo play, though its layout also supports team strategies.
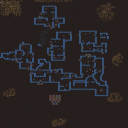
좀비의 습격: 마을 (Dawn of the Dead: Houses)
‘Dawn of the Dead: Houses’는 좀비 웨이브 디펜스 장르의 스타크래프트 브루드워 유즈맵으로, 플레이어는 이웃 마을에 몰려드는 좀비 무리를 상대로 생존을 위해 방어전을 펼치게 된다. 맵의 구조는 정글 타일셋을 기반으로 한 주거지역 형태로, 건물과 도로, 펜스가 복합적으로 배치되어 있어 전략적 요충지를 점령하고 병력을 배치하는 재미가 있다. 맵 중앙에 위치한 넓은 도로와 교차로에서는 대규모 좀비 웨이브가 몰려오며, 플레이어는 이 타이밍에 맞춰 방어선을 구축하고 자원을 확보해야 한다. 건물 내부로 좀비를 유인해 방어하기보다는, 외부 펜스를 활용한 ‘입구막기’ 방식의 전략이 유리한데, 이는 맵의 도로 구조와 건물 배치 덕분에 자연스럽게 진행된다. 또한, 맵 곳곳에 흩어져 있는 보급품과 자원 건물들은 후반부로 갈수록 중요해지며, 자원 확보를 위한 전투와 방어선의 유지 사이에서 균형을 잡아야 한다. 좀비의 공격 패턴은 단순한 웨이브 외에도 일정 시간마다 강력한 보스형 좀비가 등장하는 등 변칙적인 요소도 포함되어 있어, 초보 플레이어는 당황하기 쉽다. 하지만 기본적인 방어선을 유지하면서 자원을 확보하는 데 집중한다면 비교적 안정적으로 진행할 수 있는 구조다. 이 맵은 특히 팀 플레이보다는 1인 플레이에 최적화되어 있으며, 혼자서도 충분히 긴장감 있는 플레이가 가능하다는 점에서 단일 플레이어에게 추천할 만하다. 다만, 난이도가 높아질수록 좀비의 공격력과 수량이 급격히 증가하므로, 방어선을 신속하게 구축하고 자원 관리에 신경을 써야 한다. 맵의 분위기는 어둡고 긴장감 넘치는 좀비 아포칼립스 테마로 구성되어 있어, 해당 장르를 좋아하는 플레이어라면 몰입감 있게 즐길 수 있을 것이다. Dawn of the Dead: Houses is a zombie wave defense map for StarCraft: Brood War, where players must survive relentless waves of zombies in a residential neighborhood setting. The map, built on a jungle tileset, features a mix of buildings, roads, and fences, offering strategic choke points for defense. The central roads and intersections are focal points for zombie waves, requiring players to fortify defenses and secure resources at key moments. While luring zombies into buildings is an option, the layout favors an 'entry-blocking' strategy, leveraging external fences and choke points for better control. Scattered supply depots and resource buildings become crucial in the late game, demanding a balance between combat and resource management. The zombie attacks escalate with each wave, introducing occasional boss-like zombies that add unpredictability. Though overwhelming for beginners, the map rewards disciplined players who prioritize defense lines and resource efficiency. Designed primarily for single-player experiences, it delivers intense immersion for fans of zombie apocalypse-themed games. High difficulty levels demand rapid adaptation, as zombie numbers and strength surge dramatically, making early fortification and resource planning essential for survival. The eerie, tense atmosphere perfectly complements the survival horror genre, offering deep engagement for its target audience.
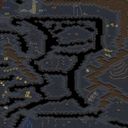
Dodgers! v.1.2 (장애물 피하기)
스타크래프트 브루드워의 미니게임으로 유명한 ‘Dodgers! v.1.2’는 기본적으로 ‘장애물 피하기’ 장르의 유즈맵이다. 맵 이미지에서 확인할 수 있듯이, 플레이어는 좁고 복잡한 통로를 따라 이동하며 다양한 장애물을 피해 목적지까지 도달해야 한다. 맵의 특징은 좁은 길목과sharp turn, 그리고 예상치 못한 장애물 배치로, 순간적인 반응력과 맵 읽기가 중요하다는 점이다. 내부 설명에서도 ‘장애물을 피하며 끝까지 가세요’라는 간단한 문구로 목적과 특징을 잘 전달하고 있다. 이 맵은 1인 플레이를 기본으로 하며, 4인까지 동시에 참여할 수 있도록 설계되어 있다. 각 플레이어는 개별적으로 목표를 향해 나아가지만, 맵의 좁은 통로 때문에 자연스럽게 경쟁 구도가 형성된다. 특히 좁은 길목에서 다른 플레이어와 부딪히면 방향 전환이 제한되어 전략적 움직임이 강요된다. 따라서 단순히 속도만이 아니라 맵의 구조를 얼마나 빠르게 파악하고 효율적인 경로를 선택하느냐가 승부의 관건이다. 맵의 디자인은 미로와 비슷하지만, 미로와 달리 ‘정답 경로’가 존재하지 않으며, 플레이어의 실시간 판단에 따라 결과가 달라진다. 추천 대상으로는 스타크래프트의 기본 조작에 익숙한 초보자부터 숙련자까지 폭넓게 즐길 수 있는 맵이다. 단, 좁은 통로와 갑작스러운 장애물 때문에 처음 플레이 시에는 미끄러지거나 길을 잃기 쉽다. 따라서 여러 번 시도해 보면서 맵의 패턴을 익히는 것이 중요하다. 또한, 팀플레이보다는 개인전 형식에 더 어울리므로 경쟁心을 자극하는 재미 요소가 강하다. 마지막으로, 맵의 전체적인 분위기는 우주 테마를 기반으로 하고 있지만, 미니게임 특성상 시각적 요소보다는 gameplay가 우선시된다. 플레이 전에는 맵의 복잡한 통로와 장애물 배치를 미리 확인하고, 키보드 조작에 익숙해질 필요가 있다. This Brood War mini-game, 'Dodgers! v.1.2,' belongs to the obstacle-avoidance genre, challenging players to navigate narrow, maze-like corridors while dodging unexpected obstacles. As shown in the map image, the design emphasizes sharp turns and tight passages, forcing quick reflexes and spatial awareness. The internal description succinctly captures its essence: 'go around the obstacles and try to get to the end.' Designed primarily as a single-player experience, the map accommodates up to four players simultaneously, creating a competitive dynamic within its confined spaces. The narrow pathways naturally lead to collisions, making movement strategy as crucial as speed. Unlike traditional mazes, this map lacks a fixed 'correct path,' relying instead on real-time decision-making to determine success. The confined spaces demand efficient route planning, as poor choices early on can lead to dead ends or forced retreats. Ideal for both beginners familiar with Brood War controls and seasoned players, the map’s difficulty lies in adapting to its unpredictable layout. New players may struggle with sudden turns or collisions, so repeated attempts are encouraged to internalize the map’s flow. While playable in team formats, the game thrives as a solo challenge, rewarding individual skill over cooperative strategy. Visually, the map leans into its space-themed tileset, though the primary focus remains on gameplay fluidity. Before playing, it’s advisable to study the corridor layouts and practice movement controls to minimize early-game frustration.
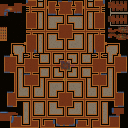
고양이와 쥐: 사막 미로 (Cat and Mice Desert Maze)
카트 앤 마이시(Desert Maze)라는 이름의 이 스타크래프트 브루드워 유즈맵은 이름 그대로 '고양이와 쥐' 컨셉의 퍼즐형 미니게임이다. 맵 전체가 사막 지형으로 구성되어 있으며, 플레이어는 쥐의 입장에서 탈출을 목표로 미로를 통과해야 한다. 맵 중앙에는 커다란 고양이 그림이 그려져 있으며, 주변으로 복잡한 길이 얽혀 있어 길을 찾는 과정이 핵심이다. 플레이어는 맵 테두리에 위치한 다양한 입구 중 하나를 선택해 들어가며, 출구는 맵의 반대편에 위치하고 있는 것으로 보인다. 맵의 구조는 격자 형태의 미로를 기반으로 하고 있으며, 각 구역은 벽과 통로로 구분되어 있어 전략적인 선택이 요구된다. 벽면에는 장식용 인공물이 배치되어 있어 시각적으로도 흥미로운 요소로 작용한다. 맵의 해상도는 4096x4096으로 상당히 크며, 타일 단위는 128x128로 세밀한 디자인과 넓은 공간감을 제공한다. 이 맵은 기본적으로 1인 플레이를 상정하고 제작되었으나, 최대 7인까지 동시 플레이가 가능한 것으로 추정된다. 퍼즐의 난이도는Creator의 언급에 따르면 2.01 버전으로 개선되었으며, 복잡한 미로를 통과하는 과정에서 자연스럽게 전략과 집중력이 요구된다. 특히, 사막 지형의 황량한 분위기는 플레이어에게 긴장감을 더해주며, 탈출을 위한 최적의 경로를 찾는 재미가 있다. 이 맵은 특히 퍼즐과 미로 탐색을 좋아하는 유저들에게 추천할 만하다. 플레이 전에는 맵의 구조를 꼼꼼히 살펴보아야 하며, 여러 번의 시도를 통해 최적의 경로를 찾는 것이 중요하다. 또한, 맵의 복잡한 구조상 한 번 길을 잃으면 다시 처음부터 시도해야 할 수도 있어 인내심이 요구된다. 한편, 맵 전체가 황혼 타일셋으로 구성되어 있어 분위기도 독특하고, 장식용 인공물들이 맵의 아름다움을 배가시킨다. 이 맵은 단순한 퍼즐 게임을 넘어, 전략적 사고와 공간 인식 능력을 키울 수 있는 좋은 기회가 될 것이다. The StarCraft: Brood War custom map *Cat and Mouse (Desert Maze)* is a puzzle mini-game based on the classic "cat and mouse" concept, as its name suggests. The entire map is set in a desert terrain, where players take on the role of a mouse trying to escape by navigating through a maze. A large cat illustration sits at the center of the map, surrounded by a web of intricate paths that form the core challenge. Players enter through one of several entrances located along the map’s edges, with the exit appearing to be on the opposite side. The layout follows a grid-based maze structure, with each section divided by walls and corridors, requiring strategic decision-making. Decorative artifacts along the walls add visual interest, enhancing the experience. With a high resolution of 4096x4096 and a tile size of 128x128, the map offers fine details and a spacious feel. While designed primarily for solo play, it reportedly supports up to seven players simultaneously. The puzzle difficulty has been refined in version 2.01, demanding strategy and focus as players seek the optimal escape route. The desolate desert atmosphere heightens tension, making the challenge of finding the best path both engaging and rewarding. This map is especially recommended for players who enjoy puzzles and maze navigation. Before playing, it’s crucial to study the layout carefully, as multiple attempts may be needed to discover the most efficient route. The maze’s complexity means getting lost could force a restart from the beginning, so patience is key. The map’s twilight-themed tileset gives it a unique ambiance, while the decorative artifacts further enhance its aesthetic appeal. Beyond being a simple puzzle game, *Desert Maze* offers a great opportunity to sharpen strategic thinking and spatial awareness.
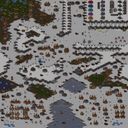
마린 스페셜 포스 FinalB (Marine Special Forces FinalB)
스타크래프트 브루드워의 유명한 유즈맵 'Marine Special Forces FinalB'는Hardcore 버전으로 분류되는 디펜스 장르의 컴까기 맵이다. 맵의 구조는 중앙에 위치한 넓은 평지 주변으로 언덕과 산책로, 건물 배치 공간이 조화롭게 배치되어 있으며, 플레이어는 해변가와 산림 지대를 방어선으로 삼아 끊임없이 몰려드는 적의 공격을 막아내야 한다. 맵 상단과 하단에 위치한 입구는 좁고 경사진 지형으로 구성되어 있어 적의 이동을 제한하는 동시에 아군의 방어력을 높이는 역할을 한다. 특히, 맵 중앙의 넓은 공간은 아군의 집결 및 방어 시설 배치에 유리한 환경을 제공하며, 언덕 지형은 시야 확보와 공격 각도를 조절하는 데 중요한 요소가 된다.Hardcore 버전답게 적의 공격 빈도와 강도가 매우 높아, 단순한 방어 전략으로는 버티기 어려운 난이도가 특징이다. 플레이어는 초반부터 강력한 방어 건물과 유닛을 배치하여 입구를 견고히 막아야 하며, 중반 이후에는 지속적인 업그레이드와 스킬 활용이 필수적이다. 맵의 아름다움은 해변가와 숲, 산악 지형의 조화로운 색채와 디자인으로, 스타크래프트의 클래식한 분위기를 느낄 수 있도록 디자인되었다. 이 맵은 주로 1인 플레이를 중심으로 제작되었으나, 팀플레이도 가능한 구조로 구성되어 있어 다양한 전략을 구사할 수 있는 장점이 있다.Hardcore 장르답게 초보자는 물론 중수 플레이어에게도 도전적인 난이도를 자랑하며, 오랜 시간 동안 스타크래프트 유즈맵 커뮤니티에서 사랑받아 온 맵 중 하나이다. 플레이 전에는 맵의 지형과 입구 구조, 적의 공격 패턴을 충분히 숙지하는 것이 중요하며, 방어 건물의 배치와 업그레이드 타이밍을 carefully 관리해야 한다. 특히, 언덕과 산책로의 활용은 방어 성공 여부를 좌우하는 핵심 요소이기 때문에, 이 부분을 집중적으로 연습하는 것이 좋다. Marine Special Forces FinalB is a hardcore UMS defense map in StarCraft: Brood War, designed as a 1-player challenge. The map features a central open area surrounded by elevated terrain, walkways, and strategic building zones, with narrow sloped pathways at the top and bottom acting as choke points to slow enemy advances. The coastal and forest regions serve as natural defensive perimeters, while the middle plains offer ample space for unit clustering and base expansion. As a hardcore version, the enemy waves are relentless and escalate in intensity, forcing players to deploy advanced defensive structures and continuous upgrades from the start. The map’s visual design blends serene coastline, dense forests, and rugged mountain terrain, reflecting classic StarCraft aesthetics. While primarily built for solo play, its layout supports team-based strategies, allowing for cooperative or competitive multiplayer modes. The difficulty curve is steep, making it suitable for intermediate players seeking a tough challenge. Key to success lies in mastering the choke points, positioning defensive buildings optimally, and timing upgrades carefully. Players should study the terrain’s high-ground advantages and prioritize controlling key elevations to maximize survivability against the waves of enemy forces.
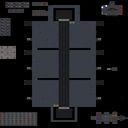
탱크 디펜스 SE v4.0 (Tank Defense SE v4.0)
스타크래프트 브루드워의 디펜스 장르 유즈맵인 'Tank Defense SE v4.0'은 탱크 유닛을 중심으로 한 방어형 전투가 특징인 맵으로, 플레이어는 끊임없이 몰려오는 적의 공격을 저지하며 최대한 오랫동안 살아남는 전략을 펼쳐야 한다. 맵 중앙의 넓은 공간에서 탱크 유닛을 배치하고, 외곽의 좁은 통로와 요새를 활용해 적의 진격을 늦추는 구조로 설계되어 있다. 이미지 상단과 하단, 좌우에 위치한 좁은 통로들은 진형 구축과 수비 전략의 핵심으로, 탱크의 방어력과 기동성을 최대한 활용할 수 있도록 배려되었다. 맵의 외곽에는 여러 개의 요새가 배치되어 있어, 이곳에서 적군을 처리하거나 추가적인 방어선을 구축할 수 있다. 또한, 맵의 가운데에 위치한 넓은 공간은 탱크의 기동력을 살려 적을 유인하거나 일점사하는 데 활용할 수 있다. 적의 공격 패턴은 랜덤으로 등장하는 유닛들로 구성되어 있으며, 플레이어는 제한된 자원으로 각 요새와 통로를 방어하면서 최대한 오래 버텨야 한다. 맵의 난이도는 적의 공격 빈도와 유닛의 강력함에 따라 조절되며, 초보 플레이어는 기본적인 방어 라인을 유지하는 데 집중해야 하고, 숙련자는 탱크의 배치와 기동력을 극대화해 더 높은 점수를 노릴 수 있다. 이 맵은 주로 1인 플레이를 상정하고 있지만, 팀플레이를 지원하는 구조로도 구성되어 있어 친구들과 함께 협력 수비를 즐길 수도 있다. 탱크 디펜스 SE 시리즈의 최신 버전인 만큼, 이전 버전들보다 맵의 밸런스가 개선되어 있고, 적의 공격 패턴도 더 다양해진 점이 특징이다. 특히, 탱크 유닛의 특성을 살린 디자인과 좁은 통로의 활용은 이 맵의 전략적 깊이를 크게 높였다. 플레이하기 전에는 탱크의 배치 위치와 각 요새의 역할, 적의 공격 루트를 미리 숙지해 두는 것이 중요하며, 이를 통해 더 효과적인 방어 전략을 세울 수 있다. 이 맵은 디펜스 장르를 любителям과, 특히 탱크 유닛을 활용한 전략적 수비 플레이를 즐기는 유저들에게 강력히 추천한다. 또한, 협동 플레이를 통해 팀원과의 호흡을 맞추는 재미도 느낄 수 있어, 친구들과 함께 플레이해 보는 것도 좋은 방법이다. Tank Defense SE v4.0 is a defense genre custom map in StarCraft: Brood War where players must defend against endless enemy waves using tanks as their primary unit. The goal is to survive as long as possible by strategically positioning tanks and blocking enemy advances. The map features a central open area for tank deployment, with narrow corridors and fortresses along the outer edges designed to slow enemy progress. These narrow pathways—located at the top, bottom, and sides of the map—are crucial for forming defensive formations and maximizing the tanks' defensive strength and mobility. Multiple fortresses around the perimeter allow players to engage enemies directly or establish additional defensive lines. The wide central space enables players to lure enemies or focus fire for efficient elimination. Enemy waves consist of randomly spawned units, and players must manage limited resources to hold their ground. Difficulty scales based on attack frequency and unit strength, with beginners focusing on maintaining basic defense lines while advanced players optimize tank positioning and mobility for higher scores. While primarily designed for solo play, the map also supports team play, allowing friends to cooperate in defense. As the latest version in the Tank Defense SE series, it improves balance and introduces more varied enemy patterns compared to previous iterations. The map’s strategic depth is enhanced by its tank-focused design and the effective use of narrow corridors. Before playing, it’s important to familiarize yourself with tank placement, fortress roles, and enemy attack routes to develop a more effective defense strategy. This map is highly recommended for fans of the defense genre, especially those who enjoy strategic defensive play with tanks. It also offers a fun cooperative experience, making it a great choice to play with friends and synchronize teamwork.
최근 등록된 맵
새로 추가된 파일과 버전을 확인하세요.
최종 지점 (Final Point)
이 맵은 스타크래프트: 브루드워의 밀리 기반 유즈맵으로, 내부 제목과 파일명에서 확인되는 ‘Ôèíàëüíàÿ òî÷êà’는 러시아어로 ‘최종 지점’을 의미하는 듯하며, 이는 맵의 배경 스토리나 목표를 암시하는 것으로 추정된다. 4096x4096의 넓은 황무지 타일셋을 기반으로 한 맵 구조는 광활한 개방형 필드를 제공하며, 플레이어가 중앙에서 적대적인 유닛들과 교전하거나 거점 방어를 수행하는 방식으로 진행되는 것으로 보인다. 1인 플레이를 전제로 한 디자인이며, 플레이어는 제한된 자원과 유닛을 활용해 목표를 달성해야 하는 서바이벌 또는 디펜스 요소가 포함된 구조로 보이며, 제목과 번역된 설명의 분위기로 보아 진영 간의 전투보다는 단일 플레이어의 생존과 자원 관리, 또는 스킬 활용이 중점인 듯하다. 맵의 진행 방식은 다소 추상적이지만, 내부 설명의 ‘프랭크 반 플리트’와 ‘비누르스트 정부’에 대한 언급은 플레이어의 목표가 특정 세력의 명령을 수행하거나 방해하는 것일 가능성을 시사한다. 맵의 넓은 공간은 전략적 이동과 위치 선정을 강조하며, 유즈맵 특유의 다양한 트리거가 적용된 것으로 보이며, 플레이어는 맵 곳곳에 배치된 자원이나 건물을 확보해 성장하거나 방어전을 펼치는 방식으로 진행된다. 추천 대상은 밀리 기반 유즈맵에 익숙한 플레이어들로, 넓은 맵에서 전략적 사고와 빠른 판단력을 요구하는 맵을 선호하는 경우 즐길 수 있을 것이다. 플레이 전에는 맵의 승리 조건과 트리거 설정을 미리 확인하는 것이 중요하며, 특히 자원 관리와 유닛 배치에 대한 이해가 필요할 것으로 보인다. This map is a StarCraft: Brood War custom map based on the MELEE genre, with its internal title and filename ‘Ôèíàëüíàÿ òî÷êà’ likely translating to ‘Final Point’ in Russian, hinting at its thematic focus. The 4096x4096 vast wasteland tileset provides an open playing field, suggesting a design centered on survival, resource management, or defensive strategies for a single player. The map’s structure implies a progression where players must navigate central conflicts or defend key points against hostile forces. The gameplay appears to incorporate elements of survival and strategy, with the player’s objective potentially tied to completing missions related to the mentioned factions—‘Frank van Fleet’ and the ‘Vinurst government’—though the exact victory conditions remain unclear without further context. The expansive map layout emphasizes strategic movement, positioning, and resource control, typical of custom maps utilizing triggers for dynamic gameplay. Players familiar with MELEE-based custom maps will appreciate the strategic depth required to navigate the terrain, secure resources, and execute defensive or offensive maneuvers. Before playing, reviewing the map’s victory conditions and trigger settings is advisable, as the success heavily relies on efficient resource management and unit positioning. This map is recommended for those who enjoy large-scale custom maps with strategic and survival elements.
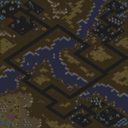
Угроза Дюка
이 맵은 스타크래프트: 브루드워의 유즈맵으로, 1인 플레이를 전제로 제작된 디펜스 장르의 미션형 맵이다. 제목에서 유추할 수 있듯이 '듀크'라는 이름의 보스를 상대하는 구성으로 보이며, 내부 맵 제목과 설명이 한글과 러시아어, 영어가 혼재되어 있지만 플레이 구조는 명확히 디펜스 방식으로 설계되었다. 맵의 전체 크기는 4096x3072로 상당히 넓은 구역을 차지하며, 황무지 타일셋을 사용하여 건조하고 삭막한 분위기를 연출한다. 미로나 방어 지점을 통과하며 적의 대군을 상대해야 하는 구조로 보이며, 특히 보스를 상대로 한 전투가 주요 포인트일 것으로 추정된다. 플레이 방식은 방어선을 구축하고 끊임없이 몰려드는 적 유닛을 상대하는 형태로, 초반에는 소수의 유닛으로 시작해 점차 방어력을 강화하거나 전략을 세워야 한다. 맵의 넓이와 구조상 시야 확보와 유닛 컨트롤이 중요할 것이며, 예상 플레이 시간은 30분 내외로 예상된다. 난이도는 보통으로 설정되어 있지만, 보스전까지 도달하기 위한 중간 단계에서 실패할 경우 난이도가 급격히 상승할 수 있다. 추천 대상은 스타크래프트의 기본적인 미션 플레이 경험이 있는 유저로, 디펜스 장르에 익숙한 플레이어라면 더욱 원활한 진행이 가능할 것이다. 주의해야 할 점은 맵의 넓이와 복잡한 구조로 인해 초반에 길을 잃거나 목표 지점을 찾기 어려울 수 있으며, 적의 공격 패턴을 정확히 파악하지 못하면 보스전 이전에 패배할 가능성이 높다. 또한, 내부 설명에 따르면 러시아어와 영어가 혼용되어 있어 일부 텍스트는 플레이어의 이해를 방해할 수 있으므로, 맵의 목표와 진행 방식은 미리 숙지하는 것이 좋다. 맵의 인코딩이 cp1252로 설정되어 있어 한글 표시가 깨질 가능성이 있으므로, 맵을 실행하기 전에 텍스트 인코딩 설정을 확인하는 것이 좋다. This map is a StarCraft: Brood War custom map designed for solo play, structured as a mission-based defense game. Based on the title, it appears to involve battling a boss named "Duke," though the internal map title and description mix Korean, Russian, and English. Despite this, the gameplay is clearly structured as a defense-style mission. The map spans a large area of 4096x3072, using a barren tileset that creates a dry, desolate atmosphere. The layout seems to require navigating mazes or defensive positions while facing waves of enemies, with the boss battle likely being the main focus. The gameplay revolves around setting up defenses and continuously countering relentless enemy units. Players start with a small force, gradually reinforcing defenses or refining strategies. Due to the map's size and structure, vision control and unit micro-management are crucial. The estimated playtime is around 30 minutes. While the difficulty is set to normal, failing in the mid-game stages before reaching the boss can significantly increase the challenge. It’s recommended for players with basic mission experience in StarCraft, and those familiar with defense games will find it easier to progress. Potential pitfalls include getting lost or struggling to locate objectives early on due to the map's vast and complex layout. Without a precise understanding of enemy attack patterns, players may fail before even reaching the boss. Additionally, since the internal descriptions mix Russian and English, some text may be confusing—reviewing the map’s objectives and mechanics beforehand is advisable. The map uses CP1252 encoding, so Korean text may appear garbled; checking text encoding settings before running the map is recommended.
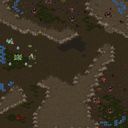
아이우르가x 디펜스 (Aurgax Defense)
‘아이우르가x 디펜스(Áàçà Äåðèëóò)’는 스타크래프트 브루드워에서 제공되는 UMS 장르의 유즈맵으로, 플레이어는 아이우르가스 기지를 방어하고 해당 지역 내 모든 적 건물을 파괴하는 것이 주요 목표다. 맵은 사막 타일셋을 기반으로 구축되었으며, 2048x2048 크기의 넓은 평야가 특징이다. 지형은 비교적 평탄한 편이지만 곳곳에 바위 지형과 언덕이 배치되어 있어 시야 확보와 진형 구축에 영향을 미친다. 또한, 맵 곳곳에 퍼져 있는 건물을 파괴하는 과정에서 자연스럽게 자원 관리와 병력 배치 전략을 요구하는 구조로 설계되었다고 추정된다. 이 맵은 1인 플레이를 기반으로 하며, 컴퓨터가 조종하는 적 세력의 공격 패턴과 건물 배치에 따라 방어 전략을 수립해야 한다. 맵의 제목 ‘Áàçà Äåðèëóò’는 러시아어로 ‘Aurgax Defense’를 의미하는 것으로 보이며, 이는 러시아어 사용자나 국제 유저들에게도 접근성을 높이는 요소로 작용할 수 있다. 플레이어는 건설로봇을 활용해 건물을 수리하고, 초반 자원 확보를 통해 방어선을 구축해야 하며, 적의 공격 타이밍과 병력 구성을 예측하여 대처해야 한다. 맵의 진행은 비교적 선형적으로 진행되지만, 적의 공격 경로가 다양하고 다수의 건물이 산재해 있어 전략적 깊이가 요구된다. 이 맵을 플레이하기 위해서는 스타크래프트 브루드워를 기본적으로 설치해야 하며, UMS 모드에서 호환 가능한 버전(1.16.1 이상)으로 실행해야 한다. 또한, 맵 내부의 설명이 영어와 러시아어 혼용으로 작성되어 있어, 초보자의 경우 번역기를 활용하는 것이 도움이 될 수 있다. 맵의 난이도는 제작자의 의도에 따라 보통 수준으로 추정되며, 적의 공격 패턴과 건물 배치에 익숙해지는 것이 핵심이다. 초반에는 자원 수집과 방어 시설 확충에 집중하고, 중반 이후에는 적극적인 반격과 건물을 파괴하는 전략을 펼쳐야 한다. 이 맵은 디펜스 장르의 기본 틀로 돌아가면서도, 넓은 맵과 복잡한 건물 배치로 인해 전략적 깊이가 있는 편이다. 따라서 방어와 공격의 균형을 맞추는 플레이 감각을 키우고자 하는 유저들에게 추천할 만한 작품이다. 또한, 다양한 적의 공격 패턴을 경험해 보고 싶거나, 넓은 맵에서 전략적 포지셔닝을 연습하고자 하는 플레이어들에게도 적합할 것으로 보인다. 다만, 맵의 설명이 다소 불친절할 수 있어, 초보자의 경우 미리 시연 동영상이나 가이드를 참고하는 것이 좋다. "Aurgax Defense" is a UMS custom map in *StarCraft: Brood War* where players defend the Aurgax base and destroy all enemy buildings in the area. The map uses a desert tileset and features a vast 2048x2048 plain. While the terrain is mostly flat, scattered rocks and hills affect visibility and formation setup. The map is designed so that destroying scattered buildings naturally requires resource management and troop positioning strategies. The map is single-player, where players must adapt their defense strategies based on enemy AI-controlled forces' attack patterns and building placements. The title "Aurgax Defense" appears to be Russian, enhancing accessibility for Russian-speaking or international players. Players must use SCVs to repair buildings, secure early resources to build defenses, and anticipate enemy attack timings and compositions. While the progression is relatively linear, the variety of attack paths and scattered buildings demand strategic depth. To play, *StarCraft: Brood War* must be installed, and the map requires UMS-compatible versions (1.16.1 or higher). Since the map's instructions are a mix of English and Russian, beginners may benefit from using a translator. The difficulty is estimated to be moderate, with mastery of enemy patterns and building placements being key. Early focus should be on resource gathering and expanding defenses, while mid-to-late game calls for aggressive counterattacks and building destruction. Though it follows classic defense map conventions, its large scale and complex building layouts add strategic depth, making it a strong choice for players looking to refine their balance of defense and offense. It also suits those wanting to experience varied enemy attack patterns or practice strategic positioning on a wide map. However, the instructions may be somewhat unclear, so beginners should check walkthrough videos or guides beforehand.
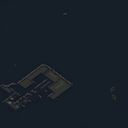
크롭 파트리오타 (Krov Patrioata)
《크롭 파트리오타》는 스타크래프트: 브루드워의 유즈맵으로, 얼음과 설원으로 뒤덮인 겨울 풍경의 맵에서 펼쳐지는 디펜스 장르의 유닛 격추 게임이다. 맵 제목은 러시아어로 '조국을 위한 희생'이라는 의미를 담고 있으며, 내부 설명에 따르면 듀란(Duran)이라는 인물이 공식적으로 조직을 떠나며 발생하는 긴장감을 테마로 삼고 있는 것으로 추정된다. 맵의 배경은 하얀 설원과 얼음으로 덮인 절벽, 그리고 어두운 하늘이 대비되는 시각적 인상을 주며, 플레이어는 이 차갑고 고립된 공간에서 적을 상대로 방어전을 펼치게 된다. 이 맵의 핵심은 디펜스 방식으로, 맵 중앙에 위치한 주요 건물을 보호하면서 끊임없이 쏟아지는 적 유닛을 상대하는 구조를 갖추고 있다. 맵의 디자인은 중앙 요새를 surrounded by 좁은 통로와 절벽으로 둘러싸인 형태로, 적들이 접근할 수 있는 루트를 제한하고 있다. 플레이어는 초반부터 강력한 방어 건물을 배치할 수 있는 위치와 자원 확보를 위한 확장 지역을 확보해야 하며, 적의 공격 패턴에 따라 전략을 유연하게 바꿔나가야 한다. 특히 얼음 타일과 설원 지형은 시야를 제한하고 유닛의 기동력을 감소시킬 수 있기 때문에, 센서나 포토캐논 같은 방어 건물의 배치와 시야 확보가 매우 중요하다. 플레이어는 1인 플레이를 전제로 하며, 맵의 크기가 상당히 넓기 때문에 유닛의 컨트롤과 자원 관리에 주의를 기울여야 한다. 맵의 타일셋이 설원/얼음으로 구성되어 있어, 일반적인 스타크래프트 맵과는 다른 시각적 분위기를 제공하며, 이는 플레이어에게 차분하고 전략적인 플레이를 유도하는 분위기를 조성한다. 또한 맵의 내부 설명에 Campaign Creations라는 제작자 그룹과 연락처가 포함되어 있으며, 번역자가 C@HeK로 명시되어 있어 국제적인 제작 환경에서 만들어진 맵임을 짐작할 수 있다. 이 맵은 방어에 중점을 둔 디펜스 장르의 유즈맵을 선호하는 플레이어들에게 적합하며, 특히 긴장감을 조성하는 스토리와 겨울 풍경의 맵 디자인이 마음에 든다면 추천할 만하다. 다만, 맵의 난이도나 승리 조건, 세부적인 밸런스는 맵 내부에서 확인해야 하며, 플레이 전에는 맵의 특수 조건(예: 얼음 지형의 영향, 시야 제한)을 미리 숙지하고 전략을 준비하는 것이 중요하다. This StarCraft: Brood War custom map, titled 'Krov Patrioata', immerses players in a defensive strategy experience set against a stark, icy backdrop reminiscent of a frozen tundra. The map, whose title translates to 'Sacrifice for the Fatherland' in Russian, appears to draw thematic inspiration from narratives of tension and departure, as hinted by internal descriptions referencing a character named Duran and an official break from an organization. The gameplay revolves around a defense-oriented structure where players must protect a central stronghold from relentless waves of enemy units. The map’s design features a central fortress encircled by narrow pathways and icy cliffs, strategically limiting enemy approach routes. Early game strategy involves securing expansion areas for resource gathering while positioning defensive structures, such as photon cannons or sensor arrays, to counter incoming threats. The snowy terrain and icy tiles not only create a visually striking environment but also impact gameplay by restricting sightlines and reducing unit mobility, adding an extra layer of challenge. Designed for solo play, the map’s expansive layout demands careful management of resources and unit control. The winter-themed tile set provides a unique aesthetic distinct from typical StarCraft maps, fostering a calm yet strategic atmosphere. Notably, the internal map description includes references to 'Campaign Creations' and a translator named C@HeK, suggesting an international development background. Ideal for players who enjoy defensive strategy custom maps, 'Krov Patrioata' offers a blend of thematic depth and mechanical challenge. Its winter setting and narrative hints make it particularly appealing to those seeking immersive, story-driven gameplay. However, players are advised to familiarize themselves with the map’s unique mechanics, such as terrain effects on movement and visibility, before diving into the experience.
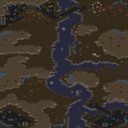
포라보티텔리 3.3 (Enslavers 3.3)
스타크래프트 브루드워의 고전 유즈맵인 <Ïîðàáîòèòåëè 3.3>는 국내외에서 오랜 기간 사랑받아 온 컴까기 장르의 대표작으로, 플레이어에게 긴장감 넘치는 전투와 전략적 선택을 요구하는 작품이다. 내부 설명에 따르면 레이너와 몬태그가 찰스와 그의 감염된 유령들을 상대한다는 스토리가 담겨 있으며, 단순히 적을 섬멸하는 것이 아니라 감염된 유령을 관리하는 요소가 포함된 것으로 보인다. 맵의 전체적인 분위기는 황무지 타일셋을 기반으로 하여 삭막하고 전투적인 느낌을 준다. 이 맵은 1인 플레이를 전제로 제작된 것으로 추정되며, 플레이어는 테란 건물을 건설하고 병력을 양성해 적을 상대로 방어전을 펼치는 동시에, 감염된 유령을 색출하고 제거하는 이중적인 목표를 수행해야 한다. 맵의 UI나 트리거에 대한 정보가 부족해 정확한 승리 조건은 확인할 수 없지만, 내부 제목과 설명을 종합해 볼 때 ‘Enslavers’라는 시리즈물의 한 작품으로, 감염자와 생존자 간의 대립이 핵심 테마로 보인다. 맵의 구조는 중앙에 위치한 넓은 평야와 주변의 언덕, 협곡 등으로 나뉘어 있으며, 이로 인해 병력의 기동성과 방어선의 구축이 중요할 것으로 예상된다. 플레이어는 초반 빠른 테란 건물을 확보해 안정적인 자원 채취를 시작해야 하며, 동시에 감염된 유령이 출현하는 위치를 감시해야 한다. 맵 곳곳에 흩어져 있는 감염 지역을 정화하지 않으면 적 병력이 끊임없이 증강되므로, 전략적 요충지를 선점하고 병력을 배치하는 것이 관건이다. 맵의 전체적인 밸런스는 다소 어려울 수 있어 초보자는 난이도를 낮춰 플레이하는 것이 좋으며, 숙련자라면 감염 지역을 효율적으로 정리하면서 병력을 보존하는 극한의 컨트롤을 요구할 것이다. 특히 테란의 방어 건물인 벙커와 터렛을 적극 활용해 감염된 유령의 접근을 차단하는 동시에, 바이오닉 병력으로 적 기지를 압박하는 전술을 추천한다. 이 맵을 즐기기 위해서는 테란의 기본적인 빌드와 유닛 운영법에 익숙해야 하며, 동시에 맵의 구조와 감염 지역 분포를 숙지하는 것이 중요하다. 또한, 같은 시리즈의 후속작인 Enslavers 3.4A나 3.5B 버전과의 비교를 통해 개선된 요소나 변화점을 찾아보는 것도 흥미로운 방법이다. 이 맵은 단순한 컴까기 이상의 전략적 깊이를 제공하므로, 여러 번 플레이하면서 최적의 전략을 찾아내는 재미가 있다. Starcraft: Brood War’s classic custom map <Ïîðàáîòèòåëè 3.3> is a beloved representative of the domestic and international "comp stomp" genre, offering players tense battles and strategic choices. According to its internal description, the storyline pits Raynor and Montag against Charles and his infected ghosts, but the objective isn’t just wiping out enemies—it also involves managing and eliminating the infected ghosts. The map’s overall aesthetic, built on a desolate wasteland tileset, delivers a stark, combat-driven atmosphere. Designed primarily for solo play, the player must construct Terran buildings, train forces, and defend against waves of enemies while simultaneously hunting down and eliminating infected ghosts. While details about the UI or triggers are scarce, combining the internal title and description suggests it’s part of the *Enslavers* series, with the core theme revolving around the conflict between the infected and survivors. The map’s layout features a central open plain flanked by hills, ravines, and other terrain, making mobility and defensive positioning crucial. Players should secure early Terran buildings to establish stable resource gathering while monitoring where infected ghosts spawn. Without cleansing the scattered infection sites, enemy forces will continuously grow, so controlling strategic chokepoints and deploying troops effectively is key. The map’s balance leans toward the challenging side, making it advisable for beginners to lower the difficulty, while experienced players will need to refine their control—efficiently clearing infection zones while preserving their forces. A recommended tactic involves leveraging Terran defensive structures like bunkers and turrets to block infected ghost approaches while pressuring enemy bases with bio units. To fully enjoy this map, players should be familiar with basic Terran builds and unit management, as well as the map’s layout and the distribution of infection sites. Comparing it to later versions like *Enslavers 3.4A* or *3.5B* can also highlight improvements or changes. Beyond being a simple comp stomp, this map offers deep strategic layers, rewarding repeated play as you discover the optimal strategies.
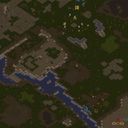
Адум - я имею в виду Адун
이 맵은 스타크래프트 브루드워의 유즈맵으로, 한 명의 플레이어가 컴퓨터를 상대로 전투를 펼치는 컴까기 장르의 맵으로 추정된다. 맵 제목과 내부 설명이 한글과 키릴 문자(러시아어)가 혼합되어 있어 다소 혼란스러워 보이지만, 플레이 경험상으로는 방어와 공격의 균형을 맞추는 디펜스형 유즈맵으로 느껴진다. 맵의 전체적인 분위기는 사막 타일셋을 기반으로 구성되어 있으며, 중앙에는 넓은 평지가 펼쳐져 있어 전투가 벌어질 공간으로 보인다. 주변으로는 언덕과 협곡이 배치되어 있어 strategic depth를 제공하며, 플레이어는 자원을 확보하고 유닛을 생산해 적의 공격을 방어하거나 역공을 펼치는 방식으로 진행하는 것으로 보인다. 특히, 맵의 하단부에는Resource가 배치되어 있으며, 상단부에는 적의 기지가 위치하고 있는 것으로 추정된다. 방어 건물이나 유닛 생산 건물이 맵 곳곳에 배치되어 있어, 플레이어는 자신의 전략에 따라 방어선을 구축하거나 적극적인 공격을展開할 수 있다. 맵의 난이도는 내부 설명에 언급된 ‘건강한 정신’이란 문구와 함께 보통 수준으로 추정되며, 초보 플레이어보다는 일정 수준의 전략적 사고가 요구되는 맵으로 보인다. 추천하는 플레이 방식은 초반 자원 확보와 방어선 구축을 중시하되, 중간 이후에는 적의 약점을 공략하는 공격형 전략을 취하는 것이다. 맵의 구조상으로는Resource 확보와 유닛 생산, 그리고 방어 시설의 배치 여부가 승패를 좌우할 가능성이 높으므로, 이러한 요소들을 면밀히 확인하고 준비하는 것이 중요하다. 또한, 맵의 타일셋과 구조상으로는 사막 지역의 특성을 살린 전략적 전투가 예상되며, 플레이어는 맵의 지형을 활용해 유리한 전투 위치를 선정해야 한다. 마지막으로, 맵의 인코딩 문제로 인해 제목이나 내부 설명이 깨져 보이는 경우가 있으니, 실제 플레이 시에는 맵의 내부 정보를 사전 확인하는 것이 좋다. This map is a custom StarCraft: Brood War UMS map where a single player battles against the computer, likely falling under the 'compete against AI' (컴까기) genre. The title and internal description mix Korean and Cyrillic characters (Russian), which may initially confuse players, but the gameplay experience suggests a defense-focused UMS map requiring balanced offense and strategy. The map utilizes a desert tileset with a central open area for combat, surrounded by hills and canyons that add strategic depth. The lower section appears to feature resource deposits, while the upper section likely contains the enemy base. Scattered defensive structures and unit production buildings across the map allow players to either fortify defenses or launch proactive attacks. The difficulty is presumed moderate, as indicated by the internal note about 'healthy minds,' demanding strategic thinking rather than beginner-level tactics. Recommended playstyle emphasizes securing early resources, establishing a defense line, and shifting to targeted offensive maneuvers mid-game. Resource management, unit production, and defensive structure placement are critical to success, with the desert terrain offering opportunities to exploit high-ground advantages. Players should verify internal map details beforehand due to potential encoding issues causing title or description corruption during display.
Ярость
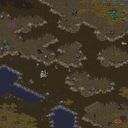
‘ßðîñòü’라는 제목의 스타크래프트 브루드워 유즈맵을 플레이해보았다. 내부 제목과 설명을 보면 약 한 달 전 ‘쿠퍼’라는 인물이 수수께끼의 사건을 해결한 후, 이번에는 ‘이상한 실험’을 저지르는 집으로 돌아왔다는 스토리를 담고 있는 듯하다. 맵은 황무지 타일셋을 기반으로 조성되어 있으며, 2048x2048의 거대한 맵 크기를 자랑한다. 특이하게도 사이트 제목에 깨진 문자(ßðîñòü)가 포함되어 있는데, 이는 cp1252 인코딩의 러시아어 텍스트가 깨져 보이는 현상으로 추정된다. 맵의 진행 방식은 1인 플레이가 가능한 유즈맵으로, 주로 디펜스와 서바이벌 요소가 섞인 구조를 띤다. 중앙에 위치한 건물이 있으며, 주변에서 끊임없이 몰려오는 적들을 상대해야 한다. 적의 종류는 다양해 보이며, 맵 곳곳에 배치된 방어 시설이나 보급로 등을 활용해 전략적으로 대처해야 한다. 게임의 난이도는 맵의 규모와 적의 지속적인 공격 패턴을 고려할 때 ‘보통’ 정도로 예상된다. 플레이어는 제한된 자원으로 방어선을 구축하고,Resource를 확보하며 적의 공격을 버텨내야 한다. 맵의 분위기는 다소 어두운 편으로, 실험실 같은 내부 구조와 황무지 외곽의 폐허가 어우러져 긴장감을 조성한다. 추천 대상은 스타크래프트 유즈맵을 즐기는 플레이어이며, 특히 1인용 디펜스 및 서바이벌 게임을 선호하는 유저들에게 적합할 것으로 보인다. 플레이 전에는 맵의 구조와 적 배치 패턴을 미리 숙지하는 것이 중요하다. 또한,Resource 관리와 방어 시설의 배치에 신경을 써야 하며, 긴 플레이 시간을 감안해 충분한 시간적 여유를 두고 도전하는 것이 좋다. 맵의 스토리나 승리 조건은 명확히 제공되지 않지만, 맵 제목과 내장된 설명을 통해 일종의 ‘미션’을 수행해야 하는 것으로 추정된다. I tried playing the StarCraft: Brood War custom map titled "ßðîñòü." Based on the internal title and description, it seems to follow a story where a character named "Cooper" solves a mysterious incident and returns to a house conducting a "strange experiment," set about a month later. The map is built on a wasteland tileset and boasts a massive size of 2048x2048. Interestingly, the site title includes corrupted characters (ßðîñòü), likely due to Russian text in CP1252 encoding appearing broken. The gameplay revolves around a single-player custom map, primarily blending defense and survival elements. There's a central building that must be defended against relentless waves of enemies approaching from all sides. The enemy types vary, and players must strategically counter them by utilizing defensive structures and supply routes scattered across the map. Given the map's scale and the enemies' continuous attack patterns, the difficulty is expected to be "moderate." Players must build defenses with limited resources, gather resources, and withstand the onslaught. The atmosphere is quite dark, with the interior resembling a laboratory and the wasteland outskirts filled with ruins, creating a tense ambiance. It's recommended for players who enjoy StarCraft custom maps, especially those who prefer single-player defense and survival games. Before playing, it's important to familiarize yourself with the map layout and enemy spawn patterns. You should also focus on resource management and defensive structure placement, and set aside enough time to tackle it, as the play session can be lengthy. While the map's story or victory conditions aren't clearly provided, it's estimated that players must complete a sort of "mission" based on the title and embedded description.
Генезис
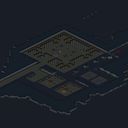
‘Генезис’는 스타크래프트 브루드워의 유즈맵으로, 1인 플레이를 전제로 제작된 독특한 디펜스 장르의 맵이다. 설원 타일셋을 배경으로 펼쳐진 맵은 차가운 분위기를 자아내며, 플레이어는 테란 과학자 유리우스 젝의 입장에서 독특한 존재를 방어하는 임무를 수행한다. 맵의 특징은 중앙에 위치한 거대한 구조물 주변을 빙글빙글 도는 방어 포인트로, 각 포인트에서 끊임없이 몰려드는 적을 처리하는 것이 주된 플레이 방식이다. 적의 공격 패턴은 다소 규칙적이지만, 맵의 규모가 크고 포인트 간 이동 거리가 있어 체력 관리와 자원 활용이 중요하다. 또한, 맵 곳곳에 숨겨진 보너스 자원이나 특수 아이템이 배치되어 있어 이를 잘 활용하면 방어에 큰 도움이 된다. 맵의 난이도는 초보자에게는 다소 어려울 수 있지만, 적의 패턴을 숙지하고 효율적인Build Order를 따르면 비교적 안정적으로 클리어할 수 있다. 특히, 후반부로 갈수록 몰려드는 적의 수가 급격히 증가하므로 방어 라인의 구축과 자원 관리에 신경을 써야 한다. ‘Генези스’는 디펜스를 любить하는 플레이어들에게는 새로운 경험을 제공할 수 있는 맵으로, 특히 1인 플레이를 선호하는 유저들에게 추천할 만한 작품이다. 다만, 맵의 설명이 러시아어로만 제공되어 있어 한국어 사용자 입장에서는 다소 진입 장벽이 있을 수 있으니, 사전 설명이나 가이드를 참고하는 것이 좋다. 맵의 분위기와 구조가 독특한 만큼, 여러 번 플레이해 보면서 최적의 전략을 찾아내는 재미가 있는 맵이라 할 수 있다. ‘Genesis’ is a StarCraft: Brood War custom map designed for solo play, featuring a unique defense genre. Set against a snowy tileset, the map exudes a cold atmosphere, and players take on the role of Terran scientist Yurius Jex, tasked with defending against mysterious entities. The map’s key feature is a massive central structure surrounded by rotating defensive points, where players must continuously fend off waves of enemies. While the enemy attack patterns are somewhat predictable, the map’s large scale and the distance between points make health management and resource allocation crucial. Hidden across the map are bonus resources and special items that, if used wisely, can greatly aid in defense. The difficulty may be challenging for beginners, but mastering enemy patterns and employing efficient build orders can make clearing the map relatively stable. As the game progresses, the number of enemies surges dramatically, so players must focus on establishing strong defense lines and managing resources carefully. ‘Genesis’ offers a fresh experience for defense enthusiasts, particularly those who prefer solo play. However, since the map’s instructions are provided only in Russian, Korean-speaking players may face some entry barriers, so consulting pre-game guides or explanations beforehand is recommended. With its distinctive atmosphere and structure, the map offers the fun of refining optimal strategies through repeated play.
맵 선택 가이드
태그는 맵의 핵심 특징을 빠르게 설명하지만 제작 버전마다 규칙이 다를 수 있습니다. 상세 설명에서 권장 인원, 난이도, 플레이 시간과 버전을 함께 확인한 뒤 다운로드하세요.