
1:1 밀리 스타크래프트 맵 모음
'1:1 밀리' 태그가 등록된 맵을 모았습니다. 장르 하나로 찾기 어려운 플레이 방식, 난이도와 특징을 중심으로 인기 맵과 최신 맵을 비교해 보세요.
- 등록 맵
- 6개
- 누적 다운로드
- 0
- 누적 조회
- 76
인기 맵
다운로드와 조회 반응이 높은 맵입니다.
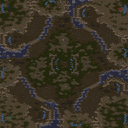
피의 투혼 (Fighting Spirit 1.3)
스타크래프트 브루드워의 classic한 1:1 밀리 맵으로, iCCup에서 널리 사용된 Fighting Spirit 1.3은 사막 지형을 배경으로 한 공정한 대칭형 맵입니다. 맵 중앙의 협소한 길목을 두고 양측이 좁은 통로를 두고 치열한 전투를 벌이는 구조로, 초반 러시부터 후반까지 긴장감이 끊이지 않는 플레이가 특징입니다. 좁은 길목은 자연스럽게 양측의 병력이 모여 지속적인 전투를 유도하며, 중앙의 언덕 지형은 시야 확보와 전략적 우위를 제공합니다. 또한 맵의 사막 타일셋은 건조한 분위기를 살려 전장 feel을 한층 높입니다. 이 맵은 1:1 밀리에서 가장 인기 있던 맵 중 하나로, iCCup의 공식 맵으로도 채택되어 countless 유저들에게 익숙한 디자인입니다. 빠른 전투와 전략적 선택이 요구되는 구조로, 초보자는 물론 숙련자까지 즐길 수 있는 밸런스가 잘 잡힌 맵입니다. 특히 좁은 길목에서의 전투는 테란의 벙커링, 프로토스의 광전사 러시, 저그의 러커 활용 등 각 종족의 특징을 극대화할 수 있어 종족별 전략을 연습하기에도 최적의 환경입니다. 또한 맵의 symmetrical한 구조는 양측의 공정한 대결을 보장하며, 맵의 넓이는 4096x4096로 표준적인 크기를 유지하고 있습니다. 플레이 전에는 중앙 언덕의 시야 확보와 좁은 길목의 병력 충돌 지점을 면밀히 확인해야 합니다. 특히 초반 러시 타이밍을 노리는 플레이어라면 길목의 협소함을 충분히 활용할 수 있도록 병력 조합과 테크 트리를 신중히 계획해야 합니다. 또한 언덕의 고지대에서 시야를 확보한 상태에서 적의 움직임을 미리 파악하는 것이 승리의 열쇠가 될 수 있습니다. 이 맵은 1:1 밀리에서 기본기부터 전략까지 종합적으로 연마할 수 있는 필수 맵으로, 스타크래프트의 classic한 재미를 느낄 수 있는 명작 중 하나입니다. 이 맵은 Rose.of.Dream에 의해 제작되었으며, Kespa와 iCCup을 통해 널리 퍼졌고, 특히 한국 커뮤니티에서 많은 사랑을 받았습니다. Fighting Spirit 1.3은 그 이름처럼 투쟁心을 자극하는 맵으로, countless 유저들에게 잊지 못할 전투의 기억을 선사합니다. StarCraft: Brood War’s classic 1v1 melee map, Fighting Spirit 1.3—widely used in iCCup—features a fair, symmetrical desert terrain. The map’s narrow central chokepoint forces both players into tight engagements from the opening rush through the late game, creating relentless tension. The confined passage naturally clusters forces, sustaining continuous combat, while the central hill offers vision control and strategic advantages. The arid tile set further amplifies the battlefield’s gritty atmosphere. One of the most popular 1v1 maps, Fighting Spirit 1.3 was even adopted as an official iCCup map, making its design familiar to countless players. Its fast-paced structure demands quick decisions and sharp strategy, appealing to both beginners and experts thanks to its well-balanced design. The narrow chokepoint highlights each race’s strengths—Terran bunkering, Protoss zealot rushes, Zerg lurker play—making it ideal for practicing race-specific tactics. The symmetrical layout ensures fair matchups, and the 4096x4096 dimensions keep the map at a standard size. Before playing, study the hill’s vision range and the exact collision points in the chokepoint. If rushing early, plan your army composition and tech path carefully to exploit the tight space. Controlling vision from the high ground lets you anticipate enemy moves, often tipping the balance in your favor. A must-play for 1v1, Fighting Spirit 1.3 hones fundamentals and strategy alike, delivering classic StarCraft excitement. Created by Rose.of.Dream, Fighting Spirit 1.3 spread through Kespa and iCCup, earning deep affection in the Korean community. True to its name, the map stokes the fighting spirit, leaving countless players with unforgettable battle memories.
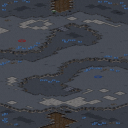
소울 서바이버 (Sole Survivor)
스타크래프트 브루드워의 고전 유즈맵 중 하나로 꼽히는 <소울 서바이버(Sole Survivor)>는 1:1 밀리 대결을 기반으로 한 전략 게임이다. 이 맵은 전장 한가운데에 위치한 중앙 기지 하나를 두고 두 플레이어가 자원을 채취하며 병력을 생산하고, 상대의 건물을 파괴해 승리를 쟁취하는 구조로 되어 있다. 맵의 특징은 중앙에 위치한 넥서스로, 시작과 동시에 양측의 병력이 이곳을 중심으로 교전하게 되며,Resource Vespene Geyser와 Mineral Field가 골고루 배치되어 있어 자원 수급이 용이하다. 특히 맵의 지형이 비교적 평평하고 넓은 편이어서 초반부터 중반까지의 전투가 치열하게 전개된다. 상대의 병력 생산 동선을 방해하거나 중앙 방어선을 구축하는 전략이 중요하다. 또한, 맵의 크기가 상당히 넓어 병력의 이동 시간이 길기 때문에, 타이밍 러시나 견제를 시도하는 플레이어에게는 신중한 판단이 요구된다. 초반에는 자원 채취를 우선시하며 병력을 생산해야 하고, 중반부터는 상대의 약점을 노리거나 방어선을 무너뜨리는 전략을 구사해야 한다. 이 맵은 초보자보다는 중급 이상의 플레이어에게 더 적합하며, 빠른 판단력과 전략적 사고가 victoria를 결정짓는 핵심 요소로 작용한다. 또한, 맵의 타일셋이 우주로 설정되어 있어 전쟁의 분위기를 한층 더 immersive하게 느낄 수 있다. 이 맵을 플레이하기 위해서는 멀티태스킹 능력이 필수적이며, 상대의 움직임을 예측하고 대응하는 능력이 요구된다. 특히, 상대의 병력 구성을 빠르게 파악하고, 그에 맞게 카운터 전략을 세우는 것이 중요하다. 이 맵은 스타크래프트의 밀리 장르의 정수를 담고 있으며, 1:1 대결의 긴장감과 전략적 깊이를 동시에 제공하는Classic Map으로 평가된다. 플레이어는 맵의 지형을 충분히 숙지하고, 상대방의 플레이 스타일을 분석하는 데 시간을 투자해야 한다. 또한, 자원 관리와 생산 효율성 역시 승리를 좌우하는 중요한 요소 중 하나다. 이 맵을 즐기는 플레이어들은 전략적 깊이를 즐기며, 상대와의 긴장감 넘치는 대결을 통해 실력을 키울 수 있을 것이다. <Soul Survivor> is a classic Brood War custom map renowned for its intense 1:1 melee battles. The game revolves around a central base located in the middle of the battlefield, where two players gather resources, train armies, and destroy enemy structures to secure victory. The standout feature is the Nexus at the map’s center, which becomes the focal point of early skirmishes as both players’ forces clash immediately. Mineral Fields and Vespene Geysers are evenly distributed, ensuring smooth resource collection. The terrain is notably open and flat, fostering fierce engagements from the early to mid-game. Strategic placement of defensive lines or disruption of enemy production routes is crucial. Given the map’s expansive size, unit movement takes time, demanding careful timing for rushes or harassment attempts. Early focus should be on gathering resources and expanding production, while mid-game calls for exploiting opponent weaknesses or breaking their defenses. This map favors intermediate to advanced players, where quick decision-making and tactical foresight often decide the outcome. The space-themed tileset enhances immersion, reinforcing the war-torn atmosphere. Success hinges on multitasking, predicting enemy moves, and adapting counter-strategies on the fly—especially in identifying unit compositions and countering them effectively. <Soul Survivor> encapsulates the essence of StarCraft’s melee genre, delivering both high-stakes tension and deep strategic play, making it a timeless classic. Mastery requires thorough terrain knowledge, opponent analysis, and meticulous resource management, as these factors heavily influence victory. Players who enjoy this map relish its strategic depth and the thrilling duels that sharpen their skills.
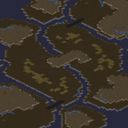
피닉스 (Phoenix)
스타크래프트 브루드워의 1:1 대전 밀리 맵 ‘피닉스(Phoenix)’는 이름 그대로 화려한 전투와 빠른 속도의 공방전을 즐길 수 있는 공간이다. 황무지 타일셋을 기반으로 한 맵은 1024x1024 크기의 공간을 4096x4096 해상도로 펼쳐내며, 중앙에 위치한 넓은 평지와 양 측면에 배치된 멀티 지역들이 특징이다. 맵의 이름과 설명에서 암시하듯 ‘누가 이 1:1 맵을 지배할 것인가?’라는 질문에 답을 내놓기 위해 플레이어는 초반부터 치열한 자원 관리와 테크 트리 경쟁을 펼치게 된다. 맵의 구조는 비교적 단순하지만, 중앙 평지의 넓은 시야와 멀티 지역 간의 접근성 덕분에 다양한 전략이 가능한 장점이 있다. 특히, 빠른 테크를 확보한 플레이어는 중앙 교전에서 우위를 점할 수 있으며, 반대로 안정적인 멀티 운영을 선호하는 경우에도 상대의 공격 타이밍을 잘 읽어야 한다. 맵의 난이도는 밸런스가 잘 잡혀 있어 초보자와 숙련자 모두에게 공정한 경쟁을 제공하며, 빠른 플레이 스타일을 선호하는 유저들에게는 이상적인 환경을 제공한다. 피닉스는 1:1 밀리 매치를 즐기는 플레이어라면 누구나 한 번쯤 시도해 볼 만한 맵으로, 특히 빠른 게임을 선호하는 유저들에게 추천할 만하다. 플레이 전에는 중앙 교전 타이밍과 멀티 지역 방어 전략을 미리 생각해 두는 것이 좋다. 또한, 상대의 테크 트리를 유심히 관찰하여 상성에 맞는 유닛 조합을 준비하는 것도 승리 전략의 핵심이다. StarCraft: Brood War’s 1v1 melee map "Phoenix" is a space designed for flashy battles and fast-paced offense and defense, true to its name. Built on a wasteland tileset, the map unfolds a 1024x1024 space in a 4096x4096 resolution, featuring a wide central plain and multi-locations positioned on both sides. As the name and description suggest, players engage in fierce resource management and tech-tree competition from the very start to answer the question: "Who will dominate this 1v1 map?" The map’s structure is relatively simple, but its wide visibility across the central plain and the accessibility between multi-locations allow for diverse strategies. Players who secure a fast tech can gain an advantage in central battles, while those favoring stable multi-management must carefully read their opponent’s attack timing. The map’s difficulty is well-balanced, offering fair competition for both beginners and experts, and it provides an ideal environment for players who prefer fast-paced gameplay. Phoenix is a map worth trying for anyone who enjoys 1v1 melee matches, especially those who favor quick games. Before playing, it’s wise to plan ahead for central battle timing and multi-defense strategies. Observing the opponent’s tech tree closely and preparing unit compositions suited to the matchup is also key to victory.
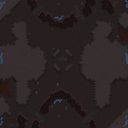
크로스파이어 (Crossfire)
《크로스파이어》는 스타크래프트: 브루드워의 1:1 밀리전용 맵으로, 정글 타일셋을 활용한 자연스러운 지형과 전투가 발생하기 쉬운 중앙 평야가 특징이다. 넓은 시야를 확보할 수 있는 언덕과 협곡, 그리고 각 플레이어의 시작 지점 사이에 위치한 중립 지역이maps의 흥미로운 요소가 된다. 맵의 핵심은 중앙 교전로와 양측의 본진 방어 구조로, 초반 러시와 후반의 전략적인 병력 운용을 동시에 고려해야 한다. 특히 중앙의 평원은 테란의 벙커링이나 저그의 러커 전략, 프로토스의 캐리어 운영 등 다양한 빌드와 카운터가 가능한 다채로운 전술을 유도한다. 또한 맵의 배치 덕분에 빠른 판단과 기동성이 요구되며, 한 번의 실수가 승리를 좌우할 수 있는 긴장감 있는 플레이 스타일을 제공한다. 초보자도 쉽게 접근할 수 있지만, 숙련된 플레이어에게는 미묘한 지형과 시야 싸움에서 승패가 갈리는 만큼 전략적 깊이가 있는 맵이다. 추천하는 플레이어는 1:1 밀리전을 즐기는 모든 유저로, 특히 빠른 승부와 전술적 대결을 선호하는 유저에게 적합하다. 시작 전에는 중앙 교전로의 시야 확보와 언덕의 위치, 본진 입구 방어 구조를 미리 숙지하는 것이 좋다. 이 맵에서 승리하려면 초반 자원 확보와 병력 조합, 그리고 상대의 움직임을 읽는 능력이 무엇보다 중요하다. 또한, 맵의 크기와 해상도가 커서 미세한 컨트롤과 타이밍을 요구하므로, 마우스 감도와 핫키 설정을 최적화하는 것이 좋다. 《Crossfire》 is a 1v1 melee map from StarCraft: Brood War, featuring natural terrain with a jungle tileset and a central plain where battles frequently erupt. Key elements include hills and ravines that provide wide sightlines, as well as a neutral zone between the players' starting positions. The map’s core revolves around the central battle path and defensive structures around each player’s main base, requiring players to balance early rushes with late-game strategic troop movements. The central plain allows for diverse tactics, supporting Terran bunker rushes, Zerg lurker strategies, Protoss carrier play, and more, making it a versatile battleground for varied builds and counters. The layout demands quick decision-making and mobility, with even a single mistake potentially deciding the match. While accessible to beginners, its subtle terrain and sightline battles create deep strategic layers that challenge even skilled players. This map is recommended for all 1v1 melee enthusiasts, particularly those who enjoy fast-paced, tactical duels. Before starting, it’s wise to familiarize yourself with the central battle path’s sightlines, hill positions, and main base entrance defenses. To win on this map, securing early resources, coordinating troop compositions, and predicting your opponent’s moves are crucial. Additionally, the map’s size and high resolution demand precise micro-management and timing, so optimizing mouse sensitivity and hotkey settings is essential.
Magma Plains (마그마 평원)
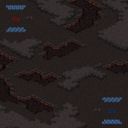
‘Magma Plains’는 스타크래프트 브루드워의 정글 타일셋을 배경으로 한 1:1 밀리 맵으로, 맵의 중앙에 위치한 좁은 다리나 협로가 주요 전투 공간으로 예상된다. 내부 설명에 따라 ‘모든 적 건물 파괴’를 승리 조건으로 삼고 있으며, 맵 구조상 방어와 공격의 균형이 중요할 것으로 보인다. 정글 타일셋의 울창한 지형과 좁은 통로가 시야를 제한하고, 전략적 움직임을 요구할 가능성이 크다. 특히 테란의 경우 벙커링이나 시즈 탱크 활용이, 프로토스는 파일런과 실드 배터리 배치로 방어선을 구축하는 플레이가 예상된다. 저그 역시Creep의 확장을 통해 지형을 장악하고, 스포닝 풀이나 히드라리스크 덴을 적절한 위치에 배치해 방어와 공격을 병행할 수 있을 것이다. 맵의 해상도와 크기(1024x1024, 2048x2048)는 대규모 병력 전투보다는 소규모 교전과micro 컨트롤이 중요한 스타일을 가질 가능성이 높다. 플레이어는 맵의 중앙 지형을 두고 벌어지는 초반 러시와 중반의 대규모 전투를 대비해야 하며,Resource의 확보와시야 확보가 승리의 열쇠가 될 것이다. 초보 플레이어는 좁은 길목에서의 전투에서 당황할 수 있으므로, 미네랄 라인과 가스 리FIgHTER의 배치를 철저히 연습하는 것이 좋다. 반면 숙련된 플레이어는 지형 상의 이점을 최대한 활용해 적을 몰아붙이는 플레이가 가능할 것이다. 이 맵은 1:1 밀리 특유의 긴장감과 전략적 깊이를 제공하며, 특히 정글 타일셋의 특성상 생존형과 공격형 빌드 모두가 유효할 것으로 보인다. 다만, 맵의 협소한 구조상 테란의 경우 벙커나 터렛을 통한 방어가, 프로토스는 포톤 캐논을 통한 방어가 상대적으로 수월할 수 있어, 초반 빌드 선택이 승패를 좌우할 가능성이 크다. ‘Magma Plains’ is a 1v1 melee map in StarCraft: Brood War set against a jungle tile theme, where the narrow bridges and choke points in the center are expected to be the primary battlegrounds. According to the in-game description, the victory condition is set to "destroy all enemy buildings," and the map’s structure suggests that balancing defense and offense will be crucial. The dense jungle terrain and tight corridors likely restrict visibility and demand strategic maneuvering. Terran players may rely on bunker rushes or siege tank positioning, while Protoss could establish defensive lines with photon cannons and shield batteries. Zerg, in turn, could secure the terrain via creep spread, placing spawning pools and hydralisk dens in key locations to balance defense and aggression. Given the map’s resolution and size (1024x1024 or 2048x2048), large-scale battles will be less common, favoring small-scale skirmishes and precise micro-management instead. Players should prepare for early rushes and mid-game clashes centered around the central terrain, where securing resources and vision will be vital to victory. Novice players might struggle in the tight chokepoints, so thorough practice with mineral line and gas refinery placement is essential. Experienced players, however, can leverage the terrain to outmaneuver opponents effectively. This map delivers the tense, strategic depth typical of 1v1 melee matches, and the jungle theme allows both survival-focused and aggressive builds to remain viable. That said, the map’s narrow layout may give Terran an edge with bunkers and turrets, and Protoss with photon cannons, making early build choices a potential deciding factor in the match’s outcome.
The Big Push (더 빅 푸시)
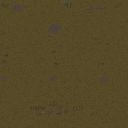
스타크래프트 브루드워의 클래식 밀리 맵인 〈The Big Push〉는 1:1 전투를 중심으로 설계된 흥미로운 대결용 맵이다. 맵의 핵심이 되는 전투는 황무지 지형에서 벌어지며, 중앙의 넓은 평지인 'The Big Push' 구역을 중심으로 양측 플레이어가 밀고 당기는 전술을 펼치게 된다. NATO와 바르샤바 조약기구(와르소 패킷)의 상징적 대립을 모티브로 삼은 이 맵은, 이름 그대로 '큰Push'가 승패를 가르는 핵심 포인트가 된다. 맵의 구조는 비교적 단순하면서도 전략적 깊이를 제공하는데, 중앙 평지는 넓은 시야를 확보할 수 있어 유닛 컨트롤과 포지셔닝이 중요해진다. 양측의 기지 앞마당과 연결되는 길목에는 좁은 협로가 있어, 디펜스와 러시 타이밍을 맞추는 것이 관건이다. 또한, 맵의 양 끝단에는 자원 멀티가 배치되어 있어 자원 관리와 멀티 확보가 승리의 중요 요소로 작용한다. 초보자는 중앙 병력을 집중시키기 어려운 반면, 숙련자는 유닛의 상성을 고려한 조합과 타이밍 러쉬를 구사할 수 있어, 같은 맵이라도 플레이어의 실력에 따라 완전히 다른 양상이 펼쳐진다. 특히, 테란의Siege Tank나 저그의Mutalisk, 프로토스의Zealot 등 유닛별로 강점을 발휘할 수 있는 장소가 나뉘어 있어, 다양한 전략을 시도해 볼 수 있다. 추천하는 대상은 밀리 초심자보다는 중급 이상의 플레이어로, 중앙 전투에서 승부를 가르는 감각을 키우고 싶거나, 좁은 길목에서의 디펜스와 러시 타이밍을 연습하고자 하는 유저들에게 적합하다. 플레이 전 반드시 확인해야 할 점은 각 종족별 유닛 조합과 맵의 주요 교전 지점인데, 특히 중앙의 'The Big Push' 구역에서 벌어지는 전투에서 승리하느냐가 승리의 관건이 된다. 이 맵을 즐기기 위해서는 각 종족의 기본 전략과 유닛 상성을 숙지하고, 맵의 구조를 정확히 이해하는 것이 중요하다. The Big Push is a classic 1v1 melee map in StarCraft: Brood War, designed around intense head-to-head combat. Set in a barren terrain, the map centers on a wide central plain called 'The Big Push,' where NATO and Warsaw Pact forces clash in a symbolic showdown. The layout is straightforward yet strategically rich, with the central area offering clear sightlines for unit positioning and control. Narrow pathways connect each player's main base to the central zone, making defensive setups and rush timing crucial. Resource expansions are placed at both ends, adding resource management to the strategic mix. Beginners may struggle with central unit coordination, while skilled players can leverage unit matchups—such as Terran Siege Tanks, Zerg Mutalisks, or Protoss Zealots—to gain an edge. This map is best suited for intermediate to advanced players looking to refine their mid-game combat tactics or practice tight choke-point defense and rush timing. Before playing, familiarize yourself with each race's unit compositions and key engagement zones, especially the central 'The Big Push' area, where decisive battles are won. Understanding the map's layout and unit strengths is essential to mastering this classic.
최근 등록된 맵
새로 추가된 파일과 버전을 확인하세요.
The Big Push (더 빅 푸시)
스타크래프트 브루드워의 클래식 밀리 맵인 〈The Big Push〉는 1:1 전투를 중심으로 설계된 흥미로운 대결용 맵이다. 맵의 핵심이 되는 전투는 황무지 지형에서 벌어지며, 중앙의 넓은 평지인 'The Big Push' 구역을 중심으로 양측 플레이어가 밀고 당기는 전술을 펼치게 된다. NATO와 바르샤바 조약기구(와르소 패킷)의 상징적 대립을 모티브로 삼은 이 맵은, 이름 그대로 '큰Push'가 승패를 가르는 핵심 포인트가 된다. 맵의 구조는 비교적 단순하면서도 전략적 깊이를 제공하는데, 중앙 평지는 넓은 시야를 확보할 수 있어 유닛 컨트롤과 포지셔닝이 중요해진다. 양측의 기지 앞마당과 연결되는 길목에는 좁은 협로가 있어, 디펜스와 러시 타이밍을 맞추는 것이 관건이다. 또한, 맵의 양 끝단에는 자원 멀티가 배치되어 있어 자원 관리와 멀티 확보가 승리의 중요 요소로 작용한다. 초보자는 중앙 병력을 집중시키기 어려운 반면, 숙련자는 유닛의 상성을 고려한 조합과 타이밍 러쉬를 구사할 수 있어, 같은 맵이라도 플레이어의 실력에 따라 완전히 다른 양상이 펼쳐진다. 특히, 테란의Siege Tank나 저그의Mutalisk, 프로토스의Zealot 등 유닛별로 강점을 발휘할 수 있는 장소가 나뉘어 있어, 다양한 전략을 시도해 볼 수 있다. 추천하는 대상은 밀리 초심자보다는 중급 이상의 플레이어로, 중앙 전투에서 승부를 가르는 감각을 키우고 싶거나, 좁은 길목에서의 디펜스와 러시 타이밍을 연습하고자 하는 유저들에게 적합하다. 플레이 전 반드시 확인해야 할 점은 각 종족별 유닛 조합과 맵의 주요 교전 지점인데, 특히 중앙의 'The Big Push' 구역에서 벌어지는 전투에서 승리하느냐가 승리의 관건이 된다. 이 맵을 즐기기 위해서는 각 종족의 기본 전략과 유닛 상성을 숙지하고, 맵의 구조를 정확히 이해하는 것이 중요하다. The Big Push is a classic 1v1 melee map in StarCraft: Brood War, designed around intense head-to-head combat. Set in a barren terrain, the map centers on a wide central plain called 'The Big Push,' where NATO and Warsaw Pact forces clash in a symbolic showdown. The layout is straightforward yet strategically rich, with the central area offering clear sightlines for unit positioning and control. Narrow pathways connect each player's main base to the central zone, making defensive setups and rush timing crucial. Resource expansions are placed at both ends, adding resource management to the strategic mix. Beginners may struggle with central unit coordination, while skilled players can leverage unit matchups—such as Terran Siege Tanks, Zerg Mutalisks, or Protoss Zealots—to gain an edge. This map is best suited for intermediate to advanced players looking to refine their mid-game combat tactics or practice tight choke-point defense and rush timing. Before playing, familiarize yourself with each race's unit compositions and key engagement zones, especially the central 'The Big Push' area, where decisive battles are won. Understanding the map's layout and unit strengths is essential to mastering this classic.
Magma Plains (마그마 평원)
‘Magma Plains’는 스타크래프트 브루드워의 정글 타일셋을 배경으로 한 1:1 밀리 맵으로, 맵의 중앙에 위치한 좁은 다리나 협로가 주요 전투 공간으로 예상된다. 내부 설명에 따라 ‘모든 적 건물 파괴’를 승리 조건으로 삼고 있으며, 맵 구조상 방어와 공격의 균형이 중요할 것으로 보인다. 정글 타일셋의 울창한 지형과 좁은 통로가 시야를 제한하고, 전략적 움직임을 요구할 가능성이 크다. 특히 테란의 경우 벙커링이나 시즈 탱크 활용이, 프로토스는 파일런과 실드 배터리 배치로 방어선을 구축하는 플레이가 예상된다. 저그 역시Creep의 확장을 통해 지형을 장악하고, 스포닝 풀이나 히드라리스크 덴을 적절한 위치에 배치해 방어와 공격을 병행할 수 있을 것이다. 맵의 해상도와 크기(1024x1024, 2048x2048)는 대규모 병력 전투보다는 소규모 교전과micro 컨트롤이 중요한 스타일을 가질 가능성이 높다. 플레이어는 맵의 중앙 지형을 두고 벌어지는 초반 러시와 중반의 대규모 전투를 대비해야 하며,Resource의 확보와시야 확보가 승리의 열쇠가 될 것이다. 초보 플레이어는 좁은 길목에서의 전투에서 당황할 수 있으므로, 미네랄 라인과 가스 리FIgHTER의 배치를 철저히 연습하는 것이 좋다. 반면 숙련된 플레이어는 지형 상의 이점을 최대한 활용해 적을 몰아붙이는 플레이가 가능할 것이다. 이 맵은 1:1 밀리 특유의 긴장감과 전략적 깊이를 제공하며, 특히 정글 타일셋의 특성상 생존형과 공격형 빌드 모두가 유효할 것으로 보인다. 다만, 맵의 협소한 구조상 테란의 경우 벙커나 터렛을 통한 방어가, 프로토스는 포톤 캐논을 통한 방어가 상대적으로 수월할 수 있어, 초반 빌드 선택이 승패를 좌우할 가능성이 크다. ‘Magma Plains’ is a 1v1 melee map in StarCraft: Brood War set against a jungle tile theme, where the narrow bridges and choke points in the center are expected to be the primary battlegrounds. According to the in-game description, the victory condition is set to "destroy all enemy buildings," and the map’s structure suggests that balancing defense and offense will be crucial. The dense jungle terrain and tight corridors likely restrict visibility and demand strategic maneuvering. Terran players may rely on bunker rushes or siege tank positioning, while Protoss could establish defensive lines with photon cannons and shield batteries. Zerg, in turn, could secure the terrain via creep spread, placing spawning pools and hydralisk dens in key locations to balance defense and aggression. Given the map’s resolution and size (1024x1024 or 2048x2048), large-scale battles will be less common, favoring small-scale skirmishes and precise micro-management instead. Players should prepare for early rushes and mid-game clashes centered around the central terrain, where securing resources and vision will be vital to victory. Novice players might struggle in the tight chokepoints, so thorough practice with mineral line and gas refinery placement is essential. Experienced players, however, can leverage the terrain to outmaneuver opponents effectively. This map delivers the tense, strategic depth typical of 1v1 melee matches, and the jungle theme allows both survival-focused and aggressive builds to remain viable. That said, the map’s narrow layout may give Terran an edge with bunkers and turrets, and Protoss with photon cannons, making early build choices a potential deciding factor in the match’s outcome.
크로스파이어 (Crossfire)
《크로스파이어》는 스타크래프트: 브루드워의 1:1 밀리전용 맵으로, 정글 타일셋을 활용한 자연스러운 지형과 전투가 발생하기 쉬운 중앙 평야가 특징이다. 넓은 시야를 확보할 수 있는 언덕과 협곡, 그리고 각 플레이어의 시작 지점 사이에 위치한 중립 지역이maps의 흥미로운 요소가 된다. 맵의 핵심은 중앙 교전로와 양측의 본진 방어 구조로, 초반 러시와 후반의 전략적인 병력 운용을 동시에 고려해야 한다. 특히 중앙의 평원은 테란의 벙커링이나 저그의 러커 전략, 프로토스의 캐리어 운영 등 다양한 빌드와 카운터가 가능한 다채로운 전술을 유도한다. 또한 맵의 배치 덕분에 빠른 판단과 기동성이 요구되며, 한 번의 실수가 승리를 좌우할 수 있는 긴장감 있는 플레이 스타일을 제공한다. 초보자도 쉽게 접근할 수 있지만, 숙련된 플레이어에게는 미묘한 지형과 시야 싸움에서 승패가 갈리는 만큼 전략적 깊이가 있는 맵이다. 추천하는 플레이어는 1:1 밀리전을 즐기는 모든 유저로, 특히 빠른 승부와 전술적 대결을 선호하는 유저에게 적합하다. 시작 전에는 중앙 교전로의 시야 확보와 언덕의 위치, 본진 입구 방어 구조를 미리 숙지하는 것이 좋다. 이 맵에서 승리하려면 초반 자원 확보와 병력 조합, 그리고 상대의 움직임을 읽는 능력이 무엇보다 중요하다. 또한, 맵의 크기와 해상도가 커서 미세한 컨트롤과 타이밍을 요구하므로, 마우스 감도와 핫키 설정을 최적화하는 것이 좋다. 《Crossfire》 is a 1v1 melee map from StarCraft: Brood War, featuring natural terrain with a jungle tileset and a central plain where battles frequently erupt. Key elements include hills and ravines that provide wide sightlines, as well as a neutral zone between the players' starting positions. The map’s core revolves around the central battle path and defensive structures around each player’s main base, requiring players to balance early rushes with late-game strategic troop movements. The central plain allows for diverse tactics, supporting Terran bunker rushes, Zerg lurker strategies, Protoss carrier play, and more, making it a versatile battleground for varied builds and counters. The layout demands quick decision-making and mobility, with even a single mistake potentially deciding the match. While accessible to beginners, its subtle terrain and sightline battles create deep strategic layers that challenge even skilled players. This map is recommended for all 1v1 melee enthusiasts, particularly those who enjoy fast-paced, tactical duels. Before starting, it’s wise to familiarize yourself with the central battle path’s sightlines, hill positions, and main base entrance defenses. To win on this map, securing early resources, coordinating troop compositions, and predicting your opponent’s moves are crucial. Additionally, the map’s size and high resolution demand precise micro-management and timing, so optimizing mouse sensitivity and hotkey settings is essential.
피닉스 (Phoenix)
스타크래프트 브루드워의 1:1 대전 밀리 맵 ‘피닉스(Phoenix)’는 이름 그대로 화려한 전투와 빠른 속도의 공방전을 즐길 수 있는 공간이다. 황무지 타일셋을 기반으로 한 맵은 1024x1024 크기의 공간을 4096x4096 해상도로 펼쳐내며, 중앙에 위치한 넓은 평지와 양 측면에 배치된 멀티 지역들이 특징이다. 맵의 이름과 설명에서 암시하듯 ‘누가 이 1:1 맵을 지배할 것인가?’라는 질문에 답을 내놓기 위해 플레이어는 초반부터 치열한 자원 관리와 테크 트리 경쟁을 펼치게 된다. 맵의 구조는 비교적 단순하지만, 중앙 평지의 넓은 시야와 멀티 지역 간의 접근성 덕분에 다양한 전략이 가능한 장점이 있다. 특히, 빠른 테크를 확보한 플레이어는 중앙 교전에서 우위를 점할 수 있으며, 반대로 안정적인 멀티 운영을 선호하는 경우에도 상대의 공격 타이밍을 잘 읽어야 한다. 맵의 난이도는 밸런스가 잘 잡혀 있어 초보자와 숙련자 모두에게 공정한 경쟁을 제공하며, 빠른 플레이 스타일을 선호하는 유저들에게는 이상적인 환경을 제공한다. 피닉스는 1:1 밀리 매치를 즐기는 플레이어라면 누구나 한 번쯤 시도해 볼 만한 맵으로, 특히 빠른 게임을 선호하는 유저들에게 추천할 만하다. 플레이 전에는 중앙 교전 타이밍과 멀티 지역 방어 전략을 미리 생각해 두는 것이 좋다. 또한, 상대의 테크 트리를 유심히 관찰하여 상성에 맞는 유닛 조합을 준비하는 것도 승리 전략의 핵심이다. StarCraft: Brood War’s 1v1 melee map "Phoenix" is a space designed for flashy battles and fast-paced offense and defense, true to its name. Built on a wasteland tileset, the map unfolds a 1024x1024 space in a 4096x4096 resolution, featuring a wide central plain and multi-locations positioned on both sides. As the name and description suggest, players engage in fierce resource management and tech-tree competition from the very start to answer the question: "Who will dominate this 1v1 map?" The map’s structure is relatively simple, but its wide visibility across the central plain and the accessibility between multi-locations allow for diverse strategies. Players who secure a fast tech can gain an advantage in central battles, while those favoring stable multi-management must carefully read their opponent’s attack timing. The map’s difficulty is well-balanced, offering fair competition for both beginners and experts, and it provides an ideal environment for players who prefer fast-paced gameplay. Phoenix is a map worth trying for anyone who enjoys 1v1 melee matches, especially those who favor quick games. Before playing, it’s wise to plan ahead for central battle timing and multi-defense strategies. Observing the opponent’s tech tree closely and preparing unit compositions suited to the matchup is also key to victory.
피의 투혼 (Fighting Spirit 1.3)
스타크래프트 브루드워의 classic한 1:1 밀리 맵으로, iCCup에서 널리 사용된 Fighting Spirit 1.3은 사막 지형을 배경으로 한 공정한 대칭형 맵입니다. 맵 중앙의 협소한 길목을 두고 양측이 좁은 통로를 두고 치열한 전투를 벌이는 구조로, 초반 러시부터 후반까지 긴장감이 끊이지 않는 플레이가 특징입니다. 좁은 길목은 자연스럽게 양측의 병력이 모여 지속적인 전투를 유도하며, 중앙의 언덕 지형은 시야 확보와 전략적 우위를 제공합니다. 또한 맵의 사막 타일셋은 건조한 분위기를 살려 전장 feel을 한층 높입니다. 이 맵은 1:1 밀리에서 가장 인기 있던 맵 중 하나로, iCCup의 공식 맵으로도 채택되어 countless 유저들에게 익숙한 디자인입니다. 빠른 전투와 전략적 선택이 요구되는 구조로, 초보자는 물론 숙련자까지 즐길 수 있는 밸런스가 잘 잡힌 맵입니다. 특히 좁은 길목에서의 전투는 테란의 벙커링, 프로토스의 광전사 러시, 저그의 러커 활용 등 각 종족의 특징을 극대화할 수 있어 종족별 전략을 연습하기에도 최적의 환경입니다. 또한 맵의 symmetrical한 구조는 양측의 공정한 대결을 보장하며, 맵의 넓이는 4096x4096로 표준적인 크기를 유지하고 있습니다. 플레이 전에는 중앙 언덕의 시야 확보와 좁은 길목의 병력 충돌 지점을 면밀히 확인해야 합니다. 특히 초반 러시 타이밍을 노리는 플레이어라면 길목의 협소함을 충분히 활용할 수 있도록 병력 조합과 테크 트리를 신중히 계획해야 합니다. 또한 언덕의 고지대에서 시야를 확보한 상태에서 적의 움직임을 미리 파악하는 것이 승리의 열쇠가 될 수 있습니다. 이 맵은 1:1 밀리에서 기본기부터 전략까지 종합적으로 연마할 수 있는 필수 맵으로, 스타크래프트의 classic한 재미를 느낄 수 있는 명작 중 하나입니다. 이 맵은 Rose.of.Dream에 의해 제작되었으며, Kespa와 iCCup을 통해 널리 퍼졌고, 특히 한국 커뮤니티에서 많은 사랑을 받았습니다. Fighting Spirit 1.3은 그 이름처럼 투쟁心을 자극하는 맵으로, countless 유저들에게 잊지 못할 전투의 기억을 선사합니다. StarCraft: Brood War’s classic 1v1 melee map, Fighting Spirit 1.3—widely used in iCCup—features a fair, symmetrical desert terrain. The map’s narrow central chokepoint forces both players into tight engagements from the opening rush through the late game, creating relentless tension. The confined passage naturally clusters forces, sustaining continuous combat, while the central hill offers vision control and strategic advantages. The arid tile set further amplifies the battlefield’s gritty atmosphere. One of the most popular 1v1 maps, Fighting Spirit 1.3 was even adopted as an official iCCup map, making its design familiar to countless players. Its fast-paced structure demands quick decisions and sharp strategy, appealing to both beginners and experts thanks to its well-balanced design. The narrow chokepoint highlights each race’s strengths—Terran bunkering, Protoss zealot rushes, Zerg lurker play—making it ideal for practicing race-specific tactics. The symmetrical layout ensures fair matchups, and the 4096x4096 dimensions keep the map at a standard size. Before playing, study the hill’s vision range and the exact collision points in the chokepoint. If rushing early, plan your army composition and tech path carefully to exploit the tight space. Controlling vision from the high ground lets you anticipate enemy moves, often tipping the balance in your favor. A must-play for 1v1, Fighting Spirit 1.3 hones fundamentals and strategy alike, delivering classic StarCraft excitement. Created by Rose.of.Dream, Fighting Spirit 1.3 spread through Kespa and iCCup, earning deep affection in the Korean community. True to its name, the map stokes the fighting spirit, leaving countless players with unforgettable battle memories.
소울 서바이버 (Sole Survivor)
스타크래프트 브루드워의 고전 유즈맵 중 하나로 꼽히는 <소울 서바이버(Sole Survivor)>는 1:1 밀리 대결을 기반으로 한 전략 게임이다. 이 맵은 전장 한가운데에 위치한 중앙 기지 하나를 두고 두 플레이어가 자원을 채취하며 병력을 생산하고, 상대의 건물을 파괴해 승리를 쟁취하는 구조로 되어 있다. 맵의 특징은 중앙에 위치한 넥서스로, 시작과 동시에 양측의 병력이 이곳을 중심으로 교전하게 되며,Resource Vespene Geyser와 Mineral Field가 골고루 배치되어 있어 자원 수급이 용이하다. 특히 맵의 지형이 비교적 평평하고 넓은 편이어서 초반부터 중반까지의 전투가 치열하게 전개된다. 상대의 병력 생산 동선을 방해하거나 중앙 방어선을 구축하는 전략이 중요하다. 또한, 맵의 크기가 상당히 넓어 병력의 이동 시간이 길기 때문에, 타이밍 러시나 견제를 시도하는 플레이어에게는 신중한 판단이 요구된다. 초반에는 자원 채취를 우선시하며 병력을 생산해야 하고, 중반부터는 상대의 약점을 노리거나 방어선을 무너뜨리는 전략을 구사해야 한다. 이 맵은 초보자보다는 중급 이상의 플레이어에게 더 적합하며, 빠른 판단력과 전략적 사고가 victoria를 결정짓는 핵심 요소로 작용한다. 또한, 맵의 타일셋이 우주로 설정되어 있어 전쟁의 분위기를 한층 더 immersive하게 느낄 수 있다. 이 맵을 플레이하기 위해서는 멀티태스킹 능력이 필수적이며, 상대의 움직임을 예측하고 대응하는 능력이 요구된다. 특히, 상대의 병력 구성을 빠르게 파악하고, 그에 맞게 카운터 전략을 세우는 것이 중요하다. 이 맵은 스타크래프트의 밀리 장르의 정수를 담고 있으며, 1:1 대결의 긴장감과 전략적 깊이를 동시에 제공하는Classic Map으로 평가된다. 플레이어는 맵의 지형을 충분히 숙지하고, 상대방의 플레이 스타일을 분석하는 데 시간을 투자해야 한다. 또한, 자원 관리와 생산 효율성 역시 승리를 좌우하는 중요한 요소 중 하나다. 이 맵을 즐기는 플레이어들은 전략적 깊이를 즐기며, 상대와의 긴장감 넘치는 대결을 통해 실력을 키울 수 있을 것이다. <Soul Survivor> is a classic Brood War custom map renowned for its intense 1:1 melee battles. The game revolves around a central base located in the middle of the battlefield, where two players gather resources, train armies, and destroy enemy structures to secure victory. The standout feature is the Nexus at the map’s center, which becomes the focal point of early skirmishes as both players’ forces clash immediately. Mineral Fields and Vespene Geysers are evenly distributed, ensuring smooth resource collection. The terrain is notably open and flat, fostering fierce engagements from the early to mid-game. Strategic placement of defensive lines or disruption of enemy production routes is crucial. Given the map’s expansive size, unit movement takes time, demanding careful timing for rushes or harassment attempts. Early focus should be on gathering resources and expanding production, while mid-game calls for exploiting opponent weaknesses or breaking their defenses. This map favors intermediate to advanced players, where quick decision-making and tactical foresight often decide the outcome. The space-themed tileset enhances immersion, reinforcing the war-torn atmosphere. Success hinges on multitasking, predicting enemy moves, and adapting counter-strategies on the fly—especially in identifying unit compositions and countering them effectively. <Soul Survivor> encapsulates the essence of StarCraft’s melee genre, delivering both high-stakes tension and deep strategic play, making it a timeless classic. Mastery requires thorough terrain knowledge, opponent analysis, and meticulous resource management, as these factors heavily influence victory. Players who enjoy this map relish its strategic depth and the thrilling duels that sharpen their skills.
맵 선택 가이드
태그는 맵의 핵심 특징을 빠르게 설명하지만 제작 버전마다 규칙이 다를 수 있습니다. 상세 설명에서 권장 인원, 난이도, 플레이 시간과 버전을 함께 확인한 뒤 다운로드하세요.