
1:1 대전 스타크래프트 맵 모음
'1:1 대전' 태그가 등록된 맵을 모았습니다. 장르 하나로 찾기 어려운 플레이 방식, 난이도와 특징을 중심으로 인기 맵과 최신 맵을 비교해 보세요.
- 등록 맵
- 10개
- 누적 다운로드
- 1
- 누적 조회
- 993
인기 맵
다운로드와 조회 반응이 높은 맵입니다.
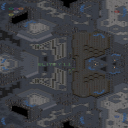
블리츠 Y 1.1 (Blitz Y 1.1)
이 맵은 ASL Season17 공식맵으로, 원작자 칼사간(2006)의 ‘Blitz’를 네메시(NEMEC)가 재디자인한 밀리 유즈맵이다. 우주 테마의 넓은 맵에서 펼쳐지는 빠른 속도의 전투가 특징으로, 스타크래프트 브루드워의 기본 메커닉을 살리면서도 공중 유닛과 지상 유닛의 균형이 돋보인다. 맵 중앙에는 커다란 운석 지역이 있으며, 이곳은 파괴 가능한 자원으로 활용되어 전투의 변수를 창출한다. 각 플레이어는 시작 본진에서 출발해 자원을 확보하고, 상대방의 건물을 파괴하는 것이 주요 목표로 보인다. 맵의 구조상 빠른 확장보다는 초반부터 중앙 지역을 차지하기 위한 치열한 전투가 예상되며, 맵의 넓이와 장애물 배치로 인해 전략적 선택이 중요해진다. 초보 플레이어의 경우 자원 확보와 동시에 방어 라인을 구축하는 데 중점을 두어야 하며, 숙련된 플레이어는 중앙 지역을 선점하고 상대방의 자원 라인을 차단하는 전략을 구사할 수 있다. 맵의 밸런스는 테란, 저그, 프로토스의 각 종족이 공중과 지상을 조합한 전투를 펼칠 수 있도록 설계되어 있으며, 특히 공중 유닛의 활용이 승패를 좌우할 수 있다. 또한, 맵의 넓은 크기 때문에 맵 리딩 능력이 뛰어난 플레이어에게 유리한 구조로 보인다. 이 맵은 ASL 공식맵답게 프로와 아마추어 모두 즐길 수 있는 수준의 밸런스를 갖추고 있으며, 빠른 진행과 전략적 깊이가 조화를 이루는 것이 특징이다. 플레이 전에는 반드시 각 종족의 장단점을 숙지하고, 맵의 주요 자원 지점과 중앙 지역을 미리 파악해 두는 것이 중요하다. 또한, 공중 유닛의 생산과 관리에 신경 써야 하며, 상대방의 전략에 대응할 수 있는 유연한 빌드를 준비하는 것이 좋다. This map is an official ASL Season17 map, redesigned by NEMEC from the original 'Blitz' by CarlSagan (2006). It features fast-paced combat set on a vast space-themed map, where air and ground unit balance plays a crucial role in Brood War’s classic mechanics. A large asteroid zone sits at the center, serving as destructible resources that add strategic variability. Players start from their main bases, gathering resources and destroying enemy buildings to achieve victory. The map’s layout suggests central control over the asteroid zone is key, with early-game clashes determining the flow of the match. For beginners, balancing resource collection with early defense setup is essential. Advanced players can seize the central region and cut off enemy resource lines. The map’s balance supports Terran, Zerg, and Protoss, allowing strategic use of air units, which often decide the outcome. The expansive size favors players with strong map awareness. As an official ASL map, it offers balanced gameplay suitable for both professionals and amateurs, blending speed with deep strategy. Before playing, study each race’s strengths and weaknesses, identify key resource points and central zones, and prepare flexible builds. Air unit production and management are critical, as is adapting to opponents’ strategies.
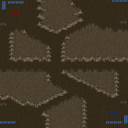
목점 (Choke Point)
‘Choke Point’는 스타크래프트: 브루드워의 2인용 밀리맵으로, 좁은 길목을 사이에 두고 두 플레이어가 전투를 펼치는 빠른 속도의 대결을 지향합니다. 맵 중앙에 위치한 좁은 길목이 주요 전투 지역으로, 이곳에서 벌어지는 빠른 교전이 이 맵의 핵심입니다. 좁은 통로를 활용한 전략적 움직임과 순간적인 판단력이 승부를 좌우하며, 좁은 공간에서 벌어지는 ‘치킨 게임’과 같은 긴장감이 특징입니다. 이 맵은 특히 빠른 템포와 긴장감을 좋아하는 플레이어들에게 인기가 있습니다. 두 플레이어가 서로의 움직임을 읽고, 좁은 공간에서 효율적으로 유닛을 컨트롤해야 하기 때문에, 전략적인 깊이와 순간적인 판단력이 요구됩니다. 또한, 맵의 구조상 프로토스 대 저그, 테란 대 프로토스 등 다양한 종족 간의 조합으로도 플레이할 수 있어 종족 간 밸런스도 고려해 볼 필요가 있습니다. 맵의 크기는 2048x2048이며, 황무지 타일셋을 사용한 깔끔한 디자인으로 시각적인 만족감도 높습니다. 추천 대상은 밀리맵을 즐겨하는 플레이어, 좁은 공간에서의 전투를 좋아하는 유저, 그리고 빠른 속도의 대결을 선호하는 게이머입니다. 초보자의 경우 좁은 공간에서 벌어지는 전투에 적응하기 어려울 수 있으므로, 기본적인 밀리맵 플레이 경험을 쌓은 후 도전하는 것이 좋습니다. 또한, 팀플레이가 아닌 1:1 대결이므로 상대방의 플레이 스타일을 빠르게 파악하고 대응하는 능력이 중요합니다. 플레이 전 확인해야 할 포인트는 좁은 길목의 중요성과 각 종족의 유닛 조합입니다. 프로토스의 경우 질럿과 드라군을, 저그의 경우 히드라리스크와 러커, 테란의 경우 마린과 탱크와 같은 유닛들이 좁은 공간에서 효과적으로 활용될 수 있는지 미리 생각해 보는 것이 좋습니다. 또한, 맵의 중앙 통로가 좁기 때문에 빠른 이동과 컨트롤이 승패를 좌우할 수 있음을 기억해야 합니다. ‘Choke Point’ is a two-player melee map in *StarCraft: Brood War* designed for fast-paced battles where players fight across a narrow passage between them. The central chokepoint serves as the primary battleground, where rapid exchanges define the map’s core gameplay. Victory hinges on strategic use of the tight corridors and split-second decision-making, with the intense "chicken game" dynamics of confined spaces adding to the thrill. This map is especially popular among players who enjoy quick tempo and high tension. Success requires reading opponents’ movements and efficiently controlling units in cramped areas, demanding both strategic depth and sharp reflexes. Its layout also accommodates diverse matchups like Protoss vs. Zerg or Terran vs. Protoss, making race balance an important consideration. The map measures 2048x2048, featuring a sleek design with a wasteland tileset that enhances visual appeal. Ideal for players who love melee maps, those who thrive in close-quarters combat, and gamers seeking fast-paced duels. Beginners may struggle with the confined battles, so it’s best to build basic melee experience before attempting this map. Since it’s a 1v1 format, quickly recognizing and adapting to an opponent’s playstyle is crucial. Key points to check before playing include the chokepoint’s role and optimal unit compositions for each race. Protoss should consider Zealots and Dragoons, Zerg Hydralisks and Lurkers, and Terran Marines and Tanks—all of which excel in tight spaces. Given the narrow central corridor, swift movement and precise control can turn the tide of battle.
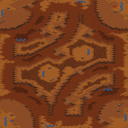
인디언의 비가 (Indian Lament)
〈Indian Lament〉는 스타크래프트: 브루드워의 유즈맵으로, 디자인된 맵 제목 그대로 분위기 있는 서사적인 느낌을 전달하는 디펜스 장르의 유즈맵이다. 맵의 전체적인 색감은 황혼 타일셋을 기반으로 따뜻한 오렌지빛과 붉은색 톤이 돋보이며, 중앙에 위치한 넓은 평지 주변으로는 돌출된 언덕과 요철이 복잡하게 배치되어 있다. 이 구조는 플레이어가 방어선을 구축하거나 이동 경로를 고려할 때 전략적 깊이를 더하는 요소로 작용한다. 맵 상단과 하단에는 각각의 시작 지역이 대칭 형태로 배치되어 있으며, 중앙 지역은 넓은 개활지로 펼쳐져 있어 대규모 전투가 벌어질 수 있는 공간으로 보인다. 맵의 가장자리는 절벽과 바위로 둘러싸여 있어 외부의 공격이 coming in을 어렵게 만들도록 설계된 것으로 추정된다. 맵의 제목 ‘Indian Lament’와 어울리게 인디언풍의 장식적인 요소가 일부 타일에 표현되어 있으며, 이는 맵의 독특한 분위기를 형성하는 데 기여한다. 이 맵은 1:1 대결 구조를 기반으로 하며, 방어와 공격의 균형을 맞춰야 하는 디펜스 게임플레이를 제공할 것으로 예상된다. 플레이어는 시작 지역을 방어하는 동시에 중앙 지역을 점유하거나 적의 기지를 공격하는 전략을 구사해야 하며, 맵의 복잡한 지형이 이를 한층 더 흥미롭게 만든다. 특히 중앙의 넓은 평지는 전투의 중심지가 될 가능성이 높으며, 언덕과 요철은 시야 확보와 기습 공격의 기회를 제공할 수 있다. 이 맵은 초보자와 숙련자 모두 즐길 수 있도록 적절한 난이도와 전략적 선택지를 제공할 것으로 보이며, 특히 디펜스와 공세를 동시에 고려해야 하는 플레이어들에게 매력적으로 다가갈 것이다. 다만 맵의 규모가 크고 복잡한 지형이 포함되어 있어, 처음 플레이할 때는 맵의 구조를 충분히 숙지하고 전략을 계획하는 것이 중요하다. 또한, 중앙 지역을 장악하는 것이 승리의 열쇠가 될 가능성이 높으므로, 초반Resource 관리와 유닛 생산 계획을 철저히 세워야 한다. 이 맵은 디펜스와 공격의 균형을 맞추는 것이 핵심이며, 이를 위해서는 맵의 지형을 적극적으로 활용하는 플레이가 요구된다. 특히 언덕과 바위를 활용한 방어선 구축, 그리고 중앙 평지에서 벌어지는 대규모 전투에서의 승부가 승패를 가를 것으로 보인다. 이처럼 〈Indian Lament〉는 전략적 깊이와 아름다운 디자인으로 스타크래프트 유즈맵의 매력을 한껏 살린佳作으로 평가된다. Indian Lament is a custom map for StarCraft: Brood War, designed to deliver an atmospheric and narrative-driven defense experience. The map features a warm color palette dominated by shades of orange and red, using the Twilight tileset as its foundation. The central area is a vast open plain, surrounded by undulating hills and rocky outcrops that add strategic depth to both defensive positioning and movement. The top and bottom of the map contain symmetrical starting positions, while the edges are bordered by cliffs and rocks, making it difficult for external forces to infiltrate easily. The title 'Indian Lament' suggests a thematic influence, with some decorative elements resembling indigenous motifs subtly integrated into the tiles. This map is structured for a 1v1 confrontation, emphasizing a balance between defense and offense. Players must defend their starting bases while strategically capturing or controlling the central area, where large-scale battles are likely to unfold. The terrain’s complexity offers opportunities for ambushes and provides vantage points for sight control. The gameplay is designed to be accessible yet challenging, appealing to both beginners and experienced players. However, the map’s size and intricate layout require players to familiarize themselves with the terrain and plan their strategies carefully. Securing the central area early on appears crucial, as it could dictate the flow of the game. Resource management and unit production timing are vital, especially during large-scale battles in the central plain. The map’s core mechanic revolves around balancing defense and offense, with the terrain playing a pivotal role in shaping the outcome. Overall, Indian Lament stands out as a well-crafted custom map that combines strategic depth with aesthetic appeal, making it a compelling choice for StarCraft fans.
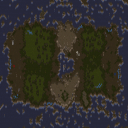
The Green Mile (녹색의 길)
스타크래프트: 브루드워의 고전 밀리 맵 《The Green Mile》은 이름 그대로 녹색의 긴 길을 따라 펼쳐지는 1:1 전투가 특징이다. 맵 중앙에는 거대한 중앙 길과 삼림 지대가 펼쳐져 있으며, 양쪽 플레이어의 기지 주변은 협소한 통로와 언덕 지형으로 구성되어 있다. 이러한 지형은 초반부터 빠른 교전과 전략적 움직임을 유도하며, 특히 언덕을 활용한 시야 싸움과 기습 공격이 중요해진다. 맵의 이름은 《녹색의 길》을 의미하며, 녹색의 삼림지대가 맵 전체의 주요 테마로 작용한다. 맵의 크기는 8192x3072로 상당히 넓지만, 중앙 길로 이어지는 통로가 좁아 실질적인 전투는 비교적 조밀한 공간에서 이루어진다. 맵의 타일셋은 사막이지만, 실제로는 초록색 계열의 삼림과 도로가 주를 이루며, 이는 맵의 이름과 분위기를 살리는 데 기여한다. 추천 플레이어는 2명으로, 1:1 밀리 전투를 즐기기에 최적화되어 있으며, 특히 테란과 프로토스의 경우 언덕과 좁은 길목에서의 전투가 승패를 좌우할 수 있다. 초보 플레이어는 중앙 길목에서의 빠른 교전과 언덕 시야 싸움을 연습하는 것을 추천하며, 숙련자라면 입구 막기, 시야 싸움, 자원 관리 등을 고려해 전략을 세워야 한다. 맵의 승리는 기본적인 밀리 승리 조건인 상대방의 넥서스 또는 커맨드 센터 파괴로 달성할 것으로 추정된다. 맵의 주요 특징은 넓은 공간이지만 실질적인 전투가 좁은 길목에서 벌어지는 '넓은 공간 속 좁은 전투' 구조로, 이는 전략적 깊이를 더하는 요소로 작용한다. 또한, 맵의 이름과 테마가 일치하는 녹색 삼림지대가 맵의 시각적 특징을 살리며, 플레이어에게 긴 여정의 느낌을 준다. 이 맵은 고전 밀리 맵으로서의 정체성을 유지하면서도, 지형의 특징을 살린 전략적 깊이가 돋보이는 맵으로 평가된다. 특히 언덕과 좁은 길목이 다수 배치되어 있어, 초보자와 숙련자 모두에게 흥미로운 전투 경험을 제공할 것으로 예상된다. The Green Mile in StarCraft: Brood War is a classic 1v1 melee map featuring a long green path as its central theme. The map centers around a vast green corridor flanked by forests, with each player's base connected by narrow passages and elevated terrain. This layout encourages early engagements and strategic maneuvering, particularly emphasizing the importance of vision control from high ground and surprise attacks. The name translates to "Green Path," reflecting the map's lush forest theme that dominates its visual identity. Despite its large 8192x3072 dimensions, the map's real battles unfold in the confined central corridor, creating a dense combat space. While the tileset is desert-themed, the map is dominated by green forests and roads that align with its name and atmosphere. Designed for two players, it excels at 1v1 melee combat, where Terran and Protoss players especially must master elevated terrain and narrow choke points to secure victory. New players should practice quick engagements in the central corridor and vision control on the hills, while experienced players should focus on defending entrances, managing vision, and resource efficiency. Victory is achieved by destroying the opponent's Nexus or Command Center, following standard melee rules. The map's defining feature is its "wide space with narrow battles" structure, where vast areas contrast with tight, strategic combat zones—adding depth to tactical play. The cohesive green forest theme enhances the map's visual appeal, giving players a sense of embarking on a long journey. As a classic melee map, it balances nostalgic appeal with strategic complexity, offering engaging battles for both beginners and veterans thanks to its numerous hills and choke points.
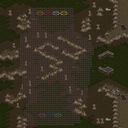
스나이퍼 발드 + 엑스트라 v314 (Sniper Bald + Extras v314)
스타크래프트 브루드워의 유즈맵 《Sniper Bald + Extras v314》는 저격수 포지션에 특화된 디펜스형 맵으로, 사막 지형을 배경으로 펼쳐지는 긴장감 넘치는 전투가 특징이다. 맵 중앙에 위치한 넓은 개활지는 저격수끼리의 일대일 대결을 유도하며, 양측 진영은 각각의 저격 포인트에서 적을 포착해야 한다. 맵 곳곳에 배치된 바위와 언덕은 시야를 차단하는 장애물 역할을 하며, strategic한 포지션 선택이 승패를 좌우한다. 특히, 맵의 좌우에 배치된 고지대는 저격수에게 유리한 위치이지만, 반대로 적의 사정권에 노출되기도 쉽기 때문에 신중한 움직임이 요구된다. 추가 요소로 추정되는 'Extras'는 저격 이외의 전투나 보조 기능을 제공할 가능성이 있으며, 이는 플레이어의 전략적 선택을 더욱 다양하게 만든다. 초보 플레이어의 경우 적응하기 어려운 맵 구조이지만, 숙련된 저격수라면 각 포지션의 특성과 적의 움직임을 읽어내 승리를 이끌어낼 수 있다. 이 맵은 주로 1:1 또는 2:2 팀전으로 즐기는 것을 추천하며, 저격수 간의 심리전이 핵심인 만큼 집중력과 순발력이 요구되는 유즈맵이다. 플레이 전에는 맵의 시야 차단 요소와 저격 포지션의 특징을 미리 숙지하는 것이 중요하다. 또한, 맵의 추가 요소인 'Extras'가 어떤 기능을 제공하는지 확인하여 전략을 다양화할 수 있도록 준비하는 것이 좋다. Sniper Bald + Extras v314 is a StarCraft: Brood War custom map designed for sniper-focused defense gameplay, set against a desert terrain. The expansive central area encourages intense one-on-one or team-based sniper duels, where players must strategically position themselves to eliminate opponents. Natural obstacles like rocks and hills obstruct line of sight, adding depth to the tactical choices available. The high-ground positions on either side of the map offer advantageous sniping spots but also expose players to enemy fire, requiring careful positioning and awareness. The 'Extras' component, while not fully verified from the image, likely introduces additional combat mechanics or support features, enriching the strategic options. This map demands precision and quick reflexes, making it more suited for experienced players who can adapt to its nuanced terrain. It is best enjoyed in 1v1 or 2v2 team formats, where sniper psychology and map control play crucial roles. Before playing, it is essential to familiarize yourself with the line-of-sight obstacles and sniper positions. Additionally, understanding the role of 'Extras' can provide a strategic edge by diversifying gameplay approaches.
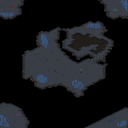
더 월 (The Wall)
스타크래프트 브루드워의 ‘Untitled Scenario’라는 이름의 맵이지만 파일명 ‘the wall.scm’을 보면 알 수 있듯이 ‘벽’이라는 이름에 걸맞게 좁은 통로를 사이에 두고 적과 대치하는 디펜스형 맵이다. 맵의 구조는 가운데를 가로지르는 좁고 긴 통로로 양쪽으로 나뉘며, 각 측면에 건물이 배치되어 있다. 통로 양옆에는 벽이 세워져 있어 아군과 적군의 통로가 제한되어 있지만, 중앙 통로의 폭이 좁아 병력 이동이 다소 불편한 구조로 보인다. 이미지에서 확인되는 적 건물 배치와 플레이어의 시작 지점을 고려할 때, 주로 중앙 통로를 통해 적을 공격하거나 방어하는 방식으로 진행되는 컴까기 형식의 맵으로 추정된다. 플레이어는 시작하자마자 좁은 길목을 통과해야 하며, 상대방의 본진으로 진격하거나 중앙 통로를 방어하는 두 가지 전략을 선택할 수 있다. 그러나 통로의 길이가 길고 양옆으로 방어 시설이 배치되어 있는 만큼, 무턱대고 돌격하기보다는 미네랄과 가스를 확보하며 병력을 효율적으로 운영하는 것이 중요할 것으로 보인다. 또한, 벽을 사이에 둔 대치 구도에서 원거리 유닛의 활용이 필수적일 것으로 예상된다. 맵의 전체적인 분위기는 우주 테마의 타일셋을 사용해 조화롭게 구성되어 있으며, 어두운 색감의 밤하늘 배경이 전략적 긴장감을 더한다. 이 맵은 초보자보다는 어느 정도 전략적 감각이 필요한 플레이어에게 권장되며, 특히 좁은 공간에서의 전투 경험이 부족한 유저에게는 도전적인 요소로 작용할 수 있다. 또한, 팀플레이가 필요 없는 1:1 대결 구조이므로 개인전으로 즐기기에 적합하다. 맵의 난이도는 중앙 통로의 좁은 폭과 방어 시설의 존재로 인해 보통 수준으로 예상된다. 플레이 전에는 미네랄과 가스의 분포를 확인하고, 통로 양옆의 방어 시설을 미리 파악해 두는 것이 중요할 것이다. This StarCraft: Brood War map, officially named "Untitled Scenario" but commonly referred to as "The Wall" (thewall.scm), is a defensive-style map centered around a narrow passage where players face off against opponents. The layout splits into two sides divided by a long, tight corridor, with buildings positioned along each side. Walls flank the pathway, restricting movement between allied and enemy territories, though the narrow central passage makes troop movement somewhat cumbersome. Based on the visible enemy structures and starting positions in the screenshot, the map likely follows a comp-stomp format where players either attack or defend through the central corridor. Upon spawning, players must navigate the tight passage, choosing between advancing toward the opponent’s main base or defending the central corridor. Given the corridor’s length and the defensive structures lining its sides, reckless rushes are ill-advised; instead, securing minerals and gas while deploying forces efficiently is key. The map’s design emphasizes the importance of ranged units, particularly in the stalemate created by the walls separating the two sides. The overall aesthetic blends a space-themed tileset harmoniously with a dark, nighttime sky, enhancing the strategic tension. This map is better suited for players with some strategic experience rather than beginners, and it can be particularly challenging for those unfamiliar with close-quarters combat. As a 1v1 structure that doesn’t require teamwork, it’s ideal for solo play. The difficulty is moderate, primarily due to the narrow corridor and defensive setups. Before starting, players should check mineral and gas distributions and scout the defensive structures along the passage to plan their approach.
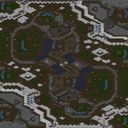
Autumn to Winter (가을에서 겨울로) 0.6
《Autumn to Winter 0.6》는 스타크래프트 브루드워의 밀리 맵으로, 가을과 겨울의 자연 풍경을 테마로 한 아름다운 맵 디자인과 함께 플레이어들에게 긴장감 넘치는 대결을 제공합니다. 맵 중앙에 위치한 커다란 호수와 그 주변의 숲, 언덕, 평원 등은 시각적으로 아름다움을 더하며, 전투가 벌어질 때마다 자연 경관이 전투의 무대가 됩니다. 맵의 구조는 비교적 평등한 자원 분배와 공격로를 제공하여, 초보자와 숙련자 모두에게 공정한 경쟁을 보장합니다. 맵의 symmetrical(대칭) 구조는 양쪽 플레이어의 공정성을 유지하는 데 중점을 두고 있으며, 중앙 지역은 중간 거점으로서의 역할도 겸합니다. 맵의 디자인에서 눈에 띄는 특징은 계절의 변화에 따른 색상 변화로, 가을의 붉은색과 겨울의 흰색이 맵 곳곳에서 조화를 이룹니다. 이러한 디자인 요소는 단순히 시각적 즐거움을 제공할 뿐만 아니라, 플레이어의 심리적 안정을 도와 긴장감을 조절하는 데에도 기여합니다. 전투는 주로 맵 중앙의 넓은 평원에서 벌어지며, 양쪽의 언덕 지역은 방어와 침투의 중요한 포인트가 됩니다. 맵의 타일셋은 플랫폼을 사용해 깔끔하고 현대적인 느낌을 주며, 이는 게임의 몰입감을 높이는 데 기여합니다. 플레이어는 맵의 특성을 충분히 활용해 전략을 펼칠 수 있으며, 특히 중앙 지역을 장악하는 것이 승리의 관건이 될 수 있습니다. 이 맵은 밀리맵으로서의 기본적인 공정성과 전략적 깊이를 모두 갖추고 있어, 스타크래프트 브루드워의 매력을 느낄 수 있는 훌륭한 선택지 중 하나입니다. 초보자의 경우 맵의 구조와 자원 분배를 숙지하는 데 시간이 다소 필요할 수 있지만, 익숙해지면 다양한 전략을 시도해 볼 수 있는 재미가 있습니다. 숙련자라면 맵의 symmetrical한 구조와 중앙 지역의 중요성을 바탕으로, 빠르게 적을 제압하는 데 중점을 둘 수 있습니다. 이 맵은 맵 디자인과 전략적 균형이 잘 조화된 excellent한 밀리 맵으로, 스타크래프트 유저라면 한 번쯤 플레이해 볼 만한 가치가 있습니다. 플레이 전에는 맵의 symmetrical한 구조를 확인하고, 중앙 지역과 언덕 지역의 중요성을 숙지하는 것이 좋습니다. 또한, 자원 분배가 공정한 만큼 초반 빌드와 자원 관리에도 신경을 써야 합니다. 다양한 전략을 시도해 보며, 맵의 특징을 최대한 활용해 보세요. 이 맵은 특히 1:1 대결에서 그 진가를 발휘하며, 공정한 경쟁을 추구하는 플레이어들에게 추천드립니다. 맵의 아름다움과 전략적 깊이 모두를 즐길 수 있는 훌륭한 작품입니다. 이 맵을 플레이하면서 스타크래프트의 classic한 매력을 다시 한 번 느낄 수 있을 것입니다. 《Autumn to Winter 0.6》 is a *Brood War* melee map featuring a stunning design inspired by autumn and winter landscapes. The map's central lake, surrounding forests, hills, and plains create a visually striking battlefield where natural scenery enhances every clash. With its balanced resource distribution and symmetrical layout, it ensures fair competition for both beginners and veterans, while the central area serves as a key mid-game strategic point. One standout feature is its seasonal color shifts—warm autumn hues blending into crisp winter whites—adding both aesthetic appeal and a calming effect to ease tension. Battles unfold primarily on the wide central plain, with the elevated hill regions on either side serving as critical vantage points for defense and infiltration. The clean, modern tile set further immerses players, reinforcing the map’s strategic depth. For newcomers, mastering the layout and resource flow may take time, but once familiar, the map offers room for diverse strategies. Veterans, meanwhile, can leverage its symmetry and central dominance to quickly overwhelm opponents. A well-balanced and thoughtfully designed melee map, 《Autumn to Winter 0.6》 is a must-play for *StarCraft* fans, especially in 1v1 matches where fairness and depth shine. Before diving in, study the symmetrical structure, prioritize central control, and refine early builds and resource management to fully exploit its potential. This map beautifully captures *Brood War*’s classic charm while delivering a fresh, engaging experience.
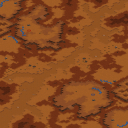
1v1 Desert Rat
스타크래프트 브루드워의 1:1 대전 맵 '1v1 Desert Rat'은 황량한 사막 지형을 배경으로 펼쳐지는 밀리(Melee) 스타일 전투를 제공합니다. 맵의 가장 큰 특징은 중앙에 위치한 좁은 통로와 양쪽의 넓은 개활지인데, 이 지형은 플레이어 간의 전투가 어떻게 펼쳐질지를 결정짓는 핵심 요소입니다. 좁은 길목을 두고 벌어지는 근접 전투는 신속한 컨트롤과 전략적 판단이 요구되며, 반대로 넓은 공간에서는 치고 빠지는 플레이가 중요해집니다. 맵의 디자인상으로는 유닛 간의 이동 경로가 상대적으로 단순해 보이지만, 황혼 타일셋의 붉은 노을이 어우러진 배경은 시각적으로도 플레이어의 긴장감을 높이는 데 한몫합니다. 'Desert Rat'이라는 제목은 사막의 쥐를 뜻하는 것인데, 이는 perhaps 플레이어들이 쥐처럼 재빠르게 움직이며 상대방을 공격한다는 의미를 담고 있는 것 같습니다. 제작자 Desdichado는 이 맵을 2명의 플레이어에게 추천하며, 'Come and get it. Nuttin like gettin your rat cooked.'라는 독특한 설명문은 플레이어에게 도전적인 분위기를 조성합니다. 이 맵은 기본적인 밀리 전투를 즐기고자 하는 유저들에게 적합하며, 특히 1:1 전투의 짜릿함을 느끼고 싶은 플레이어들에게 추천할 만합니다. 다만, 맵의 밸런스나 디자인상 세부적인 요소는 개인의 플레이 스타일에 따라 체감 차이가 클 수 있으니, 여러 번 플레이해보며 자신의 전술에 맞게 활용하는 것이 중요합니다. 또한, 좁은 통로를 활용한 벙커링이나 러시 전략이 상대방의 유닛 생산 타이밍에 크게 좌우될 수 있으므로, 초보자는 난이도가 다소 높을 수 있습니다. 이 맵을 즐기기 위해서는 기본적인 테란, 프로토스, 저그의 유닛 컨트롤과 빌드 오더에 대한 이해가 필요합니다. This StarCraft: Brood War 1v1 map, 'Desert Rat,' delivers a classic Melee-style battle set against a desolate desert landscape. The map's defining feature is its central narrow corridor flanked by wide open areas, which dictates the flow of combat between players. Close-quarters battles through the tight passage demand quick reflexes and strategic foresight, while the expansive spaces favor hit-and-run tactics. Although the terrain appears straightforward, the twilight-themed tileset bathed in warm hues enhances the visual intensity, keeping players on edge. The title 'Desert Rat' likely symbolizes the agility and cunning required to outmaneuver opponents, much like a rat darting through the desert. Created by Desdichado, this map is recommended for two players, and its quirky description—'Come and get it. Nuttin like gettin your rat cooked.'—adds a playful yet challenging tone. Ideal for those seeking the thrill of 1v1 combat, this map offers a straightforward yet engaging experience for fans of basic Melee battles. However, due to its design, players may experience varying levels of challenge depending on their playstyle, with strategies like bunker rushes or early rushes heavily influenced by the opponent's unit production timing. Beginners might find the difficulty steep, so familiarity with unit control and build orders for Terran, Protoss, or Zerg is essential for an enjoyable experience.
Type-Moon 아레나 vR99 (Type-Moon Arena vR99)
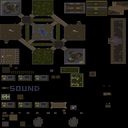
스타크래프트 유즈맵의 꽃이라 불리는 아레나 장르의 명작, 〈Type-Moon Arena vR99〉는 팬덤 사이에서 오랜 기간 사랑받아 온 대전형 맵입니다. 이 맵은 수직으로 긴 맵 구조를 활용해 플레이어 간의 치열한 공방전을 유도하며, 각기 다른 캐릭터를 선택할 수 있는 시스템을 제공합니다. 맵의 중앙에는 넓은 개활지가 펼쳐져 있어 빠른 이동과 전투가 가능하며, 양측에는 각각의 시작 지역이 배치되어 있습니다. 맵 좌우 양끝에는 건물이 배치되어 있어 시야를 가리며, 전략적인 진입로를 활용한 치고 빠지기 전술이 중요합니다. 전투는 주로 근접과 중거리 스킬을 중심으로 전개되며, 일부 캐릭터는 원거리 공격을 보유하고 있는 듯 보입니다. 맵의 구조상 두 플레이어가 중앙 개활지에서 마주치면 치열한 전투가 벌어질 가능성이 높으며, 한쪽에 치우친 플레이를 하면 상대방의 반격을 유도할 수 있습니다. 초보자는 맵의 지형을 충분히 숙지하지 못해 불리한 위치에서 전투를 벌일 가능성이 크므로, 맵을 여러 번 플레이하며 최적의 진입로를 찾는 것이 중요합니다. 또한, 맵의 긴 구조상 시야 확보가 전투의 승패를 좌우할 수 있으므로, 고지대나 건물을 적극 활용하는 것이 좋습니다. 이 맵은 주로 두 명의 플레이어가 대결을 펼치는 1:1 대전 양상을 띄지만, 2:2 또는 3:3 팀전으로도 즐길 수 있는 구조로 보입니다. 전투의 승패는 순수하게 실력과 캐릭터 선택, 전략에 따라 결정되며, RNG 요소가 거의 없는 순수한 실력 대결이라는 점이 특징입니다. 이 맵을 즐기기 위해서는 빠른 반응 속도와 정확한 컨트롤, 그리고 상대방의 움직임을 예측하는 능력이 요구됩니다. 〈Type-Moon Arena vR99〉는 스타크래프트 유즈맵 계의 레전드 격인 작품으로, 오랜 시간 동안 많은 플레이어들에게 사랑받아 온 만큼, 아레나 장르에 관심이 있는 유저라면 반드시 한 번쯤 플레이해 볼 가치가 있습니다. 단, 캐릭터 간 밸런스는 제작자의 의도에 따라 다소 차이가 있을 수 있으므로, 자신의 플레이 스타일에 맞는 캐릭터를 선택하는 것이 중요합니다. Type-Moon Arena vR99, a masterpiece of the Arena genre—known as the crown jewel of StarCraft custom maps—has long been beloved by fans as a competitive battle map. The map’s tall, vertical structure forces intense back-and-forth combat between players, while offering a system where each player can choose from a variety of characters. At the center lies a vast open area, enabling swift movement and battles, with starting zones positioned on either side. Buildings at both ends of the map block vision, making strategic entry points and hit-and-run tactics crucial. Combat revolves mainly around melee and mid-range skills, though some characters appear to have ranged attacks. Due to the map’s layout, a clash in the central open area often leads to fierce battles, and favoring one side can invite counterattacks from the opponent. Beginners unfamiliar with the terrain may find themselves fighting from unfavorable positions, so playing multiple times to identify optimal routes is key. Given the map’s elongated design, securing vision can determine victory or defeat, making high ground and buildings valuable assets. While primarily designed for 1v1 duels, the map also supports 2v2 or 3v3 team battles. Victory hinges purely on skill, character selection, and strategy, with minimal RNG—making it a true test of player ability. To enjoy this map, quick reflexes, precise controls, and the ability to predict an opponent’s movements are essential. As a legendary work in the StarCraft custom map scene that has stood the test of time, Type-Moon Arena vR99 is worth playing at least once for anyone interested in the Arena genre. However, character balance may vary depending on the creator’s design, so choosing a character that fits your playstyle is important.
Faceoff
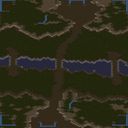
‘Faceoff’는 스타크래프트 브루드워의 2인용 밀리 맵으로, 강을 건너 상대방을 제압하는 간단하면서도 박진감 넘치는 전투를 경험할 수 있는 맵이다. 맵 중앙을 가로지르는 강은 양측 본진을 구분하는 자연스러운 장벽 역할을 하며, 좁은 다리나 얕은 여울을 통해 교전이 이루어지는 구조로 되어 있다. 강둑은 지형을 활용한 방어와 공격이 가능한 요충지로, 플레이어는 시야 확보와 병력 기동의 타이밍을 carefully 하게 판단해야 한다. 초반에는 자원 채취와 테크트리를 쌓는 동시에 상대방의 움직임을 예의주시해야 하며, 강을 건너는 데는 일정량의 시야와 병력이 필요하기 때문에 초반 러시나 압박 전략이 유효할 수 있다. 맵의 symmetrical한 디자인 덕분에 선공과 후공 간의 밸런스가 비교적 잘 맞춰져 있으며, 짧은 플레이 시간 안에 승부가 결정나는 경우가 많아 타임어택 형식의 플레이가 느껴진다. 또한, 사막 타일셋의 황량한 분위기가 강을 건너는 긴장감을 한층 더해 준다. 이 맵은 밀리 매니아나 1:1 대전을 즐기는 유저들에게 적합하며, 특히 빠른 플레이와 전략적 판단이 요구되는 만큼 입문자보다는 어느 정도 경험이 있는 플레이어에게 더 어울린다. 강을 건너는 순간이 승패를 가르는 핵심 포인트이므로, 지형을 잘 활용한 기습이나 방어 라인 구축이 승리의 열쇠가 될 것이다. Faceoff is a 2-player melee map in StarCraft: Brood War that delivers a fast-paced, straightforward battle centered around crossing a river to defeat your opponent. The map features a river dividing the two bases, with narrow bridges and shallow areas serving as natural choke points for combat. The riverbanks act as strategic high-ground positions, requiring players to carefully manage vision, troop mobility, and timing. Early game demands a balance between resource gathering, tech progression, and monitoring the opponent’s movements, as crossing the river often necessitates a certain level of military presence and visibility. The symmetrical design ensures a fair matchup between the first and second players, with games often concluding quickly, giving a time-attack feel. The desert tile set enhances the tense atmosphere, making the river crossing feel like a pivotal moment in the match. This map is ideal for melee enthusiasts and players who enjoy 1v1 battles, offering a challenge that rewards strategic foresight and quick decision-making. The key to victory lies in leveraging the terrain, executing well-timed rushes, or solidifying defensive lines to control the river crossings effectively.
최근 등록된 맵
새로 추가된 파일과 버전을 확인하세요.
Faceoff
‘Faceoff’는 스타크래프트 브루드워의 2인용 밀리 맵으로, 강을 건너 상대방을 제압하는 간단하면서도 박진감 넘치는 전투를 경험할 수 있는 맵이다. 맵 중앙을 가로지르는 강은 양측 본진을 구분하는 자연스러운 장벽 역할을 하며, 좁은 다리나 얕은 여울을 통해 교전이 이루어지는 구조로 되어 있다. 강둑은 지형을 활용한 방어와 공격이 가능한 요충지로, 플레이어는 시야 확보와 병력 기동의 타이밍을 carefully 하게 판단해야 한다. 초반에는 자원 채취와 테크트리를 쌓는 동시에 상대방의 움직임을 예의주시해야 하며, 강을 건너는 데는 일정량의 시야와 병력이 필요하기 때문에 초반 러시나 압박 전략이 유효할 수 있다. 맵의 symmetrical한 디자인 덕분에 선공과 후공 간의 밸런스가 비교적 잘 맞춰져 있으며, 짧은 플레이 시간 안에 승부가 결정나는 경우가 많아 타임어택 형식의 플레이가 느껴진다. 또한, 사막 타일셋의 황량한 분위기가 강을 건너는 긴장감을 한층 더해 준다. 이 맵은 밀리 매니아나 1:1 대전을 즐기는 유저들에게 적합하며, 특히 빠른 플레이와 전략적 판단이 요구되는 만큼 입문자보다는 어느 정도 경험이 있는 플레이어에게 더 어울린다. 강을 건너는 순간이 승패를 가르는 핵심 포인트이므로, 지형을 잘 활용한 기습이나 방어 라인 구축이 승리의 열쇠가 될 것이다. Faceoff is a 2-player melee map in StarCraft: Brood War that delivers a fast-paced, straightforward battle centered around crossing a river to defeat your opponent. The map features a river dividing the two bases, with narrow bridges and shallow areas serving as natural choke points for combat. The riverbanks act as strategic high-ground positions, requiring players to carefully manage vision, troop mobility, and timing. Early game demands a balance between resource gathering, tech progression, and monitoring the opponent’s movements, as crossing the river often necessitates a certain level of military presence and visibility. The symmetrical design ensures a fair matchup between the first and second players, with games often concluding quickly, giving a time-attack feel. The desert tile set enhances the tense atmosphere, making the river crossing feel like a pivotal moment in the match. This map is ideal for melee enthusiasts and players who enjoy 1v1 battles, offering a challenge that rewards strategic foresight and quick decision-making. The key to victory lies in leveraging the terrain, executing well-timed rushes, or solidifying defensive lines to control the river crossings effectively.
Autumn to Winter (가을에서 겨울로) 0.6
《Autumn to Winter 0.6》는 스타크래프트 브루드워의 밀리 맵으로, 가을과 겨울의 자연 풍경을 테마로 한 아름다운 맵 디자인과 함께 플레이어들에게 긴장감 넘치는 대결을 제공합니다. 맵 중앙에 위치한 커다란 호수와 그 주변의 숲, 언덕, 평원 등은 시각적으로 아름다움을 더하며, 전투가 벌어질 때마다 자연 경관이 전투의 무대가 됩니다. 맵의 구조는 비교적 평등한 자원 분배와 공격로를 제공하여, 초보자와 숙련자 모두에게 공정한 경쟁을 보장합니다. 맵의 symmetrical(대칭) 구조는 양쪽 플레이어의 공정성을 유지하는 데 중점을 두고 있으며, 중앙 지역은 중간 거점으로서의 역할도 겸합니다. 맵의 디자인에서 눈에 띄는 특징은 계절의 변화에 따른 색상 변화로, 가을의 붉은색과 겨울의 흰색이 맵 곳곳에서 조화를 이룹니다. 이러한 디자인 요소는 단순히 시각적 즐거움을 제공할 뿐만 아니라, 플레이어의 심리적 안정을 도와 긴장감을 조절하는 데에도 기여합니다. 전투는 주로 맵 중앙의 넓은 평원에서 벌어지며, 양쪽의 언덕 지역은 방어와 침투의 중요한 포인트가 됩니다. 맵의 타일셋은 플랫폼을 사용해 깔끔하고 현대적인 느낌을 주며, 이는 게임의 몰입감을 높이는 데 기여합니다. 플레이어는 맵의 특성을 충분히 활용해 전략을 펼칠 수 있으며, 특히 중앙 지역을 장악하는 것이 승리의 관건이 될 수 있습니다. 이 맵은 밀리맵으로서의 기본적인 공정성과 전략적 깊이를 모두 갖추고 있어, 스타크래프트 브루드워의 매력을 느낄 수 있는 훌륭한 선택지 중 하나입니다. 초보자의 경우 맵의 구조와 자원 분배를 숙지하는 데 시간이 다소 필요할 수 있지만, 익숙해지면 다양한 전략을 시도해 볼 수 있는 재미가 있습니다. 숙련자라면 맵의 symmetrical한 구조와 중앙 지역의 중요성을 바탕으로, 빠르게 적을 제압하는 데 중점을 둘 수 있습니다. 이 맵은 맵 디자인과 전략적 균형이 잘 조화된 excellent한 밀리 맵으로, 스타크래프트 유저라면 한 번쯤 플레이해 볼 만한 가치가 있습니다. 플레이 전에는 맵의 symmetrical한 구조를 확인하고, 중앙 지역과 언덕 지역의 중요성을 숙지하는 것이 좋습니다. 또한, 자원 분배가 공정한 만큼 초반 빌드와 자원 관리에도 신경을 써야 합니다. 다양한 전략을 시도해 보며, 맵의 특징을 최대한 활용해 보세요. 이 맵은 특히 1:1 대결에서 그 진가를 발휘하며, 공정한 경쟁을 추구하는 플레이어들에게 추천드립니다. 맵의 아름다움과 전략적 깊이 모두를 즐길 수 있는 훌륭한 작품입니다. 이 맵을 플레이하면서 스타크래프트의 classic한 매력을 다시 한 번 느낄 수 있을 것입니다. 《Autumn to Winter 0.6》 is a *Brood War* melee map featuring a stunning design inspired by autumn and winter landscapes. The map's central lake, surrounding forests, hills, and plains create a visually striking battlefield where natural scenery enhances every clash. With its balanced resource distribution and symmetrical layout, it ensures fair competition for both beginners and veterans, while the central area serves as a key mid-game strategic point. One standout feature is its seasonal color shifts—warm autumn hues blending into crisp winter whites—adding both aesthetic appeal and a calming effect to ease tension. Battles unfold primarily on the wide central plain, with the elevated hill regions on either side serving as critical vantage points for defense and infiltration. The clean, modern tile set further immerses players, reinforcing the map’s strategic depth. For newcomers, mastering the layout and resource flow may take time, but once familiar, the map offers room for diverse strategies. Veterans, meanwhile, can leverage its symmetry and central dominance to quickly overwhelm opponents. A well-balanced and thoughtfully designed melee map, 《Autumn to Winter 0.6》 is a must-play for *StarCraft* fans, especially in 1v1 matches where fairness and depth shine. Before diving in, study the symmetrical structure, prioritize central control, and refine early builds and resource management to fully exploit its potential. This map beautifully captures *Brood War*’s classic charm while delivering a fresh, engaging experience.
Type-Moon 아레나 vR99 (Type-Moon Arena vR99)
스타크래프트 유즈맵의 꽃이라 불리는 아레나 장르의 명작, 〈Type-Moon Arena vR99〉는 팬덤 사이에서 오랜 기간 사랑받아 온 대전형 맵입니다. 이 맵은 수직으로 긴 맵 구조를 활용해 플레이어 간의 치열한 공방전을 유도하며, 각기 다른 캐릭터를 선택할 수 있는 시스템을 제공합니다. 맵의 중앙에는 넓은 개활지가 펼쳐져 있어 빠른 이동과 전투가 가능하며, 양측에는 각각의 시작 지역이 배치되어 있습니다. 맵 좌우 양끝에는 건물이 배치되어 있어 시야를 가리며, 전략적인 진입로를 활용한 치고 빠지기 전술이 중요합니다. 전투는 주로 근접과 중거리 스킬을 중심으로 전개되며, 일부 캐릭터는 원거리 공격을 보유하고 있는 듯 보입니다. 맵의 구조상 두 플레이어가 중앙 개활지에서 마주치면 치열한 전투가 벌어질 가능성이 높으며, 한쪽에 치우친 플레이를 하면 상대방의 반격을 유도할 수 있습니다. 초보자는 맵의 지형을 충분히 숙지하지 못해 불리한 위치에서 전투를 벌일 가능성이 크므로, 맵을 여러 번 플레이하며 최적의 진입로를 찾는 것이 중요합니다. 또한, 맵의 긴 구조상 시야 확보가 전투의 승패를 좌우할 수 있으므로, 고지대나 건물을 적극 활용하는 것이 좋습니다. 이 맵은 주로 두 명의 플레이어가 대결을 펼치는 1:1 대전 양상을 띄지만, 2:2 또는 3:3 팀전으로도 즐길 수 있는 구조로 보입니다. 전투의 승패는 순수하게 실력과 캐릭터 선택, 전략에 따라 결정되며, RNG 요소가 거의 없는 순수한 실력 대결이라는 점이 특징입니다. 이 맵을 즐기기 위해서는 빠른 반응 속도와 정확한 컨트롤, 그리고 상대방의 움직임을 예측하는 능력이 요구됩니다. 〈Type-Moon Arena vR99〉는 스타크래프트 유즈맵 계의 레전드 격인 작품으로, 오랜 시간 동안 많은 플레이어들에게 사랑받아 온 만큼, 아레나 장르에 관심이 있는 유저라면 반드시 한 번쯤 플레이해 볼 가치가 있습니다. 단, 캐릭터 간 밸런스는 제작자의 의도에 따라 다소 차이가 있을 수 있으므로, 자신의 플레이 스타일에 맞는 캐릭터를 선택하는 것이 중요합니다. Type-Moon Arena vR99, a masterpiece of the Arena genre—known as the crown jewel of StarCraft custom maps—has long been beloved by fans as a competitive battle map. The map’s tall, vertical structure forces intense back-and-forth combat between players, while offering a system where each player can choose from a variety of characters. At the center lies a vast open area, enabling swift movement and battles, with starting zones positioned on either side. Buildings at both ends of the map block vision, making strategic entry points and hit-and-run tactics crucial. Combat revolves mainly around melee and mid-range skills, though some characters appear to have ranged attacks. Due to the map’s layout, a clash in the central open area often leads to fierce battles, and favoring one side can invite counterattacks from the opponent. Beginners unfamiliar with the terrain may find themselves fighting from unfavorable positions, so playing multiple times to identify optimal routes is key. Given the map’s elongated design, securing vision can determine victory or defeat, making high ground and buildings valuable assets. While primarily designed for 1v1 duels, the map also supports 2v2 or 3v3 team battles. Victory hinges purely on skill, character selection, and strategy, with minimal RNG—making it a true test of player ability. To enjoy this map, quick reflexes, precise controls, and the ability to predict an opponent’s movements are essential. As a legendary work in the StarCraft custom map scene that has stood the test of time, Type-Moon Arena vR99 is worth playing at least once for anyone interested in the Arena genre. However, character balance may vary depending on the creator’s design, so choosing a character that fits your playstyle is important.
스나이퍼 발드 + 엑스트라 v314 (Sniper Bald + Extras v314)
스타크래프트 브루드워의 유즈맵 《Sniper Bald + Extras v314》는 저격수 포지션에 특화된 디펜스형 맵으로, 사막 지형을 배경으로 펼쳐지는 긴장감 넘치는 전투가 특징이다. 맵 중앙에 위치한 넓은 개활지는 저격수끼리의 일대일 대결을 유도하며, 양측 진영은 각각의 저격 포인트에서 적을 포착해야 한다. 맵 곳곳에 배치된 바위와 언덕은 시야를 차단하는 장애물 역할을 하며, strategic한 포지션 선택이 승패를 좌우한다. 특히, 맵의 좌우에 배치된 고지대는 저격수에게 유리한 위치이지만, 반대로 적의 사정권에 노출되기도 쉽기 때문에 신중한 움직임이 요구된다. 추가 요소로 추정되는 'Extras'는 저격 이외의 전투나 보조 기능을 제공할 가능성이 있으며, 이는 플레이어의 전략적 선택을 더욱 다양하게 만든다. 초보 플레이어의 경우 적응하기 어려운 맵 구조이지만, 숙련된 저격수라면 각 포지션의 특성과 적의 움직임을 읽어내 승리를 이끌어낼 수 있다. 이 맵은 주로 1:1 또는 2:2 팀전으로 즐기는 것을 추천하며, 저격수 간의 심리전이 핵심인 만큼 집중력과 순발력이 요구되는 유즈맵이다. 플레이 전에는 맵의 시야 차단 요소와 저격 포지션의 특징을 미리 숙지하는 것이 중요하다. 또한, 맵의 추가 요소인 'Extras'가 어떤 기능을 제공하는지 확인하여 전략을 다양화할 수 있도록 준비하는 것이 좋다. Sniper Bald + Extras v314 is a StarCraft: Brood War custom map designed for sniper-focused defense gameplay, set against a desert terrain. The expansive central area encourages intense one-on-one or team-based sniper duels, where players must strategically position themselves to eliminate opponents. Natural obstacles like rocks and hills obstruct line of sight, adding depth to the tactical choices available. The high-ground positions on either side of the map offer advantageous sniping spots but also expose players to enemy fire, requiring careful positioning and awareness. The 'Extras' component, while not fully verified from the image, likely introduces additional combat mechanics or support features, enriching the strategic options. This map demands precision and quick reflexes, making it more suited for experienced players who can adapt to its nuanced terrain. It is best enjoyed in 1v1 or 2v2 team formats, where sniper psychology and map control play crucial roles. Before playing, it is essential to familiarize yourself with the line-of-sight obstacles and sniper positions. Additionally, understanding the role of 'Extras' can provide a strategic edge by diversifying gameplay approaches.
더 월 (The Wall)
스타크래프트 브루드워의 ‘Untitled Scenario’라는 이름의 맵이지만 파일명 ‘the wall.scm’을 보면 알 수 있듯이 ‘벽’이라는 이름에 걸맞게 좁은 통로를 사이에 두고 적과 대치하는 디펜스형 맵이다. 맵의 구조는 가운데를 가로지르는 좁고 긴 통로로 양쪽으로 나뉘며, 각 측면에 건물이 배치되어 있다. 통로 양옆에는 벽이 세워져 있어 아군과 적군의 통로가 제한되어 있지만, 중앙 통로의 폭이 좁아 병력 이동이 다소 불편한 구조로 보인다. 이미지에서 확인되는 적 건물 배치와 플레이어의 시작 지점을 고려할 때, 주로 중앙 통로를 통해 적을 공격하거나 방어하는 방식으로 진행되는 컴까기 형식의 맵으로 추정된다. 플레이어는 시작하자마자 좁은 길목을 통과해야 하며, 상대방의 본진으로 진격하거나 중앙 통로를 방어하는 두 가지 전략을 선택할 수 있다. 그러나 통로의 길이가 길고 양옆으로 방어 시설이 배치되어 있는 만큼, 무턱대고 돌격하기보다는 미네랄과 가스를 확보하며 병력을 효율적으로 운영하는 것이 중요할 것으로 보인다. 또한, 벽을 사이에 둔 대치 구도에서 원거리 유닛의 활용이 필수적일 것으로 예상된다. 맵의 전체적인 분위기는 우주 테마의 타일셋을 사용해 조화롭게 구성되어 있으며, 어두운 색감의 밤하늘 배경이 전략적 긴장감을 더한다. 이 맵은 초보자보다는 어느 정도 전략적 감각이 필요한 플레이어에게 권장되며, 특히 좁은 공간에서의 전투 경험이 부족한 유저에게는 도전적인 요소로 작용할 수 있다. 또한, 팀플레이가 필요 없는 1:1 대결 구조이므로 개인전으로 즐기기에 적합하다. 맵의 난이도는 중앙 통로의 좁은 폭과 방어 시설의 존재로 인해 보통 수준으로 예상된다. 플레이 전에는 미네랄과 가스의 분포를 확인하고, 통로 양옆의 방어 시설을 미리 파악해 두는 것이 중요할 것이다. This StarCraft: Brood War map, officially named "Untitled Scenario" but commonly referred to as "The Wall" (thewall.scm), is a defensive-style map centered around a narrow passage where players face off against opponents. The layout splits into two sides divided by a long, tight corridor, with buildings positioned along each side. Walls flank the pathway, restricting movement between allied and enemy territories, though the narrow central passage makes troop movement somewhat cumbersome. Based on the visible enemy structures and starting positions in the screenshot, the map likely follows a comp-stomp format where players either attack or defend through the central corridor. Upon spawning, players must navigate the tight passage, choosing between advancing toward the opponent’s main base or defending the central corridor. Given the corridor’s length and the defensive structures lining its sides, reckless rushes are ill-advised; instead, securing minerals and gas while deploying forces efficiently is key. The map’s design emphasizes the importance of ranged units, particularly in the stalemate created by the walls separating the two sides. The overall aesthetic blends a space-themed tileset harmoniously with a dark, nighttime sky, enhancing the strategic tension. This map is better suited for players with some strategic experience rather than beginners, and it can be particularly challenging for those unfamiliar with close-quarters combat. As a 1v1 structure that doesn’t require teamwork, it’s ideal for solo play. The difficulty is moderate, primarily due to the narrow corridor and defensive setups. Before starting, players should check mineral and gas distributions and scout the defensive structures along the passage to plan their approach.
The Green Mile (녹색의 길)
스타크래프트: 브루드워의 고전 밀리 맵 《The Green Mile》은 이름 그대로 녹색의 긴 길을 따라 펼쳐지는 1:1 전투가 특징이다. 맵 중앙에는 거대한 중앙 길과 삼림 지대가 펼쳐져 있으며, 양쪽 플레이어의 기지 주변은 협소한 통로와 언덕 지형으로 구성되어 있다. 이러한 지형은 초반부터 빠른 교전과 전략적 움직임을 유도하며, 특히 언덕을 활용한 시야 싸움과 기습 공격이 중요해진다. 맵의 이름은 《녹색의 길》을 의미하며, 녹색의 삼림지대가 맵 전체의 주요 테마로 작용한다. 맵의 크기는 8192x3072로 상당히 넓지만, 중앙 길로 이어지는 통로가 좁아 실질적인 전투는 비교적 조밀한 공간에서 이루어진다. 맵의 타일셋은 사막이지만, 실제로는 초록색 계열의 삼림과 도로가 주를 이루며, 이는 맵의 이름과 분위기를 살리는 데 기여한다. 추천 플레이어는 2명으로, 1:1 밀리 전투를 즐기기에 최적화되어 있으며, 특히 테란과 프로토스의 경우 언덕과 좁은 길목에서의 전투가 승패를 좌우할 수 있다. 초보 플레이어는 중앙 길목에서의 빠른 교전과 언덕 시야 싸움을 연습하는 것을 추천하며, 숙련자라면 입구 막기, 시야 싸움, 자원 관리 등을 고려해 전략을 세워야 한다. 맵의 승리는 기본적인 밀리 승리 조건인 상대방의 넥서스 또는 커맨드 센터 파괴로 달성할 것으로 추정된다. 맵의 주요 특징은 넓은 공간이지만 실질적인 전투가 좁은 길목에서 벌어지는 '넓은 공간 속 좁은 전투' 구조로, 이는 전략적 깊이를 더하는 요소로 작용한다. 또한, 맵의 이름과 테마가 일치하는 녹색 삼림지대가 맵의 시각적 특징을 살리며, 플레이어에게 긴 여정의 느낌을 준다. 이 맵은 고전 밀리 맵으로서의 정체성을 유지하면서도, 지형의 특징을 살린 전략적 깊이가 돋보이는 맵으로 평가된다. 특히 언덕과 좁은 길목이 다수 배치되어 있어, 초보자와 숙련자 모두에게 흥미로운 전투 경험을 제공할 것으로 예상된다. The Green Mile in StarCraft: Brood War is a classic 1v1 melee map featuring a long green path as its central theme. The map centers around a vast green corridor flanked by forests, with each player's base connected by narrow passages and elevated terrain. This layout encourages early engagements and strategic maneuvering, particularly emphasizing the importance of vision control from high ground and surprise attacks. The name translates to "Green Path," reflecting the map's lush forest theme that dominates its visual identity. Despite its large 8192x3072 dimensions, the map's real battles unfold in the confined central corridor, creating a dense combat space. While the tileset is desert-themed, the map is dominated by green forests and roads that align with its name and atmosphere. Designed for two players, it excels at 1v1 melee combat, where Terran and Protoss players especially must master elevated terrain and narrow choke points to secure victory. New players should practice quick engagements in the central corridor and vision control on the hills, while experienced players should focus on defending entrances, managing vision, and resource efficiency. Victory is achieved by destroying the opponent's Nexus or Command Center, following standard melee rules. The map's defining feature is its "wide space with narrow battles" structure, where vast areas contrast with tight, strategic combat zones—adding depth to tactical play. The cohesive green forest theme enhances the map's visual appeal, giving players a sense of embarking on a long journey. As a classic melee map, it balances nostalgic appeal with strategic complexity, offering engaging battles for both beginners and veterans thanks to its numerous hills and choke points.
인디언의 비가 (Indian Lament)
〈Indian Lament〉는 스타크래프트: 브루드워의 유즈맵으로, 디자인된 맵 제목 그대로 분위기 있는 서사적인 느낌을 전달하는 디펜스 장르의 유즈맵이다. 맵의 전체적인 색감은 황혼 타일셋을 기반으로 따뜻한 오렌지빛과 붉은색 톤이 돋보이며, 중앙에 위치한 넓은 평지 주변으로는 돌출된 언덕과 요철이 복잡하게 배치되어 있다. 이 구조는 플레이어가 방어선을 구축하거나 이동 경로를 고려할 때 전략적 깊이를 더하는 요소로 작용한다. 맵 상단과 하단에는 각각의 시작 지역이 대칭 형태로 배치되어 있으며, 중앙 지역은 넓은 개활지로 펼쳐져 있어 대규모 전투가 벌어질 수 있는 공간으로 보인다. 맵의 가장자리는 절벽과 바위로 둘러싸여 있어 외부의 공격이 coming in을 어렵게 만들도록 설계된 것으로 추정된다. 맵의 제목 ‘Indian Lament’와 어울리게 인디언풍의 장식적인 요소가 일부 타일에 표현되어 있으며, 이는 맵의 독특한 분위기를 형성하는 데 기여한다. 이 맵은 1:1 대결 구조를 기반으로 하며, 방어와 공격의 균형을 맞춰야 하는 디펜스 게임플레이를 제공할 것으로 예상된다. 플레이어는 시작 지역을 방어하는 동시에 중앙 지역을 점유하거나 적의 기지를 공격하는 전략을 구사해야 하며, 맵의 복잡한 지형이 이를 한층 더 흥미롭게 만든다. 특히 중앙의 넓은 평지는 전투의 중심지가 될 가능성이 높으며, 언덕과 요철은 시야 확보와 기습 공격의 기회를 제공할 수 있다. 이 맵은 초보자와 숙련자 모두 즐길 수 있도록 적절한 난이도와 전략적 선택지를 제공할 것으로 보이며, 특히 디펜스와 공세를 동시에 고려해야 하는 플레이어들에게 매력적으로 다가갈 것이다. 다만 맵의 규모가 크고 복잡한 지형이 포함되어 있어, 처음 플레이할 때는 맵의 구조를 충분히 숙지하고 전략을 계획하는 것이 중요하다. 또한, 중앙 지역을 장악하는 것이 승리의 열쇠가 될 가능성이 높으므로, 초반Resource 관리와 유닛 생산 계획을 철저히 세워야 한다. 이 맵은 디펜스와 공격의 균형을 맞추는 것이 핵심이며, 이를 위해서는 맵의 지형을 적극적으로 활용하는 플레이가 요구된다. 특히 언덕과 바위를 활용한 방어선 구축, 그리고 중앙 평지에서 벌어지는 대규모 전투에서의 승부가 승패를 가를 것으로 보인다. 이처럼 〈Indian Lament〉는 전략적 깊이와 아름다운 디자인으로 스타크래프트 유즈맵의 매력을 한껏 살린佳作으로 평가된다. Indian Lament is a custom map for StarCraft: Brood War, designed to deliver an atmospheric and narrative-driven defense experience. The map features a warm color palette dominated by shades of orange and red, using the Twilight tileset as its foundation. The central area is a vast open plain, surrounded by undulating hills and rocky outcrops that add strategic depth to both defensive positioning and movement. The top and bottom of the map contain symmetrical starting positions, while the edges are bordered by cliffs and rocks, making it difficult for external forces to infiltrate easily. The title 'Indian Lament' suggests a thematic influence, with some decorative elements resembling indigenous motifs subtly integrated into the tiles. This map is structured for a 1v1 confrontation, emphasizing a balance between defense and offense. Players must defend their starting bases while strategically capturing or controlling the central area, where large-scale battles are likely to unfold. The terrain’s complexity offers opportunities for ambushes and provides vantage points for sight control. The gameplay is designed to be accessible yet challenging, appealing to both beginners and experienced players. However, the map’s size and intricate layout require players to familiarize themselves with the terrain and plan their strategies carefully. Securing the central area early on appears crucial, as it could dictate the flow of the game. Resource management and unit production timing are vital, especially during large-scale battles in the central plain. The map’s core mechanic revolves around balancing defense and offense, with the terrain playing a pivotal role in shaping the outcome. Overall, Indian Lament stands out as a well-crafted custom map that combines strategic depth with aesthetic appeal, making it a compelling choice for StarCraft fans.
1v1 Desert Rat
스타크래프트 브루드워의 1:1 대전 맵 '1v1 Desert Rat'은 황량한 사막 지형을 배경으로 펼쳐지는 밀리(Melee) 스타일 전투를 제공합니다. 맵의 가장 큰 특징은 중앙에 위치한 좁은 통로와 양쪽의 넓은 개활지인데, 이 지형은 플레이어 간의 전투가 어떻게 펼쳐질지를 결정짓는 핵심 요소입니다. 좁은 길목을 두고 벌어지는 근접 전투는 신속한 컨트롤과 전략적 판단이 요구되며, 반대로 넓은 공간에서는 치고 빠지는 플레이가 중요해집니다. 맵의 디자인상으로는 유닛 간의 이동 경로가 상대적으로 단순해 보이지만, 황혼 타일셋의 붉은 노을이 어우러진 배경은 시각적으로도 플레이어의 긴장감을 높이는 데 한몫합니다. 'Desert Rat'이라는 제목은 사막의 쥐를 뜻하는 것인데, 이는 perhaps 플레이어들이 쥐처럼 재빠르게 움직이며 상대방을 공격한다는 의미를 담고 있는 것 같습니다. 제작자 Desdichado는 이 맵을 2명의 플레이어에게 추천하며, 'Come and get it. Nuttin like gettin your rat cooked.'라는 독특한 설명문은 플레이어에게 도전적인 분위기를 조성합니다. 이 맵은 기본적인 밀리 전투를 즐기고자 하는 유저들에게 적합하며, 특히 1:1 전투의 짜릿함을 느끼고 싶은 플레이어들에게 추천할 만합니다. 다만, 맵의 밸런스나 디자인상 세부적인 요소는 개인의 플레이 스타일에 따라 체감 차이가 클 수 있으니, 여러 번 플레이해보며 자신의 전술에 맞게 활용하는 것이 중요합니다. 또한, 좁은 통로를 활용한 벙커링이나 러시 전략이 상대방의 유닛 생산 타이밍에 크게 좌우될 수 있으므로, 초보자는 난이도가 다소 높을 수 있습니다. 이 맵을 즐기기 위해서는 기본적인 테란, 프로토스, 저그의 유닛 컨트롤과 빌드 오더에 대한 이해가 필요합니다. This StarCraft: Brood War 1v1 map, 'Desert Rat,' delivers a classic Melee-style battle set against a desolate desert landscape. The map's defining feature is its central narrow corridor flanked by wide open areas, which dictates the flow of combat between players. Close-quarters battles through the tight passage demand quick reflexes and strategic foresight, while the expansive spaces favor hit-and-run tactics. Although the terrain appears straightforward, the twilight-themed tileset bathed in warm hues enhances the visual intensity, keeping players on edge. The title 'Desert Rat' likely symbolizes the agility and cunning required to outmaneuver opponents, much like a rat darting through the desert. Created by Desdichado, this map is recommended for two players, and its quirky description—'Come and get it. Nuttin like gettin your rat cooked.'—adds a playful yet challenging tone. Ideal for those seeking the thrill of 1v1 combat, this map offers a straightforward yet engaging experience for fans of basic Melee battles. However, due to its design, players may experience varying levels of challenge depending on their playstyle, with strategies like bunker rushes or early rushes heavily influenced by the opponent's unit production timing. Beginners might find the difficulty steep, so familiarity with unit control and build orders for Terran, Protoss, or Zerg is essential for an enjoyable experience.
맵 선택 가이드
태그는 맵의 핵심 특징을 빠르게 설명하지만 제작 버전마다 규칙이 다를 수 있습니다. 상세 설명에서 권장 인원, 난이도, 플레이 시간과 버전을 함께 확인한 뒤 다운로드하세요.