
1:1 스타크래프트 맵 모음
'1:1' 태그가 등록된 맵을 모았습니다. 장르 하나로 찾기 어려운 플레이 방식, 난이도와 특징을 중심으로 인기 맵과 최신 맵을 비교해 보세요.
- 등록 맵
- 11개
- 누적 다운로드
- 1
- 누적 조회
- 306
인기 맵
다운로드와 조회 반응이 높은 맵입니다.
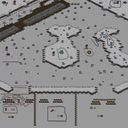
초딩vs중딩
‘초딩vs중딩’은 스타크래프트: 브루드워의 유즈맵으로, 서로 다른 두 층위의_BASE_에서 펼쳐지는 흥미로운 대결을 제공한다. 맵의 구조는 위쪽과 아래쪽 각각의 구역이 독립적으로 구성되어 있어, 초딩과 중딩이 각각 자신의 영역을 지키며 상대의 공격을 방어하거나 침략을 시도하는 방식으로 진행된다. 위쪽의 초딩 구역과 아래쪽의 중딩 구역은 중앙 통로로 연결되어 있으며, 이 통로를 통해 양측의 유닛들이 교전할 수 있다. 맵의 특징은 두 구역이 완전히 분리되어 있지 않다는 점으로, 중앙 통로 주변의 좁은 길목을 두고 치열한 접전이 벌어진다. 플레이어는 자신의 구역에서 자원을 확보하고 유닛을 생산한 뒤, 중앙 통로를 통해 상대방의 구역으로 진출하거나 방어선을 구축해야 한다. 특히, 중앙 통로의 좁은 길목은 전략적 요충지로, 이곳에서의 전투는 맵의 승패를 좌우할 수 있다. 초딩과 중딩의 대결이라는 컨셉 덕분에 게임은 단순히 공격과 방어에 그치지 않고, 상대방의 전략을 예측하고 대응하는 심리전이 중요한 요소로 작용한다. 초보자도 쉽게 접근할 수 있는 직관적인 조작감과 함께, 경험이 쌓일수록 더 깊이 있는 전략을 요구하는 점도 매력적이다. 이 맵은 특히 팀플레이가 강제되지 않으며, 1:1 또는 2:2, 4:4 등 다양한 인원수로 즐길 수 있어 파티 플레이에서도 인기다. 그러나 중앙 통로의 좁은 길목이 bottleneck이 될 수 있어, 이를 어떻게 활용하느냐가 관건이다. 또한, 구역별로 자원 분배가 균등하지 않을 가능성이 있어, 초반 자원 확보 전략이 중요하다. 초딩과 중딩의 대결이라는 독특한 설정 덕분에, 단순히 디펜스나 공격만을 넘어서 재미있는 스토리성도 느낄 수 있다. 이 맵을 즐기기 위해서는 중앙 통로의 통제권을 놓고 벌어지는 치열한 공방전을 숙지하고, 자신의 구역과 상대 구역의 특성을 잘 이해하는 것이 중요하다. 초보자도 쉽게 즐길 수 있지만, 숙련자라면 더 섬세한 전략을 구사할 여지가 많아진다. 특히, 유닛의 생산 타이밍과 중앙 통로의 방어선을 어떻게 구축할지가 승패를 가르는 핵심 포인트다. 이 맵은 디펜스와 공격의 균형을 맞추는 재미와 함께, 상대방의 움직임을 예측하는 재미까지 더해져 스타크래프트 유즈맵의 정석을 느낄 수 있는 작품이다. ‘초딩vs중딩’ is a StarCraft: Brood War custom map where two opposing sides battle across different levels of a BASE. The map is structured with separate upper and lower zones, allowing 초딩 (novices) and 중딩 (intermediates) to defend their own territories while attacking or invading the opponent’s. The upper and lower sections are connected by a central corridor, where most clashes occur due to the tight bottleneck around it. Players gather resources, produce units in their zones, and either push through the corridor to attack or fortify defenses. The narrow passage in the center is a critical strategic point, often deciding the match’s outcome. Thanks to its 초딩 vs. 중딩 concept, the game goes beyond simple offense and defense, requiring players to anticipate and counter the opponent’s strategies—a key psychological element. The intuitive controls make it accessible for beginners, while deeper strategies emerge as players gain experience. The map supports various player counts (1v1, 2v2, 4v4) and doesn’t force team play, making it popular for group sessions. However, the bottleneck in the corridor can create traffic issues, so managing it effectively is crucial. Uneven resource distribution between zones also means early resource-gathering strategies matter. The unique premise adds a fun narrative layer beyond pure defense or attack. To excel, players must master the central corridor’s control, understand their own and the opponent’s zone traits, and time unit production and defensive setups carefully. While easy to pick up, skilled players can refine their tactics for greater depth. Balancing defense and offense while predicting the opponent’s moves makes this a quintessential StarCraft custom map experience.
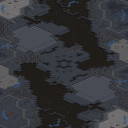
매치포인트 (MatchPoint 1.1)
《MatchPoint 1.1》는 스타크래프트 브루드워의 밀리 맵으로, 2인용 1:1 전투에 특화된 구조를 자랑한다. 우주 테마의 타일셋을 사용한 맵의 중앙부는 비교적 평평한 지형으로 이루어져 있으며, 양측 본진은 각각의 멀티와 연결된 러시 거리가 적당히 확보되어 있다. 본진과 멀티 사이에 위치한 미네랄 멀티는 게임 초반 자원 확보에 영향을 미치는데, 이를 둘러싼 언덕 지형이 중립 건물을 배치하기에 적합한 구조로 보인다. 맵의 양쪽 가장자리는 방어하기 어려운 넓은 평지인데, 이는 빠른 러시나 포지션 싸움을 유도할 수 있는 요소로 작용할 수 있다. 또한, 맵 곳곳에 배치된 소규모 언덕과 언덕 건너편의 미네랄 멀티는 전략적 포지션 선정을 강요하며, 테란의 벙커링이나 저그의 러커 활용을 고려한 설계로 추정된다. 맵의 균형은 비교적 잘 맞는 편으로, 양측이 대등한 자원과 지형을 확보할 수 있도록 배치되어 있지만, 중앙 평지의 넓이와 언덕의 배치에 따라 초보자와 숙련자 간의 실력 격차가 드러날 수 있는 맵이다. 초보자에게는 자원 확보와 멀티 활용이 용이한 반면, 숙련자에게는 미묘한 언덕과 평지 간의 포지션 싸움에서 승부가 갈릴 가능성이 높다. 특히 우주 테마의 타일셋은 밋밋해 보일 수 있지만, 맵의 평탄한 구조는 빠른 전투와 스나이핑을 선호하는 플레이어들에게 적합하다. 플레이 전에는 중앙 평지의 넓이와 본진 멀티의 접근성을 미리 확인하고, 상대방의 전략에 따라Early 메카닉, 바이오닉, 또는 저글링-히드라 위주의 빌드를 구상하는 것이 좋다. 또한, 언덕을 활용한 시야 싸움과 멀티 방어 타이밍을 철저히 연습한다면 이 맵에서 우위를 점할 수 있을 것이다. MatchPoint 1.1 is a StarCraft: Brood War melee map designed for intense 1v1 battles. The central area features a relatively flat terrain, while the main bases are connected to smaller multi expansions with moderate rush distances. The mineral-only expansions near the bases play a key role in early-game resource control, and the surrounding cliff formations provide strategic positions for neutral buildings. The wide open edges on both sides of the map make them vulnerable to fast rushes or positional clashes, while scattered small cliffs and mineral expansions in the mid-game force players to make critical decisions on build orders and expansions. The map maintains a balanced design, offering equal resources and terrain control to both players, though the spacious central plains and cliff placements can amplify skill gaps between beginners and experts. New players will benefit from easier resource gathering and multi expansion control, while experienced players will thrive on micro-intensive positional battles and precise execution of strategies such as Terran bunker rushes or Zerg lurker setups. The space-themed tileset may seem plain, but the flat terrain structure favors quick engagements and sniping tactics. Before playing, it's crucial to assess the central open area's width and the accessibility of base expansions, then adapt your build—whether Early Mech, Bio, or Ling-Hydra—to counter your opponent's strategy. Mastering cliff-based sight control and multi-defense timing will give you a significant advantage in this map.
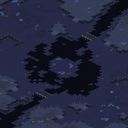
STF - Opposition
STF - Opposition는 스타크래프트 브루드워의 밸런스형 1:1 밀리 맵으로, symmetrical(대칭) 구조를 기반으로 한 symmetrical 디자인(대칭 구조)이 특징입니다. 맵 중앙을 기준으로 양측이 거의 동일한 지형을 공유하고 있지만, 세부적인 언덕과 언덕 사이의 통로 배치, 미네랄과 가스 위치가 미묘하게 달라 각 플레이어의 전략적 선택지를 제한하고 있습니다. 이런 구조는 양측의 공격과 수비 위치를 자연스럽게 결정짓게 하며, 맵의 이름 'Opposition'이 보여주듯 상대방과 대립하는 입장 차이를 극대화합니다. 특히 양쪽의 언덕 지형이 서로를 바라보는 형태로 배치되어 있어, 초반 러시 타이밍과 기지 방어 라인을 플레이어의 선호도에 따라 유연하게 선택할 수 있도록 설계되었습니다. 미네랄과 가스의 균형도 적절히 맞춰져 있어, 자원 관리와 멀티 태스킹을 중시하는 플레이어에게는 전략적 깊이를 더해줍니다. 다만, symmetrical 구조임에도 불구하고 일부 통로의 폭이 좁아 테란의 배럭 러시나 저그의 러커 전략 등 특정 종족의 강세가 두드러질 가능성이 있으며, 이는 맵의 밸런스를 맞추기 위한 의도된 디자인으로 보입니다. 초보 플레이어는 이러한 구조적 특징을 잘 이해하지 못해 일방적인 공격을 당하기 쉬우며, 고수 층에서는 symmetrical 맵의 특성을 활용한 심리전과 타이밍 러시가 빈번히 등장할 것으로 예상됩니다. 전반적으로 symmetrical 밸런스형 1:1 맵을 선호하는 유저들에게 강력히 추천할 만한 작품입니다. 플레이 전에는 자신의 선호하는 종족과 전략 스타일을 고려해, 맵의 양측 언덕 지형과 통로 폭을 미리 분석해 두는 것이 좋습니다. 또한 symmetrical 맵의 특성상, 상대방의 전략을 빠르게 읽고 대응하는 능력이 중요하므로, 다양한 빌드 오더를 연습해 둔 상태라면 더 큰 재미를 느낄 수 있을 것입니다. STF - Opposition is a balanced 1:1 melee map for StarCraft: Brood War, built around a symmetrical design that ensures both players share nearly identical terrain. The subtle differences in mineral and gas placement, as well as the arrangement of hills and pathways, subtly restrict strategic choices, forcing players to adapt their attack and defense positions naturally. The map's title 'Opposition' reflects this dynamic, highlighting the contrasting roles each player must adopt. The hill placements are strategically angled to face each other, allowing flexibility in early rush timing and base defense lines depending on player preference. The balance of resources is also well-tuned, adding depth to resource management and multitasking gameplay. However, despite its symmetry, certain pathways are narrow enough to favor specific strategies like Terran's Barracks rush or Zerg's Lurker tactics, which may influence the map's balance. This appears to be an intentional design choice to create a dynamic playing field. Beginner players may struggle due to the structural nuances, while advanced players will likely engage in psychological warfare and timing rushes common in symmetrical maps. Overall, this is a highly recommended map for players who enjoy balanced 1:1 symmetrical melee maps. Before playing, it's advisable to analyze the map's hills, pathways, and resource layouts to align with your preferred race and strategy. Given the nature of symmetrical maps, the ability to quickly read and counter your opponent's strategy is crucial—practicing diverse build orders will enhance your experience.
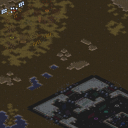
브레이브하트 캐슬 어썰트 (Braveheart Castle Assault)
브레이브하트 캐슬 어썰트는 스타크래프트 브루드워의 유즈맵으로, 스코틀랜드와 잉글랜드의 역사적 대립을 배경으로 한 전략 디펜스 장르의 맵이다. 맵은 거대한 성곽과 중앙 평야로 나뉘어 있으며, 스코틀랜드 플레이어는 성곽 내부에서, 잉글랜드 플레이어는 외부에서 시작하는 구조로 보인다. 성곽 중앙에는 거대한 성문이 있어, 잉글랜드가 스코틀랜드를 공격하거나 스코틀랜드가 방어할 때 중요한 전략 지점이 될 것이다. 맵 상단과 하단에 각각의 본진 건물이 배치되어 있으며, 성곽 주변으로는 언덕과 숲이 배치되어 있어 시야 확보와 기습 공격에 영향을 미칠 것으로 추정된다. 이 맵은 컴까기(컴퓨터 상대 유즈맵) 방식으로 진행되며, 스코틀랜드 플레이어는 윌리엄 월레스를, 잉글랜드 플레이어는 왕을 처치하는 것이 목표로 보인다. 맵의 symmetrical한 구조와 중앙 성문은 밀고 당기는 전투를 유도할 것이며, 플레이어는 자원 관리와 병력 운용뿐 아니라 지형의 이점을 활용해야 할 것이다. 특히 성곽 내외의 시야 차이는 전술적 우위를 결정짓는 중요한 요소로 작용할 것으로 보인다. 초보자보다는 중간 이상의 실력을 가진 플레이어에게 어울리며, 역사적 테마와 전략적 깊이가 결합된 점이 이 맵의 주요 특징이다. 플레이 전에는 맵의 symmetrical한 구조와 중앙 성문의 역할, 언덕과 숲의 배치 등을 미리 숙지하는 것이 중요하다. 또한, 각 진영의 목표와 승리 조건을 명확히 이해하고, 자원 운영과 병력 조합을 신중히 계획해야 한다. 특히, 성곽 내외의 시야 차이를 활용한 기습 공격과 방어 전략을 연습한다면 더 좋은 결과를 얻을 수 있을 것이다. 이 맵은 역사적 테마와 전략적 깊이가 결합된 유즈맵으로, 전략 디펜스와 컴까기 장르를 좋아하는 플레이어들에게 추천할 만하다. 특히, 팀플레이보다는 1:1 또는 2:2 이상의 팀전 형식으로 플레이하는 것이 더 흥미로울 것으로 보인다. Braveheart Castle Assault is a StarCraft: Brood War custom map that reimagines the historical rivalry between Scotland and England as a strategic defense game. The map features a massive castle fortress divided into an inner stronghold and an outer plain, with the Scots starting inside the walls and the English outside. A central gate dominates the battlefield, serving as a critical choke point for both attack and defense. This map is designed as a computer opponent-style UMS (Use Map Settings) game, where Scottish players must defeat William Wallace and English players must eliminate the King. The symmetrical layout and central gate encourage back-and-forth battles, requiring players to manage resources, deploy forces strategically, and leverage terrain advantages. The elevation and forest placement around the fortress will impact vision control and ambush tactics, making positioning a key factor in success. Players should familiarize themselves with the symmetrical design, the role of the central gate, and the strategic importance of high-ground positions before jumping in. Understanding each faction's objectives—Scottish players must protect Wallace while the English aim to slay the King—is essential. Resource management and troop composition planning are crucial, especially when considering the vision disparities between the inner and outer zones of the fortress. This map blends historical themes with deep strategic gameplay, making it ideal for fans of strategy defense and computer opponent custom maps. It works best in 1v1 or team-based formats like 2v2, where tactical coordination and map control can shine.
데저트 스나이핑 언리미티드 (Desert Sniping Unlimited)
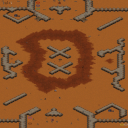
스타크래프트 브루드워의 유즈맵 classic Desert Sniping의 후속작으로, 사막 한가운데에서 저격수 한 명으로 적을 섬멸하고 깃발을 점령하는 재미가 있는 맵이다. 맵의 전체적인 배경은 사막으로 구성되어 있으며, 중앙에 넓은 개활지가 있어 저격전이 벌어지기 좋은 환경을 제공한다. 맵 곳곳에는 바위와 언덕이 배치되어 있어 엄폐물로 활용할 수 있으며, 이 지형을 활용해 적의 시야에서 벗어나거나 우회 공격이 가능하다. 플레이어는 시작 지점에서 저격소총을 장착한 채로 출발하며, 적을 사살하거나 적의 깃발을奪取하는 두 가지 목표를 달성해야 한다. 깃발은 맵의 네 귀퉁이에 위치한 기지 내부에 위치하고 있으며, 이를奪取하는 데 성공하면 일정 시간 동안 아군의 기지에서 보호받을 수 있다. 또한, 적의 공격을 피해가며 아군의 기지로 깃발을 운반하는 전략적 선택도 중요하다. 맵의 난이도는 플레이어의 시야 관리와 엄폐물의 활용 여부에 따라 크게 달라지며, 초보자의 경우 적의 저격에 쉽게 노출될 수 있어 주의가 필요하다. 반면 숙련된 플레이어는 지형을 적극 활용해 우위를 점할 수 있다. 이 맵은 1:1 저격 대결부터 6인까지의 팀전까지 다양한 방식으로 즐길 수 있으며, 특히 4인 이상의 팀전에서는 팀워크와 역할 분담이 victoria에 큰 영향을 미친다. 맵의 특징인 ‘Must have players 1 and 4!!!’라는 문구는 내부 설명에 포함되어 있어, 1번과 4번 플레이어의 역할이 특히 중요함을 암시한다. 따라서 이들을 중심으로 전략을 짜는 것이 게임의 승률을 높이는 열쇠가 될 것이다. This StarCraft: Brood War custom map is a sequel to the classic Desert Sniping, offering an engaging experience where players control a sniper to eliminate enemies and capture the enemy flag in a desert setting. The map features a vast open central area ideal for sniper battles, with scattered rocks and hills providing cover for strategic maneuvers. Players spawn with a sniper rifle and must either eliminate opponents or seize the flag located in corners of the map. Successfully capturing the flag grants temporary protection in the team’s base, but transporting it safely back requires careful navigation and tactical use of terrain. Difficulty hinges on effective use of cover and vision control, with beginners often struggling against enemy snipers. Skilled players, however, can leverage the map’s layout to dominate. The map supports various formats, from 1v1 sniper duels to team battles with up to 6 players, where teamwork and role assignment—especially for players 1 and 4—are crucial for victory, as hinted by the internal note: ‘Must have players 1 and 4!!!’.
The Grid 1.1a (그리드 1.1a)
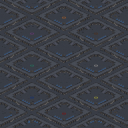
스타크래프트 브루드워의 고전 밀리 맵으로 유명한 'The Grid 1.1a'는 8명의 플레이어가 각자의 자원을 확보한 뒤 중앙의 넓은 평원에서 전투를 펼치는 구조를 가지고 있다. 맵의 특징은 중앙 광장과 이를 둘러싼 8개의 시작 위치가 깔끔한 대칭형으로 배치되어 있어 초보자와 숙련자 모두에게 공정한 전투를 제공한다는 점이다. 맵 중앙에는 광물 지대와 가스 기지가 배치되어 있어 자원 확보 경쟁이 치열해지며, 이로 인해 빠른 mineral gathering과 strategic gas control이 승리의 핵심 요소로 작용한다. 맵의 지형은 비교적 평평하여 이동 방해 요소가 적지만, 일부 시작 지점 주변의 언덕은 시야 확보와 초기 방어에 유리한 위치를 제공한다. 전투 시에는 중앙에서 마주치는 대규모 교전이 빈번하게 발생하며, 이로 인해 빠른 병력 생산과 효율적인 컨트롤이 요구된다. 특히 테란의 경우, 초기 SCV 생산과 베럭-팩토리-스타포트 체제를 빠르게 구축하여 중앙을 장악하는 것이 중요하며, 저그의 경우 초반 러시 방어와speedling skirmish를 통한 이득 창출이 승률을 좌우한다. 프로토스의 경우, 빠른 넥서스 확장을 바탕으로 다수의 질럿과 드라군을 배치하여 중앙을 장악하는 전략이 유효하다. 맵의 밸런스는 대체로 공정한 편이지만, 특정 종족의 특성과 맵의 대칭성 덕분에 누가 유리하다고 단정 짓기는 어려운 편이다. 이 맵은 1:1 밀리 매치에서 주로 사용되며, 중앙 교전을 통한 전술적 판단과micro management가 승부를 가르는 주요 포인트다. 초보자에게는 맵의 대칭성과 평범한 지형 덕분에 적응이 용이하지만, 숙련자들에게는 중앙에서의 빠른 교전과 효율적인 자원 운용이 관건이 된다. 따라서 이 맵을 플레이하기 전에는 각 종족별로 초반 빌드와 중앙 교전 전략을 숙지하는 것이 중요하다. 또한, 맵의 넓이가 넓기 때문에 시야 확보와 정찰을 소홀히 하지 않도록 주의해야 한다. 이 맵은 스타크래프트의 고전 밀리 맵답게 오랜 시간 동안 많은 플레이어들에게 사랑받아 왔으며, 그 안정적인 밸런스와 명확한 승리 조건 덕분에 지금도 정기적으로 플레이되고 있다. "The Grid 1.1a" is a classic Brood War melee map famous for its eight-player setup, where players secure their own resources before engaging in combat across a wide central battlefield. The map’s design features a clean symmetrical layout, with eight starting positions evenly spaced around a central plaza, ensuring fair conditions for both beginners and veterans. At the heart of the map lie mineral fields and gas geysers, making resource control a high-stakes race where efficient mineral gathering and strategic gas management can decide the match. The terrain is mostly flat, minimizing movement obstacles, though small hills near certain starting points provide early scouting and defensive advantages. Battles often culminate in large-scale clashes in the center, demanding quick unit production and precise micro-management. For Terran, establishing a fast Barracks-Factory-Starport build order to seize the center is crucial, while Zerg must focus on early rush defense and leveraging speedlings for early-game advantages. Protoss players benefit from rapid Nexus expansions, fielding Zealots and Dragoons to dominate the central area. While the map’s symmetry and balance make it fair overall, no single race holds a definitive advantage due to the varied strengths each brings. Primarily used in 1v1 melee matches, the map rewards tactical decision-making and micro in central engagements. Beginners appreciate its straightforward symmetry and terrain, while advanced players must master quick engagements and resource optimization. Before playing, it’s essential to study each race’s early builds and central combat strategies. Given the map’s size, maintaining scouting and vision control is also critical. A timeless classic in Brood War’s melee scene, "The Grid 1.1a" remains popular for its stable balance and clear win conditions, continuing to see regular play decades after its release.
고나 다이 (Gonna Die)
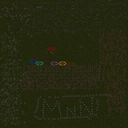
스타크래프트: 브루드워의 유즈맵 «Gonna Dieeeeee»는 이름 그대로의 직설적인 재미를 담은 컴까기 장르의 맵입니다. 내부 설명처럼 적의 건물을 모두 파괴하는 것이 목표인 이 맵은, 사실상 밀리 맵으로 분류되어 있지만 실상은 두 플레이어가 각자의 기지를 지키며 끊임없이 몰려드는 적 유닛을 상대하는 이른바 ‘컴퓨터 상대 유즈맵’에 가깝습니다. 맵 중앙에는 넓은 평지가 펼쳐져 있어 유닛들이 자연스럽게 교전할 수 있는 구조로, 초보자와 숙련자 모두에게 공평한 전투가 가능하도록 설계되었습니다. 다만, 맵의 이름은 다소 도발적이지만 실제 플레이에서는 전략과 컨트롤이 중요한 정석적인 디펜스 형식이기 때문에, 이름만 보고 무작정 접근하기보다는 맵의 특성을 이해한 후 플레이하는 것이 좋습니다. 주요 특징으로는, 사막 타일셋을 기반으로 한 황량한 지형이 시각적으로 긴장감을 조성한다는 점입니다. 플레이어는 각자 2~3개의 mineral field를 확보한 채 시작하며, 초기 자원은 제한적이지만 적 기지의 건물을 파괴할수록 추가 자원이 제공되어 전선이 유지됩니다. 맵의 중앙부는 넓은 개활지로, 유닛들이 움직이기 편리하지만 반대로 적의 공격을 받기 쉬운 위치이기도 합니다. 따라서, 초반에는 방어에 치중하되, 중앙 지역을 장악하거나 기습 공격을 통해 상대의 건설로봇을 제거하는 플레이가 권장됩니다. 특히, 테란의 경우 벙커링이나 마린 물량을, 저그의 경우 러커나 히드라리스크 조합을, 프로토스의 경우 질럿과 드라군 위주의 조합을 활용하는 것이 효과적일 것으로 추정됩니다. 이 맵은 1:1 전투에 최적화되어 있지만, 팀플레이가 불가능한 구조는 아니므로 두 플레이어 간의 심리전이 상당히 중요합니다. 또한, 맵의 난이도는 플레이어의 실력에 따라 크게 달라질 수 있어, 초보자는 방어 위주의 플레이를, 숙련자는 공격과 방어의 밸런스를 맞춰 플레이하는 것이 좋습니다. 마지막으로, 맵의 이름은 다소 자극적이지만 실제 플레이에서는 상대방을 압박하는 전술적 재미가 핵심이라는 점을 잊지 말아야 합니다. Gonna Dieeeeee is a Computer vs. Player (compkagi) style custom map for StarCraft: Brood War that lives up to its provocative name. Unlike a traditional Melee map, this title focuses on survival against waves of AI-controlled enemy units while destroying the opponent’s buildings. The map features a vast central plain surrounded by mineral fields, allowing for dynamic unit clashes in a desert-themed setting. The minimalist design emphasizes strategy and unit control, making it accessible to both beginners and experienced players. The gameplay revolves around securing resources—typically two to three mineral patches per player—while fending off enemy forces that spawn periodically. The open terrain in the center encourages aggressive pushes or tactical retreats, depending on the player’s race and composition. Terran players might benefit from bunkers or Marine drops, Zergs can exploit Hydralisks and Zerglings, and Protoss could rely on Zealots and Dragoons for early pressure. The map’s balance is highly skill-dependent; beginners should prioritize defense, while advanced players can experiment with timing attacks and map control. Despite its aggressive name, the core enjoyment comes from outmaneuvering the AI and opponent in a structured yet unpredictable environment. The desert tileset adds a layer of visual tension, enhancing the overall intensity of the match.
밀려드는 조수 (Tidal Flats)
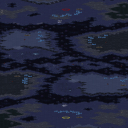
‘Tidal Flats’는 조수가 밀려와 육지가 물에 잠기는 특수한 환경의 섬 맵으로, 공중 유닛을 중심으로 전투를 펼쳐야 하는 독특한 구조를 지닌 스타크래프트 브루드워 유즈맵입니다. 맵 중앙에는 거대한 물 웅덩이가 자리 잡고 있으며, 시간이 지나면서 수위가 점차 상승해 지상 유닛의 이동이 점차 제한됩니다. 이 때문에 플레이어는 조기에 공중 병력을 확보하거나 지상 병력을 효율적으로 배치해야 하며, 물이 완전히 덮이기 전에 승리를 가져가야 합니다. 맵의 좌측과 우측에는 각각의 기지가 위치하고 있어, 초반에는 안전하게 확장을 펼칠 수 있지만, 수위가 올라갈수록 후방으로의 후퇴가 어려워지는 긴장감을 느낄 수 있습니다. 지상 유닛만으로는 장기전을 펼치기 어려운 구조이며, 공중 유닛의 비중이 높기 때문에 에어 유닛의 생산과 관리가 승리의 핵심으로 작용합니다. 또한, 맵의 중앙에는 소규모의 섬이 존재해, 이를 활용한 전략적 요충지로 활용할 수 있습니다. 맵의 분위기는 화산 타일셋을 기반으로 하여, 붉은 빛을 띄는 바위와 검은 흙으로 구성된 지형이 조수의 상승과 함께 물에 잠기는 모습을 연출해, 시각적으로도 독특한 몰입감을 제공합니다. 이 맵은 1:1 대결에 특화된 맵으로, 빠른 판단력과 전략적 선택이 요구되는 만큼, 공중 유닛의 생산과 지상 병력의 효율적인 운용을 동시에 고려해야 합니다. 초보자는 공중 유닛의 생산이 다소 까다로울 수 있어, 난이도가 다소 높은 편에 속하지만, 숙련된 플레이어에게는 치열한 공중전과 지상전의 조화를 느낄 수 있는 매력적인 맵입니다. 특히, 조수가 올라가는 타이밍을 예측하고, 적절한 시점에 병력을 생산해내는 것이 승리의 열쇠가 됩니다. 맵을 플레이하기 전에는 공중 유닛의 생산 건물과 지상 유닛의 배치 가능 지역을 미리 확인하고, 조수의 상승 속도를 고려해 병력의 비중을 조절하는 것이 중요합니다. 또한, 상대방의 전략에 따라 공중 병력의 비중을 조절하는 유연성이 필요합니다. 맵의 밸런스는 공중 유닛의 중요성을 부각시키며, 지상 병력의 활용을 제한하는 구조로 구성되어 있어, 다양한 전략을 시도해 볼 수 있는 매력이 있습니다. ‘Tidal Flats’ is a unique StarCraft: Brood War custom map set on an island where the tide rises and floods the land, forcing players to focus on aerial combat. The map features a large central pool of water that gradually rises over time, restricting ground unit movement and pushing players to secure air forces early or position ground units strategically before the water fully submerges the battlefield. Bases are located on both the left and right sides, allowing safe early expansions but making retreats increasingly difficult as the tide rises. The map’s design makes prolonged ground-based warfare impractical, emphasizing air units as the key to victory. A small central island adds a strategic vantage point that players can leverage. The volcanic tile set—with its red-hued rocks and dark soil—immerses players in a visually striking environment where rising waters submerge the terrain, enhancing the map’s dramatic atmosphere. Balanced for 1v1 matches, ‘Tidal Flats’ demands quick decision-making and adaptable strategies, requiring players to balance air unit production with efficient ground force deployment. While the focus on air units may pose a challenge for beginners, experienced players will appreciate the intense blend of aerial and ground combat. Success hinges on predicting the tide’s timing and producing the right forces at the right moment. Before playing, it’s crucial to scout air unit production structures and ground deployment zones while adjusting your force composition based on the tide’s rise. Flexibility is key, as you’ll need to adapt your air-to-ground unit ratio depending on your opponent’s strategy. The map’s design highlights the dominance of air power while limiting ground unit viability, offering a dynamic and engaging experience with varied strategic possibilities.
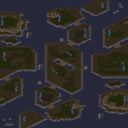
정글 랜드 (Jungle Land)
스타크래프트 브루드워의 정글 테마를 배경으로 한 1:1 밀리전 맵인 ‘Jungle Land’는 넓은 맵 곳곳에 vegetation과 지형의 고저차가 특징적인 맵으로, 중앙에 위치한 넓은 평지와 주변의 나무가 빽빽한 지역이 자연스럽게 진영을 구분짓는 구조를 가지고 있다. 초반 자원 수급은 비교적 안전하게 이루어질 수 있지만, 중앙 지역을 차지하기 위한 초반 교전이 발생할 가능성이 높아 전략의 중요성이 크다. 지형상으로는 좁은 길목을 따라 공격로가 형성되어 있어, 탱크나 골리앗 같은 대형 유닛을 동원한 진영 방어가 유리한 편이며, 저글링이나 질럿 같은 근접 유닛을 적극 활용하여 맵 장악을 노려야 한다. 또한, 맵의 여기저기에 배치된 vegetation은 시야 차단과 동시에 유닛의 진격을 방해하는 요소로 작용할 수 있어, 정찰과 시야 확보가 승패를 가를 수 있는 중요한 포인트가 된다. 이 맵은 기본적인 밀리 전략을 응용하면서도 자연 지형의 복잡성을 활용한 전투가 가능하다는 점에서 플레이어들에게 색다른 경험을 제공한다. 초보 플레이어라면 중앙 교전에서의 손실을 최소화하는 데 중점을 두고, 실력이 있는 플레이어라면 vegetation을 활용한 기습 공격이나 주변 자원 지역을 미리 확보하는 전략을 구사할 필요가 있다. 맵의 난이도는 일반적인 1:1 밀리전과 비슷하여 초보부터 숙련자까지 폭넓게 즐길 수 있지만, 지형의 복잡성 때문에 실수 한 번이 승패로 직결될 수 있으니 신중한 플레이가 요구된다. This 1:1 melee map set in a jungle-themed environment, titled 'Jungle Land,' features a vast play area with vegetation and varied terrain elevations that naturally divide the two starting bases. The central flat region and surrounding dense foliage create strategic choke points, making early resource control and map dominance crucial. The terrain favors ranged units like tanks and goliaths for defense, while melee units such as zerglings or zealots can be effective for aggressive map control. Scattered vegetation provides cover and obscures vision, adding an extra layer of strategy to scouting and engagements. Players must balance resource collection with early map control, as controlling the central area can dictate the flow of the game. Suitable for both beginners and experienced players, the map rewards careful positioning and map awareness, though its complexity means mistakes can quickly lead to defeat. Optimal play involves leveraging the terrain for ambushes or securing side resources early to gain an advantage.
![클랜 가입 [S][C][M]! (Join Clan [S][C][M]!) 맵 미리보기](https://cdn-star-data.huzy.net/thumbnail_f78e81e0345f417c9a1422df239c89f0.jpg)
클랜 가입 [S][C][M]! (Join Clan [S][C][M]!)
스타크래프트: 브루드워의 classic한 밀리전 맵 ‘Join Clan [S][C][M]!’은 8명의 플레이어가 한꺼번에 전투를 펼치는 정석적인 1:1 대결 구조를 갖추고 있다. 맵 중앙에는 넓은 개활지가 펼쳐져 있어 초반부터 치열한 전투가 벌어질 가능성이 크며, 양측 본진은 각각의 안전한 지역에 배치되어 있어 초반 러시 타이밍을 잡기 용이하다. 맵의 테두리에는 다수의 미네랄과 가스 멀티가 배치되어 있어 자원 수급 경쟁이 치열해질 수 있으며, 특히 가스가 풍부한 멀티는 후반 테크트리 확보에 중요한 역할을 할 것으로 추정된다. 사막 타일셋의 황량한 분위기가 맵의 긴장감을 더욱 고조시키며, 2048x2048의 넓은 공간 덕분에 다양한 전략과 전술이 나올 수 있는 여지가 많다. ‘Destroy all enemy buildings’를 승리 조건으로 내세운 이 맵은, 상대방의 건물을 모조리 파괴하는 것만큼 간단하고 명확한 목표가 없기 때문에 플레이어들은 끊임없이 공격과 방어를 반복해야 한다. 초보자들은 중앙 교전과 본진 방어에 주의를 기울여야 하며, 숙련자들은 멀티 확보와 테크트리 구축을 통해 상대방을 압도하는 전략을 구사해야 한다. 맵의 밸런스는 맵의 중앙 구조와 자원 분포에 따라 크게 좌우될 것으로 보이며, 특히 가스가 많은 멀티는 테란의 팩토리나 프로토스의 사이버네틱스 코어 구축에 유리할 가능성이 높다. 이 맵은 classic한 밀리전을 즐기는 플레이어들에게는 최적의 선택지가 될 것이며, 특히 팀플레이보다는 1:1 대결을 선호하는 유저들에게 추천할 만하다. 플레이 전에는 맵의 자원 분포와 중앙 교전 지점을 정확히 파악하고, 자신의 종족에 맞는 전략을 미리 준비하는 것이 중요하다. 초반에는 상대방의 움직임을 살피며 안정적으로 출발하는 것이 관건이며, 중반 이후에는 멀티 확보와 테크트리 구축을 통해 상대방을 압박하는 플레이가 필요하다. 'Join Clan [S][C][M]!' from StarCraft: Brood War is a classic melee map featuring a straightforward 1v1 structure where eight players engage in simultaneous combat. The map’s wide open central area makes early skirmishes highly likely, while each player’s main base is positioned in a secure location, allowing for easy timing of early rushes. The edges of the map are lined with multiple mineral and gas expansions, intensifying resource competition—especially the gas-rich expansions, which are crucial for securing late-game tech. The barren desert tileset heightens the map’s tense atmosphere, and its 2048x2048 scale offers ample space for diverse strategies and tactics. With a victory condition of 'Destroy all enemy buildings,' the map’s objective is as simple and clear as it gets—requiring players to constantly balance offense and defense. Beginners should focus on central clashes and defending their main bases, while experienced players can dominate by securing expansions and establishing tech trees. The map’s balance hinges heavily on its central layout and resource distribution, with gas-heavy expansions favoring Terran’s Factories or Protoss’s Cybernetics Cores. This map is an excellent choice for players who enjoy classic melees, especially those who prefer 1v1 matches over team play. Before jumping in, it’s essential to study the resource distribution and central engagement zones, tailoring your strategy to your chosen race. Early on, observe your opponent’s movements and start steadily, but as the game progresses, prioritize securing expansions and tech to pressure your foe.
피스톨 듀얼스 픽스드 (Pistol Duels Fixed)
스타크래프트 브루드워의 유즈맵 <피스톨 듀얼스 픽스드(Pistol Duels Fixed)>는 최대 8명의 플레이어가 실시간 총격전을 펼치는 1:1 대결형 맵입니다. 맵의 주된 목표는 ‘최초 20킬 달성’이지만, 그 이면에는 반응 속도와 정확한 조준 능력, 그리고 전략적 움직임이 모두 요구되는 긴장감 넘치는 전투가 펼쳐집니다. 내부 설명에서 확인할 수 있듯이 ‘반응 시간’과 ‘정확도’를 중시하는 이 맵은 마치 서부영화 속 결투장과도 같아, 플레이어들에게 신속한 판단력과 안정적인 손놀림을 동시에 요구합니다. 맵의 구조는 비교적 단순하면서도 치밀합니다. 중앙에 위치한 넓은 개활지는 플레이어들이 자유롭게 이동하며 상대방을 조준할 수 있는 공간을 제공합니다. 맵의 가장자리로 갈수록 장애물이나 엄폐물이 적어지며, 이 때문에 플레이어는 끊임없이 위치를 변경하며 시야를 확보해야 합니다. 맵의 전체적인 분위기는 밝고 개방적이지만, 개활지에서의 전투만큼이나 엄폐물을 활용한 전략적 플레이가 중요하다는 점이 특징입니다. 맵의 이름에서도 알 수 있듯이 ‘피스톨’이라는 무기의 특성상 사정거리는 짧지만, 빠른 연사력과 정확한 조준이 преимуще를 차지합니다. 이는 마치 FPS 게임의 듀얼 모드와도 흡사하여, 순간의 판단과 반응이 승리를 좌우하는 핵심 요소로 작용합니다. 이 맵은 특히 빠른 판단력과 반사신경을 요구하기 때문에 실전적인 감각을 키우고 싶거나, 타 유저들과의 경쟁에서 승부를 겨루고자 하는 플레이어들에게 적합합니다. 또한, 8인까지 동시 참여가 가능하기 때문에 친구들과의 대결이나 토너먼트 형식으로 플레이하기도 좋습니다. 다만, 맵의 특성상 초보자에게는 다소 난해할 수 있으므로, 반복된 플레이를 통해 적응하는 것이 중요합니다. 맵의 고정 버전인 ‘픽스드’는 기존의 버전보다 밸런스나 구조적인 안정성이 개선된 것으로 보이며, 이는 플레이어들에게 더욱 공정한 경쟁 환경을 제공합니다. 이 맵을 즐기기 위해서는 무엇보다도 빠른 반응 속도와 정확한 조준 능력이 필요합니다. 또한, 상대방의 움직임을 예측하고, 순간적인 판단으로 위치를 변경하는 전략적 사고가 요구됩니다. 맵의 간결한 구조는 이를 더욱 부각시키며, 플레이어들에게 끊임없는 긴장감을 선사합니다. 만약 당신이 스타크래프트의 유즈맵 중에서도 실전적인 감각과 경쟁심을 동시에 느낄 수 있는 맵을 찾고 있다면, <피스톨 듀얼스 픽스드>는 최적의 선택이 될 것입니다. 맵의 이름에서도 느껴지는 서부영화의 결투장 같은 분위기와 함께, 진정한 실력 발휘의 장으로 삼아 보시기 바랍니다. StarCraft: Brood War's custom map *Pistol Duels Fixed* is a 1v1 real-time shooter where up to eight players engage in intense gunfights. While the primary objective is to reach 20 kills first, the true challenge lies in reaction speed, precise aiming, and strategic movement, creating a high-stakes battle. As noted in the in-game description, this map emphasizes "reaction time" and "accuracy," resembling a wild west duel where quick decisions and steady hands are essential. The map's design is simple yet meticulous. A wide open central area allows players to move freely and line up shots, while the edges offer fewer obstacles, forcing constant repositioning to maintain visibility. Despite its bright, open atmosphere, the map rewards strategic use of cover just as much as direct combat. As the name suggests, the "pistol" weapon has a short range but high fire rate and accuracy, making split-second judgment and reflexes the keys to victory—much like a first-person shooter duel mode. This map is ideal for players looking to sharpen their reflexes or compete against others, thanks to its fast-paced, skill-based gameplay. With support for up to eight players, it also works well for friendly matches or tournaments. However, its mechanics may be challenging for beginners, so repeated play is key to adapting. The fixed version, *Pistol Duels Fixed*, appears to improve balance and structural stability over the original, offering a fairer competitive environment. To enjoy this map, players need sharp reflexes, precise aiming, and the ability to predict opponents' movements while quickly changing positions. The map's clean design highlights these skills, keeping players on edge. If you're searching for a Brood War custom map that blends practical combat sense with competitive spirit, *Pistol Duels Fixed* is an excellent choice. Its duel-like atmosphere, reminiscent of a western showdown, makes it the perfect arena to test your true skills.
최근 등록된 맵
새로 추가된 파일과 버전을 확인하세요.
초딩vs중딩
‘초딩vs중딩’은 스타크래프트: 브루드워의 유즈맵으로, 서로 다른 두 층위의_BASE_에서 펼쳐지는 흥미로운 대결을 제공한다. 맵의 구조는 위쪽과 아래쪽 각각의 구역이 독립적으로 구성되어 있어, 초딩과 중딩이 각각 자신의 영역을 지키며 상대의 공격을 방어하거나 침략을 시도하는 방식으로 진행된다. 위쪽의 초딩 구역과 아래쪽의 중딩 구역은 중앙 통로로 연결되어 있으며, 이 통로를 통해 양측의 유닛들이 교전할 수 있다. 맵의 특징은 두 구역이 완전히 분리되어 있지 않다는 점으로, 중앙 통로 주변의 좁은 길목을 두고 치열한 접전이 벌어진다. 플레이어는 자신의 구역에서 자원을 확보하고 유닛을 생산한 뒤, 중앙 통로를 통해 상대방의 구역으로 진출하거나 방어선을 구축해야 한다. 특히, 중앙 통로의 좁은 길목은 전략적 요충지로, 이곳에서의 전투는 맵의 승패를 좌우할 수 있다. 초딩과 중딩의 대결이라는 컨셉 덕분에 게임은 단순히 공격과 방어에 그치지 않고, 상대방의 전략을 예측하고 대응하는 심리전이 중요한 요소로 작용한다. 초보자도 쉽게 접근할 수 있는 직관적인 조작감과 함께, 경험이 쌓일수록 더 깊이 있는 전략을 요구하는 점도 매력적이다. 이 맵은 특히 팀플레이가 강제되지 않으며, 1:1 또는 2:2, 4:4 등 다양한 인원수로 즐길 수 있어 파티 플레이에서도 인기다. 그러나 중앙 통로의 좁은 길목이 bottleneck이 될 수 있어, 이를 어떻게 활용하느냐가 관건이다. 또한, 구역별로 자원 분배가 균등하지 않을 가능성이 있어, 초반 자원 확보 전략이 중요하다. 초딩과 중딩의 대결이라는 독특한 설정 덕분에, 단순히 디펜스나 공격만을 넘어서 재미있는 스토리성도 느낄 수 있다. 이 맵을 즐기기 위해서는 중앙 통로의 통제권을 놓고 벌어지는 치열한 공방전을 숙지하고, 자신의 구역과 상대 구역의 특성을 잘 이해하는 것이 중요하다. 초보자도 쉽게 즐길 수 있지만, 숙련자라면 더 섬세한 전략을 구사할 여지가 많아진다. 특히, 유닛의 생산 타이밍과 중앙 통로의 방어선을 어떻게 구축할지가 승패를 가르는 핵심 포인트다. 이 맵은 디펜스와 공격의 균형을 맞추는 재미와 함께, 상대방의 움직임을 예측하는 재미까지 더해져 스타크래프트 유즈맵의 정석을 느낄 수 있는 작품이다. ‘초딩vs중딩’ is a StarCraft: Brood War custom map where two opposing sides battle across different levels of a BASE. The map is structured with separate upper and lower zones, allowing 초딩 (novices) and 중딩 (intermediates) to defend their own territories while attacking or invading the opponent’s. The upper and lower sections are connected by a central corridor, where most clashes occur due to the tight bottleneck around it. Players gather resources, produce units in their zones, and either push through the corridor to attack or fortify defenses. The narrow passage in the center is a critical strategic point, often deciding the match’s outcome. Thanks to its 초딩 vs. 중딩 concept, the game goes beyond simple offense and defense, requiring players to anticipate and counter the opponent’s strategies—a key psychological element. The intuitive controls make it accessible for beginners, while deeper strategies emerge as players gain experience. The map supports various player counts (1v1, 2v2, 4v4) and doesn’t force team play, making it popular for group sessions. However, the bottleneck in the corridor can create traffic issues, so managing it effectively is crucial. Uneven resource distribution between zones also means early resource-gathering strategies matter. The unique premise adds a fun narrative layer beyond pure defense or attack. To excel, players must master the central corridor’s control, understand their own and the opponent’s zone traits, and time unit production and defensive setups carefully. While easy to pick up, skilled players can refine their tactics for greater depth. Balancing defense and offense while predicting the opponent’s moves makes this a quintessential StarCraft custom map experience.
STF - Opposition
STF - Opposition는 스타크래프트 브루드워의 밸런스형 1:1 밀리 맵으로, symmetrical(대칭) 구조를 기반으로 한 symmetrical 디자인(대칭 구조)이 특징입니다. 맵 중앙을 기준으로 양측이 거의 동일한 지형을 공유하고 있지만, 세부적인 언덕과 언덕 사이의 통로 배치, 미네랄과 가스 위치가 미묘하게 달라 각 플레이어의 전략적 선택지를 제한하고 있습니다. 이런 구조는 양측의 공격과 수비 위치를 자연스럽게 결정짓게 하며, 맵의 이름 'Opposition'이 보여주듯 상대방과 대립하는 입장 차이를 극대화합니다. 특히 양쪽의 언덕 지형이 서로를 바라보는 형태로 배치되어 있어, 초반 러시 타이밍과 기지 방어 라인을 플레이어의 선호도에 따라 유연하게 선택할 수 있도록 설계되었습니다. 미네랄과 가스의 균형도 적절히 맞춰져 있어, 자원 관리와 멀티 태스킹을 중시하는 플레이어에게는 전략적 깊이를 더해줍니다. 다만, symmetrical 구조임에도 불구하고 일부 통로의 폭이 좁아 테란의 배럭 러시나 저그의 러커 전략 등 특정 종족의 강세가 두드러질 가능성이 있으며, 이는 맵의 밸런스를 맞추기 위한 의도된 디자인으로 보입니다. 초보 플레이어는 이러한 구조적 특징을 잘 이해하지 못해 일방적인 공격을 당하기 쉬우며, 고수 층에서는 symmetrical 맵의 특성을 활용한 심리전과 타이밍 러시가 빈번히 등장할 것으로 예상됩니다. 전반적으로 symmetrical 밸런스형 1:1 맵을 선호하는 유저들에게 강력히 추천할 만한 작품입니다. 플레이 전에는 자신의 선호하는 종족과 전략 스타일을 고려해, 맵의 양측 언덕 지형과 통로 폭을 미리 분석해 두는 것이 좋습니다. 또한 symmetrical 맵의 특성상, 상대방의 전략을 빠르게 읽고 대응하는 능력이 중요하므로, 다양한 빌드 오더를 연습해 둔 상태라면 더 큰 재미를 느낄 수 있을 것입니다. STF - Opposition is a balanced 1:1 melee map for StarCraft: Brood War, built around a symmetrical design that ensures both players share nearly identical terrain. The subtle differences in mineral and gas placement, as well as the arrangement of hills and pathways, subtly restrict strategic choices, forcing players to adapt their attack and defense positions naturally. The map's title 'Opposition' reflects this dynamic, highlighting the contrasting roles each player must adopt. The hill placements are strategically angled to face each other, allowing flexibility in early rush timing and base defense lines depending on player preference. The balance of resources is also well-tuned, adding depth to resource management and multitasking gameplay. However, despite its symmetry, certain pathways are narrow enough to favor specific strategies like Terran's Barracks rush or Zerg's Lurker tactics, which may influence the map's balance. This appears to be an intentional design choice to create a dynamic playing field. Beginner players may struggle due to the structural nuances, while advanced players will likely engage in psychological warfare and timing rushes common in symmetrical maps. Overall, this is a highly recommended map for players who enjoy balanced 1:1 symmetrical melee maps. Before playing, it's advisable to analyze the map's hills, pathways, and resource layouts to align with your preferred race and strategy. Given the nature of symmetrical maps, the ability to quickly read and counter your opponent's strategy is crucial—practicing diverse build orders will enhance your experience.
고나 다이 (Gonna Die)
스타크래프트: 브루드워의 유즈맵 «Gonna Dieeeeee»는 이름 그대로의 직설적인 재미를 담은 컴까기 장르의 맵입니다. 내부 설명처럼 적의 건물을 모두 파괴하는 것이 목표인 이 맵은, 사실상 밀리 맵으로 분류되어 있지만 실상은 두 플레이어가 각자의 기지를 지키며 끊임없이 몰려드는 적 유닛을 상대하는 이른바 ‘컴퓨터 상대 유즈맵’에 가깝습니다. 맵 중앙에는 넓은 평지가 펼쳐져 있어 유닛들이 자연스럽게 교전할 수 있는 구조로, 초보자와 숙련자 모두에게 공평한 전투가 가능하도록 설계되었습니다. 다만, 맵의 이름은 다소 도발적이지만 실제 플레이에서는 전략과 컨트롤이 중요한 정석적인 디펜스 형식이기 때문에, 이름만 보고 무작정 접근하기보다는 맵의 특성을 이해한 후 플레이하는 것이 좋습니다. 주요 특징으로는, 사막 타일셋을 기반으로 한 황량한 지형이 시각적으로 긴장감을 조성한다는 점입니다. 플레이어는 각자 2~3개의 mineral field를 확보한 채 시작하며, 초기 자원은 제한적이지만 적 기지의 건물을 파괴할수록 추가 자원이 제공되어 전선이 유지됩니다. 맵의 중앙부는 넓은 개활지로, 유닛들이 움직이기 편리하지만 반대로 적의 공격을 받기 쉬운 위치이기도 합니다. 따라서, 초반에는 방어에 치중하되, 중앙 지역을 장악하거나 기습 공격을 통해 상대의 건설로봇을 제거하는 플레이가 권장됩니다. 특히, 테란의 경우 벙커링이나 마린 물량을, 저그의 경우 러커나 히드라리스크 조합을, 프로토스의 경우 질럿과 드라군 위주의 조합을 활용하는 것이 효과적일 것으로 추정됩니다. 이 맵은 1:1 전투에 최적화되어 있지만, 팀플레이가 불가능한 구조는 아니므로 두 플레이어 간의 심리전이 상당히 중요합니다. 또한, 맵의 난이도는 플레이어의 실력에 따라 크게 달라질 수 있어, 초보자는 방어 위주의 플레이를, 숙련자는 공격과 방어의 밸런스를 맞춰 플레이하는 것이 좋습니다. 마지막으로, 맵의 이름은 다소 자극적이지만 실제 플레이에서는 상대방을 압박하는 전술적 재미가 핵심이라는 점을 잊지 말아야 합니다. Gonna Dieeeeee is a Computer vs. Player (compkagi) style custom map for StarCraft: Brood War that lives up to its provocative name. Unlike a traditional Melee map, this title focuses on survival against waves of AI-controlled enemy units while destroying the opponent’s buildings. The map features a vast central plain surrounded by mineral fields, allowing for dynamic unit clashes in a desert-themed setting. The minimalist design emphasizes strategy and unit control, making it accessible to both beginners and experienced players. The gameplay revolves around securing resources—typically two to three mineral patches per player—while fending off enemy forces that spawn periodically. The open terrain in the center encourages aggressive pushes or tactical retreats, depending on the player’s race and composition. Terran players might benefit from bunkers or Marine drops, Zergs can exploit Hydralisks and Zerglings, and Protoss could rely on Zealots and Dragoons for early pressure. The map’s balance is highly skill-dependent; beginners should prioritize defense, while advanced players can experiment with timing attacks and map control. Despite its aggressive name, the core enjoyment comes from outmaneuvering the AI and opponent in a structured yet unpredictable environment. The desert tileset adds a layer of visual tension, enhancing the overall intensity of the match.
피스톨 듀얼스 픽스드 (Pistol Duels Fixed)
스타크래프트 브루드워의 유즈맵 <피스톨 듀얼스 픽스드(Pistol Duels Fixed)>는 최대 8명의 플레이어가 실시간 총격전을 펼치는 1:1 대결형 맵입니다. 맵의 주된 목표는 ‘최초 20킬 달성’이지만, 그 이면에는 반응 속도와 정확한 조준 능력, 그리고 전략적 움직임이 모두 요구되는 긴장감 넘치는 전투가 펼쳐집니다. 내부 설명에서 확인할 수 있듯이 ‘반응 시간’과 ‘정확도’를 중시하는 이 맵은 마치 서부영화 속 결투장과도 같아, 플레이어들에게 신속한 판단력과 안정적인 손놀림을 동시에 요구합니다. 맵의 구조는 비교적 단순하면서도 치밀합니다. 중앙에 위치한 넓은 개활지는 플레이어들이 자유롭게 이동하며 상대방을 조준할 수 있는 공간을 제공합니다. 맵의 가장자리로 갈수록 장애물이나 엄폐물이 적어지며, 이 때문에 플레이어는 끊임없이 위치를 변경하며 시야를 확보해야 합니다. 맵의 전체적인 분위기는 밝고 개방적이지만, 개활지에서의 전투만큼이나 엄폐물을 활용한 전략적 플레이가 중요하다는 점이 특징입니다. 맵의 이름에서도 알 수 있듯이 ‘피스톨’이라는 무기의 특성상 사정거리는 짧지만, 빠른 연사력과 정확한 조준이 преимуще를 차지합니다. 이는 마치 FPS 게임의 듀얼 모드와도 흡사하여, 순간의 판단과 반응이 승리를 좌우하는 핵심 요소로 작용합니다. 이 맵은 특히 빠른 판단력과 반사신경을 요구하기 때문에 실전적인 감각을 키우고 싶거나, 타 유저들과의 경쟁에서 승부를 겨루고자 하는 플레이어들에게 적합합니다. 또한, 8인까지 동시 참여가 가능하기 때문에 친구들과의 대결이나 토너먼트 형식으로 플레이하기도 좋습니다. 다만, 맵의 특성상 초보자에게는 다소 난해할 수 있으므로, 반복된 플레이를 통해 적응하는 것이 중요합니다. 맵의 고정 버전인 ‘픽스드’는 기존의 버전보다 밸런스나 구조적인 안정성이 개선된 것으로 보이며, 이는 플레이어들에게 더욱 공정한 경쟁 환경을 제공합니다. 이 맵을 즐기기 위해서는 무엇보다도 빠른 반응 속도와 정확한 조준 능력이 필요합니다. 또한, 상대방의 움직임을 예측하고, 순간적인 판단으로 위치를 변경하는 전략적 사고가 요구됩니다. 맵의 간결한 구조는 이를 더욱 부각시키며, 플레이어들에게 끊임없는 긴장감을 선사합니다. 만약 당신이 스타크래프트의 유즈맵 중에서도 실전적인 감각과 경쟁심을 동시에 느낄 수 있는 맵을 찾고 있다면, <피스톨 듀얼스 픽스드>는 최적의 선택이 될 것입니다. 맵의 이름에서도 느껴지는 서부영화의 결투장 같은 분위기와 함께, 진정한 실력 발휘의 장으로 삼아 보시기 바랍니다. StarCraft: Brood War's custom map *Pistol Duels Fixed* is a 1v1 real-time shooter where up to eight players engage in intense gunfights. While the primary objective is to reach 20 kills first, the true challenge lies in reaction speed, precise aiming, and strategic movement, creating a high-stakes battle. As noted in the in-game description, this map emphasizes "reaction time" and "accuracy," resembling a wild west duel where quick decisions and steady hands are essential. The map's design is simple yet meticulous. A wide open central area allows players to move freely and line up shots, while the edges offer fewer obstacles, forcing constant repositioning to maintain visibility. Despite its bright, open atmosphere, the map rewards strategic use of cover just as much as direct combat. As the name suggests, the "pistol" weapon has a short range but high fire rate and accuracy, making split-second judgment and reflexes the keys to victory—much like a first-person shooter duel mode. This map is ideal for players looking to sharpen their reflexes or compete against others, thanks to its fast-paced, skill-based gameplay. With support for up to eight players, it also works well for friendly matches or tournaments. However, its mechanics may be challenging for beginners, so repeated play is key to adapting. The fixed version, *Pistol Duels Fixed*, appears to improve balance and structural stability over the original, offering a fairer competitive environment. To enjoy this map, players need sharp reflexes, precise aiming, and the ability to predict opponents' movements while quickly changing positions. The map's clean design highlights these skills, keeping players on edge. If you're searching for a Brood War custom map that blends practical combat sense with competitive spirit, *Pistol Duels Fixed* is an excellent choice. Its duel-like atmosphere, reminiscent of a western showdown, makes it the perfect arena to test your true skills.
브레이브하트 캐슬 어썰트 (Braveheart Castle Assault)
브레이브하트 캐슬 어썰트는 스타크래프트 브루드워의 유즈맵으로, 스코틀랜드와 잉글랜드의 역사적 대립을 배경으로 한 전략 디펜스 장르의 맵이다. 맵은 거대한 성곽과 중앙 평야로 나뉘어 있으며, 스코틀랜드 플레이어는 성곽 내부에서, 잉글랜드 플레이어는 외부에서 시작하는 구조로 보인다. 성곽 중앙에는 거대한 성문이 있어, 잉글랜드가 스코틀랜드를 공격하거나 스코틀랜드가 방어할 때 중요한 전략 지점이 될 것이다. 맵 상단과 하단에 각각의 본진 건물이 배치되어 있으며, 성곽 주변으로는 언덕과 숲이 배치되어 있어 시야 확보와 기습 공격에 영향을 미칠 것으로 추정된다. 이 맵은 컴까기(컴퓨터 상대 유즈맵) 방식으로 진행되며, 스코틀랜드 플레이어는 윌리엄 월레스를, 잉글랜드 플레이어는 왕을 처치하는 것이 목표로 보인다. 맵의 symmetrical한 구조와 중앙 성문은 밀고 당기는 전투를 유도할 것이며, 플레이어는 자원 관리와 병력 운용뿐 아니라 지형의 이점을 활용해야 할 것이다. 특히 성곽 내외의 시야 차이는 전술적 우위를 결정짓는 중요한 요소로 작용할 것으로 보인다. 초보자보다는 중간 이상의 실력을 가진 플레이어에게 어울리며, 역사적 테마와 전략적 깊이가 결합된 점이 이 맵의 주요 특징이다. 플레이 전에는 맵의 symmetrical한 구조와 중앙 성문의 역할, 언덕과 숲의 배치 등을 미리 숙지하는 것이 중요하다. 또한, 각 진영의 목표와 승리 조건을 명확히 이해하고, 자원 운영과 병력 조합을 신중히 계획해야 한다. 특히, 성곽 내외의 시야 차이를 활용한 기습 공격과 방어 전략을 연습한다면 더 좋은 결과를 얻을 수 있을 것이다. 이 맵은 역사적 테마와 전략적 깊이가 결합된 유즈맵으로, 전략 디펜스와 컴까기 장르를 좋아하는 플레이어들에게 추천할 만하다. 특히, 팀플레이보다는 1:1 또는 2:2 이상의 팀전 형식으로 플레이하는 것이 더 흥미로울 것으로 보인다. Braveheart Castle Assault is a StarCraft: Brood War custom map that reimagines the historical rivalry between Scotland and England as a strategic defense game. The map features a massive castle fortress divided into an inner stronghold and an outer plain, with the Scots starting inside the walls and the English outside. A central gate dominates the battlefield, serving as a critical choke point for both attack and defense. This map is designed as a computer opponent-style UMS (Use Map Settings) game, where Scottish players must defeat William Wallace and English players must eliminate the King. The symmetrical layout and central gate encourage back-and-forth battles, requiring players to manage resources, deploy forces strategically, and leverage terrain advantages. The elevation and forest placement around the fortress will impact vision control and ambush tactics, making positioning a key factor in success. Players should familiarize themselves with the symmetrical design, the role of the central gate, and the strategic importance of high-ground positions before jumping in. Understanding each faction's objectives—Scottish players must protect Wallace while the English aim to slay the King—is essential. Resource management and troop composition planning are crucial, especially when considering the vision disparities between the inner and outer zones of the fortress. This map blends historical themes with deep strategic gameplay, making it ideal for fans of strategy defense and computer opponent custom maps. It works best in 1v1 or team-based formats like 2v2, where tactical coordination and map control can shine.
데저트 스나이핑 언리미티드 (Desert Sniping Unlimited)
스타크래프트 브루드워의 유즈맵 classic Desert Sniping의 후속작으로, 사막 한가운데에서 저격수 한 명으로 적을 섬멸하고 깃발을 점령하는 재미가 있는 맵이다. 맵의 전체적인 배경은 사막으로 구성되어 있으며, 중앙에 넓은 개활지가 있어 저격전이 벌어지기 좋은 환경을 제공한다. 맵 곳곳에는 바위와 언덕이 배치되어 있어 엄폐물로 활용할 수 있으며, 이 지형을 활용해 적의 시야에서 벗어나거나 우회 공격이 가능하다. 플레이어는 시작 지점에서 저격소총을 장착한 채로 출발하며, 적을 사살하거나 적의 깃발을奪取하는 두 가지 목표를 달성해야 한다. 깃발은 맵의 네 귀퉁이에 위치한 기지 내부에 위치하고 있으며, 이를奪取하는 데 성공하면 일정 시간 동안 아군의 기지에서 보호받을 수 있다. 또한, 적의 공격을 피해가며 아군의 기지로 깃발을 운반하는 전략적 선택도 중요하다. 맵의 난이도는 플레이어의 시야 관리와 엄폐물의 활용 여부에 따라 크게 달라지며, 초보자의 경우 적의 저격에 쉽게 노출될 수 있어 주의가 필요하다. 반면 숙련된 플레이어는 지형을 적극 활용해 우위를 점할 수 있다. 이 맵은 1:1 저격 대결부터 6인까지의 팀전까지 다양한 방식으로 즐길 수 있으며, 특히 4인 이상의 팀전에서는 팀워크와 역할 분담이 victoria에 큰 영향을 미친다. 맵의 특징인 ‘Must have players 1 and 4!!!’라는 문구는 내부 설명에 포함되어 있어, 1번과 4번 플레이어의 역할이 특히 중요함을 암시한다. 따라서 이들을 중심으로 전략을 짜는 것이 게임의 승률을 높이는 열쇠가 될 것이다. This StarCraft: Brood War custom map is a sequel to the classic Desert Sniping, offering an engaging experience where players control a sniper to eliminate enemies and capture the enemy flag in a desert setting. The map features a vast open central area ideal for sniper battles, with scattered rocks and hills providing cover for strategic maneuvers. Players spawn with a sniper rifle and must either eliminate opponents or seize the flag located in corners of the map. Successfully capturing the flag grants temporary protection in the team’s base, but transporting it safely back requires careful navigation and tactical use of terrain. Difficulty hinges on effective use of cover and vision control, with beginners often struggling against enemy snipers. Skilled players, however, can leverage the map’s layout to dominate. The map supports various formats, from 1v1 sniper duels to team battles with up to 6 players, where teamwork and role assignment—especially for players 1 and 4—are crucial for victory, as hinted by the internal note: ‘Must have players 1 and 4!!!’.
클랜 가입 [S][C][M]! (Join Clan [S][C][M]!)
스타크래프트: 브루드워의 classic한 밀리전 맵 ‘Join Clan [S][C][M]!’은 8명의 플레이어가 한꺼번에 전투를 펼치는 정석적인 1:1 대결 구조를 갖추고 있다. 맵 중앙에는 넓은 개활지가 펼쳐져 있어 초반부터 치열한 전투가 벌어질 가능성이 크며, 양측 본진은 각각의 안전한 지역에 배치되어 있어 초반 러시 타이밍을 잡기 용이하다. 맵의 테두리에는 다수의 미네랄과 가스 멀티가 배치되어 있어 자원 수급 경쟁이 치열해질 수 있으며, 특히 가스가 풍부한 멀티는 후반 테크트리 확보에 중요한 역할을 할 것으로 추정된다. 사막 타일셋의 황량한 분위기가 맵의 긴장감을 더욱 고조시키며, 2048x2048의 넓은 공간 덕분에 다양한 전략과 전술이 나올 수 있는 여지가 많다. ‘Destroy all enemy buildings’를 승리 조건으로 내세운 이 맵은, 상대방의 건물을 모조리 파괴하는 것만큼 간단하고 명확한 목표가 없기 때문에 플레이어들은 끊임없이 공격과 방어를 반복해야 한다. 초보자들은 중앙 교전과 본진 방어에 주의를 기울여야 하며, 숙련자들은 멀티 확보와 테크트리 구축을 통해 상대방을 압도하는 전략을 구사해야 한다. 맵의 밸런스는 맵의 중앙 구조와 자원 분포에 따라 크게 좌우될 것으로 보이며, 특히 가스가 많은 멀티는 테란의 팩토리나 프로토스의 사이버네틱스 코어 구축에 유리할 가능성이 높다. 이 맵은 classic한 밀리전을 즐기는 플레이어들에게는 최적의 선택지가 될 것이며, 특히 팀플레이보다는 1:1 대결을 선호하는 유저들에게 추천할 만하다. 플레이 전에는 맵의 자원 분포와 중앙 교전 지점을 정확히 파악하고, 자신의 종족에 맞는 전략을 미리 준비하는 것이 중요하다. 초반에는 상대방의 움직임을 살피며 안정적으로 출발하는 것이 관건이며, 중반 이후에는 멀티 확보와 테크트리 구축을 통해 상대방을 압박하는 플레이가 필요하다. 'Join Clan [S][C][M]!' from StarCraft: Brood War is a classic melee map featuring a straightforward 1v1 structure where eight players engage in simultaneous combat. The map’s wide open central area makes early skirmishes highly likely, while each player’s main base is positioned in a secure location, allowing for easy timing of early rushes. The edges of the map are lined with multiple mineral and gas expansions, intensifying resource competition—especially the gas-rich expansions, which are crucial for securing late-game tech. The barren desert tileset heightens the map’s tense atmosphere, and its 2048x2048 scale offers ample space for diverse strategies and tactics. With a victory condition of 'Destroy all enemy buildings,' the map’s objective is as simple and clear as it gets—requiring players to constantly balance offense and defense. Beginners should focus on central clashes and defending their main bases, while experienced players can dominate by securing expansions and establishing tech trees. The map’s balance hinges heavily on its central layout and resource distribution, with gas-heavy expansions favoring Terran’s Factories or Protoss’s Cybernetics Cores. This map is an excellent choice for players who enjoy classic melees, especially those who prefer 1v1 matches over team play. Before jumping in, it’s essential to study the resource distribution and central engagement zones, tailoring your strategy to your chosen race. Early on, observe your opponent’s movements and start steadily, but as the game progresses, prioritize securing expansions and tech to pressure your foe.
The Grid 1.1a (그리드 1.1a)
스타크래프트 브루드워의 고전 밀리 맵으로 유명한 'The Grid 1.1a'는 8명의 플레이어가 각자의 자원을 확보한 뒤 중앙의 넓은 평원에서 전투를 펼치는 구조를 가지고 있다. 맵의 특징은 중앙 광장과 이를 둘러싼 8개의 시작 위치가 깔끔한 대칭형으로 배치되어 있어 초보자와 숙련자 모두에게 공정한 전투를 제공한다는 점이다. 맵 중앙에는 광물 지대와 가스 기지가 배치되어 있어 자원 확보 경쟁이 치열해지며, 이로 인해 빠른 mineral gathering과 strategic gas control이 승리의 핵심 요소로 작용한다. 맵의 지형은 비교적 평평하여 이동 방해 요소가 적지만, 일부 시작 지점 주변의 언덕은 시야 확보와 초기 방어에 유리한 위치를 제공한다. 전투 시에는 중앙에서 마주치는 대규모 교전이 빈번하게 발생하며, 이로 인해 빠른 병력 생산과 효율적인 컨트롤이 요구된다. 특히 테란의 경우, 초기 SCV 생산과 베럭-팩토리-스타포트 체제를 빠르게 구축하여 중앙을 장악하는 것이 중요하며, 저그의 경우 초반 러시 방어와speedling skirmish를 통한 이득 창출이 승률을 좌우한다. 프로토스의 경우, 빠른 넥서스 확장을 바탕으로 다수의 질럿과 드라군을 배치하여 중앙을 장악하는 전략이 유효하다. 맵의 밸런스는 대체로 공정한 편이지만, 특정 종족의 특성과 맵의 대칭성 덕분에 누가 유리하다고 단정 짓기는 어려운 편이다. 이 맵은 1:1 밀리 매치에서 주로 사용되며, 중앙 교전을 통한 전술적 판단과micro management가 승부를 가르는 주요 포인트다. 초보자에게는 맵의 대칭성과 평범한 지형 덕분에 적응이 용이하지만, 숙련자들에게는 중앙에서의 빠른 교전과 효율적인 자원 운용이 관건이 된다. 따라서 이 맵을 플레이하기 전에는 각 종족별로 초반 빌드와 중앙 교전 전략을 숙지하는 것이 중요하다. 또한, 맵의 넓이가 넓기 때문에 시야 확보와 정찰을 소홀히 하지 않도록 주의해야 한다. 이 맵은 스타크래프트의 고전 밀리 맵답게 오랜 시간 동안 많은 플레이어들에게 사랑받아 왔으며, 그 안정적인 밸런스와 명확한 승리 조건 덕분에 지금도 정기적으로 플레이되고 있다. "The Grid 1.1a" is a classic Brood War melee map famous for its eight-player setup, where players secure their own resources before engaging in combat across a wide central battlefield. The map’s design features a clean symmetrical layout, with eight starting positions evenly spaced around a central plaza, ensuring fair conditions for both beginners and veterans. At the heart of the map lie mineral fields and gas geysers, making resource control a high-stakes race where efficient mineral gathering and strategic gas management can decide the match. The terrain is mostly flat, minimizing movement obstacles, though small hills near certain starting points provide early scouting and defensive advantages. Battles often culminate in large-scale clashes in the center, demanding quick unit production and precise micro-management. For Terran, establishing a fast Barracks-Factory-Starport build order to seize the center is crucial, while Zerg must focus on early rush defense and leveraging speedlings for early-game advantages. Protoss players benefit from rapid Nexus expansions, fielding Zealots and Dragoons to dominate the central area. While the map’s symmetry and balance make it fair overall, no single race holds a definitive advantage due to the varied strengths each brings. Primarily used in 1v1 melee matches, the map rewards tactical decision-making and micro in central engagements. Beginners appreciate its straightforward symmetry and terrain, while advanced players must master quick engagements and resource optimization. Before playing, it’s essential to study each race’s early builds and central combat strategies. Given the map’s size, maintaining scouting and vision control is also critical. A timeless classic in Brood War’s melee scene, "The Grid 1.1a" remains popular for its stable balance and clear win conditions, continuing to see regular play decades after its release.
맵 선택 가이드
태그는 맵의 핵심 특징을 빠르게 설명하지만 제작 버전마다 규칙이 다를 수 있습니다. 상세 설명에서 권장 인원, 난이도, 플레이 시간과 버전을 함께 확인한 뒤 다운로드하세요.