
히드라리스크 스타크래프트 맵 모음
'히드라리스크' 태그가 등록된 맵을 모았습니다. 장르 하나로 찾기 어려운 플레이 방식, 난이도와 특징을 중심으로 인기 맵과 최신 맵을 비교해 보세요.
- 등록 맵
- 22개
- 누적 다운로드
- 7
- 누적 조회
- 1,499
인기 맵
다운로드와 조회 반응이 높은 맵입니다.
히드라2000부대막기HELL
‘히드라2000부대막기HELL’은 스타크래프트 브루드워의 유즈맵으로, 디펜스(방어) 장르에 속하는 맵입니다. 맵 제목에서 알 수 있듯이 히드라리스크 2,000마리의 공격을 방어하는 것이 주요 목표로 보입니다. 맵의 구조는 중앙에 위치한 플레이어 기지 주변으로 적의 공격로가 형성되어 있으며, 다수의 히드라리스크가 끊임없이 몰려오는 방식으로 진행됩니다. 맵 상단과 하단에 위치한 방어 건물과 유닛 배치로 인해 방어 라인이 여러 층으로 나뉘어 있어 전략적인 대처가 요구됩니다. 히드라리스크의 물량과 지속적인 공격 패턴은 플레이어에게 끊임없는 압박을 가하며, 이를 효과적으로 방어하기 위해서는 자원 관리와 유닛 배치, 그리고 타이밍을 잘 조절해야 합니다. 맵의 분위기는 치열한 전투와 방어전이 주를 이뤄, 긴장감 넘치는 플레이 경험을 제공합니다. 초보자의 경우 방어 라인을 쉽게 무너뜨릴 수 있으므로, 게임의 난이도를 고려하여 충분한 연습이 필요할 것으로 보입니다. 또한, 맵의 크기가 2048x3072로 비교적 넓은 편이어서, 넓은 시야를 활용한 전략적 플레이가 중요할 것으로 보입니다. 이 맵은 히드라리스크의 물량전에 도전하고자 하는 플레이어들에게 흥미로운 경험을 제공할 것입니다. 다만, 히드라리스크의 공격을 효과적으로 방어하기 위해서는 최소한의 방어 건물과 유닛 생산 능력이 요구되며, 자원의 효율적 사용이 관건이 될 것입니다. 따라서, 이 맵을 즐기기 전에 방어 전략과 자원 관리, 그리고 유닛 조합에 대한 이해가 필요한 만큼, 초보자의 경우 난이도가 다소 높을 수 있습니다. 플레이 전, 맵의 구조와 방어 라인을 미리 숙지하고, 히드라리스크의 공격 패턴을 분석하는 것이 중요합니다. 또한, 방어 건물의 배치와 업그레이드, 그리고 보조 유닛의 사용 여부를 신중히 결정해야 합니다. 이 맵은 방어전이라는 장르의 특성을 살려, 플레이어의 전략적 사고와 긴장감을 동시에 자극하는 재미있는 유즈맵으로 평가됩니다. 히드라리스크의 공격을 성공적으로 방어하고 나면 성취감을 느낄 수 있을 것입니다. ‘Hydra 2000 Squad Defense HELL’ is a custom map in *StarCraft: Brood War* that falls under the defense (tower defense) genre. As the name suggests, the main objective appears to be defending against an onslaught of 2,000 Hydralisks. The map’s structure features enemy attack paths surrounding the player’s base in the center, with waves of Hydralisks continuously swarming in. Multiple defensive layers are created by the placement of defensive structures and units at the top and bottom of the map, requiring strategic responses. The sheer number of Hydralisks and their relentless attack patterns create constant pressure, demanding careful resource management, unit positioning, and precise timing to defend effectively. The map’s atmosphere is dominated by intense battles and defensive warfare, delivering a tense and engaging gameplay experience. For beginners, the defensive lines can be easily overwhelmed, so sufficient practice is necessary given the map’s difficulty. Additionally, with a size of 2048x3072, the map is relatively large, making strategic play that leverages a wide field of view crucial. This map offers an exciting challenge for players looking to test their defenses against a massive Hydralisk swarm. However, to effectively counter the Hydralisk attacks, a minimum level of defensive structures and unit production is required, with efficient resource use being key. Thus, prior understanding of defense strategies, resource management, and unit compositions is essential before enjoying this map, which may present a higher difficulty for newcomers. Before playing, it’s important to familiarize yourself with the map’s structure and defensive lines and analyze the Hydralisk attack patterns. You must also carefully decide on the placement and upgrades of defensive buildings, as well as whether to use auxiliary units. By capturing the essence of the defense genre, this custom map stimulates both strategic thinking and tension, making it a fun experience. Successfully defending against the Hydralisk assault will leave you with a strong sense of accomplishment.
Hydralisk Attack 20,001+
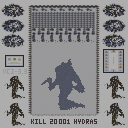
'히드라리스크 어택 20,001+'는 제목 그대로 2만 마리가 넘는 히드라리스크가 몰려오는 압도적인 규모의 디펜스 유즈맵입니다. 플랫폼 타일셋 위에 펼쳐진 128×128 타일의 광활한 맵에서 최대 7명의 플레이어가 협력해 밀려드는 저그 병력을 막아내는 것이 핵심입니다. 내부 설명에 따르면 이지·노말·하드 세 가지 난이도 모드와 추가 사운드, 여러 기능이 포함되어 있어 숙련도별 도전이 가능합니다. 맵 크기가 4096×4096 픽셀로 매우 넓어 기지 배치와 병력 이동 경로를 전략적으로 설계해야 하며, 히드라리스크의 원거리 공격을 견딜 방어선 구축이 승부를 가릅니다. 트리거로 구현된 웨이브 시스템이 점진적으로 난이도를 높이며, 후반부에는 수만 기 유닛이 동시에 등장해 프레임 드랍과 마이크로 컨트롤 양쪽을 시험합니다. 협동 디펜스 특유의 역할 분담과 자원 공유가 중요하므로 팀원 간 소통이 잘 되는 그룹에게 적합합니다. 플레이 전에는 버전 표시가 'VCI 3.3 (beta)'인 점을 확인하고, 최신 패치 여부와 호환성을 체크하는 것이 좋습니다. 대규모 유닛 처리와 웨이브 생존의 쾌감을 원하는 유저에게 추천합니다. 'Hydralisk Attack 20,001+' is a massive defense UMS map where over 20,000 Hydralisks swarm the players, just as the title suggests. On a vast 128×128 tile map built on the Platform tileset, up to seven players cooperate to hold back the endless Zerg forces. The internal description notes Easy, Normal, and Hard difficulty modes, custom sounds, and additional features, allowing challenges tailored to skill level. The enormous 4096×4096 pixel map demands strategic base placement and troop routing, while building a defensive line capable of withstanding the Hydralisks' ranged attacks is the key to victory. A trigger-based wave system gradually ramps up difficulty, and in the late game tens of thousands of units appear simultaneously, testing both frame-rate stability and micro control. Since role assignment and resource sharing are crucial in cooperative defense, this map suits groups with good communication. Before playing, verify the version marked 'VCI 3.3 (beta)' and check for latest patches or compatibility issues. Recommended for users seeking the thrill of massive unit management and wave survival.
![[EUD] 히드라2000부대막기_EX 맵 미리보기](https://cdn-star-data.huzy.net/thumbnail_0cd40c8e9d7745ad8a0a6ebaa8401744.jpg)
[EUD] 히드라2000부대막기_EX
스타크래프트 브루드워의 유즈맵 중 하나인 '[EUD] 히드라2000부대막기_EX'는 디펜스 장르에 속하는 맵으로, 플레이어는 끊임없이 몰려오는 적 유닛을 막아내야 하는 구조를 가지고 있다. 맵의 제목에서 알 수 있듯이 주로 히드라리스크로 구성된 대규모 적 부대를 상대하는 것이 주요 목표이며, EUD(Extended Unit Death) 기술을 활용해 복잡한 트리거가 구현되어 있는 특징이 있다. 맵은 화산 타일셋을 기반으로 제작되어 visually한 분위기를 자아내며, 2048x3072라는 넓은 맵 사이즈 덕분에 다양한 배치와 진형이 가능하다는 장점이 있다. 게임은 일정 시간마다 등장하는 적 웨이브를 방어하는 방식으로 진행되며, 각 웨이브마다 조금씩 강화된 적 부대가 등장해 플레이어의 전략과 대처 능력을 시험한다. 방어에 성공할 때마다 보상을 얻으며, 일정 조건을 달성하면 승리하거나 추가적인 기능을 해금할 수 있는 구조로 보인다. 맵의 넓은 공간을 활용해 방어선을 구축하고, 적의 공격을 효율적으로 분산시키는 것이 핵심 전략이 될 것이다. 또한, EUD 기술이 적용되어 있어 일반적인 맵과는 다른 특수 효과나 인터페이스가 포함되어 있을 가능성이 높다. 이 맵은 주로 1인 플레이를 상정하고 제작되었으나, 팀 플레이로도 충분히 즐길 수 있을 것으로 추정된다. 방대한 맵 크기와 복잡한 적 웨이브 시스템 덕분에 플레이어는 여러 번의 시도와 전략 수정을 통해 자신만의 방어 노하우를 쌓아갈 수 있을 것이다. 초보자보다는 어느 정도의 경험이 있는 플레이어에게 더 적합할 것으로 보이며, 디펜스 장르에 익숙한 유저라면 재미있게 즐길 수 있는 맵이다. 다만, 넓은 맵을 활용한 전략적 플레이가 요구되므로, 시야 확보와 자원 관리에 주의를 기울일 필요가 있다. 이 맵을 플레이하기 전에는 EUD 맵에 대한 기본적인 이해와 디펜스 장르의 특성을 숙지하는 것이 좋다. 또한, 넓은 맵에서 발생할 수 있는 자원 부족이나 방어선 붕괴 scenarios를 대비하기 위해 미리 방어 건물이나 유닛 배치 계획을 세워두는 것이 중요하다. 맵의 난이도는 난이도 설정이나 웨이브 강도에 따라 달라질 수 있으므로, 처음 플레이할 때는 쉬운 난이도로 시작하는 것이 추천된다. 특히 히드라리스크는 스플래시 대미지를 입히므로, 방어 건물이나 탱커 유닛을 적절히 배치해 효율적인 대처가 필요할 것이다. This StarCraft: Brood War custom map, '[EUD] 히드라2000부대막기_EX', falls under the defense genre, challenging players to withstand relentless waves of enemy units, primarily Hydralisks as indicated by the title. Utilizing EUD (Extended Unit Death) technology, the map incorporates advanced triggers that enhance gameplay mechanics beyond standard custom maps. Set against a volcanic tileset, the 2048x3072 map size provides ample space for strategic unit placement and dynamic combat scenarios. The gameplay revolves around a wave-based defense system where players must fortify their positions and repel increasingly powerful enemy assaults. Successful defense yields rewards, and achieving specific objectives unlocks additional features or leads to victory. The vast map area allows for creative defensive setups, encouraging players to spread out units and manage resources efficiently. Given the EUD implementation, players can expect unique mechanics or interfaces that differ from conventional custom maps. While designed primarily for single-player experiences, the map can also accommodate team-based play. The expansive layout and complex enemy waves make it ideal for players seeking a challenge and the opportunity to refine their strategies over multiple attempts. Beginners may find it daunting, but intermediate to advanced players familiar with defense maps will appreciate its depth and replayability. Strategic vision and resource management are crucial, as overlooking potential weaknesses in defensive lines can lead to failure. Before diving into gameplay, players should familiarize themselves with EUD mechanics and the nuances of defense maps. It is advisable to plan defensive structures and unit placements carefully to mitigate risks such as resource shortages or line breaches. Starting on easier difficulties is recommended for newcomers, as the Hydralisk's splash damage requires thoughtful positioning of defensive buildings and tank units. The map's difficulty can vary based on settings and wave intensity, so adjusting these parameters can help tailor the experience to individual skill levels.
뉴 히드라리스크 어택 20k 하드 (New Hydralisk Attack 20k Hard)
‘뉴 히드라리스크 어택 20k 하드’는 스타크래프트 브루드워의 유즈맵으로, 디펜스 장르에 속하는 하드코어한 방어형 맵이다. 맵의 구조는 긴 직선 형태로 펼쳐져 있으며, 오른쪽 끝에서 끊임없이 몰려드는 히드라리스크 무리를 왼쪽 기지에서 저지하는 것이 핵심이다. 기지 앞에는 방어진이 촘촘히 배치되어 있어, 플레이어는 자원 관리와 방어 건물의 배치, 업그레이드를 통해 끊임없이 쏟아지는 적을 상대해야 한다. 특히 하드 난이도답게 적의 수가 매우 많고, 스폰 주기도 빨라 지속적인 집중을 요구하는 것이 특징이다. 맵의 배경은 어두운 톤으로, 긴장감을 고조시키며, 방어선이 무너지면 곧바로 게임 오버로 이어지는 긴박한 상황이 연출된다. 방어 건물로 사용할 수 있는 유닛은 제한되어 있으며, 자원 수급도 제한적이기 때문에 효율적인 플레이가 요구된다. 하드 난이도답게 초보자는 클리어하기 어려우며, 숙련된 플레이어라도 몇 번의 시도와 전략 수정이 필요할 정도로 난이도가 높다. 전체적으로는 ‘컴까기’와 ‘디펜스’의 조합으로, 방어와 자원 관리의 밸런스를 맞추는 것이 관건인 맵으로 평가할 수 있다. 추천 대상은 스타크래프트의 방어와 전략적 플레이를 좋아하는 유저들이며, 특히 긴장감 넘치는 플레이를 즐기는 유저들에게 적합하다. 플레이 전에는 방어 건물의 배치와 업그레이드 우선순위를 미리 계획하고, 자원 관리에 유의할 필요가 있다. 또한, 게임 시작 직후 첫-wave를 어떻게 넘기느냐가 이후의 진행을 좌우하는 중요한 포인트가 된다. This StarCraft: Brood War custom map, 'New Hydralisk Attack 20k Hard,' falls under the defense genre, offering a challenging hard-core defensive gameplay experience. The map features a long, linear structure where the player must defend their base on the left side against an endless stream of Hydralisks spawning from the right. The defense line is densely packed with structures, requiring players to manage resources, strategically place defensive buildings, and prioritize upgrades to withstand the relentless enemy waves. The hard difficulty ensures a high enemy count with rapid spawn intervals, demanding constant focus and adaptability. The dark-toned background enhances the intense atmosphere, with failure leading to an immediate game over. Limited unit options for defense and restricted resource income add to the challenge, making efficient resource and upgrade management crucial. The high difficulty makes it inaccessible for beginners, and even experienced players may need multiple attempts and strategic adjustments. The map blends elements of 'computer-killing' and 'defense,' emphasizing the balance between defense and resource management. It is recommended for players who enjoy strategic defense mechanics and high-pressure gameplay. Before playing, planning defensive structure placement, prioritizing upgrades, and managing resources are essential. The initial wave often sets the tone for the rest of the game, making it a critical moment to handle effectively.
히드라리스크 어택 10k v0.999o (Hydralisk Attack 10k v0.999o)
히드라리스크 어택 10k v0.999o는 스타크래프트 브루드워의 대표적인 디펜스 유즈맵으로, 플레이어는 끊임없이 몰려드는 저그 유닛들을 방어하며 최대한 오랫동안 생존해야 하는 챌린지형 맵이다. 맵의 이름은 저그의 히드라리스크가 1만 마리 공격한다는 컨셉에서 유래했으며, 하드 버전으로 제작되어 난이도가 상당히 높다. 내부 설명에서 보듯이 보너스로 4천 마리의 저글링과 666마리의 저글링이 추가로 등장하는 등, 극한의 방어 능력을 요구하는 구조로 설계되었다. 맵의 해상도는 2048 x 8192로 매우 넓은 구성을 자랑하며, 타일셋은 플랫폼을 사용해 시각적 안정성을 높였다. 방어 건물로는 주로 프로토스 포톤 캐논과 테란 터렛이 배치되어 있으며, 맵의 디자인상 방어 포인트가 여러 곳에 분산되어 있어 전략적인 배치와 자원 관리가 필수적이다. 플레이어는 시작 지점에서 조금씩 후퇴하며 방어선을 구축해야 하며, 지속적인 공격으로 인해 자원 소모가 크고 입구도 여러 곳이라 실수가 치명적이다. 특히 하드 버전답게 워커와 히드라리스크의 비중이 높아져 방어 난이도가 배가된다. 이 맵은 초보 플레이어보다는 중수 이상의 유저들에게 적합하며, 점진적으로 난이도를 높이는 방식으로 반복 플레이를 유도한다. 추천하는 플레이 방식은 방어 건물의 효율적 배치와 자원 관리, 그리고 빠른 반응 속도를 키우는 데 집중하는 것이다. 맵의 구조상 한 번 실수하면 금방 밀리기 때문에, 철저한 준비와 경험이 요구된다. 또한, 보너스 유닛들이 추가되는 시점이 있으니 그 타이밍을 잘 노려야 한다. 이 맵은 스타크래프트 유즈맵 커뮤니티에서 오랫동안 사랑받아온 classic 디펜스 게임으로, 넓은 맵과 높은 난이도, 그리고 끊임없는 도전 정신을 자극하는 플레이 경험을 제공한다. 특히 방어 건물의 종류가 제한적이면서도 적의 공격 패턴이 다양해져, 순수한 전략성과 긴장감을 동시에 느낄 수 있다. Hydralisk Attack 10k v0.999o is a classic defense-style custom map in *StarCraft: Brood War* where players must defend against endless waves of Zerg units and survive as long as possible. The map’s name comes from its premise—10,000 Hydralisks attacking—but it’s designed as a hard version with significantly higher difficulty. As mentioned in the in-game description, the challenge is amplified by bonus waves, including an additional 4,000 Zerglings and 666 Zerglings, pushing players to their absolute limits. The map boasts an enormous resolution of 2048 x 8192, featuring a vast layout with a platform-based tileset for visual stability. Defense structures like Protoss Photon Cannons and Terran Turrets are strategically placed across multiple defensive points, requiring careful resource management and smart positioning. Players begin by slowly retreating from their starting point to build a defense line, but constant attacks drain resources quickly, and the presence of multiple entrances means mistakes are unforgiving. True to its hard difficulty, the map emphasizes Hydralisks and Zerglings, drastically increasing the challenge. It’s best suited for intermediate to advanced players, encouraging repeated play by gradually ramping up the difficulty. To succeed, focus on efficient building placement, resource control, and quick reflexes—one misstep can lead to an immediate loss. Timing is also crucial, as bonus units appear at specific moments, so players must be ready to adapt. A long-time favorite in the *StarCraft* custom map community, *Hydralisk Attack 10k* delivers a classic defense experience with its expansive map, punishing difficulty, and relentless challenge. The limited defensive options combined with the Zerg’s varied attack patterns create a tense, high-stakes battle where pure strategy and quick thinking are essential.
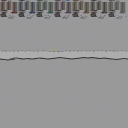
히드라리스크 어택 20,001 HARD (Hydralisk Attack 20,001 HARD)
스타크래프트 브루드워의 유즈맵으로 인기를 끌었던 ‘히드라리스크 어택’ 시리즈의 한 작품인 <히드라리스크 어택 20,001 HARD>는 이름 그대로 히드라리스크의 맹공격을 방어하는 디펜스 장르의 맵이다. 맵의 전체적인 구조는 세로로 긴 형태를 띄며, 플레이어는 화면 하단에 위치한 기지를 지키며 끊임없이 쏟아지는 적의 공격을 막아내야 한다. 맵의 특징은 적의 유닛이 좌우로 넓게 배치되어 등장한다는 점으로, 이는 플레이어의 방어 라인을 신속히 구축하고 전략을 세우는 데 중점을 둔다. 적의 공격은 저글링, 히드라리스크, 뮤탈리스크, 울트라리스크 등으로 구성되며, 난이도(HARD)가 표기된 만큼 초반부터 강력한 조합으로 공격을 퍼붓기 때문에 긴장감 넘치는 플레이가 요구된다. 맵의 디자인상으로는 지형이 평지 형태로 되어 있어 유닛의 배치와 움직임을 세밀하게 조율해야 하며, 방어 타워나 유닛의 생산을 위한 공간이 제한적으로 배치되어 있어 효율적인 자원 관리가 필수적이다. 또한, 맵의 세로 길이가 매우 길어 화면 스크롤이 빈번히 발생하므로 시야 확보는 물론, 적의 움직임을 빠르게 포착하는 능력이 중요하다. 이 맵은 디펜스 장르를 선호하는 플레이어들에게는 물론, 긴장감 있는 전투를 즐기고자 하는 유저들에게도 강력히 추천할 만하다. 특히 히드라리스크의 특성을 고려한 방어 전략을 세우는 재미가 있으며, 반복 플레이를 통해 점차 난이도를 높이는 방식으로도 즐길 수 있다. 플레이 전에는 기지 주변의 지형과 적의 공격 패턴을 미리 숙지하는 것이 중요하며, 초반 방어 라인을 어떻게 구축할지에 따라 전체적인 플레이의 성공 여부가 좌우된다. 초보자의 경우 난이도 HARD의 압박감 때문에 어려움을 느낄 수 있으나, 점차 적응해 나가면 전략적 깊이를 느낄 수 있는 맵이다. StarCraft: Brood War's popular custom map *Hydralisk Attack 20,001 HARD* is a defense-style map where players must fend off relentless waves of Hydralisks, as the name suggests. The map features a vertically elongated layout, with players defending their base at the bottom of the screen against waves of incoming enemies. Its defining trait is the wide horizontal spread of enemy units, forcing players to quickly establish defensive lines and adapt their strategies on the fly. Enemy compositions include Zerglings, Hydralisks, Mutalisks, Ultralisk, and more, with the HARD difficulty delivering punishing early-game assaults that keep players on edge. The terrain is mostly flat, requiring precise unit positioning and movement, while limited space for defensive structures and production means resource management is crucial. The map's length also means frequent screen scrolling, making map awareness and rapid enemy tracking essential. This map is highly recommended for defense enthusiasts and players seeking high-tension battles alike. Its mechanics encourage creative defensive strategies tailored to Hydralisk behavior, and the difficulty can be scaled up through repeated play. Before jumping in, study the base surroundings and enemy attack patterns—your initial defensive setup will largely determine your success. While the HARD difficulty may overwhelm beginners, those who persevere will discover deep strategic layers worth mastering.
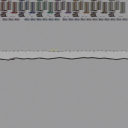
히드라리스크 어택 20,001 하드 (Hydralisk Attack 20,001 HARD)
'히드라리스크 어택 20,001 하드'는 제목 그대로 20,001마리의 히드라리스크 떼거리를 상대로 기지를 사수하는 초고난도 디펜스 유즈맵이다. 플랫폼 타일셋을 기반으로 64x256 타일, 세로로 긴 2048x8192 크기의 맵은 공격 루트가 명확한 직선형 구조로 보이며, 파일명에 명시된 '5벙커' 제한 사항이 핵심 제약 조건으로 작용한다. 최대 7인 협동 플레이를 지원하며, 제작자 ckhyam의 의도대로 'HARD' 난이도에 걸맞게 압도적인 물량 공세를 제한된 벙커와 유닛으로 막아내야 한다. 진행 방식은 별도의 자원 채취나 테크 트리 확장 없이 시작부터 주어진 전력으로 웨이브를 버티는 생존형에 가깝다. 히드라리스크의 사거리와 화력을 고려해 벙커 배치와 집중 사격, 유닛 컨트롤이 생존의 열쇠가 된다. 협동전 특성상 역할 분담과 화력 집중이 필수적이며, 솔로 플레이는 사실상 불가능에 가깝다. 추천 대상은 극한의 디펜스 상황을 즐기는 하드코어 유저나 팀워크 검증을 원하는 그룹이다. 플레이 전 벙커 수 제한과 맵의 세로 길이로 인한 시야 확보, 랙 가능성을 염두에 두어야 한다. 'Hydralisk Attack 20,001 HARD' is an ultra-high-difficulty defense UMS map where players must defend their base against a swarm of 20,001 Hydralisks, just as the title states. Based on the Platform tileset, the vertically long 64x256 tile map (2048x8192) appears to have a linear structure with a clear attack route, and the '5 Bunker' limit mentioned in the filename acts as a key constraint. Supporting up to 7-player co-op, the map lives up to its 'HARD' difficulty as intended by creator ckhyam, requiring players to withstand overwhelming waves with limited bunkers and units. The gameplay is survival-oriented, holding waves with starting forces without separate resource gathering or tech expansion. Bunker placement, focus fire, and unit control are key to survival considering the Hydralisk's range and damage. Role assignment and firepower concentration are essential for co-op, making solo play nearly impossible. Recommended for hardcore users who enjoy extreme defense scenarios or groups wanting to test teamwork. Before playing, keep in mind the bunker limit, visibility issues due to vertical map length, and potential lag.
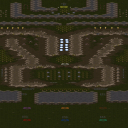
히드라레이스 (HydraRace)
스타크래프트 브루드워의 유즈맵 HydraRace는 여섯 명의 플레이어가 히드라리스크를 조종해 목적지까지 도달하는 경쟁형 레이싱 맵이다. 맵은 사막 타일셋으로 구성되어 있으며, 넓은 평지 위를 가로지르는 트랙과 협소한 지름길, 그리고 장애물 구간으로 구성되어 있어 플레이어의 선택과 조종 실력이 중요하다. 게임의 목표는 단순히 먼저 도착하는 것이 아니라, 히드라리스크의 기동성을 살려 지름길을 택하거나 방해 요소를 피하면서 효율적으로 진행하는 것이다. 맵의 구조상 중앙 트랙은 비교적 넓어서 초반에 플레이어들이 모여들지만, 후반부로 갈수록 좁아지는 지형과 장애물이 배치되어 있어 후반 전략이 중요해진다. 또한, 맵의 길이가 길고 트랙이 복잡하여 실수 한 번이 순위 변동으로 직결될 수 있어 긴장감을 높인다. 히드라리스크의 특성상 점프 업그레이드는 필수이며, 맵 곳곳에 배치된 자원과 업그레이드 건물을 활용해 체력과 공격력을 보강할 수 있다. 이러한 요소는 단순히 속도 경쟁을 넘어 전략적 요소를 추가하여, 플레이어들에게 긴장감과 재미를 제공한다. 이 맵은 레이싱과 디펜스, 그리고 미니게임적 요소가 혼합된 유즈맵으로, 특히 경쟁심과 팀워크가 요구되는 플레이어들에게 추천할 만하다. 다만, 히드라리스크의 조종 난이도가 다소 높아 초보자는 적응에 시간이 걸릴 수 있다. 플레이 전에는 맵의 지형과 장애물 위치를 숙지하고, 점프 업그레이드를 우선적으로 진행하는 것이 핵심 전략이다. HydraRace in StarCraft: Brood War is a competitive racing map where six players control Hydralisks, racing to reach a destination. The map features a desert tile set with a wide-open track stretching across flat terrain, narrow shortcuts, and obstacle sections, making player decision-making and control skills crucial. The goal isn't just to arrive first but to efficiently navigate by utilizing the Hydralisk's mobility, choosing shortcuts, and avoiding obstacles. Structurally, the central track is relatively wide at the start, drawing players together, but as the game progresses, the terrain narrows and obstacles appear, making late-game strategy vital. With a long and complex track, even a single mistake can shift rankings, heightening tension. Since Hydralisks benefit greatly from the jump upgrade, players can reinforce health and attack power by using resources and upgrade buildings scattered across the map. These elements transform the race beyond mere speed competition, adding strategic depth that delivers excitement and fun. This map blends racing, defense, and mini-game elements, making it highly recommended for players who enjoy competition and teamwork. However, the Hydralisk's controls can be challenging, so beginners may need time to adapt. Before playing, it's essential to memorize the terrain and obstacle positions and prioritize the jump upgrade as a core strategy.
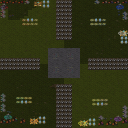
히드라 랜처즈 v7.1 (Hydra Rancherz v7.1)
스타크래프트 브루드워의 대표적인 디펜스형 유즈맵인 'Hydra Rancherz v7.1'은 플레이어가 히드라리스크를 관리하며 끊임없이 쏟아지는 적의 공격을 방어하는 구조로 짜여 있다. 맵 중앙에 위치한 본진 건물을 중심으로, 사방에서 몰려오는 저글링, 히드라리스크, 뮤탈리스크 등 다양한 저그의 병력과 occasional한 울트라리스크, 데바우어링까지 상대해야 한다. 히드라리스크를 키우고 진화시키는 시스템이 핵심인데, 미네랄과 가스를 확보한 플레이어는 히드라리스크를 사냥해 경험치를 얻고, 일정 조건에 도달하면 더 강한 유닛으로 진화시킬 수 있다. 예를 들어 히드라리스크에서 뮤탈리스크로, 또는 디파일러로 변신시킬 수 있으며, 이 과정에서의 전략적 선택이 승패를 가른다. 맵 디자인은 사막 타일셋을 활용해 넓은 평원과 협소한 통로, 그리고 본진 주변의 방어 시설 배치 등으로 상당히 전략적인 공간 활용을 요구한다. 특히 본진 주변의 방어 타워와 성큰 콜로니를 적절히 배치하고, 히드라리스크의 위치와 진화 타이밍을 조절하는 것이 중요하다. 8명의 플레이어가 각자 본진을 차지한 상태로 경쟁하며, 마지막까지 살아남는 플레이어 또는 팀이 승리하는 방식으로 진행된다. 맵의 밸런스는 히드라리스크의 성장 곡선과 적의 공격 패턴이 절묘하게 맞아떨어져, 초보자부터 숙련자까지 모두 즐길 수 있도록 설계되어 있다. 이 맵을 플레이하기 전에는 히드라리스크의 진화 루트와 필요한 업그레이드 조건, 그리고 방어 시설의 효율적인 배치 방법을 미리 숙지하는 것이 좋다. 또한, 맵의 난이도를 조절할 수 있는 옵션이 있는지 사전에 확인하고, 팀 플레이를 원한다면 팀원과의 전략 조율도 필수적이다. 이 맵은 히드라리스크의 성장과 방어 전략이 조화를 이룰 때 비로소 진정한 재미를 느낄 수 있는 유즈맵으로, 여러 번 플레이할수록 새로운 전략과 인사이트를 발견할 수 있을 것이다. Hydra Rancherz v7.1 is a standout defense-style custom map in StarCraft: Brood War, where players manage Hydralisks while fending off relentless waves of enemy attacks. The central base, surrounded by desert tiles, faces constant assaults from Zerg units like Zerglings, Hydralisks, Mutalisks, and occasionally Ultralisk and Devouring One. The core mechanic revolves around hunting, leveling, and evolving Hydralisks into stronger units such as Mutalisks or Defilers by collecting minerals and gas. Strategic decisions in evolution paths and timing significantly impact the outcome. The map design leverages a desert tileset, featuring open plains, narrow passages, and strategically placed defensive structures around the main base. Players must balance tower placements, manage Hydralisk positioning, and time their evolutions carefully. With 8 players competing for control of individual bases, the last surviving player or team wins. The balance is well-crafted, blending Hydralisk growth curves with enemy attack patterns, making it accessible yet challenging for both beginners and veterans. Before playing, familiarize yourself with the Hydralisk evolution routes, required upgrades, and optimal defensive structure placements. Check for difficulty adjustment options and coordinate strategies with teammates if playing in teams. Hydra Rancherz v7.1 shines when players harmonize growth and defense, offering deeper strategies and insights with each playthrough, ensuring long-term enjoyment.
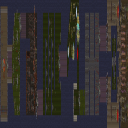
이 возможно해 2: 더 워즈 포털 (Impossible 2: The Worms Portal)
스타크래프트 브루드워의 유즈맵 'Impossible 2: The Worms Portal'은 파괴해야 할 포털을 중심으로 펼쳐지는 intense한 디펜스와 공세형 플레이가 조화를 이루는 맵이다. 맵 중앙에 위치한 거대한 포털 건물을 둘러싸고 있는 방어 구조물은 플레이어의 시선을 집중시킨다. 포털 주변으로 배치된 다수의 저글링과 히드라리스크 웨이브가 끊임없이 공격을 퍼부으며, 이를 저지하기 위해 플레이어는 방어 타워와 유닛을 효율적으로 배치해야 한다. 맵의 특성상 빠른 판단과 전략적 움직임이 요구되며, 특히 초반 방어 라인을 구축하는 것이 관건이다. 맵 곳곳에 숨겨진 자원과 업그레이드 포인트를 활용해 유닛의 강화를 도모할 수 있으며, 포털 파괴를 목표로 한 협동 플레이가 필수적이다. 맵의 분위기는 어둡고 긴장감이 넘치며, 플레이어는 끊임없이 몰려오는 적의 웨이브를 방어하면서 포털을 공격할 타이밍을 잡아야 한다. 이 맵은 방어와 공격의 균형을 맞추는 전략적 사고를 요구하는 동시에, 빠른 손놀림과 순간적인 판단력을 테스트한다. 초보 플레이어는 방어 라인의 중요성을 간과하기 쉬우므로, 반복 플레이를 통해 최적의 배치와 유닛 컨트롤 방법을 익히는 것이 중요하다. 또한, 팀 플레이 시에는 각 플레이어의 역할 분배와 협력이 원활히 이루어져야만 포털 파괴라는 목표를 달성할 수 있다. 맵의 난이도는 비교적 높지만, 그만큼 달성感이 크며, 다양한 전략을 시도해 볼 수 있는 여지가 많다. 이 맵은 디펜스와 공세형 플레이를 모두 즐길 수 있는 유즈맵으로, 스타크래프트의 전략적 깊이를 충분히 느낄 수 있도록 설계되었다. 플레이 전에는 반드시 방어 라인과 공격 루트를 미리 계획하고, 자원 관리와 업그레이드 우선순위를 신중히 고려해야 한다. Impossible 2: The Worms Portal is a UMS-style custom map in StarCraft: Brood War that blends intense defense mechanics with aggressive wave-based assaults. The focal point is a massive portal structure at the center of the map, surrounded by defensive formations. Waves of Zerglings and Hydralisks relentlessly attack the perimeter, forcing players to deploy towers and units strategically. Quick decision-making and spatial awareness are critical, as establishing a solid early defense is essential for survival. Hidden resources and upgrade points are scattered across the map, allowing players to enhance their forces for both defense and offense. The game's dark and tense atmosphere amplifies the pressure as players must balance holding the line with launching coordinated attacks on the portal. This map demands a mix of strategic foresight and reflex-based execution, with team coordination playing a pivotal role. Novice players may struggle with proper defensive positioning, so repeated playthroughs are recommended to refine tactics and unit control. The map's difficulty is balanced by its rewarding gameplay, offering a rich variety of strategies to explore. Impossible 2 is ideal for those seeking a challenging yet satisfying experience that highlights StarCraft's depth in both defense and offensive mechanics. Prior to playing, it is crucial to plan defense layouts, manage resources efficiently, and prioritize upgrades to maximize effectiveness.
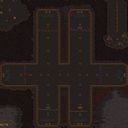
썬크 디펜스 6웨이! (SunkenDefense6Way!)
스타크래프트 브루드워의 대표적인 디펜스 유즈맵인 'SunkenDefense6Way!'는 기존의 선버전 10을 기반으로 리메이크된 작품으로, 여섯 가지 방향에서 끊임없이 몰려오는 적군을 상대로 넥서스를 지켜내는 것이 목표다. 맵 중앙에 위치한 넥서스를 중심으로 여섯 개의 입구에서 적 병력이 끊임없이 생성되며, 플레이어는 이를 저지하고 주요 건물을 보호해야 한다. 적군은 저글링, 히드라리스크, 울트라리스크 등 다양한 유닛으로 구성되어 있으며, 후반으로 갈수록 그 규모와 강도가 높아진다. 맵의 핵심은 다방향으로 펼쳐지는 방어선을 효율적으로 관리하고, 자원과 유닛 생산을 균형 있게 조율하는 데 있다. 특히 여섯 개의 입구가 동시에 활성화되기 때문에 방어 포인트를 분산시켜야 하며, 각 입구별로 적의 공격 패턴을 예측하고 대처하는 전략이 요구된다. 초보자의 경우 입구별 방어 타이밍을 맞추는 것만으로도 어려움을 느낄 수 있지만, 반복 플레이를 통해 점차 익숙해질 수 있는 구조다. 적의 공격 주기는 약 5분 간격으로 추정되며, 각 웨이브가 끝날 때마다 소소한 보상이 주어지는 듯 보인다. 맵의 밸런스는 넥서스의 체력과 방어 건물의 배치에 따라 크게 좌우되며, 플레이어는Buildings Defense를 적극 활용해 최대한의 효율을 이끌어내야 한다. 추천 대상은 디펜스 장르를 즐기는 유저들로, 특히 다방향 공격에 대한 전략적 대비를 좋아하는 플레이어에게 적합하다. 플레이 전에는 맵의 구조와 입구별로 가장 효과적인 방어 빌드를 미리 숙지하는 것이 중요하다. SunkenDefense6Way! is a classic StarCraft: Brood War defense custom map where the goal is to defend your Nexus against relentless waves of enemies approaching from six different directions. Enemies continuously spawn from six entrances centered around the Nexus in the middle of the map, and players must hold them off while protecting their key structures. The enemy forces consist of various units like Zerglings, Hydralisks, and Ultralisks, with the scale and intensity of attacks growing stronger as the game progresses. The core challenge lies in managing a multi-directional defense line efficiently while balancing resource gathering and unit production. Since all six entrances can activate simultaneously, players must spread their defenses thin and adapt their strategies to counter each entrance's distinct attack patterns. Beginners may struggle with timing their defenses per entrance, but the map is designed to become more intuitive with repeated play. Enemy attack cycles seem to occur roughly every five minutes, with small rewards given at the end of each wave. The map's balance heavily depends on the Nexus's HP and the placement of defensive structures, so players should maximize the use of Buildings Defense to optimize their strategy. This map is ideal for fans of the defense genre, especially those who enjoy strategizing against multi-directional assaults. Before playing, it's crucial to study the map layout and pre-plan the most effective defense builds for each entrance.
![내가 컴퓨터의 히드라[EUD] (Controlling the Computer's Hydralisk [EUD]) 맵 미리보기](https://cdn-star-data.huzy.net/thumbnail_3fc7250d4bba4dc18471645c86d2207b.jpg)
내가 컴퓨터의 히드라[EUD] (Controlling the Computer's Hydralisk [EUD])
스타크래프트의 유즈맵 ‘내가 컴퓨터의 히드라[EUD]’는 기존 UMS(유즈맵) 장르의 틀을 벗어나 EUD(Extended Unit Death) 기술을 활용한 인공지능과 유닛 특화 시스템으로 플레이 경험을 완전히 재구성한 작품이다. 맵의 핵심은 플레이어가 직접 컴퓨터의 유닛을 조종하는 ‘역할 전환’에 있으며, 초반부터 컴퓨터가 보라색 히드라리스크를 생산해 공격해오는 구조로 시작된다. 플레이어는 이 히드라를 제어하며 방어선 구축은 물론, 공격 루트를 선택해 컴퓨터의 네트워크를 교란시켜야 한다. 맵 곳곳의 자원 지대와 기지를 확보하는 것이 관건인데, 자원 채집뿐 아니라 컴퓨터의 공격 패턴을 예측해 방어 타워나 유닛을 배치하는 전략적 요소가 풍부하다. 특히 EUD를 통한 AI 조작은 기존 유즈맵과는 차별화된 시스템으로, 플레이어의 선택에 따라 컴퓨터의 공격 방식이 변하는 등 상호작용성이 뛰어나다. 맵의 볼륨은 4096x4096의 넓은 해상도를 자랑하며, 화산 타일셋을 기반으로 한 지형이 독특한 분위기를 연출한다. 초보자에게는 다소 난해할 수 있지만, 컴퓨터의 공격 패턴을 익히고 자원 관리와 유닛 운용을 체계적으로 학습하면 호기심을 자극하는 재미있는 경험을 제공할 것이다. 특히 컴퓨터의 히드라를 조종한다는 독특한 컨셉이 매력적인 맵으로, UMS 장르의 새로운 가능성을 보여주는 작품이다. 플레이 전에는 EUD 기술이 적용된 맵이라는 점과, 컴퓨터의 공격 루트가 랜덤하게 변할 수 있음을 미리 숙지하고 플레이하는 것이 좋다. 또한 넓은 맵을 효율적으로 탐색하기 위해 미니맵과 자원 위치를 빠르게 인식할 수 있도록 준비하는 것이 중요하다. StarCraft custom map *I Control the Computer’s Hydralisks [EUD]* breaks away from the traditional UMS (Use Map Settings) genre by completely reinventing the player experience through EUD (Extended Unit Death) technology and a specialized unit system. The core of the map lies in the "role reversal," where players directly control the computer's units. From the start, the AI produces purple hydralisks that attack, and players must seize control of these hydras, not only to build defenses but also to disrupt the computer’s network by choosing strategic attack routes. Securing resource zones and bases scattered across the map is crucial, requiring not just resource gathering but also predicting the AI’s attack patterns to place defensive towers or units effectively. The EUD-driven AI manipulation stands out from conventional custom maps, offering high interactivity where the computer’s attack style changes based on player decisions. With a massive 4096x4096 resolution, the map boasts a vast play area, and its volcanic tileset creates a unique atmosphere. While it may be challenging for beginners, mastering the AI’s attack patterns, resource management, and unit control will lead to an engaging experience that sparks curiosity. The standout feature is the unconventional concept of controlling the computer’s hydralisks, showcasing new possibilities for the UMS genre. Before playing, it’s wise to familiarize yourself with the EUD mechanics and the fact that the AI’s attack routes can shift randomly. Efficiently navigating the expansive map also requires quick recognition of the minimap and resource locations.
최근 등록된 맵
새로 추가된 파일과 버전을 확인하세요.
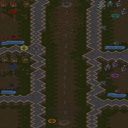
히드라리스크 대 마린 (Hydralisk Vs. Marine)
히드라리스크 대 마린은 사막 타일셋을 바탕으로 한 1024x1024 크기의 유즈맵으로, 플레이어는 저그 히드라리스크나 테란 마린 중 하나를 선택하여 유닛을 생산하고, 맵 중앙에 배치된 비컨으로 보내야 한다. 비컨에 유닛을 하나 보낼 때마다 12개의 동일한 유닛이 자동으로 생성되어 자원이 급증하는 구조를 이루며, 이는典型的な 밀리(그라인드) 방식의 게임플레이를 제공한다. 유닛 생산 속도는 초기에는 느리지만, 비컨에 보내는 유닛이 늘어날수록 기하급수적으로 증가하는 자원을 바탕으로 더 높은 등급의 유닛이나 특수 유닛을 해금할 수 있어, 전략적인 생산 타이밍과 비컨 사용 효율이 승패를 좌우한다. 맵은 최대 4인 자유 전투를 지원하며, 팀 설정은 없으므로 각 플레이어는 자신만의 생산 라인을 구축하고 상대방의 진격을 저지하거나, 단순히 자원 경쟁을 통해 누가 더 빠르게 목표 유닛 수를 달성하는지 겨루는 형태다. 별도의 승리 조건은 설정되지 않아, 보통은 정해진 시간 내에 가장 많은 유닛을 비컨에送达하거나, 일정량 이상의 유닛을 생산한 플레이어가 승자로 간주된다. 이로 인해 초보자도 쉽게 규칙을 이해하고 바로 플레이에 들어갈 수 있으며, 중상급 플레이어는 생산 효율을 극대화하는 미세 조작과 타이밍 조절을 통해 높은 점수를 노릴 수 있다. 플레이 전에는 비컨 위치와 유닛 생산 건물의 배치를 확인하고, 초기 자원 관리 방법 및 단축키 설정을 미리 살펴보는 것이 좋다. Hydralisk Vs. Marine is a UMS map set on a desert tileset with a size of 1024x1024. Players choose either Zerg Hydralisk or Terran Marine, produce units, and send them to the beacon placed at the map center. Each unit sent to the beacon automatically generates 12 identical units, causing a rapid resource increase that defines a典型的な milling (grind) style of gameplay. Although unit production starts slowly, sending more units to the beacon yields exponentially growing resources, allowing players to unlock higher‑tier or special units. Thus, strategic timing of production and efficient beacon use determine victory or defeat. The map supports up to four players in a free‑for‑all format with no teams, so each player builds their own production line, either to block opponents’ advances or simply to compete in a resource race to reach a target unit count first. No explicit victory condition is set; typically the winner is the player who delivers the most units to the beacon within a set time or who produces a minimum amount of units. This makes the rules easy for beginners to grasp and jump into, while intermediate and advanced players can optimize production efficiency through fine‑tuned micromanagement and timing to chase high scores. Before playing, check the beacon’s location and the layout of production buildings, review initial resource management methods, and preset hotkeys if needed.
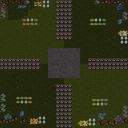
히드라 랜처즈 v8.1 (Hydra Rancherz v8.1)
히드라 랜처즈 v8.1은 사막 지형을 배경으로 히드라리스크 전투를 중심으로 펼쳐지는 전략형 유즈맵으로, 최대 8명의 플레이어가 참여하여 팀을 구성하거나 개인戦으로 진행할 수 있다. 맵의 핵심은 히드라리스크의 개체수 관리와 전투력 강화에 있으며, 히드라를 훈련시키고 장비를 부여해 적군을 압도하는 것이 목표로 보인다. 맵은 넓은 평원과 협곡, 언덕 지형이 조화를 이루며, 히드라의 이동성과 시야 확보가 중요한 요소로 작용할 것으로 추정된다. 전투는 히드라리스크의 개체수에 따라 진행되며, 장비와 경험치 시스템을 통해 히드라를 성장시키는 재미가 강조될 것이다. 그러나 맵의 상세한 승리 조건이나 보상 체계는 이미지에서 확인되지 않으므로, 사용자는 해당 맵을 플레이하기 전에 내부 설명이나 튜토리얼을 반드시 확인해야 한다. 특히 히드라의 훈련 비용과 장비 선택이 전략에 큰 영향을 미칠 것이므로, 초보 플레이어는 난이도 상승에 주의가 필요하다. 이 맵은 히드라리스크와 전략적 성장 요소를 좋아하는 플레이어들에게 강력히 추천된다. 맵의 구조상 히드라의 개체수 제한과 자원 수급이 밸런스 포인트로 작용할 것이므로, 히드라를 다수 확보하는 전략과 소수 정예 전략을 상황에 따라 선택할 필요가 있다. Hydra Rancherz v8.1 is a strategy custom map set in a desert terrain, where up to 8 players can engage in team-based or free-for-all battles centered around hydralisk units. The core gameplay revolves around managing hydralisk populations and upgrading their combat capabilities through training and equipment. The map features a mix of open plains, canyons, and elevated terrain, which likely influences hydralisk mobility and line-of-sight mechanics. Battles progress based on hydralisk population dynamics, with a focus on growing and equipping these units for overwhelming enemy forces. While the exact victory conditions and reward systems are not visible in the provided image, players are strongly advised to review internal instructions or tutorials before starting. Hydralisk training costs and equipment choices significantly impact strategy, so novice players should be cautious of difficulty spikes. This map is highly recommended for players who enjoy hydralisk units and strategic growth elements. Given the map's structure, hydralisk population caps and resource management will be key balance points, requiring players to adapt between mass hydro and elite strategies based on situational needs.
뉴 히드라리스크 어택 20k 하드 (New Hydralisk Attack 20k Hard)
‘뉴 히드라리스크 어택 20k 하드’는 스타크래프트 브루드워의 유즈맵으로, 디펜스 장르에 속하는 하드코어한 방어형 맵이다. 맵의 구조는 긴 직선 형태로 펼쳐져 있으며, 오른쪽 끝에서 끊임없이 몰려드는 히드라리스크 무리를 왼쪽 기지에서 저지하는 것이 핵심이다. 기지 앞에는 방어진이 촘촘히 배치되어 있어, 플레이어는 자원 관리와 방어 건물의 배치, 업그레이드를 통해 끊임없이 쏟아지는 적을 상대해야 한다. 특히 하드 난이도답게 적의 수가 매우 많고, 스폰 주기도 빨라 지속적인 집중을 요구하는 것이 특징이다. 맵의 배경은 어두운 톤으로, 긴장감을 고조시키며, 방어선이 무너지면 곧바로 게임 오버로 이어지는 긴박한 상황이 연출된다. 방어 건물로 사용할 수 있는 유닛은 제한되어 있으며, 자원 수급도 제한적이기 때문에 효율적인 플레이가 요구된다. 하드 난이도답게 초보자는 클리어하기 어려우며, 숙련된 플레이어라도 몇 번의 시도와 전략 수정이 필요할 정도로 난이도가 높다. 전체적으로는 ‘컴까기’와 ‘디펜스’의 조합으로, 방어와 자원 관리의 밸런스를 맞추는 것이 관건인 맵으로 평가할 수 있다. 추천 대상은 스타크래프트의 방어와 전략적 플레이를 좋아하는 유저들이며, 특히 긴장감 넘치는 플레이를 즐기는 유저들에게 적합하다. 플레이 전에는 방어 건물의 배치와 업그레이드 우선순위를 미리 계획하고, 자원 관리에 유의할 필요가 있다. 또한, 게임 시작 직후 첫-wave를 어떻게 넘기느냐가 이후의 진행을 좌우하는 중요한 포인트가 된다. This StarCraft: Brood War custom map, 'New Hydralisk Attack 20k Hard,' falls under the defense genre, offering a challenging hard-core defensive gameplay experience. The map features a long, linear structure where the player must defend their base on the left side against an endless stream of Hydralisks spawning from the right. The defense line is densely packed with structures, requiring players to manage resources, strategically place defensive buildings, and prioritize upgrades to withstand the relentless enemy waves. The hard difficulty ensures a high enemy count with rapid spawn intervals, demanding constant focus and adaptability. The dark-toned background enhances the intense atmosphere, with failure leading to an immediate game over. Limited unit options for defense and restricted resource income add to the challenge, making efficient resource and upgrade management crucial. The high difficulty makes it inaccessible for beginners, and even experienced players may need multiple attempts and strategic adjustments. The map blends elements of 'computer-killing' and 'defense,' emphasizing the balance between defense and resource management. It is recommended for players who enjoy strategic defense mechanics and high-pressure gameplay. Before playing, planning defensive structure placement, prioritizing upgrades, and managing resources are essential. The initial wave often sets the tone for the rest of the game, making it a critical moment to handle effectively.
썬크 디펜스 6웨이! (SunkenDefense6Way!)
스타크래프트 브루드워의 대표적인 디펜스 유즈맵인 'SunkenDefense6Way!'는 기존의 선버전 10을 기반으로 리메이크된 작품으로, 여섯 가지 방향에서 끊임없이 몰려오는 적군을 상대로 넥서스를 지켜내는 것이 목표다. 맵 중앙에 위치한 넥서스를 중심으로 여섯 개의 입구에서 적 병력이 끊임없이 생성되며, 플레이어는 이를 저지하고 주요 건물을 보호해야 한다. 적군은 저글링, 히드라리스크, 울트라리스크 등 다양한 유닛으로 구성되어 있으며, 후반으로 갈수록 그 규모와 강도가 높아진다. 맵의 핵심은 다방향으로 펼쳐지는 방어선을 효율적으로 관리하고, 자원과 유닛 생산을 균형 있게 조율하는 데 있다. 특히 여섯 개의 입구가 동시에 활성화되기 때문에 방어 포인트를 분산시켜야 하며, 각 입구별로 적의 공격 패턴을 예측하고 대처하는 전략이 요구된다. 초보자의 경우 입구별 방어 타이밍을 맞추는 것만으로도 어려움을 느낄 수 있지만, 반복 플레이를 통해 점차 익숙해질 수 있는 구조다. 적의 공격 주기는 약 5분 간격으로 추정되며, 각 웨이브가 끝날 때마다 소소한 보상이 주어지는 듯 보인다. 맵의 밸런스는 넥서스의 체력과 방어 건물의 배치에 따라 크게 좌우되며, 플레이어는Buildings Defense를 적극 활용해 최대한의 효율을 이끌어내야 한다. 추천 대상은 디펜스 장르를 즐기는 유저들로, 특히 다방향 공격에 대한 전략적 대비를 좋아하는 플레이어에게 적합하다. 플레이 전에는 맵의 구조와 입구별로 가장 효과적인 방어 빌드를 미리 숙지하는 것이 중요하다. SunkenDefense6Way! is a classic StarCraft: Brood War defense custom map where the goal is to defend your Nexus against relentless waves of enemies approaching from six different directions. Enemies continuously spawn from six entrances centered around the Nexus in the middle of the map, and players must hold them off while protecting their key structures. The enemy forces consist of various units like Zerglings, Hydralisks, and Ultralisks, with the scale and intensity of attacks growing stronger as the game progresses. The core challenge lies in managing a multi-directional defense line efficiently while balancing resource gathering and unit production. Since all six entrances can activate simultaneously, players must spread their defenses thin and adapt their strategies to counter each entrance's distinct attack patterns. Beginners may struggle with timing their defenses per entrance, but the map is designed to become more intuitive with repeated play. Enemy attack cycles seem to occur roughly every five minutes, with small rewards given at the end of each wave. The map's balance heavily depends on the Nexus's HP and the placement of defensive structures, so players should maximize the use of Buildings Defense to optimize their strategy. This map is ideal for fans of the defense genre, especially those who enjoy strategizing against multi-directional assaults. Before playing, it's crucial to study the map layout and pre-plan the most effective defense builds for each entrance.
이 возможно해 2: 더 워즈 포털 (Impossible 2: The Worms Portal)
스타크래프트 브루드워의 유즈맵 'Impossible 2: The Worms Portal'은 파괴해야 할 포털을 중심으로 펼쳐지는 intense한 디펜스와 공세형 플레이가 조화를 이루는 맵이다. 맵 중앙에 위치한 거대한 포털 건물을 둘러싸고 있는 방어 구조물은 플레이어의 시선을 집중시킨다. 포털 주변으로 배치된 다수의 저글링과 히드라리스크 웨이브가 끊임없이 공격을 퍼부으며, 이를 저지하기 위해 플레이어는 방어 타워와 유닛을 효율적으로 배치해야 한다. 맵의 특성상 빠른 판단과 전략적 움직임이 요구되며, 특히 초반 방어 라인을 구축하는 것이 관건이다. 맵 곳곳에 숨겨진 자원과 업그레이드 포인트를 활용해 유닛의 강화를 도모할 수 있으며, 포털 파괴를 목표로 한 협동 플레이가 필수적이다. 맵의 분위기는 어둡고 긴장감이 넘치며, 플레이어는 끊임없이 몰려오는 적의 웨이브를 방어하면서 포털을 공격할 타이밍을 잡아야 한다. 이 맵은 방어와 공격의 균형을 맞추는 전략적 사고를 요구하는 동시에, 빠른 손놀림과 순간적인 판단력을 테스트한다. 초보 플레이어는 방어 라인의 중요성을 간과하기 쉬우므로, 반복 플레이를 통해 최적의 배치와 유닛 컨트롤 방법을 익히는 것이 중요하다. 또한, 팀 플레이 시에는 각 플레이어의 역할 분배와 협력이 원활히 이루어져야만 포털 파괴라는 목표를 달성할 수 있다. 맵의 난이도는 비교적 높지만, 그만큼 달성感이 크며, 다양한 전략을 시도해 볼 수 있는 여지가 많다. 이 맵은 디펜스와 공세형 플레이를 모두 즐길 수 있는 유즈맵으로, 스타크래프트의 전략적 깊이를 충분히 느낄 수 있도록 설계되었다. 플레이 전에는 반드시 방어 라인과 공격 루트를 미리 계획하고, 자원 관리와 업그레이드 우선순위를 신중히 고려해야 한다. Impossible 2: The Worms Portal is a UMS-style custom map in StarCraft: Brood War that blends intense defense mechanics with aggressive wave-based assaults. The focal point is a massive portal structure at the center of the map, surrounded by defensive formations. Waves of Zerglings and Hydralisks relentlessly attack the perimeter, forcing players to deploy towers and units strategically. Quick decision-making and spatial awareness are critical, as establishing a solid early defense is essential for survival. Hidden resources and upgrade points are scattered across the map, allowing players to enhance their forces for both defense and offense. The game's dark and tense atmosphere amplifies the pressure as players must balance holding the line with launching coordinated attacks on the portal. This map demands a mix of strategic foresight and reflex-based execution, with team coordination playing a pivotal role. Novice players may struggle with proper defensive positioning, so repeated playthroughs are recommended to refine tactics and unit control. The map's difficulty is balanced by its rewarding gameplay, offering a rich variety of strategies to explore. Impossible 2 is ideal for those seeking a challenging yet satisfying experience that highlights StarCraft's depth in both defense and offensive mechanics. Prior to playing, it is crucial to plan defense layouts, manage resources efficiently, and prioritize upgrades to maximize effectiveness.
히드라레이스 (HydraRace)
스타크래프트 브루드워의 유즈맵 HydraRace는 여섯 명의 플레이어가 히드라리스크를 조종해 목적지까지 도달하는 경쟁형 레이싱 맵이다. 맵은 사막 타일셋으로 구성되어 있으며, 넓은 평지 위를 가로지르는 트랙과 협소한 지름길, 그리고 장애물 구간으로 구성되어 있어 플레이어의 선택과 조종 실력이 중요하다. 게임의 목표는 단순히 먼저 도착하는 것이 아니라, 히드라리스크의 기동성을 살려 지름길을 택하거나 방해 요소를 피하면서 효율적으로 진행하는 것이다. 맵의 구조상 중앙 트랙은 비교적 넓어서 초반에 플레이어들이 모여들지만, 후반부로 갈수록 좁아지는 지형과 장애물이 배치되어 있어 후반 전략이 중요해진다. 또한, 맵의 길이가 길고 트랙이 복잡하여 실수 한 번이 순위 변동으로 직결될 수 있어 긴장감을 높인다. 히드라리스크의 특성상 점프 업그레이드는 필수이며, 맵 곳곳에 배치된 자원과 업그레이드 건물을 활용해 체력과 공격력을 보강할 수 있다. 이러한 요소는 단순히 속도 경쟁을 넘어 전략적 요소를 추가하여, 플레이어들에게 긴장감과 재미를 제공한다. 이 맵은 레이싱과 디펜스, 그리고 미니게임적 요소가 혼합된 유즈맵으로, 특히 경쟁심과 팀워크가 요구되는 플레이어들에게 추천할 만하다. 다만, 히드라리스크의 조종 난이도가 다소 높아 초보자는 적응에 시간이 걸릴 수 있다. 플레이 전에는 맵의 지형과 장애물 위치를 숙지하고, 점프 업그레이드를 우선적으로 진행하는 것이 핵심 전략이다. HydraRace in StarCraft: Brood War is a competitive racing map where six players control Hydralisks, racing to reach a destination. The map features a desert tile set with a wide-open track stretching across flat terrain, narrow shortcuts, and obstacle sections, making player decision-making and control skills crucial. The goal isn't just to arrive first but to efficiently navigate by utilizing the Hydralisk's mobility, choosing shortcuts, and avoiding obstacles. Structurally, the central track is relatively wide at the start, drawing players together, but as the game progresses, the terrain narrows and obstacles appear, making late-game strategy vital. With a long and complex track, even a single mistake can shift rankings, heightening tension. Since Hydralisks benefit greatly from the jump upgrade, players can reinforce health and attack power by using resources and upgrade buildings scattered across the map. These elements transform the race beyond mere speed competition, adding strategic depth that delivers excitement and fun. This map blends racing, defense, and mini-game elements, making it highly recommended for players who enjoy competition and teamwork. However, the Hydralisk's controls can be challenging, so beginners may need time to adapt. Before playing, it's essential to memorize the terrain and obstacle positions and prioritize the jump upgrade as a core strategy.
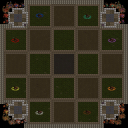
히드라 존즈 (Hydra Zones)
히드라 존즈(Hydra Zones) 7.2 버전은 사막 타일셋의 2048x2048 대형 맵에서 8인 플레이어가 히드라리스크를 중심으로 전투를 벌이는 유즈맵이다. 맵 제목과 내부 설명의 'Kill Triggerz' 문구에서 알 수 있듯, 킬 카운트나 처치 보상 트리거가 핵심 기제로 작동하는 것으로 보인다. 64x64 타일 단위의 넓은 전장은 다수의 진입로와 지역별 고저 차이를 활용한 포지셔닝 싸움을 유도하며, 히드라리스크의 사거리와 근접 유닛의 접근전을 동시에 고려한 지형 배치가 눈에 띈다. 4.0과 6.0 버전이 앞서 존재했다는 점에서 밸런스 조정과 트리거 개선이 지속되어 온 맵으로 추정된다. 진행 방식은 일반적인 밀리 자원 채취보다는 시작 지점 인근 자원과 트리거 기반 보급으로 빠르게 병력을 뽑아 난전에 돌입하는 흐름이 예상된다. 8인 개인전 또는 팀전 모두 가능해 보이나, 킬 트리거 기반 보상 구조상 개인전(FFA)이나 2:2:2:2 같은 다자 구도에서 킬 경쟁이 치열해질 가능성이 높다. 추천 대상은 히드라리스크 컨트롤과 다수전 상황 판단에 자신 있는 중급 이상 유저, 그리고 킬 기반 성장형 맵을 선호하는 커뮤니티 모임이다. 플레이 전에는 버전별 밸런스 차이(7.2에서 추가된 유닛/업그레이드/트리거 변경점)와 시작 자원 설정, 승리 조건(킬 제한/시간 제한/최후 생존) 확인을 권장한다. Hydra Zones 7.2 is a user-made map set on a 2048x2048 desert tileset where eight players battle centered around Hydralisks. The map title and the internal description "Kill Triggerz" suggest that kill-count or kill-reward triggers form the core mechanic. The expansive 64x64-tile battlefield features multiple chokepoints and elevation differences that encourage positioning fights, with terrain laid out to accommodate both Hydralisk range and melee engagement. The existence of prior 4.0 and 6.0 versions indicates ongoing balance tweaks and trigger refinements. Gameplay likely skips standard resource gathering in favor of starting resources and trigger-based income, pushing players into early skirmishes. While both FFA and team setups are possible, the kill-trigger reward structure favors chaotic multi-party formats like 1v1v1v1v1v1v1v1 or 2v2v2v2 where kill races intensify. Recommended for intermediate-to-advanced players confident in Hydralisk micro and multi-army decision-making, as well as communities that enjoy kill-based progression maps. Before playing, verify version-specific changes in 7.2 (new units, upgrades, trigger adjustments), starting resource settings, and win conditions (kill limit, time limit, last-man-standing).
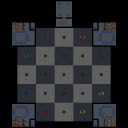
히드라리스크 존 컨트롤 ver 2.2 (Hydralisk Zone Control ver 2.2)
스타크래프트 브루드워 유즈맵 '히드라리스크 존 컨트롤 ver 2.2 (Hydralisk Zone Control ver 2.2)'는 8인용 미니게임 장르로, 우주 타일셋 위에서 히드라리스크를 활용한 존 컨트롤 방식의 아케이드성 대결을 제공한다. 맵 크기는 3072x3072로 넓은 전장에서 다수의 플레이어가 동시에 구역을 차지하고 방어하는 구도가 펼쳐지며, 제작자 DontHateOnNewbs가 버전 2.1에서 발견된 버그를 수정해 2.2를 배포했다. 내부 설명에 따르면 알려진 버그가 모두 수정되어 안정성이 향상되었으며, 별도의 트리거나 복잡한 스토리 없이 직관적인 구역 점령과 유닛 컨트롤 중심으로 진행된다. 플레이어는 각자 히드라리스크를 조작해 맵 곳곳에 배치된 존을 점령하고 일정 시간 유지하거나 적을 몰아내는 방식으로 점수를 획득하며, 빠른 판단력과 마이크로 컨트롤이 승부를 가른다. 8인 전원 자유 대결(FFA) 구도로 추정되며, 팀 설정 없이 개인전으로 즐기기에 적합하다. 맵 구조는 대칭형 배치로 공정성을 확보했고, 우주 배경의 타일셋이 시야 확보에 유리해 난전 중에도 전황 파악이 용이하다. 초보자도 쉽게 룰을 익힐 수 있으나, 숙련자 간의 대결에서는 미세한 컨트롤 차이가 크게 작용해 반복 플레이 가치가 높다. 추천 대상은 짧은 시간 내 경쟁적 재미를 원하는 유저, 히드라리스크 특유의 사거리와 공격 속도를 활용한 존 싸움에 흥미를 느끼는 플레이어다. 플레이 전 버전 2.2 적용 여부와 맵 해시(2e82767358dafdb6) 확인으로 최신 빌드인지 점검하면 좋다. StarCraft Brood War use-map 'Hydralisk Zone Control ver 2.2' is an 8-player mini-game set on a space tileset, offering arcade-style zone control battles centered on Hydralisks. The 3072x3072 map provides a spacious arena where multiple players simultaneously capture and defend zones, and creator DontHateOnNewbs released version 2.2 after fixing all known bugs from 2.1. The internal description notes that all known bugs have been resolved, improving stability, and the gameplay proceeds intuitively around zone occupation and unit control without complex triggers or story. Each player maneuvers Hydralisks to capture zones scattered across the map, holding them for a set time or eliminating opponents to score, making quick decision-making and micro-control decisive. The match is presumed to be a free-for-all with eight players, suitable for individual competition without team settings. The symmetrical layout ensures fairness, and the space tileset aids visibility during chaotic fights. Beginners can grasp the rules quickly, yet subtle control differences greatly affect outcomes among veterans, giving high replay value. Recommended for users seeking competitive fun in short sessions and players interested in zone battles leveraging the Hydralisk's range and attack speed. Before playing, verify that version 2.2 is applied and check the map hash (2e82767358dafdb6) to confirm the latest build.
맵 선택 가이드
태그는 맵의 핵심 특징을 빠르게 설명하지만 제작 버전마다 규칙이 다를 수 있습니다. 상세 설명에서 권장 인원, 난이도, 플레이 시간과 버전을 함께 확인한 뒤 다운로드하세요.