
황무지 테마 스타크래프트 맵 모음
'황무지 테마' 태그가 등록된 맵을 모았습니다. 장르 하나로 찾기 어려운 플레이 방식, 난이도와 특징을 중심으로 인기 맵과 최신 맵을 비교해 보세요.
- 등록 맵
- 2개
- 누적 다운로드
- 0
- 누적 조회
- 108
인기 맵
다운로드와 조회 반응이 높은 맵입니다.
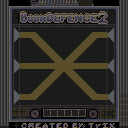
-bonded 방어 (Bound Defense 2)
《Bound Defense 2》는 스타크래프트: 브루드워의 디펜스 장르 유즈맵으로, 황무지 테마의 넓은 맵에서 적의 끊임없는 공격을 방어하는 것이 목표다. 맵의 중앙부에 위치한 방어 거점을 중심으로, 플레이어는 지정된 위치에서 스파이더 마인, 터렛, 미사일 터렛 등 다양한 방어 건물을 설치하고 유지할 수 있다. 맵의 가장자리를 따라 끊임없이 몰려오는 적 유닛을 저지하며, 방어 거점을 지키기 위해 끊임없이 건물을 업그레이드하고 수리해야 한다. 맵의 구조는 중앙 방어 거점을 보호하는 형태로 설계되어 있으며, 방어선이 무너지면 적 유닛이 거점으로 진입해 공격을 가하는 방식으로 진행된다. 적의 공격 패턴은 주기적으로 바뀌며, 플레이어는 이를 예측하고 방어 체계를 유연하게 재구성해야 한다. 맵의 전체적인 분위기는 황량한 황무지라는 테마에 맞게 어두운 톤으로 구성되어 있으며, 방어 거점 주변에는 자원 채취가 불가능한 것으로 보인다. 방어에 실패할 경우 패배 조건이 발동되므로, 전략적인 건물 배치와 자원 관리가 필수적이다. 초보자에게는 건물 배치와 업그레이드 타이밍을 익히는 데 시간이 걸릴 수 있지만, 익숙해지면 긴장감 넘치는 방어전을 즐길 수 있는 맵이다. 특히 방어 거점 주변의 좁은 길목을 적극 활용한 방어 전략이 중요하며, 적의 유닛이 몰려오는 방향을 예측해 방어선을 구축하는 것이 핵심이다. 추천 플레이 인원은 6명으로, 각 플레이어가 분담해 특정 구역을 방어하거나, 협력해 중앙 거점을 공동으로 관리하는 방식으로 플레이할 수 있다. 맵의 난이도는 초보도 쉽게 접근할 수 있지만, 고난이도에서는 적의 공격 패턴이 복잡해지고 방어 건물의 내구도가 빠르게 소모되므로, 꾸준한 업그레이드와 수리가 필요하다. 플레이 전에는 방어 건물의 위치와 업그레이드 경로를 미리 숙지하고, 적의 공격 타이밍을 파악하는 것이 중요하다. 또한, 방어 거점 주변의 좁은 길목을 활용한 방어 전략을 연습해두면 좋다. 이 맵은 디펜스 장르를 좋아하는 플레이어들에게 특히 추천하며, 팀웍과 전략적 사고가 요구되는 만큼 친구들과 함께 플레이하면 더 큰 재미를 느낄 수 있다. Bound Defense 2 is a defense-style custom map for StarCraft: Brood War, set in a desolate wasteland theme where players must defend a central stronghold against endless waves of enemy units. The map features a central defense hub where players can construct and upgrade defensive structures such as spider mines, turrets, and missile turrets. Enemies continuously spawn from the map's edges and advance toward the stronghold, with the goal of preventing them from breaching the defense lines. The map's layout is designed to protect the central hub, and failing to maintain defenses results in enemy units infiltrating and attacking the stronghold directly. Enemy attack patterns vary periodically, requiring players to adapt their defensive strategies dynamically. The atmosphere is dark and fitting for the wasteland theme, with no resource gathering possible near the stronghold. Losing the defense lines triggers a defeat condition, making strategic building placement and resource management crucial. While beginners may struggle with timing upgrades and placements, mastering the map offers an intense and engaging defensive experience. Narrow pathways around the stronghold are key defensive chokepoints, and predicting enemy movement patterns is essential for effective defense. The recommended player count is six, allowing for individual or team-based defense strategies, such as dividing zones or collaborating on central hub management. The difficulty is accessible to newcomers but ramps up with complex attack patterns and rapid wear on defensive structures, necessitating constant upgrades and repairs. Before playing, familiarize yourself with building placements, upgrade paths, and enemy attack timings. Practicing chokepoint defense strategies around the stronghold will greatly improve your performance. This map is highly recommended for fans of the defense genre, offering a blend of strategy and teamwork that is especially enjoyable with friends.
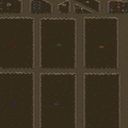
울트라 드로어 -1OOOO- (Ultra Drawer -1OOOO-)
스타크래프트 브루드워의 유즈맵 '울트라 드로어 -1OOOO-'는 드로어(drawer)라는 장르의 독특한 요소를 극대화한 디펜스 형식의 맵으로, 플레이어는 제한된 공간 안에서 끊임없이 밀려드는 적을 효율적으로 처리해야 한다. 이 맵은 7명의 플레이어가 각자 독립된 공간에서 전투를 벌이는 구조로, 각자의 영역이 중앙의 넓은 공간을 통해 연결되지만 직접적인 상호작용은 제한되어 있어 전략적인 배치와 자원 관리가 중요하다. 중앙 공간은 아이템 상자나 보너스 자원이 배치되어 있어 이를 획득하는 것이 승리의 열쇠가 된다. 맵의 전체적인 분위기는 황무지 테마로, 어두운 색조와 황폐한 지형이 긴장감을 더하며, 적의 웨이브가 밀려오는 타이밍과 패턴이 다소 규칙적이지만 난이도가 점차 상승하는 특징을 가지고 있다. 플레이어는 초반에는 소규모의 적을 상대하지만, 시간이 지나면서 대규모의 조합을 상대해야 하므로 초보자는 적응이 어려울 수 있다. 추천 대상은 스타크래프트의 기본 전략을 숙지한 플레이어들로, 특히 디펜스와Resource Management(자원 관리)에 익숙한 유저가 즐기기 좋다. 플레이 전에는 각자의 시작 지점과 중앙 자원의 위치를 정확히 숙지하고, 초반 자원 확보를 위해 빠르게 행동하는 것이 중요하다. 또한, 중앙 공간을 지나가며 적의 공격을 피하거나 반격을 가하는 타이밍을 잘 조절해야 한다. 맵의 밸런스는 대체로 안정적이지만, 특정 조합의 적에 대한 대비가 부족할 수 있어 패턴 학습이 필요하다. 드로어 장르에 익숙하지 않은 플레이어는 난이도를 '어려움'으로 설정하고 천천히 적응해 나가는 것이 좋다. StarCraft: Brood War's custom map *Ultrara Drawer -1OOOO-* maximizes the unique elements of the drawer genre, featuring a defense-style gameplay where players must efficiently handle waves of enemies in confined spaces. Seven players battle in isolated zones connected by a central open area, though direct interaction is limited, making strategic positioning and resource management key to success. The central space contains item boxes and bonus resources—securing these is vital for victory. The map adopts a desolate wasteland theme, with dark tones and barren terrain heightening tension, while enemy waves follow somewhat predictable patterns that gradually escalate in difficulty. Early on, players face minor threats, but as time passes, they must contend with larger, more complex enemy compositions, posing a challenge for beginners. It’s best suited for those familiar with StarCraft’s core strategies, particularly players experienced in defense mechanics and resource allocation. Before starting, it’s crucial to memorize starting positions and the locations of central resources, acting quickly to secure early funds. Players must also carefully time their movements through the central area—either dodging attacks or countering enemies. While the map’s balance is generally stable, certain enemy compositions may lack counterplay, requiring players to study and adapt to patterns. For those new to the drawer genre, setting the difficulty to 'Hard' and learning gradually is recommended.
최근 등록된 맵
새로 추가된 파일과 버전을 확인하세요.
울트라 드로어 -1OOOO- (Ultra Drawer -1OOOO-)
스타크래프트 브루드워의 유즈맵 '울트라 드로어 -1OOOO-'는 드로어(drawer)라는 장르의 독특한 요소를 극대화한 디펜스 형식의 맵으로, 플레이어는 제한된 공간 안에서 끊임없이 밀려드는 적을 효율적으로 처리해야 한다. 이 맵은 7명의 플레이어가 각자 독립된 공간에서 전투를 벌이는 구조로, 각자의 영역이 중앙의 넓은 공간을 통해 연결되지만 직접적인 상호작용은 제한되어 있어 전략적인 배치와 자원 관리가 중요하다. 중앙 공간은 아이템 상자나 보너스 자원이 배치되어 있어 이를 획득하는 것이 승리의 열쇠가 된다. 맵의 전체적인 분위기는 황무지 테마로, 어두운 색조와 황폐한 지형이 긴장감을 더하며, 적의 웨이브가 밀려오는 타이밍과 패턴이 다소 규칙적이지만 난이도가 점차 상승하는 특징을 가지고 있다. 플레이어는 초반에는 소규모의 적을 상대하지만, 시간이 지나면서 대규모의 조합을 상대해야 하므로 초보자는 적응이 어려울 수 있다. 추천 대상은 스타크래프트의 기본 전략을 숙지한 플레이어들로, 특히 디펜스와Resource Management(자원 관리)에 익숙한 유저가 즐기기 좋다. 플레이 전에는 각자의 시작 지점과 중앙 자원의 위치를 정확히 숙지하고, 초반 자원 확보를 위해 빠르게 행동하는 것이 중요하다. 또한, 중앙 공간을 지나가며 적의 공격을 피하거나 반격을 가하는 타이밍을 잘 조절해야 한다. 맵의 밸런스는 대체로 안정적이지만, 특정 조합의 적에 대한 대비가 부족할 수 있어 패턴 학습이 필요하다. 드로어 장르에 익숙하지 않은 플레이어는 난이도를 '어려움'으로 설정하고 천천히 적응해 나가는 것이 좋다. StarCraft: Brood War's custom map *Ultrara Drawer -1OOOO-* maximizes the unique elements of the drawer genre, featuring a defense-style gameplay where players must efficiently handle waves of enemies in confined spaces. Seven players battle in isolated zones connected by a central open area, though direct interaction is limited, making strategic positioning and resource management key to success. The central space contains item boxes and bonus resources—securing these is vital for victory. The map adopts a desolate wasteland theme, with dark tones and barren terrain heightening tension, while enemy waves follow somewhat predictable patterns that gradually escalate in difficulty. Early on, players face minor threats, but as time passes, they must contend with larger, more complex enemy compositions, posing a challenge for beginners. It’s best suited for those familiar with StarCraft’s core strategies, particularly players experienced in defense mechanics and resource allocation. Before starting, it’s crucial to memorize starting positions and the locations of central resources, acting quickly to secure early funds. Players must also carefully time their movements through the central area—either dodging attacks or countering enemies. While the map’s balance is generally stable, certain enemy compositions may lack counterplay, requiring players to study and adapt to patterns. For those new to the drawer genre, setting the difficulty to 'Hard' and learning gradually is recommended.
-bonded 방어 (Bound Defense 2)
《Bound Defense 2》는 스타크래프트: 브루드워의 디펜스 장르 유즈맵으로, 황무지 테마의 넓은 맵에서 적의 끊임없는 공격을 방어하는 것이 목표다. 맵의 중앙부에 위치한 방어 거점을 중심으로, 플레이어는 지정된 위치에서 스파이더 마인, 터렛, 미사일 터렛 등 다양한 방어 건물을 설치하고 유지할 수 있다. 맵의 가장자리를 따라 끊임없이 몰려오는 적 유닛을 저지하며, 방어 거점을 지키기 위해 끊임없이 건물을 업그레이드하고 수리해야 한다. 맵의 구조는 중앙 방어 거점을 보호하는 형태로 설계되어 있으며, 방어선이 무너지면 적 유닛이 거점으로 진입해 공격을 가하는 방식으로 진행된다. 적의 공격 패턴은 주기적으로 바뀌며, 플레이어는 이를 예측하고 방어 체계를 유연하게 재구성해야 한다. 맵의 전체적인 분위기는 황량한 황무지라는 테마에 맞게 어두운 톤으로 구성되어 있으며, 방어 거점 주변에는 자원 채취가 불가능한 것으로 보인다. 방어에 실패할 경우 패배 조건이 발동되므로, 전략적인 건물 배치와 자원 관리가 필수적이다. 초보자에게는 건물 배치와 업그레이드 타이밍을 익히는 데 시간이 걸릴 수 있지만, 익숙해지면 긴장감 넘치는 방어전을 즐길 수 있는 맵이다. 특히 방어 거점 주변의 좁은 길목을 적극 활용한 방어 전략이 중요하며, 적의 유닛이 몰려오는 방향을 예측해 방어선을 구축하는 것이 핵심이다. 추천 플레이 인원은 6명으로, 각 플레이어가 분담해 특정 구역을 방어하거나, 협력해 중앙 거점을 공동으로 관리하는 방식으로 플레이할 수 있다. 맵의 난이도는 초보도 쉽게 접근할 수 있지만, 고난이도에서는 적의 공격 패턴이 복잡해지고 방어 건물의 내구도가 빠르게 소모되므로, 꾸준한 업그레이드와 수리가 필요하다. 플레이 전에는 방어 건물의 위치와 업그레이드 경로를 미리 숙지하고, 적의 공격 타이밍을 파악하는 것이 중요하다. 또한, 방어 거점 주변의 좁은 길목을 활용한 방어 전략을 연습해두면 좋다. 이 맵은 디펜스 장르를 좋아하는 플레이어들에게 특히 추천하며, 팀웍과 전략적 사고가 요구되는 만큼 친구들과 함께 플레이하면 더 큰 재미를 느낄 수 있다. Bound Defense 2 is a defense-style custom map for StarCraft: Brood War, set in a desolate wasteland theme where players must defend a central stronghold against endless waves of enemy units. The map features a central defense hub where players can construct and upgrade defensive structures such as spider mines, turrets, and missile turrets. Enemies continuously spawn from the map's edges and advance toward the stronghold, with the goal of preventing them from breaching the defense lines. The map's layout is designed to protect the central hub, and failing to maintain defenses results in enemy units infiltrating and attacking the stronghold directly. Enemy attack patterns vary periodically, requiring players to adapt their defensive strategies dynamically. The atmosphere is dark and fitting for the wasteland theme, with no resource gathering possible near the stronghold. Losing the defense lines triggers a defeat condition, making strategic building placement and resource management crucial. While beginners may struggle with timing upgrades and placements, mastering the map offers an intense and engaging defensive experience. Narrow pathways around the stronghold are key defensive chokepoints, and predicting enemy movement patterns is essential for effective defense. The recommended player count is six, allowing for individual or team-based defense strategies, such as dividing zones or collaborating on central hub management. The difficulty is accessible to newcomers but ramps up with complex attack patterns and rapid wear on defensive structures, necessitating constant upgrades and repairs. Before playing, familiarize yourself with building placements, upgrade paths, and enemy attack timings. Practicing chokepoint defense strategies around the stronghold will greatly improve your performance. This map is highly recommended for fans of the defense genre, offering a blend of strategy and teamwork that is especially enjoyable with friends.
맵 선택 가이드
태그는 맵의 핵심 특징을 빠르게 설명하지만 제작 버전마다 규칙이 다를 수 있습니다. 상세 설명에서 권장 인원, 난이도, 플레이 시간과 버전을 함께 확인한 뒤 다운로드하세요.