
화산 테마 스타크래프트 맵 모음
'화산 테마' 태그가 등록된 맵을 모았습니다. 장르 하나로 찾기 어려운 플레이 방식, 난이도와 특징을 중심으로 인기 맵과 최신 맵을 비교해 보세요.
- 등록 맵
- 44개
- 누적 다운로드
- 0
- 누적 조회
- 1,657
인기 맵
다운로드와 조회 반응이 높은 맵입니다.
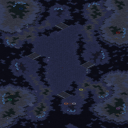
루나 더 파이널 (Luna the Final)
스타크래프트 브루드워의 UMS 유즈맵 'Luna the Final'은 화산 테마의 거대한 맵에서 펼쳐지는 디펜스 형식의 전략 게임이다. 맵 중앙의 넓은 공간에서 시작되는 전투는 플레이어가 일정 주기마다 밀려드는 적을 방어하는 방식으로 진행되며, 맵 곳곳에 배치된 방어 건물과 자원 수급 포인트를 활용해 어떻게든 살아남아야 한다. 맵의 크기가 4096x4096으로 상당히 넓고, 해상도도 4096x4096인 만큼 넓은 시야와 전략적 위치 선정이 중요하다. 특히 맵의 테마가 화산인 만큼, 배경에 녹색과 붉은색의 용암 지대가 눈에 띄며, 이는 분위기뿐만 아니라 시야 확보에도 영향을 미친다. 맵의 제작자인 I3aDa_FireFist에 의해 V.3.1 버전까지 업데이트되었으며, 강퇴 기능과 강제 옵션 기능이 추가되어 플레이어 간 커뮤니케이션과 게임 진행의 안정성이 높아졌다. 이 맵은 기본적으로 디펜스 장르에 속하지만, 단순한 방어뿐만 아니라 자원 관리와 위치 선정, 타이밍 공격 등 다층적인 전략을 요구한다. 플레이어는 초반에 주어지는 소량의 자원으로 방어 건물을 건설하거나 유닛을 생산해야 하며, 적의 공격 패턴을 예측해 방어선을 구축하는 것이 중요하다. 맵의 중앙 부분은 비교적 평탄한 지형이지만, 가장자리에는 언덕 지형이 있어 시야와 공격 범위를 확보하기 좋다. 또한, 맵 곳곳에 scattered한 리소스 지점이 존재해 자원 수급을 원활히 할 수 있도록 설계되어 있다. 이 맵을 즐기기 위해서는 기본적인 스타크래프트 전략 이해와 함께, 디펜스 게임의 기본적인 전략 감각이 필요하다. 초보자의 경우 난이도가 다소 높을 수 있지만, 꾸준한 플레이를 통해 방어 루틴을 익히고, 적의 공격 패턴을 분석하는 연습을 하면 점차 숙련될 수 있다. 또한, 팀 플레이를 지원하는 맵이므로 친구들과 함께 플레이하면 더욱 즐겁게 클리어할 수 있을 것이다. 맵의 거대한 규모와 화산 테마가 주는 분위기는 스타크래프트의Classic한Feel을 살리면서도, 새로운 전략적 깊이를 제공하는 훌륭한 UMS 유즈맵으로 꼽힌다. This Brood War UMS custom map, 'Luna the Final,' offers a strategic defense experience set against a volcanic theme on a massive 4096x4096 battlefield. Players must defend against waves of enemies by strategically placing buildings and managing resources across the expansive map. The volcanic terrain, with its distinct green and red lava textures, not only sets the mood but also influences visibility and positioning. Developed by I3aDa_FireFist up to version V.3.1, this map includes features like kick and forced option functions to enhance gameplay stability and player communication. While primarily a defense genre map, 'Luna the Final' demands more than just basic tactics. Players must balance resource collection, base construction, and timing attacks against enemy waves. The central area of the map is relatively flat, offering open space for expansions, while the edges feature elevated terrain that provides strategic vantage points. Scattered resource points across the map ensure a steady supply chain for continuous defense. For beginners, the map may present a steep learning curve due to its size and complexity. However, with practice, players can hone their defense strategies and adapt to enemy patterns. The map supports team play, making it ideal for multiplayer sessions with friends. The classic Brood War feel, combined with the volcanic aesthetic and strategic depth, makes 'Luna the Final' a standout UMS custom map that offers both challenge and immersion.
![보스사냥 RPG - TOP[3] 맵 미리보기](https://cdn-star-data.huzy.net/thumbnail_b9e333b1f8b3498db1e7652a9ac84aed.jpg)
보스사냥 RPG - TOP[3]
보스사냥 RPG - TOP[3]는 스타크래프트 브루드워의 유즈맵으로, 7명의 플레이어가 함께 보스를 사냥하는 RPG 장르의 맵입니다. 맵은 화산 테마로 구성되어 있으며, 넓은 맵 곳곳에 보스가 배치되어 있습니다. 플레이어는 각자 조종 가능한 영웅을 키우며 장비를 획득하고 스킬을 발전시켜 보스를 물리치는 것이 목표입니다. 화면 중앙에는 보스가 위치해 있으며, 보스 주변에는 방어 시설이나 보조 구조물이 배치되어 있어 전략적인 전투가 요구됩니다. 맵 상단에는 플레이어의 자원과 상태가 표시되는 인터페이스가 보이며, 하단에는 미니맵이 제공되어 넓은 맵을 efficiently 탐색할 수 있습니다. 보스를 사냥하는 과정에서 레벨 업과 아이템 강화가 가능하며, 이를 통해 점차 강해질 수 있습니다. 맵의 구조상 보스 간의 간격이 넓어 이동이 빈번히 필요하며, 보스에 따라 다른 전술이 요구됩니다. 또한, 보스를 사냥할 때마다 보상이 주어지며, 이를 통해 영웅을 더욱 강력하게 성장시킬 수 있습니다. 이 맵은 초보자부터 숙련자까지 즐길 수 있도록 설계되었으며, 특히 팀워크와 전략적인 플레이가 중요한 요소로 작용합니다. 다만, 보스의 패턴을 학습하지 않으면 난이도가 급격히 상승할 수 있어, 초보 플레이어는 보스의 공격 패턴을 숙지한 후 도전하는 것이 좋습니다. 또한, 아이템과 스킬의 균형이 중요하므로, 장비와 스킬 트리를 신중히 선택해야 합니다. 전체적으로는 긴 플레이 시간과 반복 가능한 재미가 있는 맵으로, 스타크래프트의 유즈맵 중에서도 손꼽히는 RPG 경험을 제공합니다. Boss Hunting RPG - TOP[3] is a StarCraft: Brood War custom map designed for 7 players to hunt bosses together in an RPG genre. The map features a volcanic theme with bosses placed across the expansive terrain. Players control individual heroes, level them up, collect equipment, and develop skills to defeat the bosses. The central area of the screen displays the boss along with surrounding defensive structures or auxiliary buildings, requiring strategic combat. The top of the screen shows an interface with player resources and status, while the bottom provides a minimap for efficient navigation. Players can level up and upgrade items through boss hunts, gradually increasing their hero's power. The map's structure includes wide gaps between bosses, necessitating frequent movement and different tactics for each boss encounter. Rewards are given after defeating bosses, allowing heroes to grow stronger. This map is designed for players of all skill levels, especially emphasizing teamwork and strategy. However, the difficulty spikes if players fail to learn boss patterns, so beginners should study boss attacks before attempting. Balancing equipment and skill trees is crucial, as poor choices can hinder progress. Overall, this is a long-playing and replayable map that delivers a standout RPG experience among StarCraft custom maps.
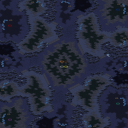
비잔티움 II 2.3 (Byzantium II 2.3)
‘Byzantium II 2.3’은 스타크래프트 브루드워의 대표적인 밀리 맵으로, 고대 동로마 제국인 비잔티움 제국의 이름을 딴 전략 대결 공간이다. 2~4명으로 구성된 플레이어들이 각각의 시작 지점에서Resource를 확보하고, 지형을 활용해 방어선을 구축하거나 상대 teritorry를 확장하는 방식으로 게임이 진행된다. 맵 중앙에는 넓은 평원과 산악 지형이 조화롭게 배치되어 있어, 초원에서는 빠른 병력 이동이 가능하고, 산악 지대에서는 방어적 우위를 점할 수 있는 구조로 설계되었다. 특히 화산 테마의 타일셋 덕분에 독특한 분위기를 연출하며, 맵의 균형 있는 디자인은 초보자와 숙련자 모두에게 흥미로운 전략적 선택을 강요한다. 맵의 승패는Resource 관리와 기지 확장 능력에 크게 좌우되며, 상대의 멀티 지역을 조기에 확보하거나 방어塔를 구축하는 것이 핵심 전략이다. 초심자의 경우Resource 확보와 초반 병력 생산에 주의를 기울여야 하며, 숙련자들은 지형 이점을 활용한 기습 공격이나 다방향 멀티 운영을 통해 승리를 노릴 수 있다. 비잔티움 제국의 역사적 배경과는 별개로, 이 맵은 밀리 유저들에게는 전략적 깊이를 제공하는 고전 중 하나로 손꼽힌다. 플레이 전, 맵의 주요Resource 위치와 접근 경로를 미리 숙지하고, 상대의 예상 멀티 지역을 예측하는 것이 중요하다. 또한, 화산 테마의 시각적 특성 탓에 일부 지역은 시야가 제한될 수 있으니, 센서 업그레이드나 오버로드 활용을 고려해보는 것도 좋은 전략이다. Byzantium II 2.3 is a classic StarCraft: Brood War melee map inspired by the Byzantine Empire of the Eastern Roman world. Players, typically 2 to 4, start at distinct locations and compete to secure Resources, expand their bases, and outmaneuver opponents through strategic terrain control. The map features a balanced mix of open plains for rapid troop movement and mountainous regions for defensive advantage, all set against a volcanic tileset that adds a unique visual flair. The balanced design ensures that both beginners and experienced players face meaningful strategic choices, with victory often hinging on efficient Resource management and base expansion. Early-game focus on Resource collection and unit production is crucial for newcomers, while seasoned players can leverage the terrain for ambushes or multi-directional expansion strategies. Though the map’s historical theme adds flavor, its core appeal lies in the depth of StarCraft’s classic melee mechanics. Before playing, it’s advisable to familiarize yourself with the primary Resource locations and choke points, as the volcanic theme may obscure vision in certain areas. Upgrading sensors or using overlords for scouting can provide a significant edge in anticipating opponent expansions.
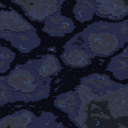
사파이어 아일즈 (Sapphire Isles)
‘사파이어 아일즈’는 지구라트 형태의 섬들이 바다 한가운데 떠 있는 독특한 지형을 자랑하는 스타크래프트 브루드워의 유즈맵으로, 2~6명이 플레이할 수 있는 밀리 기반의 대전 맵이다. 화산 테마의 타일셋으로 구성된 맵은 수중 지역과 섬 사이의 협소한 통로, 그리고 중앙의 높은 지대까지 다양한 고저차를 활용해 전략적 선택을 강제한다. 해상도는 6144x6144에 달하며, 타일 단위는 192x192로 넓은 맵을 세밀하게 구성할 수 있도록 설계되었다. 특히 섬들 사이의 좁은 길목은 병력 이동을 제한하는 동시에, 후방 기습이나 시야 확보를 위한 중요한 포인트로 작용한다. 중앙의 높은 지대는 방어 거점 역할을 할 수 있으며, 수중 지역은 시야가 제한되어 적이 접근하기 전에 미리 탐색하거나 은폐할 수 있는 공간으로 활용된다. 맵의 전체적인 분위기는 ‘바다 아래의 공포’를 테마로 삼아, 수면 위의 섬과 수면 아래의 미지의 공간을 대조적으로 배치해 플레이어에게 긴장감을 부여한다. 다만, 넓은 맵 특성상 초반 자원 확보가 중요하며, 중앙 고지대를 차지하는 것이 승리의 관건으로 보인다. 팀전이 아니기 때문에 개인전과 같은 변수가 발생할 수 있지만, 섬 간의 이동 제한으로 인해 전투는 필연적으로 좁은 길목에서 벌어질 수밖에 없다. 맵을 플레이하기 전에는 섬 간의 통로와 중앙 고지대의 확보 여부를 먼저 점검하는 것이 좋으며, 수중 지역의 시야 차이를 적극 활용해 적의 움직임을 예측하는 전략이 필요하다. 초보자에게는 넓은 맵과 좁은 길목이 부담스러울 수 있지만, 섬 간의 이동 경로를 숙지하면 비교적 쉽게 적응할 수 있을 것이다. 이 맵은 좁은 길목과 높은 지대의 전략적 중요성을 체험하고 싶은 플레이어들에게 추천한다. 또한, 화산 테마의 분위기를 좋아하는 유저라면 시각적 만족감까지 얻을 수 있을 것이다. 다만, 넓은 맵에서 발생하는 렉이나 로딩 시간은 사양에 따라 차이를 보일 수 있어, 사전 테스트가 권장된다. 맵의 밸런스는 섬 간의 통로가 좁아 병력 집중이 강제되는 구조로 인해, 초반 자원 확보와 중앙 고지대 차지 여부가 승패를 좌우할 가능성이 높다. 유사한 구조의 맵을 선호하는 플레이어라면 이 맵을 즐겁게 플레이할 수 있을 것이다. ‘Sapphire Isles’ is a unique Brood War custom map in *StarCraft: Brood War*, featuring floating islands shaped like ziggurats scattered across the ocean. Designed for 2 to 6 players, this mill-based battle map utilizes a volcanic tile set, incorporating diverse elevation changes—from underwater regions and narrow passages between islands to elevated central highlands—to force strategic decisions. With a resolution of 6144x6144 and tile units of 192x192, the map offers a finely detailed and expansive battlefield. The narrow corridors between islands restrict troop movement while serving as critical vantage points for ambushes or scouting. The central highlands act as defensive strongholds, while the murky underwater areas limit visibility, allowing players to either scout stealthily or conceal their movements. The map’s overall atmosphere, themed around “horror beneath the waves,” contrasts the exposed islands above with the unknown depths below, heightening tension. Due to the map’s vastness, securing early resources is vital, and controlling the central high ground appears crucial for victory. While this is a free-for-all rather than a team game, the constrained paths between islands mean battles inevitably unfold in tight choke points. Before playing, it’s wise to scout the passages between islands and secure the central high ground. Leveraging the limited visibility underwater can help predict enemy movements. Novices may find the large map and narrow paths overwhelming, but familiarizing themselves with island routes will ease adaptation. This map is ideal for players seeking to experience the strategic importance of narrow passages and elevated terrain. Fans of the volcanic aesthetic will also appreciate its visual appeal. However, performance issues like lag or long loading times may vary by system, so testing beforehand is recommended. The map’s balance—with its narrow corridors forcing concentrated forces—makes early resource gathering and control of the central high ground decisive factors in victory. Players who enjoy similar map structures will likely find this one highly enjoyable.
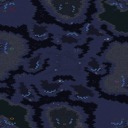
헌트리스 (The Huntress)
스타크래프트 브루드워 맵 '더 헌트리스(The Huntress)'는 6인용 밀리 맵으로, 원작자 likewise_가 2000년 제작한 '딥 퍼플'을 기반으로 개조된 시나리오 버전 1.2다. 내부 설명에 따르면 패자들을 '잃어버린 사원'에서 사냥하던 헌트리스가 이제 그들의 유일한 희망이라는 스토리가 담겨 있다. 맵의 배경은 화산 테마로 구성되어 있으며, 중앙에 거대한 사원이 자리 잡고 있어 건물 배치와 전투 흐름이 흥미롭게 연계된다. 특히 맵의 이름과 스토리에서 느껴지는 사냥꾼과 희생자의 긴장감은 플레이어들에게 전략적 긴장감을 부여한다. 맵은 4096x4096 크기의 넓은 공간을 자랑하지만, 핵심 전투 지역은 비교적 조밀하게 배치되어 있어 빠르게 전투가 벌어질 수 있다. 또한, 타일셋이 화산인 만큼 지형의 고저차가 크고, 일부 지역은 시야를 가리는 지형이 존재해 전략적 판단이 요구된다. 초반 자원 수급은 비교적 평범하지만, 중앙 지역으로 진출하기까지는 일정 수준의 병력 구축이 필요해 초보 플레이어보다는 중급 이상의 숙련자가 즐기기에 적합한 구조다. 맵의 특징상 팀플레이보다는 개인 또는 소규모 전투가 주를 이루며, 특히 '헌트리스'라는 컨셉에 맞게 적을 추격하고 섬멸하는 플레이 스타일이 강제된다. 다만, 맵의 내구도는 비교적 튼튼한 편이지만, 일부 지역은 건물 건설에 제약이 있어 빌드 오더를 신중히 세워야 한다. 이 맵을 플레이하기 전에 사전 준비로는 건물을 짓기 어려운 지역과 주요 자원 분포를 숙지하는 것이 중요하며, 특히 중앙 교전 지역에서의 전투는 자원과 병력의 균형을 유지하는 것이 승리의 열쇠가 될 것이다. 추천 대상은 전략적 감각과 전투 경험을 겸비한 플레이어들로, 단순히 자원만 모아 공격하는 것이 아니라 지형과 스토리를 살린 플레이를 즐기는 이들에게 적합하다. 맵의 가치를 높이려면 내구도 관리와 시야 확보에 중점을 두고, 스토리를 반영한 사냥꾼의 역할을 자임하는 플레이가 필요할 것이다. The Huntress is a 6-player StarCraft: Brood War melee map based on the 2000 remake of likewise_'s 'Deep Purple,' now reimagined as a scenario version 1.2. According to its internal lore, the Huntress hunts losers from the Lost Temple, positioning her as their sole hope. The volcanic-themed terrain features a large central temple, blending architectural strategy with combat flow. While the 4096x4096 map offers vast space, key battle zones are densely packed, enabling rapid engagements. The volcanic terrain includes elevation changes and obscured viewpoints, demanding strategic foresight. Early resource gathering is straightforward, but advancing to central areas requires balanced army development, making it more suitable for intermediate to advanced players. The map emphasizes solo or small-scale combat over team play, with mechanics that enforce a pursuit-and-eliminate playstyle inspired by the 'Huntress' theme. Building constraints in certain areas necessitate careful build orders. Players should familiarize themselves with hard-to-reach zones and resource distribution before starting. Success hinges on maintaining resource balance and controlling vision during central conflicts. Ideal for those who appreciate strategic depth and thematic immersion, this map rewards durability management and role-adherent play. Prospective players should prioritize terrain awareness and narrative-driven tactics to fully experience its design philosophy.
마이크로 헌터스 - 노 배리어스 (Micro Hunters - NO BARRIERS)
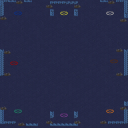
스타크래프트 브루드워의 ‘마이크로 헌터스 - 노 배리어스’는 화면 전체가 좁고 밀집된 맵에서 펼쳐지는 빠른 속도의 전투가 돋보이는 팀 밀리 맵이다. 화산 테마의 배경과 좁은 지형이 어우러져 플레이어의 움직임과 전술적 선택이 더욱 중요해진다. 맵 중앙에는 넓은 개활지가 있으며, 각 팀의 시작 지역은 좁은 통로와 구불구불한 길로 연결되어 있다. 이 구조는 초반의 치열한 접전과 빠른Resources 확보를 강제하며, 특히 저글링이나 질럿 같은 근접 유닛을 중심으로 한 전투가 빛을 발할 것이다. 또한 좁은 길목은 적의 시야를 제한하여 기습 공격이나 후방 침투 전략이 유효해진다. 플레이어는 제한된 자원으로도 빠른 판단과 효율적인Resource 관리가 요구된다. Mineral Field가 중앙과 양쪽 길목에 골고루 분포되어 있어 Mineral gathering 경쟁이 치열해질 수 있으며, Gas Geyser는 양 팀 시작 지역 근방에 위치해 있어 테크트리 확장이 용이하다. 맵의 좁은 통로와 복잡한 지형은 시야 확보와 병력 운용에 큰 영향을 미치므로, 초반의 Mineral gathering과 Gas 확보가 승패를 좌우할 가능성이 높다. 또한 좁은 길목에서 벌어지는 근접전은 유닛의 컨트롤과 타이밍에 따라 승부가 갈릴 수 있어, 기계 유닛과 근접 유닛의 조합이 중요해진다. 이 맵은 초보자보다는 중급 이상의 플레이어에게 더 적합하다. 좁은 지형과 빠른 전투로 인해Resource 관리와 유닛 컨트롤에 대한 기본기가 요구되며, 특히 좁은 통로에서 벌어지는 전투는 미세한 컨트롤과 타이밍이 중요하다. 팀워크가 요구되는 맵이므로, 팀원과의 원활한 소통과 협력이 필수적이다. 또한 맵의 특성상 초반Resources 확보가 늦어지면 쉽게 밀릴 수 있어, 빠른 결정과Resource 관리 능력을 키운 플레이어에게 추천할 만한 맵이다. 특히 화산 테마의 배경과 좁은 지형이 어우러진 시각적 요소는 플레이어에게 긴장감을 더해준다. StarCraft: Brood War’s *Micro Hunters - No Barriers* is a team melee map where fast-paced battles unfold in a tightly packed, screen-filling layout. The volcanic-themed background and cramped terrain force players to focus on movement and tactical decisions. A wide open central area sits between each team’s starting zones, which are connected by narrow, winding paths. This design demands intense early clashes and quick resource gathering, especially favoring close-quarters combat with units like Zerglings or Zealots. The tight corridors also restrict visibility, making ambushes and rear infiltration viable strategies. Even with limited resources, players must act quickly and manage them efficiently. Mineral Fields are evenly spread across the center and side paths, sparking fierce mineral-gathering races, while the Gas Geysers near each team’s base make tech expansions straightforward. The map’s narrow passages and complex layout heavily influence vision control and troop movement, so securing minerals and gas early can decide the match. Close-quarters fights in these choke points hinge on precise unit control and timing, making the synergy between mechanical and melee units crucial. This map is better suited for intermediate to advanced players. The confined spaces and rapid engagements require solid fundamentals in resource management and unit control, and battles in tight corridors demand sharp micro and impeccable timing. Teamwork is essential, so clear communication and coordination with teammates are a must. Falling behind early in resource collection can quickly lead to defeat, so players who excel at quick decision-making and resource efficiency will thrive here. The map’s volcanic backdrop and claustrophobic terrain also heighten the tension, keeping players on edge.
뉴 선킨 디펜스 (New Sunken Defence)
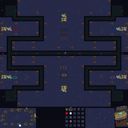
‘뉴 선킨 디펜스(New Sunken Defence)’는 스타크래프트 브루드워의 유즈맵으로, 화산 테마의 맵에서 방어전을 펼치는 디펜스 장르의 맵이다. 맵의 중앙에 위치한 주요 건물을 지키며 끊임없이 몰려드는 적 유닛들을 상대하는 것이 핵심 목표로 보인다. 맵 구조는 대칭형이며, 각 플레이어의 기지 주변으로 보호막 역할을 하는 구조물이 배치되어 있어 방어 라인을 구축하는 전략이 중요할 것으로 추정된다. 맵의 배경은 화산 지형으로, 붉은 색조의 지형과 용암이 시각적으로 강렬한 인상을 준다. 맵의 테두리에는 오브젝트로 추정되는 장식물이 배치되어 있으며, 맵 중앙에는 거대한 화산 구조물이 위치하고 있다. 방어전 외에도 맵의 일부 구간에 출현하는 특수 유닛이나 보너스 오브젝트가 존재할 가능성이 있으며, 이를 활용하는 플레이가 게임의 재미를 더할 것으로 보인다. 이 맵은 주로 컴퓨터 상대 디펜스 형식으로 진행되며, 방어 라인을 어떻게 구축하고 자원을 얼마나 효율적으로 활용하는지가 승패를 좌우할 것이다. 초보자보다는 중급 이상의 플레이어에게 적합하며, 화산 테마의 링크와 전략적 방어 구축을 경험해 보고 싶은 유저들에게 추천할 만한 맵이다. 플레이 전에는 맵의 주요 방어 지점과 자원 분포를 미리 확인하여 전략을 세우는 것이 중요하다. 또한, 맵의 특수한 오브젝트나 이벤트가 발생할 수 있으므로, 게임 내 안내 메시지를 주의 깊게 확인하는 것도 좋다. ‘New Sunken Defence’ is a custom map for *StarCraft: Brood War* where players defend against waves of enemies on a volcanic-themed map. The core objective is to protect the main building located at the center of the map while fending off relentless enemy attacks. The symmetrical layout features protective structures around each player’s base, making strategic defense line construction crucial. The map’s striking visuals—with its red-toned terrain and lava—create a vivid backdrop, while decorative objects line the edges and a massive volcanic structure dominates the center. Beyond defense, certain sections may spawn special units or bonus objects that add depth to gameplay, rewarding creative strategies. Designed primarily for AI-based defense modes, success hinges on efficient resource management and fortifying defenses. Better suited for intermediate to advanced players, it offers a chance to experience volcanic-themed links and tactical defense setups. Before playing, scouting key defensive spots and resource distribution is essential, and paying close attention to in-game notifications can help adapt to potential special events or hidden mechanics.
퀸 디펜스 (Queen Defense)
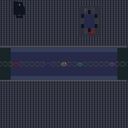
스타크래프트 브루드워의 디펜스 장르 유즈맵 'Queen Defense'는 화산 테마의 맵에서 적의 공세를 방어하며 퀸을 보호하는 목표를 달성하는 게임이다. 맵의 구조상 중앙에 위치한 퀸을 중심으로 사방에서 몰려오는 적을 처리해야 하며, 방어선을 구축할 수 있는 공간이 적절히 분배되어 있다. 맵의 특징으로는 화산 테마의 지형이 시각적으로 돋보이며, 각 라운드별로 등장하는 적의 유닛 조합이 조금씩 달라져서 플레이어의 전략을 요구한다. 방어에 실패하면 퀸이 피해를 입거나 사망할 수 있어 신속한 판단과 유닛 관리 능력이 중요하다. 맵의 크기는 3072x2048로 비교적 넓지만, 퀸 주변의 좁은 길목에서 적을 상대해야 하는 경우가 많아 좁은 공간에서의 전투가 자주 발생한다. 또한, 'Still Adding More Levels'라는 설명이 포함되어 있는 것으로 보아 지속적인 업데이트가 예상되며, 플레이어는 여러 라운드를 거쳐 점점 강화되는 적에 대응해야 한다. 초보 플레이어의 경우 퀸의 보호와 자원 관리에 중점을 두는 것이 좋으며, 경험이 쌓이면 방어 라인을 효율적으로 배치하고 적의 공세 타이밍을 예측하는 플레이가 가능하다. 맵을 플레이하기 전에는 퀸의 위치와 주요 방어 포인트를 미리 파악하고, 각 라운드에서 등장하는 적의 유닛 종류를 숙지하는 것이 중요하다. 또한, 자원 관리를 잘해야 추가 유닛을 생산하여 방어력을 보강할 수 있다. 이 맵은 디펜스 장르에 익숙한 플레이어뿐만 아니라 새로운 유즈맵을 경험해 보고 싶은 스타크래프트 팬들에게도 추천할 만하다. StarCraft: Brood War's defense-genre custom map *Queen Defense* tasks players with defending a central Queen from waves of enemies in a volcanic-themed arena. The map’s design centers around protecting the Queen, who sits in the middle, while fending off attacks from all directions. Strategic positioning is key, as the available space for building defenses is well-distributed but often forces close-quarters combat in narrow passages near the Queen. Visually striking with its volcanic terrain, the map introduces varied enemy unit compositions each round, forcing players to adapt their tactics. Failure to defend properly risks the Queen taking damage or dying, making quick decision-making and unit management essential. Though the map’s size (3072x2048) is relatively large, the tight corridors around the Queen frequently lead to intense, cramped battles. The description mentions *"Still Adding More Levels,"* suggesting ongoing updates, meaning players must prepare for increasingly powerful enemy waves over multiple rounds. Beginners should focus on protecting the Queen and managing resources, while more experienced players can optimize their defensive lines and anticipate enemy attack timings. Before playing, it’s crucial to familiarize yourself with the Queen’s location and key defensive spots, as well as the enemy units that appear in each round. Efficient resource management allows for producing additional units to reinforce defenses. This map is a great choice for both players familiar with defense games and StarCraft fans looking to try something new.
데스 노트 (Death Note)
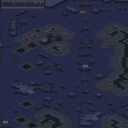
이 맵은 스타크래프트 브루드워의 유즈맵으로, 화산 테마의 디자인과 함께 특유의 어두운 분위기가 인상적인 작품이다. 맵 제목인 ÐÉÂTH ÑØTÉ는 내부 설명을 바탕으로 'DeathNote'로 추정되는 한글 깨짐 현상이 발생한 제목으로, 정식 명칭은 'Death Note' (데스 노트)로 보인다. 내부 메타데이터에서도 동일한 제목이 사용되며, 제작자는 Gorthaur[EoC]로 기록되어 있다. 맵의 크기는 3072x3072 타일이며, 화산 타일셋을 기반으로 만들어진 이 유즈맵은 플레이는 8명으로 진행되는 것으로 추정된다. 이미지 상에서도 여러 플레이어의 기지가 배치되어 있는 모습이 보이며, 이는 다중 플레이어간 경쟁 구조를 가질 가능성이 높다. 플레이 방식은 디펜스와 유사한 구조를 띄고 있으며, 맵 중앙에 위치한 주요 목표물을 보호하거나 파괴하는 경쟁형 구도가 예상된다. 화산 테마 덕분에 지형이 복잡하고 방어하기 어려운 요소가 많을 것으로 보이며, 이는 플레이어들에게 전략적인 대비를 요구할 것이다. 또한, 맵 상단에 있는 붉은색 원형 기호와 화산 지형은 일종의 방어 시설이나 핵심 포인트로 기능할 가능성이 크다. 맵의 디자인과 배치로 미루어보아, 플레이어들은 자원 수집, 기지 건설, 방어 구조물 배치에 집중하면서도 상대방을 견제하는 플레이를 해야 할 것이다. 이 맵은 초보자보다는 어느 정도의 전략적 감각과 맵 리딩 능력이 필요한 유즈맵으로 보이며, 다중 플레이어 간의 상호작용이 핵심인 만큼 팀 플레이가 중요할 것으로 예상된다. 또한, 화산 테마의 분위기상 다소 어두운 스토리나 설정이 포함될 가능성도 있어, 단순히 전투뿐만 아니라 맵의 분위기를 즐기는 플레이어들에게도 매력적인 요소로 작용할 것이다. 추천 대상은 스타크래프트 유즈맵을 즐겨 플레이하는 중급 이상의 유저들이며, 특히 디펜스와 경쟁형 맵을 좋아하는 플레이어들에게 적합할 것으로 보인다. 플레이 전에는 맵의 주요 목표와 승리 조건을 미리 확인하는 것이 중요할 것이다. The map is a custom Starcraft: Brood War UMS (Use Map Settings) title featuring a volcanic theme and a distinct dark atmosphere. The title ÐÉÂTH ÑØTÉ appears to be a corrupted version of 'DeathNote,' as inferred from the internal description and metadata, where the correct name is likely 'Death Note.' The map is created by Gorthaur[EoC] and spans 3072x3072 tiles using a volcanic tileset. The gameplay is estimated to support up to 8 players, as suggested by the presence of multiple player bases in the image. The gameplay structure suggests a defense-oriented or competitive format, where players must either protect or destroy a central objective located in the middle of the map. The volcanic terrain implies a complex and challenging environment, requiring strategic preparation and adaptability. The red circular symbols and volcanic features at the top of the map likely represent defensive structures or key points. Players will need to focus on resource gathering, base building, and deploying defensive structures while also engaging in tactics to counter opponents. This map appears to be designed for intermediate to advanced players who enjoy strategic depth and multiplayer interaction. The volcanic theme hints at a potentially darker narrative or setting, which may appeal to players looking for an immersive experience beyond pure combat. It is recommended for those who favor defense-based and competitive custom maps. Before playing, it is essential to understand the primary objectives and victory conditions, as these will significantly influence strategy.
던전 디프스 (Dungeon Depths)
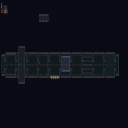
스타크래프트 브루드워의 유즈맵 '던전 디프스(Dungeon Depths)'는 컴까기 장르에 속하는 유저 대 컴퓨터 전투 맵으로, 6명의 플레이어가 하나의 팀을 이뤄 다양한 몬스터와 보스를 상대하는 구조로 구성되어 있다. 맵은 화산 테마의 타일셋을 사용해 어두운 지하 동굴과 용암 지역을 연출하며, 좁은 통로와 넓은 개활지가 교차하는 지형을 바탕으로 전략적 움직임을 요구한다. 플레이어는 각자 시작 지점에서 출발해 맵 중앙에 위치한 '던전 핵심'을 향해 전진하거나, 등장하는 적들을 처치하며 보스를 물리치는 목표를 달성해야 한다. 맵 곳곳에는 자원과 회복 아이템, 함정이 배치되어 있으며, 특히 좁은 길목에서는 다수의 저글링이나 히드라리스크가 쏟아져 나오는 등 압박이 심해진다. 보스전이 예고되는 구역에서는 미리 준비된 방어 시설을 활용하거나, 팀원 간의 엄호를 통해 생존 확률을 높이는 것이 중요하다. 맵의 난이도는 중간 정도로, 초보자가 플레이하기에는 다소 어려운 편이지만, 팀워크와 컨트롤을 익히면 충분히 클리어할 수 있다. 추천 플레이 방법은 빠른 자원 수집과 효율적인 스킬 사용, 그리고 보스 전에 충분한 병력을 모아 두는 것이다. 맵을 플레이하기 전에는 자신의 종족별 특성과 맵 내 아이템의 위치를 미리 숙지하고, 팀원과의 조율 없이 무리한 돌진은 삼가는 것이 좋다. 또한, 맵의 좁은 길목에서 적이 밀려오는 경우를 대비해 백업 병력을 준비해 두는 것도 필수다. 이 맵은 특히 컴까기 경험이 있는 플레이어들에게 매력적으로 다가갈 것이며, 팀 플레이를 중시하는 유저들에게 추천할 만하다. 또한, 화산 테마의 분위기와 긴장감 넘치는 전투가 어우러져 몰입감을 높이는 요소로 작용한다. Dungeon Depths is a UMS-style user-made map in StarCraft: Brood War that falls under the computer-killing genre, where six players unite as a single team to battle through waves of monsters and bosses. The map employs a volcanic tileset to create an atmospheric underground dungeon with narrow corridors and open areas that demand strategic positioning. Players start at their respective bases and advance toward the central 'Dungeon Core,' or focus on defeating enemies to reach the final boss. The map features scattered resources, healing items, and traps, with high-pressure moments where large groups of Zerglings or Hydralisks spawn in confined spaces. Boss arenas require preparation, including the use of defensive structures and coordinated team efforts to survive. The difficulty is moderate, making it challenging for beginners but manageable with practice and teamwork. Key tips include efficient resource gathering, smart skill usage, and stockpiling forces before major battles. Before playing, players should familiarize themselves with their race-specific strengths, locate important items, and avoid reckless rushes without backup. Narrow pathways are prime spots for enemy waves, so maintaining reserve forces is crucial. This map is ideal for those experienced in computer-killing maps and players who value teamwork. The volcanic theme and intense combat create an immersive experience that keeps players engaged throughout the game.
개별 저글링 디펜스 3 (LurkerIndivisualDefense3)
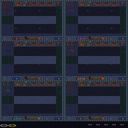
스타크래프트 브루드워 유즈맵 〈LurkerIndivisualDefense3〉는 개별 저글링을 조종하며 적의 공격을 방어하는 디펜스 장르의 맵이다. 맵은 화산 테마의 넓은 필드에 배치된 다수의 Mineral Chunks를 중심으로 펼쳐지며, 플레이어는 각자의 저글링을 조종해 끊임없이 몰려오는 적군 유닛을 상대해야 한다. 적군은 대부분 저글링과 히드라리스크, 뮤탈리스크 등으로 구성되어 있으며, 일정 시간이 지나면 더 강력한 유닛들이 등장하는 패턴이 보인다. 맵의 특징은 개별 저글링 컨트롤에 중점을 둔 점으로, 파일럿의 미세한 움직임과 스킬 사용이 승패를 좌우한다. 맵의 구조는 중앙 Mineral Chunks를 중심으로 동서남북으로 넓은 길이 뻗어 있으며, 적의 공격 루트는 mostly Mineral Chunks 주변을 따라 형성된다. 초보자는 적의 빈도와 패턴을 익히는 데 다소 시간이 걸릴 수 있으며, 숙련자들은 효율적인 컨트롤과 자원 관리를 통해 생존력을 높일 수 있다. 추천 대상은 저글링 컨트롤에 익숙한 유저부터 시작해 점차 난이도를 높여가고 싶은 플레이어까지 폭넓게 활용할 수 있으며, 특히 디펜스와 저글링 조종에 흥미를 느끼는 유저들에게 적합하다. 플레이 전에는 적의 유닛 구성과 패턴을 미리 파악하고, Mineral Chunks 주변의 방어선을 어떻게 구축할지 전략을 세워둘 필요가 있다. 또한, 저글링의 이동 경로를 효율적으로 설계하지 않으면 자원 손실을 막기 어려우므로, 맵의 지형과 Mineral Chunks의 위치를 숙지하는 것이 중요하다. 이 맵은 반복 플레이를 통해 점차 자신의 전략을 다듬어 나갈 수 있는 장점이 있으며, 개인의 실력 향상에 도움이 되는 유즈맵으로 평가된다. StarCraft: Brood War custom map *LurkerIndivisualDefense3* is a defense genre map where you control individual zerglings to fend off enemy attacks. Set on a wide volcanic-themed field dotted with numerous Mineral Chunks, players must manage their zerglings to counter waves of incoming enemy units. The enemy forces primarily consist of zerglings, hydralisks, and mutalisks, with stronger units appearing as time progresses. The map emphasizes precise zergling control, where even the smallest movements and ability usage can determine victory or defeat. The layout features wide paths extending in all four directions from a central Mineral Chunk cluster, with enemy attack routes mostly forming around these resource patches. Beginners may need time to learn enemy frequencies and patterns, while skilled players can enhance their survival through efficient control and resource management. Suitable for users familiar with zergling micro all the way to those seeking to gradually increase difficulty, this map is especially appealing to players interested in defense mechanics and zergling control. Before playing, it’s important to study enemy unit compositions and patterns and plan how to establish defensive lines around the Mineral Chunks. Without efficient zergling movement paths, resource loss becomes inevitable, so understanding the terrain and Mineral Chunk locations is crucial. The map rewards repeated play, allowing players to refine their strategies over time, making it a valuable custom map for personal skill development.
| iCCup | Medusa 1.1 OBs
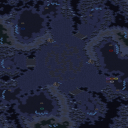
스타크래프트 브루드워의 대표적인 8인용 밸런스 맵으로, iCCup에서 제공한 | iCCup | Medusa 1.1 OBs는 화산 테마의 넓은 맵에서 펼쳐지는 치열한 전투가 특징이다. 맵의 중앙에는 중앙 광산 자원이 배치되어 있어 초반 자원 확보가 중요하며, 각 플레이어는 시작 지점에서 빠르게 확장을 시도할 수밖에 없다. 맵의 지형은 비교적 평탄한 편이지만, 곳곳에 있는 언덕과 좁은 통로가 전략적인 요충지로 작용한다. 특히 8인의 플레이어가 한꺼번에 접전을 펼치기 때문에 초반 러시와 타이밍 러시가 빈번히 발생하며, 이는 맵의 긴장감을 한층 높이는 요소로 작용한다. 중앙 자원 bölgesi 외에도 맵 좌우에는 추가 자원 지역이 배치되어 있어, 이를 확보하는 플레이어는 상당한 이점을 누릴 수 있다. 그러나 중앙 자원 지역에 대한 접근성이 좋아서 초반부터 치열한 다툼이 벌어지며, 이를 잘 활용하지 못하는 플레이어는 금세 자원 부족에 시달리게 된다. 또한 맵의 symmetrical 구조는 모든 플레이어에게 동일한 시작 조건을 제공하지만, 각자의 전략과 확장에 따라 운명이 갈리게 된다. 이 맵은 특히 팀플레이보다는 개인전 성향이 강한데, 8인이 모두 경쟁하는 구조이기 때문에 각 플레이어의 판단력과 자원 관리 능력이 승패를 좌우한다. 초보자에게는 다소 어려운 맵으로 평가될 수 있지만, 스타크래프트의 기본기를 다지기 위한 훌륭한 연습용 맵으로도 손색이 없다. 또한 밸런스에 대한 평가가 좋아서, 스크림이나 대회에서도 자주 사용되는 맵 중 하나다. 플레이하기 전에는 맵의 중앙 자원 지역과 각자의 시작 위치, 그리고 맵의 symmetrical 구조를 미리 숙지하고, 자원 확보와 방어 위치 선정에 신경을 써야 한다. 또한 초반 러시 타이밍을 노리는 플레이어와 자원 확장을 우선시하는 플레이어 간의 전략적 대결도 흥미로운 볼거리다. 이 맵은 스타크래프트의 classic한 밸런스 맵으로서, 오랜 시간 많은 플레이어들에게 사랑받아 온 작품이다. 특히 iCCup를 통해 배포된 맵답게, 다양한 전략과 전술을 시도해 볼 수 있는 장점이 있다. StarCraft: Brood War features a well-balanced 8-player map known as *Medusa 1.1 OBs*, provided by iCCup. This volcanic-themed map is characterized by intense battles unfolding across its vast terrain. Central to the map is a key mineral patch, making early resource control crucial as players are forced to expand quickly from their starting positions. While the terrain is relatively flat, strategic high ground and narrow chokepoints scattered throughout the map play a decisive role in engagements. With all eight players clashing in close proximity, early rushes and timing attacks are common, heightening the map’s tension. In addition to the central minerals, additional resource areas on the left and right sides of the map offer significant advantages to those who secure them. However, the central minerals’ accessibility leads to fierce competition from the start, and players who fail to capitalize on them quickly face resource shortages. The map’s symmetrical design ensures equal starting conditions for all players, though individual strategies and expansions ultimately determine outcomes. While the map leans toward solo play rather than team games, its competitive 8-player structure demands strong decision-making and resource management from each participant. Though it may pose a challenge for beginners, it serves as an excellent training ground for mastering StarCraft’s fundamentals. Its balanced design has also made it a staple in scrimmages and tournaments. Before playing, familiarize yourself with the central minerals, starting positions, and the map’s symmetrical layout, focusing on resource control and defensive positioning. The strategic clash between early rushers and those prioritizing expansion adds to the map’s appeal. *Medusa 1.1 OBs* stands as a classic balanced map in StarCraft, cherished by players for years. As an iCCup-distributed map, it offers ample opportunities to experiment with diverse strategies and tactics.
최근 등록된 맵
새로 추가된 파일과 버전을 확인하세요.
69892 컨트롤 easy
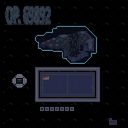
‘69892 컨트롤 easy’는 스타크래프트: 브루드워의 유즈맵으로, 조종과 컨트롤을 중시하는 컴까기 장르에 속한다. 맵의 주요 특징은 타워 디펜스와 유사한 구조 속에서 다수의 적 유닛이 끊임없이 쏟아져 나오며, 플레이어는 제한된 자원으로 이들을 efficiently하게 제어해야 한다는 점이다. 맵 중앙에 위치한 넓은 평지에서는 다수의 적들이 몰려들어오고, 이들을 처리하는 과정에서 플레이어는 마우스와 키보드 조작을 통해 유닛의 이동 경로 설정, 스킬 사용, 자원 관리 등을 실시간으로 수행해야 한다. 맵의 외곽에는 방어 시설이 배치되어 있어, 이를 활용하면 비교적 안전한 상황에서 적을 제어할 수 있지만, 공간 활용과 타이밍이 매우 중요하다. 맵의 난이도는 ‘easy’라고 명시되어 있지만, 실제 플레이에서는 적의 밀도와 패턴이 빠르게 변하므로 초보자가 осво하기에는 다소 난해할 수 있다. 특히 다수의 유닛을 동시에 제어해야 하는 상황에서 발생하는 조작 미스를 줄이는 것이 핵심 포인트다. 맵의 분위기는 화산 타일셋을 활용해 붉은 색조로 이루어져 있으며, 적 유닛들이 등장하는 중앙 지역은 시야가 제한되지 않도록 설계되어 있다. 플레이어는 맵의 구조와 적의 패턴을 빠르게 파악하고, 효율적인 컨트롤을 통해 생존을 도모해야 한다. 이 맵은 조종 감각을 연마하고 싶거나, 타워 디펜스와 컴까기의 중간적 재미를 느끼고 싶은 플레이어에게 추천할 만하다. 플레이 전에는 반드시 자신의 조종 실력과 반응 속도를 점검하고, 맵의 초기 배치와 적의 등장 위치를 숙지하는 것이 중요하다. 또한, 마우스 감도와 키보드 설정 역시 플레이 경험에 큰 영향을 미치므로 사전에 최적화하는 것이 좋다. 맵의 진행은 단계적으로 어려운 적들이 등장하는 방식으로 구성되어 있어, 점차적으로 실력을 쌓아갈 수 있도록 설계되어 있다. 전체적으로는 조종과 전략이 조화를 이룰 때 가장 높은 점수를 얻을 수 있는 구조로, 반복 플레이를 통해 실력을 향상시킬 수 있는 매력이 있다. ‘69892 Control Easy’ is a custom map in *StarCraft: Brood War* that falls under the tower-defense and micro-heavy genre. The map’s core challenge lies in managing waves of enemies that continuously spawn in a structure resembling a tower-defense setup, requiring the player to efficiently control them with limited resources. In the wide central plain, multiple enemies swarm in, forcing the player to make real-time decisions—setting unit paths, using abilities, and managing resources—all through precise mouse and keyboard inputs. Defensive structures along the map’s edges provide safer vantage points for controlling enemies, but success hinges on smart space utilization and impeccable timing. Despite its ‘easy’ difficulty label, the map’s rapidly shifting enemy density and patterns can make it tricky for beginners. The key to mastering it lies in minimizing control errors, especially when juggling multiple units at once. The map’s aesthetic leans into a volcanic tile set, bathed in deep reds, while the central enemy spawn area is designed to ensure unobstructed visibility. Players must quickly grasp the map’s layout and enemy behaviors, relying on sharp control to survive. This map is ideal for those looking to sharpen their micro skills or experience the hybrid appeal of tower defense and micro-intensive gameplay. Before diving in, it’s crucial to assess your control precision and reaction speed, familiarize yourself with the initial setup and enemy spawn points, and fine-tune your mouse sensitivity and keyboard bindings for the best experience. The difficulty ramps up gradually, introducing tougher enemies in stages to help players build their skills incrementally. Ultimately, the map rewards a balance of control and strategy, offering replayability as players refine their approach through repeated attempts.
방랑 (Stranstvie)
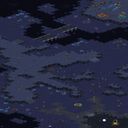
이 맵은 스타크래프트 브루드워의 UMS(유즈맵) 장르로, 한 플레이어가 미지의 행성을 탐험하며 숨겨진 임무를 해결하는 서바이벌 퍼즐형 맵이다. 제목인 'Ñòðàíñòâèå'는 러시아어로 '여행'을 의미하는데, 내부 설명에서도 '쿠페로(Kupfer)가 알려지지 않은 행성으로 여행을 떠난다'는 설정으로 확인된다. 맵의 배경은 화산 테마의 어두운 분위기로 구성되어 있으며, 여러 개의 섬 형태의 지형이 흩어져 있는 구조로 보인다. 플레이어는 중앙의 시작 지점에서 출발해 각 섬을 오가며 자원을 확보하고, 적대적인 환경과 적 유닛들을 피해가며 목표를 달성해야 한다. 맵 곳곳에 배치된 장애물과 함정, 그리고 제한된 이동 경로로 인해 strategic thinking(전략적 사고)과 quick decision-making(빠른 판단)이 요구되는 점이 특징이다. 또한, 섬 사이에 다리를 연결하거나 건너편으로 이동하는 과정이 맵의 난이도를 높이는 요소로 작용할 것으로 추정된다. 이 맵은 초보보다는 경험 있는 플레이어에게 더 적합하며, 긴장감 있는 탐험과 해결 과정을 즐기는 유저들에게 추천된다. 플레이 전에는 맵의 전체 구조를 파악하고, 각 섬의 리소스 분배와 이동 경로를 미리 계획해 두는 것이 중요할 것으로 보인다. This map falls under the UMS (User-Made Scenario) genre in StarCraft: Brood War, designed as a survival puzzle where a single player embarks on a journey to an unknown planet to complete hidden missions. The title 'Ñòðàíñòâèå' translates to 'Journey' in Russian, which aligns with the in-map description mentioning Kupfer's trip to an uncharted planet. The map features a volcanic theme with a dark ambiance, composed of scattered island-like terrains. The player starts from a central location and must navigate between these islands to gather resources, evade hostile environments, and complete objectives. The fragmented terrain, traps, and limited pathways demand strategic planning and quick decision-making. Bridges and narrow connections between islands add to the challenge, making this map more suitable for experienced players who enjoy tense exploration and problem-solving. Before playing, it's advisable to study the map's layout, resource distribution, and potential pathways to optimize movement and efficiency.
7인 입구막기 ★다이아★ (7 Players Entrance Blocking ★Diamond★)
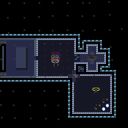
스타크래프트 브루드워 유즈맵으로 인기 있는 '7인 입구막기 ★다이아★'는 7명의 플레이어가 협동하여 몰려오는 적을 방어하는 디펜스 장르의 맵입니다. 화산 테마의 배경에서 펼쳐지는 전투는 시각적으로도 흥미로운 요소로 가득합니다. 맵 중앙에는 거대한 입구가 있으며, 이곳으로 끊임없이 적 유닛들이 쏟아져 나오며, 플레이어들은 입구를 보호하거나 유닛을 생산해 적을 막아내야 합니다. 맵 구조는 비교적 단순하지만, 입구 주변의 좁은 통로와 다수의 적의 끊임없는 공격으로 인해 전략적인 플레이가 요구됩니다. 방어선을 유지하는 동시에 자원과 유닛 생산을 효율적으로 관리해야 하며, 입구 주변의 지형지물과 시야 확보가 승패를 좌우할 수 있습니다. 이 맵의 특징 중 하나는 7인의 협동입니다. 각 플레이어는 개별적으로 자원을 관리하며, 입구 방어에 필요한 유닛을 생산하거나 보조 역할을 맡을 수 있습니다. 입구 주변의 좁은 통로는 몰려드는 적을 효과적으로 방어할 수 있는 장점이 있지만, 반대로 유닛의 움직임이 제한될 수 있어 전략적인 배치와 타이밍이 중요합니다. 특히 입구 주변의 구조물과 장애물을 활용한 방어 전략이 필요하며, 적의 공세 패턴을 파악하고 대비하는 것이 핵심입니다. 이 맵은 초보자보다는 어느 정도의 스타크래프트 경험이 있는 플레이어에게 적합합니다. 입구막기라는 장르의 특성상, 빠른 반응과 효율적인 유닛 관리 능력이 요구되기 때문입니다. 또한, 7인의 협동이 필수적이므로 팀원 간의 의사소통과 전략적 협력이 중요합니다. 입구막기 맵의 특성상, 방어에 실패하면 순식간에 전선이 무너질 수 있으므로, 신중한 플레이가 필요합니다. 맵을 플레이하기 전에 입구 주변의 지형과 방어 가능한 위치를 미리 파악하고, 자원 관리와 유닛 생산 계획을 세워두는 것이 좋습니다. 이 맵은 방어뿐만 아니라, 입구 주변의 전략적 지점을 차지하는 것도 중요합니다. 적의 공격을 효과적으로 방어하면서도, 자원을 확보하고 유닛을 생산할 수 있는 위치를 선점해야 합니다. 또한, 입구 주변의 좁은 통로를 활용한 함정이나 진형 구축도 승리에 큰 영향을 미칠 수 있습니다. 이 맵은 끊임없는 적의 공격과 제한된 공간으로 인해 긴장감을 유지하며 플레이할 수 있는 장점이 있습니다. 7인의 팀웍과 전략이 요구되는 이 맵은 스타크래프트 유즈맵の中에서도 인기 있는 디펜스 장르의 대표적인 작품 중 하나로 손꼽힙니다. StarCraft: Brood War custom map *7 Player Entrance Blocking ★Diamond★* is a popular defense-style game where seven players team up to fend off waves of incoming enemies. Set against a volcanic backdrop, the battles are visually engaging. At the center of the map lies a massive entrance, constantly spewing out enemy units, and players must defend the choke point or produce their own forces to hold them back. While the map layout is straightforward, the narrow pathways around the entrance and relentless enemy assaults demand strategic play. Balancing resource management, unit production, and maintaining a solid defense line is key, with terrain and visibility around the entrance often determining victory or defeat. A defining feature of this map is its reliance on teamwork among seven players. Each manages their own resources and can focus on producing defensive units or supporting roles. The tight corridors around the entrance make it easier to block waves of enemies, but they also restrict movement, making smart positioning and timing crucial. Players must leverage the structures and obstacles near the entrance to craft effective defense strategies, while also studying enemy attack patterns to counter them. This map is better suited for players with some StarCraft experience rather than absolute beginners. The entrance-blocking genre demands quick reactions and efficient unit control. Since coordination among all seven players is essential, communication and strategic planning are vital. A single mistake in defense can collapse the frontline instantly, so careful, deliberate play is necessary. Before jumping in, it’s wise to scout the terrain around the entrance, identify key defensive spots, and plan out resource management and unit production. Beyond just defense, securing strategic points near the entrance is critical. Players must balance holding off attacks with securing resources and production bases. Setting up traps or formations in the narrow corridors can also play a major role in victory. The constant enemy pressure and confined space create a tense, high-stakes experience. With its emphasis on teamwork and strategy, this map stands out as one of the most popular defense-style custom maps in StarCraft’s modding scene.
Amazing TD 스파이럴 V. 2009 (Amazing TD Spiral V. 2009)
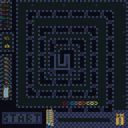
스타크래프트 브루드워의 대표적인 디펜스 장르 유즈맵 ‘Amazing T D Spiral V. 2009’은 ‘터렛 디펜스’(Turret Defense) 형식으로, 플레이어는 미리 설치된 포탑을 활용해 끊임없이 몰려오는 적 유닛을 방어하는 것이 핵심이다. 맵은 화산 테마의 그래픽이 적용된 2048x2048 크기의 넓은 공간으로 구성되어 있으며, ‘스파이럴’(Spiral)이라는 이름에서 유추할 수 있듯 적의 웨이브가 나선형 경로를 따라 밀려오는 구조가 특징이다. 맵의 중앙에는 포탑을 건설할 수 있는 건물을 배치할 수 있는 공간이 마련되어 있으며, 적의 웨이브는 맵 외곽에서 시작해 서서히 안쪽으로 진입하는 방식으로 진행된다. 맵 제목에 포함된 ‘Shadow’나 ‘Twilight Terrain’이라는 설명에서 어두운 분위기의 맵 디자인이 예상되며, ‘Stronger Foes’라는 설명은 난이도가 높은 적들이 등장함을 시사한다. ‘Improved Ban’이나 ‘Various other changes’라는 설명은 기존 버전과의 차별점을 강조한 것으로, 맵의 밸런스나 난이도 조절이 이루어진 것으로 보인다. 이 맵은 디펜스 장르 특성상 긴 플레이 시간을 요구하지 않지만, 적의 웨이브가 지속적으로 밀려오며 포탑의 배치와 업그레이드가 중요한 전략적 요소를 지닌다. 초보자는 기본 포탑 배치와 업그레이드 우선순위를 익히는 데 집중해야 하며, 숙련자는 더 효율적인 포탑 조합과 적의 움직임에 따른 대처를 통해 높은 점수를 노릴 수 있다. 맵의 넓은 공간과 나선형 경로 덕분에 플레이어는 웨이브를 효과적으로 분산시킬 수 있는 포탑 배치 전략을 고민해야 한다. 또한, ‘FedorKicksAss’라는 제작자의 이름이 포함된 설명에서 알 수 있듯, 맵의 디자인이나 밸런스가 상당한 노력과 연구를 거쳐 만들어진 것으로 추정된다. 이 맵은 디펜스 유즈맵을 즐기는 유저들에게는 반드시 한 번쯤 도전해볼 만한 작품으로, 특히 터렛 디펜스에 익숙한 플레이어라면 더욱 흥미롭게 느낄 수 있을 것이다. 맵의 그래픽과 분위기가 디자인적으로 뛰어나며, 적의 웨이브가 끊임없이 밀려오는 긴장감 있는 플레이가 특징이다. 다만, 포탑의 배치와 업그레이드에 대한 깊은 이해가 필요하기 때문에 초보자가 접근하기에는 다소 어려울 수 있다. 따라서 이 맵을 처음 플레이하는 유저는 기본적인 디펜스 전략을 숙지한 후 도전하는 것을 추천한다. StarCraft: Brood War’s classic defense genre custom map *Amazing T D Spiral V. 2009* is a turret defense-style game where players must rely on pre-placed turrets to fend off relentless waves of enemy units. The map features a sprawling 2048x2048 volcanic-themed landscape, and as the name *Spiral* suggests, enemy waves advance along a winding, spiral-shaped path. At the center of the map lies a designated area where players can construct buildings to place additional turrets, while waves spawn from the outer edges and gradually push inward. The map’s title references *Shadow* and *Twilight Terrain*, hinting at its dark, atmospheric aesthetic, and the mention of *Stronger Foes* signals that players will face increasingly tougher enemies. Descriptions like *Improved Ban* and *Various other changes* highlight refinements over previous versions, suggesting adjustments to balance and difficulty. Though defense maps typically don’t demand long play sessions, *Amazing T D Spiral V. 2009* keeps players engaged with continuous waves, making turret placement and strategic upgrades essential. Beginners should focus on mastering basic turret layouts and upgrade priorities, while experienced players can aim for higher scores by optimizing turret combinations and adapting to enemy movements. The map’s vast size and spiral design encourage players to strategize on dispersing waves effectively through smart turret placement. Additionally, the inclusion of the creator’s name, *FedorKicksAss*, implies that the map’s design and balance were carefully crafted through extensive effort and testing. A must-try for defense map enthusiasts—especially those familiar with turret defense—the map stands out for its polished visuals and the tense, high-stakes feel of endless waves. However, its reliance on deep knowledge of turret placement and upgrades may pose a challenge for newcomers, so beginners are advised to familiarize themselves with basic defense strategies before diving in.
소환 전쟁 V2.2.4 (Summon Wars V2.2.4)
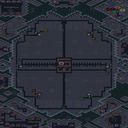
스타크래프트 브루드워의 유즈맵 'Summon Wars V2.2.4'는 전투와 소환술을 결합한 전략형 디펜스 맵으로, 플레이어는 각자 강력한 유닛을 소환하고 적의 공격을 방어하면서 승리를 차지해야 한다. 맵은 중앙에 넓은 전투 공간이 있으며, 각 플레이어는 자신의 기지 주변에 위치한 소환석을 통해 다양한 유닛을 생산할 수 있다. 특히, 유닛의 소환과 관리가 이 맵의 핵심으로, 각 유닛은 고유한 스킬과 특성을 보유하고 있어 전략적인 선택이 요구된다. 전투는 팀 간 대결로 진행되며, 상대의 기지를 파괴하거나 모든 적 유닛을 전멸시키는 것이 목표로 보인다. 맵의 디자인과 타일셋은 화산 테마로 구성되어 있어, 용암과 암석으로 이루어진 배경이 전투의 긴장감을 한층 더 끌어올린다. 또한, 맵 곳곳에 배치된 장애물과 지형은 유닛의 이동과 전투에 영향을 미치며, 플레이어는 이를 활용한 전술적 플레이가 가능하다. 이 맵은 실시간 전략과 디펜스 요소의 조합으로, 다양한 플레이 스타일을 시도할 수 있는 재미를 제공한다. 특히, 소환술과 유닛의 조합을 어떻게 구성하느냐에 따라 승패가 좌우될 수 있으므로, 플레이어는 신중한 전략 수립이 필요하다. 초보자에게는 다소 복잡하게 느껴질 수 있지만, 익숙해지면 각 유닛의 특성과 맵의 지형을 이해하고 활용하는 재미가 크다. 또한, 맵의 밸런스가 잘 잡혀 있다면 팀워크와 개개인의 전략이 조화를 이룰 때 최고의 플레이가 나올 것으로 예상된다. 이 맵을 즐기기 위해서는 각 유닛의 역할과 특성을 숙지하는 것이 중요하며, 이를 통해 더욱 흥미진진한 전투를 경험할 수 있을 것이다.Summon Wars V2.2.4 is a strategic defense map in StarCraft: Brood War that combines combat with summoning mechanics. Players take turns summoning powerful units from their bases while defending against enemy attacks to achieve victory. The map features a central battle arena surrounded by bases where units are produced via summoning stones. Each unit has unique skills and attributes, requiring players to make strategic decisions during battles. Matches appear to be team-based, with objectives including destroying the enemy base or eliminating all opposing units. The map's volcanic-themed design, with lava and rocky terrain, enhances the intense atmosphere of the gameplay. Terrain obstacles and features influence unit movement and combat, allowing players to leverage them in their tactics. This map blends real-time strategy and defense elements, offering diverse playstyles to experiment with. Success depends heavily on how players combine summoned units and utilize the map's terrain. While the mechanics may seem complex for beginners, mastering unit roles and map geography leads to deeply engaging battles. Balanced gameplay likely emerges when teamwork aligns with individual strategies. To fully enjoy this map, understanding each unit's function becomes essential, unlocking the potential for thrilling and dynamic combat experiences.
스타 워즈 세이셸 F1 (Star Wars Defense Final)
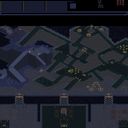
스타크래프트 브루드워의 디펜스 장르 유즈맵인 〈스타 워즈 세이셸 F1〉은 7인용으로 제작된 공격과 방어가 균형을 이루는 전략형 맵입니다. 맵은 화산 테마의 타일셋으로 구성되어 있으며, 방어 팀은 30분 동안 적의 공격을 막아내야 하고, 공격 팀은 제한 시간 내에 승리를 거두어야 합니다. 내부 설명에 따르면 다수의 미니언과 엘리트 유닛, 영웅 유닛이 등장하는 것으로 보이며, 이는 게임의 전략적 깊이를 더합니다. 맵의 구조는 중앙에 넓은 전장이 펼쳐져 있고, 각 팀의 본진이 상대방과 마주보는 형태로 배치되어 있습니다. 방어 팀은 본진 주변에 방어 건물을 설치할 수 있으며, 공격 팀은 이를 파괴하거나 적 유닛을 섬멸해야 합니다. 맵의 규모는 6144x6144 크기로 상당히 넓고, 타일셋은 화산 테마로 되어 있어 시각적으로 흥미로운 분위기를 연출합니다. 플레이어는 각기 다른 특성을 가진 유닛을 조합하여 전략을 수립해야 하므로, 팀워크와 전술적 사고가 요구됩니다. 특히 방어 팀은Resource management와 방어 라인 구축이 중요하며, 공격 팀은 신속한 진격과 핵심 건물의 파괴가 성공의 열쇠가 됩니다. 이 맵은 스타크래프트의 디펜스 장르를 любителей 입문자에게는 적합한 난이도로 제공하며, 7인용이라는 점에서 대규모의 전략적 플레이가 가능하다는 장점이 있습니다. 다만, 팀 간의 밸런스가 maps의 구조와 트리거에 따라 크게 좌우될 수 있으므로, 플레이 전 맵의 특성을 충분히 숙지하는 것이 좋습니다. 또한, 영웅 유닛의 능력과 맵 내의 리소스 분포를 미리 확인하여 전략을 세우는 것이 중요합니다. 이 맵은 디펜스 장르의 핵심을 잘 살린 작품으로, 스타크래프트의 유즈맵 커뮤니티에서 인기 있는 장르인 만큼 많은 플레이어에게 사랑받을 가능성이 높습니다. StarCraft: Brood War's defense genre custom map *Star Wars Seychelles F1* is a balanced 7-player strategy map where offense and defense play equally important roles. Set against a volcanic tile theme, the defense team must hold out for 30 minutes against enemy attacks, while the offense team must secure victory within a set time limit. According to the in-game description, the map features numerous minions, elite units, and hero units, adding strategic depth to the gameplay. The layout consists of a wide central battlefield with each team’s base facing the other. The defense team can construct defensive structures around their base, while the offense must either destroy these buildings or eliminate enemy units. Spanning 6144x6144 tiles, the map is expansive, and its volcanic tile theme creates a visually engaging atmosphere. Players must combine units with different traits to form strategies, requiring strong teamwork and tactical thinking. For the defense team, effective resource management and building a solid defense line are crucial, while the offense team must advance quickly and destroy key structures to succeed. This map offers a balanced challenge suitable for newcomers to the defense genre while enabling large-scale strategic play thanks to its 7-player format. However, team balance heavily depends on the map’s structure and triggers, so it’s wise to study the map’s mechanics beforehand. Additionally, understanding hero unit abilities and resource distribution is essential for planning strategies. As a well-crafted representation of the defense genre and a popular type of custom map in the StarCraft community, *Star Wars Seychelles F1* has strong potential to be widely loved by players.
Squad Support BETA
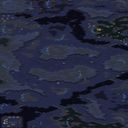
스타크래프트 브루드워의 유즈맵 중에서도 디펜스와 멀티플레이를 조합한 흥미로운 구조의 맵, "Squad Support BETA"를 소개합니다. 이 맵은 3~4명의 플레이어를 대상으로 하며, specialized squads(특수 부대)를 활용해 기지를 방어하거나 적군을 파괴하는 두 가지 vittoria 조건을 제공합니다. 내부 설명에서 언급된 바와 같이, '기지를 방어하는 플레이'와 '적군을 공격하는 플레이'로 나뉘어 진행되는 것이 특징입니다. 화산 테마의 타일셋을 사용한 맵답게, 적절한 지형 배치와 리소스 분포가 플레이어의 전략적 선택을 요구합니다. 특히 specialized squads라는 시스템은 개별 유닛 조합의 장단점을 고려한 플레이를 유도하며, 팀워크가 중요한 포인트로 작용합니다. 초보자도 쉽게 접근할 수 있는 난이도로 설계되었지만, specialized squads의 적절한 활용 여부에 따라 승패가 갈릴 수 있어 깊이를 더합니다. 플레이 전 반드시 확인해야 할 부분은 맵의 리소스 위치와 주요 길목, 그리고 특수 부대의 구성 요소입니다. 이러한 요소들이 맵의 밸런스를 좌우할 수 있어, 사전 준비를 철저히 하는 것이 중요합니다. 또한, 4명의 플레이어가 모두 다른 역할을 맡을 가능성이 높기 때문에, 각자의 역할 분담을 신중히 고려해야 합니다. 이 맵은 디펜스와 멀티플레이를 동시에 즐기고 싶은 유저들에게 강력히 추천할 만한 작품입니다. specialized squads 시스템을 통해 전략의 깊이를 더할 수 있으며, 화산 테마의 맵 디자인이 시각적으로도 흥미로운 경험을 제공합니다. 무엇보다도, 팀워크와 역할 분담을 중시하는 구조는 소통과 협동의 중요성을 재확인하게 만듭니다. "Squad Support BETA" is a StarCraft: Brood War custom map that combines defense and multiplayer mechanics into an engaging structure. Designed for 3 to 4 players, it offers two victory conditions: defending your base or destroying the enemy using specialized squads. As noted in the in-game description, gameplay alternates between "defensive play" and "offensive play." With its volcanic-themed tileset, the map features strategic terrain and resource distribution that demand careful planning from players. The specialized squads system encourages players to consider the strengths and weaknesses of individual unit compositions, making teamwork a crucial factor. While the map is designed to be accessible to beginners, the outcome often hinges on how well players utilize their squads, adding depth to the experience. Before playing, it’s essential to check resource locations, key pathways, and the components of each squad, as these elements heavily influence the map’s balance. Since four players may each take on distinct roles, thoughtful role assignment is vital. This map is highly recommended for players who want to enjoy both defense and multiplayer simultaneously, offering added strategic depth through the specialized squads system and visually engaging volcanic-themed design. Above all, its emphasis on teamwork and role distribution reinforces the importance of communication and cooperation.
Special Forces Ultimate (스페셜 포스 얼티메이트)
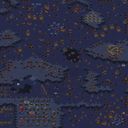
Special Forces Ultimate는 스타크래프트 브루드워의 UMS 유즈맵으로, 6명의 플레이어가 참여하는 팀 기반 전투 맵이다. 맵은 화산 테마의 넓은 평야 지형으로 구성되어 있으며, 중앙에 위치한 큰 광물 지대와 그 주변에 흩어져 있는 소규모 자원 지대가 특징적이다. 시작 지점은 맵의 4개 모서리와 중앙 부근에 배치되어 있으며, 플레이어는 각자의 기지에서 자원을 채취하고 병력을 생산해 적을 공격하거나 방어해야 한다. 맵의 크기는 3072x3072로 넓은 편이지만, 자원 지대가 비교적 가깝게 배치되어 있어 초반 자원 확보 경쟁이 치열할 것으로 보인다. 맵의 디자인상으로는 지형을 활용한 전략적 우위가 중요할 것으로 보이며, 특히 중앙 광물 지대를 둘러싼 고지대에서 시야와 공격 루트를 통제하는 것이 승리의 열쇠가 될 가능성이 크다. 제공된 이미지에서는 플레이어 시작 위치가 명확히 확인되며, 각 시작 지점 주변으로 초기 자원과 건물이 배치되어 있는 것으로 추정된다. 맵의 난이도는 제작자나 후속 버전에 따라 다르겠지만, 넓은 맵과 다수의 플레이어 수를 고려할 때 초보자의 경우 적응이 필요할 수 있다. 또한, 팀 기반 전투이기 때문에 팀원 간의 협력이 필수적이며, 개별 플레이어의 역량보다는 전체적인 전략과 조정이 승패를 좌우할 것으로 보인다. 마지막으로, 맵의 배경이 화산 테마이기 때문에 지형의 특징을 살린 다양한 전략이 나올 것으로 예상된다. 이 맵을 플레이하기 전에는 자원 분포와 시작 위치 간의 거리를 확인하고, 팀원과의 전략적인 협의가 필요할 것이다. Special Forces Ultimate is a UMS custom map for StarCraft: Brood War, a team-based combat map where six players participate. The map features a volcanic-themed wide plain terrain, with a large central mineral field surrounded by scattered smaller resource areas. Starting positions are located at the four corners of the map and near the center, where players must gather resources from their bases, produce units, and attack or defend against opponents. While the map size is large at 3072x3072, the relatively close placement of resource areas suggests intense early competition for resource control. The map design emphasizes strategic advantages through terrain control, with high ground around the central mineral field likely playing a crucial role in securing vision and attack routes. The provided image clearly shows player starting positions, with initial resources and buildings likely arranged around each spawn point. Difficulty may vary depending on the creator or later versions, but given the large scale and multiple players, beginners may need time to adapt. Since it is a team-based battle, cooperation among teammates is essential, and overall strategy and coordination will likely determine victory rather than individual skill. Given the volcanic theme, various strategies leveraging the terrain’s features are expected. Before playing, it’s advisable to check resource distribution and distances between starting positions and coordinate a strategy with teammates.
맵 선택 가이드
태그는 맵의 핵심 특징을 빠르게 설명하지만 제작 버전마다 규칙이 다를 수 있습니다. 상세 설명에서 권장 인원, 난이도, 플레이 시간과 버전을 함께 확인한 뒤 다운로드하세요.