
화산 타일셋 스타크래프트 맵 모음
'화산 타일셋' 태그가 등록된 맵을 모았습니다. 장르 하나로 찾기 어려운 플레이 방식, 난이도와 특징을 중심으로 인기 맵과 최신 맵을 비교해 보세요.
- 등록 맵
- 28개
- 누적 다운로드
- 2
- 누적 조회
- 1,271
인기 맵
다운로드와 조회 반응이 높은 맵입니다.
![[EUD] 히드라2000부대막기_EX 맵 미리보기](https://cdn-star-data.huzy.net/thumbnail_0cd40c8e9d7745ad8a0a6ebaa8401744.jpg)
[EUD] 히드라2000부대막기_EX
스타크래프트 브루드워의 유즈맵 중 하나인 '[EUD] 히드라2000부대막기_EX'는 디펜스 장르에 속하는 맵으로, 플레이어는 끊임없이 몰려오는 적 유닛을 막아내야 하는 구조를 가지고 있다. 맵의 제목에서 알 수 있듯이 주로 히드라리스크로 구성된 대규모 적 부대를 상대하는 것이 주요 목표이며, EUD(Extended Unit Death) 기술을 활용해 복잡한 트리거가 구현되어 있는 특징이 있다. 맵은 화산 타일셋을 기반으로 제작되어 visually한 분위기를 자아내며, 2048x3072라는 넓은 맵 사이즈 덕분에 다양한 배치와 진형이 가능하다는 장점이 있다. 게임은 일정 시간마다 등장하는 적 웨이브를 방어하는 방식으로 진행되며, 각 웨이브마다 조금씩 강화된 적 부대가 등장해 플레이어의 전략과 대처 능력을 시험한다. 방어에 성공할 때마다 보상을 얻으며, 일정 조건을 달성하면 승리하거나 추가적인 기능을 해금할 수 있는 구조로 보인다. 맵의 넓은 공간을 활용해 방어선을 구축하고, 적의 공격을 효율적으로 분산시키는 것이 핵심 전략이 될 것이다. 또한, EUD 기술이 적용되어 있어 일반적인 맵과는 다른 특수 효과나 인터페이스가 포함되어 있을 가능성이 높다. 이 맵은 주로 1인 플레이를 상정하고 제작되었으나, 팀 플레이로도 충분히 즐길 수 있을 것으로 추정된다. 방대한 맵 크기와 복잡한 적 웨이브 시스템 덕분에 플레이어는 여러 번의 시도와 전략 수정을 통해 자신만의 방어 노하우를 쌓아갈 수 있을 것이다. 초보자보다는 어느 정도의 경험이 있는 플레이어에게 더 적합할 것으로 보이며, 디펜스 장르에 익숙한 유저라면 재미있게 즐길 수 있는 맵이다. 다만, 넓은 맵을 활용한 전략적 플레이가 요구되므로, 시야 확보와 자원 관리에 주의를 기울일 필요가 있다. 이 맵을 플레이하기 전에는 EUD 맵에 대한 기본적인 이해와 디펜스 장르의 특성을 숙지하는 것이 좋다. 또한, 넓은 맵에서 발생할 수 있는 자원 부족이나 방어선 붕괴 scenarios를 대비하기 위해 미리 방어 건물이나 유닛 배치 계획을 세워두는 것이 중요하다. 맵의 난이도는 난이도 설정이나 웨이브 강도에 따라 달라질 수 있으므로, 처음 플레이할 때는 쉬운 난이도로 시작하는 것이 추천된다. 특히 히드라리스크는 스플래시 대미지를 입히므로, 방어 건물이나 탱커 유닛을 적절히 배치해 효율적인 대처가 필요할 것이다. This StarCraft: Brood War custom map, '[EUD] 히드라2000부대막기_EX', falls under the defense genre, challenging players to withstand relentless waves of enemy units, primarily Hydralisks as indicated by the title. Utilizing EUD (Extended Unit Death) technology, the map incorporates advanced triggers that enhance gameplay mechanics beyond standard custom maps. Set against a volcanic tileset, the 2048x3072 map size provides ample space for strategic unit placement and dynamic combat scenarios. The gameplay revolves around a wave-based defense system where players must fortify their positions and repel increasingly powerful enemy assaults. Successful defense yields rewards, and achieving specific objectives unlocks additional features or leads to victory. The vast map area allows for creative defensive setups, encouraging players to spread out units and manage resources efficiently. Given the EUD implementation, players can expect unique mechanics or interfaces that differ from conventional custom maps. While designed primarily for single-player experiences, the map can also accommodate team-based play. The expansive layout and complex enemy waves make it ideal for players seeking a challenge and the opportunity to refine their strategies over multiple attempts. Beginners may find it daunting, but intermediate to advanced players familiar with defense maps will appreciate its depth and replayability. Strategic vision and resource management are crucial, as overlooking potential weaknesses in defensive lines can lead to failure. Before diving into gameplay, players should familiarize themselves with EUD mechanics and the nuances of defense maps. It is advisable to plan defensive structures and unit placements carefully to mitigate risks such as resource shortages or line breaches. Starting on easier difficulties is recommended for newcomers, as the Hydralisk's splash damage requires thoughtful positioning of defensive buildings and tank units. The map's difficulty can vary based on settings and wave intensity, so adjusting these parameters can help tailor the experience to individual skill levels.
![[7]意外来客 맵 미리보기](https://cdn-star-data.huzy.net/thumbnail_afeb2a0f866640dd83075a793b116674.jpg)
[7]意外来客
[7]意外来客는 화산 타일셋을 배경으로 한 1인용 유즈맵으로, 플레이어는 지도 중앙에 위치한 듀가르 장군을 찾아가야 한다. 맵은 넓은 6144×6144 크기의 영역을 여러 구역으로 나누어 놓아 탐험과 전투를 번갈아 경험하게 한다. 시작 지점에서부터 여러 갈래 길이 펼쳐져 있어, 어느 길을 선택하느냐에 따라 적의 배치와 이벤트가 달라진다. 적은 주로 화산 지역 특유의 저그 유닛과 테란 방어 시설로 구성돼 있어, 공격과 방어를 적절히 조절해야 한다. 주요 목표는 듀가르 장군을 찾고, 그 옆에 서 있는 정체불명의 성당 기사와 대화하거나 전투를 통해 진행 상황을 확인하는 것이다. 전투는 비교적 짧지만, 적의 위치와 스폰 타이밍을 파악하는 것이 승리의 열쇠이며, 맵 곳곳에 숨겨진 아이템을 수집하면 전투력을 보강할 수 있다. 플레이 전에는 화산 타일셋 특성상 시야가 제한되는 구역이 있으니, 정찰 유닛을 먼저 파견해 안전한 경로를 확보하는 것이 좋다. 전체적인 진행은 스토리와 탐험 요소가 강조된 RPG 스타일이며, 초보자도 충분히 즐길 수 있지만 적절한 마이크로 관리가 필요하다. 따라서 스토리 중심의 싱글플레이를 즐기는 유저와 화산 지형의 특수성을 체험하고 싶은 플레이어에게 추천한다. [7] Unexpected Visitor is a single-player UMS map set on a volcanic tileset, where the player must locate General Dugarl in the center of the map. The map spans a large 6144×6144 area divided into several zones, alternating between exploration and combat. From the starting point, multiple branching paths appear, and the chosen route determines enemy placement and events. Enemies consist mainly of Zerg units and Terran defenses typical of volcanic regions, requiring a balance of offense and defense. The main objective is to find General Dugarl and interact—or fight—with the mysterious chapel knight standing beside him. Battles are relatively short, but understanding enemy positions and spawn timing is key to victory; hidden items scattered around the map can boost combat power. Before playing, note that the volcanic tileset creates limited‑vision areas, so sending a scout unit first to secure a safe route is advisable. Overall, the map emphasizes story and exploration in an RPG style, accessible to beginners yet demanding careful micro‑management. It is recommended for players who enjoy single‑player narrative experiences and want to test the unique volcanic terrain.
![블록 더 게이트 [2] (Block The Gate [2]) 맵 미리보기](https://cdn-star-data.huzy.net/thumbnail_a16402008b2b4d9695a8cb8808ba223a.jpg)
블록 더 게이트 [2] (Block The Gate [2])
《Block The Gate [2]》는 스타크래프트 브루드워의 유즈맵으로, 입구막기 형식의 디펜스 장르에 속하는 맵이다. 맵 제목에서 유추할 수 있듯이, ‘The Gate’라는 명칭이 시사하듯 플레이어는 입구를 forsvars하기 위해 중앙의 좁은 통로를 막아내야 한다. 화산 타일셋을 활용한 지형이 인상적인 이 맵은 좁고 긴 통로를 중심으로 양쪽에서 몰려오는 적군을 방어하는 것이 주된 목표로 보인다. 적군은 주로 맵의 좌우 양쪽에서 끊임없이 쏟아져 나오며, 좁은 통로에서 유닛들이 밀집되어 전투가 벌어지는 구조다. 맵의 중앙 통로는 좁아 유닛들이 자연스럽게 밀집되면서 방어가 수월해지지만, 반대로 좁은 통로의 양쪽 끝은 넓은 개활지이기 때문에 방어선이 뚫릴 위험도 상존한다. 맵의 가장자리와 통로의 연결부에는 빈 공간이 적절히 배치되어 있어 방어 유닛을 배치하고 보급로를 확보하기 용이하다. 또한, 맵 곳곳에 흩어져 있는 잔디와 바위 등은 시야를 차단하거나 전략적 요충지를 제공하여 플레이어의 전술을 다양화할 수 있도록 돕는다. 이 맵은 주로 5인 플레이를 상정하고 제작된 것으로 보이며, 각 플레이어는 독립된 기지에서 시작해 중앙 통로로 이어지는 길을 지켜내야 한다. 방어에 실패하면 적군이 통로를 통과해 기지로 침입하는 구조로 추정된다. 초보자부터 숙련자까지 즐길 수 있도록 난이도를 조절할 수 있는 요소들이 포함되어 있을 가능성이 높으며, 특히 좁은 통로의 장벽을 어떻게 구축하고 유닛을 배치하느냐가 승패를 좌우할 것이다. 이 맵을 플레이하기 전에 방어에 특화된 빌드와 유닛 조합을 연습하는 것이 좋으며, 통로 양쪽의 넓은 개활지에서 벌어지는 전투를 대비한 대처법도 숙지해야 한다. 또한, 맵의 타일셋이 화산이기 때문에 지형 특성상 언덕이나 계단 구조가 일부 존재할 수 있으며, 이는 시야와 공격 범위에 영향을 미칠 수 있으니 주의가 필요하다. 이 맵은 특히 입문자들에게 좁은 공간에서의 유닛 컨트롤과 방어 전략을 배울 수 있는 좋은 기회가 될 것이다. 《Block The Gate [2]》 is a user-made map for *StarCraft: Brood War*, falling under the defense genre in the "block the entrance" style. As the title suggests, players must defend the entrance by blocking the central narrow passage, referred to as "The Gate." This map features striking volcanic terrain, with gameplay centered around defending a long, narrow corridor from waves of enemies approaching from both sides. Enemies primarily spawn continuously from the left and right edges of the map, clashing in dense formations within the tight passage. While the central corridor's narrowness naturally concentrates units for easier defense, the wide open areas at both ends pose a risk of the defensive line being breached. The map strategically includes small gaps along the edges and at the corridor's junctions, making it easier to position defensive units and secure supply lines. Scattered grass and rocks throughout the map not only obstruct vision but also provide strategic vantage points, allowing for diverse tactical approaches. Designed primarily for five players, each starts in an independent base and must protect the path leading to the central corridor. Failure to defend results in enemies breaking through and invading the base. The map likely includes adjustable difficulty elements to cater to both beginners and experienced players, with victory hinging on how effectively players construct barriers and position units in the narrow passage. Before playing, it's advisable to practice defense-focused builds and unit compositions, as well as prepare for battles in the wide open areas on either side of the corridor. Given the volcanic tile set, some sections may feature hills or stair-like structures that affect visibility and attack range, so players should remain mindful of these terrain features. This map offers an excellent opportunity for newcomers to learn unit control and defensive strategies in confined spaces.
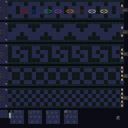
마운트 임파서블 2.5 (Mount Impossible 2.5)
스타크래프트 브루드워의 유즈맵 시리즈로 유명한 〈마운트 임파서블〉의 최신 버전인 〈Mount Impossible 2.5.al〉은 7명의 플레이어가 함께 도전하는 하이브리드 디펜스와 서바이벌 장르의 맵입니다. 맵 이름은 'Mount Impossible'이라는 이름 그대로, 중앙에 위치한 거대한 산(또는 구조물)을 progressively 파괴해 나가며 마지막 스테이지를 클리어하는 것이 목표로 보입니다. 화산 타일셋을 기반으로 한 어두운 분위기의 맵은 게임의 긴장감을 한층 높이며, 다양한 스테이지와 난이도 변환을 통해 반전을 제공합니다. 플레이어들은 각자의 위치에서 시작해, 중앙의 목표물을 향해 끊임없이 몰려오는 적들을 방어하거나, 산을 무너뜨리는 데 필요한 자원을 확보하는 등 다채로운 플레이를 경험할 수 있습니다. 맵의 구조는 세로로 긴 형태를 띠고 있으며, 각 스테이지마다 새로운 기믹이나 적 패턴이 등장하여 플레이어의 적응력을 요구합니다. 특히, 후반부로 갈수록 적의 공격 패턴이 복잡해지고, 방어 구조물의 중요성이 커지므로 전략적 사고가 요구됩니다. 이 맵은 7인 플레이를 전제로 설계되어 있으며, 팀 플레이보다는 개인의 판단력과 협동이 중요한 요소로 작용합니다. 맵의 전체적인 분위기는dark fantasy 또는 sf와 같은 분위기를 연상시키며, 플레이어들에게 긴장감과 성취감을 동시에 제공할 것입니다. 초보자보다는 중급 이상의 플레이어에게 더 적합한 난이도를 가지고 있으며, 반복 플레이를 통해 새로운 전략을 세워볼 수 있는 요소도 포함되어 있습니다. 플레이 전에는 맵의 구조와 각 스테이지의 목표를 미리 숙지하고, 방어용 건물의 배치와 자원 관리에 신경을 쓰는 것이 중요합니다. 또한, 중앙의 목표물을 파괴하는 데 필요한 조건이나 트리거가 어떤 것인지 확인해 두면 게임 진행이 smoother할 것입니다. 맵의 긴장감과 흥미로운 전개로 인해, 스타크래프트 유즈맵의 팬이라면 한번쯤 도전해 볼 만한 가치가 있는 작품입니다. This StarCraft: Brood War custom map, Mount Impossible 2.5.al, is a hybrid defense and survival game designed for 7 players. The map's name, 'Mount Impossible,' hints at the core challenge: progressively destroying a large central mountain (or structure) across multiple stages to reach the final objective. Crafted with a volcanic tileset, the dark, foreboding atmosphere amplifies the tension, while varying stages and dynamic difficulty shifts introduce unexpected twists. Players begin in distinct starting positions, tasked with either defending against relentless waves of enemies or securing resources to dismantle the mountain. The map's vertical layout ensures a compact yet strategic space where each stage introduces new mechanics or enemy patterns, demanding adaptability and quick decision-making from players. As the game progresses, enemy attacks grow more complex, and the role of defensive structures becomes critical, rewarding foresight and coordination. Built for 7-player matches, the map emphasizes individual judgment and teamwork over rigid team roles. The aesthetic leans into a dark fantasy or sci-fi vibe, immersing players in a world where strategy and perseverance are key. While approachable for intermediate players, its challenge curve makes it less ideal for absolute beginners, though replayability is high thanks to evolving strategies and hidden mechanics. Before playing, familiarize yourself with the map's layout and each stage's objectives, paying close attention to where defensive structures and resources are placed. Understanding the conditions required to destroy the central objective will streamline your progress. With its gripping tension and layered gameplay, Mount Impossible 2.5.al is a must-try for StarCraft custom map enthusiasts seeking a fresh yet familiar challenge.
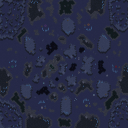
Shattered Twilight (파괴된 황혼)
《Shattered Twilight》는 스타크래프트: 브루드워의 3v3 동맹전용 UMS 유즈맵으로, 황혼의 세계를 배경으로 한 어두운 분위기의 테란 밀리 맵이다. 중앙에 광물 지대가 밀집된 자원이 풍부한 지역이 펼쳐지며, 협소한 통로와 복잡한 지형이 곳곳에 배치되어 전략적 깊이를 더한다. 맵 이름은 '파괴된 황혼'을 뜻하며, 어두운 색감의 화산 타일셋으로 전체적인 분위기가 조성된다. 8192x4096의 넓은 맵 크기와 256x128의 타일셋을 기반으로 한 디자인은 넓은 시야와 긴 교전 거리를 제공하며, 복잡한 지형은 테란의 벙커와 시즈 탱크, 프로토스의 캐리어, 저그의 뮤탈리스크 등 다양한 유닛의 활용을 강제한다. 중앙 자원 지대는 초반부터 중반까지의 전투를 유도하며, 동맹 간의 협력이 필수적이다. 맵의 난이도는 보통 수준으로 예상되며, 3v3 동맹전의 특성상 동맹원 간의 호흡이 중요하다. 이 맵은 주로 공방이나 UMS 커스텀 게임에서 즐기기 적합하며, 넓은 공간에서 벌어지는 대규모 교전과Resource Management가 주요 특징이다. 플레이 전에는 동맹원과의 전략적 합의가 무엇보다 중요하며, 특히 중앙 자원 지역을 둘러싼 초반 교전과 후방 기습을 대비한 방어 라인을 마련하는 것이 관건이다. 또한, 테란의 경우 벙커와 시즈 탱크 배치, 프로토스는 캐리어와 하이 템플러 활용, 저그는 뮤탈리스크와 저글링 다수 운용이 핵심 전략이 될 수 있다. 이 맵은Resource Management와 동맹 협력이 동시에 요구되는 만큼, 플레이어의 역량과 팀워크가 승리를 좌우할 것이다. 《Shattered Twilight》 is a 3v3 team-based UMS custom map for *StarCraft: Brood War*, set in a dark, twilight world as a Terran melee map. The center features a densely packed mineral field with abundant resources, while narrow passages and complex terrain are strategically placed throughout to add depth. The name "Shattered Twilight" reflects the map's theme, conveyed through a volcanic tileset with dark color tones. Designed on an 8192x4096 map size with a 256x128 tileset, it offers wide visibility and long engagement ranges, forcing players to utilize diverse units like Terran bunkers and siege tanks, Protoss carriers, and Zerg mutalisks. The central resource area drives early to mid-game combat, making cooperation among allies essential. With a moderate difficulty level, teamwork among teammates is crucial in this 3v3 setting. The map is best enjoyed in public games or custom UMS matches, featuring large-scale battles in vast spaces and emphasizing resource management. Before playing, strategic coordination with teammates is vital, particularly in preparing for early clashes around the central resource area and establishing defensive lines to counter potential rear assaults. Terran players should focus on bunker and siege tank positioning, Protoss on carriers and high templars, and Zerg on mutalisks and zerglings. Since the map demands both resource management and teamwork, a player's skill and coordination with their team will ultimately determine victory.
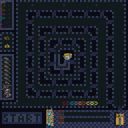
Amazing Turret Spiral 2010
‘Amazing Turret Spiral 2010’은 스타크래프트: 브루드워의 디펜스 장르 유즈맵으로, 중앙에 위치한 방어용 터렛과 주기적으로 몰아치는 적 웨이브를 방어하는 구조가 특징이다. 맵은 화산 타일셋을 기반으로 2048x2048 크기에서 펼쳐지며, 플레이어는 7명의 인원으로 구성된 팀으로 참여해 입구 주변에 배치된 터렛을 강화하고 유지하는 방식으로 적의 공격을 막아내야 한다. 맵 중앙에 위치한 ‘Spiral’이라는 이름에 걸맞게 적의 진행 경로가 나선형으로 배치되어 있으며, 이는 방어 전략의 핵심으로 작용한다. 맵의 디자인상으로는 입구에서 멀어질수록 적의 수가 증가하는 ‘입구막기’ 스타일의 디펜스가 강하지만, 터렛을 중심으로 한 방어 시스템이 추가되어 타워 디펜스와 컴까기 요소가 혼합된 형태로 보인다. 특히 터렛의 배치와 업그레이드, 그리고 적 웨이브의 밀도 변화가 플레이의 재미를 더하는 요소로 추정된다. 플레이어는 터렛의 체력과 공격력을 관리하며 적의 공격을 버텨야 하며, 일정 시간 또는 웨이브가 지나면 보상으로 추가 자원이나 업글 아이템을 획득할 수 있을 것으로 보인다. 맵의 난이도는 적의 웨이브 밀도와 터렛의 초기 배치에 따라 달라질 수 있으며, 초보자의 경우 미리 배치된 터렛의 성능을 충분히 활용하는 전략이 필요할 것으로 보인다. 맵의 이름에서 ‘Spiral’이 포함된 점과 실제 맵 구조상 나선형 경로가 확인되는 점을 고려할 때, 이 맵은 ‘나선형 터렛 디펜스’라는 장르로 분류될 수 있다. 플레이 전에는 터렛의 배치 위치와 초기 자원, 그리고 적의 웨이브 패턴을 미리 확인하는 것이 중요할 것이다. 또한, 팀원 간의 실시간 협력이 필수적이며, 터렛의 업그레이드 타이밍을 잘 조율해야만 후반 웨이브까지 버틸 수 있을 것으로 보인다. Amazing Turret Spiral 2010 is a StarCraft: Brood War defense genre custom map where players defend against waves of enemies using strategically placed turrets. The map, built on a volcanic tileset at 2048x2048 resolution, features a spiral-like enemy path design that forces players to manage turret placement and upgrades to withstand increasing enemy pressure. The core gameplay revolves around maintaining and upgrading turrets positioned at key choke points, while coordinating with a team of 7 players to survive escalating enemy waves. The spiral design suggests a tower defense hybrid structure, though the turret-centric mechanics lean more toward a turret defense or tower-based custom defense experience. Players must balance turret health, damage output, and resource allocation, as surviving longer waves likely grants access to upgrades or bonuses. Difficulty scales with wave intensity and initial turret efficiency, requiring beginners to rely on pre-placed structures and team coordination. Before playing, reviewing the turret spawn locations, initial resources, and enemy wave patterns is crucial for success. Real-time teamwork and timely turret upgrades are essential to endure the later stages of the map.
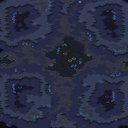
현기증 (Vertigo)
이 맵은 스타크래프트 브루드워의 유즈맵으로, 8명의 플레이어가 참여하는 멀티플레이어 대결 맵이다. 내부 맵 제목과 설명에 따르면 '모든 적 건물 파괴'가 승리 조건으로 보이며, Um Jaekyeong에 의해 제작되었다. 맵은 화산 타일셋을 기반으로 4096x4096 해상도로 구성되어 있으며, 중앙에 위치한 언덕과 계단 구조가 특징적이다. 이 지형적 특성은 전투 중 전략적 우위를 제공할 수 있으며, 언덕 위에서 수비하거나 언덕 아래로 내려가 공격하는 플레이가 가능할 것으로 추정된다. 맵의 이름은 'Vertigo'로, '현기증' 또는 '어지러움'을 뜻하는 영어 단어와 동일하여, perhaps 맵의 높은 지형이나 균형을 잃기 쉬운 구조를 연상시키는 듯하다. 그러나 내부 설명에는 승리 조건 외의 스토리나 배경이 없으므로, 순수하게 전략과 전투에 집중할 수 있는 맵으로 보인다. 플레이어는 중앙 언덕을 중심으로 배치되며, 각 플레이어의 시작 위치가 언덕 위에서 언덕 아래로 이어지는 계단을 통해 연결되어 있다. 이러한 구조는 초반 러시나 방어 전략을 중요하게 만들며, 언덕 위의 높은 지대에서 시야와 공격을 효율적으로 활용할 수 있도록 설계된 것으로 추정된다. 맵의 밸런스는 아직 명확하지 않지만, 언덕의 중앙 통로 역할을 하는 계단을 두고 벌이는 전투가 주요 볼거리일 가능성이 높다. 또한, 맵의 크기가 크고 지형이 복잡하지 않아 빠른 전투가 예상되므로, 플레이어 간의 협력과 위치 선정이 승패를 좌우할 것이다. 초보자도 쉽게 접근할 수 있지만, 언덕의 이점을 활용한 전략적 플레이가 필요하므로 '보통' 수준의 난이도가 적절할 것으로 판단된다. 이 맵을 즐기기 위해서는 최소 4명 이상의 플레이어가 참여하는 것이 좋으며, 팀 플레이보다는 각 플레이어 간 경쟁 구도가 더 어울리는 맵으로 보인다. 또한, 맵의 이름과 지형적 특징을 고려할 때, perhaps '공포'나 '어둠'과 같은 분위기를 연출할 수 있는 연출이 추가된다면 더 흥미로운 경험을 제공할 수 있을 것이다. 마지막으로, 맵의 해상도와 타일셋이 화려하여 시각적 완성도가 높으므로, 스타크래프트의 그래픽을 최대한 활용할 수 있는 장점이 있다. This map is a StarCraft: Brood War custom map designed for eight players in a multiplayer battle. According to the internal map title and description, the victory condition appears to be destroying all enemy buildings, and it was created by Um Jaekyeong. The map is built on a volcanic tileset with a 4096x4096 resolution and features a central hill with a staircase structure. This terrain design likely provides a strategic advantage in combat, allowing players to defend from the elevated hill or attack by descending. The map is named *Vertigo*, which shares the same English meaning as "dizziness" or "vertigo," possibly hinting at its high terrain or the precarious balance of its layout. However, the internal description lacks any additional story or background beyond the victory condition, suggesting a pure focus on strategy and combat. Players are positioned around the central hill, with each starting location connected by stairs leading down from the elevated area. This structure emphasizes early rushes and defensive strategies, as the higher ground offers better visibility and attack efficiency. While the map's balance remains unclear, the central staircase likely serves as a key battleground, making it a major highlight. Given its large size and relatively simple terrain, fast-paced combat is expected, with player coordination and positioning determining victory. Though accessible to beginners, the need for strategic play to leverage the hill's advantages suggests a moderate difficulty level is appropriate. To fully enjoy this map, at least four players are recommended, and its design seems better suited for individual competition rather than team play. Considering the map's name and terrain, adding an atmosphere evoking fear or darkness could enhance the experience. Finally, the high-resolution volcanic tileset ensures strong visual appeal, maximizing the graphical potential of StarCraft.
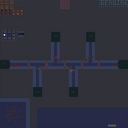
러커 디 400 레벨 (Lurker D 400 Levels)
스타크래프트 브루드워의 화산 타일셋을 배경으로 한 ‘Lurker D 400 Levels’는 여섯 명의 플레이어가 동시에 경쟁하는 독특한 디펜스형 유즈맵이다. 맵의 전체 크기가 4096x4096에 달하는 거대한 규모로, 중앙에 위치한 넓은 공간을 중심으로 여섯 개의 플레이어 기지가 배치되어 있다. 각 플레이어는 시작 지점에서부터 강력한 ‘러커’를 중심으로 한 유닛을 생산해 상대 기지를 공격하거나 방어해야 하며, 맵 곳곳의 자원과 건물을 활용해 전력을 보강할 수 있다. 맵의 특징은 맵 이름에 드러나듯 400단계의 레벨을 постепен하게 올라가는 진행 방식에 있다. 각 레벨이 올라갈수록 적의 공격 빈도와 강도가 증가하며, 플레이어는 제한된 자원으로 효율적인 방어와 공격을 병행해야 한다. 맵의 중앙 지역은 넓은 평야로 펼쳐져 있어 러커의 기동성과 방어 라인 구축이 중요하며, 언덕과 좁은 통로, 자원 밀집 지역 등이 전략적 포인트로 작용한다. 게임의 목적은 상대 기지를 파괴하거나 모든 적을 제거하는 것이며, 맵의 symmetrical한 구조상 초반부터 치열한 접전이 예상된다. 특히 러커의 특성상 시야 확보와 적절한 위치 선정이 승패를 좌우할 수 있으므로, 플레이어는 맵의 지형을 숙지하고 효율적인 유닛 컨트롤을 요구받는다. 초보 플레이어보다는 중급 이상의 실력을 갖춘 유저들이 도전해볼 만한 맵으로, 디펜스와 공격의 밸런스가 잘 조율된 점이 특징이다. 또한 맵의 규모가 크기 때문에 한 번의 실수가 치명적으로 이어질 수 있어, 신중한 플레이가 필요하다는 점도 빼놓을 수 없다. ‘Lurker D 400 Levels’는 단순히 디펜스를 넘어서 전략적 깊이가 있는 유즈맵으로, 여섯 명의 플레이어가 동시에 경쟁하는 특유의 긴장감과 짜릿함을 느낄 수 있다. 맵의 규모와 난이도 상승 시스템은 지속적인 플레이를 유도하며, 특히 러커를 중심으로 한 전략적 플레이가 돋보이는 작품이다. 이 맵을 플레이하고자 한다면, 러커의 특성과 맵의 지형을 충분히 숙지하고, 자원 관리와 방어 라인 구축에 신경을 쓰는 것이 중요하다. 또한 맵의 레벨이 올라갈수록 어려워지는 난이도를 감안해, 초반에는 안정적인 자원 확보와 방어 태세를 갖추는 것이 관건이다. 여섯 명의 플레이어가 경쟁하는 구조상 팀워크와 순간적인 판단력이 요구되므로, 혼자서는 해결하기 어려운 상황이 자주 발생할 수 있다. 이 맵은 디펜스와 공격의 균형을 맞추는 동시에, 상대의 전략을 예측하고 대응하는 능력이 필수적인 만큼, 전략 게임을 좋아하는 유저들에게 strong 추천할 만한 작품이다. 마지막으로, 맵의 거대한 규모와 화산 타일셋의 조화로운 디자인은 시각적으로도 즐거움을 제공하며, 플레이어의 집중력을 높이는 데 기여한다. 이 맵을 통해 스타크래프트의 전략적 깊이를 한층 더 느낄 수 있을 것이다. "Lurker D 400 Levels" is a unique defense-style custom map set against the volcanic tileset from *StarCraft: Brood War*, where six players compete simultaneously. Spanning a massive 4096x4096 grid, the map features six player bases arranged around a central open area. Each player starts by producing powerful units centered around the *lurker*, tasked with attacking or defending against opponents while reinforcing their forces using scattered resources and structures. As the name suggests, the map progresses through 400 escalating levels, with each stage increasing the frequency and intensity of enemy attacks. Players must balance limited resources with efficient offense and defense. The central region is a vast plain, making lurker mobility and defensive line construction critical. Strategic points include hills, narrow corridors, and resource clusters. The goal is to destroy enemy bases or eliminate all opponents, with the symmetrical layout ensuring intense early-game clashes. Since lurkers rely on positioning and vision control, victory often hinges on terrain knowledge and precise unit control. This map is best suited for intermediate to advanced players, offering a well-balanced mix of defense and offense. Given its scale, even a single mistake can be fatal, demanding careful play. "Lurker D 400 Levels" goes beyond simple defense, offering deep strategy in a high-tension, six-player competitive setting. Its rising difficulty and lurker-focused mechanics create a standout experience. To excel, players should master lurker tactics, study the terrain, and prioritize resource management and defense. Early-game stability is key, as later levels grow exponentially harder. The six-player format requires teamwork and quick decision-making, often making solo solutions impossible. Balancing offense and defense while predicting and countering opponents' strategies is essential, making this a must-play for strategy game fans. Finally, the map’s vast scale and striking volcanic aesthetic enhance immersion, sharpening focus and visual appeal. It’s a fantastic way to experience *StarCraft*’s strategic depth.
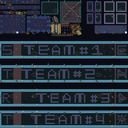
팀 디펜스 2.1 Official (Team Defense 2.1 Official)
스타크래프트 브루드워의 대표적인 유즈맵 장르인 디펜스(Defense) 유형의 맵 'Team Defense 2.1 Official'은 8명의 플레이어가 한 팀이 되어 방어와 생존을 중심으로 진행되는 팀전 디펜스 맵이다. 맵의 핵심 목표는 맵 중앙에 위치한 출구를 보호하면서 적대 팀의 공격을 막아내고, 마지막까지 살아남아 승리를 차지하는 것이다. 맵은 화산 타일셋을 기반으로 제작되어 독특한 지형과 시각적 특징을 제공하며, 다양한 방어 구조물을 배치할 수 있는 공간이 마련되어 있다. 내부 설명에 따르면 '많은 영웅(Heros)'을 사용할 수 있도록 설계된 것으로 보이며, 새로운 맵(No Map)임을 강조하고 있다. 디펜스 맵의 특성상 전략적 배치와 협동 플레이가 중요하며, 출구 주변을 방어하는 동시에 적을 섬멸하는 균형 잡힌 플레이가 요구된다. 맵의 symmetrical한 구조는 팀 간의 공정한 경쟁을 가능하게 하며, 팀워크와 개개인의 실력이 모두 요구되는 종합적인 전략 게임으로 느껴진다. 특히 출구 주변의 좁은 길목에서 벌어지는 전투는 긴장감을 고조시키며, 순간적인 판단과 빠른 반응이 승리를 좌우할 수 있다. 초보자의 경우 방어 구조물의 배치와 영웅의 활용법에 대한 기본적인 이해가 필요하며, 숙련된 플레이어는 팀원 간의 호흡을 맞추어 효율적인 전략을 구사할 수 있다. 맵의 symmetrical한 디자인과 중앙 출구 구조는 팀 간의 전투가 집중되는 핫스팟을 형성하므로, 초반 방어 라인의 구축과 영웅의 선택이 게임의 흐름을 결정짓는 중요한 포인트가 될 것이다. 이 맵은 팀워크를 중시하는 디펜스 유형의 맵을 선호하는 플레이어들에게 특히 추천된다. 또한, 맵의 symmetrical한 구조는 밸런스 측면에서도 우수하여, 팀 간의 실력 차가 크지 않다면 공정한 경쟁이 가능할 것으로 보인다. 플레이 전에는 팀원과의 사전 전략 회의와 영웅 조합에 대한 논의가 필수적이며, 특히 출구 주변의 방어 타워나 유닛의 배치 위치를 숙지하고 있어야 한다. 맵의 난이도는 내부 설명에 명시되어 있지 않지만, symmetrical한 구조와 중앙 출구의 중요성, 그리고 '많은 영웅'의 활용 가능성을 고려할 때 대체로 '보통' 이상의 난이도로 예상된다. 이 맵은 디펜스 장르에 익숙한 플레이어라면 누구나 즐길 수 있으며, 특히 팀플레이를 선호하는 유저들에게 강렬한 재미를 제공할 것이다. StarCraft: Brood War’s classic Defense-style custom map, *Team Defense 2.1 Official*, is a team-based Defense mode where eight players work together to survive by focusing on defense and endurance. The core objective is to protect the exit located at the center of the map while fending off enemy attacks and securing victory by surviving until the end. Built on a volcanic tileset, the map features unique terrain and visuals, offering plenty of space to strategically place defensive structures. According to the in-game description, it appears designed to utilize a wide variety of heroes, emphasizing that it’s a brand-new map. As a Defense map, strategic positioning and teamwork are crucial, requiring balanced play that both defends the exit and eliminates enemies. The symmetrical layout ensures fair competition between teams, making it a well-rounded strategy game that demands both teamwork and individual skill. The tight choke points around the exit create high-tension battles where quick decisions and fast reactions can determine victory. Beginners should grasp the basics of placing defensive structures and using heroes effectively, while experienced players can coordinate with teammates to execute advanced strategies. The symmetrical design and central exit structure create hotspots where team battles converge, making early defense line setup and hero selection key factors that shape the game’s flow. This map is especially recommended for players who enjoy Defense-style maps that emphasize teamwork. The symmetrical design also ensures strong balance, allowing for fair competition even if there’s a slight skill gap between teams. Before playing, it’s essential to hold a pre-game strategy meeting with teammates and discuss hero compositions, particularly familiarizing yourselves with defensive tower and unit placements near the exit. While the in-game description doesn’t specify difficulty, considering the symmetrical layout, the exit’s importance, and the potential use of many heroes, the map is likely rated as "medium" or higher. Anyone familiar with the Defense genre can enjoy this map, and it offers intense fun for those who prefer team play.
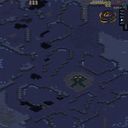
서바이벌 마스 4 (Survive Mars 4)
Survive Mars 4는 4096×4096 화산 타일셋을 배경으로 한 서바이벌형 유즈맵으로, 빠른 베이스 구축과 유닛 생산이 핵심 목표입니다. 맵 초반에 기지를 신속히 세우지 않으면 적절한 방어와 자원 확보가 어려워 즉시 패배할 위험이 높아집니다. 건설 가능한 건물 중 ‘Ghost’를 짓으면 프로브를, ‘Nexus’를 만들면 다크 템플러 선택기를 통해 히어로를 구매할 수 있다는 점이 특징이며, 이를 활용해 초반 전투력을 끌어올리는 전략이 중요합니다. 플레이어는 최대 6명까지 동시에 참여할 수 있으며, 팀 구분이 없으므로 자유로운 멀티플레이가 가능합니다. 지도는 기본적으로 자원 배치가 고르게 분포돼 있지 않아, 초기 자원 채집 루트를 미리 파악하고 이동 경로를 최적화하는 것이 승리의 열쇠가 됩니다. 또한, 화산 타일셋 특성상 지형이 높낮이가 심하고 장애물이 많아 유닛 이동 시 충돌을 피해야 합니다. 초보자도 즐길 수 있도록 난이도는 보통 수준으로 설계됐지만, 빠른 판단과 순간적인 대응력이 요구됩니다. 게임을 시작하기 전에 ‘Ghost’와 ‘Nexus’ 건설 순서를 미리 계획하고, 다크 템플러 히어러를 언제 구매할지 전략을 세우는 것이 좋습니다. 전반적으로 빠른 템포와 서바이벌 요소가 결합된 이 맵은 빠른 전개를 선호하는 유저와 협동 플레이를 즐기는 그룹에게 추천됩니다. Survive Mars 4 is a survival‑type UMS map set on a volcanic tileset with a massive 4096×4096 layout, where rapid base building and unit production are the core objectives. If you fail to establish a base quickly at the start, you will struggle to defend and gather resources, leading to an early defeat. The map features a Ghost building that spawns a probe and a Nexus that unlocks a Dark Templar chooser for purchasing heroes, making early combat power crucial. Up to six players can join simultaneously without team divisions, allowing free‑form multiplayer. Resources are not evenly spread, so scouting early resource routes and optimizing movement paths are key to victory. The volcanic terrain adds height variations and obstacles, requiring careful unit navigation. While the difficulty is set to a moderate level suitable for beginners, quick decision‑making and reactive play are essential. Before starting, plan the construction order of Ghost and Nexus and decide when to acquire a Dark Templar hero. Overall, this map blends fast pacing with survival mechanics, making it ideal for players who enjoy rapid gameplay and cooperative challenges.
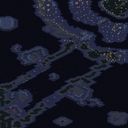
충성 (Loyalty)
이 맵은 스타크래프트 브루드워의 한글과 러시아어가 혼재된 제목을 지닌 특이한 유즈맵으로, 내부 설명에 따르면 '녹색 진영의 성채를 파괴하라'는 목표를 갖고 있는 것으로 보인다. 맵의 구조는 중앙에 위치한 커다란 기지 형태의 건물이 녹색 진영으로 추정되며, 주변을 둘러싼 넓은 평야와 산맥이 배치되어 있다. 맵의 전체적인 분위기는 화산 타일셋을 사용해 어두운 붉은색과 갈색 톤으로 이루어져 있으며, 기습이나 방어전을 염두에 둔 배치로 보인다. 플레이어는 단독으로 이 기지를 파괴해야 하는 임무를 수행하게 되며, 맵의 広大한 크기상으로는 이동과 전투에 전략적 선택이 요구될 것으로 예상된다. 맵의 이름 '[ÏÂÂ12] -- Âåðíîñòü'는 인코딩 오류로 인해 가독성이 떨어지지만, 내부 제목 '[ÏÂÂ12] -- Âåðíîñòü'를 고려했을 때 러시아어 'Верность'(충성심)의 의미를 내포하고 있을 가능성이 있다. 다만, 게임 내 실제 스토리나 설정은 제공되지 않아 플레이어는 오로지 목표인 '녹색 진영의 성채 파괴'에 집중하게 된다. 이 맵의 가장 큰 특징은 넓은 맵 크기와 기지 구조의 중심성이다. 플레이어는 시작 지점에서 출발해 기지로 접근하기까지 상당한 거리를 이동해야 하며, 도중에 적의 방어 시설이나 유닛이 배치되어 있을 가능성이 크다. 맵의 広大함 때문에 전략적 기동성과 자원 관리가 중요할 것이며, 특히 초반에는 맵의 지형을 정확히 숙지하지 못해 불리한 상황에 처할 수 있다. 또한, 맵의 타일셋이 화산으로 설정되어 있어 시야가 제한적일 수 있으며, 이는 전투 시 예측하지 못한 기습을 받을 가능성을 높인다. 이 맵은 단독 플레이를 전제로 제작되었으므로, 팀플레이의 메커니즘은 고려되지 않은 것으로 보인다. 플레이어는 맵의 지형을 활용한 우회 공격이나 방어 전략을 세워야 하며, 특히 기지 내부로 진입하는 루트를 신중히 선택해야 한다. 맵의 목표가 단순 파괴이므로, 전략적 요소가 강하며 신속한 판단력이 요구된다. 추천 대상은 스타크래프트의 유즈맵을 즐겨 플레이하는 유저, 특히 넓은 맵과 전략적 전투를 선호하는 플레이어들에게 적합할 것이다. 플레이 전에는 맵의 지형을 미리 확인하고, 기지 접근 루트를 계획하는 것이 중요하다. 또한, 맵의 넓이상으로는 자원 수집보다는 전투와 기동성에 초점을 맞추는 것이 효율적일 것이다. This StarCraft: Brood War custom map features a mixed Korean and Russian title, with an internal objective to 'destroy the green faction's stronghold.' The map utilizes a volcanic tileset, creating a dark, rugged aesthetic with central high ground surrounded by vast plains and mountain ranges. The layout suggests a focus on strategic movement and combat, as players must traverse long distances to reach the objective—a single-player mission to destroy a base-like structure at the map's center. The title '[ÏÂÂ12] -- Âåðíîñòü' appears corrupted due to encoding issues, but the internal name hints at the Russian word 'Верность' (loyalty), adding an intriguing thematic layer despite the lack of explicit lore. The map's scale is its defining trait, demanding careful navigation and tactical planning. Players start at a distant location, requiring significant travel time to reach the green base, where defenses or enemy units may lurk. The volcanic tileset limits visibility, increasing the risk of ambushes and necessitating cautious exploration. Given the single-player premise, team dynamics are irrelevant, but individual adaptability is crucial—players must scout routes, assess threats, and decide between direct assaults or stealth approaches. The objective’s simplicity belies its strategic depth, appealing to players who enjoy large-scale, methodical custom maps. Ideal for veterans of Brood War UMS maps, this title rewards those who prioritize map awareness and quick decision-making. Before playing, reviewing the terrain and planning entry points will enhance the experience, as resource management takes a backseat to mobility and combat efficiency.
데저트 스트라이크 나이트 V4.6 (Desert Strike Night V4.6)
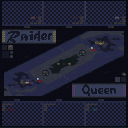
데저트 스트라이크 나이트 V4.6은 스타크래프트 브루드워 유즈맵 역사상 가장 오랫동안 사랑받아온 '데저트 스트라이크' 시리즈의 야간 테마 버전이다. 이 맵은 6인용 3대3 팀전 전용으로 설계되었으며, 화산 타일셋 위에 밤 분위기를 구현한 어두운 전장이 인상적이다. 플레이어는 각 진영의 넥서스(프로토스) 또는 커맨드 센터(테란)에서 일정 주기로 자동 생성되는 유닛을 업그레이드하고 조합해 상대 본진을 파괴하는 전형적인 밀고 당기기(Tug of War) 방식의 게임플레이를 즐긴다. 원작의 핵심 시스템인 유닛 생산 라인업, 단계별 업그레이드 트리, 마린/파이어뱃/고스트 등 테란 유닛과 질럿/드라군/하이템플러 등 프로토스 유닛의 상성 관계는 그대로 계승했다. 여기에 야간 시야 제한과 맵 곳곳에 배치된 조명 효과가 추가되어, 낮 버전과는 다른 전략적 판단을 요구한다. 맵 크기는 128x128 타일(4096x4096 픽셀)로 표준 데저트 스트라이크 전장 규모를 유지하며, 양 진영 사이 중앙 전선에서 치열한 힘싸움이 벌어진다. 팀원 간의 미네랄/가스 자원 공유, 상대 조합에 맞춘 카운터 유닛 생산, 핵미사일·사이오닉 스톰·디펜시브 매트릭스 등 특수 기술의 타이밍 활용이 승패를 가른다. 한국 서버를 중심으로 활발히 매칭이 이루어지며, 원작자 Queen-Gambit의 기반 위에 PetraRal이 수정하고 NietzscheLee가 도움을 준 버전이다. 입문자는 유닛 상성과 업그레이드 우선순위를 익히는 데 시간이 필요하지만, 숙련되면 깊은 전략적 재미와 팀워크의 쾌감을 동시에 느낄 수 있다. 보이스 채팅이나 빠른 핑 소통이 가능한 환경에서 3인 파티로 즐기기를 권장한다. 고전 명작 유즈맵의 정수를 현대적 밸런스로 경험하고 싶은 유저에게 최적의 선택지다. Desert Strike Night V4.6 is a night-themed variant of the Desert Strike series, one of the most historic and popular custom maps in StarCraft Brood War. This map supports 6 players in a 3v3 team format, featuring a dark battlefield based on the volcanic tileset with a night atmosphere. Players upgrade and combine units automatically produced from each faction's Nexus or Command Center to destroy the enemy base in a classic tug-of-war gameplay. While retaining the core systems of unit production, upgrades, and special abilities from the original Desert Strike, it adds strategic variables through night vision limitations and lighting effects. The map size follows the standard 128x128 tile scale, with intense power struggles occurring on the central frontline between the two bases. Resource sharing among teammates, understanding unit composition counters, and well-timed special ability usage determine victory. Actively played on Korean servers, this version modifies Queen-Gambit's original work by PetraRal with assistance from NietzscheLee. Newcomers need time to learn basic unit counters and upgrade trees, but mastery yields deep strategic satisfaction. Since teamwork is crucial, voice chat or quick ping communication is recommended. Recommended for users who want to experience the essence of a classic masterpiece custom map with modern balance.
최근 등록된 맵
새로 추가된 파일과 버전을 확인하세요.
충성 (Loyalty)
이 맵은 스타크래프트 브루드워의 한글과 러시아어가 혼재된 제목을 지닌 특이한 유즈맵으로, 내부 설명에 따르면 '녹색 진영의 성채를 파괴하라'는 목표를 갖고 있는 것으로 보인다. 맵의 구조는 중앙에 위치한 커다란 기지 형태의 건물이 녹색 진영으로 추정되며, 주변을 둘러싼 넓은 평야와 산맥이 배치되어 있다. 맵의 전체적인 분위기는 화산 타일셋을 사용해 어두운 붉은색과 갈색 톤으로 이루어져 있으며, 기습이나 방어전을 염두에 둔 배치로 보인다. 플레이어는 단독으로 이 기지를 파괴해야 하는 임무를 수행하게 되며, 맵의 広大한 크기상으로는 이동과 전투에 전략적 선택이 요구될 것으로 예상된다. 맵의 이름 '[ÏÂÂ12] -- Âåðíîñòü'는 인코딩 오류로 인해 가독성이 떨어지지만, 내부 제목 '[ÏÂÂ12] -- Âåðíîñòü'를 고려했을 때 러시아어 'Верность'(충성심)의 의미를 내포하고 있을 가능성이 있다. 다만, 게임 내 실제 스토리나 설정은 제공되지 않아 플레이어는 오로지 목표인 '녹색 진영의 성채 파괴'에 집중하게 된다. 이 맵의 가장 큰 특징은 넓은 맵 크기와 기지 구조의 중심성이다. 플레이어는 시작 지점에서 출발해 기지로 접근하기까지 상당한 거리를 이동해야 하며, 도중에 적의 방어 시설이나 유닛이 배치되어 있을 가능성이 크다. 맵의 広大함 때문에 전략적 기동성과 자원 관리가 중요할 것이며, 특히 초반에는 맵의 지형을 정확히 숙지하지 못해 불리한 상황에 처할 수 있다. 또한, 맵의 타일셋이 화산으로 설정되어 있어 시야가 제한적일 수 있으며, 이는 전투 시 예측하지 못한 기습을 받을 가능성을 높인다. 이 맵은 단독 플레이를 전제로 제작되었으므로, 팀플레이의 메커니즘은 고려되지 않은 것으로 보인다. 플레이어는 맵의 지형을 활용한 우회 공격이나 방어 전략을 세워야 하며, 특히 기지 내부로 진입하는 루트를 신중히 선택해야 한다. 맵의 목표가 단순 파괴이므로, 전략적 요소가 강하며 신속한 판단력이 요구된다. 추천 대상은 스타크래프트의 유즈맵을 즐겨 플레이하는 유저, 특히 넓은 맵과 전략적 전투를 선호하는 플레이어들에게 적합할 것이다. 플레이 전에는 맵의 지형을 미리 확인하고, 기지 접근 루트를 계획하는 것이 중요하다. 또한, 맵의 넓이상으로는 자원 수집보다는 전투와 기동성에 초점을 맞추는 것이 효율적일 것이다. This StarCraft: Brood War custom map features a mixed Korean and Russian title, with an internal objective to 'destroy the green faction's stronghold.' The map utilizes a volcanic tileset, creating a dark, rugged aesthetic with central high ground surrounded by vast plains and mountain ranges. The layout suggests a focus on strategic movement and combat, as players must traverse long distances to reach the objective—a single-player mission to destroy a base-like structure at the map's center. The title '[ÏÂÂ12] -- Âåðíîñòü' appears corrupted due to encoding issues, but the internal name hints at the Russian word 'Верность' (loyalty), adding an intriguing thematic layer despite the lack of explicit lore. The map's scale is its defining trait, demanding careful navigation and tactical planning. Players start at a distant location, requiring significant travel time to reach the green base, where defenses or enemy units may lurk. The volcanic tileset limits visibility, increasing the risk of ambushes and necessitating cautious exploration. Given the single-player premise, team dynamics are irrelevant, but individual adaptability is crucial—players must scout routes, assess threats, and decide between direct assaults or stealth approaches. The objective’s simplicity belies its strategic depth, appealing to players who enjoy large-scale, methodical custom maps. Ideal for veterans of Brood War UMS maps, this title rewards those who prioritize map awareness and quick decision-making. Before playing, reviewing the terrain and planning entry points will enhance the experience, as resource management takes a backseat to mobility and combat efficiency.
개인 Lurker Defense (Personal Lurker Defense)
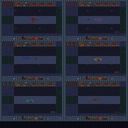
개인 Lurker Defense는 화산 타일셋을 기반으로 한 6인용 디펜스 맵으로, 플레이어가 직접 러커 유닛을 배치해 적의 물결을 막아내는 구조를 가지고 있다. 맵 전체가 2048×3072 해상도에 64×96 타일 단위로 구성되어 있어 넓은 전장을 제공하며, 주요 경로는 중앙에 위치한 고지대를 중심으로 여러 갈래로 나뉜다. 시작 시 플레이어는 제한된 자원으로 러커를 생산하고, 적 유닛이 접근하면 자동으로 사거리 내에 있는 적을 감지해 독을 퍼뜨린다. 러커의 특성상 일정 거리 안에서만 공격이 가능하므로, 적의 진입 경로를 예측해 적절한 위치에 배치하는 것이 핵심 전략이다. 맵에는 자연스럽게 화산 지형의 높낮이가 존재해 시야 확보와 방어 라인 설정에 영향을 주며, 일부 구역에서는 높은 지형이 방어를 유리하게 만든다. 플레이 중에는 적 유닛의 종류와 파동이 점차 강해지므로, 초반에는 러커를 집중 배치해 방어 라인을 구축하고, 중후반에는 추가 자원을 확보해 러커를 보강하거나 보조 유닛을 활용하는 것이 좋다. 또한, 러커의 독 효과는 지속 시간이 길어 적을 서서히 약화시키므로, 적의 이동 경로를 길게 만들 수 있는 지형을 활용하면 효율이 높아진다. 이 맵은 디펜스 장르를 좋아하고 러커 유닛의 특성을 이해한 플레이어에게 특히 추천한다. 초보자는 러커 배치와 자원 관리에 익숙해지는 데 시간이 걸릴 수 있으니, 처음 플레이 시에는 적 파동을 천천히 진행하도록 설정해 연습하는 것이 도움이 된다. Personal Lurker Defense is a 6-player defense map built on a volcanic tileset, where players directly place Lurker units to block waves of enemies. The map spans 2048×3072 resolution with a 64×96 tile grid, offering a large battlefield and multiple branching paths centered around a central high ground. At the start, players produce Lurkers with limited resources, and once enemies approach, the Lurkers detect and release poison within their range. Because Lurkers can only attack within a certain distance, predicting enemy routes and positioning them strategically is essential. The volcanic terrain’s elevation naturally affects line‑of‑sight and defensive line placement, with higher areas providing advantageous positions. As the match progresses, enemy types and waves become stronger; early game focuses on concentrating Lurkers to establish a solid defense, while mid‑to‑late game benefits from securing additional resources to reinforce Lurkers or add support units. Lurker’s poison has a long duration, gradually weakening foes, so utilizing terrain that forces enemies to travel longer paths enhances efficiency. This map is especially recommended for players who enjoy defense gameplay and understand Lurker mechanics. Beginners may need time to master Lurker placement and resource management, so starting with slower enemy waves for practice is advisable.
X-i 디펜스 (X-i Defense)
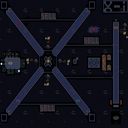
‘X-i Defense’는 스타크래프트 브루드워의 대표적인 디펜스 장르 유즈맵으로, 플레이어는 끊임없이 밀려오는 적의 웨이브를 방어해야 한다. 맵은 중앙에 플레이어의 기지를 배치하고, 사방에서 적 유닛이 끊임없이 등장하는 구조로 되어 있어, 전략적 배치와 자원 관리, 순간적인 판단력이 요구된다. 맵의 디자인 특성은 화산 타일셋을 활용한 붉은 색감과 rugged한 지형으로, 적의 공격이 임박했을 때의 긴장감을 배가시킨다. 특히, 기지 주변의 좁은 길목과 요새화된 포인트들이 다수의 적을 한꺼번에 상대해야 하는 순간을 만들어내며, 이는 디펜스 맵에서 흔히 느낄 수 있는 긴박감을 극대화한다. 플레이 방식은 단순하면서도 깊이 있는 전략을 요구한다. 초반에는 적은 소규모의 웨이브로 시작하지만, 시간이 지나면서 다수의 고급 유닛이 포함된 공격이 반복된다. 플레이어는 방어 타워를 건설하고, 유닛을 생산하여 배치하는 동시에, 자원 채집과 기지 확장을 병행해야 한다. 맵의 지형적 특징인 계단식 구조와 좁은 통로들은 효율적인 방어선을 구축할 수 있는 포인트를 제공하며, 잘못된 배치나 자원의 오버스펜딩은 곧 게임의 패배로 이어질 수 있다. 또한, 맵 곳곳에 숨겨진 보너스 자원 포인트와 추가 방어 시설들이 배려되어 있어, 숙련된 플레이어는 이를 활용한 역습 전략을 구사할 수 있다. 이 맵을 추천하는 대상은 디펜스 장르에 익숙한 플레이어부터, 전략적 사고와 순간 판단력이 뛰어난 유저까지 폭넓다. 특히, 스타크래프트의 기본 메커니즘을 이해하고 있다면 누구나 쉽게 접근할 수 있지만, 고득점을 노리려면 여러 번의 재도전과 전략의 최적화가 필수적이다. 단, 맵의 난이도가 높지 않지만, 지속적인 공격과 예기치 못한 돌파구에 대응해야 하므로, 긴장감을 유지하며 플레이할 수 있는 유저에게 적합하다. 마지막으로, 맵의 볼륨이 크고 디자인도 세밀하기 때문에, 한 번 플레이한 후에도 재방문해 새로운 전략을 모색해 볼 만한 가치가 충분하다. 준비된 플레이어라면, 이 맵을 통해 디펜스 장르의 깊이를 제대로 느낄 수 있을 것이다. This map, X-i Defense, stands out as a classic Defense genre custom map in StarCraft: Brood War, where players must withstand relentless waves of enemy attacks. The map is structured around a central base with a rugged volcanic tile set, enhancing the visual tension as enemies approach. The terrain features narrow pathways and fortified points, forcing players to make strategic decisions about tower placement and unit production. Resources are scarce, requiring careful management to balance defense and expansion. The gameplay is straightforward yet demands deep tactical thinking. Early waves are manageable, but as time progresses, the enemy sends stronger, more varied units, testing the player's adaptability. Narrow passages and stair-like formations create choke points where efficient tower placement can turn the tide. Hidden resource points and defensive structures add layers to the strategy, allowing skilled players to execute counterattacks or reinforce weak spots. While accessible to newcomers familiar with StarCraft's mechanics, mastering high scores requires repeated attempts and refined tactics. This map is ideal for players who enjoy the Defense genre and those who thrive under pressure, needing quick reflexes and strategic foresight. Though not overly difficult, the constant pressure and unpredictable enemy breakthroughs demand sustained focus. Its large scale and detailed design make it worth revisiting, offering new challenges with each playthrough. For those seeking depth and excitement in Defense maps, X-i Defense delivers a satisfying and engaging experience.
터렛 스파이럴 지옥 (Amazing Turret Spiral Hell)
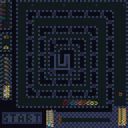
《Amazing Turret Spiral Hell》은 스타크래프트 브루드워의 디펜스형 유즈맵으로, 32개의 레벨을 단계별로 돌파하는 서바이벌 디펜스 장르에 속한다. 맵의 핵심은 중앙에 위치한 '터렛' 건물을 중심으로 적의 공세를 막아내는 구조로, 맵 곳곳에 배치된 방어 건물과 자원 수급 포인트를 활용해 장기전을 펼쳐야 한다. 이미지에서 확인되는 것처럼, 맵은 화산 타일셋을 사용해 화려한 배경과 함께 플레이어의 시선을 사로잡으며, 각 레벨마다 난이도가 점차 상승하는 방식으로 설계되어 있다. 특히 ‘Spiral Hell’이라는 이름답게 맵 중앙의 터렛이 나선형으로 배치되어 있어 방어 라인이 복잡하게 얽혀 있어 전략적 깊이를 더한다. 플레이 방식은 기본적으로 컴퓨터 상대와의 전투로, 각 레벨마다 정해진 시간에 맞춰 끊임없이 몰려드는 적군을 막아내야 하며, 방어에 성공하면 다음 레벨로 넘어갈 수 있다. 맵의 특징은 방어 건물의 종류와 배치 가능 여부가 레벨에 따라 제한되며, 자원 관리와 빌드 타이밍이 승패를 좌우한다는 점이다. 또한, 맵의 난이도가 ‘보통’ 수준으로 설정되어 있어 초보 플레이어도 쉽게 접근할 수 있지만, 고레벨로 갈수록 전략의 중요성이 커진다. 맵의 구조상 중앙 터렛을 중심으로 한 방어 라인을 어떻게 구축하느냐가 핵심 포인트로, 플레이어는 각 레벨의 특성을 분석해 최적의 방어 전략을 수립해야 한다. 이 맵은 특히 ‘디펜스’ 장르를 любители(좋아하는) 유저들에게 추천할 만하며, 서바이벌 요소와 단계별 도전 과제가 결합된 점이 매력적이다. 또한, 2048x2048의 넓은 맵 크기와 화산 타일셋 덕분에 시각적 즐거움도 높다. 다만, 레벨이 진행될수록 적의 공세가 점점 강해지므로, 자원 관리와 방어 건물의 효율적 배치가 필수적이다. 맵의 난이도가 초반에는 낮지만 후반으로 갈수록 어려워지므로, 꾸준한 연습과 전략 수정이 필요하다는 점도 유의해야 한다. Amazing Turret Spiral Hell is a defense-style custom map for StarCraft: Brood War, featuring a survival defense genre where players progress through 32 levels in a step-by-step challenge. The core gameplay revolves around protecting a central 'turret' building from waves of enemies, utilizing strategically placed defensive structures and resource points scattered across the map. As seen in the image, the map employs a volcanic tileset, offering vibrant visuals that enhance the player's experience, while the difficulty gradually increases with each level. The gameplay focuses on surviving waves of AI-controlled enemies, with progression to the next level contingent on successfully defending the central turret. A defining feature of the map is the spiral arrangement of the turret at the center, creating a complex and strategic defensive layout. Resource management and precise build timing are crucial, as the types and placement of defensive structures are restricted per level. While the map is designed with a 'medium' difficulty, making it accessible to beginners, the later levels demand deeper strategic thinking and adaptability. This map is particularly recommended for fans of the defense genre, especially those who enjoy survival elements combined with incremental challenges. The large 2048x2048 map size and volcanic tileset also add to the visual appeal. However, players should note that the enemy assaults intensify significantly as levels progress, necessitating efficient resource allocation and optimal defensive positioning. The increasing difficulty in later stages requires consistent practice and strategic adjustments to overcome the challenges effectively.
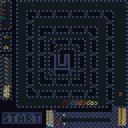
터렛 스파이럴 지옥 (Amazing Turret Spiral Hell)
‘Amazing Turret Spiral Hell’은 스타크래프트: 브루드워의 디펜스 장르 유즈맵으로, 플레이어는 끊임없이 밀려오는 적의 웨이브를 상대로 터렛과 방어 건물을 배치해가며 터렛 스피럴Hell을 구축해야 한다. 맵 이름은 ‘터렛 디펜스 32 레벨 v2’ 파일명으로도 알려져 있으며, ‘Amazing Turret Defense Shadow Spiral Hell’이라는 내부 타이틀이 붙어 있다. 2048×2048 크기의 거대한 맵은 화산 타일셋을 기반으로 하며, 64×64 단위의 넓은 공간이 펼쳐진다. 맵의 특징은 중앙에서부터 시작되는 ‘스파이럴’ 형태의 적 웨이브가 마치 나선형으로 퍼져나가듯 끊임없이 공격해 온다는 점으로, 방어 구조물을 촘촘히 배치하지 않으면 순식간에 뚫리고 만다. 특히 ‘32 레벨’이란 제목처럼 난이도가 단계적으로 높아지며, 후반부로 갈수록 적의 공격 패턴과 수가 급격히 증가해 전략적 사고와 빠른 판단력이 요구된다. 맵의 분위기는 어둡고 파괴적인 화산 지형 덕분에 긴장감이 배가되며, 방어에 실패하면 ‘지옥’이란 이름에 걸맞게 순식간에 밀려드는 적의 물량에 압도당하는 경험을 선사한다. 초보 플레이어는 초반 구조물의 배치와 자원 관리에 어려움을 느낄 수 있지만, 익숙해지면 각 레벨의 패턴을 익히고 효율적인 터렛 조합을 구축하는 재미가 쏠쏠하다. 특히 ‘+50’ 이상의 고단계 레벨에서는 적의 공격력이 폭발적으로 증가하기 때문에, 자원 관리와 방어선의 재구축 타이밍이 승패를 좌우한다. 이 맵은 디펜스 장르의 정수를 담은 동시에, 레벨 디자인과 난이도 상승 구조가 매우 잘 짜여 있어 반복 플레이를 유도하는 매력이 있다. 또한 넓은 맵 공간과 복잡한 웨이브 패턴 덕분에 전략적 깊이도 깊어, 단순히 방어만 하는 것이 아니라 ‘어떻게 하면 적은 최소한의 자원으로 상대할 수 있을까’를 끊임없이 고민하게 만든다. 추천 대상은 디펜스 장르를 люби하는 플레이어이며, 특히 난이도 상승이 매력적인 고난이도 맵을 선호하는 유저들에게 적합하다. 플레이 전 준비 사항으로는 각 레벨의 적 패턴을 미리 숙지하고, 자원 수급과 방어 건물의 효율적인 배치를 연습하는 것이 중요하다. 또한, 팀 플레이가 가능하다면 협력하여 방어선을 구축하는 전략을 세우는 것도 좋은 방법이다. 맵의 난이도는 레벨이 올라갈수록 급격히 높아지기 때문에, 초반 레벨에서 기본기를 다지는 것이 중요하다. 이 맵을 즐기기 위해서는 ‘내가 어디까지 버틸 수 있을까’를 끊임없이 스스로에게 묻는 긴장감이 핵심이며, 그 과정 자체가 중독성을 자아낸다. 마지막으로, 맵의 분위기와 긴장감 있는 연출 덕분에 디펜스 장르의 새로운 경험을 원한다면 반드시 시도해 볼 만한 작품이다. 'Amazing Turret Spiral Hell' is a defense-style custom map in *StarCraft: Brood War*, where players must place turrets and defensive structures to fend off relentless waves of enemies, gradually building a "Turret Spiral Hell." The map is also known under the filename 'Turret Defense 32 Level v2' and carries an internal title, 'Amazing Turret Defense Shadow Spiral Hell.' Spanning a massive 2048×2048 grid with a volcanic tileset, the layout offers vast 64×64-unit spaces. The defining feature is the spiral-shaped enemy waves that emanate outward from the center, relentlessly attacking in a widening spiral pattern. Without tightly packed defensive structures, the waves quickly overwhelm the player. As suggested by the "32 Level" title, difficulty escalates progressively, with enemy attack patterns and numbers surging dramatically in later stages, demanding sharp strategic thinking and quick decision-making. The map’s dark, destructive volcanic terrain amplifies the tension, and failing to defend results in an overwhelming enemy horde that lives up to its "hellish" name. While beginners may struggle with early structure placement and resource management, mastering the game reveals the satisfaction of learning each level’s patterns and optimizing turret combinations. At higher levels—especially beyond '+50'—enemy power spikes so intensely that resource efficiency and timely reconstruction of defenses become critical to survival. This map encapsulates the essence of the defense genre while offering meticulously designed level progression and difficulty scaling that naturally encourage repeated play. The expansive map and intricate wave patterns add strategic depth, pushing players to not just defend, but to constantly refine their approach for maximum efficiency with minimal resources. It’s a perfect fit for fans of the defense genre, particularly those who enjoy maps with escalating difficulty. To prepare, study each level’s enemy patterns in advance, practice efficient resource gathering, and hone your placement of defensive buildings. If playing with a team, coordinating to build layered defenses can be a game-changer. Since difficulty ramps up sharply, mastering the early levels is crucial. The core thrill lies in pushing your limits—constantly asking yourself, "How long can I hold out?"—and the addictive tension makes the challenge deeply engaging. If you're looking for a fresh defense experience with gripping atmosphere and escalating stakes, this is a must-try.
트론 라이트 사이클 (TRON Light Cycles)
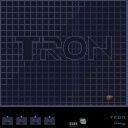
TRON 라이트 사이클 맵은 스타크래프트 브루드워의 UMS 유즈맵 중에서도 레이싱과 회피를 결합한 독특한 플레이 방식을 제공합니다. 맵은 4096×4096 타일 기반의 화산 타일셋으로 구성되어 있으며, 중앙에 길게 뻗은 사이클 트랙이 배치되어 있습니다. 플레이어는 각각 라이트 사이클 유닛을 조종해 트랙을 따라 순환하면서 상대의 뒤를 잡거나, 급격한 코너에서 회피 기술을 활용해 충돌을 피해야 합니다. 트랙은 직선 구간과 급격한 곡선이 교차해 있어 속도 조절과 정확한 이동이 핵심이며, 트랙 양쪽에 배치된 장애물과 파워업 아이템이 경기 흐름에 변수를 제공합니다. 경기 시작 시 모든 유닛은 동일한 속도로 출발하지만, 아이템을 획득하면 일시적인 속도 상승이나 방어막을 얻을 수 있어 전략적인 선택이 요구됩니다. 맵은 4명의 플레이어가 동시에 참여하도록 설계되었으며, 팀 구성이 없고 자유롭게 전투를 펼칠 수 있는 프리포트 방식입니다. 따라서 개인 실력과 반사 신경이 중요한 맵이며, 레이싱 게임을 좋아하거나 빠른 판단과 회피 능력을 연습하고 싶은 플레이어에게 특히 추천됩니다. 플레이 전에는 트랙 레이아웃을 미리 파악하고, 아이템 스폰 위치와 장애물 배치를 확인하는 것이 유리합니다. 또한, 라이트 사이클 유닛의 기본 이동 속도와 회전 제한을 숙지하면 초반 충돌을 최소화할 수 있습니다. The TRON Light Cycles map offers a unique blend of racing and evasion within StarCraft: Brood War’s UMS custom map category. Set on a 4096×4094 volcanic tileset, the map features a long, winding track where each player controls a Light Cycle unit. The gameplay revolves around circling the track, attempting to cut off opponents while deftly navigating sharp turns and avoiding collisions. Straight sections and tight curves demand precise speed control, and items scattered along the sides provide temporary speed boosts or shields, adding strategic depth. All four players start simultaneously with equal speed, but item pickups can create momentary advantages. The map is designed for free‑for‑all play without teams, emphasizing individual skill and quick reflexes. It is ideal for players who enjoy fast‑paced racing games or want to hone their reaction time and evasion tactics. Before starting, reviewing the track layout, item spawn points, and obstacle placements is advisable. Understanding the Light Cycle’s base movement speed and turning limits helps reduce early‑game crashes and improves overall performance.
팀 디펜스 2.1 Official (Team Defense 2.1 Official)
스타크래프트 브루드워의 대표적인 유즈맵 장르인 디펜스(Defense) 유형의 맵 'Team Defense 2.1 Official'은 8명의 플레이어가 한 팀이 되어 방어와 생존을 중심으로 진행되는 팀전 디펜스 맵이다. 맵의 핵심 목표는 맵 중앙에 위치한 출구를 보호하면서 적대 팀의 공격을 막아내고, 마지막까지 살아남아 승리를 차지하는 것이다. 맵은 화산 타일셋을 기반으로 제작되어 독특한 지형과 시각적 특징을 제공하며, 다양한 방어 구조물을 배치할 수 있는 공간이 마련되어 있다. 내부 설명에 따르면 '많은 영웅(Heros)'을 사용할 수 있도록 설계된 것으로 보이며, 새로운 맵(No Map)임을 강조하고 있다. 디펜스 맵의 특성상 전략적 배치와 협동 플레이가 중요하며, 출구 주변을 방어하는 동시에 적을 섬멸하는 균형 잡힌 플레이가 요구된다. 맵의 symmetrical한 구조는 팀 간의 공정한 경쟁을 가능하게 하며, 팀워크와 개개인의 실력이 모두 요구되는 종합적인 전략 게임으로 느껴진다. 특히 출구 주변의 좁은 길목에서 벌어지는 전투는 긴장감을 고조시키며, 순간적인 판단과 빠른 반응이 승리를 좌우할 수 있다. 초보자의 경우 방어 구조물의 배치와 영웅의 활용법에 대한 기본적인 이해가 필요하며, 숙련된 플레이어는 팀원 간의 호흡을 맞추어 효율적인 전략을 구사할 수 있다. 맵의 symmetrical한 디자인과 중앙 출구 구조는 팀 간의 전투가 집중되는 핫스팟을 형성하므로, 초반 방어 라인의 구축과 영웅의 선택이 게임의 흐름을 결정짓는 중요한 포인트가 될 것이다. 이 맵은 팀워크를 중시하는 디펜스 유형의 맵을 선호하는 플레이어들에게 특히 추천된다. 또한, 맵의 symmetrical한 구조는 밸런스 측면에서도 우수하여, 팀 간의 실력 차가 크지 않다면 공정한 경쟁이 가능할 것으로 보인다. 플레이 전에는 팀원과의 사전 전략 회의와 영웅 조합에 대한 논의가 필수적이며, 특히 출구 주변의 방어 타워나 유닛의 배치 위치를 숙지하고 있어야 한다. 맵의 난이도는 내부 설명에 명시되어 있지 않지만, symmetrical한 구조와 중앙 출구의 중요성, 그리고 '많은 영웅'의 활용 가능성을 고려할 때 대체로 '보통' 이상의 난이도로 예상된다. 이 맵은 디펜스 장르에 익숙한 플레이어라면 누구나 즐길 수 있으며, 특히 팀플레이를 선호하는 유저들에게 강렬한 재미를 제공할 것이다. StarCraft: Brood War’s classic Defense-style custom map, *Team Defense 2.1 Official*, is a team-based Defense mode where eight players work together to survive by focusing on defense and endurance. The core objective is to protect the exit located at the center of the map while fending off enemy attacks and securing victory by surviving until the end. Built on a volcanic tileset, the map features unique terrain and visuals, offering plenty of space to strategically place defensive structures. According to the in-game description, it appears designed to utilize a wide variety of heroes, emphasizing that it’s a brand-new map. As a Defense map, strategic positioning and teamwork are crucial, requiring balanced play that both defends the exit and eliminates enemies. The symmetrical layout ensures fair competition between teams, making it a well-rounded strategy game that demands both teamwork and individual skill. The tight choke points around the exit create high-tension battles where quick decisions and fast reactions can determine victory. Beginners should grasp the basics of placing defensive structures and using heroes effectively, while experienced players can coordinate with teammates to execute advanced strategies. The symmetrical design and central exit structure create hotspots where team battles converge, making early defense line setup and hero selection key factors that shape the game’s flow. This map is especially recommended for players who enjoy Defense-style maps that emphasize teamwork. The symmetrical design also ensures strong balance, allowing for fair competition even if there’s a slight skill gap between teams. Before playing, it’s essential to hold a pre-game strategy meeting with teammates and discuss hero compositions, particularly familiarizing yourselves with defensive tower and unit placements near the exit. While the in-game description doesn’t specify difficulty, considering the symmetrical layout, the exit’s importance, and the potential use of many heroes, the map is likely rated as "medium" or higher. Anyone familiar with the Defense genre can enjoy this map, and it offers intense fun for those who prefer team play.
서바이벌 마스 4 (Survive Mars 4)
Survive Mars 4는 4096×4096 화산 타일셋을 배경으로 한 서바이벌형 유즈맵으로, 빠른 베이스 구축과 유닛 생산이 핵심 목표입니다. 맵 초반에 기지를 신속히 세우지 않으면 적절한 방어와 자원 확보가 어려워 즉시 패배할 위험이 높아집니다. 건설 가능한 건물 중 ‘Ghost’를 짓으면 프로브를, ‘Nexus’를 만들면 다크 템플러 선택기를 통해 히어로를 구매할 수 있다는 점이 특징이며, 이를 활용해 초반 전투력을 끌어올리는 전략이 중요합니다. 플레이어는 최대 6명까지 동시에 참여할 수 있으며, 팀 구분이 없으므로 자유로운 멀티플레이가 가능합니다. 지도는 기본적으로 자원 배치가 고르게 분포돼 있지 않아, 초기 자원 채집 루트를 미리 파악하고 이동 경로를 최적화하는 것이 승리의 열쇠가 됩니다. 또한, 화산 타일셋 특성상 지형이 높낮이가 심하고 장애물이 많아 유닛 이동 시 충돌을 피해야 합니다. 초보자도 즐길 수 있도록 난이도는 보통 수준으로 설계됐지만, 빠른 판단과 순간적인 대응력이 요구됩니다. 게임을 시작하기 전에 ‘Ghost’와 ‘Nexus’ 건설 순서를 미리 계획하고, 다크 템플러 히어러를 언제 구매할지 전략을 세우는 것이 좋습니다. 전반적으로 빠른 템포와 서바이벌 요소가 결합된 이 맵은 빠른 전개를 선호하는 유저와 협동 플레이를 즐기는 그룹에게 추천됩니다. Survive Mars 4 is a survival‑type UMS map set on a volcanic tileset with a massive 4096×4096 layout, where rapid base building and unit production are the core objectives. If you fail to establish a base quickly at the start, you will struggle to defend and gather resources, leading to an early defeat. The map features a Ghost building that spawns a probe and a Nexus that unlocks a Dark Templar chooser for purchasing heroes, making early combat power crucial. Up to six players can join simultaneously without team divisions, allowing free‑form multiplayer. Resources are not evenly spread, so scouting early resource routes and optimizing movement paths are key to victory. The volcanic terrain adds height variations and obstacles, requiring careful unit navigation. While the difficulty is set to a moderate level suitable for beginners, quick decision‑making and reactive play are essential. Before starting, plan the construction order of Ghost and Nexus and decide when to acquire a Dark Templar hero. Overall, this map blends fast pacing with survival mechanics, making it ideal for players who enjoy rapid gameplay and cooperative challenges.
맵 선택 가이드
태그는 맵의 핵심 특징을 빠르게 설명하지만 제작 버전마다 규칙이 다를 수 있습니다. 상세 설명에서 권장 인원, 난이도, 플레이 시간과 버전을 함께 확인한 뒤 다운로드하세요.