
협력 플레이 스타크래프트 맵 모음
'협력 플레이' 태그가 등록된 맵을 모았습니다. 장르 하나로 찾기 어려운 플레이 방식, 난이도와 특징을 중심으로 인기 맵과 최신 맵을 비교해 보세요.
- 등록 맵
- 45개
- 누적 다운로드
- 1
- 누적 조회
- 1,639
인기 맵
다운로드와 조회 반응이 높은 맵입니다.
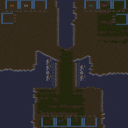
2vs2vs2 Shared Base Best MAP
2vs2vs2 Shared Base Best MAP은 6인용 사막 타일셋 기반의 팀 밀리 성향 유즈맵으로, 표준 밀리 규칙 위에 '공유 베이스(Shared Base)' 개념을 얹어 협력 플레이를 강조한 작품이다. 제목이 예고하듯 2대2대2 고정 팀 구성이 강제되며, 아군 간 기지 건물 공유 또는 자원·비전 공유 트리거가 작동해 혼자서는 감당하기 어려운 멀티 태스킹을 분담할 수 있다. 128x128 타일(4096x4096 픽셀) 크기의 널찍한 사막 전장은 확장 기지 확보 경쟁을 치열하게 만들며, 모래 지형 특성상 시야가 넓어 드랍십·셔틀 견제와 대규모 지상전 양상이 자주 연출된다. 내부 설명란에 'nEwBiCeY rocks u!!'라는 제작자 서명이 남아 있어 개인 제작 맵임을 알 수 있으며, 별도 시나리오나 트리거 승리 조건 없이 적 팀 전원 섬멸이라는 밀리 본연의 목표를 유지한다. 무작위 매칭보다는 음성 채팅이 가능한 지인·클랜원과 짝을 이뤄 빌드 오더와 타이밍 러시를 맞춰 들어갈 때 진가를 발휘한다. 플레이 전 동맹 간 핑·핫키 세팅 통일, 초반 빌드 분담(한 명은 경제, 한 명은 초반 압박) 등 사전 전략 수립이 승패를 가르는 핵심 포인트다. 2vs2vs2 Shared Base Best MAP is a 6-player, desert-tileset UMS map leaning toward team melee, layering a 'Shared Base' concept onto standard melee rules to emphasize cooperative play. As the title indicates, a fixed 2v2v2 team setup is enforced, and triggers likely share structures, resources, or vision between allies, allowing teammates to split the heavy multitasking load. The spacious 128x128-tile (4096x4096-pixel) desert battlefield intensifies the race for expansions, while the open terrain encourages frequent dropship/shuttle harassment and large-scale ground engagements. The internal description bears the mapper's signature—'nEwBiCeY rocks u!!'—confirming its indie origin, and there are no special scenario triggers or alternate victory conditions; the goal remains total annihilation of opposing teams. The map shines best when played with friends or clanmates on voice chat who can synchronize build orders and timing pushes. Before launching, aligning ping, hotkey layouts, and early-game role assignments—such as one player focusing on economy while the other applies early pressure—is the key to victory.
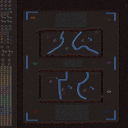
日디펜스 (Nichi Defence)
스타크래프트 브루드워의 유즈맵 ‘日defence’는 일본풍 배경의 디펜스 장르로, 6명의 플레이어가 협력하여 끊임없이 몰려드는 적을 상대로 넥서스를 방어하는 구조를 가지고 있다. 맵 중앙에는 플레이어 기지가 위치하며, 주위 8방향에서 적 유닛이 끊임없이 스폰되어 방어선을 형성해야 한다. 맵의 특징은 일본 전통 건축물을 연상시키는 붉은 기와 지붕과 푸른 벽돌 구조물이 주위에 배치되어 atmosferic한 일본 분위기를 자아낸다는 점이다. 특히, 맵 테두리에는 세로로 긴Japan의 한자 ‘日’가 거대하게 배치되어 있어 시각적 포인트가 되고 있다. 방어에 성공하면 맵 상단에 위치한 ‘DEFENCE SUCCESS’라는 메시지가 표시되며, 실패 시 ‘DEFENCE FAIL’이라는 메시지가 출력된다. 플레이어는 스타팅 위치에서 제공되는 기본 병력으로 시작하며, 맵 곳곳에 배치된 미네랄과 가스를 채취하여 유닛을 보충하거나 강화할 수 있다. 맵의 난이도는 적의 스폰 주기와 유닛 조합에 따라 변동되며, 초보자는 기본 병력만으로는 버티기 어려운 구조를 가지고 있어 전략적 판단이 요구된다. 추천되는 플레이 방식은 초기 방어선을 구축한 후, 자원 수급을 안정화하여 후반부 적의 대규모 공세를 효율적으로 방어하는 것이다. 이 맵은 일본 문화에 관심이 있는 유저뿐만 아니라, 디펜스 장르의 전략적 깊이를 즐기고자 하는 모든 플레이어에게 적합하다. 특히, 협력 플레이를 선호하는 그룹 활동에 최적화되어 있으며, 맵의 분위기와 시스템이 어우러져 몰입감을 높이는 데 초점을 맞추고 있다. StarCraft: Brood War's custom map '日Defence' is a defense genre set in a Japanese-themed background where six players must work together to defend their nexuses against endless waves of enemies. The map centers around the players' base, with enemies spawning continuously from all eight directions, requiring them to establish and maintain a defensive line. The map's visual design features red tiled roofs and blue brick structures reminiscent of traditional Japanese architecture, creating an atmospheric Japanese ambiance. A prominent feature is the large vertical kanji '日' (meaning 'sun' or 'day') from Japan, placed along the map's edges, serving as a striking visual focal point. Upon successfully defending, the message 'DEFENCE SUCCESS' appears at the top of the screen, while failure triggers 'DEFENCE FAIL.' Players begin with basic units at their starting positions and can gather minerals and gas scattered throughout the map to reinforce or upgrade their forces. The difficulty varies based on enemy spawn intervals and unit compositions, making it challenging for beginners who rely solely on starting units without strategic planning. Recommended strategies involve establishing an initial defense line early, stabilizing resource collection, and efficiently countering large enemy assaults in the late game. This map is ideal not only for players interested in Japanese culture but also for those who enjoy the strategic depth of defense genres. It is particularly well-suited for group activities that favor cooperative play, with its immersive atmosphere and well-integrated mechanics designed to enhance player engagement.
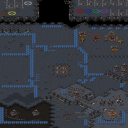
톰과 제리 서울쥐의 도움 (Tom and Jerry: Seoul Mouse's Help)
‘톰과제리 서울쥐의 도움’은 스타크래프트 브루드워의 유즈맵으로, 전형적인 디펜스 장르의 변형 플레이를 제공하는 맵이다. 제목에서 느껴지듯 톰과 제리, 그리고 서울쥐가 등장하는 캐릭터 기반의 대결 구조로, 전투가 아닌 방어와 생존에 초점을 맞춘 재미를 선사한다. 맵의 전체적인 분위기는 어두운 톤의 우주 배경과 함께, 곳곳에 배치된 캐릭터 아이콘과 장식이 시선을 끈다. 플레이어는 각자의 위치에서 공격을 받거나 공격을 해야 하며, 특히 서울쥐가 톰의 공격을 방어하는 동시에 제리를 기다리는 스토리性 요소가 특징이다. 맵의 중앙부에는 넓은 개활지가 펼쳐져 있어 전투가 벌어지기 쉽고, 내부적으로는 다수의 미네랄과 가스를 확보할 수 있는 구조로 보인다. 맵의 특징은 단순히 방어만 하는 것이 아니라, 공격과 방어가 혼합된 전략이 요구된다는 점이다. 예를 들어, 서울쥐가 톰의 공격을 버티면서 제리를 기다리는 동시에, 제리가 톰을 공격할 수 있도록 경로를 확보해야 한다. 이 때문에 맵을 플레이하는 동안은 시야 확보는 물론, 빠른 유닛 생산과 배치 전략이 중요해진다. 초보자부터 숙련자까지 즐길 수 있는 구조이지만, 특히 팀 플레이와 협력이 필요한 맵이기 때문에 파티원과의 호흡이 중요하다. 맵의 볼륨은 크지 않지만, 간결한 구조와 명확한 목표가 있어서 플레이어의 집중력을 유지하기에 좋다. 다만, 맵의 밝기가 전반적으로 어두운 편이라 맵의 디테일을 제대로 확인하기 위해서는 밝기 조절이 필요할 수 있다. 또한, 7인으로 구성된 플레이어 수를 고려할 때, 각 플레이어의 역할 분배와 전략적인 협력이 필수적이다. 특히 서울쥐의 역할을 맡는 플레이어는 방어와 자원 관리를 동시에 신경 써야 하므로, 난이도가 높은 편에 속할 수 있다. 이 맵을 즐기기 위해서는 기본적인 스타크래프트 유즈맵 플레이 경험이 필요하며, 특히 디펜스와 팀 플레이에 익숙한 유저에게 추천할 만하다. 맵을 시작하기 전에 각 플레이어의 역할과 목표를 미리 숙지하는 것이 좋다. 또한, 맵의 분위기를 살리기 위해 캐릭터의 위치와 이동 경로를 미리 계획해 두면 더욱 원활한 플레이가 가능하다. “Tom & Jerry vs. Seoul Mouse” is a *StarCraft: Brood War* custom map that offers a twist on the classic defense genre. As the title suggests, the map features a character-based showdown between Tom, Jerry, and Seoul Mouse, shifting the focus from combat to defense and survival for a fresh kind of fun. The overall mood is set by a dark cosmic backdrop, with character icons and decorations scattered throughout to draw the eye. Players take turns either defending their positions or launching attacks, and the standout feature is Seoul Mouse’s dual role—defending against Tom while waiting for Jerry to arrive. The central area opens up into a wide battlefield where clashes are likely to happen, and the map’s internal layout provides ample minerals and gas to secure. What makes this map unique is that it doesn’t just emphasize defense; it blends attack and defense into a single strategic challenge. For example, Seoul Mouse must hold off Tom’s assault while also creating paths for Jerry to strike back. This means players need sharp vision control, rapid unit production, and smart positioning throughout the match. The map is designed to be enjoyable for both beginners and veterans, but its cooperative nature makes teamwork and coordination with teammates essential. While the scale isn’t massive, the clean layout and clear objectives help maintain player focus. However, the dim lighting can make it hard to see fine details, so adjusting brightness may be necessary. With seven players, role distribution and strategic cooperation are critical—especially for the player taking on Seoul Mouse, whose duties include both defense and resource management, making the role fairly demanding. To get the most out of this map, some prior experience with *StarCraft* custom maps is helpful, and it’s particularly well-suited for players familiar with defense mechanics and team-based play. Before jumping in, it’s wise to review each player’s role and objectives. Planning character positions and movement paths in advance can also lead to smoother gameplay and better immersion in the map’s atmosphere.
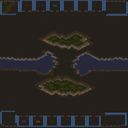
SHARED BASES
SHARED BASES는 스타크래프트 브루드워의 멀티 플레이를 위한 partager형 맵으로, 시작 시 인접한 플레이어와 동맹을 맺을 수 있는 독특한 시스템을 채용한 유즈맵이다. 평범한 4096x4096 크기의 사막 타일셋 맵이지만, 초반 동맹 시스템 덕분에 전형적인 밀리맵과는 다른 전략적 재미를 느낄 수 있다. 각 플레이어는 시작 지점에서 가까운 상대와 자동으로 동맹을 맺으며, 이 동맹은 게임 초반 자원 분배와 방어 전략에 큰 영향을 미친다. 맵 중앙에는 넓은 평지 공간이 펼쳐져 있어 조기 대치나 기지 확장 시 유리한 위치를 선점할 수 있으며, 전체적으로는 협력과 경쟁이 혼합된 플레이 경험을 제공한다. 동맹의 중요성 때문에 초보자들은 동맹 상대 선택과 초기 자원 관리에 주의해야 하며, 숙련자들은 동맹을 활용한 전략적 이득과 배신 가능성을 고려한 플레이를 시도해 볼 수 있다. 맵의 구조상으로는 비교적 평이한 편이지만, 동맹 시스템 덕분에 단순히 멀티 플레이를 즐기는 것보다 더 깊은 전략적 선택지가 제공된다는 점이 큰 특징이다. 특히 동맹 상대와의 협력과 배신 가능성을 염두에 둔 플레이가 이 맵의 재미를 좌우한다. 공략 팁으로는, 시작 시 동맹 상대가 같은 진영일 경우 초반 자원 분배를 최대한 활용하고, 다른 진영일 경우 동맹의 동맹까지 고려한 광역 전략을 세우는 것이 중요하다. 또한, 맵 중앙의 넓은 공간을 차지하는 타이밍과 동맹의 움직임을 예측하는 능력이 승패를 가를 수 있다. 이 맵은 스타크래프트의 기본 멀티 플레이를 любитель 수준에서 벗어나고 싶은 유저들에게 적합하며, 동맹 시스템을 통해 보다 전략적인 멀티 플레이를 경험해 보고 싶은 플레이어들에게 추천할 만하다. 다만, 동맹 시스템의 특성상 운에 의존하는 요소가 다소 있어 숙련된 플레이어와 초보자 간의 실력 차이를 좁히기 위한 밸런스 조정은 필요할 수 있다. 전체적으로는 협력과 배신, 전략과 운이 혼합된 재미있는 멀티 플레이 경험을 제공하는 맵이라고 할 수 있다. 특히 같은 팀 내에서도 동맹이 달라질 수 있는 가능성을 염두에 두고 플레이한다면, 이 맵의 전략적 깊이가 더 높아질 것이다. SHARED BASES is a custom map for StarCraft: Brood War multiplayer that adopts a shared-base system, allowing players to form alliances with nearby opponents at the start. Despite being a standard 4096x4096 desert tileset map, its unique early-game alliance system offers a different strategic experience compared to typical melee maps. Players automatically ally with the closest opponent at the starting location, which significantly impacts early resource distribution and defensive strategies. A wide open plain in the center of the map provides an advantageous position for early skirmishes or base expansions, blending cooperation and competition into the gameplay. Beginners should pay close attention to ally selection and initial resource management due to the importance of alliances, while experienced players can explore strategic advantages and potential betrayals. While the map's structure is relatively simple, the alliance system introduces deeper strategic choices beyond casual multiplayer. The fun of this map largely depends on cooperation with allies and the potential for betrayal. For optimal play, maximize early resource sharing if your ally is of the same race, or plan a broader strategy considering allies of allies if they are of a different race. Controlling the central open space and predicting ally movements can often decide the outcome. This map is ideal for players looking to move beyond basic multiplayer and experience more strategic gameplay through its alliance system. However, due to the reliance on the alliance mechanic, some luck-based elements may affect balance, potentially narrowing the skill gap between experienced and novice players. Overall, it offers an engaging multiplayer experience where cooperation, betrayal, strategy, and luck intertwine. Players who consider the possibility of shifting alliances within the same team will find even greater depth in the map's strategy.
드래곤 루인스 (Dragon Ruins)
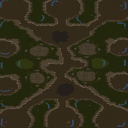
드래곤 루인스는 스타크래프트: 브루드워의 대규모 맵으로, 6인 멀티 플레이에 특화된 구도로 제작되었습니다. 건물이 거의 존재하지 않고 넓은 개활지가 펼쳐진 이 맵은, 유저들 간의 전투가 중심이 되는 밀리 스타일을 그대로 살리면서도 독특한 지형을 제공합니다. 맵 중앙에는 거대한 드래곤 형상의 지형물이 자리 잡고 있으며, 이 드래곤의 머리와 꼬리 부분은 각 플레이어의 시작 지점과 연결되는 주요 통로 역할을 합니다. 이러한 구조는 전투가 벌어질 수 있는 주요 핫스팟을 자연스럽게 형성하며, 초반부터 적극적인 러시나 방어전을 유도합니다. 맵의 특징은 무엇보다도 넓은 개활지와 제한된 건물 공간에 있습니다. 플레이어는 시작 지점에서 드래곤의 몸통을 따라 좁은 길목을 지나 중앙 광장으로 연결되며, 이곳에서 적과의 조우가 빈번하게 발생합니다. 또한 드래곤의 몸통 양옆에는 작은 언덕과 협곡이 있어, 시즈 탱크나 고스트의 락다운 같은 전략적 활용이 가능합니다. 맵의 전체적인 밸런스는 중앙 지역을 두고 벌어지는 전투가 승패를 좌우할 가능성이 높으며, 초반Resource gathering(미네랄 및 가스 수집)은 필수적이지만, 동시에 빠른 타이밍 러시가 가능한 구조로 설계되었습니다. 특히 스타팅 포인트 간의 거리가 비교적 가까워서, 초반부터 치열한 교전이 벌어질 수 있는 환경입니다. 이 맵은 멀티 플레이 중심의 밀리 경험을 원하는 유저들에게 적합합니다. 넓은 시야와 다양한 전술적 선택지가 제공되며, 특히 드래곤 형상의 지형을 활용한 플레이가Highlight(주목)할 만한 요소입니다. 초보자에게는 다소 어려운 구조일 수 있지만, 넓은 개활지에서 벌어지는 전투는 실력 향상에 도움이 될 것입니다. 또한, 팀플레이가 가능한 맵으로, 각 플레이어의 역할 분담과 협력이 중요해집니다. 맵을 플레이하기 전에는Resource gathering(자원 채집)과 초기 빌드 오더를 철저히 준비해, 빠른 타이밍 러시나 안정적인 테크 트리를 확보하는 것이 중요합니다. 드래곤 루인스는 넓은 시야와 개활지에서의 전투를 즐기는 유저들에게 강력히 추천할 만한 맵입니다. Dragon Ruins is a large-scale StarCraft: Brood War map designed specifically for 6-player multiplayer matches. The map features a minimalistic design with almost no buildings, emphasizing open terrain where player battles take center stage. Dominating the center is a massive dragon-shaped terrain formation, with the head and tail connecting to each player's starting locations. This unique structure naturally creates key hotspots for combat, encouraging early rushes or defensive strategies from the outset. The map's defining characteristics lie in its vast open spaces and limited building areas. Players must navigate narrow paths along the dragon's body to reach the central plaza, where frequent encounters with opponents occur. Additionally, the dragon's sides are dotted with small hills and ravines, allowing strategic use of siege tanks or ghost lockdown abilities. The overall balance of the map hinges on battles in the central region, making early resource gathering essential, though the map's design also accommodates fast-paced timing rushes. The starting points are relatively close to one another, ensuring intense early-game skirmishes. This map is ideal for players seeking a multiplayer-focused melee experience. It offers wide visibility and diverse tactical options, with the dragon-shaped terrain serving as a standout feature. While beginners might find the open layout challenging, the arena-style combat is excellent for skill development. The map also supports team play, where role distribution and coordination are crucial. Before playing, thorough preparation of resource gathering and early build orders is recommended to secure either a quick timing rush or a stable tech path. Dragon Ruins is highly recommended for players who enjoy open-field battles and wide visibility in their matches.
메이슨 오브 호러 5 (Mansion Of Horror 5)
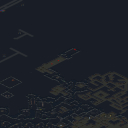
스타크래프트 브루드워의 공포 테마 유즈맵인 〈Mansion Of Horror 5〉는 플레이어가 한밤중의 공포 저택을 탈출하는 서바이벌 디펜스 장르로, 다섯 명의 플레이어가 협력해 다양한 적과 함정을 극복해야 하는 흥미로운 구조로 설계되었다. 맵은 설원 지역을 배경으로 한 어두운 분위기의 저택과 주변 지역을 포함하며, 곳곳에 배치된 몬스터와 위험한 지형 요소들이 플레이어의 도전을 더욱 어렵게 만든다. 게임은 빠른 진행보다는 전략적이고 신중한 움직임이 요구되는 방식으로, 플레이어들은 적의 공격 패턴을 학습하고 자원을 효율적으로 관리하면서 출구를 향해 나아가야 한다. 특히 저택 내부와 외부의 복잡한 길과 좁은 통로들은 플레이어 간의 팀워크와 의사소통을 강조하며, 단일 팀 플레이를 전제로 한 이 맵은 협동이 성공의 핵심 요소로 작용한다. 플레이어는 시작 지점에서 출발해 맵 곳곳에 숨겨진 아이템과 보급로를 확보하며, 몬스터의 습격을 피해가며 전진해야 한다. 저택 내부와 외부의 경계가 모호한 구조는 맵의 긴장감을 높이며, 예상치 못한 곳에서 등장하는 적들이 플레이어의 긴장을 더욱 자극한다. 또한 맵의 디자인상 일부 지역은 지형적 장애물로 인해 접근이 제한되며, 이는 플레이어들이 맵을 꼼꼼히 탐색하고 전략을 세우는 데 도움이 된다. 공포 테마에 걸맞게 어두운 색감과 조명의 대비가 인상적인 이 맵은, 공포와 긴장감을 즐기는 유저들에게 특히 추천할 만하다. 다만, 초보 플레이어의 경우 적의 패턴을 익히지 못해 어려움을 느낄 수 있으므로, 몇 번의 시도와 경험을 통해 적응하는 것이 중요하다. 이 맵을 플레이하기 전에는 최소한의 맵 이해도를 갖추는 것이 좋다. 시작 전 각 플레이어의 초기 위치와 주요 아이템의 위치를 확인하고, 맵의 주요 경로와 위험 지대를 미리 파악해두면 게임 진행이 훨씬 수월해진다. 또한 팀원 간의 역할 분배를 미리 정해두고, 누가 아이템을 수집하고 누가 적을 상대할 것인지 등을 협의해두면 효율적인 플레이가 가능하다. 이 외에도 게임 내의 알림音이나 효과음에도 주의를 기울여, 몬스터의 접근이나 위험 신호를 빠르게 인지할 수 있도록 준비하는 것이 좋다. StarCraft: Brood War’s horror-themed custom map, *Mansion of Horror 5*, is a survival defense game where five players must escape a haunted mansion under the cover of night. Designed as a cooperative challenge, the map tasks players with overcoming waves of enemies and deadly traps through strategic, methodical play rather than speed. Set against a snowy backdrop, the dark, atmospheric mansion and its surrounding grounds are filled with hidden monsters and treacherous terrain that heighten the difficulty. The map’s structure emphasizes teamwork and communication, with winding paths, narrow corridors, and indistinct boundaries between indoor and outdoor areas creating tension and forcing players to stay alert. Progress depends on securing hidden items and supply routes while evading enemy ambushes, and some areas are deliberately inaccessible due to terrain obstacles, rewarding thorough exploration and careful planning. The map’s moody lighting, stark contrasts, and oppressive atmosphere make it ideal for players who enjoy horror and suspense. However, newcomers may struggle at first, as mastering enemy patterns is essential—patience and repeated attempts are key to adapting. Before jumping in, it’s wise to familiarize yourself with the map: check starting positions, locate critical items, and identify safe routes and danger zones. Assigning roles—such as item collection or combat focus—and coordinating with teammates beforehand can streamline gameplay. Paying close attention to in-game sounds and alerts also helps detect approaching threats early, keeping you one step ahead of the horrors lurking in the shadows.
Impossible map suliStio (이뽀서블 맵 술리스티오)
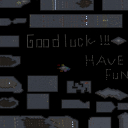
‘Impossible map suliStio’는 스타크래프트 브루드워 유즈맵으로, 제한된 유닛만으로 모든 레벨을 돌파해야 하는 도전형 디펜스 맵이다. 맵 이름은 ‘불가능’이라는 수식어가 붙을 정도로 난이도가 높을 것으로 예상되지만, 오히려 그러한 극한의 조건이 플레이어의 전략적 사고를 극대화하는 재미를 선사한다. 내부 설명에서도 ‘제한된 유닛을 활용해 살아남아야 한다’고 명시되어 있어, 자원 관리와 유닛 배치에 몰입할 수밖에 없는 구조다. 전체적으로는 협동 플레이가 핵심으로, ‘서로 협력해야 한다’는 설명이 길게 반복되며 팀웍의 중요성을 강조한다. 맵의 구조는 비교적 단순하지만, 레벨별로 요구 조건이 달라지는 방식으로 설계된 것으로 보인다. 예를 들어 초기에는 기본 유닛만으로 방어선을 구축해야 하고, 중반부에는 특정 유닛의 조합이 필수적이거나 보스전과 유사한 형태의 전투가 예상된다. 맵 이미지 상으로는 넓은 평지 위에 다수의 건물이 배치되어 있으며, 중앙부에 주요 방어 거점이 위치하는 것으로 추정된다. 또한, 맵 곳곳에 배치된 자원 멀티나 보급 기지가 제한적이어서 자원 확보가 치열할 것으로 보인다. 이러한 조건은 플레이어가 초반 자원 운용을 신중히 결정해야 하며, späteren 스테이지로 갈수록 유닛의 업그레이드와 조합을 신중히 계획해야 함을 암시한다. 플레이어는 6인으로 구성된 팀으로 참여하며, 각자 제한된 유닛 풀을 가지고 시작한다. 맵의 해상도는 6144x6144로 상당히 크며, 타일셋은 우주를 기반으로 하고 있어 광활한 공간감과 함께 SF 분위기를 느낄 수 있다. 하지만 넓은 맵과 제한된 유닛이라는 조건이 맞물려, 초반 방어와 자원 확보가 쉽게 무너질 수 있어 전략적 깊이가 요구된다. 특히, 협동이 필수라는 점에서 팀원 간의 호흡이 중요하며, 개인의 실력보다는 팀의 전략적 판단이 승패를 좌우할 가능성이 높다. 난이도는 내부 설명에서 ‘불가능’이라는 표현이 있지만, 실제로는 팀워크와 전략에 따라 극복할 수 있는 난이도로 설계되었을 것이다. 이 맵은 초보자들이 도전하기에는 다소 버겁지만, 경험이 있는 플레이어들에게는 한층 깊은 전략적 재미를 제공할 것으로 예상된다. 특히, 제한된 자원과 유닛을 활용한 창의적인 플레이가 요구되므로, 브루드워의 기본기를 다지고 싶거나 협동 플레이의 묘미를 느끼고 싶은 유저들에게 추천할 만한 작품이다. 단, 맵의 난이도가 높다는 점을 감안해, 팀원 간의 사전 협의가 충분히 이루어진 상태에서 플레이하는 것이 바람직하다. 또한, 맵의 해상도가 크고 타일셋이 우주라는 점을 고려해, 넓은 시야와 거리감을 활용한 전략적 플레이가 필요할 것이다. This StarCraft: Brood War custom map, ‘Impossible map suliStio’, challenges players to survive through multiple levels using only the limited units provided at the start. The name itself hints at the extreme difficulty, but this very challenge becomes the core of the map’s strategic depth and engaging gameplay. The internal description emphasizes „working together is the key," making teamwork a non-negotiable aspect of success, as players must collaborate to overcome increasingly tough obstacles. The map’s layout appears straightforward at first glance, yet its true complexity lies in the evolving requirements per level. Early stages likely demand efficient base-building and unit management with minimal resources, while later phases may introduce mandatory unit combinations or boss-like encounters. The image suggests a large, open terrain with strategic buildings scattered across, particularly around a central defense point. Limited resource nodes and supply depots scattered sparsely across the map force players to prioritize resource gathering and allocation carefully, adding tension to every decision. Designed for six players, the team starts with a restricted pool of units, and the vast 6144x6144 map size—paired with a space-themed tileset—creates an immersive, sci-fi atmosphere. However, the combination of a sprawling battlefield and constrained unit options means early defenses and resource control are fragile. Success hinges not on individual skill but on coordinated team strategy, making communication and planning critical. While the name suggests impossibility, the map is likely balanced to be beatable with the right strategy and teamwork. While this map may be daunting for beginners, it offers a rewarding experience for seasoned players seeking to test their strategic prowess and teamwork. The emphasis on limited resources and units encourages creative problem-solving, making it a great choice for those looking to refine their Brood War fundamentals or enjoy the synergy of cooperative play. Players should coordinate with teammates beforehand, especially given the map’s high difficulty. Additionally, the map’s vast scale and space-themed aesthetic call for strategic use of vision and distance to outmaneuver opponents.
마이크로 헌터스 - 노 배리어스 (Micro Hunters - NO BARRIERS)
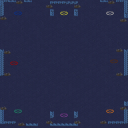
스타크래프트 브루드워의 ‘마이크로 헌터스 - 노 배리어스’는 화면 전체가 좁고 밀집된 맵에서 펼쳐지는 빠른 속도의 전투가 돋보이는 팀 밀리 맵이다. 화산 테마의 배경과 좁은 지형이 어우러져 플레이어의 움직임과 전술적 선택이 더욱 중요해진다. 맵 중앙에는 넓은 개활지가 있으며, 각 팀의 시작 지역은 좁은 통로와 구불구불한 길로 연결되어 있다. 이 구조는 초반의 치열한 접전과 빠른Resources 확보를 강제하며, 특히 저글링이나 질럿 같은 근접 유닛을 중심으로 한 전투가 빛을 발할 것이다. 또한 좁은 길목은 적의 시야를 제한하여 기습 공격이나 후방 침투 전략이 유효해진다. 플레이어는 제한된 자원으로도 빠른 판단과 효율적인Resource 관리가 요구된다. Mineral Field가 중앙과 양쪽 길목에 골고루 분포되어 있어 Mineral gathering 경쟁이 치열해질 수 있으며, Gas Geyser는 양 팀 시작 지역 근방에 위치해 있어 테크트리 확장이 용이하다. 맵의 좁은 통로와 복잡한 지형은 시야 확보와 병력 운용에 큰 영향을 미치므로, 초반의 Mineral gathering과 Gas 확보가 승패를 좌우할 가능성이 높다. 또한 좁은 길목에서 벌어지는 근접전은 유닛의 컨트롤과 타이밍에 따라 승부가 갈릴 수 있어, 기계 유닛과 근접 유닛의 조합이 중요해진다. 이 맵은 초보자보다는 중급 이상의 플레이어에게 더 적합하다. 좁은 지형과 빠른 전투로 인해Resource 관리와 유닛 컨트롤에 대한 기본기가 요구되며, 특히 좁은 통로에서 벌어지는 전투는 미세한 컨트롤과 타이밍이 중요하다. 팀워크가 요구되는 맵이므로, 팀원과의 원활한 소통과 협력이 필수적이다. 또한 맵의 특성상 초반Resources 확보가 늦어지면 쉽게 밀릴 수 있어, 빠른 결정과Resource 관리 능력을 키운 플레이어에게 추천할 만한 맵이다. 특히 화산 테마의 배경과 좁은 지형이 어우러진 시각적 요소는 플레이어에게 긴장감을 더해준다. StarCraft: Brood War’s *Micro Hunters - No Barriers* is a team melee map where fast-paced battles unfold in a tightly packed, screen-filling layout. The volcanic-themed background and cramped terrain force players to focus on movement and tactical decisions. A wide open central area sits between each team’s starting zones, which are connected by narrow, winding paths. This design demands intense early clashes and quick resource gathering, especially favoring close-quarters combat with units like Zerglings or Zealots. The tight corridors also restrict visibility, making ambushes and rear infiltration viable strategies. Even with limited resources, players must act quickly and manage them efficiently. Mineral Fields are evenly spread across the center and side paths, sparking fierce mineral-gathering races, while the Gas Geysers near each team’s base make tech expansions straightforward. The map’s narrow passages and complex layout heavily influence vision control and troop movement, so securing minerals and gas early can decide the match. Close-quarters fights in these choke points hinge on precise unit control and timing, making the synergy between mechanical and melee units crucial. This map is better suited for intermediate to advanced players. The confined spaces and rapid engagements require solid fundamentals in resource management and unit control, and battles in tight corridors demand sharp micro and impeccable timing. Teamwork is essential, so clear communication and coordination with teammates are a must. Falling behind early in resource collection can quickly lead to defeat, so players who excel at quick decision-making and resource efficiency will thrive here. The map’s volcanic backdrop and claustrophobic terrain also heighten the tension, keeping players on edge.
E V O L V E S V.MiTiS
스타크래프트 브루드워의 유즈맵인 《E V O L V E S V.MiTiS》는 플레이어들이 끊임없이 진화하는 적들을 상대로 방어전을 펼치는 디펜스 장르의 맵입니다. 내부 맵 제목과 설명만으로도 알 수 있듯이, '진화'라는 키워드가 중심이 되는 이 맵은 단순한 방어가 아니라 끊임없이 변화하는 적의 패턴과 공격 루트를 분석하고 대응해야 하는 전략적 깊이가 느껴집니다. 6명의 플레이어가 각각 다른 위치에서 시작하며, 중앙의 본진을 중심으로 퍼져 있는 멀티 지역과 좁은 통로를 활용한 입구막기 전략이 필수적입니다. 맵 구조는 우주 테마의 타일셋을 사용해 어두운 배경과 번쩍이는 빛 효과로 시각적인 긴장감을 조성합니다. 적의 공격 루트는 맵 곳곳에 흩어져 있는 입구와 좁은 통로로 구성되어 있으며, 플레이어는 이를 미리 방어하거나 효율적으로 배치한 방어 건물로 막아야 합니다. 특히, 적의 유닛이 진화할 때마다 공격 패턴이 달라지므로, 초반 방어는 물론 중후반까지도 끊임없는 전략적 재수정이 요구됩니다. 맵의 symmetrical한 구조는 양측의 밸런스를 맞추는 데 도움을 주지만, 중앙 지역을 둘러싼 좁은 길목은 입구막기 플레이어에게는 전략적 요충지가 됩니다. 이 맵의 가장 큰 특징은 '진화' 시스템에 있습니다. 적 유닛이 일정 시간마다 또는 특정 조건을 만족할 때마다 stronger하고 새로운 능력치를 지닌 유닛으로 진화합니다. 이를 막기 위해서는 플레이어 간 협력이 필수적이며, 각 플레이어의 역할 분담이 승패를 좌우할 수 있습니다. 또한, 멀티 지역을 확보하고 방어선을 구축하는 동시에, 상대방의 멀티를 견제하는 공격적 플레이도 중요해 다양한 전략이 요구됩니다. 초보 플레이어는 적의 진화 속도를 감당하지 못해 어려움을 느낄 수 있지만, 경험이 쌓이면 각 플레이어의 역할을 숙지하고 효율적으로 방어선을 구축할 수 있게 됩니다. 추천 대상은 전략적 사고와 협력이 필요한 고수 플레이어입니다. 맵의 symmetrical한 구조와 좁은 통로, 끊임없는 진화 시스템은 초보자보다는 중수 이상의 플레이어에게 더 적합합니다. 또한, 팀 플레이가 필수적이므로 친구들과 함께 플레이하면 더욱 재미있게 즐길 수 있습니다. 플레이 전에는 맵의 구조와 입구 위치, 적의 진화 패턴을 미리 숙지하고, 방어 건물의 효율적인 배치와 멀티 지역 확보를 연습하는 것이 중요합니다. 특히, 좁은 통로에서의 입구막기 전략은 이 맵의 승패를 좌우하는 핵심 요소이므로, 이를 중심으로 전략을 세우는 것이 좋습니다. StarCraft: Brood War’s custom map *E V O L V E S V.MiTiS* is a defense-style map where players must hold off constantly evolving enemies. As the name and description suggest, "evolution" is the core theme—this isn’t just about static defense but about analyzing and adapting to shifting enemy patterns and attack routes. Six players start in different positions, and defending the central main base while controlling the scattered multi-locations and narrow passages is essential. The map uses a space-themed tileset, with a dark backdrop and flashing light effects creating a tense visual atmosphere. Enemy attack routes are spread across various entrances and tight corridors, forcing players to either preemptively block them or deploy defensive structures efficiently. Since enemy units evolve over time, changing their attack patterns, players must continuously adjust their strategies from the early game all the way to the late game. While the map’s symmetrical design helps balance both sides, the narrow paths surrounding the central area become critical chokepoints for players tasked with defending entrances. The defining feature of this map is its "evolution" system. Enemy units periodically grow stronger or gain new abilities when certain conditions are met. Countering this requires strong teamwork, as each player’s role and contribution can determine victory or defeat. Securing multi-locations, building defensive lines, and pressuring the opponent’s expansions are all vital, demanding a mix of defensive and aggressive strategies. Novice players may struggle to keep up with the rapid evolution of enemies, but as they gain experience, they can learn each role and optimize their defenses. This map is best suited for advanced players who enjoy strategic thinking and teamwork. Its symmetrical layout, tight corridors, and constant evolution make it more accessible to intermediate and higher-level players rather than beginners. Since teamwork is essential, playing with friends can make the experience even more enjoyable. Before jumping in, study the map layout, entrance locations, and enemy evolution patterns. Practice efficient building placement and multi-taking, as controlling narrow chokepoints is often the key to victory—build your strategy around securing those critical passages.
메가맨 X 골렘즈 (Megaman X Golems)
스타크래프트 브루드워 유즈맵으로 등장한 <메가맨 X 골렘즈>는 디펜스와 건설 요소가 결합된 독특한 게임 플레이를 제공합니다. 맵은 거대한 사막 평야를 배경으로 하며, централь에 위치한 주요 구조물을 파괴하고 재건하는 것이 주요 목표로 보입니다. 맵 곳곳에 scattered된 유닛들은 파괴 가능한 오브젝트나 방어 시설로 추정되며, 이를 조작해 적대적 유닛이나 구조물을 제어하거나 파괴해야 합니다. 맵 이미지에서 확인되는 수많은 잔해와 잔디 패턴은 파괴와 건설의 반복을 암시하며, 플레이어는 이를 통해 전술을 유동적으로 변화시켜야 할 것입니다. 5인 플레이를 지원하는 이 맵은 혼자서도 진행할 수 있지만, 협력 플레이가 유리할 것으로 보입니다. 특히 사막 타일셋의 황량한 분위기는 긴장감을 조성하며, 파괴와 재건의 반복 속에서 전략적 깊이를 느낄 수 있습니다. 초보자와 숙련자 모두 즐길 수 있도록 디자인된 이 맵은 파괴와 건설의 밸런스가 핵심이며, 맵의 복잡한 구조를 파악하기 전까지는 다소 난해할 수 있습니다. 따라서 플레이 전 맵의 각 구역별 기능을 미리 확인하고, 파괴와 재건의 우선순위를 신중히 결정해야 합니다. 추천 대상은 전략적 사고를 좋아하는 플레이어이며, 특히 디펜스와 건설 요소가 결합된 게임을 선호하는 유저에게 어울릴 것입니다. This StarCraft: Brood War custom map, Megaman X Golems, combines defense mechanics with construction elements to deliver a unique gameplay experience. Set against a vast desert backdrop, the map appears to revolve around destroying and rebuilding central structures as the primary objective. Scattered units throughout the map likely serve as destructible objects or defensive installations that players must manipulate to control or destroy. The scattered debris and grass patterns hint at the cycle of destruction and reconstruction, requiring players to adapt their strategies dynamically. Supporting up to five players, this map can be played solo but benefits significantly from cooperative play. The barren desert tileset enhances the tense atmosphere, immersing players in a strategic depth of destruction and rebuilding. Designed for both beginners and experienced players, the map emphasizes the balance between destruction and construction, though its complex structure may initially challenge players. Before diving in, it's advisable to familiarize yourself with the functions of each map zone and carefully decide the priority of destruction and reconstruction. Recommended for players who enjoy strategic thinking, particularly those who appreciate maps that blend defense and construction mechanics.
Paths Open Rpg Beta
스타크래프트 브루드워의 오픈 RPG 장르 유즈맵인 <Paths Open Rpg Beta>는 플레이어가 마을을 구매하고 영웅을 육성하는 재미있는 디펜스형 맵입니다. 맵은 넓은 사막 지형을 배경으로 펼쳐지며, 각 마을은 고유한 보너스를 제공해 전략적 선택을 강요합니다. 마을을 구매하면 자원과 유닛 생산 능력이 향상되어 방어력을 크게 높일 수 있지만, 모든 마을을 확보하는 데에는 신중한 계획이 필요합니다. 게임은 퀘스트 시스템을 중심으로 진행됩니다. 필수 스토리 퀘스트 외에도 선택 가능한 세계 퀘스트가 있어, 돈을 벌거나 특별한 보상을 획득할 수 있습니다. 영웅 시스템은 맵의 핵심으로, 강력한 영웅을 영입하고 장비를 강화해 전투력을 극대화할 수 있습니다. 영웅은 개별적인 스킬을 보유하고 있어, 조합과 전략에 따라 다양한 플레이 스타일을 구사할 수 있습니다. 맵의 디펜스 구조는 마을 보호와 영웅 육성이 동시에 요구되므로, 초보자는 물론 숙련자까지 즐길 수 있는 깊이 있는 전략이 필요합니다. 사막 지형의 넓은 공간은 시야를 확보하기 어렵게 만들어, 적의 움직임을 예측하는 능력이 중요합니다. 또한, 맵 곳곳에 숨겨진 아이템과 보너스가 있어, 탐험을 통해 추가적인 이점을 얻을 수 있습니다. 이 맵은 특히 RPG 요소를 좋아하는 유저들에게 추천합니다. 영웅 육성과 장비 강화, 퀘스트 수행을 통해 성장感을 느낄 수 있으며, 디펜스 요소는 게임의 긴장감을 높입니다. 다만, 넓은 맵과 다양한 선택지 때문에 초보자는 게임의 흐름을 파악하는 데 시간이 걸릴 수 있으니, 먼저 튜토리얼이나 가이드를 참고하는 것이 좋습니다. 또한, 팀 플레이 시에는 각 플레이어의 역할 분배가 중요해, 협력 플레이가 필수적입니다. 플레이 전에는 마을의 위치와 보너스를 꼼꼼히 확인하고, 영웅의 스킬과 장비 조합을 미리 계획하는 것이 좋습니다. 맵의 넓은 공간을 효율적으로 활용하기 위해, 주요 길목에 방어선을 구축하는 전략이 효과적입니다. 이 맵은 한 번 플레이하면 다시 플레이하고 싶은 매력이 있는 만큼, 꾸준한 인기를 누리고 있습니다. <Paths Open RPG Beta> is an open RPG-style custom map in *StarCraft: Brood War* where players purchase towns and train heroes in an engaging defense-style gameplay. The map unfolds across vast desert terrain, with each town offering unique bonuses that demand strategic choices. Buying a town boosts resource income and unit production capabilities, significantly strengthening defenses—but securing all towns requires careful planning. The game revolves around a quest system, featuring both mandatory story quests and optional world quests that allow players to earn money or obtain special rewards. The hero system is central to gameplay, enabling players to recruit powerful heroes, enhance their equipment, and maximize combat effectiveness. Each hero possesses distinct skills, allowing for diverse playstyles depending on their combinations and strategies. The defense structure of the map requires balancing town protection with hero training, offering deep strategic depth suitable for both beginners and experienced players. The expansive desert terrain limits visibility, making it crucial to predict enemy movements. Hidden items and bonuses scattered throughout the map provide additional advantages for those who explore. This map is especially recommended for players who enjoy RPG elements, as the progression through hero training, equipment upgrades, and quest completion delivers a strong sense of growth, while the defense mechanics heighten tension. However, the vast map and numerous choices may overwhelm beginners, so reviewing tutorials or guides beforehand is advisable. In team play, effective role distribution is essential, making cooperation a necessity. Before playing, it’s wise to carefully examine town locations and their bonuses, and to plan hero skill and equipment combinations in advance. Strategically fortifying key pathways is effective for maximizing the map’s open spaces. With its replayability and consistent popularity, this map offers an experience worth revisiting.
던전 앤 드래곤 DM v. -Flike- (DnD DM v. -Flike-)
「DnD DM v. -Flike-」는 스타크래프트 브루드워의 유즈맵 중에서도 독특한 RPG 장르의 대작으로, 던전 앤 드래곤(D&D) 시스템을 모티브로 제작된 맵입니다. 이 맵은 플레이어들이 각자 영웅 역할을 맡아 전형적인 RPG의 턴제 전투와 스토리 진행을 즐길 수 있도록 설계되어 있으며, 던전 마스터(DM) 역할을 맡은 플레이어는 스토리를 이끌어나가는 서사적 역할을 담당합니다. 내부 맵 설명에서도 언급된 것처럼, 플레이어는 「The heros play the game like any other RPG, the Dungeon master makes the story.」라는 슬로건 아래 각자의 역할을 분배하여 긴장감 넘치는 모험을 펼치게 됩니다. 맵의 구조는 사막 타일셋을 기반으로 펼쳐지며, 넓은 평야와 다양한 지형이 조화를 이룹니다. 던전 마스터는 게임의 스토리를 주도적으로 설정하고, 다른 플레이어들은 던전 마스터가 제시하는 목표에 따라 임무를 수행하거나 전투를 벌이는 방식으로 진행됩니다. 전투는 턴제에 기반한 시스템으로 추정되며, 맵 곳곳에 배치된 적들은 플레이어의 전략에 따라 물리치거나 회피해야 합니다. 특히, 넓은 맵을 활용한 전투는 대규모 전투가 벌어질 가능성이 높으며, 각 플레이어의 역할과 전략이 승패를 좌우할 것으로 보입니다. 이 맵의 가장 큰 특징은 「던전 마스터 시스템」에 있습니다. 던전 마스터는 단순히 게임을 진행하는 역할을 넘어, 스토리를 창조하고 적의 배치, 아이템 드랍, 이벤트 발생 등을 조율할 수 있습니다. 이는 다른 RPG 유즈맵과는 차별화되는 요소로, 플레이어 간의 상호작용과 창의성을 극대화할 수 있는 시스템입니다. 또한, 맵의 넓이와 지형 다양성은 플레이어들에게 긴장감과 몰입감을 제공하며, 다양한 전략을 수립할 수 있는 기회를 제공합니다. 추천 대상은 크게 두 가지로 나뉩니다. 첫째, RPG 장르를 좋아하는 플레이어들에게는 최적의 선택입니다. 턴제 전투와 스토리 중심의 진행은 RPG 팬들에게 친숙한 경험을 제공할 것입니다. 둘째, 팀 플레이를 즐기는 플레이어들에게도 적합합니다. 던전 마스터와 영웅 간의 역할 분배를 통해 팀워크를 발휘할 수 있으며, 각자의 역할을 수행하며 협력하는 재미를 느낄 수 있습니다. 다만, 맵의 넓이와 복잡한 시스템을 고려할 때 초보자보다는 어느 정도의 게임 경험이 있는 플레이어에게 더 적합할 수 있습니다. 플레이 전 확인해야 할 포인트는 던전 마스터의 역할과 시스템 이해입니다. 던전 마스터는 단순히 게임을 진행하는 것이 아니라 스토리를 창조하고, 플레이어들에게 끊임없는 선택과 도전을 제공해야 합니다. 또한, 맵의 넓이와 지형 복잡도를 미리 숙지하여 전투 시 전략을 수립하는 것이 중요합니다. 마지막으로, 팀원 간의 역할 분배와 협의가 원활히 이루어질 수 있도록 사전에 논의하는 것이 좋습니다. The map 「DnD DM v. -Flike-」 is a standout RPG-style custom map in StarCraft: Brood War, inspired by the classic Dungeons & Dragons system. Players take on the roles of heroes, engaging in turn-based combat and story-driven progression typical of RPGs, while a designated Dungeon Master (DM) guides the narrative and controls events. As described in the internal map notes, 「The heros play the game like any other RPG, the Dungeon master makes the story.」, this division of roles creates a dynamic and immersive experience. The map utilizes a desert-themed tile set, offering a vast and varied terrain that enhances the adventure feel. The DM controls the overarching story and objectives, while other players navigate challenges, battles, and quests within the expansive environment. The turn-based combat system suggests strategic depth, requiring players to adapt their tactics to the evolving challenges presented by the DM. A defining feature of this map is the Dungeon Master system, which goes beyond mere progression to allow the DM to craft the story dynamically. This includes placing enemies, managing item drops, and orchestrating events, providing a level of creativity and player interaction rarely seen in other RPG custom maps. The map’s size and diverse landscapes further contribute to its immersive quality, offering ample opportunities for strategic planning and exploration. This map is particularly recommended for players who enjoy RPG mechanics and team-based gameplay. The turn-based combat and narrative-driven progression will appeal to RPG enthusiasts, while the role-divided team play fosters collaboration and strategy. However, due to its scale and complexity, it may be better suited for players with some prior experience in custom maps or turn-based RPGs. Before playing, it is essential to understand the DM’s role and the overall system. The DM is not just a facilitator but a storyteller who must create engaging scenarios and challenges. Familiarity with the map’s terrain and strategic planning is also crucial for combat success. Lastly, pre-game discussions among team members to clarify roles and strategies will enhance the overall experience.
최근 등록된 맵
새로 추가된 파일과 버전을 확인하세요.
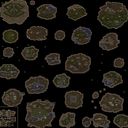
나이트 런 엘리스 4.45 (Knight Run Elice 4.45)
스타크래프트 브루드워의 유즈맵인 ‘나이트 런 엘리스 4.45’는 다채로운 맵 디자인과 흥미로운 진행 방식을 제공하는 디펜스 장르의 맵입니다. 맵 곳곳에 배치된 다양한 지형과 구조물을 활용해 적의 공격을 방어하면서 목표 지점까지 도달하는 플레이 방식이 특징입니다. 게임이 시작되면 플레이어는 우측 하단에 위치한 시작 지점에서 출발하며, 맵 중앙과 좌측 상단에는 여러 개의 방어 거점이 존재합니다. 이 거점들은 적의 공격 경로에 따라 배치되어 있어, 단순히 방어만 하는 것이 아니라 효율적인 길찾기와 전략적 대처가 필요합니다. 맵의 진행은 크게 세 단계로 나뉩니다. 첫 번째 단계에서는 약한 적들이 규칙적으로 쏟아져 나오며, 플레이어는 이들을 막아내며 전진할 수 있는 통로를 확보해야 합니다. 두 번째 단계로 접어들면 적의 공격 패턴이 다양해지고, 일부 구간에서는 좁은 통로에서 적이 몰려오는 ‘입구막기’ 형식의 방어가 요구됩니다. 마지막으로 세 번째 단계에서는 맵의 좌측 상단에 위치한 최종 목표 지점까지 도달해야 하는데, 이 과정에서 적의 강력한 공격과 기동성 있는 유닛들이 등장합니다. 맵 곳곳에 숨겨진 자원이나 보너스 아이템을 획득하면 일시적으로 아군의 전투력이 상승하는 효과가 있어, 이를 활용하는 것이 승리의 열쇠가 됩니다. 이 맵은 6명의 플레이어가 참여할 수 있으며, 각 플레이어는 고유한 시작 위치를 부여받아 개별적으로 또는 팀을 이뤄 진행할 수 있습니다. 맵의 난이도는 보통으로 설정되어 있지만, 적의 공격 패턴이 빠르게 변화하고 일부 구간에서는 타임어택 요소까지 포함되어 있어, 초보 플레이어보다는 어느 정도의 경험이 있는 유저에게 더 적합합니다. 또한, 맵의 디자인과 색상이 밝고 명쾌한 편이라 시각적인 피로감을 줄여줍니다. 전체적인 플레이 시간은 맵의 규모와 진행 방식에 따라 약 25~35분 정도로 추정되며, 여러 번 플레이하면서 자신만의 전략을 발전시킬 수 있는 재플레이 가치가 높은 맵입니다. 이 맵을 플레이하기 위해서는 맵의 구조와 적의 공격 패턴을 신속하게 파악하는 능력이 필요합니다. 특히 좁은 통로나 장애물이 많은 구간에서는 아군의 유닛을 효율적으로 배치하고, 보너스 아이템을 적극 활용하는 것이 중요합니다. 또한, 팀 플레이를 선호하는 유저라면 팀원 간의 협력이 승패를 좌우할 수 있으니, 사전 전략 회의를 통해 효율적인 플레이를 준비하는 것이 좋습니다. ‘나이트 런 엘리스 4.45’는 디펜스와 서바이벌 요소가 혼합된 맵으로, 전략적 사고와 빠른 판단력이 요구되는 유즈맵을 즐기는 유저들에게Strongly recommended합니다. This StarCraft: Brood War custom map, 'Knight Run Elice 4.45', offers a diverse map design and engaging gameplay in the defense genre. The map features a variety of terrains and structures that players must navigate while defending against enemy attacks and reaching the goal. The game begins with players starting at the bottom-right corner, and the map is divided into multiple defensive points scattered across the central and top-left areas. The gameplay is structured into three main phases. In the first phase, weaker enemies spawn regularly, and players must clear pathways to advance. The second phase introduces more varied enemy patterns, including 'choke point' defenses in narrow corridors. The final phase requires players to reach the top-left goal, facing stronger enemies and units with high mobility. Hidden resources and bonus items scattered throughout the map provide temporary boosts to combat effectiveness, making their acquisition crucial for success. Designed for up to six players, this map allows for both individual and team-based progression. While the difficulty is set to 'medium,' the dynamic enemy patterns and time-sensitive segments make it more suitable for experienced players than beginners. The map’s bright and clear visual design minimizes visual fatigue, and the estimated playtime ranges from 25 to 35 minutes, depending on the player’s strategy and efficiency. To excel in 'Knight Run Elice 4.45,' players must quickly understand the map layout and enemy behavior. Narrow corridors and obstacle-heavy areas require strategic unit placement and efficient use of bonus items. For team-based players, coordination and pre-game strategy discussions are vital for success. This map blends defense and survival elements, making it highly recommended for players who enjoy custom maps that demand strategic thinking and quick decision-making.
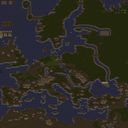
『가족놀이』나라_짓고 놀기 (Family Playground Building)
『가족놀이』나라_짓고 놀기(Family Playground Building)는 스타크래프트: 브루드워의 유즈맵으로, 6명의 플레이어가 가족이라는 컨셉으로 각자 자신의 영토를 건설하고 발전시키는 독특한 형식을 취하고 있다. 맵은 사막 타일셋으로 이루어져 있으며, 넓은 평지에 흩어져 있는 자원 지대를 중심으로 자원을 채취하고 건물을 건설하는 플레이가 전개된다. 맵의 특징은 단순히 건물을 짓는 것에 그치지 않고, 가족 구성원 간 상호작용과 전략적 협력이 요구된다는 점이다. 각 플레이어는 시작 시점에서 자원 기지 외에도 가족 구성원의 개성과 능력을 고려해 건물을 배치해야 하며, 이를 통해Resource Management(자원 관리)와Territory Control(영토 통제)의 균형을 맞춰 나가야 한다. 플레이 방식은 크게 세 단계로 나뉜다. 첫째, 초반에는 자원의 확보와 기본 건물 건설이 우선시된다. 둘째, 중반에는 가족 구성원의 특성을 살린 건물 배치와 전략적 확장이 필요하다. 예를 들어, 자원 생산 건물을 효율적으로 배치하거나 방어 건물을 구축해 적의 침입을 방지하는 것이다. 셋째, 후반에는 가족 구성원의 능력을 최적화하고, 경쟁 플레이어와의 영토 분쟁에서 우위를 차지하는 것이 목표가 된다. 맵의 구조상, 중앙 지역은 자원이 풍부한 편이지만, 주변 지역으로 진출할수록 자원 확보가 어려워지므로 초반과 후반의 전략적 차이가 뚜렷하다. 이 맵의 가장 큰 매력은 가족 구성원 간의 협력과 경쟁이 동시에 이루어지는 점이다. 플레이어는 각자 자신의 영토를 지키면서도, 때로는 동맹을 맺고 때로는 경쟁 관계를 형성할 수 있다. 또한, 맵의 난이도는 초보자도 쉽게 접근할 수 있도록 구성되어 있지만, 세부적인 전략을 구사하려면 약간의 숙련이 요구된다. 따라서, 이 맵은 가족이나 친구들과 함께 즐기기에 최적의 선택이며, 특히Resource Sharing(자원 공유)과Strategy Planning(전략 계획)의 중요성을 느낄 수 있는 경험을 제공한다. 마지막으로, 맵의 디자인과 색상 구성이 사막 분위기를 잘 살리고 있어, 몰입감을 높이는 데 기여한다. 플레이 전에는 각 가족 구성원의 특성과 맵의 자원 분포를 미리 확인해 두는 것이 좋다. 또한, 동맹을 맺을 때와 적대 관계를 형성할 때의 리스크를 신중히 판단해야 한다. "Family Playground Building" is a *StarCraft: Brood War* custom map where six players take on the role of family members, each building and expanding their own territory in a unique format. The map features a desert tile set, with resource zones scattered across wide open plains where players gather resources and construct buildings. What sets this map apart is that it goes beyond simple building construction, requiring players to engage in strategic cooperation and interaction with family members. At the start, players must not only secure resources but also arrange buildings based on the personalities and abilities of their family members, balancing resource management and territorial control. The gameplay is divided into three main phases. In the early game, the priority is securing resources and constructing basic buildings. The mid-game calls for strategic expansion and placing buildings that leverage the family members' traits—such as efficiently arranging resource-producing structures or building defenses to fend off enemy invasions. In the late game, the focus shifts to optimizing family abilities and gaining an advantage in territorial disputes with rival players. Due to the map's layout, the central area is rich in resources, but securing them becomes increasingly difficult as players expand outward, creating a clear strategic divide between early and late game. The map’s greatest appeal lies in the blend of cooperation and competition among family members. Players must defend their own territories while forming alliances or rivalries as the situation demands. While the difficulty is designed to be accessible for beginners, executing advanced strategies requires some practice. As a result, it’s an ideal choice for playing with family or friends, offering a chance to experience the importance of resource sharing and strategic planning firsthand. The map’s design and color scheme effectively evoke a desert atmosphere, enhancing immersion. Before starting, it’s wise to review the family members’ traits and the map’s resource distribution. Additionally, carefully weigh the risks when deciding whether to form alliances or adopt a hostile stance.
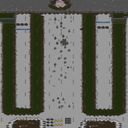
터렛/캐논 워즈 V.5 (Turret/Cannon WARz V.5)
스타크래프트 브루드워의 인기 디펜스 유즈맵인 〈Turret/Cannon WARz V.5〉는 터렛과 캐논을 직접 건설하고 조작하여 공중 유닛의 공격을 막아내는 전략적인 디펜스 장르의 맵이다. 맵 중앙을 가로지르는 길을 따라 끊임없이 몰려오는 적 공중 유닛들을 저지하는 것이 주요 목표로, 플레이어는 제한된 자원으로 건물을 배치하고 업그레이드하여 방어선을 구축해야 한다. 맵의 구조는 시작 지점과 끝 지점을 잇는 일직선 길이 있으며, 양 옆으로 넓은 공간이 확보되어 있어 터렛이나 캐논을 배치할 수 있는 공간이 풍부하다. 특히 맵의 양 끝에 위치한 시작 지점과 끝 지점은 각각의 팀(또는 플레이어)이 건물을 건설할 수 있는 전용 구역으로 나뉘어 있어, 전략적인 위치 선정이 victory의 핵심으로 작용한다. 맵의 이름은 'Turret/Cannon WARz'로, 터렛과 캐논을 주력으로 사용한다는 점과 전쟁(War)을 연상시키는 전투적인 분위기가 돋보인다. V.5 버전은 이전 버전에서의 밸런스 조정과 UI 개선, 그리고 새로운 건물 배치 옵션 등이 추가되어 더 전략적인 플레이를 가능하게 한다. 이 맵은 초보부터 숙련자까지 모두 즐길 수 있도록 디자인되어 있지만, 특히 건물을 효율적으로 배치하고 업그레이드를 신중히 진행하는 능력이 중요하다. 플레이어는 맵의 중앙 길에 집중되는 공격을 효과적으로 방어하기 위해, 건물을 일직선으로만 배치하는 것이 아니라 좌우로 넓게 퍼뜨려 배치하는 전략을 사용해야 한다. 또한, 공중 유닛의 종류에 따라 효과적인 방어 건물의 조합이 달라지므로, 맵의 흐름을 잘 읽고 대처하는 능력이 필요하다. 맵의 분위기는 전쟁과 방어의 긴장감이 느껴지도록 디자인되어 있으며, 건물을 건설하는 소리와 공격 소리가 어우러져 immersive한 경험을 제공한다. 이 맵을 즐기기 위해서는 적어도 6명의 플레이어가 필요하며, 각 플레이어는 개별적으로 건물을 건설하고 관리할 수 있다. 추천되는 플레이 스타일은 방어 건물 간의 시너지를 극대화하기 위해 협력 플레이를 중시하는 것이다. 이 맵은 디펜스 장르에 익숙한 플레이어뿐만 아니라, 새로운 전략을 시도해 보고 싶은 유저들에게도 훌륭한 선택지가 될 것이다. 건물을 건설하고 업그레이드하는 재미와 함께, 끊임없이 몰려오는 적을 방어하는 짜릿한 긴장감까지 느낄 수 있는佳作 유즈맵이라 할 수 있다. 특히 건물을 배치할 수 있는 공간이 넓은 만큼, 창의적인 전략을 구상하고자 하는 플레이어들에게는 더없이 좋은 기회가 될 것이다. 마지막으로, 이 맵은 꾸준한 업데이트와 밸런스 조정을 통해 더 많은 플레이어들에게 사랑받고 있는 만큼, 앞으로도 많은 관심을 받을 만한 가치가 있다. Turret/Cannon WARz V.5 is a popular defense UMS map in StarCraft: Brood War where players construct and upgrade turrets and cannons to fend off waves of incoming air units. The core objective is to defend a central path from relentless enemy aerial assaults by strategically placing defensive structures within designated zones at the map's start and end points. The map features a straight-line path flanked by wide open spaces, allowing players to spread out their defenses across the battlefield. Version 5 introduces refined balance adjustments, enhanced UI elements, and additional building placement options, elevating the strategic depth of gameplay. While accessible to beginners, mastering turret and cannon placement, along with timely upgrades, becomes crucial for veteran players seeking optimal defense. Effective strategies involve scattering buildings not just in a straight line but across the sides to maximize coverage against diverse air unit types that dominate the central route. The immersive experience is heightened by the war-themed atmosphere, blending construction sounds with the intensity of incoming attacks. Designed for six players, the map encourages cooperative play where individual contributions to the defense line culminate in a collective victory. Recommended for fans of defense genres and those eager to experiment with unconventional tactics, Turret/Cannon WARz V.5 offers a thrilling blend of strategic planning, quick decision-making, and adrenaline-pumping action. Its broad building placement zones invite creative approaches, making it a standout choice for players looking to refine their defensive prowess. The map's ongoing updates and community-driven refinements further solidify its appeal, ensuring its continued relevance and popularity among StarCraft UMS enthusiasts.
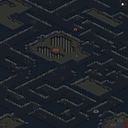
스타 워즈 RPG (Star Wars RPG)
스타크래프트 브루드워의 <스타 워즈 RPG>는 은하계를 배경으로 한 거대한 RPG 유즈맵으로, 플레이어는 제다이Knight, 반란군Rebel, 제국군Imperial 중 하나를 선택해 은하계의 평화를 지키거나 제국을 무너뜨리는 임무를 수행하게 된다. 맵은 넓은 설원 타일셋을 기반으로 펼쳐지며, 중앙에 위치한 제국의 핵심 시설물(예: 데스스타, 제국의 요새 등)이 주요 목표로 보인다. 맵의 구조는 여러 구역으로 나뉘어 있으며, 각 구역은 고유의 테마와 적 유닛, 함정, 아이템 시스템을 갖추고 있다. 플레이어는 전투를 통해 경험치를 획득하고 스킬을 레벨업하며, 아이템을 수집해 장비를 강화하는 전형적인 RPG 시스템을 경험할 수 있다. 특히 이 맵의 특징은 스토리 중심의 퀘스트 라인과 선택지를 통한 분기형 진행에 있다. 예를 들어, 데스스타를 파괴할지, 제국의 황제를 암살할지, 혹은 은하계를 재건할 것인지 등 플레이어의 선택에 따라 스토리의 전개가 달라진다. 또한, 각 진영(제다이, 반란군, 제국군)에 따라 시작 위치와 초기 아이템, 스킬 트리가 다르며, 적대 진영과의 전투는 물론 동맹 진영과의 협력도 필수적이다. 맵 곳곳에 숨겨진 비밀 지역과 보스 몬스터가 배치되어 있어, 단순히 전투만 반복하는 것이 아니라 탐험과 전략적 사고가 요구된다. 이 맵은 초보자보다는 스타크래프트와 RPG 장르에 어느 정도 익숙한 플레이어에게 추천된다. 복잡한 스킬 시스템과 아이템 관리, 그리고 다수의 적과 상호작용해야 하는 구조상, 초보자가 접근하기에는 진입 장벽이 다소 높기 때문이다. 또한, 팀 플레이가 권장되는 구조로, 혼자서 모든 임무를 수행하기보다는 친구들과 협력해 공략하는 것이 더 효율적이다. 맵의 볼륨이 크고 디자인도 세밀하게 구성되어 있어, 한 번 플레이한 후에도 다시 도전하고 싶은 유혹을 느낄 수 있다. 마지막으로, 이 맵은 설정과 세계관 구성이 탄탄해, 스타워즈 팬이라면 더욱 몰입감 있게 즐길 수 있을 것이다. 플레이 전 반드시 확인해야 할 사항으로는, 각 진영의 특성과 스킬 트리를 미리 숙지하는 것과, 맵 상의 아이템 위치와 비밀 지역 위치를 지도에 표시하는 것이다. 또한, 팀 플레이 시에는 역할 분담을 명확히 하고, 주요 목표(예: 데스스타 파괴, 황제 암살)를 우선순위로 삼는 전략을 세워야 한다. 이 외에도, 맵 곳곳에 배치된 함정과 적의 배치 패턴을 미리 분석하면 전투에서 훨씬 유리한 위치를 선점할 수 있을 것이다. StarCraft: Brood War’s *Star Wars RPG* is a massive RPG custom map set in a galaxy far, far away. Players choose to play as a Jedi Knight, Rebel, or Imperial, working to either protect the galaxy or topple the Empire. The map sprawls across a vast snowy tileset, with the Empire’s key facilities—such as the Death Star or Imperial fortresses—serving as major objectives. The layout is divided into distinct zones, each featuring unique themes, enemy units, traps, and item systems. Players gain experience through combat, level up skills, and collect items to strengthen their gear, following a classic RPG progression system. A standout feature of this map is its story-driven questlines with branching paths determined by player choices. For example, players must decide whether to destroy the Death Star, assassinate the Emperor, or help rebuild the galaxy—each decision drastically alters the narrative’s outcome. Additionally, starting locations, initial gear, and skill trees vary by faction (Jedi, Rebel, or Imperial), and cooperation with allied factions is as essential as combat against hostile ones. Hidden secret areas and boss encounters are scattered throughout, demanding exploration and strategic thinking beyond repetitive battles. This map is best suited for players already familiar with both StarCraft and RPG mechanics rather than beginners. The intricate skill systems, item management, and constant interactions with multiple enemies create a high entry barrier for newcomers. Team play is strongly encouraged, as tackling all missions solo is far less efficient than coordinating with friends. With its expansive scale and meticulously designed mechanics, the map offers enough depth to revisit even after multiple playthroughs. Fans of *Star Wars* will especially appreciate the rich lore and immersive worldbuilding. Before playing, it’s crucial to study each faction’s traits and skill trees and mark hidden areas and item locations on your map. If playing in a team, clearly assign roles and prioritize major objectives—such as destroying the Death Star or assassinating the Emperor—when planning strategy. Analyzing trap placements and enemy patrol patterns in advance can also give you a significant advantage in combat.
스폰지밥 RPG (SpongeBob Rpg)
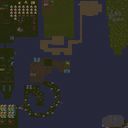
‘스폰지밥 RPG’(SpongeBob Rpg)는 스폰지밥과 친구들이 플랑크톤과 적대 세력의 침략 속에서 살아남기 위해 싸우는 스토리를 담은 스타크래프트 브루드워 UMS 유즈맵이다. 맵은 사막 타일셋으로 구성되어 있으며, 4096×4096 규모의 넓은 공간에서 진행된다. 플레이어는 스폰지밥과 그의 동료들을 조종하여 적의 공격을 막아내며, 스토리 진행에 따라 다양한 임무를 수행해야 한다. 맵의 특징은 RPG 요소와 디펜스 요소가 결합되어 있어, 스킬 업그레이드, 아이템 획득, 적의Wave 공격 등 다채로운 플레이가 가능하다. 또한, 팀 플레이를 중시하는 구조로, 5명의 플레이어가 협력하여 적們을 제압하는 것이 주요 목표로 보인다. 플레이 전에는 맵의 구조와 주요 임무, 캐릭터의 스킬 시스템을 미리 숙지하는 것이 중요하다. 특히, 적의Wave 공격 타이밍과 패턴을 분석하여 방어 전략을 세우는 것이 핵심이다. 또한, 아이템과 업그레이드 시스템이 맵의 진행에 큰 영향을 미치므로, 자원 관리와 스킬 포인트 분배에 신중을 기해야 한다. 맵의 난이도는 플레이어의 협력과 전략에 따라 크게 달라지므로, 초보자보다는 어느 정도의 경험이 있는 플레이어에게 더 적합할 것으로 추정된다. 추천 대상은 RPG와 디펜스 장르를 좋아하는 유저이며, 팀 플레이를 즐기는 유저에게 특히 매력적으로 다가올 것이다. 맵의 분위기는 해적풍과 코믹한 요소가 혼합되어 있어, 분위기 있는 플레이를 원한다면 이 맵을 추천한다. ‘SpongeBob RPG’ is a StarCraft: Brood War UMS custom map where SpongeBob and his friends battle against Plankton and hostile forces to survive. The map features a desert tile set and unfolds across a vast 4096×4096 space. Players control SpongeBob and his allies to fend off enemy attacks while completing various missions as the story progresses. The map blends RPG elements with defense mechanics, offering diverse gameplay through skill upgrades, item collection, and wave-based enemy assaults. Designed with teamwork in mind, it requires five players to cooperate and defeat the enemy forces. Before playing, it’s crucial to familiarize yourself with the map layout, key missions, and character skill systems. Analyzing enemy wave timings and patterns is essential for building an effective defense strategy. Since items and upgrades significantly impact progression, careful resource management and skill point allocation are necessary. The difficulty varies greatly depending on player coordination and strategy, making it more suitable for experienced players than beginners. Ideal for fans of RPG and defense genres, this map will particularly appeal to those who enjoy team-based gameplay. With its mix of pirate-themed and comedic elements, it offers an immersive experience for those seeking a unique atmosphere.
SHARED BASES
SHARED BASES는 스타크래프트 브루드워의 멀티 플레이를 위한 partager형 맵으로, 시작 시 인접한 플레이어와 동맹을 맺을 수 있는 독특한 시스템을 채용한 유즈맵이다. 평범한 4096x4096 크기의 사막 타일셋 맵이지만, 초반 동맹 시스템 덕분에 전형적인 밀리맵과는 다른 전략적 재미를 느낄 수 있다. 각 플레이어는 시작 지점에서 가까운 상대와 자동으로 동맹을 맺으며, 이 동맹은 게임 초반 자원 분배와 방어 전략에 큰 영향을 미친다. 맵 중앙에는 넓은 평지 공간이 펼쳐져 있어 조기 대치나 기지 확장 시 유리한 위치를 선점할 수 있으며, 전체적으로는 협력과 경쟁이 혼합된 플레이 경험을 제공한다. 동맹의 중요성 때문에 초보자들은 동맹 상대 선택과 초기 자원 관리에 주의해야 하며, 숙련자들은 동맹을 활용한 전략적 이득과 배신 가능성을 고려한 플레이를 시도해 볼 수 있다. 맵의 구조상으로는 비교적 평이한 편이지만, 동맹 시스템 덕분에 단순히 멀티 플레이를 즐기는 것보다 더 깊은 전략적 선택지가 제공된다는 점이 큰 특징이다. 특히 동맹 상대와의 협력과 배신 가능성을 염두에 둔 플레이가 이 맵의 재미를 좌우한다. 공략 팁으로는, 시작 시 동맹 상대가 같은 진영일 경우 초반 자원 분배를 최대한 활용하고, 다른 진영일 경우 동맹의 동맹까지 고려한 광역 전략을 세우는 것이 중요하다. 또한, 맵 중앙의 넓은 공간을 차지하는 타이밍과 동맹의 움직임을 예측하는 능력이 승패를 가를 수 있다. 이 맵은 스타크래프트의 기본 멀티 플레이를 любитель 수준에서 벗어나고 싶은 유저들에게 적합하며, 동맹 시스템을 통해 보다 전략적인 멀티 플레이를 경험해 보고 싶은 플레이어들에게 추천할 만하다. 다만, 동맹 시스템의 특성상 운에 의존하는 요소가 다소 있어 숙련된 플레이어와 초보자 간의 실력 차이를 좁히기 위한 밸런스 조정은 필요할 수 있다. 전체적으로는 협력과 배신, 전략과 운이 혼합된 재미있는 멀티 플레이 경험을 제공하는 맵이라고 할 수 있다. 특히 같은 팀 내에서도 동맹이 달라질 수 있는 가능성을 염두에 두고 플레이한다면, 이 맵의 전략적 깊이가 더 높아질 것이다. SHARED BASES is a custom map for StarCraft: Brood War multiplayer that adopts a shared-base system, allowing players to form alliances with nearby opponents at the start. Despite being a standard 4096x4096 desert tileset map, its unique early-game alliance system offers a different strategic experience compared to typical melee maps. Players automatically ally with the closest opponent at the starting location, which significantly impacts early resource distribution and defensive strategies. A wide open plain in the center of the map provides an advantageous position for early skirmishes or base expansions, blending cooperation and competition into the gameplay. Beginners should pay close attention to ally selection and initial resource management due to the importance of alliances, while experienced players can explore strategic advantages and potential betrayals. While the map's structure is relatively simple, the alliance system introduces deeper strategic choices beyond casual multiplayer. The fun of this map largely depends on cooperation with allies and the potential for betrayal. For optimal play, maximize early resource sharing if your ally is of the same race, or plan a broader strategy considering allies of allies if they are of a different race. Controlling the central open space and predicting ally movements can often decide the outcome. This map is ideal for players looking to move beyond basic multiplayer and experience more strategic gameplay through its alliance system. However, due to the reliance on the alliance mechanic, some luck-based elements may affect balance, potentially narrowing the skill gap between experienced and novice players. Overall, it offers an engaging multiplayer experience where cooperation, betrayal, strategy, and luck intertwine. Players who consider the possibility of shifting alliances within the same team will find even greater depth in the map's strategy.
E V O L V E S V.MiTiS
스타크래프트 브루드워의 유즈맵인 《E V O L V E S V.MiTiS》는 플레이어들이 끊임없이 진화하는 적들을 상대로 방어전을 펼치는 디펜스 장르의 맵입니다. 내부 맵 제목과 설명만으로도 알 수 있듯이, '진화'라는 키워드가 중심이 되는 이 맵은 단순한 방어가 아니라 끊임없이 변화하는 적의 패턴과 공격 루트를 분석하고 대응해야 하는 전략적 깊이가 느껴집니다. 6명의 플레이어가 각각 다른 위치에서 시작하며, 중앙의 본진을 중심으로 퍼져 있는 멀티 지역과 좁은 통로를 활용한 입구막기 전략이 필수적입니다. 맵 구조는 우주 테마의 타일셋을 사용해 어두운 배경과 번쩍이는 빛 효과로 시각적인 긴장감을 조성합니다. 적의 공격 루트는 맵 곳곳에 흩어져 있는 입구와 좁은 통로로 구성되어 있으며, 플레이어는 이를 미리 방어하거나 효율적으로 배치한 방어 건물로 막아야 합니다. 특히, 적의 유닛이 진화할 때마다 공격 패턴이 달라지므로, 초반 방어는 물론 중후반까지도 끊임없는 전략적 재수정이 요구됩니다. 맵의 symmetrical한 구조는 양측의 밸런스를 맞추는 데 도움을 주지만, 중앙 지역을 둘러싼 좁은 길목은 입구막기 플레이어에게는 전략적 요충지가 됩니다. 이 맵의 가장 큰 특징은 '진화' 시스템에 있습니다. 적 유닛이 일정 시간마다 또는 특정 조건을 만족할 때마다 stronger하고 새로운 능력치를 지닌 유닛으로 진화합니다. 이를 막기 위해서는 플레이어 간 협력이 필수적이며, 각 플레이어의 역할 분담이 승패를 좌우할 수 있습니다. 또한, 멀티 지역을 확보하고 방어선을 구축하는 동시에, 상대방의 멀티를 견제하는 공격적 플레이도 중요해 다양한 전략이 요구됩니다. 초보 플레이어는 적의 진화 속도를 감당하지 못해 어려움을 느낄 수 있지만, 경험이 쌓이면 각 플레이어의 역할을 숙지하고 효율적으로 방어선을 구축할 수 있게 됩니다. 추천 대상은 전략적 사고와 협력이 필요한 고수 플레이어입니다. 맵의 symmetrical한 구조와 좁은 통로, 끊임없는 진화 시스템은 초보자보다는 중수 이상의 플레이어에게 더 적합합니다. 또한, 팀 플레이가 필수적이므로 친구들과 함께 플레이하면 더욱 재미있게 즐길 수 있습니다. 플레이 전에는 맵의 구조와 입구 위치, 적의 진화 패턴을 미리 숙지하고, 방어 건물의 효율적인 배치와 멀티 지역 확보를 연습하는 것이 중요합니다. 특히, 좁은 통로에서의 입구막기 전략은 이 맵의 승패를 좌우하는 핵심 요소이므로, 이를 중심으로 전략을 세우는 것이 좋습니다. StarCraft: Brood War’s custom map *E V O L V E S V.MiTiS* is a defense-style map where players must hold off constantly evolving enemies. As the name and description suggest, "evolution" is the core theme—this isn’t just about static defense but about analyzing and adapting to shifting enemy patterns and attack routes. Six players start in different positions, and defending the central main base while controlling the scattered multi-locations and narrow passages is essential. The map uses a space-themed tileset, with a dark backdrop and flashing light effects creating a tense visual atmosphere. Enemy attack routes are spread across various entrances and tight corridors, forcing players to either preemptively block them or deploy defensive structures efficiently. Since enemy units evolve over time, changing their attack patterns, players must continuously adjust their strategies from the early game all the way to the late game. While the map’s symmetrical design helps balance both sides, the narrow paths surrounding the central area become critical chokepoints for players tasked with defending entrances. The defining feature of this map is its "evolution" system. Enemy units periodically grow stronger or gain new abilities when certain conditions are met. Countering this requires strong teamwork, as each player’s role and contribution can determine victory or defeat. Securing multi-locations, building defensive lines, and pressuring the opponent’s expansions are all vital, demanding a mix of defensive and aggressive strategies. Novice players may struggle to keep up with the rapid evolution of enemies, but as they gain experience, they can learn each role and optimize their defenses. This map is best suited for advanced players who enjoy strategic thinking and teamwork. Its symmetrical layout, tight corridors, and constant evolution make it more accessible to intermediate and higher-level players rather than beginners. Since teamwork is essential, playing with friends can make the experience even more enjoyable. Before jumping in, study the map layout, entrance locations, and enemy evolution patterns. Practice efficient building placement and multi-taking, as controlling narrow chokepoints is often the key to victory—build your strategy around securing those critical passages.
TMNT
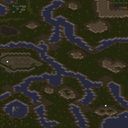
TMNT는 스타크래프트 브루드워의 UMS(유즈맵) 장르로, 닌자 거북이 시리즈의 세계관을 배경으로 한 디펜스형 맵이다. 맵은 사막 타일셋을 기반으로 하며, 4명의 플레이어가 협력하거나 경쟁하는 방식으로 진행된다. 맵 중앙에는 주요 목표가 있는 것으로 보이며, 'Find Master Splinter'라는 내부 설명을 통해 특정 목표를 달성해야 한다는 점이 유추된다. 구조상으로는 방어 지점과 적의 웨이브가 오는 듯한 패턴이 확인되며, 플레이어는 자원 수집과 방어 시설을 구축하는 동시에 목표를 향해 나아가야 할 것으로 추정된다. 맵의 규모는 4096x4096으로 상당히 크며, 넓은 시야와 다양한 지형을 활용한 전략적 플레이가 가능할 것으로 보인다. 디자인 측면에서는 사막 환경답게 건조한 분위기와 더불어, 닌자 거북이 시리즈의 특징을 살린 디테일이 곳곳에 반영되어 있을 것으로 예상된다. 플레이어들은 팀을 이뤄 협력하거나, 개별적으로 목표를 달성하는 방식으로 게임을 진행할 수 있으며, 방어와 진격을 병행하는 균형 잡힌 플레이가 요구된다. 초보자와 숙련자 모두 즐길 수 있도록 난이도는 조절 가능할 것으로 보이며, 예상 플레이 시간은 맵의 규모와 목표 달성까지의 난이도를 고려할 때 약 30분 내외로 추정된다. 맵의 인코딩은 cp949로 한국어 환경에서 안정적으로 구동될 수 있도록 설계된 것으로 보인다. TMNT는 닌자 거북이 팬이라면 특히 관심 가질 만한 맵으로, 시리즈의 팬이 아니더라도 디펜스와 협력 플레이를 좋아하는 유저들에게 추천할 만하다. 플레이 전에는 맵의 목표와 방어 시스템을 미리 숙지하고, 팀원과의 소통을 중시하는 전략적 플레이가 필요하다. 또한, 넓은 맵을 효율적으로 활용하기 위해 빠른 이동과 자원 관리에 주의를 기울여야 할 것이다. TMNT는 닌자 거북이 팬과 스타크래프트 유즈맵爱好자 모두에게 즐거움을 줄 수 있는 작품으로 보인다. 맵을 플레이하기 전에는 내부 설명과 제공된 목표를 꼼꼼히 확인하고, 팀원과의 전략 수립을 통해 원활한 플레이를 도모해야 한다. 넓은 사막 지형과 복잡한 구조가 특징인 이 맵은, 플레이어의 전략적 사고와 협력심을 동시에 시험할 수 있는 요소로 가득 차 있다. 닌자 거북이의 세계관을 체험할 수 있는 독특한 경험을 제공하는 TMNT는, 스타크래프트 유즈맵 커뮤니티에서 한 번쯤 시도해볼 가치가 있는 작품이다. 특히 디펜스와 팀 플레이를 좋아하는 유저들에게는 더할 나위 없이 좋은 선택지가 될 것이다. 맵의 난이도는 조절 가능하도록 설계되어 있어, 초보자와 숙련자 모두에게 적합한 난이도 설정으로 즐길 수 있을 것으로 보인다. TMNT is a UMS (user-made map) genre map for *StarCraft: Brood War* set in the world of the *Teenage Mutant Ninja Turtles* series, featuring a defense-type gameplay style. The map is based on a desert tileset, where four players either cooperate or compete. At the center of the map, there appears to be a main objective, as suggested by the internal description "Find Master Splinter," implying that players must achieve a specific goal. The structure includes defensive points and what seems to be waves of enemies, requiring players to gather resources, build defensive structures, and advance toward the objective simultaneously. The map is quite large at 4096x4096, offering ample visibility and diverse terrain for strategic gameplay. In terms of design, it likely captures the arid atmosphere of a desert environment while incorporating the distinctive details of the *TMNT* series throughout. Players can team up to cooperate or work individually to complete objectives, balancing defense and offense in a well-rounded playstyle. The difficulty is likely adjustable to cater to both beginners and experienced players, with an estimated playtime of around 30 minutes, factoring in the map’s scale and the challenge of achieving the goal. The map is encoded in CP949, ensuring stable operation in Korean environments. TMNT is a map that fans of the *TMNT* series will particularly appreciate, though it also appeals to players who enjoy defense and cooperative gameplay. Before playing, it’s important to familiarize yourself with the map’s objectives and defensive systems, prioritize communication with teammates, and focus on efficient movement and resource management to make the most of the vast terrain. With its expansive desert landscape and intricate design, the map tests both strategic thinking and teamwork. Offering a unique experience immersed in the *TMNT* universe, TMNT is a worthwhile map to try in the *StarCraft* UMS community, especially for those who enjoy defense and team-based gameplay. Its adjustable difficulty ensures it’s accessible to players of all skill levels, making it an excellent choice for both beginners and veterans.
맵 선택 가이드
태그는 맵의 핵심 특징을 빠르게 설명하지만 제작 버전마다 규칙이 다를 수 있습니다. 상세 설명에서 권장 인원, 난이도, 플레이 시간과 버전을 함께 확인한 뒤 다운로드하세요.