
협동 플레이 스타크래프트 맵 모음
'협동 플레이' 태그가 등록된 맵을 모았습니다. 장르 하나로 찾기 어려운 플레이 방식, 난이도와 특징을 중심으로 인기 맵과 최신 맵을 비교해 보세요.
- 등록 맵
- 120개
- 누적 다운로드
- 2
- 누적 조회
- 4,571
인기 맵
다운로드와 조회 반응이 높은 맵입니다.
디지몬 운빨 디펜스 (Digimon Lucky Defense)
‘디지몬 운빨 디펜스’는 스타크래프트: 브루드워의 유즈맵으로, 디지몬 시리즈의 캐릭터들이 등장하는 디펜스 장르의 맵이다. 맵의 중앙은 넓은 길로 연결된 채널 구조로 이루어져 있으며, 플레이어는 이 길 위로 몰려오는 적들을 막아내야 한다. 맵 좌측 하단과 우측 상단에는 각각의 시작 지역이 배치되어 있어, 4명의 플레이어가 각각의 진영에서 시작해 협력하거나 경쟁하며 진행하는 방식이다. 적의 웨이브는 랜덤하게 소환되며, 플레이어는 제한된 자원으로 디지몬을 진화시키거나 스킬을 사용해 방어선을 구축할 수 있다. 맵의 배경은 사막 타일셋을 활용해 건조한 사막 지형을 연출하며, 길 양측으로는 지형적 요충지가 배치되어 있어 방어 포인트를 설정하기 용이하다. 플레이어는 게임 시작 전, 각자 보유한 디지몬의 초기 등급과 스킬을 고려해 전략을 세워야 하며, 랜덤한 진화 시스템과 운빨 요소가 게임의 재미를 더한다. 특히, 적의 웨이브가 지속적으로 밀려오므로 빠른 판단과 효율적인 자원 관리가 필수적이다. 맵의 구조상 길목이 좁아져 있는 지점들이 있어, 방어 포인트를 잘 선정하면 적은 피해로도 웨이브를 막아낼 수 있다. 반면, 방어선을 잘못 세우면 적의 공격에 vulnerable해질 수 있으므로 신중한 플레이가 요구된다. 이 맵은 디지몬 팬뿐만 아니라 디펜스 장르를 즐기는 플레이어들에게도 매력적이다. 디지몬의 다양한 진화 루트와 스킬을 활용한 전략적 플레이가 가능하며, 랜덤한 요소 덕분에 매번 다른 플레이 경험을 제공한다. 초보자도 쉽게 접근할 수 있지만, 고수들은 더욱 정교한 전략을 구사할 수 있어 다양한 층위의 플레이가 가능하다. 다만, 랜덤 요소로 인한 불공정함이 발생할 수 있으므로, 플레이 전 규칙과 밸런스에 대한 사전 확인을 권장한다. 추천 대상은 디지몬 팬, 디펜스 장르 애호가, 그리고 팀플레이를 즐기는 유저들이다. 특히 4인 플레이 시 팀 간의 협력이 중요해지므로, 커뮤니케이션이 원활한 그룹에서 즐기면 더욱 재미있다. 맵의 난이도는 초보자도 쉽게 접근할 수 있도록 설계되었지만, 고난이도 웨이브에서는 숙련된 플레이가 필요하다. 플레이 전 디지몬의 진화 루트와 스킬을 숙지하고, 맵의 주요 방어 포인트를 미리 확인해 두는 것이 좋다. "Digimon Fortune Defense" is a StarCraft: Brood War custom map featuring characters from the Digimon series in a defense genre. The map consists of a central channel structure with wide paths connecting different areas, where players must defend against waves of enemies advancing along these paths. Starting zones are placed at the bottom-left and top-right corners, allowing four players to begin in their respective factions and either cooperate or compete as the game progresses. Enemy waves spawn randomly, and players must use limited resources to evolve their Digimon or activate skills to build defensive lines. The map employs a desert tileset to create a dry, arid terrain, with strategic chokepoints along the paths making it easier to establish strong defensive positions. Before starting, players should strategize based on their initial Digimon ranks and available skills, as the random evolution system and luck-based elements add to the game's appeal. Since enemy waves continuously push forward, quick decision-making and efficient resource management are crucial. The map features narrow passages where chokepoints can be set up, allowing players to repel waves with minimal damage if positioned well. However, poor defensive line placement can leave players vulnerable to enemy attacks, making careful planning essential. This map appeals not only to Digimon fans but also to players who enjoy defense games. Its variety of Digimon evolution paths and skill-based strategies offer deep tactical gameplay, while the random elements ensure a fresh experience each time. While accessible to beginners, skilled players can employ more refined tactics, catering to a wide range of skill levels. That said, the random elements may lead to occasional unfairness, so it's advisable to check the rules and balance beforehand. The map is recommended for Digimon fans, defense genre enthusiasts, and those who enjoy team play. Cooperation between teammates becomes especially important in 4-player mode, making it ideal for groups with good communication. While designed to be approachable for beginners, higher difficulty waves require experienced play. Before starting, it's helpful to familiarize yourself with Digimon evolution paths and skills, as well as identify key defensive chokepoints on the map.
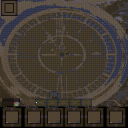
이세계 디펜스 (The Otherworld Defense)
스타크래프트 브루드워의 유즈맵 장인에 의해 만들어진 이세계 디펜스가 제공하는 디펜스 형식의 흥미로운 게임 경험은 플레이어들에게 색다른 재미를 선사한다. 이 맵은 내부 설명에서 언급된 대로 「어느날 갑작스럽게 폭주한 팬덤이세돌」을 제어하는 내용을 담고 있는 것으로 보이며, 팬덤을 안정화시키는 과정이 하나의 스토리적 요소가 되어 플레이어의 몰입도를 높인다. 맵의 전체적인 구도는 넓은 사막 지형을 배경으로 펼쳐지며, 중앙에 위치한 주요 방어 지점을 중심으로 적의 공격을 막아내는 구조로 설계되어 있다. 타일셋이 사막으로 설정되어 있어 건조한 환경의 분위기를 잘 연출하고 있으며, 지형 자체는 비교적 평탄한 편이지만 곳곳에 있는 언덕과 오아시스 지역이 전략적 요소를 제공한다. 맵 상단과 하단, 좌우에 배치된 입구들을 통해 끊임없이 몰려드는 적들을 효과적으로 방어해야 하며, 방어 시설의 배치와 자원 관리가 승리의 핵심이다. 맵의 크기가 매우 크고 넓은 탓에 넓은 시야를 확보하는 것이 중요하며, 초반에는 소규모의 적들을 상대하다가 후반으로 갈수록 대규모의 웨이브가 등장하는 구조로 추정된다. 방어 시설의 종류나 특수 능력, 승리 조건 등은 맵 설명이나 이미지에서 명확히 확인되지 않지만, 넓은 공간을 활용한 방어 라인 구축과 적절한 자원 배분이 요구될 것으로 보인다. 이 맵은 특히 디펜스 장르에 익숙한 플레이어들에게는 익숙한 요소들이 많겠지만, 넓은 맵과 사막 지형의 조화로 인해 전략적인 깊이가 한 층 더해진다. 또한, 플레이어 간의 협력이 중요한 요소로 작용할 가능성이 높은데, 팀플레이가 필수적이지는 않지만 다수의 입구를 방어해야 하는 구조상 2인 이상의 팀 구성이 유리할 것으로 보인다. 추천하는 플레이 스타일은 방어 라인을 조기에 구축하고, 자원 수집을 지속적으로 병행하면서 후반 웨이브에 대비하는 것이다. 초보자의 경우 방어 라인의 중요성을 깨닫지 못하고 자원을 과도하게 소비하는 경우가 많으므로, 자원과 방어 시설 간의 균형을 carefully 관리하는 것이 중요하다. 또한, 맵의 넓은 크기 탓에 맵 리딩 능력이 부족한 플레이어는 시야 확보와 자원 분배를 소홀히 할 가능성이 있으니 맵의 주요 지점(입구, 자원 지역, 방어 포인트)을 미리 숙지하는 것이 좋다. 이세계 디펜스는 넓은 맵과 디펜스 장르의 특징을 잘 조합하여 플레이어들에게 긴장감과 전략적 재미를 동시에 제공하는 맵으로, 디펜스 매니아뿐만 아니라 넓은 맵과 전략적 요소가 좋아하는 유저들에게도 추천할 만한 작품이다. 다만, 맵의 넓은 크기와 복잡한 지형 탓에 첫 플레이 시에는 다소 버겁게 느껴질 수 있으니, 초반에 방어 라인을 안정화시키는 연습을 충분히 한 뒤 도전하는 것이 좋다. 또한, 팀플레이가 가능한 경우라면 팀원과의 원활한 소통을 통해 방어 라인을 분산시켜 더 효율적인 방어가 가능할 것이다. 이 맵의 특징은 넓은 공간을 활용한 넓은 시야와 전략적 배치에 있으며, 이러한 요소들이 플레이어의 전략적 사고를 자극하여 디펜스 장르에 대한 새로운 재미를 느낄 수 있도록 도와준다. This StarCraft: Brood War custom map, "이세계 디펜스(The Otherworld Defense)", offers a refreshing take on the defense genre by integrating narrative elements inspired by the internal description mentioning "a rampaging fandom." Set against a vast desert backdrop with the tile set clearly designed for arid environments, the map challenges players to defend multiple entrances from relentless enemy waves, with the central area serving as the primary defensive hub. The massive 6144x6144 map size ensures a sprawling battlefield where strategic positioning and resource management become critical, especially as enemy waves intensify in later stages. While the exact types of defensive structures and victory conditions remain unclear from the provided data, the map’s design suggests a need for balanced resource allocation and early establishment of defensive lines to withstand escalating assaults. Players familiar with defense maps will appreciate the strategic depth added by the desert terrain, which introduces natural choke points and elevated positions for better vantage points. Although the map does not explicitly require team play, coordinating with teammates—especially when defending multiple entrances—can significantly improve efficiency. Beginners may struggle with the map’s scale and resource management, so a focus on early defensive setup and controlled expansion is highly recommended. The combination of a large map, strategic terrain, and wave-based enemy assaults makes "이세계 디펜스" an engaging experience for both seasoned defense map enthusiasts and players who enjoy maps with a strong emphasis on spatial strategy. To fully enjoy this map, players should prioritize map awareness, early defensive planning, and efficient resource use, ensuring a smoother transition into the more intense later waves.
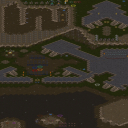
헬름즈 딥 v. 아나타 18.0 (Helms Deep v. Annatar 18.0)
스타크래프트 브루드워의 유즈맵 중에서도 전략성과 긴장감을 동시에 느낄 수 있는 ‘헬름즈 딥 v. 아나타 18.0(Helms Deep v. Annatar 18.0)’은 사막 지형을 배경으로 펼쳐지는 대규모 디펜스 형식의 맵입니다. 맵 중앙에 위치한 요새는 거대한 사각형 구조로 되어 있으며, 주변으로 여러 개의 방어 포인트가 배치되어 있습니다. 플레이어는 이 요새를 중심으로 적의 공격을 버텨내며 생존해야 하는 구조로 보이며, 요새의 각 모서리에는 대형 포탑이나 방어 시설이 있는 것으로 보입니다. 맵의 외곽은 넓은 평야가 펼쳐져 있어 적의 이동 경로가 다양하게 분포되어 있으며, 이를 활용해 전략적인 방어선을 구축할 수 있습니다. 이 맵은 다수의 플레이어가 참여하는 팀 대항전 형식으로 추정되며, 각 플레이어는 요새의 방어 또는 공격 역할을 맡아 진행하는 것으로 보입니다. 맵 상단과 하단에는 각각의 진영이 배치되어 있으며, 요새를 중심으로 한 방어 라인은 맵의 구조상 좁은 통로와 넓은 평지를 모두 포함하고 있어 방어 전략의 다양성을 요구합니다. 맵 중앙의 요새는 마치 ‘호수의 눈’이 떠오르는 듯한 독특한 디자인으로, 방어 시설이 집중되어 있어 적의 공격을 효과적으로 차단할 수 있도록 설계된 것으로 보입니다. 또한, 맵의 외곽에는 넓은 공간이 있어 적의 이동을 유도하거나 포위 공격을 시도할 수 있는 기회가 많습니다. 이 맵을 플레이하기 위해서는 방어와 공격의 균형을 carefully 조절해야 하며, 요새의 각 포인트를 효과적으로 방어하면서도 적의 약점을 노릴 수 있는 전략이 필요합니다. 플레이어 간의 협력이 중요한 만큼, 팀원 간의 호흡이 좋아야만 승리를 이끌어낼 수 있을 것입니다. 특히 요새의 각 모서리나 중앙 통로에서 벌어지는 전투는 맵의 긴장감을 한층 높이며, 맵의 구조상 넓은 시야를 확보하기 어려운 부분이 있어 예측하지 못한 공격을 받을 수도 있습니다. 따라서, 맵을 플레이하기 전에 요새의 구조와 각 방어 포인트의 위치를 충분히 숙지하는 것이 중요합니다. 이 맵은 주로 방어와 공격이 번갈아 가며 진행되는 만큼, 플레이어의 판단력과 순간적인 결정력이 승리를 좌우할 것입니다. 이 맵은 스타크래프트 유즈맵 중에서도 규모가 큰 편에 속하며, 대규모의 전투를 즐기고자 하는 플레이어들에게 적합한 작품입니다. 특히 디펜스와 공격이 혼합된 형식의 맵이기 때문에, 전략성을 중시하는 플레이어라면 즐겁게 플레이할 수 있을 것입니다. 다만, 맵의 복잡한 구조와 넓은 평야로 인해 초보자는 적응하는 데 시간이 걸릴 수 있으니, 먼저 연습 모드를 활용해 맵의 구조를 익히는 것이 좋습니다. 또한, 팀원과의 원활한 의사소통을 통해 전략을 공유하고, 요새의 각 포인트를 효율적으로 방어할 수 있도록 노력해야 합니다. 이 맵은 스타크래프트의 클래식한 유즈맵 중에서도 손꼽히는 작품으로, 오랜 기간 사랑받아 온 만큼, 플레이어들에게 새로운 전략과 재미를 선사할 것입니다. Among the custom maps of *StarCraft: Brood War*, *Helms Deep v. Annatar 18.0* stands out for delivering both strategic depth and intense suspense. Set against a desert landscape, this large-scale defense-style map features a massive square fortress at its center, surrounded by multiple defensive points. Players must hold their ground around the fortress, survive enemy assaults, and defend its corners, where heavy turrets and defensive structures are likely positioned. The outer edges of the map stretch into vast plains, offering varied enemy approach routes and opportunities to establish strategic defensive lines. Designed for team-based battles with multiple players, each participant takes on either a defensive or offensive role centered around the fortress. The top and bottom of the map house opposing factions, and the defensive lines around the fortress include both narrow passages and open fields, demanding diverse defensive strategies. The fortress’s central design resembles a "lake’s eye," with concentrated defensive structures to effectively block enemy advances. The map’s outer areas provide ample space to lure or encircle opponents, adding layers of tactical play. Success on this map hinges on balancing defense and offense, efficiently guarding key points of the fortress while exploiting enemy weaknesses. Teamwork is crucial, and strong coordination among players is essential for victory. Battles at the fortress’s corners or central corridors heighten the tension, and the map’s layout—where wide visibility is limited—can lead to unexpected ambushes. Familiarizing yourself with the fortress’s layout and defensive points beforehand is vital. As a large-scale custom map, it’s ideal for players seeking epic battles where defense and offense alternate dynamically. Its hybrid defense-attack mechanics make it a perfect fit for those who prioritize strategy. However, the map’s intricate design and expansive terrain may pose a challenge for beginners, so practicing in a training mode to learn the layout is recommended. Clear communication with teammates is key to sharing strategies and defending key points efficiently. A classic among *StarCraft* custom maps, *Helms Deep v. Annatar 18.0* has earned enduring popularity for offering fresh strategies and thrilling gameplay.
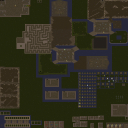
드래곤 오브 레전드 1.6v (Dragon of Legend 1.6v)
《드래곤 오브 레전드 1.6v》는 스타크래프트: 브루드워의 유즈맵으로, 전설의 용을 둘러싼 전략적 전투와Resource Management를 중심으로 설계된 디펜스 장르의 정석에 가까운 작품이다. 맵은 사막 테마의 넓은 평야와 고저차가 있는 지형을 활용하여 플레이어에게 전략적 깊이를 제공하며, 4명의 플레이어가 협력하거나 경쟁하며 진행된다. 맵 중앙에는 거대한 드래곤이 등장하며, 이는 맵의 핵심 목표로 추정된다. 플레이어는Resource를 확보하고, 방어선을 구축하며, 드래곤의 공격을 방어하거나 이를 활용하여 상대방을 압박하는 방식으로 진행할 수 있는 것으로 보인다. 맵의 구조는 용의 등장 시점과 진행 방식에 따라 크게 변화하는 방식으로, 전략적 선택과 타이밍이 게임의 승패를 좌우할 가능성이 크다. 또한, 맵의 히든 요소가 존재한다는 설명으로 미루어 볼 때, 숨겨진 미션이나 보너스 목표가 포함되어 있어 재플레이성을 높일 수 있는 설계가 적용되었을 것으로 추정된다. 밸런스 수정이 여러 차례 진행되었다는 점은 제작자의 노력이 반영된 결과물임을 시사하며, 특히 '피쉬'와 'Kai_oR'가 수정에 관여했다는 점은 커뮤니티 내에서의 피드백을 적극 반영했다는 증거로 보인다. 이 맵은Resource 관리와 방어 전략에 중점을 둔 만큼,Resource 확보의 중요성을 이해하고, 효율적인 방어선을 구축하는 데 중점을 둔 플레이어에게 적합한 작품이다. 또한, 4인 멀티 플레이를 전제로 설계되었으므로, 팀워크와 전략적 협력이 요구되는 맵으로, 개인전보다는 팀전 또는 협동 플레이를 선호하는 유저들에게 추천할 만하다. 맵을 플레이하기 전에는Resource 확보 방법, 드래곤의 등장 타이밍, 그리고 방어선의 중요성을 숙지하고,Resource 확보와 방어 전략을 균형 있게 운영할 수 있는 준비를 갖추는 것이 중요하다. 특히,Resource가 부족한 초기 단계에서Resource 확보를 소홀히 하면, 이후 드래곤의 공격이나 상대방의 압박에 대응하기 어려워질 수 있으므로,Resource 확보의 우선순위를 높게 두는 것이 좋다. 《Dragon of Legend 1.6v》 is a custom map for *StarCraft: Brood War*, designed as a quintessential defense genre title centered around strategic battles and resource management revolving around legendary dragons. The map leverages a vast desert-themed plain with varied terrain to offer players strategic depth, where four players either cooperate or compete. A massive dragon appears at the center of the map, serving as the core objective. Players secure resources, build defensive lines, and either defend against the dragon's attacks or use it to pressure opponents. The map's structure dynamically changes based on the dragon's appearance and progression, making strategic choices and timing crucial to victory. Given the mention of hidden elements, it likely includes secret missions or bonus objectives to enhance replayability. The multiple balance adjustments suggest the creator's dedication, with contributions from 'Fish' and 'Kai_oR' indicating active community feedback integration. Tailored for players who emphasize resource management and defense strategies, this map is best suited for those who prioritize efficient resource gathering and solid defensive setups. Designed for four-player multiplayer, it demands teamwork and strategic coordination, making it ideal for users who prefer team or cooperative play over solo matches. Before playing, it's essential to understand resource acquisition methods, the dragon's appearance timing, and the importance of defensive lines, ensuring a balanced approach to resource management and defense. Neglecting resource gathering in the early stages can leave players vulnerable to the dragon's attacks or enemy pressure, so prioritizing resource acquisition is key.
Income D! 2013!
스타크래프트 브루드워의 유즈맵 《Income D! 2013!》는 6인용 디펜스 장르 맵으로, 플레이어들이 자원을 끊임없이 확보하며 방어선을 구축하고 적의 공격을 막아내는 구조로 설계되었다. 맵 중앙에 위치한 메인 기지에서 시작해, 방어를 담당하는 플레이어들은 끊임없이 몰려드는 적 웨이브를 상대해야 한다. 맵의 핵심은 '수입' 시스템으로, 미네랄과 가스를 끊임없이 채굴해 방어용 유닛이나 건물을 업그레이드하는 데 사용해야 한다는 점이다. 맵의 지형은 비교적 평탄한 가운데 일부 고지대가 있어 시야 확보가 용이하며, 적의 공격로도 비교적 명확하게 나뉘어 있어 전략적인 대비를 할 수 있다. 맵 상단과 하단에 위치한Resource Areas에서는 자원이 끊임없이 생성되며, 이를 차지하기 위한Resource Wars가 발생할 수 있어 자원 확보 경쟁도 치열하다. 방어에 실패하면 메인 기지가 파괴되면서 패배하게 되며, 반대로 적을 모두 물리치면 승리 조건을 달성하게 된다. 맵의 분위기는 화려한 우주 타일셋으로 구성되어 있으며, 밤낮이 바뀌는 효과가 있어 긴장감을 더해준다. 초보자도 쉽게 접근할 수 있는 구조이지만, 적의 공격 패턴과 자원 확보 타이밍을 잘 읽어내야만 안정적인 승리를 이끌어낼 수 있다. 특히Resource Areas를 어떻게 차지하고 방어할 것인지, 자원 사용을 어떻게 최적화할 것인지에 따라 승패가 갈릴 수 있으므로 신중한 플레이가 요구된다. 4~6인용으로 설계된 만큼 팀플레이가 강제되며, 팀원 간의 커뮤니케이션이 원활하지 않으면 자원 경쟁에서 밀릴 위험이 크다. 전체적으로는 디펜스 장르의 기본 뼈대를 따르지만, 자원 시스템과Resource Wars가 결합되면서 전략적 깊이가 더해진 맵으로 평가된다. 평범한 디펜스 맵이 아니라Income D! 2013!만의 특징을 살려 플레이해보길 추천한다. Income D! 2013! is a 6-player UMS defense map in StarCraft: Brood War where players must continuously gather resources while building and upgrading defenses to withstand relentless enemy waves. The core mechanic revolves around the 'income' system, requiring players to mine minerals and gas to fund unit production and upgrades. The map features a relatively flat terrain with elevated positions for better vision, and enemy attack routes are clearly defined, allowing for strategic preparation. Resource Areas at the top and bottom generate resources continuously, often sparking Resource Wars for control. Failing to defend the main base leads to defeat, while eliminating all enemies grants victory. The map uses a vibrant space-themed tileset with day-night cycles, enhancing the immersive atmosphere. While the structure is beginner-friendly, mastering enemy attack patterns and resource timing is crucial for consistent wins. Optimal control of Resource Areas and resource allocation can determine victory or defeat. Designed for 4-6 players, teamwork is essential, as poor communication risks falling behind in resource competition. Unlike standard defense maps, Income D! 2013! integrates a unique resource-driven economy, adding strategic depth. Beyond basic defense mechanics, its signature income system makes it a standout experience worth trying.
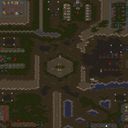
MTG MaguS Edition V2 8.5s
스타크래프트 브루드워의 UMS(유즈맵) 장르로 만들어진 MTG MaguS Edition V2는 7명의 플레이어가 참여하는 대규모 맵으로, 사막 타일셋을 기반으로 한 넓은 맵 구조가 특징이다. 맵은 중앙을 중심으로 대칭형으로 배치되어 있으며, 각 플레이어는 자신의 기지 near base에서 시작하여 리소스를 확보하고 유닛을 생산하는 동시에 적의 공격을 방어하거나 공격해야 한다. 맵의 이름과 버전(8.5s)에서 알 수 있듯이, 이 맵은 MTG(Magus The Game) 시리즈의 일환으로 개발되었으며,MagusEnjoy!에 의해 제작되었다고 추정된다. 맵의 해상도와 타일셋 특성상 넓은 시야와 전략적 배치의 중요성이 강조되며, 사막 맵답게 자원 채취 구역이 넓고 유닛 이동 경로가 복잡하게 구성되어 있다. 플레이어는 초기 자원과 유닛을 기반으로 초반 방어선을 구축해야 하며, 중반 이후에는 대규모 전투를 통해 상대방을 제압하는 것이 필수적이다. 맵의 symmetrical design과 넓은 공간을 활용한 유닛 배치 및 전략적 움직임이 핵심으로, 숙련된 플레이어는 자신의 기지를 방어하면서도 적의 약점을 노릴 수 있는 기회를 잡아야 한다. 초보자에게는 맵의 규모와 복잡성이 부담스러울 수 있지만, 팀플레이와 협동 전략을 배울 수 있는 좋은 기회가 된다. 맵의 버전과 개선 사항이 지속적으로 업데이트되어 왔다는 점에서, 개발자의 노력이 반영된 완성도 높은 맵으로 평가된다. 플레이 전에는 맵의 symmetrical 구조와 자원 분포를 미리 숙지하고, 초기 유닛 생산과 자원 관리 계획을 세우는 것이 중요하다. 또한, 맵의 넓은 시야를 활용한 정찰과 적의 움직임에 대한 대응이 승패를 좌우할 수 있다. 다양한 전략과 전술을 시도해 볼 수 있는 UMS 맵으로, 스타크래프트의 전략적 깊이를 즐기고자 하는 플레이어들에게 추천한다. MTG MaguS Edition V2 is a UMS (Use Map Settings) custom map for StarCraft: Brood War, designed for 7 players. Set in a desert tile environment, the map features a large, symmetrical layout where each player starts near their base, securing resources and producing units while defending against or attacking opponents. The name and version (8.5s) indicate this is part of the MTG (Magus The Game) series, developed by MagusEnjoy!. The high resolution and tile-set emphasize strategic positioning and expansive resource areas, with complex unit movement paths typical of desert-themed maps. Players must establish early defenses while leveraging the map's size for unit deployment and tactical maneuvers. The symmetrical design and open spaces require skilled players to balance base defense with exploiting enemy weaknesses. While the scale and complexity may overwhelm beginners, the map offers valuable lessons in teamwork and cooperative strategies. Continuous updates (as suggested by versioning) imply a polished and evolving experience. Before playing, familiarize yourself with the symmetrical layout and resource distribution, and plan initial unit production and resource management carefully. Scouting and adapting to enemy movements are critical, as the wide field of view allows for diverse strategies and tactics. Ideal for players seeking depth in StarCraft's strategic gameplay, this UMS map is highly recommended for those looking to explore varied and dynamic battlefield scenarios.
100층 빌딩 탈출하기 (Escape the 100-Story Building)
100층 빌딩 탈출하기는 스타크래프트 브루드워의 유즈맵으로, 플레이어가 방화범으로부터 안전을 위해 100층짜리 빌딩을 탈출하는 퍼즐형 장르의 맵이다. 맵의 구조는 빌딩 내부를 상세히 재현했으며, 각 층마다 다양한 장애물과 함정이 배치되어 있어 플레이어는 신중하게 길을 찾아야 한다. 맵의 분위기는 긴장감이 넘치며, 탈출을 성공하기 위해선 빠른 판단력과 전략이 요구된다. 특히 100층이라는 높은 층수는 플레이어에게 막대한 도전 과제를 제공하며, 각 층마다 숨겨진 비밀이나 숨겨진 길을 찾아야만 다음 단계로 나아갈 수 있다. 이 맵은 단순히 탈출하는 것을 넘어, 퍼즐과 액션이 조화를 이룬 흥미로운 경험을 제공한다. 초보자와 숙련자 모두 즐길 수 있도록 난이도가 조절되어 있으며, 특히 팀 플레이를 한다면 더 효율적으로 탈출할 수 있을 것이다. 다만, 맵의 크기가 크고 층수가 많기 때문에 플레이 시간이 길어질 수 있어 주의가 필요하다. 이 맵의 핵심은 '빠르게 생각하고, 신중하게 움직여야 한다'는 점으로, 단순하게 달리는 것만으로는 탈출이 불가능하다는 점을 기억해야 한다. 또한, 맵의 각 층마다 숨겨진 아이템이나 힌트가 존재할 가능성이 높아, 플레이어는 모든 층을 꼼꼼히 살피는 것이 중요하다. 이 맵은 퍼즐과 액션을 좋아하는 플레이어들에게 특히 추천되며, 팀원과의 협력이 탈출 성공률을 크게 높일 수 있다. 마지막으로, 이 맵은 스타크래프트의Classic 유즈맵으로서의 매력을 느낄 수 있도록 디자인되어 있어, 오랜 시간동안 사랑받아 온 classic 스타일을 좋아하는 플레이어들에게도 좋은 선택이 될 것이다. 플레이 전에는 맵의 구조와 각 층의 함정을 미리 숙지하는 것이 중요하며, 팀원과의 사전 협의를 통해 탈출 전략을 세우는 것도 좋은 방법이다. 이 맵을 즐기기 위해서는 단순히 달리는 것뿐만 아니라, 전략적 사고와 팀워크가 필수라는 점을 잊지 말아야 한다. "Escape from the 100-Story Building" is a custom map in *StarCraft: Brood War* where players must escape a 100-story building to avoid a fire, featuring a puzzle-style gameplay experience. The map meticulously recreates the interior of the building, with each floor presenting unique obstacles and traps that require careful navigation. The tense atmosphere demands quick decision-making and strategic planning to succeed. The sheer height of 100 floors presents a significant challenge, as players must uncover hidden paths or secrets on each floor to progress. Beyond mere escape, the map blends puzzles and action into an engaging experience, offering adjustable difficulty to suit both beginners and veterans. Team play enhances efficiency, making cooperation key to a successful escape. However, due to its size and multiple floors, the playtime can be lengthy, so patience is necessary. The core principle is to "think fast and move carefully"—mindless running won’t cut it. Each floor may hold hidden items or clues, so thorough exploration is essential. This map is especially recommended for players who enjoy puzzles and action, and teamwork drastically improves escape success rates. Designed to evoke the charm of classic *StarCraft* custom maps, it’s a great choice for fans of traditional styles who have loved these maps for years. Before playing, familiarizing yourself with the map’s structure and each floor’s traps is crucial, and coordinating with teammates beforehand can help devise an effective escape strategy. To fully enjoy this map, remember that strategic thinking and teamwork are just as important as speed.
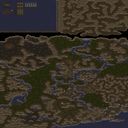
반지의 제왕 - 혼돈의 지역 (Lotr - Region of Chaos)
《반지의 제왕 - 혼돈의 지역(Lotr - Region of Chaos)》은 스타크래프트: 브루드워의 대표적인 유즈맵 중 하나로, 반지의 제왕 세계관을 배경으로 펼쳐지는 대규모 디펜스 및 서바이벌 장르의 맵이다. 맵은 사막 타일셋을 기반으로 8192x8192의 거대한 맵 크기를 자랑하며, 플레이어는 각각의 지역을 방어하면서 적의 끊임없는 공격을 버텨내야 한다. 맵의 구조는 중앙에 위치한 주요 거점을 중심으로 여러 개의 외부 지역으로 나뉘어져 있으며, 각 지역은 고유한 방어 구조와 전략적 요소를 갖추고 있다. 적군은 주로 사우론의 군대와 오크, 나즈굴 등으로 추정되며, 이들은 일정 주기마다 웨이브를 이루어 공격을 퍼붓는다. 맵의 진행은 웨이브 디펜스 형식으로, 플레이어는 자원 수집, 건물을 건설, 유닛을 생산 및 업그레이드하여 방어력을 강화해야 한다. 특히 맵의 일부 지역은 리소스가 제한적이거나 방어가 취약한데, 이러한 부분은 빠른 판단과 전략적 자원 관리가 요구된다. 맵의 분위기는 반지의 제왕의 서사시적 분위기를 잘 살렸고, 사운드나 이펙트도 그에 맞게 디자인된 것으로 보인다. 플레이어는 총 6명이 참여할 수 있으며, 각 플레이어는 개인의 전략을 세울 수 있지만 팀워크가 중요하다는 점도 특징이다. 이 맵은 대규모의 맵 크기와 복잡한 구조로 인해 초보자보다는 중급 이상의 플레이어에게 더 적합한데, 특히 디펜스와 서바이벌 장르에 익숙한 유저들에게 추천할 만하다. 플레이 전에는 맵의 주요 방어 포인트와 자원 위치, 적의 공격 패턴을 미리 숙지하는 것이 중요하며, 이를 위해 맵의 전체를 둘러보는 시간을 갖는 것이 좋다. 맵의 제작자는 Lightning303이며, 2010년 4월 16일에 제작된 것으로 기록되어 있다. 맵의 버전은 2.1이지만, 이후 2.7, 3.1 등 다양한 업데이트 버전이 존재한다는 점도 참고할 만하다. 이 맵은 반지의 제왕 팬뿐만 아니라 디펜스 및 서바이벌 장르의 유즈맵을 즐기는 모든 스타크래프트 플레이어에게 인기가 있는 맵 중 하나로 꼽힌다. 맵의 거대한 스케일과 깊이 있는 전략적 요소는 스타크래프트 유즈맵의 장점을 극대화한 작품으로, 여러 번의 플레이를 통해 새로운 전략을 발견할 수 있는 재미가 있다. 또한, 맵의 디자인과 분위기는 반지의 제왕의 세계관을 좋아하는 이들에게는 큰 매력으로 다가올 것이다. 다만, 맵의 복잡한 구조와 높은 난이도로 인해 처음 플레이하는 유저는 다소 부담스러울 수 있으니, 쉬운 난이도부터 시작하는 것이 좋다. 맵을 플레이하기 전에 각 지역별로 어떤 유닛이 생산 가능한지, 어떤 방어 건물이 있는지 등을 정리해두면 더 효율적인 플레이가 가능하다. 특히, 맵의 일부 지역은 리소스가 제한적이므로 자원을 아껴 쓰는 전략이 필요하다. 맵의 전체적인 밸런스는 제작자의 지속적인 업데이트를 통해 개선되었을 가능성이 높지만, 플레이어의 피드백을 반영한 버전인지 여부는 확인되지 않았다. 맵의 인기는 오랜 기간 동안 지속되었음을 고려할 때, 그만큼의 퀄리티와 재미를 갖추고 있다는 점은毫无疑问하다. 맵의 스케일과 디자인, 그리고 전략적 깊이는 스타크래프트 유즈맵의 한계를 넘어서는 작품으로 평가할 수 있다. 이 맵을 플레이한다면, 반지의 제왕의 세계관에 흠뻑 빠져들 수 있을 뿐만 아니라, 디펜스와 서바이벌 장르의 재미를 한층 깊게 느낄 수 있을 것이다. 특히, 팀플레이가 필요한 맵이기 때문에 친구들과 함께 플레이한다면 더 큰 재미를 느낄 수 있을 것이다. 맵의 난이도는 높지만, 그만큼의 성취감을 느낄 수 있는 작품이니만큼 꾸준한 연습과 전략 수립이 필요하다. 맵의 전체적인 흐름을 이해하고 나면, 각 플레이어의 개성 있는 플레이 스타일을 발휘할 수 있는 공간도 많다. 이 맵은 단순히 적을 물리치는 것 이상의 재미를 제공하며, 전략과 팀워크의 중요성을 다시 한 번 깨닫게 해주는 작품이다. 맵의 디자인과 분위기는 반지의 제왕의 팬이라면 누구나 좋아할 만한 요소로 가득 차 있으며, 스타크래프트 유즈맵의 새로운 장르를 개척한 작품으로도 평가할 수 있다. 이 맵을 플레이하면서 새로운 전략을 발견하고, 반지의 제왕의 세계관에 더 깊이 빠져드는 경험을 해보길 바란다. 맵의 스케일과 복잡한 구조는 처음 플레이하는 유저에게는 다소 부담스러울 수 있지만, 꾸준한 플레이를 통해 점차 익숙해질 수 있을 것이다. 맵의 모든 지역을 정복하고, 적의 모든 공격을 방어해내는 성취감은 다른 어떤 맵에서도 쉽게 느낄 수 없는 특별한 경험일 것이다. 《Lord of the Rings - Region of Chaos》 is one of the most representative custom maps in StarCraft: Brood War, set in the world of *The Lord of the Rings* and featuring large-scale defense and survival gameplay. The map, built on a desert tileset, boasts an enormous size of 8192x8192, where players must defend their respective regions against relentless enemy waves. The structure revolves around a central stronghold, with multiple outer regions branching out, each featuring unique defensive layouts and strategic elements. Enemies, primarily Sauron’s forces along with orcs and Nazgûl, attack in periodic waves. The gameplay follows a wave-defense format where players gather resources, construct buildings, produce and upgrade units, and strengthen their defenses. Some areas have limited resources or weaker defenses, requiring quick decision-making and efficient resource management. The map captures the epic atmosphere of *The Lord of the Rings*, with sound and effects designed to match. Up to six players can participate, each developing individual strategies while relying on teamwork. Due to its massive scale and complex structure, this map is better suited for intermediate to advanced players, particularly those familiar with defense and survival genres. Before playing, it’s crucial to study key defense points, resource locations, and enemy attack patterns—taking time to explore the entire map is highly recommended. The map was created by Lightning303 and first released on April 16, 2010, with versions including 2.1, 2.7, and 3.1 following later updates. Popular among both *Lord of the Rings* fans and defense/survival custom map enthusiasts, this title maximizes the strengths of StarCraft custom maps with its grand scale and deep strategic elements. Repeated play reveals new strategies, and its design and atmosphere strongly appeal to fans of the franchise. However, beginners may find the complex structure and high difficulty overwhelming, so starting on easier difficulties is advised. Before playing, organizing information on available units, defensive structures, and resource distribution per region can lead to more efficient gameplay. Some areas have scarce resources, making careful spending essential. While the map’s balance likely improved through the creator’s updates, it’s unclear whether player feedback influenced these changes. Its long-standing popularity speaks to its quality and entertainment value. This map goes beyond simple enemy elimination, offering a deeply immersive experience in *The Lord of the Rings* universe while highlighting the importance of strategy and teamwork. Playing with friends enhances the enjoyment, and the sense of achievement from mastering its challenges makes the effort worthwhile. The map fosters personal playstyles once its flow is understood, serving as both a fresh take on StarCraft custom maps and a tribute to the beloved franchise. While the scale and complexity may intimidate newcomers, consistent play helps ease the learning curve. The ultimate satisfaction of conquering all regions and repelling every attack is a unique experience unmatched by other maps.
![보스사냥 RPG - TOP[3] 맵 미리보기](https://cdn-star-data.huzy.net/thumbnail_b9e333b1f8b3498db1e7652a9ac84aed.jpg)
보스사냥 RPG - TOP[3]
보스사냥 RPG - TOP[3]는 스타크래프트 브루드워의 유즈맵으로, 7명의 플레이어가 함께 보스를 사냥하는 RPG 장르의 맵입니다. 맵은 화산 테마로 구성되어 있으며, 넓은 맵 곳곳에 보스가 배치되어 있습니다. 플레이어는 각자 조종 가능한 영웅을 키우며 장비를 획득하고 스킬을 발전시켜 보스를 물리치는 것이 목표입니다. 화면 중앙에는 보스가 위치해 있으며, 보스 주변에는 방어 시설이나 보조 구조물이 배치되어 있어 전략적인 전투가 요구됩니다. 맵 상단에는 플레이어의 자원과 상태가 표시되는 인터페이스가 보이며, 하단에는 미니맵이 제공되어 넓은 맵을 efficiently 탐색할 수 있습니다. 보스를 사냥하는 과정에서 레벨 업과 아이템 강화가 가능하며, 이를 통해 점차 강해질 수 있습니다. 맵의 구조상 보스 간의 간격이 넓어 이동이 빈번히 필요하며, 보스에 따라 다른 전술이 요구됩니다. 또한, 보스를 사냥할 때마다 보상이 주어지며, 이를 통해 영웅을 더욱 강력하게 성장시킬 수 있습니다. 이 맵은 초보자부터 숙련자까지 즐길 수 있도록 설계되었으며, 특히 팀워크와 전략적인 플레이가 중요한 요소로 작용합니다. 다만, 보스의 패턴을 학습하지 않으면 난이도가 급격히 상승할 수 있어, 초보 플레이어는 보스의 공격 패턴을 숙지한 후 도전하는 것이 좋습니다. 또한, 아이템과 스킬의 균형이 중요하므로, 장비와 스킬 트리를 신중히 선택해야 합니다. 전체적으로는 긴 플레이 시간과 반복 가능한 재미가 있는 맵으로, 스타크래프트의 유즈맵 중에서도 손꼽히는 RPG 경험을 제공합니다. Boss Hunting RPG - TOP[3] is a StarCraft: Brood War custom map designed for 7 players to hunt bosses together in an RPG genre. The map features a volcanic theme with bosses placed across the expansive terrain. Players control individual heroes, level them up, collect equipment, and develop skills to defeat the bosses. The central area of the screen displays the boss along with surrounding defensive structures or auxiliary buildings, requiring strategic combat. The top of the screen shows an interface with player resources and status, while the bottom provides a minimap for efficient navigation. Players can level up and upgrade items through boss hunts, gradually increasing their hero's power. The map's structure includes wide gaps between bosses, necessitating frequent movement and different tactics for each boss encounter. Rewards are given after defeating bosses, allowing heroes to grow stronger. This map is designed for players of all skill levels, especially emphasizing teamwork and strategy. However, the difficulty spikes if players fail to learn boss patterns, so beginners should study boss attacks before attempting. Balancing equipment and skill trees is crucial, as poor choices can hinder progress. Overall, this is a long-playing and replayable map that delivers a standout RPG experience among StarCraft custom maps.
오버마인드 디펜스 7:0 파이널 (Overmind Defence 7:0 Final)
스타크래프트 브루드워의 대표적인 UMS 디펜스 유즈맵인 ‘오버마인드 디펜스 7:0 파이널(Overmind Defence 7:0 Final)’은 8명의 플레이어가 하나의 팀을 이루어 끊임없이 몰려드는 저그 병력을 상대하는 전략적 디펜스 게임이다. 맵의 중심에는 파괴해야 할 오버마인드가 위치해 있으며, 플레이어들은 방어선을 구축하고 자원 관리, 병력 조합, 전략적 판단으로 끊임없는 웨이브를 버텨내야 한다. 맵은 3072x3072의 넓은 우주 타일셋으로 구성되어 있으며, 각 플레이어는 중앙 기지 주변의 입구에서부터 시작해 외곽 지역을 차지하며 방어선을 확장할 수 있다. 이미지에서는 우주 배경의 어두운 밤하늘과 함께 중앙에 위치한 오버마인드의 실루엣이 확인되며, 플레이어 기지 주변으로 방어 시설과 병력이 배치되어 있는 것이 보인다. 맵의 특징은 끊임없는 웨이브 디펜스로, 초반에는 소수 정예 병력으로 버티지만 후반으로 갈수록 저그의 화력이 급격히 강해지므로 플레이어 간 협력이 무엇보다 중요하다. 또한, 자원 관리와 생산 효율성 또한 승리를 좌우하는 핵심 요소로, 초반 자원이 부족한 상황에서 어떻게 병력을 조합하고 기지를 확장할지가 관건이다. 이 맵은 디펜스 게임을 즐기는 플레이어들에게 긴장감과 전략적 깊이를 제공하며, 특히 팀플레이를 중시하는 유저들에게 인기가 높다. 추천 대상은 디펜스 게임을 좋아하는 스타크래프트 유즈맵 플레이어이며, 초보자라도 팀의 흐름을 잘 따라가며 전략을 배우는 데 적합하다. 다만, 후반부로 갈수록 난이도가 급상승하므로 꾸준한 연습과 팀워크가 요구된다. 플레이 전에는 맵의 구조와 오버마인드의 위치, 자원 분포를 미리 숙지하고 각자의 역할(방어, 공격, 자원 관리)을 명확히 정하는 것이 중요하다. 또한, 병력 조합의 다양성과 방어선의 중요성을 인식하고, 끊임없이 웨이브가 밀려오므로 실수 없이 대처할 수 있는 준비를 갖추는 것이 필수다. "Overmind Defence 7:0 Final" is a classic Brood War UMS defense custom map where eight players team up to fend off endless waves of Zerg forces. At the center of the map lies the Overmind, which must be destroyed, and players must build defenses, manage resources, and make strategic decisions to survive wave after wave. The map features a vast 3072x3072 space-themed tileset, with each player starting near the central base and expanding outward to secure outer regions. The image shows a dark cosmic night sky with the Overmind’s silhouette at the center, while defensive structures and forces surround the player bases. The defining feature of this map is its relentless wave defense—players begin with elite forces but face increasingly intense Zerg attacks as the game progresses, making teamwork essential. Resource management and production efficiency are also critical to victory, as players must balance limited early resources, unit composition, and base expansion. This map offers thrilling challenge and deep strategy for defense game fans, especially those who enjoy team play. It’s recommended for Brood War custom map players who love defense games, including beginners who can follow team flow and learn strategies. However, difficulty spikes sharply in later waves, requiring consistent practice and strong teamwork. Before playing, familiarize yourself with the map layout, Overmind’s location, and resource distribution, and clearly assign roles (defense, offense, resource management). Understanding unit composition diversity and defensive line importance is key, as waves continuously assault your position—preparation and precision are a must.
Final Fantasy IX RPG
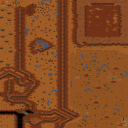
파이널 판타지 9 RPG는 원작 파이널 판타지 9의 세계관을 스타크래프트 유즈맵으로 재해석한 RPG 장르 맵이다. 192x192 타일, 6144x6144 크기의 황혼 타일셋 위에 구축된 넓은 필드에서 최대 6명의 플레이어가 8종의 캐릭터 중 하나를 선택해 모험을 시작한다. 각 캐릭터는 5단계 진화 시스템을 갖추고 있어 레벨업과 아이템 획득을 통해 단계별로 강해지는 성장 재미가 핵심이다. 진행 방식은 일반적인 RPG처럼 퀘스트 수행, 몬스터 사냥, 보스 레이드 등으로 구성되어 있으며, 파티 플레이 시 직업 간 시너지를 고려한 협력이 중요하다. 맵 곳곳에 원작의 주요 지역과 스토리 요소가 트리거로 구현되어 있어 팬들에게 익숙한 몰입감을 준다. 난이도는 초반 진입이 비교적 수월하나 후반 진화 콘텐츠와 보스전은 숙련된 컨트롤과 아이템 세팅을 요구한다. 제작자 iM2GoOd2BeTrUe가 구현한 트리거 시스템은 캐릭터별 고유 스킬과 진화 분기를 세밀하게 짜여 있어 반복 플레이 시에도 빌드 연구 재미가 있다. 맵 중앙의 허브 지역을 기점으로 외곽 던전과 숨겨진 지역이 방사형으로 배치되어 탐색 동기를 부여한다. 아이템 드랍률과 경험치 배분은 파티 인원수에 따라 자동 조절되는 것으로 보이나, 솔로 플레이 시 난이도 급상승이 예상되므로 최소 3인 이상 파티 구성을 권장한다. 배경음악과 이펙트는 원작 리소스를 차용한 흔적이 보여 저작권 측면을 고려해 개인용도로만 즐기는 것이 바람직하다. 추천 대상은 파이널 판타지 시리즈 팬, 캐릭터 육성형 RPG를 선호하는 유저, 협동 플레이를 즐기는 4~6인 파티다. 플레이 전 확인할 점은 cp949 인코딩 환경에서 한글 깨짐 여부, 최신 패치 버전 적용 여부, 그리고 맵 크기가 큰 만큼 로딩 시간과 렉 발생 가능성이다. Final Fantasy IX RPG is a custom map that reinterprets the world of Final Fantasy IX into a StarCraft Brood War RPG. On a vast 6144x6144 map built with the Twilight tileset at 192x192 tiles, up to six players choose from eight characters to begin their adventure. Each character features a five-stage evolution system, providing the core fun of growing stronger through leveling and item acquisition. Progression follows classic RPG structure: quests, monster hunting, and boss raids, with party synergy and role cooperation being crucial. Key locations and story elements from the original game are implemented via triggers, offering familiar immersion for fans. Early game is accessible, but late-game evolutions and boss fights demand skilled control and optimized gear. The creator iM2GoOd2BeTrUe designed intricate triggers for unique skills and evolution branches, adding replay value for build theorycrafting. A central hub radiates out to outer dungeons and hidden areas, encouraging exploration. Drop rates and experience scaling appear to adjust for party size, but solo play spikes difficulty, so a party of at least three is recommended. Background music and effects borrow original assets, so personal use is advised for copyright reasons. Recommended for Final Fantasy fans, players who enjoy character-growth RPGs, and groups of 4-6 seeking co-op play. Before playing, verify Korean text rendering in cp949 encoding, ensure the latest patch is applied, and be aware of potential loading times and lag due to the large map size.
Scorched Earth (불타버린 대지)
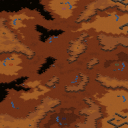
스타크래프트 브루드워 유즈맵 〈Scorched Earth〉는 2~4명의 플레이어가 한 팀을 이뤄 모든 적을 전멸시키는 것을 목표로 하는 밀리식 전투 맵이다. 맵의 이름처럼 '불타버린 대지'라는 테마가 느껴지는 황량한 황무지 지형이 특징이며, 넓은 개활지와 굴곡진 지형이 조화를 이룬다. 내부 설명에서도 '플레이어 수: 2~4'로 명시된 만큼 소규모 팀 전투에 최적화되어 있으며, '아무 것도 살아남지 못하게 하라'는 문구는 승리를 위해서는 철저한 섬멸전이 필요하다는 점을 강조한다. 맵의 구조는 중앙의 넓은 평야와 곳곳에 흩어져 있는 언덕, 그리고 기습을 위한 협곡이 조화를 이루며, 플레이어는 이 지형을 활용해 전략적 우위를 점해야 한다. 초보자와 숙련자 모두 즐길 수 있도록 밸런스가 조절된 것으로 보이며, 전장 전체를 아우르는 넓은 시야와 빠른 판단력이 요구된다. 특히 4인 플레이 시에는 팀원 간의 호흡이 승패를 좌우할 수 있어 협동 플레이가 중요하다. 맵의 분위기는 전쟁터의 처절함을 연상시키며, 전투가 벌어질수록 대지가 불타오르는 듯한 시각적 효과가 추가되어 몰입감을 높인다. 맵을 플레이하기 전에는 팀원 간의 역할 분담(탱커, 딜러, 서포터 등)을 미리 정하고, 지형지물 활용 및 기습 루트를 숙지하는 것이 중요하다. 또한, 맵의 넓은 시야를 살려 시야 확보와 정찰을 소홀히 하지 않도록 주의해야 한다. 이 맵은 밀리식 전투의 재미를 느끼고 싶거나, 팀 플레이를 중시하는 유저들에게 추천할 만하다. StarCraft: Brood War custom map *Scorched Earth* is a melee-style battle map where 2 to 4 players team up to wipe out all enemies. As the name suggests, the map features a desolate wasteland theme with barren terrain, blending open fields and rugged landscapes. The in-game description explicitly states “Player Count: 2–4,” confirming it’s optimized for small-scale team combat, and the phrase “Leave nothing alive” underscores the need for total annihilation to secure victory. The layout centers on a broad plain flanked by scattered hills and ravines ideal for ambushes—players must leverage this terrain to gain a strategic edge. The balance appears well-tuned for both beginners and veterans, demanding wide vision control and quick decision-making across the entire battlefield. In 4-player matches, coordination among teammates can decide the outcome, making teamwork essential. The atmosphere evokes the brutality of a warzone, with visual effects that make the land appear to ignite as combat intensifies, deepening immersion. Before playing, it’s crucial to assign roles (tank, damage dealer, support, etc.), study terrain usage, and plan ambush routes. Players should also prioritize vision control and scouting to avoid overlooking key areas. This map is ideal for those seeking the thrill of melee combat or who value strong team play.
최근 등록된 맵
새로 추가된 파일과 버전을 확인하세요.
4vs4 파이썬 컴까기 7업 (4vs4 Python vs AI 7-Up)
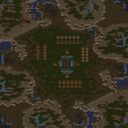
‘4vs4 파이썬 컴까기 7업’은 스타크래프트 브루드워의 4인용 컴까기 유즈맵으로, 플레이어 각각이 독립된 사령관으로 시작하여 적군을 상대로 승리를 쟁취하는 전투 중심의 맵이다. 맵은 사막 타일셋으로 구성되어 있으며, 중앙에 spacious한 평지가 펼쳐져 있어 병력 이동과 전투가 원활히 진행될 수 있도록 설계되었다. 맵의 가장 큰 특징은 4명의 플레이어가 각자 고유한 시작 지역을 차지하고, 이웃한 플레이어와는 초반 전투를 치르며 점차 확장해 나가는 구조라는 점이다. 적군은 AI가 통제하는 컴퓨터 세력으로, 맵 곳곳에 배치된 기지나 방어 시설에서 끊임없이 공격을 가해 오기 때문에 전략적 판단과 빠른 대처가 필수적이다. 초반에는 각 플레이어의 본진 주변에서 소규모 교전이 일어나며, 이 과정에서 자원과 유닛 생산 능력의 균형을 잘 맞춰야 한다. 맵의 인공지능은 ‘Easy’ 난이도로 설정되어 있지만, 4명의 플레이어가 동시에 적군과 맞서야 하므로 협력과 경쟁의 균형을 carefully 조절해야 한다. 특히, 맵의 중앙 지역은 여러 플레이어의 교전지역이 겹치는 곳이기 때문에, 이곳을 차지하는 플레이어가 우위를 점할 가능성이 높다. 또한, 맵의 사막 테마 덕분에 시야가 넓고 지형 변화가 적어 병력 이동이 예측 가능하다는 장점이 있으나, 반대로 은폐 유닛이나 공중 유닛의 활용이 제한적일 수 있다는 점도 고려해야 한다. 이 맵을 즐기기 위해서는 기본적인 스타크래프트의 전략과 컨트롤 실력이 필요하며, 특히 다수의 플레이어가 동시에 전투를 벌이는 만큼 팀워크가 중요하다. 초보자의 경우 AI의 공격을 방어하는 데 다소 어려움을 느낄 수 있지만, 반복 플레이를 통해 적군의 패턴을 익히고 유닛 조합을 최적화할 수 있을 것이다. 또한, 맵의 ‘7업’이라는 명칭은 7개의 업그레이드 단계나 목표가 있음을 시사하는데, 이는 맵의 진행 방식이나 승리 조건과 연관되어 있을 가능성이 크므로 플레이 전 확인해 보는 것이 좋다. 이 맵은 4인용이라는 점에서 친구들과의 협동 플레이나 온라인 대전을 즐기기에 적합하며, 특히 스타크래프트의 고전적인 멀티플레이 스타일을 선호하는 유저들에게 강렬한 재미를 선사할 것으로 예상된다. 사막 테마의 깔끔한 그래픽과 함께, 적절한 난이도와 전략적 깊이가 조화를 이룬佳作 유즈맵으로 꼽힌다. ‘4vs4 Python Comggagi 7-Up’ is a 4-player custom map in *StarCraft: Brood War* where each player starts as an independent commander battling against enemy forces in a combat-focused setting. The map features a desert tile set with a spacious central plain designed for smooth troop movement and combat. Its key feature is the structure where four players each occupy distinct starting zones and engage in early skirmishes with neighboring players while gradually expanding. The enemy is controlled by AI as computer forces, launching continuous attacks from bases and defensive structures scattered across the map, making strategic decision-making and quick responses essential. Early gameplay involves small-scale clashes around each player’s main base, requiring careful balancing of resources and unit production capabilities. The AI is set to ‘Easy’ difficulty, but since four players must face the enemy simultaneously, cooperation and competition must be carefully balanced. The central area of the map is a hotspot where multiple players converge, giving whoever controls it a significant advantage. The desert theme also offers wide visibility and predictable terrain for troop movement, though it may limit the use of stealth or air units. To enjoy this map, basic *StarCraft* strategy and control skills are necessary, with teamwork being especially important given the simultaneous battles among multiple players. Beginners may struggle to defend against AI attacks at first, but repeated play allows them to learn enemy patterns and optimize unit compositions. The map’s name, ‘7-Up,’ suggests seven upgrade stages or objectives, likely tied to its progression or victory conditions, so checking these before playing is recommended. As a 4-player map, it’s well-suited for cooperative play with friends or online matches, offering intense fun for those who prefer classic *StarCraft* multiplayer styles. With clean desert-themed graphics, balanced difficulty, and strategic depth, this custom map stands out as a well-crafted work.
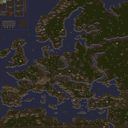
WWI : 참호전쟁 v4.7 (WWI : Trench Warfare v 4.7)
‘WWI : Trench Warfare v 4.7’는 1차 세계대전을 배경으로 한 디펜스형 스타크래프트 브루드워 유즈맵으로, 플레이어는 참호에 숨어 적의 공격을 방어하며 승리를 노려야 한다. 맵은 사막 타일셋을 기반으로 구축되었으며, 넓은 평야와 굴곡진 지형을 활용해 참호와 방어시설을 구축할 공간을 제공한다. 특이하게도 맵 상단과 하단에 각각의 플레이 영역이 나뉘어 배치되어 있으며, 중앙에는 넓은 공간이 펼쳐져 있어 기동성과 전략적 배치의 중요성이 강조된다. 플레이어는 시작과 동시에 방어 건물이나 유닛 생산 시설을 설치할 수 있으며, 적의 공격 패턴에 따라 방어선을 강화하거나 반격하는 방식으로 진행된다. 맵의 특징은 좁은 통로와 높은 지형을 활용한 입체적인 공격로 설계로, 단순히 방어만 하는 것이 아니라 지형을 활용한 전략적 우위를 점할 수 있도록 구성되어 있다. 또한, 맵의 규모가 크고 복잡한 구조로 인해 초보자는 진입장벽이 다소 높을 수 있으나, 익숙해지면 긴장감 넘치는 전투를 체험할 수 있다. 추천 대상은 팀플레이를 선호하는 유저로, 협동심이 중요시되며, 전술적 사고와 순간적인 판단력이 요구되는 맵이다. 플레이 전 반드시 확인해야 할 점은 방어선 배치와 주요 공격로의 확보로, 이 부분을 잘못 설정하면 초기 단계에서 큰 손실을 입을 수 있다는 점이다. 맵의 긴장감과 전략성은 디펜스 장르를 좋아하는 유저들에게 큰 매력을 제공할 것이다. WWI : Trench Warfare v 4.7 is a defense-style StarCraft: Brood War custom map set in World War I, where players must defend their trenches from enemy attacks. The map is built on a desert tileset, featuring vast plains and rugged terrain that provide strategic spaces for constructing trenches and defensive structures. Notably, the map is divided into upper and lower player zones, with a wide central area that emphasizes mobility and tactical positioning. Players can immediately install defensive buildings or unit production facilities upon starting, and must strengthen their defenses or launch counterattacks based on enemy patterns. The map's standout feature is its three-dimensional design, utilizing narrow passages and elevated terrain to create layered attack routes, allowing players to gain a strategic advantage beyond simple defense. While the map's scale and complexity may pose a challenge for beginners, it offers an intense and engaging combat experience for those who master it. Recommended for players who enjoy team-based gameplay, this map emphasizes cooperation, tactical thinking, and quick decision-making. Before playing, it's crucial to verify defensive line placement and secure key attack routes, as poor setup can lead to heavy losses early on. The map's tension and strategic depth make it a compelling choice for fans of the defense genre.
![에어리언 vs 프레데터[5] (Alien vs Predator[5]) 맵 미리보기](https://cdn-star-data.huzy.net/thumbnail_e6f17b1f7dcd4db6a7f0b69b911864a7.jpg)
에어리언 vs 프레데터[5] (Alien vs Predator[5])
에어리언vs프레데터[5]는 스타크래프트: 브루드워의 유즈맵으로, 에이리언과 프레데터가 인간 세력과 맞서는 독특한 디펜스 형식을 채택한 맵이다. 맵의 전체적인 분위기는 SF 액션물의 느낌이 강하게 느껴지며, 중앙의 넓은 공간을 중심으로 각 세력이 자신의 기지를 방어하고 상대방을 공격하는 방식으로 진행된다. 에이리언과 프레데터는 각각의 특수한 유닛들과 방어탑을 활용해 인간 세력의 공격을 막아내야 하며, 반대로 인간 세력은 에이리언과 프레데터의 기지에 침투해 주요 건물을 파괴하는 목표를 달성해야 한다. 맵 곳곳에 배치된 방어 건물과 자원 수집 구역은 전략적인 포지셔닝과 자원 관리의 중요성을 강조한다. 플레이어는 총 8명이 지원되며, 각 플레이어는 에이리언, 프레데터, 인간 중 하나의 세력을 선택해 플레이할 수 있다. 각 세력은 고유의 유닛과 기술, 방어 구조를 보유하고 있어 전략의 다양성을 극대화하였다. 특히 에이리언과 프레데터의 방어탑은 강력한 공격력을 자랑하며, 인간 세력은 강력한 병력과 방어시설을 통해 이를 상대해야 한다. 맵의 최신 버전에서는 각 세력의 유닛이 더욱 강화되어 밸런스가 조정된 것으로 보이며, 플레이어 간 협동과 대결이 흥미진진하게 펼쳐질 수 있도록 설계되었다. 이 맵은 디펜스와 공격의 균형을 맞추는 것이 관건으로, 특히 인간 세력의 경우 에이리언과 프레데터의 기지를 신속히 공략하는 전략과 방어선을 구축하는 타이밍이 중요하다. 반대로 에이리언과 프레데터는 중앙의 넓은 공간을 활용한 기동전과 방어 건물의 효율적 배치로 인간 세력의 공격을 막아내야 한다. 맵의 규모가 크고 각 세력의 특색이 뚜렷해 반복 플레이 시에도 새로운 전략을 시도해 볼 수 있어 장기적인 재미를 제공한다. 또한, 맵 곳곳에 숨겨진 자원과 숨겨진 길은 보물찾기 같은 재미를 더해주며, 팀 간 또는 개인 간 경쟁을 통해 더욱 흥미로운 플레이가 가능할 것으로 예상된다. 이 맵을 즐기기 위해서는 각 세력의 특성과 유닛의 성능, 맵의 주요 경로와 기지 배치 위치를 숙지하는 것이 중요하다. 또한, 팀 플레이 시에는 각 세력의 특성을 살려 협동하는 전략을 세우는 것이 승리의 관건이다. 특히 인간 세력의 경우 에이리언과 프레데터의 방어탑을 무력화하는 방법을 숙지하고, 에이리언과 프레데터는 인간 세력의 기지 공략 시 방어선을 효율적으로 무너뜨리는 방법을 모색해야 한다. 맵의 복잡한 구조와 다양한 전략적 선택지는 플레이어의 역량을 시험하며, 스타크래프트 유즈맵의 묘미를 느낄 수 있도록 구성되어 있다. Alien vs. Predator [5] is a custom map for *StarCraft: Brood War* where the Alien and Predator factions battle against human forces in a unique defensive format. The map strongly evokes the atmosphere of an SF action film, with wide open spaces in the center where each faction defends its base while attacking the enemy. The Aliens and Predators must use their specialized units and defensive towers to repel human assaults, while the humans aim to infiltrate their bases and destroy key structures. Strategically placed defensive buildings and resource zones across the map highlight the importance of positioning and resource management. The map supports up to eight players, with each choosing to play as either the Aliens, Predators, or Humans. Each faction has its own unique units, abilities, and defensive structures, maximizing strategic variety. The Aliens and Predators feature powerful defensive towers, while the humans must counter them with strong forces and fortifications. The latest version appears to have balanced the factions by strengthening their units, ensuring exciting cooperation and rivalry between players. The key to success lies in balancing defense and offense. Humans must quickly strike the Alien and Predator bases while timing their defensive lines well. Meanwhile, the Aliens and Predators should use the central open space for maneuver warfare and place defensive structures efficiently to hold off human attacks. The large scale and distinct identities of each faction allow for fresh strategies even after repeated plays, offering long-term enjoyment. Hidden resources and secret paths scattered across the map add a treasure-hunt-like thrill, while competition between teams or individuals makes the experience even more engaging. To fully enjoy the map, players should familiarize themselves with each faction’s traits, unit performance, and the map’s key routes and base layouts. In team play, coordinating strategies that leverage each faction’s strengths is crucial for victory. Humans should learn how to neutralize the Alien and Predator defensive towers, while the Aliens and Predators must find efficient ways to break through human defensive lines when attacking their bases. The map’s intricate structure and diverse strategic options test players’ skills, perfectly capturing the charm of *StarCraft* custom maps.
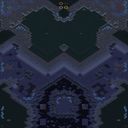
SC UpⓖL 라이드오브발키리 (SC UpⓖL Ride of Valkyrie)
‘SC UpⓖL 라이드오브발키리’는 스타크래프트 브루드워 유즈맵의 정석이라 할 수 있는 컴까기 장르의 명작으로, 플레이어가 직접 조작할 수 있는 AI와 협동하여 거대한 적진을 뚫고 나가야 하는 긴장감 넘치는 진행이 특징이다. 맵의 이름은 북유럽 신화의 전사 ‘발키리’에서 유래한 듯하며, 실제 플레이에서도 죽음의 전투를 연상케 하는 스케일과 박력이 인상적이다. 내부 설명에 따르면 7명의 플레이어 중 2명은 제작자, 4명은 조작 가능한 플레이어로 구분되어 팀워크와 전략적 연계를 요구하는 구조로 보인다. 화산 타일셋으로 조성된 배경은 붉은 색감과 용암 지형이 어우러져 전쟁의 참혹함을 시각적으로 극대화하며, 넓은 맵 크기는 대규모 병력 이동과 기동전을 펼치기에 최적화되어 있다. 맵의 핵심은 ‘업그레이드’라는 이름처럼 지속적인 기술 개발을 통해 유닛의 능력치를 강화하거나 새로운 특수 능력을 획득하는 시스템에 있으며, 이는 단순한 전투를 넘어 전략적 선택과Resource 관리 능력을 시험하는 요소로 작용한다. 적진은 중앙에 집중되어 있으며, 플레이어는 동서남북 네 방향의 입구를 통해 조금씩 전진해 나가며 중간중간 배치된 방어 기지나 보급 거점을 차지해야 한다. 맵의 균형은 초반에는 비교적 안정된 편이지만, 업그레이드와 병력의 질이 나뉘면서 중후반으로 갈수록 긴장감이 높아지며, 특히 AI의 난이도나 맵 내 패턴이 플레이어의 전략에 따라 변동할 가능성이 있어 재플레이 가치가 높다. 초보자에게는 AI의 특성과 맵의 구조를 익히는 과정이 다소 버겁게 다가올 수 있지만, 숙련된 플레이어라면 각자의 역할 분담을 통해 효율적인 협동을 도모할 수 있으며, 특히 업그레이드 타이밍과 병력 구성을 신중히 고려해야만 최종 목표인 ‘발키리’의 소환에 성공할 수 있다. 맵의 플레이 시간은 맵 크기와 목표의 복잡성을 고려했을 때 약 45~60분 내외로 예상되며, 다양한 전략적 접근이 가능한 만큼 같은 맵이라도 매 판마다 다른 재미를 느낄 수 있다. 추천 대상은 팀플레이를 즐기는 스타크래프트 유저, 특히 유즈맵에서 전략적 깊이를 추구하는 게이머라면 반드시 한 번쯤 플레이해 볼 만한 가치가 있다. 플레이 전에는 내부 설명을 숙지하여 각 플레이어의 역할과 업그레이드 시스템의 의미를 정확히 이해하고, 팀원과의 사전 협의를 통해 전략을 공유하는 것이 성공의 관건이다. 또한, 맵의 넓은 크기상 미니맵을 적극 활용하여 시야를 넓히고, 주요 거점의 확보 우선순위를 신중히 결정해야 한다. 맵의 인코딩과 타일셋의 특성상 로딩 시간이나 그래픽 품질에 영향을 받을 수 있으니, 사양에 맞는 최적화 설정을 미리 확인하는 것도 중요하다. ‘SC UpⓖL Ride of the Valkyrie’ is a masterpiece of the classic "commander-killing" genre in *StarCraft: Brood War* custom maps, where players team up with directly controllable AI to push through massive enemy territory in a tense, high-stakes progression. The map’s name likely draws from Norse mythology’s warrior "Valkyrie," and its scale and intensity in gameplay evoke the brutality of a deathmatch. According to the in-game description, the seven-player setup divides roles: two players are the creators, while four are active commanders, emphasizing teamwork and strategic coordination. The volcanic tile set—with its deep red hues and molten terrain—visually amplifies the horrors of war, while the expansive map size is perfectly suited for large-scale troop movements and maneuver warfare. At its core, the map revolves around an "upgrade" system that lets players continuously enhance unit stats or unlock new special abilities, turning battles into a test of strategic foresight and resource management rather than brute force alone. Enemy bases are clustered near the center, and players advance slowly from one of four cardinal directions (north, south, east, west), seizing intermediate defensive outposts or supply points along the way. The early game feels relatively stable, but as upgrades and troop quality diverge, tension escalates in the late stages—especially since AI difficulty and map patterns may shift based on player strategies, ensuring high replayability. Beginners might struggle to grasp the AI’s quirks and map layout, but experienced players can optimize roles and coordination, particularly by carefully timing upgrades and troop compositions to successfully summon the "Valkyrie" in the endgame. With an estimated playtime of 45–60 minutes (accounting for map size and objective complexity), the map offers varied strategic paths, making each run feel fresh. It’s a must-play for *StarCraft* fans who enjoy team-based custom maps, especially those seeking depth in strategy. Before diving in, study the in-game instructions to fully understand each player’s role and the upgrade system, and coordinate with teammates to align strategies—this is key to success. Given the map’s vast scale, make full use of the minimap to expand vision and prioritize securing critical strongholds wisely. Since encoding and tile set features can affect loading times and graphical quality, it’s wise to check and adjust settings beforehand to match your system’s specs.
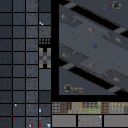
신뿌 Old and New 영웅전 (Sinppr Old and New Heroes War)
‘신뿌 Old and New 영웅전’은 스타크래프트: 브루드워의 대표적인 유즈맵인 ‘신뿌’ 시리즈의 영웅전을 주제로 한 디펜스 맵으로, 8명의 플레이어가 각각 영웅을 조종하며 적의 공격을 방어하는 구조로 구성되어 있다. 맵은 넓은 우주 타일셋을 기반으로 하며, 특별한 배경화면과 스킬 아이콘, 유닛 마커가 조합된 시각적 요소를 통해 플레이어의 전략적 선택을 돕는다. 맵 중앙에는 대규모의 적 웨이브가 끊임없이 몰려오며, 각 플레이어는 영웅의 스킬과 업그레이드를 통해 방어선을 구축하고, 아군을 지원하거나 직접 적을 공격하는 역할을 맡는다. 맵의 특징은 영웅 간의 조합과 스킬 연계가 핵심이며, 특히 영웅의 레벨과 스킬 포인트를 투자해 개별 성능을 강화할 수 있는 시스템이 있다. 맵의 밸런스는 제작자 스스로 ‘완벽수정’했다고 주장할 만큼 신경을 썼다고 하지만, 내부 설명에서 ‘바보’라는 자조적인 멘트가 포함되어 있는 점은 흥미로운 부분이다. 맵의 디자인적 특징은 넓은 필드와 다양한 지형 요소(언덕, 평지, 우주 지형)를 활용해 전략적 깊이를 더하고 있으며, 플레이어는 시야 관리와 자원 배분을 통해 생존과 공격을 병행해야 한다. 맵의 난이도는 ‘보통’을 권장하며, 초보자도 쉽게 접근할 수 있도록 튜토리얼이나 간단한 영웅 구성이 마련되어 있는 것으로 추정된다. 그러나 맵의 내부 설명이 다소 난해하거나 플레이어의 실력에 따라 밸런스가 크게 달라질 수 있으므로, 처음 플레이하는 유저는 영웅의 스킬과 역할 분담을 충분히 숙지한 후 도전하는 것이 좋다. 맵의 플레이 시간은 한 판당 약 30분 내외로 예상되며, 팀원 간의 협력이 필수적이므로 커뮤니케이션이 원활한 그룹에서 즐기면 더 좋은 경험을 얻을 수 있을 것이다. 특히 ‘신뿌’ 시리즈의 팬이라면 익숙한 시스템과 영웅 구성을 만나 반가움을 느낄 것이며, 새로운 유저도 영웅전이라는 장르의 매력을 쉽게 느낄 수 있을 것이다. This StarCraft: Brood War custom map, 'Sinppr Old and New Heroes War,' is a defense-oriented UMS title where eight players control unique heroes to withstand waves of enemy attacks. Set against a vast space-themed tileset, the map features distinct visual markers for skills, units, and objectives, enhancing strategic depth. Players must balance hero leveling, skill upgrades, and cooperative defense, with central mechanics revolving around teamwork and individual hero roles. The creator humorously claims 'perfect balance' in the internal description, though the tone suggests a more casual or experimental approach. The map’s design leverages varied terrain like hills and open spaces to create tactical opportunities, while its estimated 30-minute duration per session rewards coordination and adaptability. While accessible to newcomers, players unfamiliar with hero-based UMS maps may need to study hero abilities and team compositions beforehand. The title is ideal for fans of the 'Sinppr' series or those seeking a cooperative, skill-based challenge in StarCraft’s custom map ecosystem.
100층 빌딩 탈출하기 (Escape the 100-Story Building)
100층 빌딩 탈출하기는 스타크래프트 브루드워의 유즈맵으로, 플레이어가 방화범으로부터 안전을 위해 100층짜리 빌딩을 탈출하는 퍼즐형 장르의 맵이다. 맵의 구조는 빌딩 내부를 상세히 재현했으며, 각 층마다 다양한 장애물과 함정이 배치되어 있어 플레이어는 신중하게 길을 찾아야 한다. 맵의 분위기는 긴장감이 넘치며, 탈출을 성공하기 위해선 빠른 판단력과 전략이 요구된다. 특히 100층이라는 높은 층수는 플레이어에게 막대한 도전 과제를 제공하며, 각 층마다 숨겨진 비밀이나 숨겨진 길을 찾아야만 다음 단계로 나아갈 수 있다. 이 맵은 단순히 탈출하는 것을 넘어, 퍼즐과 액션이 조화를 이룬 흥미로운 경험을 제공한다. 초보자와 숙련자 모두 즐길 수 있도록 난이도가 조절되어 있으며, 특히 팀 플레이를 한다면 더 효율적으로 탈출할 수 있을 것이다. 다만, 맵의 크기가 크고 층수가 많기 때문에 플레이 시간이 길어질 수 있어 주의가 필요하다. 이 맵의 핵심은 '빠르게 생각하고, 신중하게 움직여야 한다'는 점으로, 단순하게 달리는 것만으로는 탈출이 불가능하다는 점을 기억해야 한다. 또한, 맵의 각 층마다 숨겨진 아이템이나 힌트가 존재할 가능성이 높아, 플레이어는 모든 층을 꼼꼼히 살피는 것이 중요하다. 이 맵은 퍼즐과 액션을 좋아하는 플레이어들에게 특히 추천되며, 팀원과의 협력이 탈출 성공률을 크게 높일 수 있다. 마지막으로, 이 맵은 스타크래프트의Classic 유즈맵으로서의 매력을 느낄 수 있도록 디자인되어 있어, 오랜 시간동안 사랑받아 온 classic 스타일을 좋아하는 플레이어들에게도 좋은 선택이 될 것이다. 플레이 전에는 맵의 구조와 각 층의 함정을 미리 숙지하는 것이 중요하며, 팀원과의 사전 협의를 통해 탈출 전략을 세우는 것도 좋은 방법이다. 이 맵을 즐기기 위해서는 단순히 달리는 것뿐만 아니라, 전략적 사고와 팀워크가 필수라는 점을 잊지 말아야 한다. "Escape from the 100-Story Building" is a custom map in *StarCraft: Brood War* where players must escape a 100-story building to avoid a fire, featuring a puzzle-style gameplay experience. The map meticulously recreates the interior of the building, with each floor presenting unique obstacles and traps that require careful navigation. The tense atmosphere demands quick decision-making and strategic planning to succeed. The sheer height of 100 floors presents a significant challenge, as players must uncover hidden paths or secrets on each floor to progress. Beyond mere escape, the map blends puzzles and action into an engaging experience, offering adjustable difficulty to suit both beginners and veterans. Team play enhances efficiency, making cooperation key to a successful escape. However, due to its size and multiple floors, the playtime can be lengthy, so patience is necessary. The core principle is to "think fast and move carefully"—mindless running won’t cut it. Each floor may hold hidden items or clues, so thorough exploration is essential. This map is especially recommended for players who enjoy puzzles and action, and teamwork drastically improves escape success rates. Designed to evoke the charm of classic *StarCraft* custom maps, it’s a great choice for fans of traditional styles who have loved these maps for years. Before playing, familiarizing yourself with the map’s structure and each floor’s traps is crucial, and coordinating with teammates beforehand can help devise an effective escape strategy. To fully enjoy this map, remember that strategic thinking and teamwork are just as important as speed.
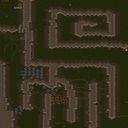
나루토 대모험! (Naruto Daemohum!)
스타크래프트 브루드워의 유즈맵 중 하나인 ‘나루토 대모험!’은 캐릭터 기반 액션과 디펜스가 조화된 재미있는 플레이 경험을 제공하는 맵이다. 맵의 배경은 사막 타일셋으로 구성되어 있으며, 플레이어는 8명의 인원으로 게임에 참여할 수 있다. 맵의 구조는 넓은 평야와 일부 오브젝트가 배치된 지역으로 구성되어 있으며, 중앙에 위치한 주요 진영을 중심으로 방어와 공격을 병행하는 플레이가 가능하다. 이미지에서 확인되는 것처럼 맵의 지형은 비교적 평탄하고, 일부 지역은 오브젝트로 막혀 있어 전략적인 움직임을 요구한다. 맵의 제목과 내부 설명에서 ‘대모험’이라는 표현이 사용된 점을 고려할 때, 단순히 디펜스에 그치지 않고 다양한 미션이나 퍼즐 요소가 포함되었을 가능성이 있다. 또한, ‘wn789632’가 제작자라는 점과 ‘재밌게하세요^^’라는 메시지가 함께 포함되어 있어, 제작자의 의도가 즐겁고 가벼운 분위기의 플레이에 중점을 두고 있음을 유추할 수 있다. 맵의 크기가 4096x4096으로 상당히 넓은 편이므로, 넓은 시야를 활용한 전략과 협력이 중요할 것으로 보인다. 다만, 맵의 내부 설명이 간결하고 승리 조건이나 게임 방식에 대한 구체적인 설명이 없으므로, 플레이 전 미리 맵의 규칙이나 목표를 확인하는 것이 좋다. 이 맵은 스타크래프트의 유즈맵 커뮤니티에서 인기를 끌 만한 요소들을 갖추고 있으며, 특히 나루토라는 인기 있는 캐릭터를 활용한 점이 흥미를 끌 수 있는 포인트다. 플레이어들은 팀워크와 빠른 판단력을 요구하는 이 맵에서 다양한 전략을 구사하며 재미를 느낄 수 있을 것이다. 또한, 맵의 사막 타일셋은 시원한 느낌을 주어 플레이어의 몰입감을 높이는 데 기여할 것으로 보인다. Naruto Daemohum! is a StarCraft: Brood War custom map that blends character-based action with defense mechanics, offering an engaging and entertaining gameplay experience. The map utilizes a desert tileset and allows up to eight players to participate. The terrain features wide open plains interspersed with scattered obstacles, enabling strategic movement and positioning around a central hub. While the visible structure appears relatively flat, some areas are blocked by objects, requiring careful navigation. The title and internal description suggest that the map may incorporate adventure or mission elements beyond simple defense, adding variety to gameplay. The creator's note, 'wn789632' and '재밌게하세요^^' (Have fun!), hints at a lighthearted and enjoyable experience. The map's large 4096x4096 size demands strategic use of vision and teamwork. However, the lack of detailed internal descriptions regarding win conditions or gameplay rules means players should review the map's objectives beforehand. This map likely appeals to the StarCraft custom map community, particularly due to its use of the popular Naruto franchise. Players can expect to enjoy diverse strategies and quick decision-making in this immersive desert-themed adventure.
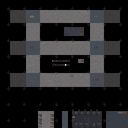
테란 디펜스 V2.0 (Terran Defence V2.0)
테란 디펜스 V2.0은 스타크래프트 브루드워의 대표적인 유즈맵 중 하나로, 테란 종족을 조종하여 끊임없이 몰려드는 적들을 방어하는 디펜스 장르의 게임입니다. 맵은 중앙에 플레이어 기지 역할을 하는 커맨드 센터가 배치되어 있으며, 주변으로 여러 개의 입구가 뚫려 있습니다. 각 입구는 지정된 경로로 적 유닛이 끊임없이 생성되어 플레이어를 공격합니다. 플레이어는 커맨드 센터를 중심으로 방어 건물을 건설하고, 업그레이드를 통해 방어력을 강화해야 합니다. 맵의 특징은 입구별로 난이도와 적의 공격 패턴이 다르다는 점으로, 특정 입구는 더 강력한 적이나 다수의 적을 동시에 상대해야 하는 경우가 있습니다. 또한, 맵 곳곳에 숨겨진 자원이나 보너스 건물들이 배치되어 있어 전략적인 자원 관리도 필요합니다. 이 맵은 주로 6명의 플레이어가 각자의 입구를 방어하는 협동형 플레이가 가능하며, 적의 공세를 막아내며 생존하는 것이 목표입니다. 초보자와 숙련자 모두 즐길 수 있도록 난이도가 조절 가능한데, 입구별로 난이도를 설정할 수 있어 자신에 맞는 난이도를 선택할 수 있습니다. 특히, 방어 건물을 효율적으로 배치하고 업그레이드를 적시에 진행하는 것이 승리의 핵심입니다. 테란 디펜스 V2.0은 오랜 기간 사랑받아온 디펜스 유즈맵의 정수라 할 수 있으며, 전략성과 긴장감을 동시에 느낄 수 있는佳作입니다. 이 맵을 플레이하기 전에는 각 입구의 난이도와 공격 패턴을 미리 확인하고, 방어 건물의 배치와 업그레이드 계획을 세워두는 것이 좋습니다. 또한, 팀원과의 원활한 소통이 필수적이기에, 팀플레이가 가능한 맵이라는 점을 유념해야 합니다. Terran Defence V2.0 is a classic custom map in StarCraft: Brood War, where players control the Terran faction to defend against endless waves of enemies. The map features a central Command Center as the player's base, surrounded by multiple entry points where enemies spawn in designated paths. Players must construct defensive buildings and upgrade their defenses to withstand the attacks. Each entry point varies in difficulty and enemy patterns, with some requiring players to handle stronger or more numerous enemies. Hidden resources and bonus buildings are scattered throughout the map, adding a layer of strategic resource management. The map supports cooperative play for up to 6 players, each defending their own entry point, with the goal of surviving the enemy onslaught. The difficulty can be adjusted per entry point, making it accessible for both beginners and experienced players. The key to victory lies in efficient building placement and timely upgrades. Terran Defence V2.0 is a refined masterpiece of the defence custom map genre, offering both strategy and tension. Before playing, it's advisable to review the difficulty and attack patterns of each entry point and plan the placement of defensive buildings and upgrades. Team communication is essential, as this map is designed for team play.
맵 선택 가이드
태그는 맵의 핵심 특징을 빠르게 설명하지만 제작 버전마다 규칙이 다를 수 있습니다. 상세 설명에서 권장 인원, 난이도, 플레이 시간과 버전을 함께 확인한 뒤 다운로드하세요.