
협동 디펜스 스타크래프트 맵 모음
'협동 디펜스' 태그가 등록된 맵을 모았습니다. 장르 하나로 찾기 어려운 플레이 방식, 난이도와 특징을 중심으로 인기 맵과 최신 맵을 비교해 보세요.
- 등록 맵
- 34개
- 누적 다운로드
- 1
- 누적 조회
- 1,158
인기 맵
다운로드와 조회 반응이 높은 맵입니다.
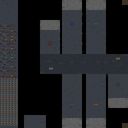
매트릭스 불렛 타임 8.3 (Matrix Bullet Time 8.3)
매트릭스 불렛 타임 8.3(영문: Matrix Bullet Time 8.3)은 스타크래프트 브루드워의 대표적인 유즈맵으로, 총 6명의 플레이어가 참여하는 협동형 디펜스 장르의 게임이다. 게임은 우주 배경의 넓은 맵에서 펼쳐지며, 플레이어들은 적의 끊임없는 공세를 방어하면서 버티는 것이 목표다. 맵 중앙에 위치한 핵을 보호하거나, 특정 구조물을 보호하는 등 방어 목표는 맵에 따라 달라진다. 적군은 다양한 유닛으로 구성되어 있으며, 일부는 플레이어의 유닛을 직접 공격하기도 하고, 일부는 구조물을 공격해 파괴를 시도한다. 플레이어들은 제한된 자원으로 유닛을 생산하고, 적의 공격을 효율적으로 방어하기 위해 전략을 세워야 한다. 맵의 특징은 '불렛 타임'이라는 시스템으로, 일시적으로 시간을 느리게 흐르게 만들어 공격 타이밍을 잡거나 방어 전략을 세울 수 있는 기회를 제공한다는 점이다. 이 시스템은 게임의 긴장감을 높이며, 플레이어 간의 협력이 필수적이다. 맵의 구조는 중앙과 외곽으로 나뉘어져 있으며, 외곽 지역은 주로 적의 기지가 위치해 있어 방어선이 형성된다. 플레이어들은 자원 수집을 통해 유닛을 업그레이드하고, 방어력을 강화할 수 있다. 게임의 난이도는 높은 편으로, 초보자가 플레이하기에는 다소 어려울 수 있으며, 숙련된 플레이어들이 모여야 안정적으로 즐길 수 있는 구조다. 특히, 한두 명의 플레이어의 실수가 전체 팀의 패배로 이어질 수 있어 팀워크가 무엇보다 중요하다. 이 맵은 디펜스 장르의 정석을 보여주며, 스타크래프트 유즈맵 among the best로 꼽히는 작품 중 하나로 손꼽힌다. 플레이는 약 40분에서 1시간가량 소요되며, 우주 배경과 독특한 시스템 덕분에 시각적·전략적 재미를 모두 제공한다. 추천 대상은 디펜스와 협동 플레이를 좋아하는 유저이며, 특히 팀플레이와 전략적 사고를 즐기는 플레이어들에게 적합하다. 게임을 시작하기 전에 맵의 구조와 적의 공격 패턴을 숙지하는 것이 중요하며, 팀원과의 원활한 소통이 승리와 직결된다. 또한, 자원 관리와 유닛 생산 타이밍을 잘 조절해야만 장기전을 이길 수 있다. 맵의 특성상 초반과 후반의 밸런스가 중요하므로, 초반 방어선을 굳건히 유지하는 것이 관건이다. Matrix Bullet Time 8.3 is a renowned user-made defense map for StarCraft: Brood War, designed for six players. Set in a vast outer-space environment, the game challenges players to work together to fend off relentless waves of enemy units targeting the central objective—typically a crucial structure or core that must be protected at all costs. The map is divided into key zones: a central area where allies spawn and defend, and outer regions dominated by enemy bases that constantly launch assaults. A standout feature is the "Bullet Time" mechanic, which temporarily slows down gameplay, allowing players to make tactical decisions with greater precision, adjust unit positioning, or execute coordinated attacks. This adds a layer of depth and urgency to both offensive and defensive strategies. The map’s design emphasizes resource management, unit upgrades, and spatial awareness, as players must allocate resources wisely and adapt their defenses based on enemy composition and attack patterns. With high difficulty and a strong emphasis on teamwork, the game is best suited for experienced players who enjoy cooperative strategy and fast-paced decision-making. The recommended playtime hovers around 40 to 60 minutes, making it an ideal session for groups looking for a challenging yet rewarding experience. Visual flair is enhanced by cosmic aesthetics, and the strategic layering—balancing early-game survival with late-game resilience—ensures replayability. Players are advised to study enemy behaviors, communicate effectively with teammates, and prioritize early defensive buildup to avoid early collapses. Overall, Matrix Bullet Time 8.3 stands as a classic in the UMS defense genre, offering a blend of action, strategy, and team coordination that appeals to competitive and casual players alike.
오버마인드 디펜스 7:1 파이널 (Overmind Defence 7:1 Final)
‘오버마인드 디펜스 7:1 파이널(Overmind Defence 7:1 final)’은 스타크래프트 브루드워의 대표적인 UMS 유즈맵으로, 8명의 플레이어가 협동하여 적의 오버마인드를 파괴하는 디펜스 형식의 타워 디펜스 맵이다. 맵은 3072x3072의 거대한 우주 타일셋으로 구성되어 있으며, 중앙에 위치한 적의 오버마인드를 surrounded하는 형태로 진행된다. 플레이어는 각자 주어진 진영에서 건물을 짓고, 유닛을 생산하여 끊임없이 몰려드는 적의 공세를 방어해야 한다. 맵의 특징은 7:1이라는 극심한 밸런스 불균형에도 불구하고, 플레이어들이 협력하여 승리 가능한 구조로 설계되었다는 점이다. 맵 곳곳에는 방어 타워를 건설할 수 있는 ‘포인트’가 배치되어 있으며, 이를 활용하여 효율적인 방어선을 구축해야 한다. 또한, 맵의 테두리에는 자원이나 업그레이드 포인트가 배치되어 있어, 이를 확보하며 병력을 강화하는 전략이 필요하다. 맵의 난이도는 8명의 플레이어가 모두 협력해야만 클리어가 가능한 ‘보통’ 수준으로, 초보자의 경우 팀원 간의 조율 부족으로 인해 실패할 가능성이 높다. 맵의 재미는 타워 디펜스와 협동의 조합으로, 전략적인 건물 배치와 실시간 병력 관리가 요구된다. 플레이 전에는 맵의 포인트 위치와 자원 분포를 숙지하는 것이 중요하며, 특히 방어 타워의 건설 위치는 승리 여부를 좌우할 수 있다. 추천 대상은 팀플을 즐기는 유저들이며, 협동 전략 게임을 좋아하는 플레이어들에게 적합하다. 맵의 긴 플레이 시간과 복잡한 구조는 초보자의 진입 장벽을 높이지만, 숙련자들에게는 깊고 전략적인 재미를 제공한다. ‘Overmind Defence 7:1 final’ is a classic UMS custom map in StarCraft: Brood War, where 8 players work together to destroy the enemy Overmind in a tower defense-style gameplay. Set on a massive 3072x3072 space-themed tile, the map challenges players to defend their territory while managing resources and unit production. The core appeal lies in its cooperative mechanics, as players must strategically build defenses and fend off relentless enemy waves despite the overwhelming 7v1 disadvantage. Key features include designated tower-building points scattered throughout the map and resource nodes along the edges, which allow for upgrades and reinforcement. The difficulty is balanced for ‘normal’ play, requiring close coordination among all players to succeed. Novices may struggle due to the need for real-time strategy and teamwork, but experienced players will appreciate the depth of tactical planning and execution. Before playing, familiarizing yourself with tower placement spots and resource locations is crucial. This map is ideal for those who enjoy team-based strategy games and cooperative gameplay, offering a rewarding yet challenging experience for seasoned players.
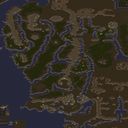
반지의 제왕: SD 컴까기 이블 (LotR - SD Comp Evil)
‘반지의 제왕: SD 컴까기 이블(LotR - SD Comp Evil)’은 스타크래프트: 브루드워의 유즈맵으로, ‘반지의 제왕’의 세계관을 기반으로 한 컴까기(컴퓨터 상대 유즈맵) 장르의 디펜스 맵이다. 맵의 중심에는 거대한 요새가 자리 잡고 있으며, 플레이어는 이 요새를 방어하며 끊임없이 몰려오는 적의 공격을 막아내야 한다. 맵의 구성은 크게 요새 주변을 도는 넓은 도로를 따라 배치된 방어 건물과, 중앙 요새를 중심으로 한 고립된 지역으로 나뉘어 있다. 방어 건물은 맵 곳곳에 흩어져 있으며, 플레이어는 초반 자원을 바탕으로 건물을 배치하고 업그레이드하는 전략을 세울 수 있다. 게임의 진행은 크게 세 단계로 나뉜다. 첫 번째는 초반 단계로, 적은 비교적 약한 유닛으로 구성되어 있지만 빠르게 증가하는 웨이브를 막아내야 한다. 두 번째 단계는 중간 단계로, 적이 stronger 유닛으로 구성된 웨이브를 보내오며 방어 건물의 중요성이 커진다. 마지막으로 마지막 단계는 보스 웨이브로, 맵의 중앙 요새를 향해 강력한 보스가 출현하며 이를 막아내야만 승리할 수 있다. 각 웨이브 사이에는 일정 시간의 휴식 시간이 주어지며, 이 시간을 활용해 방어 건물의 배치와 업그레이드를 철저히 준비해야 한다. 맵의 특징 중 하나는 맵의 규모가 상당히 크다는 점으로, 넓은 공간을 활용한 방어 라인의 설계가 중요하다. 플레이어는 4인용 맵으로, 각각의 플레이어가 독립된 요새를 방어하며 동시에 협력하는 방식이다. 각 플레이어는 고유한 리소스를 가지고 있으며, 이를 바탕으로 방어 건물과 유닛을 생산할 수 있다. 맵의 난이도는 ‘보통’ 정도로 설정되어 있으며, 초보 플레이어도 충분히 즐길 수 있지만, 고수 플레이어는 더욱 전략적인 플레이를 요구받는다. 맵의 atmospher는 ‘반지의 제왕’의dark fantasy 분위기를 잘 반영하고 있으며, 맵의 디자인과 사운드가 게임의 몰입감을 높이는 데 큰 역할을 한다. 이 맵을 추천하는 대상은 스타크래프트의 디펜스 유즈맵을 좋아하는 플레이어, 특히 ‘반지의 제왕’의 세계관에 관심이 있는 유저들이다. 또한, 넓은 맵과 다양한 전략적 선택지를 즐기고자 하는 플레이어에게도 적합하다. 플레이 전에는 방어 건물의 배치와 업그레이드 계획을 미리 세워두는 것이 중요하며, 각 웨이브의 패턴을 익히는 것이 성공의 열쇠가 될 것이다. 맵의 난이도는 전체적으로 균형 잡혀 있으나, 후반 보스 웨이브는 신중한 전략이 요구된다. ‘Lord of the Rings: SD Comp Evil’ is a custom defense map for *StarCraft: Brood War* based on the world of *The Lord of the Rings*. Players must defend a massive fortress from endless waves of enemies, with the map divided into wide roads encircling the central stronghold and isolated zones around it. Scattered defensive structures can be placed and upgraded early on using gathered resources. The game progresses through three phases: the early stage, where weaker enemy waves must be repelled quickly; the mid-game, where stronger units appear and defensive structures become crucial; and the final boss wave, where powerful enemies march toward the central fortress—defeating them is the only way to win. Brief rest periods between waves allow players to strategically arrange and upgrade defenses. The map’s large scale demands careful planning of defense lines across its expansive terrain. Designed for four players, each defends their own fortress while cooperating with others. Players have unique resources to build defenses and units, and the difficulty is set to moderate, making it enjoyable for beginners while offering depth for advanced players. The map’s atmosphere perfectly captures *The Lord of the Rings’* dark fantasy aesthetic, with immersive design and sound enhancing the experience. Recommended for fans of *StarCraft* defense maps, especially those who love *The Lord of the Rings*, as well as players who enjoy large-scale maps with strategic depth. Planning defense layouts and upgrades beforehand is key, and mastering each wave’s patterns is essential for success. While the overall difficulty is balanced, the final boss wave demands careful strategy.
오버마인드 디펜스 6:0 모어 스페이스 (Overmind Defence 6:0 More space!)
스타크래프트 브루드워의 대표적인 디펜스 장르 유즈맵 ‘오버마인드 디펜스 6:0 모어 스페이스(Overmind Defence 6:0 More space!)’는 8명의 플레이어가 한 팀으로 적의 오버마인드를 파괴하는 목표를 향해 협동하는 구조로 설계되었다. 맵은 우주 타일셋을 기반으로 3072x3072의 넓은 공간을 차지하며, 가운데 위치한 적 기지 주변으로 적의 공격로가 복잡하게 배치되어 있다. 플레이어는 각자의 스타크래프트 유닛을 이끌고 방어선을 구축하고, 적의 공세를 물리치며 자원과 기술을 확보해야 한다. 맵의 특징은 ‘0:More space!’라는 제목에서 알 수 있듯이 넓은 맵과 넓어진 방어 공간으로, 적의 침공을 더 효율적으로 차단하고 자원을 확보할 수 있는 기회를 제공한다. 특히 초반 방어 타워와 유닛 배치 위치가 넓게 분산되어 있어 전략적 플레이가 요구되며, 후반으로 갈수록 강력한 적의 공세가 쏟아지므로 팀 간의 긴밀한 협력이 필수적이다. 초보 유저는 방어선 구축과 자원 관리에 집중해야 하며, 숙련자는 적의 약점을 파고들며 공세를 역으로 활용하는 플레이가 가능하다. 맵의 재미는 넓은 공간을 활용한 광역 방어와 협동 플레이에서 오며, 특히 적의 오버마인드를 파괴하기 위한 마지막 공세 타이밍이 긴장감을 높인다. 플레이 전에는 맵의 넓은 공간을 고려해 방어선 구축과 자원 확보를 위한 전략을 미리 세우는 것이 중요하며, 팀원과의 원활한 소통이 승리를 좌우할 수 있다. 이 맵은 디펜스 장르의Classic을 재해석한 작품으로, 넓은 맵과 전략적 깊이를 통해 많은 유저들에게 사랑받고 있다. Overmind Defence 6:0 More space! is a classic defense genre custom map in StarCraft: Brood War, designed for 8 players working together as one team to destroy the enemy's Overmind. The map spans a vast 3072x3072 area using a space-themed tileset, featuring a central enemy base surrounded by intricately designed attack paths. Players must strategically place defensive towers and units, manage resources, and repel enemy waves while advancing their own technology. The name '0:More space!' reflects its expanded design, offering more room for defense and resource gathering compared to previous versions. Early gameplay requires careful tower placement and unit management, while later stages demand coordinated teamwork to withstand increasingly powerful enemy assaults. Beginners should focus on building a solid defense and resource economy, while experienced players can exploit enemy weaknesses and turn the tide with counter-attacks. The map’s charm lies in its strategic depth and teamwork, with the final push to destroy the Overmind creating intense moments. Before playing, it's crucial to plan defense lines and resource strategies, as communication and cooperation among teammates are key to success. This map is a refined take on the defense genre, celebrated for its wide space and strategic complexity among StarCraft fans.
선켄 D 6W 버전 11.0 (Sunken D 6W Version 11.0)
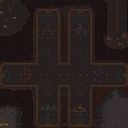
‘선켄 D 6W 버전 11.0’은 스타크래프트 브루드워의 대표적인 UMS(유즈맵) 디펜스 장르 맵으로, 수중 지형이 펼쳐지는 독특한 배경에서 다수의 플레이어가 협동하여 끊임없이 몰려드는 적을 방어하는 플레이가 특징이다. 맵은 정글 타일셋을 기반으로 한 수중 지형으로 디자인되어 있으며, 가운데에 위치한 주요 건물을 중심으로 6방향으로 뻗어나가는 구조가 보인다. 각 플레이어는 시작 지점의 미네랄과 가스를 확보한 뒤, 방어 타워와 유닛을 배치하여 적의 공격을 막아내야 한다. 특히 중앙 건물을 중심으로 한 넓은 시야와 좁은 통로 구조는 적의 대량 러시를 효과적으로 차단할 수 있도록 설계된 것으로 보인다. 맵의 난이도는 플레이어의 전략과 방어 타워의 배치에 따라 크게 달라지며, 난이도 조절이 가능한 것으로 추정된다. 맵의 진행은 시간 경과에 따라 적의 공격이 점점 강화되는 방식으로 진행되며, 플레이어는 지속적인 리소스 관리와 방어 라인의 재구축이 요구된다. 이 맵은 특히 6인 플레이를 전제로 한 협동 디펜스 게임으로, 팀워크와 순간적인 판단력이 중요한 요소로 작용할 것으로 보인다. 초보 플레이어의 경우 방어 타워의 배치와 리소스 관리에 어려움을 겪을 수 있으며, 숙련된 플레이어는 보다 효율적인 방어 전략을 구사할 수 있을 것이다. 맵의 특징으로는 수중 지형의 시각적 독특함과 함께, 중앙 건물을 중심으로 한 진형이 방어 라인을 구축하기 용이하다는 점이 있다. 플레이 전에는 맵의 구조와 적의 공격 패턴을 충분히 숙지하는 것이 중요하며, 방어 타워의 종류와 배치 위치를 미리 계획해두는 것이 성공의 열쇠가 될 것이다. Sunken D 6W Version 11.0 is a renowned UMS (User-Made Scenario) defense map in StarCraft: Brood War, featuring a distinctive underwater terrain where multiple players must cooperatively defend against waves of enemies. The map is designed with a jungle tile set adapted to underwater aesthetics, centered around a main structure with six branching paths extending outward. Each player begins with mineral and gas resources, strategically placing defensive towers and units to fend off attacks. The wide field of view from the central structure and narrow passages are clearly intended to facilitate effective blockades against large-scale rushes. The difficulty is likely adjustable, depending on the player's strategy and tower placements. The gameplay progresses with increasingly stronger enemy waves over time, demanding continuous resource management and reinforcement of defense lines. This map is specifically designed for six players, emphasizing teamwork and quick decision-making. Beginners may struggle with tower placement and resource allocation, while experienced players can deploy more advanced defensive tactics. Notable features include the unique underwater visual design and the central structure's layout, which simplifies the creation of defensive formations. Before playing, it's crucial to familiarize yourself with the map's layout and enemy attack patterns, and planning tower placements and defense strategies in advance will significantly increase your chances of success.
헌터스 히어로 GMF (Hunters Hero GMF)
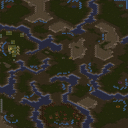
스타크래프트 브루드워의 대표적인 디펜스 장르 유즈맵 「헌터스 히어로 GMF」는 5명의 플레이어가 협동하여 3대의 컴퓨터 상대를 상대로 생존과 자원 확보를 동시에 챙기는 전략적 디펜스 게임이다. 맵의 특징은 중앙에 위치한 자원 채취 지역을 중심으로 적의 끊임없는 공격을 막아내며, 획득한 미네랄을 통해 업그레이드와 유닛 생산을 병행하는 시스템에 있다. 맵의 배경은 사막 타일셋으로 구성되어 있어 건조한 분위기가 강렬하게 느껴지며, 넓은 평야와 협소한 길목이 조화를 이루어 방어 전술을 짜기 좋게 설계되어 있다. 특히, 맵의 중앙 자원 지역 주변에는 보호막을 제공하는 구조물이 배치되어 있어 초보 플레이어도 비교적 안전하게 시작할 수 있지만, 고수들은 이 구조물을 적극 활용해 방어선을 더욱 견고하게 다질 수 있다. 게임 진행은 크게 3단계로 나뉘며, 각 단계마다 등장하는 적의 종류와 수가 증가하는 패턴을 보인다. 초반에는 저글링과 히드라가 주를 이루지만, 후반부로 갈수록 울트라리스크와 디바우러가 등장해 공격의 난이도가 급격히 상승한다. 플레이어는 자원을 확보하는 동시에 적의 공격을 방어하는 균형을 맞춰야 하는데, 자원 채취를 등한시하면 업그레이드와 유닛 생산에서 뒤처지게 되고, 반대로 공격에만 집중하면 방어선이 무너져 순식간에 패배할 수 있다. 맵의 난이도는 전반적으로 ‘보통’ 정도로 설정되어 있지만, 팀워크와 전략의 차이가 크게 작용하기 때문에 초보자와 숙련자 간의 체감 난이도 차이가 클 것으로 예상된다. 추천 대상은 디펜스 게임을 즐기며 전략적 사고를 중요시하는 플레이어이며, 특히 컴퓨터 상대와의 대결에서 협동과Resource Management 능력을 키우고 싶은 유저들에게 적합하다. 플레이 전에는 맵의 구조와 자원 채취 지역, 방어 포인트를 미리 숙지하는 것이 중요하며, 초반에는 방어에 집중하되 자원 확보도 소홀히 하지 않아야 한다. 또한, 팀원 간의 역할 분배(예: 보급 담당, 방어 담당, 공격 담당)를 명확히 하는 것이 승리의 열쇠가 될 것이다. 이 맵은 디펜스 장르의 기본 틀을 유지하면서도 자원 관리와 팀워크가 요구되는 점이 매력적이다. 특히, 컴퓨터 상대의 패턴을 익히고 이를 활용한 전략을 세우는 재미가 쏠쏠하다. 다만, 자원 확보를 등한시하면 게임이 급격히 어려워질 수 있으니 주의가 필요하다. Hunter’s Heroes GMF is a classic defense-style custom map in StarCraft: Brood War where five players team up to survive against three AI opponents while simultaneously gathering resources. The map revolves around a central resource-gathering area, where players must fend off endless enemy waves while using the collected minerals to upgrade and produce units. Set in a desert-themed tile set, the map conveys a dry, barren atmosphere, with wide open plains and narrow chokepoints that lend themselves well to tactical defense. Around the central resource zone, protective structures provide early-game safety for beginners, but skilled players can use them to reinforce their defenses even further. The game progresses through three distinct stages, each escalating in difficulty as the types and numbers of enemies increase. Early waves consist mainly of Zerglings and Hydralisks, but later stages introduce Ultralisks and Devourers, sharply raising the challenge. Players must balance resource collection with defense—neglecting one side leads to falling behind in upgrades and unit production, while overcommitting to defense risks letting the enemy overwhelm your base. Though the map is rated at a moderate difficulty overall, teamwork and strategy play a huge role, meaning beginners and veterans will experience very different levels of challenge. This map is ideal for players who enjoy defense games and value strategic thinking, especially those looking to improve their cooperation and resource management skills against AI opponents. Before playing, it’s crucial to familiarize yourself with the map layout, resource zones, and key defensive positions. Early focus should be on defense, but don’t ignore resource gathering. Clear role division among teammates—such as supply management, defense, or offense—can be the key to victory. While Hunter’s Heroes GMF keeps the core mechanics of the defense genre intact, its emphasis on resource control and teamwork makes it stand out. Mastering the AI’s attack patterns and building strategies around them adds a satisfying layer of depth. Just be careful not to ignore resource collection, or the game can quickly become much harder.
7vs1 하드 컴퓨터 (7vs1 Hard Computer)
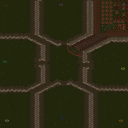
스타크래프트 브루드워 유즈맵 '7vs1 hard computer'는 7명의 플레이어가 단 한 명의 '매우 어려운 컴퓨터' 플레이어를 상대로 방어전을 펼치는 디펜스 장르의 협동형 맵이다. 맵의 핵심은 극한의 러시 타이밍을 잡아오는 AI의 공격을 효과적으로 방어하고, 이를 기반으로 역공을 노리는 전략적 균형에 있다. 맵은 사막 타일셋으로 구성되어 있으며, 넓은 평야와 중앙 언덕 지형이 특징적이다. 중앙 언덕은 방어 거점을 확보하기 좋은 위치로, 다수의 건물을 배치해 병력을 생산하고 요새화할 수 있는 공간이 제공된다. 플레이어들은 시작 지점에서 건물을 건설하고 자원을 채취할 수 있으며, AI는 주로 저그 종족으로 등장해 빠른 타이밍 러시를 시도하는 것으로 보인다. 방어에 실패하면 순식간에 건물이 파괴되고 게임이 끝나므로, 초반 자원 관리와 방어 시설 구축이 무엇보다 중요하다. 또한, AI의 공격 패턴은 상대적으로 예측 가능한 편이지만, '매우 어려움' 난이도답게 병력 규모가 크고 속도가 빨라서 방심할 수 없다. 이 맵은 협동심이 중요한데, 각 플레이어가 맡은 구역을 방어하지 못하면 전체가 무너질 수 있어 팀웍이 필수적이다. 초보자에게는 다소 어려운 편이지만, 방어 구조와 병력 운용에 익숙해지면 점차 재미를 느낄 수 있는 맵이다. 추천 플레이어는 적어도 중급 이상으로, 스타크래프트의 기본적인 빌드와 전략을 이해하고 있는 플레이어들이 즐기기 좋다. 맵을 시작하기 전에는 방어 거점의 확보와 초기 자원 배분을 carefully 해야 하며, AI의 공격 루트를 미리 예상해 대비하는 것이 중요하다. 또한, 협동 채팅을 통해 방어 계획과 병력 공유를 원활히 하는 것이 승리의 열쇠가 될 것이다. 이 맵은 디펜스 장르의 정수를 느낄 수 있는 동시에, 플레이어 간의 화합과 전략적 사고를 요구하는 흥미로운 경험을 선사할 것이다. 특히, AI의 공격 패턴을 분석하고 이를 바탕으로 방어 전략을 발전시키는 재미가 있다. 한정된 자원과 넓은 맵 공간을 활용해 어떻게 효율적으로 방어선을 구축할 것인지 고민해 보는 것도 이 맵의 묘미 중 하나다. 초반에는 방어에 집중하되, AI의 공격을 성공적으로 막아낸 후에는 역공을 노려볼 수도 있다. 하지만 역공 타이밍을 잡는 것은 매우 어려우므로, 기본적으로는 방어에 중점을 두고 플레이하는 것이 좋다. 이 맵을 즐기기 위해서는 스타크래프트의 기본적인 메커니즘을 잘 이해하고 있어야 하며, 특히 저그의 공격 패턴과 방어 건물의 배치에 대한 지식이 helpful 하다. 또한, 팀원 간의 원활한 소통이 없으면 방어에 구멍이 생길 수 있으므로, 협동심을 키우는 것도 중요하다. 이 맵은 단순히 방어만 하는 것이 아니라, 어떻게 하면 AI의 공격을 효과적으로 막아내고 역전을 노릴 수 있는지를 끊임없이 고민하게 만드는 매력이 있다. 따라서, 디펜스 장르를 좋아하는 플레이어라면 반드시 한 번쯤 도전해 볼 만한 가치가 있는 맵이라 할 수 있다. 이 맵을 통해 협동의 중요성과 전략적 사고의 필요성을 느낄 수 있을 것이다. 또한, AI의 공격 패턴을 분석하고 이를 바탕으로 한 방어 전략을 세워보는 것은 스타크래프트의 기본기를 다지는 데에도 큰 도움이 될 것이다. 이 맵은 단순히 재미뿐만 아니라, 실력 향상에도 도움이 되는 유용한 맵으로 평가할 수 있다. 마지막으로, 이 맵을 플레이할 때는 각자의 역할 분담을 명확히 하고, 팀원 간의 호흡을 맞추는 것이 무엇보다 중요하다는 점을 잊지 말아야 한다.只有这样,才能在激烈的防守战中取得最终的胜利。 This StarCraft: Brood War custom map, *"7 vs. 1 Hard Computer,"* is a cooperative defense-style map where seven players must defend against a single, extremely difficult AI opponent. The core challenge lies in effectively countering the AI's relentless rush timing and maintaining a strategic balance to launch a counterattack. The map features a desert tileset with expansive plains and a central hill terrain, which provides an ideal defensive position. The elevated ground allows players to establish strongholds, construct multiple buildings, and fortify their defenses. Players begin by building structures and gathering resources at their starting points, while the AI, typically playing as the Zerg, launches rapid early-game rushes. Failing to defend properly results in buildings being destroyed almost instantly, ending the game—making early resource management and defensive infrastructure crucial. Though the AI's attack patterns are somewhat predictable, its "very hard" difficulty ensures overwhelming force with fast-moving units, leaving no room for complacency. Teamwork is essential here; if any player fails to hold their sector, the entire defense collapses, making coordination vital. While challenging for beginners, the map becomes more enjoyable as players master defensive structures and unit control. It's best suited for intermediate to advanced players who understand basic builds and strategies. Before starting, careful planning is needed to secure defensive positions and allocate initial resources, while anticipating the AI's attack routes is key. Effective use of in-game chat for strategy discussions and shared reinforcements is often the difference between victory and defeat. This map offers a pure defense experience while demanding teamwork and strategic thinking, rewarding players who analyze the AI's patterns and adapt their defenses accordingly. The limited resources and vast map space encourage creative solutions for building efficient defensive lines. Early focus should be on defense, but successful stops can open opportunities for counterattacks—though timing these pushes is extremely difficult, so defense should remain the priority. To fully enjoy the map, players should have a solid grasp of StarCraft's mechanics, especially Zerg attack patterns and defensive building placements. Strong communication among teammates is also critical, as gaps in coordination can lead to critical failures. Beyond just defense, the map challenges players to constantly refine their strategies to not only withstand the AI's onslaught but also turn the tide in their favor. For fans of the defense genre, it's a must-try experience that highlights the importance of teamwork and tactical thinking. Analyzing the AI's behavior and adjusting defenses accordingly also serves as excellent practice for improving fundamental StarCraft skills. Ultimately, this map is valuable not just for its entertainment value but also for its role in skill development. When playing, players should clearly define roles, synchronize with teammates, and never forget that only through unity can they achieve victory in this intense defensive battle.
스타쉽 트루퍼스 스테이션 Z (Starship Troopers Station Z)
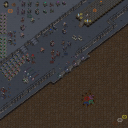
스타쉽 트루퍼스(Starship Troopers)를 모티브로 한 SF 디펜스 장르의 스타크래프트 브루드워 유즈맵 <Starship Troopers Station Z>는 4인용 협동 디펜스 맵으로, 플레이어들이 연합하여 끊임없이 몰려오는 적군을 방어하는 재미를 선사한다. 맵은 우주 테마의 광활한 배경 위에 펼쳐지며, 왼쪽과 오른쪽 끝에서 밀려오는 적 유닛들을 중앙의 방어 거점인 '스테이션 Z'에서 저지해야 한다. 방어선은 고정된 방어 시설과 플레이어의 직접적인 컨트롤이 필요한 다수의 방어 타워, 그리고 전략적 요충지를 활용한 배치로 구성된다. 맵 곳곳에 배치된 지뢰, 보호막 발생기, 에너지 재생소 등은 방어 전략의 다양성을 높이는 요소로, 단순한 타워 디펜스가 아닌 복잡한 시스템을 요구한다. 특히, 적의 공격 패턴이 시간에 따라 변화하며, 후반부로 갈수록 강력한 유닛들이 등장하므로 플레이어들은 자원 관리와 업그레이드, 그리고 효율적인 배치에 주의를 기울여야 한다. 맵의 베타 3 버전은 대부분의 버그를 수정했으며, 트리거 기반의 세밀한 진행이 특징이다. 이 맵은 SF 팬은 물론, 디펜스 장르의 전략성과 긴장감을 즐기는 유저들에게 강하게 추천된다. 플레이 전에는 방어 시설의 배치와 업그레이드 우선순위를 미리 계획하는 것이 중요하며, 팀원과의 원활한 협동이 승리의 핵심이다. Starship Troopers Station Z is a cooperative defense-style custom map for StarCraft: Brood War, inspired by the science fiction universe of Starship Troopers. Designed for four players, the map challenges teams to defend the central stronghold, Station Z, against relentless waves of enemy units attacking from both left and right sides. Set against a vast space-themed backdrop, the map features a mix of fixed defensive structures, player-controlled towers, and strategic points like mines, shield generators, and energy regenerators to diversify defensive tactics. Unlike simple tower defense, this map incorporates a dynamic system where enemy patterns escalate over time, culminating in powerful late-game units that demand careful resource management, strategic tower placement, and timely upgrades. The latest beta version (Beta 3) focuses on fixing most bugs and refining trigger-based progression, ensuring a smoother experience. With its blend of tactical depth, escalating difficulty, and immersive sci-fi theme, this map is ideal for fans of defense games and StarCraft custom maps. Players should plan their defensive layouts and upgrade paths in advance, while teamwork remains crucial for survival and success.
해변 방어 레피드 (Marine Defense Rapid)
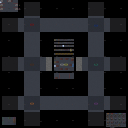
스타크래프트 브루드워의 디펜스 장르 유즈맵인 〈MARINE DEFENSE RAPID〉는 6명의 플레이어가 한 팀으로 뭉쳐 해변가 기지를 지키며 끊임없이 몰려오는 적들을 상대하는 구조로 구성되어 있다. 맵은 해변과 내륙으로 나뉘며, 해변가에는 방어 건물이, 내륙에는 보급 시설과 생산 건물이 배치되어 있다. 중앙의 좁은 통로와 바위 지형이 자연스러운 입구를 형성해 적의 진격이 제한적이지만, 순간 다수 공격에는 취약한 구조다. 마린을 주력으로 한 초반 방어가 중요하며, 후반에는 테란의 보병 유닛들이 주축을 맡게 된다. 맵의 이름에서 유추할 수 있듯, 빠른 속도로 몰려오는 적을 저지하는 ‘레피드’ 스타일의 디펜스가 핵심으로, 플레이어들은 초반에 자원을 확보해 방어선을 구축한 뒤, 시간이 지날수록 증가하는 적의 물량을 막아내야 한다. 전투는 주로 실내와 실외가 혼재된 맵에서 이루어지며, 좁은 통로와 언덕 지형이 전략적 우위를 제공한다. 초보자도 쉽게 접근할 수 있지만, 고난이도에서는 다수의 적이 동시에 공격해오는 경우 방어선이 무너질 위험이 있어 전략적 판단이 요구된다. 플레이 전에는 맵의 입구와 주요 통로 위치를 숙지하고, 초반 자원 확보와 건물 배치에 신경을 써야 한다. 또한, 적의 공격 패턴을 예측해 방어 건물을 효율적으로 배치하는 것이 승리의 관건이다. 추천 대상은 스타크래프트 디펜스 유즈맵을 즐기는 모든 플레이어이며, 특히 테란 유닛을 선호하는 유저들에게 흥미로운 경험을 제공할 것이다. 다만, 팀원 간의 호흡이 좋지 않으면 방어선이 쉽게 무너질 수 있어, 협동 플레이가 필수적이다. StarCraft: Brood War's defense genre custom map, *Marine Defense Rapid*, tasks six players working together to defend a coastal base against endless waves of enemies. The map is split into a beachfront and inland area, with defensive structures along the shore and supply depots plus production buildings inland. A narrow central passage and rocky terrain create natural choke points to slow enemy advances, though the layout is vulnerable to concentrated assaults. Early defense with Marines is critical, while later stages rely on Terran infantry units as the core force. As the name suggests, the map emphasizes a "rapid" playstyle where players must establish a defensive line early using secured resources, then hold back increasingly large enemy waves over time. Battles unfold across mixed indoor and outdoor terrain, where narrow paths and elevated ground offer strategic advantages. While accessible to beginners, high-difficulty waves can overwhelm defenses if not managed carefully, requiring smart decision-making. Before playing, it's essential to memorize the entry points and key pathways, focus on early resource gathering and building placement, and arrange defensive structures efficiently based on predicted enemy attack patterns. This map is recommended for anyone who enjoys StarCraft defense custom maps, especially those who prefer Terran units. However, poor team coordination can quickly collapse the defense, making teamwork absolutely vital.
저그 킬러 퍼펙트 버전!! (Zerg killer Perfect version!!)
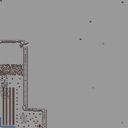
스타크래프트 브루드워 유즈맵 'Zerg killer Perfect version!!'은 저그를 상대하는 디펜스형 유즈맵으로, 8명의 플레이어가 한 팀으로 모여 저그를 상대로 버티며 승리하는 것이 목표다. 맵은 중앙에 위치한 인간 진영과 주위를 둘러싼 저그 진영으로 나뉘어져 있으며, 저그의 끊임없는 공세를 막아내며 자원을 모아 방어선을 구축하는 전략적 요소가 강하다. 맵의 특징은 저그의 공격 루트가 여러 갈래로 나뉘어져 있어 방어를 분산시켜야 하며, 중간중간 등장하는 스폰 포인트에서 끊임없이 저그가 생성되어 플레이어의 집중력을 요구한다. 초반에는 저그의 공격이 약하게 느껴질 수 있지만, 시간이 갈수록 공격 빈도와 강도가 높아지므로 초반 자원 관리와 방어 시설 구축이 중요하다. 플레이어들은 저그의 공격을 방어하면서 자원을 채취해 업그레이드를 진행하거나 추가 병력을 모집할 수 있으며, 이러한 선택이 승패를 좌우할 수 있다. 맵의 밸런스는 저그의 난이도가 점차 상승하도록 설계되어 있어, 초보자는 물론 숙련자까지 긴장감을 유지할 수 있도록 구성되어 있다. 저그를 상대로 한 협동 플레이가 요구되는 이 맵은 전략적 사고와 팀워크가 중요한 유즈맵으로, 디펜스와 협동 플레이를 좋아하는 플레이어들에게 추천할 만하다. 특히 저그의 공격을 효과적으로 방어하기 위해 방어 시설의 배치와 병력 운용을 신중히 계획해야 하며, 실시간으로 변하는 상황에 대응하는 능력이 필요하다. 또한, 저그의 공격 패턴을 익히고 이를 바탕으로 방어 전략을 유동적으로 변화시키는 것이 승리의 핵심이다. 초보자라면 난이도가 다소 높을 수 있으므로, 낮은 난이도부터 시작해 점차 익숙해지는 것이 좋다. 이 맵은 저그를 상대로 한 도전 정신과 전략적 재치를 동시에 요구하는 재미있는 유즈맵으로, 브루드워의 매력을 다시 한번 느낄 수 있는 작품이다. 플레이 전에는 맵의 구조와 저그의 공격 패턴을 충분히 숙지하고, 팀원과의 원활한 소통을 통해 전략을 공유하는 것이 중요하다. 또한, 방어 시설의 업그레이드와 병력 생산 타이밍을 잘 조절하여 저그의 공격을 효과적으로 방어할 수 있도록 준비해야 한다. 이 맵은 다인 플레이를 전제로 제작되었으므로, 팀원과의 협동이 필수적이며, 개인의 실력뿐만 아니라 팀의 조화도 승패에 큰 영향을 미친다. 저그의 공격이 치열해질수록 긴장감도 높아지므로, 플레이어들은 항상 집중력을 유지하며 플레이해야 한다. 저그를 상대로 한 도전과 성취감을 느낄 수 있는 이 맵은 브루드워 유즈맵의 대표작 중 하나로 꼽힐 만하다. 저그의 공격 패턴을 익히고, 방어 전략을 끊임없이 진화시키며, 팀원과의 원활한 소통을 통해 승리를 쟁취해 보자. 이 맵을 플레이하면서 전략적 사고와 팀워크의 중요성을 깨닫게 될 것이다. 저그를 상대로 한 디펜스는 결코 쉽지 않지만, 그 도전 과정이 주는 짜릿함은 다른 어떤 유즈맵에서도 느낄 수 없는 매력이다. 저그의 공격을 효과적으로 방어하고, 승리를 쟁취하기 위해 끊임없이 노력해 보자. Zerg killer Perfect version!! is a UMS (Use Map Settings) defense map in StarCraft: Brood War where 8 players work together as a single team to survive against relentless Zerg attacks. The map is divided into the human base in the center and the surrounding Zerg territory, with multiple attack routes forcing players to spread their defenses strategically. Early on, the Zerg assaults are manageable, but the frequency and intensity escalate over time, demanding careful resource management and defensive preparations. Players can gather resources to upgrade facilities or recruit additional forces, with these decisions significantly impacting the outcome. The map’s balanced difficulty progression ensures that both beginners and veterans can enjoy the challenge, as teamwork and adaptability are crucial for success. Effective defense requires studying Zerg attack patterns, optimizing unit production, and maintaining real-time coordination with teammates. While the difficulty may be steep for newcomers, starting on lower settings can help players gradually adapt. This map offers a thrilling blend of strategy and teamwork, making it ideal for fans of cooperative defense games in StarCraft. Before playing, familiarize yourself with the map layout and Zerg behavior, communicate clearly with your team, and plan upgrades and unit production timings wisely. As the attacks intensify, maintaining focus becomes essential, and the satisfaction of overcoming Zerg waves is unparalleled. This map stands out as a classic UMS title, rewarding players with a sense of achievement and deeper appreciation for StarCraft’s tactical depth.
크립 태그 VI ver.Final (Creep Tag VI ver.Final)
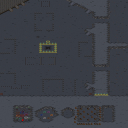
‘크립 태그 VI ver.Final’은 스타크래프트 브루드워의 대표적인 유즈맵 중 하나로,Creep Tag 시리즈의 최신 버전이다. 맵의 주요 특징은Creep(크립, 잡몹)과의 전투에 중점을 둔 디펜스 장르로, 플레이어는 지속적으로 등장하는 적 유닛을 상대로 방어선을 구축하고 생존을 목표로 한다. 맵 중앙에 위치한 Creep 둥지에서 끊임없이 몰려드는 저그 유닛들을 상대하며, 각 플레이어는 제한된 자원과 유닛을 활용해 방어 전략을 세워야 한다. 특히Creep Tag IV의 후속작답게 다양한 유닛과 아이템, 그리고 ‘DTz Spwaning’과 같은 특수 이벤트가 포함되어 있어, 플레이어의 집중력과 전략을 끊임없이 요구한다. 1인 플레이로도 즐길 수 있지만, 7명의 플레이어가 함께 협력해Creep의 공세를 막아내는 팀플레이가 핵심이다. 맵의 난이도는 초보자에게는 다소 어려울 수 있지만,Creep의 패턴을 익히고 방어 전략을 숙지할수록 점차 극복할 수 있는 구조로 설계되어 있다.Creep Tag 시리즈의 특징인 ‘태그(Tag)’ 시스템은Creep의 움직임을 예측하고 타격하는 재미를 극대화하며, 특히Creep의 변종이나 특수 유닛이 등장할 때는 긴장감이 최고조에 달한다.Creep Tag VI ver.Final은Creep의 수가 많고 지속적으로 등장한다는 점에서 체력과 집중력이 요구되며,Creep의 이동 경로를 차단하거나Creep의 약점을 노려야 하기 때문에, 플레이어의 판단력과 반응 속도가 중요한 요소로 작용한다.Creep Tag 시리즈의 팬이라면 물론,Creep 디펜스 장르를 좋아하는 플레이어들에게도 강력히 추천할 만한 맵이다.Creep Tag VI ver.Final을 플레이하기 전에는Creep의 패턴과Creep의 약점을 미리 숙지하는 것이 좋다. 또한Creep의 공격 주기와 Creep의 이동 경로를 분석해 방어선을 효율적으로 배치해야 하며,Creep의 특수 유닛이 등장할 때의 대응책을 마련해 두는 것이 필수적이다.Creep Tag VI ver.Final은Creep의 수가 많고Creep의 패턴이 다양해질수록Creep의 방어 난이도가 급격히 상승하기 때문에,Creep의 움직임을 읽는 연습을 꾸준히 하는 것이Creep의 공격을 성공적으로 막아내는 비결이다. ‘Cree Tag VI ver.Final’ is one of the most representative custom maps in *StarCraft: Brood War*, serving as the latest installment in the *Creep Tag* series. The map’s key feature is its defense-focused gameplay centered on confrontations with *Creep* (mobs), where players must build defensive lines and survive against relentlessly spawning enemy units. Players battle waves of Zerg units emerging from the *Creep* nest at the map’s center, using limited resources and units to devise defensive strategies. Following in the footsteps of *Creep Tag IV*, this version introduces a variety of units, items, and special events—such as *DTz Spawning*—requiring players to stay highly focused and employ strategic thinking throughout. While the map can be enjoyed solo, its core experience lies in teamwork, where seven players collaborate to fend off *Creep* assaults. Though the difficulty may pose a challenge for beginners, the map is designed to become more manageable as players learn *Creep* patterns and refine their defensive tactics. The signature *Tag* system from the *Creep Tag* series enhances the fun by rewarding precise prediction and striking of *Creep* movements, with tension peaking during encounters against *Creep* variants or special units. *Cree Tag VI ver.Final* demands stamina and sharp focus due to the sheer number and constant arrival of *Creep*, requiring players to block their paths or exploit weaknesses. Judgment and reaction speed are crucial factors in overcoming its challenges. Whether you’re a fan of the *Creep Tag* series or enjoy creep defense maps in general, this title comes highly recommended. Before diving into the game, familiarize yourself with *Creep* patterns and vulnerabilities. Analyze their attack cycles and movement routes to optimize your defensive setup, and prepare specific countermeasures for special units. As *Creep* numbers swell and their patterns grow more complex, the difficulty escalates rapidly—so honing your ability to read their movements is the key to successfully thwarting their attacks.
임파서블 프랙틱컬리 (Impossible Practically)
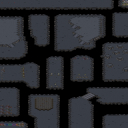
스타크래프트 브루드워의 유즈맵 <임파서블 프랙틱컬리(Impossible Practically)>는 6명의 플레이어가 협동으로 진행하는 디펜스 장르의 유즈맵이다. 맵은 우주 테마의 넓은 공간에 배치되어 있으며, 중앙에 위치한 본진을 중심으로 적의 끊임없는 공격을 방어하는 구조로 구성되어 보인다. 맵의 이름에서 알 수 있듯이 난이도가 상당히 높은 것으로 추정되며, 플레이어는 제한된 리소스를 효율적으로 활용하며 최대한 오랫동안 생존을 유지해야 한다. 내부 맵 설명이 'Work together yo.'라는 점으로 미루어 보아, 팀워크가 매우 중요한 요소로 작용할 것으로 보인다. 맵의 디자인상으로는 적의 진형이 여러 방향으로 퍼져 있어 전방위적인 방어가 요구되며, 중앙 본진 주변의 지형은 비교적 평탄한 것으로 확인된다. 또한 적의 공격 패턴이 지속적으로 변화할 가능성이 있어 전략적인 대처가 필수적일 것이다. 이러한 요소들은 이 맵이 초보 플레이어보다는 숙련된 플레이어에게 더 적합할 수 있음을 시사한다. 플레이 전에는 맵의 세부적인 방어 포인트와 보급 경로, 그리고 적의 공격 주기나 패턴을 파악하는 것이 중요하다. 특히 방어 건물이나 유닛의 배치 위치에 따라 난이도가 크게 달라질 수 있으므로, 사전 준비를 철저히 하는 것이 좋다. 협동 플레이가 핵심인 만큼, 팀원 간의 실시간 의사소통도 성공의 열쇠가 될 것이다. 이 맵은 협동 디펜스라는 장르의 특성을 잘 살려낸 작품으로, 팀워크와 전략적 사고를 동시에 요구하는 재미있는 플레이 경험을 제공할 것으로 기대된다. StarCraft: Brood War's custom map *Impossible Practically* is a 6-player cooperative defense-style map where players must work together to survive endless waves of enemy attacks. Set in a vast space-themed arena, the map centers around a main base that must be defended at all costs. As the name suggests, the difficulty is extremely high, forcing players to manage limited resources wisely while enduring as long as possible. The in-game description, *"Work together yo,"* hints that teamwork is absolutely essential. The enemy forces spread out in multiple directions, requiring all-around defense, and the terrain around the main base is mostly flat, leaving little cover. Additionally, the enemy’s attack patterns may shift dynamically, making adaptability a must. These factors suggest the map is better suited for experienced players rather than beginners. Before jumping in, it’s crucial to study key defensive points, supply routes, and the enemy’s attack cycles or patterns. Since the placement of defensive structures and units can drastically alter difficulty, thorough preparation is key. Effective real-time communication between teammates will also be vital, as cooperation is the heart of this mode. *Impossible Practically* excels at delivering the cooperative defense genre, blending teamwork and strategic thinking into an engaging and challenging experience.
최근 등록된 맵
새로 추가된 파일과 버전을 확인하세요.
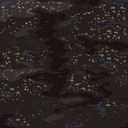
강자의 법칙 (Rule of Strong)
‘(Coop) Rule of Strong’는 스타크래프트 브루드워의 UMS(유즈맵) 장르로, 협동 플레이를 중심으로 설계된 맵입니다. 내부 설명에서 확인할 수 있듯이, 테란의 다일람 요새가 위치한 차 행성을 배경으로 프라이멀 저그의 역습을 다루고 있습니다. 맵의 제목인 ‘Rule of Strong’는 강력한 존재가 지배한다는 뜻을 담아내며, 저그의 압도적인 힘과 다일람의 저항을 상징하는 듯합니다. 이 맵은 2인 플레이를 전제로 제작되었으며, 협동 디펜스와 레트리뷰션(복수) 테마가 결합된 구조로 보입니다. 플레이어는 저그의 프라이멀 무리 또는 다일람의 방어 세력으로 나뉘어 진행하게 되며, 맵의 정글 타일셋은 차 행성의 울창한 환경과 조화를 이룹니다. 내부 설명에서 ‘Tarkossia’의 몰락과 ‘Primal Zerg’의 반격이 언급되므로, 설정상 스토리성이 있는 맵으로 추정됩니다. 맵의 해상도와 크기가 크고(1024x1024, 4096x6144), 타일 단위가 128x192로 넓은 공간을 제공해 복잡한 맵 디자인이 예상됩니다. 이는 협동 플레이 시 전략적 깊이를 더할 수 있는 요소로 작용할 것입니다. 플레이어는 협동 디펜스를 중심으로 진행하면서 적의 공격을 방어하거나, 역으로 적 기지를 파괴하는 임무를 수행할 가능성이 높습니다. 맵의 정글 타일셋과 넓은 공간은 시야를 제한하고 기습 공격의 위험을 높일 수 있어, 플레이어 간의 긴밀한 협력이 필수적일 것입니다. 또한, 내부 설명에서 ‘Daelaam’의 요새가 언급되므로, 테란과 프로토스의 연합 세력이 등장할 가능성도 배제할 수 없습니다. 이는 맵이 단순히 저그 대 테란 구도가 아니라, 다일람(프로토스)의 저항까지 포함하는 종족 간 협동전 양상을 띠고 있음을 시사합니다. 이 맵은 협동 플레이에 특화되어 있어, 친구와 함께 전략을 짜며 긴장감 넘치는 전투를 즐기고자 하는 유저들에게 추천할 만합니다. 특히, 넓은 맵과 복잡한 구조는 다양한 전술을 시도해 볼 수 있는 기회를 제공할 것입니다. 다만, 넓은 공간과 제한된 시야는 초보 플레이어에게는 다소 어려움을 느낄 수 있으므로, 기본적인 전략과 협동 플레이 경험이 있는 유저가 즐기기에 더욱 적합할 것입니다. 맵을 플레이하기 전에는 맵의 주요 구조와 협동 임무의 목표를 충분히 숙지하는 것이 중요합니다. Coop Rule of Strong is a user-made map (UMS) for StarCraft: Brood War, designed primarily for cooperative play. The map is set on the planet Char, where the Daelaam fortress faces retaliation from the Primal Zerg, as indicated in its internal description. The title ‘Rule of Strong’ suggests a theme of dominance through sheer power, reflecting the Primal Zerg’s relentless assault on the Daelaam forces. The map is structured for two players and appears to combine elements of cooperative defense and retribution. Players likely control either the Primal Zerg hordes or the Daelaam defense forces, with the dense jungle tileset of Char adding to the immersive experience. The map’s large scale (1024x1024 base size, 4096x6144 resolution) and tile dimensions (128x192) suggest a complex layout that rewards strategic planning and teamwork. The mention of ‘Tarkossia’s fall’ and the ‘Primal Zerg’s retaliation’ implies a backstory involving multiple factions, possibly including Terran and Protoss elements as part of the Daelaam coalition. The gameplay likely revolves around defending against waves of enemy attacks while strategizing to dismantle the opponent’s base or strongholds. The jungle tileset and expansive map may create opportunities for ambushes and tactical maneuvering, requiring close coordination between teammates. The internal description’s reference to the Daelaam fortress on Char hints at a narrative-driven or themed experience, where players must adapt their strategies to the environment’s challenges. This map is ideal for players seeking a cooperative challenge that emphasizes teamwork and tactical depth. Its large scale and intricate design offer a refreshing alternative to standard melee skirmishes, making it suitable for those who enjoy strategic planning and immersive storytelling. However, beginners might find the expansive map and limited visibility challenging, so prior experience with cooperative UMS maps is recommended. Before playing, it’s advisable to review the map’s structure and objectives to ensure a smooth and enjoyable experience.
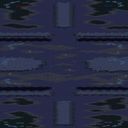
친한 요새 (Friendly Fortress)
‘Friendly Fortress’는 스타크래프트 브루드워에서 두 플레이어가 하나의 요새를 함께 공유하며 협동하는 특별한 유즈맵입니다. 맵 제목에서 느껴지듯 이 맵은 ‘친구와 함께’라는 컨셉을 중심으로 설계되어 있으며, 한정된 자원을 두고 전략을 펼치는 협동형 밀리 게임의 재미를 느낄 수 있습니다. 화산 테마의 타일셋과 넓은 맵 크기가 제공하는 개방감은 전투의 긴장감을 배가시키며, 4인용 맵임에도 불구하고 두 명의 플레이어만이 실제 전투에 참여하는 구조는 소규모 팀워크와 자원 관리 능력을 시험합니다. 맵의 목표는 요새를 방어하는 동시에 적을 물리치는 것으로 추정되며, 한정된 병력과 자원으로 어떻게 요새를 유지할지, 동맹과 어떻게 협력할지가 관건입니다. 특히 ‘친구와 함께’라는 설정은 동맹 플레이어와의 원활한 소통과 전략적 합을 중시하는 플레이 경험을 제공합니다. 초보자와 숙련자 모두 즐길 수 있도록 밸런스가 맞춰져 있지만, 동맹과의 호흡이 중요하기 때문에 팀 플레이 경험이 많은 유저에게 더 큰 재미를 느낄 수 있을 것입니다. 플레이 전에는 동맹과의 역할 분담을 미리 정하고, 요새 주변의 자원과 방어 시설의 위치를 숙지하는 것이 중요합니다. 또한, 맵의 넓은 공간을 활용한 기동전과 요새 방어 전략을 다양하게 연습해 보는 것도 추천합니다. This StarCraft: Brood War custom map, ‘Friendly Fortress,’ invites two players to share a single fortress and cooperate against the enemy. Designed as a small-scale cooperative melee, the map emphasizes teamwork and resource management within a limited space. The volcanic tileset and expansive 1024x1024 terrain create an immersive battlefield where strategic positioning and alliance coordination are key. With four player slots but only two active combatants at a time, players must decide who controls which units and how to defend the shared base efficiently. The core objective likely revolves around fortifying defenses while launching attacks, though the exact victory conditions are not specified. Beginners will find it approachable with practice, while experienced players can refine tactics like resource allocation and alliance timing. Before starting, players should agree on unit roles and scout the map’s key locations to optimize their strategy. The map’s challenge lies in balancing defense with offense, making it ideal for those who enjoy low-player-count but high-strategy melee scenarios.
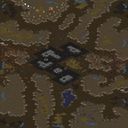
협업 (Cooperation by WParks)
스타크래프트 브루드워의 유즈맵 〈Cooperation by WParks〉는 두 명의 플레이어가 협동하여 목표를 달성하는 cooperative(협동) 디펜스형 맵이다. 맵은 황무지 타일셋으로 구성되어 있으며, 1024×1024 크기의 넓은 필드에서 펼쳐진다. 내부 설명에 언급된 ‘신성한 Klaharkent 사원 보호’ 또는 ‘뉴 휴스턴 포로 구출’ 중 하나는 해당 맵의 핵심 스토리 기반으로 추정된다. 맵 제목과 설명만으로는 구체적인 진행 방식이 명확하지 않지만, UMS(Use Map Settings) 기반의 협동 디펜스 유즈맵으로 분류되는 만큼 플레이어는 각자의 역할을 맡아 적의 공세를 방어하거나 특정 임무를 수행해야 할 것으로 보인다. 맵 구조는 중앙에 넓은 공간이 있고, 외곽으로 갈수록 방어 시설이나 자원 지역이 배치되어 있을 가능성이 높다. 협동의 중요성이 강조되는 만큼, 각 플레이어의 유닛 관리와 자원 분배, 시야 확보가 승리의 핵심 요소가 될 것이다. 초보자도 쉽게 접근할 수 있는 구조이지만, 두 플레이어 간의 실시간 소통이 없으면 난이도가 급격히 상승할 수 있다. 따라서 팀웍을 중시하는 플레이어들에게 추천되는 맵이며, 특히 디펜스와 협동 플레이가 결합된 경험을 원한다면 주목해볼 만하다. 플레이 전에는 맵 설명과 승리 조건을 반드시 확인해 보는 것이 좋다. 맵의 해상도와 타일셋은 일반적인 브루드워 맵과 동일하지만, 넓은 필드에서 펼쳐지는 전투는 전략적 깊이를 더할 것으로 예상된다. Cooperation by WParks is a cooperative defense-style custom map for StarCraft: Brood War where two players work together to achieve their goals. The map features a wasteland tileset and unfolds across a 1024x1024 field. While the internal description mentions either 'protecting the sacred Klaharkent temples' or 'rescuing the Captives of New Houston,' the exact core objective remains unclear without further context. Classified as a UMS (Use Map Settings) cooperative defense map, players likely take on distinct roles to defend against enemy waves or complete specific missions. The map structure appears to include a central open area with defensive positions or resource zones situated toward the outskirts. Cooperation is paramount, so effective unit management, resource allocation, and vision control will be critical to success. While the map is accessible to beginners, the lack of real-time communication between players can significantly increase difficulty. This makes it ideal for those seeking a blend of defense and teamwork. Before playing, reviewing the map description and victory conditions is highly recommended. The resolution and tileset follow standard Brood War conventions, but the expansive field promises deeper strategic engagement.
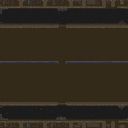
매트릭스 데스 (MATRIX DEATH)
스타크래프트 브루드워 유즈맵 <MATRIX DEATH>는 적 본진을 파괴하는 목표로 진행되는 디펜스형 맵으로, 6명의 플레이어가 협력하여 적 기지를 무너뜨리는 전투를 펼치게 된다. 맵은 황무지 타일셋으로 구성되어 있으며 넓은 평지 위에 건물이 배치되어 있어 전략적인 위치를 선점하는 것이 중요하다. 내부 설명에서 'DETRUIRE LE Q.G. ADVERSE'라는 프랑스어 문구가 확인되며, 이는 적 본진 파괴를 의미한다. 맵 구조상으로는 중앙에 넓은 공간이 펼쳐져 있고, 양측에 건물이 밀집된 구역이 배치되어 있어 러시 타이밍과 방어 전략이 관건이 될 것으로 추정된다. 적의 공격 패턴은 다양하게 구성되어 있을 가능성이 높으며, 플레이어는 자원의 확보와 방어 시설의 구축을 병행해야 한다. 초보자보다는 중급 이상의 실력을 가진 플레이어들이 즐기기 좋을 맵으로 보이며, 협동심이 중요하게 작용할 것으로 예상된다. 맵을 시작하기 전에는 적의 기지 위치와 주요 방어 시설, 자원 분포를 확인하는 것이 중요하다. 또한, 팀원 간의 역할 분담을 미리 정해두면 더 효율적인 플레이가 가능할 것이다. 맵의 난이도는 내부 설명이나 버전 정보가 없으므로 정확하게 판단할 수 없지만, 6인 협동 플레이를 고려할 때 보통 이상의 난이도로 설정되어 있을 가능성이 높다. 추천 대상은 스타크래프트 유즈맵을 люби하는 플레이어들, 특히 디펜스와 협동 플레이를 선호하는 유저들에게 적합할 것이다. 맵의 긴 플레이 시간과 전략적 깊이를 고려할 때, 여유 있는 시간과 집중력이 요구된다. 맵을 플레이하기 전에 제공된 맵 설명과 내부 구조를 충분히 분석한 후 도전하는 것이 좋다. 적의 공격 패턴을 예측하고 방어 시설을 효율적으로 배치하는 것이 승리への近道가 될 것이다. MATRIX DEATH is a UMS-style defense map in StarCraft: Brood War where six players must work together to destroy the enemy base. The map is built on a wasteland tileset, featuring a large open terrain with clustered buildings on both sides, making strategic positioning crucial. The internal description "DETRUIRE LE Q.G. ADVERSE" (French for "Destroy the Enemy HQ") confirms the primary objective. The map likely incorporates diverse enemy attack patterns, requiring players to balance resource gathering and defensive structure placement. This map appears best suited for intermediate to advanced players who enjoy cooperative gameplay. Before starting, players should scout the enemy base layout, key defensive structures, and resource distribution. Pre-defining team roles can significantly improve efficiency. While difficulty cannot be confirmed without version details, the 6-player cooperative nature suggests a moderate to high challenge level. Recommended for StarCraft UMS fans, particularly those who prefer defense and teamwork-focused maps. The extended playtime and strategic depth demand ample time and focus. Thoroughly analyzing the map's structure and enemy patterns before attempting a playthrough is strongly advised.
더 라스트 스트라이크 (The Last Strike)
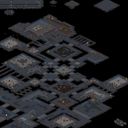
스타크래프트 브루드워의 유즈맵 '더 라스트 스트라이크(The Last Strike)'는 5인용 협동 디펜스 장르로, 테란, 프로토스, 저그의 생존자들이 Kerrigan의 무리를 상대로 최후의 반격을 펼치는 스토리를 담은 작품이다. 맵은 우주 테마의 광활한 공간에서 펼쳐지며, 플레이어는 동맹 진영과 협력해 끊임없이 밀려드는 적군을 방어해야 한다. 맵의 핵심은 '공동 작전'으로, 각 플레이어는 자신의 유닛과 건물을 관리하면서도 동맹의 생존 여부에 직접적인 영향을 받기 때문에 전략적 호흡이 무엇보다 중요하다. 적군은 Kerrigan의 군대와 동맹을 이루는 테란 잔당, 프로토스 광전사, 저그 변이체 등으로 구성되어 있으며, 이들은 일정 주기로 리젠되어 방어선을 끊임없이 압박한다. 맵의 구조는 중앙에 위치한 동맹 기지 주변으로 방어 시설이 배치되어 있어, 초반에는 방어에 집중하다가 점차 전선을 확장하는 방식으로 진행된다. 맵의 난이도는 방어 라인 설계와 동맹 간의 협력에 따라 크게 달라지며, 특히 Kerrigan의 강력한 유닛들이 등장하는 후반부로 갈수록 팀워크가 필수적이다. 이 맵은 협동 플레이의 중요성을 강조하며, 개인의 실력뿐만 아니라 동맹과의 소통과 전략적 판단이 승리를 좌우하는 재미를 제공한다. 초보자도 쉽게 접근할 수 있도록 기본적인 유닛 관리부터 동맹과의 연계까지 단계적으로 학습할 수 있는 구조로 설계되어 있다. 다만, 방어 라인의 균형이 맞지 않으면 적군의 몰려드는 물량에 무너질 위험이 있으므로, 미네랄과 가스 관리에 주의가 필요하다. 이 맵을 즐기기 위해서는 팀원 간의 원활한 의사소통과 함께, Kerrigan의 특수 유닛에 대한 대응법을 미리 숙지하는 것이 좋다. 또한, 동맹 진영의 유닛이 파괴되지 않도록 보호하는 것도 중요하며, 이는 개인의 생존뿐만 아니라 팀의 전체적인 승패에 직결된다. 마지막으로, 이 맵은 단순히 방어만을 요구하는 것이 아니라, 때로는 적극적인 역공으로 Kerrigan의 기지를 약화시켜야 하므로, 공격 타이밍을 잘 잡는 것이 핵심 전략 중 하나다. StarCraft: Brood War's custom map *The Last Strike* is a 5-player cooperative defense game where Terran, Protoss, and Zerg survivors launch a final counterattack against Kerrigan's forces. Set in a vast space-themed environment, players must defend against endless waves of enemies while working together with their allies. The core of the experience lies in "joint operations"—each player manages their own units and buildings while their survival directly impacts their allies, making strategic coordination essential. The enemy forces consist of Kerrigan's army alongside allied Terran remnants, Protoss Zealots, and Zerg mutations, spawning in waves to relentlessly pressure the defense lines. The map is structured with defensive installations surrounding the allied base in the center, starting with a focus on holding the line before gradually expanding outward. Difficulty varies depending on the defense layout and teamwork, with late-game Kerrigan's powerful units demanding flawless coordination. *The Last Strike* highlights the importance of cooperation, where victory hinges not just on individual skill but also on communication and strategic decision-making. Designed for accessibility, it guides players from basic unit management to advanced ally coordination in stages. However, an unbalanced defense line risks collapsing under the enemy's sheer numbers, so careful mineral and gas management is crucial. To fully enjoy the map, smooth team communication is vital, along with prior knowledge of countering Kerrigan's special units. Protecting allied units from destruction is also key—not just for individual survival but for the team's overall success. Beyond pure defense, the map occasionally requires proactive counterattacks to weaken Kerrigan's base, making timing and aggression critical strategic elements.

더 킹 오브 헌터스 1.4 (The King of Hunters 1.4)
스타크래프트 브루드워의 유즈맵인 〈더 킹 오브 헌터스 1.4〉는 7명의 플레이어가 단일 팀으로 협력하여 적대적 목표를 처치하는 협동 디펜스 장르의 맵입니다. 맵 제목과 내부 설명에서 확인할 수 있듯이, ‘킹’이란 캐릭터를 조종해 저그 유닛인 제리를 사냥하는 것이 주 목표로 보입니다. 사막 타일셋을 기반으로 구성된 이 맵은 넓은 평야와 중앙에 위치한 제리 웨이브(웨이브형 적군 등장 구역)가 특징적이며, 플레이어는 지속적인 적군 리젠에 대응하며 킹의 체력과 스킬을 관리해야 합니다. 맵 구조상으로는 중앙과 측면에 흩어진 소규모 기지 구조물이 보이며, 킹의 이동 경로와 방어 포인트가 다수 배치되어 있습니다. 킹의 능력치나 스킬 사용 방식에 대한 구체적인 정보는 없지만, 제목 및 장르로 미루어보아 다양한 스킬을 활용한 사냥과 생존이 주된 플레이 메커니즘으로 추정됩니다. 또한, 플레이어는 킹의 체력 감소 시 즉시 회복 수단을 사용하거나, 제리 무리의 리젠 타이밍을 예측해 방어 라인을 구축해야 합니다. 추천 대상은 협동 플레이를 선호하는 유저이며, 특히 유즈맵 경험이 있거나 디펜스 게임에 익숙한 플레이어에게 적합할 것으로 보입니다. 플레이 전 확인할 포인트는 킹의 스킬 쿨다운, 제리 웨이브의 리젠 간격, 그리고 중앙 진입로의 방어 구조물 배치입니다. 이 맵은 7인 플레이를 전제로 설계되었으므로, 팀원이 빠지거나 추가되지 않도록 사전에 인원 조율이 필요합니다. The King of Hunters 1.4 is a cooperative defense-style custom map in StarCraft: Brood War where seven players work together as a single team to defeat hostile targets. The map features a desert tileset and is designed around the central objective of controlling a character named 'King' to hunt down and eliminate Zerg units referred to as 'Jerry.' The layout includes a central wave-based enemy spawn area where Jerry units continuously respawn, along with scattered small base structures around the perimeter. Players must manage the King's health, utilize abilities, and strategically position defenses to survive relentless enemy waves. While specific skill mechanics are not detailed in the title or description, the name suggests dynamic combat and survival elements centered on the King's combat prowess. Players are expected to coordinate their efforts, predict enemy spawn timings, and adapt their defense strategies accordingly. This map is ideal for players who enjoy cooperative gameplay and have experience with custom maps or defense-oriented games. Before playing, it is important to check the King’s skill cooldowns, the respawn intervals of Jerry waves, and the layout of defensive structures along the central pathways. Since the map is designed for seven players, ensuring the full team is present before starting is essential.
6각디팬스 v2 SCV 추가 버전 (Hexagonal Defense v2 SCV Added Version)
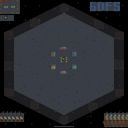
스타크래프트 브루드워의 대표적인 디펜스 장르 유즈맵인 〈6각디팬스v2_scv추가버전〉은Hexagonal Defense의 약자로, 총 6명의 플레이어가 하나의 기지를 지키며 끊임없이 밀려드는 적의 웨이브를 방어하는 전략 게임이다. 맵의 특징은 중앙에 위치한 육각형 형태의 기지 구조로, 각 변마다 배치된 방어 건물과 SCV 추가 유닛을 활용해 효율적으로 공격을 방어해야 한다는 점이다. 육각형 구조는 방어선의 균형을 맞추기 어렵게 만들며, 적의 공격 루트가 복잡해지는 만큼 전략적 깊이가 느껴진다. 플레이어는 시작과 동시에 미네랄과 가스를 확보할 수 있으며, SCV를 생산해 방어 건물과 보병 유닛을 배치하거나 수리 작업을 수행할 수 있다. 맵의 핵심은 '시간'과 '자원 관리'로, 적의 공격 주기가 점점 빨라지면서 자원의 소모도 증가하기 때문에 효율적인 SCV 운용이 필수적이다. 특히, 육각형 중앙에 위치한 보급고 주변으로 적의 공격이 집중되므로, 방어 건물의 배치와 SCV의 수리 타이밍을 잘 조절해야 한다. 또한, 맵의 외곽에는 적이 스폰되는 입구가 여러 개 존재하여, 한 곳에만 방어선을 구축하면 다른 쪽에서 공격받기 쉬우므로 균형 잡힌 방어가 요구된다. 이 맵은 초보자부터 숙련자까지 모두 즐길 수 있는 밸런스를 갖추고 있으며, 특히 협동 플레이가 돋보이는 장르로 평가된다. 게임의 난이도는 점차 상승하는 적의 웨이브와 함께 높아지므로, 플레이어는 유닛의 업그레이드와 자원 확보를 신중히 계획해야 한다. 육각형의 독특한 구조는 시각적으로도 흥미를 유발하며, 방어의 재미를 더해준다. 추천 대상은 스타크래프트의 디펜스 게임을 좋아하는 플레이어이며, 특히 전략적 사고와 자원 관리를 중시하는 유저들에게 적합하다. 플레이 전에는 SCV의 수리 타이밍과 방어 건물의 배치 위치를 미리 계획해두는 것이 좋다. This StarCraft: Brood War custom map, titled 〈6각디팬스v2_scv추가버전〉 (Hexagonal Defense v2 with SCV Addition), is a classic defense genre UMS where six players collectively defend a hexagonal base against relentless enemy waves. The map’s hexagonal core structure creates a unique challenge, as players must balance their defenses across six sides while managing limited resources and SCV repair units. At the start, players gather minerals and gas to produce SCV units, which serve dual roles in defense and base repair. The escalating enemy attacks force players to optimize their SCV allocation—whether reinforcing defense structures or repairing damaged buildings—while keeping an eye on resource sustainability. The map’s outer edges feature multiple enemy spawn points, making it crucial to maintain a balanced defense rather than overcommitting to one side. As the game progresses, enemy waves intensify, demanding smarter unit upgrades and strategic resource allocation. Suitable for both beginners and experienced players, this map offers a rewarding experience that blends cooperation with tactical depth. The rising difficulty curve rewards foresight and adaptability, making it ideal for those who enjoy strategic planning and resource management. Before playing, it’s recommended to outline a basic defense strategy, focusing on SCV repair timing and building placement to maximize survival chances against the increasingly aggressive enemy assaults.
한마리만 막아라 2 (One Unit Only Defense 2)
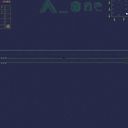
한마리만 막아라 2는 스타크래프트 브루드워 유즈맵 중에서도 단순하면서도 중독성 강한 디펜스 장르의 맵이다. 화산 타일셋의 어두운 배경 위에 펼쳐지는 이 맵은, 이름 그대로 단 한 마리의 유닛이라도 특정 지점을 통과하면 즉시 게임이 끝나는 긴장감 넘치는 룰을 가지고 있다. 플레이어는 6인 협동을 기본으로 하며, 각자 주어진 지역에서 끊임없이 밀려오는 적 유닛들을 상대해야 한다. 맵의 전체적인 구조는 중앙 통로를 향해 여러 갈래의 길이 모이는 형태로 보이며, 각 플레이어는 좁은 입구를 효과적으로 막기 위해 유닛 배치와 방어 건물의 전략적 선택이 필수적이다. 일반적인 디펜스 맵과 달리, 적 유닛의 체력이나 공격력이 비정상적으로 높기보다는 물량과 지속적인 압박으로 플레이어를 시험하는 방식으로 추정된다. 내부 설명에 따르면 A_one 제작자의 작품으로, '한마리만 막아라' 시리즈의 후속작이기 때문에 전작의 난이도와 구성을 개선했을 가능성이 높다. 플레이 경험은 초반에는 비교적 여유롭지만, 웨이브가 진행될수록 다양한 종류의 유닛이 조합되어 등장하기 때문에 팀원 간의 소통과 적절한 방어 타워 업그레이드가 클리어의 핵심으로 보인다. 특히 화산 타일셋 특유의 지형 장애물과 좁은 길목을 어떻게 활용하느냐에 따라 방어 효율이 크게 달라질 수 있다. 이 맵은 복잡한 트리거나 스토리 없이 오직 순수한 디펜스의 재미에 집중하고 싶은 플레이어, 친구들과 함께 짧은 시간 동안 긴장감을 즐기고 싶은 유저에게 추천한다. 다만, 6인 협동이 기본이므로 플레이 전에 인원을 충분히 모아야 제대로 된 재미를 느낄 수 있으며, 맵의 난이도가 어느 정도인지 사전에 확인할 수 없기 때문에 초반 빌드를 빠르게 익히는 것이 중요하다. 적 유닛이 단 한 마리라도 통과하면 게임이 끝나므로, 한눈파는 순간이 패배로 이어질 수 있다는 점을 명심해야 한다. 전체적으로 간결한 룰과 직관적인 목표 덕분에 스타크래프트 디펜스 장르를 처음 접하는 사람도 쉽게 적응할 수 있는 맵이다. One Unit Only Defense 2 is a StarCraft Brood War use map that delivers a simple yet intensely addictive defense experience. Set against the dark backdrop of the volcanic tileset, the map enforces a high-stakes rule: if even a single enemy unit breaches your line, the game ends instantly. Designed for six-player cooperation, each participant must hold their assigned corridor against relentless waves of enemies. The overall layout seems to center around a main pathway with multiple branching entrances, forcing players to strategically position units and defensive structures to block narrow chokepoints. Unlike some defense maps that rely on overpowered enemy stats, the challenge here likely comes from sheer numbers and sustained pressure. According to the internal description, it was created by A_one and is a sequel to the original 'One Unit Only Defense' series, suggesting improvements in difficulty scaling and layout over its predecessor. The early game may feel manageable, but as waves progress, mixed enemy compositions demand constant communication and timely tower upgrades for survival. The volcanic terrain's natural obstacles and tight corridors play a crucial role in defensive efficiency. This map is perfect for players who want a pure, story-free defense challenge or for groups seeking a quick, tense cooperative session. Since it requires six players, gathering a full party is essential for the intended experience, and new players should quickly learn early build orders as the difficulty cannot be assessed beforehand. Remember, a single moment of carelessness can lead to defeat if just one unit slips through. Thanks to its clear objective and minimalistic design, even newcomers to StarCraft defense maps can easily get into the action.
맵 선택 가이드
태그는 맵의 핵심 특징을 빠르게 설명하지만 제작 버전마다 규칙이 다를 수 있습니다. 상세 설명에서 권장 인원, 난이도, 플레이 시간과 버전을 함께 확인한 뒤 다운로드하세요.