
협동 게임 스타크래프트 맵 모음
'협동 게임' 태그가 등록된 맵을 모았습니다. 장르 하나로 찾기 어려운 플레이 방식, 난이도와 특징을 중심으로 인기 맵과 최신 맵을 비교해 보세요.
- 등록 맵
- 8개
- 누적 다운로드
- 0
- 누적 조회
- 240
인기 맵
다운로드와 조회 반응이 높은 맵입니다.
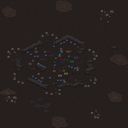
새벽의 저주 (Dawn of the Dead †)
‘새벽의 저주(Dawn of the Dead †)’는 스타크래프트: 브루드워의 유즈맵으로, 좀비 아포칼립스 세계관을 바탕으로 한 서바이벌 디펜스 장르의 맵이다. 플레이어는 총 6인으로 구성되며, 60분의 제한 시간 동안 끊임없이 몰려오는 좀비 무리를 상대로 방어전을 펼치게 된다. 맵은 정글 타일셋을 기반으로 설계되어 있으며, 중앙에 위치한 생존 거점을 중심으로 방어선을 구축하거나 전략적으로 진로를 차단하는 방식으로 진행된다. 맵의 구조상 특정 지점에서 좀비의 물량이 집중되는 패턴이 보이며, 이는 플레이어들에게 즉각적인 대응을 요구한다. 좀비의 공격 패턴은 일정 시간마다 증가하는 것으로 추정되며, 후반부로 갈수록 난이도가 급격히 상승하는 특징을 보인다. 방어 거점 주변에는 자원과 방어 시설 설치가 가능한 공간이 배치되어 있어, 플레이어는 자원을 수집해 방어 시설을 강화하거나 보급로를 확보하는 전략을 세울 수 있다. 맵의 분위기는 어둡고 긴장감 넘치며, 좀비의 출현 효과음과 배경 음악이 몰입감을 증폭시킨다. 이 맵은 특히 팀워크와 빠른 판단력이 요구되는 만큼, 초보자보다는 중간 수준 이상의 플레이어들이 즐기기에 적합하다. 플레이 전에는 팀원 간의 역할 분배와 자원 관리 계획을 사전에 논의하는 것이 중요하며, 방어 거점의 유지와 보급로 확보가 생존의 핵심 요소로 작용할 것이다. 맵의 난이도는 중상 정도로 평가되며, 6인 전원이 협력하지 않으면 완주하기 어려운 구조로 설계되어 있다. 맵의 특징상 좀비의 물량 증가 패턴과 방어 거점의 위치가 반복적으로 등장하므로, 플레이어는 맵을 숙지하고 반복 플레이를 통해 전략을 최적화할 필요가 있다. Dawn of the Dead † is a StarCraft: Brood War user-made map (UMS) that immerses players in a zombie apocalypse survival defense scenario. The map supports up to 6 players, who must defend a central survival point against waves of zombies for 60 minutes. Built on a jungle tileset, the layout features strategic choke points and open areas where players can fortify defenses or cut off zombie advances. The zombie spawns appear to intensify at regular intervals, with later waves becoming significantly more challenging. Players can collect resources to construct defensive structures or secure supply routes around the core base area. The atmosphere is tense, enhanced by eerie sound effects and background music that heighten immersion. The map demands strong teamwork and quick decision-making, making it ideal for intermediate to advanced players rather than beginners. Success hinges on coordinated role distribution, resource management, and maintaining defense positions. The difficulty is classified as moderately high, as solo efforts or poor team coordination will likely result in failure. Familiarity with the map’s zombie spawn patterns and choke points through repeated plays is crucial for optimizing survival strategies.
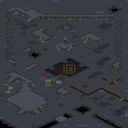
경찰들 빨리 잡어!! (Catch the Police!!)
‘경찰들 빨리 잡어!!’는 스타크래프트 브루드워의 유즈맵으로, 경찰과 도둑을 소재로 한 대결형 디펜스 맵이다. 맵의 전체적인 구조는 중앙에 넓은 공간을 두고 그 주위에 복잡한 지형과 좁은 통로를 배치해 두 진영 간의 접근성과 전투가 자연스럽게 발생하도록 설계되어 있다. 특히 좁은 길목을 중심으로 한 시야 차단과 진로 방해가 core gameplay로, 플레이어들은 숨을 곳을 찾거나 상대방을 유인하는 전술을 구사해야 한다. 경찰 측은 도둑을 붙잡기 위해 협력해야 하는 반면, 도둑은 경찰을 피해 맵 곳곳에 흩어져 있는 보물이나 목표물을 획득하거나 탈출구를 통과하는 방식으로 진행한다. 이미지에서 확인되는 붉은색과 푸른색의 구역은 각각의 진영이 시작하는 기지 역할을 하며, 각각의 기지 주변에는 방어 시설이 배치되어 있어 선공 포지션을 잡기 위한 전략적 선택이 중요하다. 맵의 지형은 울퉁불퉁한 언덕과 작은 언덕으로 나뉘어 시야를 가리는 요소가 많고, 이로 인해 예상치 못한 기습 공격이나 후방 침투가 빈번하게 발생할 가능성이 높아진다. 또한, 맵의 중앙에는 넓은 개활지가 있으나, 이 공간을 지나가는 과정에서 자연스럽게 전투가 벌어질 수밖에 없어서 플레이어들은 항상 긴장감을 유지해야 한다. 초보자도 쉽게 접근할 수 있는 구조이지만, 고수와 초보의 실력 차이는 뚜렷하게 드러날 수 있으며, 특히 협력 플레이가 필수적인 경찰 측에서는 팀워크가 승패를 좌우할 가능성이 크다. 맵을 플레이하기 전에 반드시 확인해야 할 점은 좁은 통로에서의 전투 시 시야 확보와 진로 차단 요소다. 또한, 보물이나 탈출구 위치도 사전에 숙지하고 있어야 유리한 위치를 선점할 수 있다. 이 맵은 경쟁심을 자극하는 재미와 긴장감으로 인해 스타크래프트 유즈맵 커뮤니티에서 꾸준한 인기를 얻고 있는 장르로, 여러 번의 플레이를 통해 전략과 전술을 다듬을 수 있는 장점이 있다. 특히 팀 플레이를 중시하는 스타일의 맵이기 때문에, 친구들과 함께 플레이할 때 더욱 몰입감 있는 경험을 제공할 것이다. ‘Quick Catch the Cops!’ is a *StarCraft: Brood War* custom map based on a cops-and-robbers theme, featuring a defensive battle format. The map is designed with a central open space surrounded by complex terrain and narrow passages, naturally encouraging engagement and combat between the two factions. The core gameplay revolves around blocking lines of sight and obstructing paths, particularly through chokepoints, forcing players to seek hiding spots or lure opponents into traps. The police team must cooperate to capture the thieves, while the thieves aim to evade capture by collecting scattered treasures or objectives or escaping through designated exits. The red and blue zones visible in the image serve as each faction’s starting bases, with defensive structures placed around them—strategic positioning here is crucial for gaining an early advantage. The terrain features uneven hills and small mounds that frequently obscure vision, making surprise attacks and rear infiltrations common. Though there’s a wide open area in the center, crossing it almost guarantees combat, keeping players on edge. While the map’s structure is easy for beginners to grasp, the skill gap between veterans and newcomers remains evident, especially for the police team, where teamwork can determine victory or defeat. Before playing, it’s essential to understand how vision and path-blocking work in tight corridors, as well as the locations of treasures and escape routes to secure advantageous positions. This map has maintained steady popularity in the *StarCraft* custom map community thanks to its competitive thrill and tension, offering players the chance to refine their strategies and tactics through repeated play. With its emphasis on teamwork, it delivers an immersive experience, especially when played with friends.
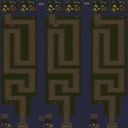
스폰 디펜스 3 팀 얼티밋 (Spawn Defense 3 Team Ultimate)
《스폰 디펜스 3 팀 얼티밋》은 스타크래프트: 브루드워의 유즈맵으로, 세 팀이 동시에 방어전을 펼치는 디펜스 장르의 대표적인 작품 중 하나로 손꼽힌다. 맵은 넓은 사막 타일셋을 배경으로 펼쳐지며, 각 팀은 중앙에 위치한 본진을 지키며 끊임없이 밀려드는 적군을 상대해야 한다. 맵의 특징은 ‘얼티밋 메서드’라는 특수 시스템을 도입했다는 점인데, 이는 기존 스폰 디펜스 시리즈에서 제공되던 보너스나 소Cow를 배제하고 순수한 방어전과 전략적 요소에 집중하도록 설계된 방식이다. 덕분에 플레이어는 순수한 맵 설계와 적의 공세 패턴 분석에 집중할 수 있으며, 맵의 밸런스를 예측하고 대응하는 재미가 돋보인다. 플레이어는 총 6명이 참여할 수 있으며, 각 팀은 독립된 본진과 미네랄, 가스를 확보한 상태로 시작한다. 맵의 구조는 중앙 광장과 같은 형태로 모든 팀이 동일한 조건에서 시작하지만, 맵의 배치와 길목이 복잡하게 얽혀 있어 팀 간의 소통과 협력이 필수적이다. 특히 적의 공격 루트는 세 팀 모두에게 동일하게 적용되지만, 각 팀의 방어 성공 여부는 개인의 컨트롤과 전략에 따라 크게 좌우된다. 맵은 끊임없이 쏟아지는 저그 유닛들과의 전투를 중심으로 진행되며, 플레이어는 방어 건물과 유닛을 적절히 배치하고, 자원 관리를 통해 지속적인 보강을 도모해야 한다. 이 맵의 가장 큰 매력은 바로 ‘얼티밋 메서드’를 통한 순수한 디펜스 경험이다. 보너스나 특수 아이템이 배제되면서 맵의 밸런스가 오롯이 디자인에 의해 결정되며, 이는 플레이어들에게 전략적 깊이를 제공한다. 또한 맵의 넓고 복잡한 구조는 단순히 방어하는 것 이상의 재미를 선사하는데, 예를 들어 적의 공격을 유도하거나, 팀원 간의 연계 플레이를 통해 다수의 적군을 한꺼번에 상대하는 등 다양한 전술적 선택이 가능하다는 점이Highlight된다. 또한 맵의 배경인 사막 타일셋은Phoenix한 분위기를 연출하며, 디펜스 게임의 긴장감을 한층 높이는 역할을 한다. 이 맵은 초보에서 숙련자까지 폭넓은 플레이어 층을 겨냥하고 있지만, 특히 팀 플레이와 전략적 사고가 필요한 맵이기 때문에 혼자서 모든 것을 해결하기보다는 팀원과의 원활한 소통과 협력이 필수적이다. 또한 맵의 난이도는 보통 수준으로 설정되어 있지만, 적의 공격 패턴을 잘 이해하고 방어 건물의 배치와 자원 관리를 효율적으로 수행할 수 있는 능력이 요구된다. 맵을 플레이하기 전에는 팀원 간의 역할 분담을 명확히 하고, 방어 건물의 업그레이드 우선순위와 자원 수급 전략을 미리 계획하는 것이 좋다. 또한 맵의 복잡한 길목을 숙지하고, 적의 공격 루트를 미리 예측하는 연습을 통해 보다 원활한 플레이가 가능해질 것이다. 이 맵은 디펜스 장르를 любить하는 플레이어들에게는 물론, 스타크래프트 유즈맵의 전략적 깊이를 즐기는 모든 이들에게 강력히 추천할 만한 작품이다. 맵의 넓은 규모와 다양한 전술적 선택지, 그리고 팀 플레이의 중요성은 이 맵이 단순히 방어전을 넘어 하나의 전략 게임으로서의 가치를 지녔음을 증명한다. 특히 ‘얼티밋 메서드’를 통한 순수한 디펜스 경험은 많은 플레이어들에게 새로운 인사이트를 제공하며, 맵의 디자인과 밸런스가 얼마나 중요한지를 다시 한번 일깨워준다. This map, Spawn Defense 3 Team Ultimate, is a standout user-made defense game within StarCraft: Brood War, designed for three teams to engage in simultaneous base defense. Set against a vast desert tileset, the map challenges players to protect their central bases from relentless waves of enemy units. A defining feature is the 'Ultimate Method,' a system that removes bonus resources and special units like cows, focusing solely on pure defense mechanics and strategic planning. This design choice ensures players concentrate on map layout analysis and adaptive tactics rather than relying on external advantages. With a maximum of six players, the map divides participants into three teams, each starting with equal resources, minerals, and gas. The layout is symmetrical, with central plazas connecting all teams, but the intricate pathways and defensive chokepoints demand strong teamwork and communication. Enemies spawn continuously, primarily composed of Zerg units, and players must strategically place defensive structures and units while managing resources to sustain their defenses. The Ultimate Method elevates the map beyond typical defense scenarios by emphasizing pure strategy. The absence of bonuses or special items means the map's balance hinges entirely on its design, offering players a deeper strategic experience. The desert-themed tileset adds to the immersive atmosphere, enhancing the tension of each wave of attacks. Players can experiment with tactics like luring enemies into traps or coordinating with teammates to overwhelm multiple threats simultaneously, making each playthrough dynamic and engaging. While accessible to both beginners and experienced players, Spawn Defense 3 Team Ultimate shines brightest in team-based play. Success relies heavily on teamwork, clear role assignments, and synchronized strategies rather than individual prowess. The map's difficulty is moderate, requiring players to master defensive structure placement, resource management, and wave pattern recognition. Prior to playing, teams should establish clear roles, prioritize structure upgrades, and plan resource allocation to optimize performance. This map is highly recommended for fans of the defense genre and players who appreciate the strategic depth of StarCraft user-made maps. Its expansive layout, tactical variety, and emphasis on teamwork transform it from a simple defense game into a full-fledged strategy experience. The Ultimate Method not only challenges players but also reinforces the importance of thoughtful map design and balanced gameplay, making it a must-play for enthusiasts seeking a refined defense challenge.
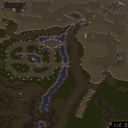
반지의 제왕: 달 전투 (Lord of the Rings: Battle of Dale)
스타크래프트 브루드워의 유즈맵 <반지의 제왕: 달 전투>는 J.R.R. 톨킨의 세계관을 기반으로 한 컴까기 장르의 디펜스 맵으로, 플레이어는 인간과 호빗 연합군을 조종하여 다가오는 어둠의 세력의 공격을 방어해야 한다. 맵은 넓은 평야와 산맥, 강으로 구성된 개방형 지형으로, 중앙의 요새를 중심으로 적의 웨이브가 끊임없이 몰려온다. 각 웨이브는 오크, 우르크하이, 트롤 등으로 구성되어 있으며, 플레이어는 제한된 자원으로 건물을 건설하고 유닛을 생산하여 방어선을 구축해야 한다. 건물을 짓는 위치와 유닛의 배치, 자원 관리가 핵심으로, 실수를 하면 순식간에 전선이 무너질 수 있다. 특히 후반부로 갈수록 적의 공격력이 강해지고 다양한 유닛이 등장하기 때문에, 초반의 안정적인 자원 수급과 방어선 구축이 승부의 관건이 된다. 맵은 6144x6144의 거대한 크기를 자랑하며, 사막 타일셋을 사용하여 건조한 분위기의 전투를 연출한다. 플레이어는 인간과 호빗의 유닛을 조종할 수 있으며, 각 유닛은 고유한 스킬과 역할을 가지고 있어 전략적인 플레이가 요구된다. 예를 들어, 궁수 유닛은 원거리 공격을, 기사는 근접 전투를 담당하는 등 역할 분담이 중요하다. 또한, 맵 곳곳에 숨겨진 보너스 자원과 보급품이 배치되어 있어 이를 잘 활용하면 더 효율적인 방어가 가능하다. 이 맵은 긴 플레이 시간과 높은 난이도로 인해 숙련자들에게 추천되며, 특히 팀 플레이가 필수적인 만큼 친구들과 함께 플레이하면 더욱 재미를 느낄 수 있다. 다만, 자원 관리를 잘못하거나 방어선을 잘못 구축하면 순식간에 밀릴 수 있으므로, 초보 플레이어는 어려움을 느낄 수 있다. 맵의 분위기와 긴장감, 전략적인 요소들이 well-balanced되어 있어 여러 번 플레이해도 질리지 않는 장점이 있다. 특히 어둠의 세력이 몰려오는 연출과 함께 긴박한 전투가 이어지는 부분은 이 맵의 하이라이트로, 몰입감을 극대화한다. 이 맵을 즐기고자 한다면, 초반의 자원 수급과 방어선 구축에 집중하고, 후반을 대비한 자원 예비분을 마련하는 것이 중요하다. 또한, 각 유닛의 특성과 스킬을 잘 이해하고, 적의 공격 패턴을 분석하는 연습이 필요하다. StarCraft: Brood War's custom map *The Lord of the Rings: Battle Under the Moon* is a defense-type map based on J.R.R. Tolkien's worldview where players control the human and hobbit alliance to fend off waves of dark forces. The map features an open terrain with vast plains, mountain ranges, and rivers, centered around a fortress that faces relentless enemy assaults. Each wave consists of orcs, Uruk-hai, trolls, and other threats, requiring players to construct buildings and produce units with limited resources to establish a defensive line. Proper building placement, unit positioning, and resource management are crucial, as mistakes can lead to a swift collapse of the frontline. As the game progresses, enemy attacks grow stronger and more diverse, making early-stage resource gathering and stable defense lines key to victory. The map boasts an enormous 6144x6144 size, set in a desert tileset that creates a dry, intense battlefield atmosphere. Players command human and hobbit units, each with unique skills and roles—archers provide ranged attacks while knights excel in melee combat, emphasizing the need for strategic teamwork. Hidden throughout the map are bonus resources and supplies that, when utilized effectively, can enhance defensive efficiency. Due to its long playtime and high difficulty, this map is recommended for experienced players, especially when played with friends to maximize enjoyment. Novices may struggle if they mismanage resources or misplace defenses, but the balanced blend of atmosphere, tension, and strategy ensures replayability. The highlight of the map lies in its intense, immersive combat sequences, particularly during enemy assaults, which heighten the sense of urgency. To fully enjoy this map, focus on early resource collection and defense setup while reserving reserves for later stages. Understanding each unit’s strengths and skills, as well as analyzing enemy attack patterns, is essential for success.
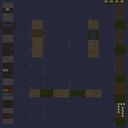
Doggy BoUnD
‘Doggy BoUnD’는 스타크래프트: 브루드워의 유즈맵으로, 6명의 플레이어가 참여하는 장애물 통과형 디펜스 맵이다. 맵 중앙을 가로지르는 넓은 구간에서 각각의 플레이어가 개(dog) 역할을 맡아 다양한 장애물을 통과하고, 일정 시간 내에 목표 지점에 도달하는 것이 목표로 보인다. 맵 곳곳에 배치된 기둥, 함정, 좁은 통로 등은 플레이어의 시야를 제한하고, 적절한 타이밍과 전략을 요구하는 요소로 추정된다. 특히 맵의 양쪽 끝과 중앙에 위치한 장애물들은 각각 다른 패턴으로 배치되어 있어, 플레이어 간 협력이 필수적일 것으로 보인다. 맵의 배경은 사막 타일셋을 사용해 건조한 환경이 연출되며, 개를 연상시키는 아이콘이나 장애물이 시각적으로 두드러진다. 플레이어들은 맵의 양쪽 끝에서 시작해 중앙의 목표 지점으로 이동해야 하며, 장애물 통과 중에는 공격이나 방어보다는 순발력과 속도에 중점을 둬야 할 것으로 보인다. 이 맵은 주로 속도와 반사신경, 그리고 팀워크를 테스트하는 퍼즐 디펜스 장르에 속하며, 개별 플레이어의 실력과 팀 간의 조율이 승패를 좌우할 것이다. 초보자의 경우 장애물의 패턴을 숙지하는 데 시간이 걸릴 수 있으며, 반복 플레이를 통해 점차 익숙해질 수 있을 것이다. 또한 맵의 난이도는 장애물의 배치와 속도에 따라 조절될 수 있으므로, 플레이어의 숙련도에 맞춰 난이도를 설정할 필요가 있다. 이 맵은 짧은 플레이 타임을 목표로 디자인되었을 가능성이 있으며, 주로 10분 내외의 플레이 시간이 예상된다. 개를 테마로 한 장애물 통과 게임은 스타크래프트 유즈맵 among에서 드물게 찾아볼 수 있는 장르이기 때문에, 새로운 경험을 원하는 플레이어들에게 추천할 만하다. 특히 팀 기반의 전략과 협동이 필요한 맵이기 때문에, 친구들과 함께 플레이할 때 더욱 재미를 느낄 수 있을 것이다. 맵을 플레이하기 전에는 장애물의 배치와 통과 방법을 미리 확인하고, 팀원 간의 역할 분담을 확실히 하는 것이 중요하다. 또한, 맵의 중앙에 위치한 장애물은 복잡한 패턴을 가질 가능성이 높으므로, 신중히 접근해야 한다. ‘Doggy BoUnD’ is a custom map in *StarCraft: Brood War* where six players participate in an obstacle-course-style defense map. Each player takes on the role of a dog, navigating through various obstacles on a wide central section of the map to reach a goal within a set time. Pillars, traps, and narrow passages scattered throughout the map restrict players’ vision and demand precise timing and strategy. Notably, the obstacles at both ends of the map and in the center are arranged in different patterns, making teamwork essential. The map uses a desert tileset, creating a dry environment where dog-themed icons and obstacles stand out visually. Players start at either end of the map and must move toward the central goal, focusing more on agility and speed than on attacking or defending during the obstacle course. This map falls under the puzzle defense genre, testing speed, reflexes, and teamwork, where individual skill and coordination between teammates determine victory. Beginners may take time to memorize obstacle patterns but can gradually get accustomed through repeated play. The difficulty can be adjusted based on obstacle placement and speed, so it’s important to set the level according to players’ proficiency. Designed for short play sessions, the game likely aims for around 10 minutes of playtime. As a rare genre among *StarCraft* custom maps—featuring a dog-themed obstacle course—it offers a fresh experience for players seeking something new. Since it requires team-based strategy and cooperation, it’s especially fun to play with friends. Before playing, it’s crucial to check obstacle layouts and passing methods and clearly assign roles among teammates. Additionally, the obstacles in the map’s center may have complex patterns, so players should approach them with caution.
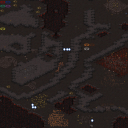
디아블로 RPG v1.00 (Diablo RPG v1.00)
스타크래프트 브루드워 유즈맵 <디아블로 RPG v1.00>은 고전 RPG 게임을 스타크래프트로 구현한 흥미로운 작품으로, 플레이어는 각자 선택한 영웅으로 디아블로를 처치하는 것이 목표다. 맵은 정글 테마의 넓은 공간에 구축되어 있으며, 중앙에 위치한 보스 디아블로가 주요 목표로 보인다. 맵 곳곳에는 몹들이 배치되어 있어 전투를 유도하며, 플레이어는 레벨업을 통해 스킬을 강화하고 아이템을 획득할 수 있는 구조로 추정된다. 맵의 배경은 어두운 분위기를 자아내며, 보스 디아블로의 presence가 강하게 느껴진다. UI 요소는 보이지 않지만, 플레이어는 미니맵을 통해 아군의 위치를 확인할 수 있을 것으로 보인다. 이 맵은 4인 플레이를 지원하는 것으로 보이며, 각 플레이어는 독립적인 영웅을 조종하여 협력하거나 경쟁적으로 디아블로를 쓰러뜨리는 플레이가 가능할 것이다. 초보자도 쉽게 접근할 수 있도록 튜토리얼이나 간단한 조작법이 제공될 것으로 추정되며, 플레이 시간은 맵의 규모와 진행 방식에 따라 30분에서 1시간 내외가 소요될 가능성이 크다. 이 맵은 특히 RPG 팬들에게 매력적으로 다가갈 것이며, 디아블로와 같은 고전 RPG의 분위기를 스타크래프트의 세계에서 체험해보고 싶은 플레이어들에게 추천된다. 플레이 전에는 각 영웅의 스킬과 아이템 시스템을 숙지하는 것이 중요할 것으로 보인다. Diablo RPG v1.00 is a unique StarCraft Brood War custom map that recreates a classic RPG experience within the game's universe. Players control individual heroes with the objective of defeating Diablo, the central boss located in the heart of the jungle-themed map. The expansive map is populated with various monsters, encouraging frequent combat encounters. Players can level up their characters, unlock new skills, and acquire items to enhance their abilities. The dark and immersive atmosphere of the map, combined with Diablo's imposing presence, creates an engaging environment. Designed for up to four players, the map likely supports both cooperative and competitive gameplay modes, allowing players to either work together or compete to be the first to defeat the boss. While the UI elements are not visible, players can probably track allies via a minimap. Suitable for beginners, the map likely includes a tutorial or simple instructions to ease new players into the experience. The expected playtime ranges from 30 minutes to an hour, depending on the map's progression system and player coordination. This map is particularly appealing to RPG enthusiasts and those looking to experience the atmosphere of classic RPGs like Diablo within StarCraft. Before playing, it is advisable to familiarize yourself with each hero's skills and item systems to maximize enjoyment.
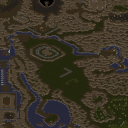
하이룰: 캐터스트로피 (Hyrule: Catastrophe)
《하이룰: 캐터스트로피(Hyrule: Catastrophe)》는 스타크래프트 브루드워의 유즈맵으로, 젤다의 전설 시리즈를 모티브로 제작된 컴까기(컴퓨터 상대 유즈맵) 장르의 디펜스 게임이다. 8명의 플레이어가 세 팀으로 나뉘어 진행하며, 각 팀은 맵 중앙의 요새를 방어하면서 동시에 적의 공격을 차단해야 한다. 맵은 사막 타일셋으로 구성되어 있으며, 넓은 평야와 협곡, 산맥이 조화를 이루며 전략적 요소를 제공한다. 맵의 이름은 ‘Hyrule’과 ‘Catastrophe’가 결합되어 있으며, 젤다의 전설 시리즈의 세계관과 분위기를 느낄 수 있도록 디자인되었다고 추정된다. 게임의 핵심은 요새 방어와 적의 침입 차단에 중점을 두고 있으며, 맵 상단과 하단에 위치한 요새를 보호하면서 동시에 적의 본진을 공격하는 방식으로 진행된다. 맵의 구조상 중앙 협곡을 통한 진입로가 비교적 좁아 병력의 집중이 필요한데, 이는 디펜스 게임의 특성상 전략적 중요성을 높이는 요소로 작용한다. 또한, 맵 곳곳에 흩어져 있는 자원 지점은 요새를 강화하거나 병력을 보충하는 데 활용될 수 있어, 자원 관리와 전략적 배치의 중요성이 커진다. 이 맵은 초보자보다는 어느 정도의 전략적 사고와 미니맵 활용 능력이 요구되는 편으로 보이며, 팀 간 협동이 중요하다. 맵의 디자인과 구조상 긴장감을 유지할 수 있도록 설계되어 있어, 플레이어들은 끊임없이 적의 움직임을 주시하고 대응해야 한다. 또한, 맵의 폭넓은 시야와 다양한 지형은 다양한 전략을 구사할 수 있는 여지를 제공한다. 다만, 맵의 난이도는 명확히 제시되지 않았으나, 일반적으로 컴까기 장르의 특성상 초보자가 접근하기엔 다소 어려운 편으로 추정된다. 이 맵을 추천하는 대상은 전략 게임을 즐기며, 팀 플레이와 협동을 중시하는 유저들이다. 또한, 젤다의 전설 시리즈의 팬이라면 맵의 세계관과 분위기를 즐길 수 있을 것이다. 플레이 전에는 맵의 구조와 요새의 위치, 자원 분포를 충분히 숙지하고, 팀원과의 전략적 합의를 미리 준비하는 것이 중요하다. 특히, 요새 방어와 동시에 적의 공격을 차단하는 이중적인 목표를 달성하기 위해선 높은 집중력과 판단력이 요구된다. 《Hyrule: Catastrophe》 is a *StarCraft: Brood War* custom map and a defense game in the "compete against AI" genre, inspired by *The Legend of Zelda* series. Eight players are divided into three teams, each tasked with defending their team’s central fortress while blocking enemy attacks. The map features a desert tileset, blending vast plains, canyons, and mountain ranges to create a strategic landscape. The name combines "Hyrule" and "Catastrophe," suggesting a design meant to evoke the world and atmosphere of *The Legend of Zelda* series. The core gameplay revolves around fort defense and intercepting enemy advances, with teams protecting their upper and lower fortresses while launching attacks on the enemy’s main base. Due to the map’s structure, the central canyon serves as a narrow choke point where concentrated forces are essential—heightening the strategic depth typical of defense games. Scattered resource points across the map can be used to reinforce fortresses or replenish troops, emphasizing the importance of resource management and strategic positioning. This map appears to demand a solid grasp of strategy and efficient use of the minimap, making it more suited for intermediate players rather than beginners. Teamwork is crucial, as the map’s design and layout are crafted to maintain tension, requiring players to constantly monitor enemy movements and respond accordingly. The wide field of view and varied terrain also allow for diverse tactical approaches. While the difficulty isn’t explicitly stated, the nature of the "compete against AI" genre suggests it may pose a challenge for newcomers. Recommended for players who enjoy strategic games and value teamwork and cooperation, this map will also appeal to *The Legend of Zelda* fans who appreciate its worldbuilding and atmosphere. Before playing, it’s important to familiarize yourself with the map’s layout, fortress positions, and resource distribution, and to coordinate strategies with your team in advance. Successfully balancing fort defense with offensive pressure demands sharp focus and decisive judgment.
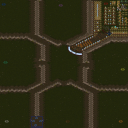
7 VS 1 하드 휴먼 (7 VS 1 Hard Human (P))
스타크래프트: 브루드워의 대표적인 유즈맵 중 하나로, 7명의 플레이어가 단 한 명의 Protoss(프로토스) 플레이어와 맞서는 디펜스 형태의 맵이다. 내부 맵 설명에서도 강조하듯 '7 people vs one very hard Human'이라는 설정으로, 7인의 인간 플레이어는 협동하여 강력한 프로토스 플레이어를 상대로 버텨내야 한다. 맵은 사막 타일셋을 기반으로 구성되어 있으며, 넓은 개방형 필드와 중앙에 위치한 프로토스 기지 구조가 특징이다. 인간 플레이어들은 왼쪽 하단 지역에 배치되며, 프로토스 플레이어는 중앙의 넥서스에서 시작해 끊임없이 공격을 퍼부어 온다. 맵의 균형과 난이도는 프로토스 플레이어의 전략적 호가성이나 인간 측의 협동 여부에 따라 크게 달라진다. 인간 플레이어들은 리소스를 모아 방어 건물을 건설하고, 프로토스 플레이어는 끊임없이 몰려드는 유닛으로 공격을 시도하는 구조로, 긴장감과 전략적 깊이를 동시에 제공한다. 특히 프로토스 플레이어가 사용하는 강력한 유닛 조합과 운영 방식이 난이도를 높이는 주요 요소로 작용한다. 이 맵은 초기부터 인기를 끌며, 스타크래프트 유즈맵의 클라시식으로 자리 잡았다. 플레이어들은 협동과 전략적 센스를 발휘해 프로토스 플레이어를 상대로 분투해야 하며, 승리 시의 성취감 또한 상당하다. 초보 플레이어보다는 중수 이상의 실력을 가진 유저들이 즐기기에 적합한 맵으로, 여러 번의 시도와 전략적 변화가 필요한 흥미로운 대결을 제공한다. 또한, 맵의 구조상 프로토스 플레이어의 난이도가 'Hard'로 명시되어 있어, 인간 플레이어들의 전략적 깊이가 더욱 요구된다. 플레이 전에는 프로토스 플레이어의 유닛 조합과 인간 측의 방어 건물 배치에 대한 사전 이해가 필수적이며, 특히 프로토스 플레이어의 방어 건물을 파괴하는 타이밍과 전략이 승패를 가를 수 있다. 맵의 길이가 넓고 개방되어 있어, 인간 플레이어들은 중앙 지역을 효과적으로 방어하거나 프로토스 플레이어의 본진을 공격하는 등 다방면의 전략을 고려해야 한다. 이 맵은 오랜 기간 동안 수많은 플레이어들에게 사랑받아 왔으며, 브루드워 유즈맵의 역사에서 빼놓을 수 없는 작품으로 꼽힌다. Protoss 플레이어의 난이도가 높다는 점에서, 인간 플레이어들의 협동과 전략적 유연성이 무엇보다 중요하다는 점을 강조한다. 또한, 맵의 지속적인 재플레이를 통해 다양한 전략과 전술을 익힐 수 있어, 스타크래프트 유즈맵의 عمق과 매력을 느끼기에 최적의 선택이라 할 수 있다. 특히 프로토스 플레이어의 운영 방식이나 인간 측의 방어 전략에 따라 맵의 밸런스가 크게 달라질 수 있어, 플레이어의 실력과 창의성에 따라 무궁무진한 재미를 선사한다. One of the most iconic custom maps in *StarCraft: Brood War*, this is a defense-style map where seven players face off against a single Protoss player. As emphasized in the in-game description, the premise is "7 people vs one very hard Human," where the seven human players must work together to withstand the relentless attacks of a powerful Protoss player. The map is set in a desert tile theme, featuring a wide-open field and a central Protoss base structure. Human players start in the bottom-left area, while the Protoss player begins at the Nexus in the center, continuously launching waves of attacks. The balance and difficulty of the map vary greatly depending on the Protoss player’s strategic approach or the humans’ coordination. Humans gather resources to build defensive structures, while the Protoss player sends endless waves of units to attack, creating a tense and strategically deep experience. The Protoss player’s powerful unit compositions and operational tactics are key factors that raise the difficulty. From the start, this map has been popular and has cemented its status as a classic among *StarCraft* custom maps. Players must rely on cooperation and strategic thinking to overcome the Protoss, and the sense of accomplishment upon victory is substantial. It’s best suited for intermediate to advanced players rather than beginners, offering an engaging battle that requires multiple attempts and strategic adjustments. Given the map’s structure, the Protoss player’s difficulty is explicitly labeled as "Hard," demanding even more strategic depth from the human side. Before playing, it’s essential to understand the Protoss player’s unit compositions and the optimal placement of human defensive buildings. The timing and strategy for destroying the Protoss’s defensive structures can often determine victory or defeat. With its expansive and open layout, humans must consider various strategies, such as effectively defending the central area or launching attacks on the Protoss’s main base. Over the years, this map has been beloved by countless players and remains an indispensable part of *Brood War* custom map history. Its high difficulty for the Protoss player underscores the importance of human teamwork and strategic adaptability. Additionally, the map’s replayability allows players to explore diverse strategies and tactics, making it an ideal choice for experiencing the depth and charm of *StarCraft* custom maps. The balance can shift dramatically depending on the Protoss player’s tactics or the humans’ defensive strategies, offering endless fun based on the players’ skill and creativity.
최근 등록된 맵
새로 추가된 파일과 버전을 확인하세요.
새벽의 저주 (Dawn of the Dead †)
‘새벽의 저주(Dawn of the Dead †)’는 스타크래프트: 브루드워의 유즈맵으로, 좀비 아포칼립스 세계관을 바탕으로 한 서바이벌 디펜스 장르의 맵이다. 플레이어는 총 6인으로 구성되며, 60분의 제한 시간 동안 끊임없이 몰려오는 좀비 무리를 상대로 방어전을 펼치게 된다. 맵은 정글 타일셋을 기반으로 설계되어 있으며, 중앙에 위치한 생존 거점을 중심으로 방어선을 구축하거나 전략적으로 진로를 차단하는 방식으로 진행된다. 맵의 구조상 특정 지점에서 좀비의 물량이 집중되는 패턴이 보이며, 이는 플레이어들에게 즉각적인 대응을 요구한다. 좀비의 공격 패턴은 일정 시간마다 증가하는 것으로 추정되며, 후반부로 갈수록 난이도가 급격히 상승하는 특징을 보인다. 방어 거점 주변에는 자원과 방어 시설 설치가 가능한 공간이 배치되어 있어, 플레이어는 자원을 수집해 방어 시설을 강화하거나 보급로를 확보하는 전략을 세울 수 있다. 맵의 분위기는 어둡고 긴장감 넘치며, 좀비의 출현 효과음과 배경 음악이 몰입감을 증폭시킨다. 이 맵은 특히 팀워크와 빠른 판단력이 요구되는 만큼, 초보자보다는 중간 수준 이상의 플레이어들이 즐기기에 적합하다. 플레이 전에는 팀원 간의 역할 분배와 자원 관리 계획을 사전에 논의하는 것이 중요하며, 방어 거점의 유지와 보급로 확보가 생존의 핵심 요소로 작용할 것이다. 맵의 난이도는 중상 정도로 평가되며, 6인 전원이 협력하지 않으면 완주하기 어려운 구조로 설계되어 있다. 맵의 특징상 좀비의 물량 증가 패턴과 방어 거점의 위치가 반복적으로 등장하므로, 플레이어는 맵을 숙지하고 반복 플레이를 통해 전략을 최적화할 필요가 있다. Dawn of the Dead † is a StarCraft: Brood War user-made map (UMS) that immerses players in a zombie apocalypse survival defense scenario. The map supports up to 6 players, who must defend a central survival point against waves of zombies for 60 minutes. Built on a jungle tileset, the layout features strategic choke points and open areas where players can fortify defenses or cut off zombie advances. The zombie spawns appear to intensify at regular intervals, with later waves becoming significantly more challenging. Players can collect resources to construct defensive structures or secure supply routes around the core base area. The atmosphere is tense, enhanced by eerie sound effects and background music that heighten immersion. The map demands strong teamwork and quick decision-making, making it ideal for intermediate to advanced players rather than beginners. Success hinges on coordinated role distribution, resource management, and maintaining defense positions. The difficulty is classified as moderately high, as solo efforts or poor team coordination will likely result in failure. Familiarity with the map’s zombie spawn patterns and choke points through repeated plays is crucial for optimizing survival strategies.
스폰 디펜스 3 팀 얼티밋 (Spawn Defense 3 Team Ultimate)
《스폰 디펜스 3 팀 얼티밋》은 스타크래프트: 브루드워의 유즈맵으로, 세 팀이 동시에 방어전을 펼치는 디펜스 장르의 대표적인 작품 중 하나로 손꼽힌다. 맵은 넓은 사막 타일셋을 배경으로 펼쳐지며, 각 팀은 중앙에 위치한 본진을 지키며 끊임없이 밀려드는 적군을 상대해야 한다. 맵의 특징은 ‘얼티밋 메서드’라는 특수 시스템을 도입했다는 점인데, 이는 기존 스폰 디펜스 시리즈에서 제공되던 보너스나 소Cow를 배제하고 순수한 방어전과 전략적 요소에 집중하도록 설계된 방식이다. 덕분에 플레이어는 순수한 맵 설계와 적의 공세 패턴 분석에 집중할 수 있으며, 맵의 밸런스를 예측하고 대응하는 재미가 돋보인다. 플레이어는 총 6명이 참여할 수 있으며, 각 팀은 독립된 본진과 미네랄, 가스를 확보한 상태로 시작한다. 맵의 구조는 중앙 광장과 같은 형태로 모든 팀이 동일한 조건에서 시작하지만, 맵의 배치와 길목이 복잡하게 얽혀 있어 팀 간의 소통과 협력이 필수적이다. 특히 적의 공격 루트는 세 팀 모두에게 동일하게 적용되지만, 각 팀의 방어 성공 여부는 개인의 컨트롤과 전략에 따라 크게 좌우된다. 맵은 끊임없이 쏟아지는 저그 유닛들과의 전투를 중심으로 진행되며, 플레이어는 방어 건물과 유닛을 적절히 배치하고, 자원 관리를 통해 지속적인 보강을 도모해야 한다. 이 맵의 가장 큰 매력은 바로 ‘얼티밋 메서드’를 통한 순수한 디펜스 경험이다. 보너스나 특수 아이템이 배제되면서 맵의 밸런스가 오롯이 디자인에 의해 결정되며, 이는 플레이어들에게 전략적 깊이를 제공한다. 또한 맵의 넓고 복잡한 구조는 단순히 방어하는 것 이상의 재미를 선사하는데, 예를 들어 적의 공격을 유도하거나, 팀원 간의 연계 플레이를 통해 다수의 적군을 한꺼번에 상대하는 등 다양한 전술적 선택이 가능하다는 점이Highlight된다. 또한 맵의 배경인 사막 타일셋은Phoenix한 분위기를 연출하며, 디펜스 게임의 긴장감을 한층 높이는 역할을 한다. 이 맵은 초보에서 숙련자까지 폭넓은 플레이어 층을 겨냥하고 있지만, 특히 팀 플레이와 전략적 사고가 필요한 맵이기 때문에 혼자서 모든 것을 해결하기보다는 팀원과의 원활한 소통과 협력이 필수적이다. 또한 맵의 난이도는 보통 수준으로 설정되어 있지만, 적의 공격 패턴을 잘 이해하고 방어 건물의 배치와 자원 관리를 효율적으로 수행할 수 있는 능력이 요구된다. 맵을 플레이하기 전에는 팀원 간의 역할 분담을 명확히 하고, 방어 건물의 업그레이드 우선순위와 자원 수급 전략을 미리 계획하는 것이 좋다. 또한 맵의 복잡한 길목을 숙지하고, 적의 공격 루트를 미리 예측하는 연습을 통해 보다 원활한 플레이가 가능해질 것이다. 이 맵은 디펜스 장르를 любить하는 플레이어들에게는 물론, 스타크래프트 유즈맵의 전략적 깊이를 즐기는 모든 이들에게 강력히 추천할 만한 작품이다. 맵의 넓은 규모와 다양한 전술적 선택지, 그리고 팀 플레이의 중요성은 이 맵이 단순히 방어전을 넘어 하나의 전략 게임으로서의 가치를 지녔음을 증명한다. 특히 ‘얼티밋 메서드’를 통한 순수한 디펜스 경험은 많은 플레이어들에게 새로운 인사이트를 제공하며, 맵의 디자인과 밸런스가 얼마나 중요한지를 다시 한번 일깨워준다. This map, Spawn Defense 3 Team Ultimate, is a standout user-made defense game within StarCraft: Brood War, designed for three teams to engage in simultaneous base defense. Set against a vast desert tileset, the map challenges players to protect their central bases from relentless waves of enemy units. A defining feature is the 'Ultimate Method,' a system that removes bonus resources and special units like cows, focusing solely on pure defense mechanics and strategic planning. This design choice ensures players concentrate on map layout analysis and adaptive tactics rather than relying on external advantages. With a maximum of six players, the map divides participants into three teams, each starting with equal resources, minerals, and gas. The layout is symmetrical, with central plazas connecting all teams, but the intricate pathways and defensive chokepoints demand strong teamwork and communication. Enemies spawn continuously, primarily composed of Zerg units, and players must strategically place defensive structures and units while managing resources to sustain their defenses. The Ultimate Method elevates the map beyond typical defense scenarios by emphasizing pure strategy. The absence of bonuses or special items means the map's balance hinges entirely on its design, offering players a deeper strategic experience. The desert-themed tileset adds to the immersive atmosphere, enhancing the tension of each wave of attacks. Players can experiment with tactics like luring enemies into traps or coordinating with teammates to overwhelm multiple threats simultaneously, making each playthrough dynamic and engaging. While accessible to both beginners and experienced players, Spawn Defense 3 Team Ultimate shines brightest in team-based play. Success relies heavily on teamwork, clear role assignments, and synchronized strategies rather than individual prowess. The map's difficulty is moderate, requiring players to master defensive structure placement, resource management, and wave pattern recognition. Prior to playing, teams should establish clear roles, prioritize structure upgrades, and plan resource allocation to optimize performance. This map is highly recommended for fans of the defense genre and players who appreciate the strategic depth of StarCraft user-made maps. Its expansive layout, tactical variety, and emphasis on teamwork transform it from a simple defense game into a full-fledged strategy experience. The Ultimate Method not only challenges players but also reinforces the importance of thoughtful map design and balanced gameplay, making it a must-play for enthusiasts seeking a refined defense challenge.
Doggy BoUnD
‘Doggy BoUnD’는 스타크래프트: 브루드워의 유즈맵으로, 6명의 플레이어가 참여하는 장애물 통과형 디펜스 맵이다. 맵 중앙을 가로지르는 넓은 구간에서 각각의 플레이어가 개(dog) 역할을 맡아 다양한 장애물을 통과하고, 일정 시간 내에 목표 지점에 도달하는 것이 목표로 보인다. 맵 곳곳에 배치된 기둥, 함정, 좁은 통로 등은 플레이어의 시야를 제한하고, 적절한 타이밍과 전략을 요구하는 요소로 추정된다. 특히 맵의 양쪽 끝과 중앙에 위치한 장애물들은 각각 다른 패턴으로 배치되어 있어, 플레이어 간 협력이 필수적일 것으로 보인다. 맵의 배경은 사막 타일셋을 사용해 건조한 환경이 연출되며, 개를 연상시키는 아이콘이나 장애물이 시각적으로 두드러진다. 플레이어들은 맵의 양쪽 끝에서 시작해 중앙의 목표 지점으로 이동해야 하며, 장애물 통과 중에는 공격이나 방어보다는 순발력과 속도에 중점을 둬야 할 것으로 보인다. 이 맵은 주로 속도와 반사신경, 그리고 팀워크를 테스트하는 퍼즐 디펜스 장르에 속하며, 개별 플레이어의 실력과 팀 간의 조율이 승패를 좌우할 것이다. 초보자의 경우 장애물의 패턴을 숙지하는 데 시간이 걸릴 수 있으며, 반복 플레이를 통해 점차 익숙해질 수 있을 것이다. 또한 맵의 난이도는 장애물의 배치와 속도에 따라 조절될 수 있으므로, 플레이어의 숙련도에 맞춰 난이도를 설정할 필요가 있다. 이 맵은 짧은 플레이 타임을 목표로 디자인되었을 가능성이 있으며, 주로 10분 내외의 플레이 시간이 예상된다. 개를 테마로 한 장애물 통과 게임은 스타크래프트 유즈맵 among에서 드물게 찾아볼 수 있는 장르이기 때문에, 새로운 경험을 원하는 플레이어들에게 추천할 만하다. 특히 팀 기반의 전략과 협동이 필요한 맵이기 때문에, 친구들과 함께 플레이할 때 더욱 재미를 느낄 수 있을 것이다. 맵을 플레이하기 전에는 장애물의 배치와 통과 방법을 미리 확인하고, 팀원 간의 역할 분담을 확실히 하는 것이 중요하다. 또한, 맵의 중앙에 위치한 장애물은 복잡한 패턴을 가질 가능성이 높으므로, 신중히 접근해야 한다. ‘Doggy BoUnD’ is a custom map in *StarCraft: Brood War* where six players participate in an obstacle-course-style defense map. Each player takes on the role of a dog, navigating through various obstacles on a wide central section of the map to reach a goal within a set time. Pillars, traps, and narrow passages scattered throughout the map restrict players’ vision and demand precise timing and strategy. Notably, the obstacles at both ends of the map and in the center are arranged in different patterns, making teamwork essential. The map uses a desert tileset, creating a dry environment where dog-themed icons and obstacles stand out visually. Players start at either end of the map and must move toward the central goal, focusing more on agility and speed than on attacking or defending during the obstacle course. This map falls under the puzzle defense genre, testing speed, reflexes, and teamwork, where individual skill and coordination between teammates determine victory. Beginners may take time to memorize obstacle patterns but can gradually get accustomed through repeated play. The difficulty can be adjusted based on obstacle placement and speed, so it’s important to set the level according to players’ proficiency. Designed for short play sessions, the game likely aims for around 10 minutes of playtime. As a rare genre among *StarCraft* custom maps—featuring a dog-themed obstacle course—it offers a fresh experience for players seeking something new. Since it requires team-based strategy and cooperation, it’s especially fun to play with friends. Before playing, it’s crucial to check obstacle layouts and passing methods and clearly assign roles among teammates. Additionally, the obstacles in the map’s center may have complex patterns, so players should approach them with caution.
반지의 제왕: 달 전투 (Lord of the Rings: Battle of Dale)
스타크래프트 브루드워의 유즈맵 <반지의 제왕: 달 전투>는 J.R.R. 톨킨의 세계관을 기반으로 한 컴까기 장르의 디펜스 맵으로, 플레이어는 인간과 호빗 연합군을 조종하여 다가오는 어둠의 세력의 공격을 방어해야 한다. 맵은 넓은 평야와 산맥, 강으로 구성된 개방형 지형으로, 중앙의 요새를 중심으로 적의 웨이브가 끊임없이 몰려온다. 각 웨이브는 오크, 우르크하이, 트롤 등으로 구성되어 있으며, 플레이어는 제한된 자원으로 건물을 건설하고 유닛을 생산하여 방어선을 구축해야 한다. 건물을 짓는 위치와 유닛의 배치, 자원 관리가 핵심으로, 실수를 하면 순식간에 전선이 무너질 수 있다. 특히 후반부로 갈수록 적의 공격력이 강해지고 다양한 유닛이 등장하기 때문에, 초반의 안정적인 자원 수급과 방어선 구축이 승부의 관건이 된다. 맵은 6144x6144의 거대한 크기를 자랑하며, 사막 타일셋을 사용하여 건조한 분위기의 전투를 연출한다. 플레이어는 인간과 호빗의 유닛을 조종할 수 있으며, 각 유닛은 고유한 스킬과 역할을 가지고 있어 전략적인 플레이가 요구된다. 예를 들어, 궁수 유닛은 원거리 공격을, 기사는 근접 전투를 담당하는 등 역할 분담이 중요하다. 또한, 맵 곳곳에 숨겨진 보너스 자원과 보급품이 배치되어 있어 이를 잘 활용하면 더 효율적인 방어가 가능하다. 이 맵은 긴 플레이 시간과 높은 난이도로 인해 숙련자들에게 추천되며, 특히 팀 플레이가 필수적인 만큼 친구들과 함께 플레이하면 더욱 재미를 느낄 수 있다. 다만, 자원 관리를 잘못하거나 방어선을 잘못 구축하면 순식간에 밀릴 수 있으므로, 초보 플레이어는 어려움을 느낄 수 있다. 맵의 분위기와 긴장감, 전략적인 요소들이 well-balanced되어 있어 여러 번 플레이해도 질리지 않는 장점이 있다. 특히 어둠의 세력이 몰려오는 연출과 함께 긴박한 전투가 이어지는 부분은 이 맵의 하이라이트로, 몰입감을 극대화한다. 이 맵을 즐기고자 한다면, 초반의 자원 수급과 방어선 구축에 집중하고, 후반을 대비한 자원 예비분을 마련하는 것이 중요하다. 또한, 각 유닛의 특성과 스킬을 잘 이해하고, 적의 공격 패턴을 분석하는 연습이 필요하다. StarCraft: Brood War's custom map *The Lord of the Rings: Battle Under the Moon* is a defense-type map based on J.R.R. Tolkien's worldview where players control the human and hobbit alliance to fend off waves of dark forces. The map features an open terrain with vast plains, mountain ranges, and rivers, centered around a fortress that faces relentless enemy assaults. Each wave consists of orcs, Uruk-hai, trolls, and other threats, requiring players to construct buildings and produce units with limited resources to establish a defensive line. Proper building placement, unit positioning, and resource management are crucial, as mistakes can lead to a swift collapse of the frontline. As the game progresses, enemy attacks grow stronger and more diverse, making early-stage resource gathering and stable defense lines key to victory. The map boasts an enormous 6144x6144 size, set in a desert tileset that creates a dry, intense battlefield atmosphere. Players command human and hobbit units, each with unique skills and roles—archers provide ranged attacks while knights excel in melee combat, emphasizing the need for strategic teamwork. Hidden throughout the map are bonus resources and supplies that, when utilized effectively, can enhance defensive efficiency. Due to its long playtime and high difficulty, this map is recommended for experienced players, especially when played with friends to maximize enjoyment. Novices may struggle if they mismanage resources or misplace defenses, but the balanced blend of atmosphere, tension, and strategy ensures replayability. The highlight of the map lies in its intense, immersive combat sequences, particularly during enemy assaults, which heighten the sense of urgency. To fully enjoy this map, focus on early resource collection and defense setup while reserving reserves for later stages. Understanding each unit’s strengths and skills, as well as analyzing enemy attack patterns, is essential for success.
경찰들 빨리 잡어!! (Catch the Police!!)
‘경찰들 빨리 잡어!!’는 스타크래프트 브루드워의 유즈맵으로, 경찰과 도둑을 소재로 한 대결형 디펜스 맵이다. 맵의 전체적인 구조는 중앙에 넓은 공간을 두고 그 주위에 복잡한 지형과 좁은 통로를 배치해 두 진영 간의 접근성과 전투가 자연스럽게 발생하도록 설계되어 있다. 특히 좁은 길목을 중심으로 한 시야 차단과 진로 방해가 core gameplay로, 플레이어들은 숨을 곳을 찾거나 상대방을 유인하는 전술을 구사해야 한다. 경찰 측은 도둑을 붙잡기 위해 협력해야 하는 반면, 도둑은 경찰을 피해 맵 곳곳에 흩어져 있는 보물이나 목표물을 획득하거나 탈출구를 통과하는 방식으로 진행한다. 이미지에서 확인되는 붉은색과 푸른색의 구역은 각각의 진영이 시작하는 기지 역할을 하며, 각각의 기지 주변에는 방어 시설이 배치되어 있어 선공 포지션을 잡기 위한 전략적 선택이 중요하다. 맵의 지형은 울퉁불퉁한 언덕과 작은 언덕으로 나뉘어 시야를 가리는 요소가 많고, 이로 인해 예상치 못한 기습 공격이나 후방 침투가 빈번하게 발생할 가능성이 높아진다. 또한, 맵의 중앙에는 넓은 개활지가 있으나, 이 공간을 지나가는 과정에서 자연스럽게 전투가 벌어질 수밖에 없어서 플레이어들은 항상 긴장감을 유지해야 한다. 초보자도 쉽게 접근할 수 있는 구조이지만, 고수와 초보의 실력 차이는 뚜렷하게 드러날 수 있으며, 특히 협력 플레이가 필수적인 경찰 측에서는 팀워크가 승패를 좌우할 가능성이 크다. 맵을 플레이하기 전에 반드시 확인해야 할 점은 좁은 통로에서의 전투 시 시야 확보와 진로 차단 요소다. 또한, 보물이나 탈출구 위치도 사전에 숙지하고 있어야 유리한 위치를 선점할 수 있다. 이 맵은 경쟁심을 자극하는 재미와 긴장감으로 인해 스타크래프트 유즈맵 커뮤니티에서 꾸준한 인기를 얻고 있는 장르로, 여러 번의 플레이를 통해 전략과 전술을 다듬을 수 있는 장점이 있다. 특히 팀 플레이를 중시하는 스타일의 맵이기 때문에, 친구들과 함께 플레이할 때 더욱 몰입감 있는 경험을 제공할 것이다. ‘Quick Catch the Cops!’ is a *StarCraft: Brood War* custom map based on a cops-and-robbers theme, featuring a defensive battle format. The map is designed with a central open space surrounded by complex terrain and narrow passages, naturally encouraging engagement and combat between the two factions. The core gameplay revolves around blocking lines of sight and obstructing paths, particularly through chokepoints, forcing players to seek hiding spots or lure opponents into traps. The police team must cooperate to capture the thieves, while the thieves aim to evade capture by collecting scattered treasures or objectives or escaping through designated exits. The red and blue zones visible in the image serve as each faction’s starting bases, with defensive structures placed around them—strategic positioning here is crucial for gaining an early advantage. The terrain features uneven hills and small mounds that frequently obscure vision, making surprise attacks and rear infiltrations common. Though there’s a wide open area in the center, crossing it almost guarantees combat, keeping players on edge. While the map’s structure is easy for beginners to grasp, the skill gap between veterans and newcomers remains evident, especially for the police team, where teamwork can determine victory or defeat. Before playing, it’s essential to understand how vision and path-blocking work in tight corridors, as well as the locations of treasures and escape routes to secure advantageous positions. This map has maintained steady popularity in the *StarCraft* custom map community thanks to its competitive thrill and tension, offering players the chance to refine their strategies and tactics through repeated play. With its emphasis on teamwork, it delivers an immersive experience, especially when played with friends.
하이룰: 캐터스트로피 (Hyrule: Catastrophe)
《하이룰: 캐터스트로피(Hyrule: Catastrophe)》는 스타크래프트 브루드워의 유즈맵으로, 젤다의 전설 시리즈를 모티브로 제작된 컴까기(컴퓨터 상대 유즈맵) 장르의 디펜스 게임이다. 8명의 플레이어가 세 팀으로 나뉘어 진행하며, 각 팀은 맵 중앙의 요새를 방어하면서 동시에 적의 공격을 차단해야 한다. 맵은 사막 타일셋으로 구성되어 있으며, 넓은 평야와 협곡, 산맥이 조화를 이루며 전략적 요소를 제공한다. 맵의 이름은 ‘Hyrule’과 ‘Catastrophe’가 결합되어 있으며, 젤다의 전설 시리즈의 세계관과 분위기를 느낄 수 있도록 디자인되었다고 추정된다. 게임의 핵심은 요새 방어와 적의 침입 차단에 중점을 두고 있으며, 맵 상단과 하단에 위치한 요새를 보호하면서 동시에 적의 본진을 공격하는 방식으로 진행된다. 맵의 구조상 중앙 협곡을 통한 진입로가 비교적 좁아 병력의 집중이 필요한데, 이는 디펜스 게임의 특성상 전략적 중요성을 높이는 요소로 작용한다. 또한, 맵 곳곳에 흩어져 있는 자원 지점은 요새를 강화하거나 병력을 보충하는 데 활용될 수 있어, 자원 관리와 전략적 배치의 중요성이 커진다. 이 맵은 초보자보다는 어느 정도의 전략적 사고와 미니맵 활용 능력이 요구되는 편으로 보이며, 팀 간 협동이 중요하다. 맵의 디자인과 구조상 긴장감을 유지할 수 있도록 설계되어 있어, 플레이어들은 끊임없이 적의 움직임을 주시하고 대응해야 한다. 또한, 맵의 폭넓은 시야와 다양한 지형은 다양한 전략을 구사할 수 있는 여지를 제공한다. 다만, 맵의 난이도는 명확히 제시되지 않았으나, 일반적으로 컴까기 장르의 특성상 초보자가 접근하기엔 다소 어려운 편으로 추정된다. 이 맵을 추천하는 대상은 전략 게임을 즐기며, 팀 플레이와 협동을 중시하는 유저들이다. 또한, 젤다의 전설 시리즈의 팬이라면 맵의 세계관과 분위기를 즐길 수 있을 것이다. 플레이 전에는 맵의 구조와 요새의 위치, 자원 분포를 충분히 숙지하고, 팀원과의 전략적 합의를 미리 준비하는 것이 중요하다. 특히, 요새 방어와 동시에 적의 공격을 차단하는 이중적인 목표를 달성하기 위해선 높은 집중력과 판단력이 요구된다. 《Hyrule: Catastrophe》 is a *StarCraft: Brood War* custom map and a defense game in the "compete against AI" genre, inspired by *The Legend of Zelda* series. Eight players are divided into three teams, each tasked with defending their team’s central fortress while blocking enemy attacks. The map features a desert tileset, blending vast plains, canyons, and mountain ranges to create a strategic landscape. The name combines "Hyrule" and "Catastrophe," suggesting a design meant to evoke the world and atmosphere of *The Legend of Zelda* series. The core gameplay revolves around fort defense and intercepting enemy advances, with teams protecting their upper and lower fortresses while launching attacks on the enemy’s main base. Due to the map’s structure, the central canyon serves as a narrow choke point where concentrated forces are essential—heightening the strategic depth typical of defense games. Scattered resource points across the map can be used to reinforce fortresses or replenish troops, emphasizing the importance of resource management and strategic positioning. This map appears to demand a solid grasp of strategy and efficient use of the minimap, making it more suited for intermediate players rather than beginners. Teamwork is crucial, as the map’s design and layout are crafted to maintain tension, requiring players to constantly monitor enemy movements and respond accordingly. The wide field of view and varied terrain also allow for diverse tactical approaches. While the difficulty isn’t explicitly stated, the nature of the "compete against AI" genre suggests it may pose a challenge for newcomers. Recommended for players who enjoy strategic games and value teamwork and cooperation, this map will also appeal to *The Legend of Zelda* fans who appreciate its worldbuilding and atmosphere. Before playing, it’s important to familiarize yourself with the map’s layout, fortress positions, and resource distribution, and to coordinate strategies with your team in advance. Successfully balancing fort defense with offensive pressure demands sharp focus and decisive judgment.
디아블로 RPG v1.00 (Diablo RPG v1.00)
스타크래프트 브루드워 유즈맵 <디아블로 RPG v1.00>은 고전 RPG 게임을 스타크래프트로 구현한 흥미로운 작품으로, 플레이어는 각자 선택한 영웅으로 디아블로를 처치하는 것이 목표다. 맵은 정글 테마의 넓은 공간에 구축되어 있으며, 중앙에 위치한 보스 디아블로가 주요 목표로 보인다. 맵 곳곳에는 몹들이 배치되어 있어 전투를 유도하며, 플레이어는 레벨업을 통해 스킬을 강화하고 아이템을 획득할 수 있는 구조로 추정된다. 맵의 배경은 어두운 분위기를 자아내며, 보스 디아블로의 presence가 강하게 느껴진다. UI 요소는 보이지 않지만, 플레이어는 미니맵을 통해 아군의 위치를 확인할 수 있을 것으로 보인다. 이 맵은 4인 플레이를 지원하는 것으로 보이며, 각 플레이어는 독립적인 영웅을 조종하여 협력하거나 경쟁적으로 디아블로를 쓰러뜨리는 플레이가 가능할 것이다. 초보자도 쉽게 접근할 수 있도록 튜토리얼이나 간단한 조작법이 제공될 것으로 추정되며, 플레이 시간은 맵의 규모와 진행 방식에 따라 30분에서 1시간 내외가 소요될 가능성이 크다. 이 맵은 특히 RPG 팬들에게 매력적으로 다가갈 것이며, 디아블로와 같은 고전 RPG의 분위기를 스타크래프트의 세계에서 체험해보고 싶은 플레이어들에게 추천된다. 플레이 전에는 각 영웅의 스킬과 아이템 시스템을 숙지하는 것이 중요할 것으로 보인다. Diablo RPG v1.00 is a unique StarCraft Brood War custom map that recreates a classic RPG experience within the game's universe. Players control individual heroes with the objective of defeating Diablo, the central boss located in the heart of the jungle-themed map. The expansive map is populated with various monsters, encouraging frequent combat encounters. Players can level up their characters, unlock new skills, and acquire items to enhance their abilities. The dark and immersive atmosphere of the map, combined with Diablo's imposing presence, creates an engaging environment. Designed for up to four players, the map likely supports both cooperative and competitive gameplay modes, allowing players to either work together or compete to be the first to defeat the boss. While the UI elements are not visible, players can probably track allies via a minimap. Suitable for beginners, the map likely includes a tutorial or simple instructions to ease new players into the experience. The expected playtime ranges from 30 minutes to an hour, depending on the map's progression system and player coordination. This map is particularly appealing to RPG enthusiasts and those looking to experience the atmosphere of classic RPGs like Diablo within StarCraft. Before playing, it is advisable to familiarize yourself with each hero's skills and item systems to maximize enjoyment.
7 VS 1 하드 휴먼 (7 VS 1 Hard Human (P))
스타크래프트: 브루드워의 대표적인 유즈맵 중 하나로, 7명의 플레이어가 단 한 명의 Protoss(프로토스) 플레이어와 맞서는 디펜스 형태의 맵이다. 내부 맵 설명에서도 강조하듯 '7 people vs one very hard Human'이라는 설정으로, 7인의 인간 플레이어는 협동하여 강력한 프로토스 플레이어를 상대로 버텨내야 한다. 맵은 사막 타일셋을 기반으로 구성되어 있으며, 넓은 개방형 필드와 중앙에 위치한 프로토스 기지 구조가 특징이다. 인간 플레이어들은 왼쪽 하단 지역에 배치되며, 프로토스 플레이어는 중앙의 넥서스에서 시작해 끊임없이 공격을 퍼부어 온다. 맵의 균형과 난이도는 프로토스 플레이어의 전략적 호가성이나 인간 측의 협동 여부에 따라 크게 달라진다. 인간 플레이어들은 리소스를 모아 방어 건물을 건설하고, 프로토스 플레이어는 끊임없이 몰려드는 유닛으로 공격을 시도하는 구조로, 긴장감과 전략적 깊이를 동시에 제공한다. 특히 프로토스 플레이어가 사용하는 강력한 유닛 조합과 운영 방식이 난이도를 높이는 주요 요소로 작용한다. 이 맵은 초기부터 인기를 끌며, 스타크래프트 유즈맵의 클라시식으로 자리 잡았다. 플레이어들은 협동과 전략적 센스를 발휘해 프로토스 플레이어를 상대로 분투해야 하며, 승리 시의 성취감 또한 상당하다. 초보 플레이어보다는 중수 이상의 실력을 가진 유저들이 즐기기에 적합한 맵으로, 여러 번의 시도와 전략적 변화가 필요한 흥미로운 대결을 제공한다. 또한, 맵의 구조상 프로토스 플레이어의 난이도가 'Hard'로 명시되어 있어, 인간 플레이어들의 전략적 깊이가 더욱 요구된다. 플레이 전에는 프로토스 플레이어의 유닛 조합과 인간 측의 방어 건물 배치에 대한 사전 이해가 필수적이며, 특히 프로토스 플레이어의 방어 건물을 파괴하는 타이밍과 전략이 승패를 가를 수 있다. 맵의 길이가 넓고 개방되어 있어, 인간 플레이어들은 중앙 지역을 효과적으로 방어하거나 프로토스 플레이어의 본진을 공격하는 등 다방면의 전략을 고려해야 한다. 이 맵은 오랜 기간 동안 수많은 플레이어들에게 사랑받아 왔으며, 브루드워 유즈맵의 역사에서 빼놓을 수 없는 작품으로 꼽힌다. Protoss 플레이어의 난이도가 높다는 점에서, 인간 플레이어들의 협동과 전략적 유연성이 무엇보다 중요하다는 점을 강조한다. 또한, 맵의 지속적인 재플레이를 통해 다양한 전략과 전술을 익힐 수 있어, 스타크래프트 유즈맵의 عمق과 매력을 느끼기에 최적의 선택이라 할 수 있다. 특히 프로토스 플레이어의 운영 방식이나 인간 측의 방어 전략에 따라 맵의 밸런스가 크게 달라질 수 있어, 플레이어의 실력과 창의성에 따라 무궁무진한 재미를 선사한다. One of the most iconic custom maps in *StarCraft: Brood War*, this is a defense-style map where seven players face off against a single Protoss player. As emphasized in the in-game description, the premise is "7 people vs one very hard Human," where the seven human players must work together to withstand the relentless attacks of a powerful Protoss player. The map is set in a desert tile theme, featuring a wide-open field and a central Protoss base structure. Human players start in the bottom-left area, while the Protoss player begins at the Nexus in the center, continuously launching waves of attacks. The balance and difficulty of the map vary greatly depending on the Protoss player’s strategic approach or the humans’ coordination. Humans gather resources to build defensive structures, while the Protoss player sends endless waves of units to attack, creating a tense and strategically deep experience. The Protoss player’s powerful unit compositions and operational tactics are key factors that raise the difficulty. From the start, this map has been popular and has cemented its status as a classic among *StarCraft* custom maps. Players must rely on cooperation and strategic thinking to overcome the Protoss, and the sense of accomplishment upon victory is substantial. It’s best suited for intermediate to advanced players rather than beginners, offering an engaging battle that requires multiple attempts and strategic adjustments. Given the map’s structure, the Protoss player’s difficulty is explicitly labeled as "Hard," demanding even more strategic depth from the human side. Before playing, it’s essential to understand the Protoss player’s unit compositions and the optimal placement of human defensive buildings. The timing and strategy for destroying the Protoss’s defensive structures can often determine victory or defeat. With its expansive and open layout, humans must consider various strategies, such as effectively defending the central area or launching attacks on the Protoss’s main base. Over the years, this map has been beloved by countless players and remains an indispensable part of *Brood War* custom map history. Its high difficulty for the Protoss player underscores the importance of human teamwork and strategic adaptability. Additionally, the map’s replayability allows players to explore diverse strategies and tactics, making it an ideal choice for experiencing the depth and charm of *StarCraft* custom maps. The balance can shift dramatically depending on the Protoss player’s tactics or the humans’ defensive strategies, offering endless fun based on the players’ skill and creativity.
맵 선택 가이드
태그는 맵의 핵심 특징을 빠르게 설명하지만 제작 버전마다 규칙이 다를 수 있습니다. 상세 설명에서 권장 인원, 난이도, 플레이 시간과 버전을 함께 확인한 뒤 다운로드하세요.