
협곡 스타크래프트 맵 모음
'협곡' 태그가 등록된 맵을 모았습니다. 장르 하나로 찾기 어려운 플레이 방식, 난이도와 특징을 중심으로 인기 맵과 최신 맵을 비교해 보세요.
- 등록 맵
- 18개
- 누적 다운로드
- 13
- 누적 조회
- 1,305
인기 맵
다운로드와 조회 반응이 높은 맵입니다.
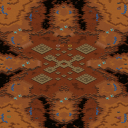
트로이 SE 2.0 (Troy SE 2.0)
스타크래프트 브루드워의 고전 맵으로 renowned ASL(아프리카TV 스타리그) 공식맵으로도 채택된 Troy SE 2.0은 2007년 최초 제작 이후 오랜 기간 동안 사랑받아온 밀리 맵이다. 황혼 테마의 넓은 평야와 중앙의 협곡이 조화를 이루며, 중앙 자원지대와 두 개의 멀티 지역이 균형 있게 배치되어 있다. 맵의 이름은 고대 도시 트로이를 연상시키며, 맵의 구조 역시 마치 트로이 전쟁의 격전지와도 같은 위험한 중앙 교두보를 공유하는 두 진영의 대결을 떠올리게 한다. 시작 위치가 서로의 시야에서 멀리 떨어져 있어 초반의 정찰과 전략적 판단이 중요한데, 특히 중앙 자원지대 주변의 언덕과 협곡은 빠른 진출을 방해하는 요소가 된다. 4096x4096의 넓은 맵 크기 덕분에 넓은 시야와 긴 교전 거리를 제공하며, 황혼 테마의 붉은 노을 색감은 맵의 분위기를 한층 더 깊게 만든다. ASL 공식맵으로 채택된 만큼 밸런스와 플레이어간의 공정한 경쟁을 중시한 디자인으로, 프로게이머들 사이에서도 전략적 깊이를 높이 평가받는 맵이다. 초보자들은 중앙 교두보의 중요성을 간과하기 쉬우며, 경험 있는 플레이어라면 언덕과 협곡을 활용한 다양한 전략을 펼칠 수 있다. especialmentes 초반 출발선에서 멀티 지역으로의 접근성이 중요하며, 테란의 경우 벙커링이나 사이클론 활용, 프로토스의 경우 관문 빌드를 통한 빠른 진출, 저그의 경우 뮤탈리스크나 러커를 활용한 중앙 장악 등 다양한 전략 구사가 가능하다. 맵의 난이도는 중간 수준으로 평가되며, 넓은 시야와 긴 교전 거리 덕분에 전략적 사고와micro 컨트롤 모두 요구되는 하이브리드형 밸런스 맵으로 자리잡았다. 특히 ASL 공식맵으로 사용되면서 많은 프로게이머들의 검증을 받았기 때문에, 경쟁력을 갖추고자 한다면 반드시 연습해볼 만한 가치가 있는 맵이다. 시작 전에는 중앙 자원지대의 배치와 협곡의 존재 여부를 확인하고, 자신의 전략에 맞는 빌드와 운영 계획을 미리 세워두는 것이 중요하다. Troy SE 2.0 is a classic Brood War map that has been widely loved since its initial release in 2007 and was even adopted as an official map for the renowned ASL (AfreecaTV StarLeague). Set against a twilight theme, the map features vast plains and a central canyon that create a balanced battlefield. The central resource area and two multi-location bases on each side are strategically positioned to ensure fairness. The map's name, Troy, evokes the ancient city and its design mirrors the strategic challenges of the Trojan War, with both sides sharing a dangerous central foothold. The starting positions are deliberately placed far from each other, emphasizing the importance of early scouting and strategic decision-making. The central resource zone, surrounded by hills and canyons, adds an extra layer of challenge by limiting quick advances. With a map size of 4096x4096, Troy SE 2.0 offers wide sight lines and long engagement distances, enhanced by the red-hued twilight atmosphere. As an ASL official map, its design prioritizes balance and fair competition, earning high praise from professional gamers for its strategic depth. Beginners may overlook the significance of the central foothold, while experienced players can leverage the terrain—such as hills and canyons—for diverse strategies. Terran players might utilize bunkers or Cyclones for early pressure, Protoss players could opt for gateway builds for rapid expansion, and Zerg players could focus on Mutalisks or Lurkers to control the center. The map is considered to have a medium difficulty level, requiring both strategic foresight and micro-management due to its wide sight lines and extended engagement ranges. Its status as an ASL official map means it has been thoroughly tested by top-tier players, making it a valuable map to practice for those aiming to improve their competitive edge. Before starting, players should verify the layout of the central resource area and the presence of canyons, then plan their build orders and strategies accordingly to maximize their chances of success.
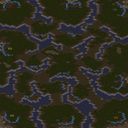
빅 게임 헌터스 (Big Game Hunters)
스타크래프트 브루드워의 대표적인 팀 밀리 맵인 '빅 게임 헌터스'는 8명의 플레이어가 치열한 전투를 펼치는 중규모 맵으로, 사막 타일셋을 기반으로 한 넓은 평야와 협곡이 특징적이다. 맵 중앙에는 거대한 협곡이 가로질러져 있으며, 양측 본진은 협곡 양 끝에 배치되어 있어 전략적인 진출과 방어가 중요하다. 내부 맵 설명에서 '8명의 플레이어용'으로 명시된 것처럼, 2~8인까지 플레이가 가능하지만 8인이 가장 밸런스가 맞춰진 상태다. 맵 이름은 사냥꾼과 사냥감을 연상시키지만, 실제로는 전형적인 팀 밀리 맵으로, 초보부터 숙련자까지 즐길 수 있는 무난한 난이도를 지닌다. 협곡을 사이에 두고 펼쳐지는 전투는 긴장감을 높이며, 중앙 협곡을 차지하는 것이 승리의 열쇠가 된다. 초보자들은 넓은 시야와 협곡을 활용한 방어에 집중해야 하며, 숙련자들은 자원과 병력 관리, 타이밍 공격 등을 통해 우위를 점할 수 있다. 맵의 넓은 공간은 작은 실수에도 큰 타격을 줄 수 있으므로, 플레이 전 맵의 지형을 숙지하고 전략을 세우는 것이 중요하다. 또한, 팀 밀리 특성상 협동과 소통이 필수적이므로, 팀원과의 호흡을 맞추는 연습도 필요하다. 이 맵은 스타크래프트의 클래식한 팀 밀리 장르를 대표하는 작품으로, 오랜 시간동안 많은 유저들에게 사랑받아왔다. 넓은 공간과 중규모의 전투가 어우러진 이 맵은 스타크래프트의 매력을 다시 한번 느낄 수 있는 훌륭한 선택지다. 특히, 사막 타일셋의 황량한 분위기가 전투의 긴장감을 더해준다. 새로운 유저들도 쉽게 접근할 수 있지만, 숙련자들에게는 전략적인 깊이를 제공하는 매력적인 맵이다. 플레이 전 협곡의 지형을 분석하고, 팀원과의 역할 분담을 철저히 준비한다면 더욱 재미있는 전투를 즐길 수 있을 것이다. "Big Game Hunters" is a classic team melee map in *StarCraft: Brood War* designed for eight players, featuring intense combat in a mid-sized battlefield. Set in a desert tile theme, the map is characterized by vast plains and deep canyons, with a massive chasm running through the center. Each team’s main base is positioned at opposite ends of the chasm, making strategic advances and defenses crucial. While playable with 2 to 8 players, the eight-player format offers the most balanced experience. Though the name suggests a hunter-and-prey dynamic, the map is a standard team melee scenario suitable for players of all skill levels, from beginners to veterans. Battles unfolding across the chasm heighten tension, with control of the central gorge often determining victory. Beginners should focus on utilizing the wide sightlines and defensive positions within the canyon, while experienced players can leverage resource management, troop timing, and coordinated attacks to gain an advantage. The map’s expansive terrain means even minor mistakes can lead to significant setbacks, so studying the layout and planning strategies beforehand is essential. Team melee also demands strong coordination and communication, making practice in syncing with teammates a key part of success. As a quintessential example of *StarCraft*’s team melee genre, "Big Game Hunters" has remained a beloved choice among players for years. Its blend of open space and mid-scale combat captures the essence of *StarCraft*, offering both accessibility for newcomers and strategic depth for veterans. The desolate, desert aesthetic further amplifies the map’s intense atmosphere. New players will find it easy to jump in, but those seeking a challenge will discover layers of strategy to master. Analyzing the chasm’s terrain and carefully dividing roles with teammates before diving in will ensure a far more engaging and rewarding experience.
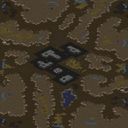
본 캐년 (Bone Canyon)
‘본 캐년(Bone Canyon)’은 스타크래프트 브루드워의 유즈맵으로, 황무지 테마의 맵에서 프로토스와 테란이 대결하는 밀리 장르의 맵이다. 맵 이름은 ‘뼈 계곡’이라는 뜻으로, 지형 자체가 마치 뼈가 산재해 있는 듯한 느낌을 준다. 중앙에 넓은 평지가 있으며, 그 주위를 언덕과 협곡이 둘러싸고 있어 시야 확보와 기지 방어에 전략적인 포인트를 제공한다. 특히 협곡 지형은 프로토스가 테란의Siege Tanks를 상대하기 어렵도록 유도하며, 반대로 테란은 시즈 탱크의 사정 거리를 활용해 프로토스의 기지를 압박할 수 있는 기회를 제공한다. 맵의 구조상 초반 러시가 치열할 수 있으며, 중반부터는 중앙 평지에서 벌어지는 대규모 전투가 승부를 가를 가능성이 높다. 이 맵은 1:2 또는 2:2와 같은 대등한 구도로도 플레이가 가능한데, 특히 컴퓨터를 상대로 한 ‘컴까기’ 형식으로도 즐길 수 있도록 디자인된 것으로 추정된다. 맵의 제목과 설명에 ‘clever comps always win’이라는 문구가 포함되어 있어 AI의 전략적 우위를 강조하고 있으며, 이는 플레이어들이 컴까기에서 전략과 타이밍을 중요시해야 함을 시사한다. 또한, ‘Modified by [GG] Sir W@11er’라는 제작자 정보와 ‘gg-clan.narod.ru’라는 배포 채널이 함께 제공되어, 이 맵이 특정 커뮤니티를 중심으로 배포되고 개선되었음을 알 수 있다. 본 캐년은 밀리 맵으로서의 기본적인 밸런스를 갖추고 있지만, 협곡과 언덕 지형이 프로토스와 테란의 상성을 극명하게 드러내기 때문에, 플레이어는 자신의 종족에 맞는 전략을 carefully 준비해야 한다. 초보자의 경우, 지형에 익숙해지기까지 다소 시간이 걸릴 수 있으며, 중급자 이상의 플레이어라면 중앙 평지에서 벌어지는 전투를 주도적으로 이끌어나갈 수 있을 것이다. 맵의 분위기는 황무지 테마답게 삭막하고 차가운 느낌을 주지만, 그 속에서 벌어지는 전투만큼은 뜨겁고 박진감 넘치는 경험을 제공할 것이다. 특히 컴퓨터를 상대로 한 플레이에서는 AI의 예측 불가능한 움직임에 대응하며 승부를 가려야 하므로, 전략적 사고가 요구된다. 이 맵은 밀리 장르의 팬이라면 한번쯤 플레이해볼 만한 가치가 있으며, 특히 프로토스와 테란의 상성을 이해하고자 하는 플레이어들에게 유용한 연습 공간이 될 것이다. 또한, 유즈맵으로서의 재미 요소도 충분히 갖추고 있어, 밀리 매니아뿐만 아니라 스타크래프트의 다양한 유즈맵을 즐기는 이들에게도 추천할 만하다. 맵을 플레이하기 전에는 자신의 종족에 맞는 빌드와 전략을 미리 준비하고, 지형의 특징을 숙지하는 것이 중요하다. ‘Bone Canyon’ is a custom map from *StarCraft: Brood War*, set in a wasteland-themed battlefield where Protoss and Terran clash in a classic melee-style match. The map’s name translates to "Bone Canyon," reflecting its terrain, which resembles scattered bones across the landscape. A wide central plain is surrounded by hills and ravines, offering strategic vantage points for vision control and base defense. The ravine terrain is designed to hinder Protoss players against Terran Siege Tanks, while Terran players can leverage the tanks’ range to pressure Protoss bases. Given the map’s structure, early rushes can be intense, and large-scale battles in the central plain often decide the outcome from the mid-game onward. This map supports balanced matchups like 1v2 or 2v2 and appears to be designed for "comp stomping" (AI grinding), as suggested by the phrase *"clever comps always win"* included in its title and description. This implies that players must prioritize strategy and timing when facing AI opponents. The map’s credits—*"Modified by [GG] Sir W@11er"* and its distribution channel *"gg-clan.narod.ru"*—indicate it was developed and refined within a specific community. While *Bone Canyon* maintains solid balance as a melee map, its ravines and elevated terrain starkly highlight the strengths and weaknesses of Protoss and Terran, requiring players to tailor their strategies accordingly. Newcomers may need time to adapt to the terrain, but intermediate and advanced players can take full advantage of the central battles. The wasteland aesthetic gives the map a stark, cold atmosphere, yet the battles unfolding within are intense and exhilarating. Playing against AI adds an extra layer of challenge, as unpredictable movements demand sharp strategic thinking. The map is worth trying for melee fans, especially those looking to refine their Protoss vs. Terran matchups. It also offers strong replay value as a custom map, appealing not only to melee enthusiasts but also to players who enjoy exploring diverse *StarCraft* custom maps. Before jumping in, players should prepare faction-specific builds, study the terrain, and plan their approach accordingly.
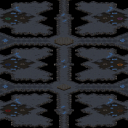
p4
이 맵은 스타크래프트 브루드워에서 3대3 팀전으로 즐길 수 있는 밀리 유즈맵으로, 중앙에 위치한 넓은 평야와 고지대가 조화를 이룬 전략적인 배치로 구성되어 있다. 좌우 대칭 형태의 넓은 평지 주변으로는 언덕과 협곡이 배치되어 있으며, 각 팀은 맨 처음 시작 지점에서 약간 떨어진 곳에 본진 건물을 배치할 수 있도록 설계되어 있다. 본진과 연결된 mineral line은 각각의 팀이 자원을 안정적으로 확보할 수 있도록 충분한 광물 지대가 배치되어 있다. 맵의 중앙부는 넓은 개활지로 펼쳐져 있어 병력 충돌 시 대규모 전투가 발생할 가능성이 높고, 고지대와 언덕은 시야 확보와 방어-line 구축에 유리한 요소가 된다. 왼쪽 상단과 오른쪽 하단에는 본진과 멀지 않은 곳에 추가 자원 지대가 배치되어 있어 초반 자원 경쟁이 치열해질 수 있는 구조다. 전체적으로 밸런스 잡힌 3vs3 밀리 맵으로서, 중앙 평야를 차지하기 위한 초반 러시와 정면 대결이 주요 전략 포인트가 될 것으로 보인다. 또한, 언덕과 협곡을 활용한 기습이나 방어-line 구축이 승패를 좌우할 수 있는 핵심 요소로 작용할 것으로 예상된다. 이 맵은 초보자부터 숙련자까지 모두 즐길 수 있도록 설계되었지만, 중앙 평야를 둘러싼 고지대와 언덕의 활용법을 익히는 것이 중요하다. 특히, 팀원과의 협력과 자원 관리, 그리고 중앙 평야를 차지하기 위한 전략적 결정이 게임의 흐름을 크게 좌우할 것이다. 빠른 병력 생산과 병력 간의 조화로운 전투가 요구되며, 초반 자원 확보와 mineral line의 안정적인 운영이 게임의 승패를 가르는 중요한 포인트가 될 것이다. 또한, 언덕과 협곡을 활용한 기습이나 방어-line 구축은 숙련자들에게는 승리의 열쇠가 될 수 있는 요소다. 이 맵을 플레이하기 전에 중앙 평야의 지형을 숙지하고, 팀원과의 원활한 소통을 통해 전략을 조율하는 것이 중요하다. 이 맵은 넓은 개활지와 고지대, 언덕이 조화를 이룬 전략적인 배치로 인해, 초보자들에게는 다소 복잡하게 느껴질 수 있지만, 숙련자들에게는 치밀한 전략과 팀워크가 요구되는 흥미로운 대결을 제공한다. 특히, 중앙 평야를 둘러싼 고지대와 협곡을 활용한 플레이어의 센스가 승패를 결정짓는 요소로 작용할 것이다. 팀원 간의 유기적인 협력과 자원 관리, 그리고 전략적 판단을 통해 승리를 쟁취해보길 바란다. 이 맵은 3vs3 밀리 유즈맵으로서, 팀워크와 전략적 사고가 요구되는 classic 스타일의 재미를 느낄 수 있는 맵이다. This map is a StarCraft: Brood War custom melee map designed for 3v3 team battles, featuring a strategic layout with a vast central plain surrounded by highlands and hills. The symmetrical wide flat terrain is bordered by hills and ravines, and each team starts with their main base slightly offset from the initial spawn point. The mineral lines connected to the bases are generously spaced to ensure stable resource gathering. The central area opens into a wide expanse where large-scale battles are likely to occur, while elevated terrain and hills provide advantages for vision control and defensive line setups. Additional resource clusters near the top-left and bottom-right bases allow for intense early-game resource competition. As a well-balanced 3v3 melee map, securing the central plain through early rushes and direct confrontations will be key strategic focuses. Ambushes and defensive formations utilizing hills and ravines are expected to play decisive roles in determining the outcome. While designed to be enjoyable for both beginners and experienced players, mastering the use of high ground and elevated terrain around the central plain is crucial. Team coordination, resource management, and strategic decisions regarding control of the central plain will heavily influence the game’s flow. Efficient unit production and cohesive combat tactics are essential, with early resource gathering and stable mineral line operations serving as critical factors in victory. For skilled players, leveraging hills and ravines for ambushes or defensive setups can be the key to success. Though the map’s blend of open fields, high ground, and hills may feel complex to newcomers, it offers a rich and engaging challenge for veterans, where player intuition and terrain utilization around the central plain become decisive factors. Strong teamwork, smart resource handling, and strategic foresight will be vital in securing victory. This map delivers classic 3v3 melee action, rewarding teamwork and strategic thinking in a timeless StarCraft experience.
협곡 (Coulee)
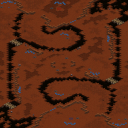
‘Coulee’는 스타크래프트: 브루드워의 유즈맵으로, 황량한 황무지 한가운데 펼쳐진 좁고 긴 협곡을 두고 두 플레이어가 자원을 확보하고 병력을 모아 승부를 겨루는 전략 대결 맵이다. 맵 중앙으로 굽이치는 협곡은 지형상 요충지로, 방어와 공격의 핵심 포인트로 작용한다. 플레이어는 협곡 양쪽에 위치한 본진 기지에서 시작하며, 좁은 길목과 협곡을 활용해 상대방의 공격을 방어하거나 반격을 가할 수 있는 전략적 선택지가 주어진다. 협곡 양쪽 언덕에는 추가 자원이 배치되어 있어 자원 관리와 테크 트리 선택도 승패를 좌우하는 중요 요소로 작용한다. 맵의 특징인 협곡은 좁고 긴 구조로 인해 병력의 움직임이 제한적이기 때문에, 한 번의 실수가 치명적인 결과를 낳을 수 있다. 초보자는 협곡의 지형을 제대로 활용하지 못해 쉽게 무너질 수 있지만, 숙련된 플레이어는 협곡을 방어와 공격의 교두보로 삼아 압도적인 우위를 점할 수 있다. 맵의 분위기는 황량한 황무지와 붉은 노을이 어우러지며, 전략적 긴장감을 한층 높인다. ‘Coulee’는 비교적 간단한 구조이지만, 협곡의 활용과 자원 관리, 타이밍 공격 등 다양한 전술을 요구하는 만큼 전략성 있는 플레이를 즐기고자 하는 유저들에게 적합한 맵이다. 특히 협곡을 사이에 둔 대칭형 구조는 상대방의 움직임을 예측하며 플레이할 수 있도록 설계되어 있어, 심리전과 전술적 깊이감을 느낄 수 있다. 플레이 전에는 협곡의 지형과 자원 배치, 언덕의 활용 가능성을 꼼꼼히 확인하고, 상대방의 전략에 대응할 수 있는 다채로운 빌드를 준비하는 것이 중요하다. 또한, 협곡을 중심으로 한 좁은 길목은 병력의 이동 속도와 전투력 관리에도 영향을 미치므로, 이를 고려한micro 컨트롤이 요구된다. Coulee is a custom map for StarCraft: Brood War, featuring a duel between two players on a narrow canyon surrounded by desolate wastelands. The central canyon serves as the key strategic point, where players must secure resources and gather forces to outmaneuver their opponent. Starting from bases on either side of the canyon, players can leverage the terrain's narrow passages and elevated areas to defend or launch attacks. The map includes scattered resources on the hills flanking the canyon, adding a layer of resource management and tech-tree decision-making to the gameplay. The canyon's restricted width forces players to carefully plan their movements, as a single misstep can lead to decisive defeats. Novice players may struggle with the terrain's strategic potential, while experienced players can exploit the canyon as a defensive or offensive stronghold. The map’s atmosphere is enhanced by its desolate wasteland setting and warm hues, creating a tense and immersive experience. Coulee’s symmetrical design and focus on canyon control make it ideal for players seeking a map that emphasizes strategy and tactical depth. The narrow canyon also fosters psychological warfare and predictive gameplay, as players must anticipate their opponent’s moves. Before playing, it’s crucial to study the terrain, resource distribution, and hilltop advantages. Players should prepare diverse builds to counter various strategies and focus on micro-management, as the canyon’s confined space demands precise unit control and positioning during battles.
그레이트 리프트 밸리 (Great Rift Valley)
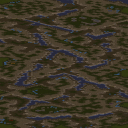
스타크래프트 브루드워의 유즈맵으로 유명한 <그레이트 리프트 밸리(Great Rift Valley)>는 광활한 사막 지형이 펼쳐진 맵으로, 화려한 지형과 독특한 지형 디자인으로 플레이어에게 강렬한 인상을 남기는 디펜스형 유즈맵이다. 맵의 이름은 ‘위대한 협곡’으로 번역할 수 있으며, 내부 맵 설명에서 ‘수천 명의 피가 흐르고 수백만의 영혼이 실려 있다’는 문구로 보아 중후한 스토리나 분위기를 지녔을 것으로 추정된다. 맵의 전체 크기는 4096x8192로 매우 넓은 영역을 차지하고 있어, 넓은 시야와 전략적 움직임이 중요한 맵으로 보인다. 사막 타일셋을 기반으로 한 맵 디자인은 건조하고 황량한 분위기를 자아내며, 협곡やは谷地形이 인상적으로 표현되어 있다. 플레이어는 이 넓은 공간에서 자원 확보와 방어 전략을 동시에 고려해야 하는 구조로 보인다. 맵의 분위기는 중세 전쟁이나 사막 전투를 연상시키며, 디펜스 요소가 강하게 느껴진다. 제공된 메타데이터 상으로는 밀리 분류로 되어 있지만, 실제로는 유즈맵 디펜스 또는 컴퓨터 상대 디펜스(컴까기) 형식으로 제작되었을 가능성이 크다. 넓은 공간과 협곡 지형은 대규모 병력 이동과 방어 포인트 설정을 요구하며, 특히 협곡을 따라 적의 진격을 막아야 하는 구조가 예상된다. 플레이어는 협곡을 중심으로한 방어선 구축과 자원 관리, 적절한 유닛 생산 및 배치를 통해 승리를 노리게 될 것이다. 이 맵의 특징 중 하나는 넓은 맵 크기와 사막 지형으로 인한 시야 확보의 중요성인데, 협곡을 따라 펼쳐진 넓은 평원과 협곡 내부의 좁은 통로 등은 전략적 요충지로 작용할 가능성이 높다. 또한, 넓은 맵에서는 자원 분포가 중요하며, 자원 멀미를 방지하기 위한 효율적인 자원 채취 경로 설계가 필수적일 것이다. 맵의 디자인과 구조상 초보자보다는 중급 이상의 플레이어에게 적합할 것으로 보이며, 넓은 공간을 활용한 다각적인 전략과 방어 라인 구축이 요구된다. 특히 협곡을 중심으로한 방어 라인은 이 맵의 핵심 전략 포인트로 작용할 가능성이 높다. 또한, 넓은 맵에서는 유닛의 이동 경로와 시야 확보가 중요하므로, 시야 확보를 위한 센서 유닛이나 정찰 유닛의 활용도 전략적 관점에서 중요할 것이다. 이 맵은 디펜스 요소 외에도 넓은 공간을 활용한 기동전과Resource management가 결합된 복합적인 전략이 요구되는 맵으로 보인다. 특히, 협곡을 따라 적을 유인하여 방어하는 전략과 함께, 협곡 외부의 넓은 평원에서 자원을 확보하고 병력을 생산하는 균형 잡힌 플레이가 중요할 것이다. 맵의 분위기와 디자인, 넓은 공간은 플레이어에게 긴장감과 전략적 깊이를 제공하며, 다양한 플레이 스타일을 요구하는 유즈맵으로 평가된다. 특히, 넓은 맵에서의Resource management와 방어 전략의 조합은 이 맵의 가장 큰 특징으로 보인다. The *Great Rift Valley* is a renowned custom map from *StarCraft: Brood War*, celebrated for its vast desert terrain. With its striking landscapes and unique design, it leaves a strong impression as a defense-focused custom game. Translated as "Great Canyon," the map’s internal description—"thousands of lives have flowed here, millions of souls have passed"—suggests a rich narrative or atmosphere. Spanning 4096x8192 in size, the map occupies a massive area, emphasizing wide visibility and strategic movement. Its desert-themed tileset evokes a dry, desolate mood, while the canyon and valley terrain stand out vividly. Players must balance resource gathering with defensive tactics across this expansive space. The atmosphere evokes medieval warfare or desert battles, with a strong defensive emphasis. Though classified as a melee map in metadata, it likely functions as a custom defense or AI defense (*compkagi*) mode. The vast space and canyon terrain demand large-scale troop movements and strategic defensive positioning. Players are expected to build defenses around the canyon, manage resources, and deploy units effectively to secure victory. One of the map’s key features is its reliance on vision control due to the expansive desert terrain. The open plains along the canyon and narrow passages within it serve as critical strategic points. Resource distribution across the large map is crucial, requiring efficient harvesting routes to avoid fatigue. Given its design and structure, the map suits intermediate to advanced players, demanding diverse strategies and strong defensive lines—especially around the canyon. Wide spaces also make unit movement and vision control vital, making scout or sensor units strategically important. Beyond defense, the map blends maneuver warfare and resource management, requiring players to balance luring enemies into the canyon while securing resources and producing forces in the open plains. Its immersive atmosphere, expansive design, and strategic depth make it a dynamic custom map that challenges players to adapt their playstyles. The combination of resource management and defense strategies is its defining trait.
Droht - 킬러 협곡 (Droht - Killer Gorge)
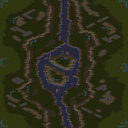
《Droht - Killer Gorge》는 스타크래프트: 브루드워의 대표적인 유즈맵 시리즈인 ‘Droht’의 최신작으로, 거대한 협곡 지형을 배경으로 펼쳐지는 밀리 맵이다. 맵 이름은 독일어로 ‘죽음’이란 뜻을 지닌 ‘Tod’에서 유래한 ‘Droht’ 시리즈의 전통을 잇고 있으며, ‘Killer Gorge’는 ‘살해자의 협곡’이라는 다소 과격한 제목이지만 사실상 맵의 지형을 묘사한 것에 가깝다. 맵의 전체 크기는 6144x6144로 매우 넓고, 협곡을 따라 중앙에 좁은 다리가 놓여 있어 병력의 교전이 자연스럽게 발생하는 구조를 가지고 있다. 협곡 양쪽에는 넓은 평지가 펼쳐져 있으며, 다리 주변은 지형이 복잡하여 시야 확보와 병력 운용이 중요한 요소가 된다. 특히 다리 위와 협곡 양쪽 언덕은 전략적 요충지로, здесь에서 전투가 벌어지면 맵의 승패가 갈릴 수 있다. 협곡 양쪽 끝에는 미네랄과 가스 멀티가 배치되어 있어 자원 확보 경쟁도 치열해진다. 플레이어는 6인으로 구성되며, 각각의 플레이어는 시작 위치에서 협곡을 건너 상대방의 본진을 향해 진격하거나, 협곡을 방어하며 자원을 확보하는 두 가지 선택을 할 수 있다. 맵의 특징은 지형이 복잡하여 시야가 제한되는 부분이 많다는 점으로, 이는 미니맵을 적극 활용하고, 정찰 유닛을 통한 정보 수집이 필수적임을 의미한다. 또한, 협곡 중앙의 다리나 언덕 지형은 진형 싸움에서 큰 영향을 미치므로, 맵에 익숙해지려면 여러 번 플레이를 통해 길목을 장악하는 법을 익혀야 한다. 맵의 분위기는 사막 지형답게 황량하고 웅장한 느낌이 강하며, 협곡의 협소한 공간과 넓은 평지가 어우러져 전략적 깊이를 더한다. 이 맵은 밀리 경기에 최적화되어 있으며, 특히 ‘Droht’ 시리즈 특유의 긴장감과 전략적 깊이를 즐기고 싶은 플레이어들에게 추천할 만한 작품이다. 다만, 넓은 맵 크기 때문에 초보자의 경우 자원 관리와 멀티 확보, 그리고 지형 이해에 시간이 걸릴 수 있으니, 먼저 싱글 플레이 모드나 연습 모드를 통해 맵에 익숙해지는 것이 좋다. 또한, 협곡을 건너는 도중 적의 기습을 받을 위험이 있으니, 항상 주변을 살피며 플레이하는 것이 중요하다. 《Droht - Killer Gorge》 is the latest installment in the "Droht" series of user-created maps for *StarCraft: Brood War*, set against the backdrop of a massive canyon terrain in a melee map. Following the tradition of the "Droht" series, whose name derives from the German word *"Tod"* meaning "death," *Killer Gorge* lives up to the name with its dramatic title, though it primarily reflects the map's dramatic canyon geography. The map spans a vast 6144x6144 size, featuring a narrow bridge running through the center of the gorge, which naturally funnels forces into combat. Flanking the gorge are wide open plains, while the area around the bridge is cluttered with complex terrain, making vision control and troop positioning crucial. The bridge itself and the hills on either side of the gorge serve as strategic chokepoints where battles can decide the outcome of the match. At both ends of the gorge, mineral and gas expansions are positioned, intensifying resource competition. The map is designed for six players, each facing a choice between charging across the gorge toward the opponent's base or defending the gorge while securing resources. A defining feature of the map is its complex terrain, which restricts visibility in many areas, making frequent use of the minimap and scouting units essential. The central bridge and elevated terrain also play a major role in formation battles, so mastering control of these key points requires repeated play. The atmosphere of the map, with its desert terrain, conveys a sense of desolation and grandeur, blending narrow canyon passages with vast open plains to add strategic depth. Optimized for melee matches, this map is highly recommended for players who enjoy the *Droht* series' signature tension and strategic complexity. However, due to its large size, beginners may struggle with resource management, expansion securing, and terrain understanding, so it's advisable to familiarize oneself with the map through single-player or practice modes first. Additionally, crossing the gorge carries the risk of ambushes, so constant vigilance is key to success.
에픽 워 3011! (The Epic War 3011!)
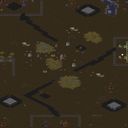
《The Epic War 3011!》은 스타크래프트 브루드워의 대규모 유즈맵으로, 4096×4096 크기의 황무지 타일셋을 배경으로 펼쳐지는 전략 디펜스 장르의 정점이라 할 수 있다. 맵 중앙을 가로지르는 협곡과 주변의 잔해가 뒤섞인 지형은 전장의 위엄을 한층 끌어올리며, 플레이어는 이 넓은 공간에서 적의 공격과 끊임없이 몰려오는 웨이브를 막아내야 한다. 이미지 상으로는 중앙 협곡 양옆으로 넓게 배치된 고지대가 주요據點으로 보이며, 이 지형적 특징 덕분에 방어선을 구축할 수 있는 전략적 요충지가 다수 존재한다. 파괴된 건물 잔해와 흩어진 상자 등은 맵의 몰입감을 높이는 요소로 작용한다. 맵 제목에서 짐작할 수 있듯이 ‘3011’이라는 숫자는 일종의 스토리적 맥락이나 시대를 나타내는 것으로 추정되며, 파괴와 재건의 주제가 담긴 듯한 느낌을 준다. 이 맵의 핵심은 방어와Resource 관리다. 플레이어는 중앙 협곡을 따라 끊임없이 밀려오는 적 유닛들을 막아내며, 각據點을 방어하는 동시에 자원의 확보와 건물을 건설하는 균형을 맞춰야 한다. 이미지 상으로는 맵 가장자리에 위치한 넥서스나 커맨드 센터가 주요 기지 역할을 할 것으로 보이며, 이 기지들 주변의 좁은 통로를 통해서만 접근할 수 있는 구조는 방어의 난이도를 한층 높인다. 또한 맵 곳곳에 흩어진 미네랄과 베스핀 가스는 자원의 확보 여부를 좌우하는 중요한 요소로,Resource 관리와 타이밍을 어떻게 잡느냐가 승패를 가를 것이다. 맵이 제공하는 넓은 시야와 전략적 요충지는 플레이어 간의 협력과 경쟁을 동시에 유도하며, 특히 협동 디펜스가 강조된 맵으로 보인다. 이 맵의 추천 대상은 전략 디펜스와 대규모 유즈맵을 좋아하는 플레이어들이다. 특히 팀플레이가 가능한 구조로 보이며, 넓은 맵과 복잡한 지형은 팀원 간의 전략적 협의와 개개인의 실력을 동시에 요구한다. 또한 방어선을 구축하고Resource를 관리하는 동시에 끊임없이 몰아치는 적들을 상대해야 하는 만큼, 집중력과 전략적 사고가 요구된다. 초보자의 경우 맵의 규모와 복잡한 지형 때문에 어려움을 느낄 수 있지만, 경험이 쌓이면 그 넓은 공간을 활용한 다양한 전략을 구사할 수 있다는 장점이 있다. 플레이 전에는 맵의 주요據點과Resource 분포, 그리고 적의 웨이브 패턴을 미리 숙지하는 것이 중요할 것이다. The Epic War 3011! is a grand-scale user-made map (UMS) in StarCraft: Brood War, set against a desolate 4096×4096 tileset terrain. The map features a central canyon flanked by elevated ruins, creating a strategic battlefield where players must defend against relentless enemy waves. The terrain suggests multiple high-ground chokepoints ideal for establishing defensive positions. The map’s title, '3011', hints at a thematic or narrative context—perhaps a futuristic era of destruction and reconstruction—enhancing immersion with scattered debris and ruins. The core gameplay revolves around defense and resource management. Players must protect key locations along the central canyon while securing resources like minerals and vespene gas, which are scattered across the map. The edge structures, likely command centers or Nexus, act as primary bases with limited access points, raising the challenge of maintaining supply lines. The wide field of view and strategic terrain encourage both cooperation and competition, particularly in team-based modes. The map’s scale and complexity demand strong strategic planning, concentration, and teamwork. This map is best suited for players who enjoy large-scale strategy defense UMS maps, especially those who appreciate team-based gameplay. Beginners may find the vast terrain overwhelming, but experienced players will appreciate the depth and strategic flexibility the map offers. Before playing, it’s crucial to study key locations, resource distribution, and enemy wave patterns to optimize defensive strategies.
어썰트 온 우 테리토리 (Assault on Wu Territory)
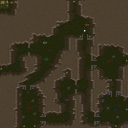
‘어썰트 온 우 테리토리(Assualt on Wu Territory)’는 삼국지 배경의 스타크래프트 브루드워 유즈맵으로, 플레이어는 손책을 조종해 오나라 territory를 공격하거나, 반대로 손책을 방어하는 이중 플레이가 가능한 전략 디펜스 장르의 맵이다. 맵은 사막 타일셋으로 구성되어 있으며 넓은 평원과 협곡, 언덕 지형이 조화롭게 배치되어 있어 시야와 기동성의 균형을 제공한다. 중앙에는 주요 거점이 위치하고 있으며, 오나라 세 명의 장수(손견, 주유, 황개)가 각각의 요새를 방어하고 있다. 전투는 손책의 유닛들을 지휘해 오나라 유닛들을 섬멸하거나, 반대로 오나라 유닛들을 조종해 손책의 공격을 방어하는 방식으로 진행된다. 맵의 특징은 손책의 선택에 따라 공격과 방어가 번갈아 일어나며, 각 라운드마다 오나라 장수들이 보조를 받거나 강화되는 등 변동성이 있는 점이다. 맵의 규모는 4096x4096으로 넓지만, 주요 전투 지역은 중앙과 동서로 나뉜 3개의 거점으로 집중되어 있어 전략적 선택이 필요하다. 또한, 협곡과 언덕을 활용한 진영별 기습이나 후방 공격이 게임의 승패를 좌우할 수 있다. 이 맵은 삼국지 팬과 전략 디펜스 장르를 좋아하는 유저들에게 특히 매력적이며, 손책의 캐릭터성을 살린 스토리텔링과 긴장감 있는 전투가 특징이다. 플레이 전에는 맵의 주요 거점과 진영별 유닛 조합을 숙지하고, 협곡과 언덕의 지형적 이점을 활용할 계획을 미리 세워야 한다. 또한, 오나라 장수들의 패턴과 강화 시점을 예측하는 것이 승리의 열쇠가 될 것이다. Assualt on Wu Territory is a StarCraft: Brood War custom map set in the Three Kingdoms period, offering a dual-player experience where one side controls Sun Ce to attack Wu territory while the other defends as the Wu forces. The map features a desert tileset with a mix of open plains, canyons, and hills, providing a balance between visibility and mobility. Central to the map are key strongholds, each defended by one of Wu's three warlords: Sun Jian, Zhou Yu, and Huang Gai. Gameplay revolves around commanding Sun Ce's units to eliminate Wu forces or, conversely, controlling Wu units to repel Sun Ce's attacks. The map introduces variability by allowing the Wu warlords to receive reinforcements or upgrades each round, adding dynamic shifts in the battle. Spanning 4096x4096 in size, the map's vastness is balanced by three primary battlegrounds clustered around the central and eastern/western strongholds. Terrain features like canyons and hills enable flanking maneuvers or surprise attacks, which can decisively influence the outcome. This map appeals to fans of the Three Kingdoms era and strategy defense enthusiasts, thanks to its immersive storytelling centered on Sun Ce and the tension-filled battles. Before playing, it's essential to familiarize yourself with the key strongholds and faction unit compositions, and to plan around the terrain advantages offered by canyons and hills. Predicting the Wu warlords' reinforcement patterns and upgrade timings will also be crucial for victory.
헬름즈 딥 v. 아나타 13.0 (Helms Deep v. Annatar 13.0)
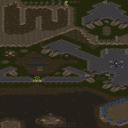
《헬름즈 딥 v. 아나타 13.0》는 스타크래프트 브루드워의 유즈맵으로, J.R.R. 톨킨의 반지의 제왕 세계관을 재해석한 디펜스 장르의 대표작 중 하나다. 이 맵은Middle-earth의 요정 왕국 로한의 헬름 협곡 요새를 배경으로 펼쳐지며, 플레이어는 로한의 기마민족과 엔트의 연합군 역할을 맡아 끊임없이 몰려오는 어둠의 군세를 상대로 요새를 지켜내는 임무를 수행한다. 맵의 핵심은 ‘방어’와 ‘전략적 배치’에 중점을 두고 있으며, 맵 중앙의 요새를 지키면서 적의 공격을 물리치는 것이 주 목표로 보인다. 특히, 맵의 지형은 협곡과 산맥으로 이루어져 있어 자연스러운 입구와 방어 거점을 형성하고 있으며, 플레이어는 이러한 지형을 활용해 병력을 효율적으로 배치하고, 적의 공격 루트를 차단해야 한다. 맵의 구조는 협소한 통로와 넓은 평야가 혼재되어 있어, 밀집된 방어선과 산개된 병력 운용을 요구하는 전략적 깊이를 제공한다. 또한, 맵의 왼쪽과 오른쪽에는 각각의 방어 거점이 마련되어 있어, 플레이어는 전선을 분산시켜 적의 공격에 대응할 수 있다. 맵의 디자인에서 눈여겨볼 점은, 요새의 중심부에 위치한 главное здание(주요 건물)이 있으며, 이 건물이 파괴되면 게임이 종료되는 패배 조건으로 추정된다. 맵의 진행은 대체로 ‘라운드’ 형식으로 이루어지며, 각 라운드마다 적의Wave가 증가하는 방식으로 진행되는 것이 보이며, 후반부로 갈수록 적의 숫자와 공격력이 급격히 상승하여 플레이어의 전략과 협력이 더욱 중요해진다. 이 맵은 특히 ‘컴퓨터 상대 디펜스’ 장르에 특화되어 있어, AI가 조종하는 적군과 실시간으로 전투를 벌이며, 플레이어는 자원 관리와 병력 업그레이드를 통해 요새를 방어해야 한다. 추천 대상은 스타크래프트의 전략적 깊이를 즐기는 플레이어, 특히 디펜스 장르와 팀플레이를 좋아하는 유저들에게 적합하며, 혼자서도 충분히 즐길 수 있지만 2인 이상의 팀 플레이가 더 높은 승률과 몰입도를 제공할 것으로 보인다. 플레이 전에는 맵의 지형과 주요 거점을 숙지하는 것이 중요하며, 각 라운드마다 적의 공격 패턴을 분석해 방어 전략을 수립하는 것이 필수적이다. 또한, 자원 관리와 병력 업그레이드를 꾸준히 진행해야 장기전을 버틸 수 있으므로, 자원의 중요성을 간과해서는 안 된다. 맵의 난이도는 라운드가 진행될수록 급격히 상승하므로, 초보자의 경우 쉬운 난이도부터 시작해 점차 трудность를 높이는 것이 좋다. 이 맵은 오랜 기간 동안 인기 있는 유즈맵으로, 지속적인 업데이트를 통해 밸런스가 조정되어 왔으며, 현재 버전인 13.0은 안정적인 플레이 환경을 제공하는 것으로 보인다. 《Helm’s Deep v. Anata 13.0》 is a custom *StarCraft: Brood War* defense map that reimagines J.R.R. Tolkien’s *The Lord of the Rings* universe. Set in Helm’s Deep, the fortress of Rohan’s horse-lords, the map challenges players to defend Middle-earth as the allied forces of the Rohirrim and Ents against endless waves of darkness. The core focus lies in defense and strategic positioning, with players tasked with protecting the central fortress from relentless enemy assaults. The terrain is defined by narrow canyons and towering mountains, creating natural choke points and vantage points for defense. Players must utilize these features to deploy troops efficiently, block enemy routes, and adapt their formations—whether through tight defensive lines or dispersed forces. The map balances tight corridors with open plains, demanding both precision and adaptability in combat. Two additional defensive strongholds are positioned on the left and right flanks, allowing players to split their forces and counter attacks from multiple directions. A key design element is the main structure at the fortress’s heart, which serves as the game’s defeat condition—its destruction ends the match. Gameplay follows a round-based structure, with each wave growing progressively stronger in both numbers and firepower. Later stages escalate drastically, requiring sharper strategy, coordination, and real-time adaptation. Tailored for the "computer vs. player defense" genre, the map pits players against AI-controlled enemies in real-time battles, where resource management and unit upgrades are essential to survival. Ideal for *StarCraft* fans who enjoy deep strategy, this map particularly suits defense enthusiasts and team players. While playable solo, team-based coordination significantly boosts success rates and immersion. Prior to playing, familiarizing yourself with the terrain and key strongholds is crucial, as is analyzing enemy attack patterns each round to refine your defense. Consistent resource allocation and unit upgrades are vital for sustaining long battles—neglecting them risks early collapse. Difficulty ramps up sharply with each round, so beginners are advised to start on easier settings before gradually increasing the challenge. A longtime fan favorite, this map has undergone continuous updates to balance mechanics, and version 13.0 delivers a stable and polished experience.
헬름 협곡 전투 2.0 (Battle of Helm's Deep 2.0)
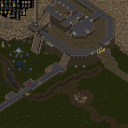
스타크래프트 브루드워의 <배틀 오브 헬름 디프 2.0>은 반지의 제왕: 왕의 귀환의 장면을 재현한 대규모 디펜스형 유즈맵으로, 플레이어는 로한 왕국과 곤도르 연합군의 지휘관으로 변신해 헬름 협곡 전투를 재현하는 재미를 느낄 수 있다. 맵은 거대한 협곡 지형을 중심으로 설계되어 있으며, 적의 대군인 우르크하이와 서펜트를 상대로 방어선을 구축하고 건물을 지켜내야 한다. 특히 협곡 입구와 성벽, 탑 구조물이 섬세하게 배치되어 전략적 깊이를 더하며, 방어용 건물을 건설하고 유닛을 배치하는 타이밍이 승패를 좌우한다. 플레이어는 시작 시점에서 제한된 자원을 바탕으로 방어 전략을 수립해야 하며, 협곡 안쪽으로 밀려드는 적을 저지하는 동시에 성벽과 탑을 보수하는 추가적인 과제가 주어진다. 맵의 분위기는 원작의 긴장감과 웅장함을 잘 살려냈으며, 디자인 역시 사막 타일셋을 사용해 건조한 지형을 연출하여 전투의 무게감을 배가시킨다. 또한 협곡의 협소한 통로와 성벽의 틈새를 활용한 입구 막기 전략이 유효하며, 플레이어 간 협력이 필수적인 팀 플레이가 요구된다. 전체적인 난이도는 중간 수준으로 추정되며, 초보자의 경우 방어선 구축과 자원 관리에 어려움을 느낄 수 있지만 익숙해지면 전략적 재미를 극대화할 수 있는 구조다. 추천 대상은 디펜스형 맵을 좋아하는 유저와 반지의 제왕 팬, 전략 게임을 즐기는 게이머로, 특히 팀플레이가 가능한 플레이 환경에서 더 큰 재미를 느낄 수 있다. 플레이 전에는 맵의 주요 방어 지점과 협곡의 입구 위치를 미리 숙지하고, 건물을 짓는 순서와 유닛 배치에 대한 기본 전략을 세워두는 것이 중요하다. 또한 협곡 안쪽의 성벽과 탑의 상태를 주기적으로 점검해야 하며, 적의 공격을 효과적으로 저지할 수 있는 유닛 조합을 준비해두는 것이 승리의 열쇠가 될 것이다. 맵의 규모가 크고 디자인도 복잡하기 때문에, 처음 플레이하는 경우 난이도를 '보통'으로 설정하고 천천히 적응해 가는 것이 좋다. 마지막으로, 맵의 긴 플레이 시간과 높은 난이도를 고려해 충분한 시간을 할애하고, 팀원과의 원활한 소통을 통해 전략을 공유하는 것이 좋다. StarCraft: Brood War’s *Battle of Helm’s Deep 2.0* is a large-scale defense-style custom map that recreates the iconic scenes from *The Lord of the Rings: The Return of the King*. Players take on the role of commanders for the kingdom of Rohan and the alliance of Gondor, reliving the Battle of Helm’s Deep. The map is designed around a vast canyon terrain, where players must fortify defensive lines and protect their buildings against waves of Uruk-hai and serpents. The strategic depth is enhanced by the meticulous placement of canyon entrances, walls, and towers, making the timing of building defenses and positioning units crucial to victory. At the start, players must establish a defense strategy with limited resources, while also repairing walls and towers as enemies push inward. The map captures the tension and grandeur of the original work, using a desert tileset to emphasize the arid landscape and amplify the weight of the battle. Narrow passages through the canyon and gaps in the walls make choke-point defense strategies effective, and teamwork is essential for success. The overall difficulty is moderate, though beginners may struggle with setting up defenses and managing resources at first. Once familiar, however, the map offers deep strategic enjoyment. Recommended for fans of defense-style maps, *The Lord of the Rings* enthusiasts, and strategy game players, it shines brightest in team-based environments. Before playing, it’s important to memorize key defense points and canyon entrances, plan building orders and unit placements, and regularly check the condition of inner walls and towers. Preparing effective unit compositions to counter attacks is vital for victory. Given the map’s large scale and complexity, new players should set the difficulty to "Normal" and adapt gradually. Finally, due to the long playtime and high difficulty, allocate sufficient time and maintain smooth communication with teammates to share strategies effectively.
마운트 임파서블 2.3.a (Mount Impossible 2.3.a)
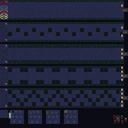
《Mount Impossible 2.3.a》는 스타크래프트: 브루드워의 유즈맵으로, вулкан 타일셋을 기반으로 한 7인용 디펜스/강화형 맵이다. 맵 중앙에는 거대한 산(mount)이 자리 잡고 있으며, 주변 언덕과 협곡을 따라 플레이어们이 건물을 배치하고 방어선을 구축할 수 있는 구조로 구성되어 있다. 맵의 가장 큰 특징은 산의 정상에 도달하는 경로가 매우 제한적이라는 점으로, 이로 인해 상대방의 공격 루트를 예측하고 방어 시설을 효율적으로 배치하는 것이 중요해진다. 또한, 맵 여기저기에 배치된 미네랄과 가스 멀티는 자원 확보 경쟁을 유도하며, 협곡을 따라 이어지는 좁은 길목은 입구막기나 매복 플레이가 필수적인 전략적 요소를 제공한다. 산의 정상에는 승리 조건이 마련되어 있으며, 이를 달성하기 위해 플레이어들은 산을 오르는 경로를 확보하거나, 상대방을 방해하며 자신의 진로를 확보해야 한다. 맵의 난이도는 중간 정도로, 초보자의 경우 방어 전략 수립과 자원 관리에 어려움을 느낄 수 있지만, 경험이 쌓이면 입구막기와 협곡 전투에서 우위를 점할 수 있다. 이 맵은 특히 팀플레이보다는 솔로 플레이에 최적화되어 있으며, 맵의 복잡한 지형과 제한적인 통로를 활용한 심리전과 스킬이 요구된다. 또한, 맵의 симметричность(대칭성)이 떨어지는 구조로 인해, 각 플레이어의 시작 위치가 운에 좌우되는 요소도 존재한다.Mount Impossible 2.3.a is a StarCraft: Brood War custom map featuring a volcanic tileset designed for 7 players. The map centers around a massive mountain structure, with players positioned on surrounding hills and valleys where they can construct buildings and defensive lines. A key feature is the limited access routes to the mountain's summit, forcing players to strategically predict enemy movements and optimize their defensive layouts. Distributed mineral and gas expansions along the map introduce resource competition, while narrow canyon paths encourage choke-point defense and ambush tactics. Victory is achieved by securing the summit path or disrupting opponents' progress. With a moderate difficulty level, this map challenges beginners in resource management and strategic planning but rewards experienced players with opportunities for superior choke-point control and psychological gameplay. The asymmetrical starting positions add an element of unpredictability, enhancing replayability. It is best suited for solo play rather than team-based strategies.
최근 등록된 맵
새로 추가된 파일과 버전을 확인하세요.
빅 게임 헌터스 (Big Game Hunters)
스타크래프트 브루드워의 대표적인 팀 밀리 맵인 '빅 게임 헌터스'는 8명의 플레이어가 치열한 전투를 펼치는 중규모 맵으로, 사막 타일셋을 기반으로 한 넓은 평야와 협곡이 특징적이다. 맵 중앙에는 거대한 협곡이 가로질러져 있으며, 양측 본진은 협곡 양 끝에 배치되어 있어 전략적인 진출과 방어가 중요하다. 내부 맵 설명에서 '8명의 플레이어용'으로 명시된 것처럼, 2~8인까지 플레이가 가능하지만 8인이 가장 밸런스가 맞춰진 상태다. 맵 이름은 사냥꾼과 사냥감을 연상시키지만, 실제로는 전형적인 팀 밀리 맵으로, 초보부터 숙련자까지 즐길 수 있는 무난한 난이도를 지닌다. 협곡을 사이에 두고 펼쳐지는 전투는 긴장감을 높이며, 중앙 협곡을 차지하는 것이 승리의 열쇠가 된다. 초보자들은 넓은 시야와 협곡을 활용한 방어에 집중해야 하며, 숙련자들은 자원과 병력 관리, 타이밍 공격 등을 통해 우위를 점할 수 있다. 맵의 넓은 공간은 작은 실수에도 큰 타격을 줄 수 있으므로, 플레이 전 맵의 지형을 숙지하고 전략을 세우는 것이 중요하다. 또한, 팀 밀리 특성상 협동과 소통이 필수적이므로, 팀원과의 호흡을 맞추는 연습도 필요하다. 이 맵은 스타크래프트의 클래식한 팀 밀리 장르를 대표하는 작품으로, 오랜 시간동안 많은 유저들에게 사랑받아왔다. 넓은 공간과 중규모의 전투가 어우러진 이 맵은 스타크래프트의 매력을 다시 한번 느낄 수 있는 훌륭한 선택지다. 특히, 사막 타일셋의 황량한 분위기가 전투의 긴장감을 더해준다. 새로운 유저들도 쉽게 접근할 수 있지만, 숙련자들에게는 전략적인 깊이를 제공하는 매력적인 맵이다. 플레이 전 협곡의 지형을 분석하고, 팀원과의 역할 분담을 철저히 준비한다면 더욱 재미있는 전투를 즐길 수 있을 것이다. "Big Game Hunters" is a classic team melee map in *StarCraft: Brood War* designed for eight players, featuring intense combat in a mid-sized battlefield. Set in a desert tile theme, the map is characterized by vast plains and deep canyons, with a massive chasm running through the center. Each team’s main base is positioned at opposite ends of the chasm, making strategic advances and defenses crucial. While playable with 2 to 8 players, the eight-player format offers the most balanced experience. Though the name suggests a hunter-and-prey dynamic, the map is a standard team melee scenario suitable for players of all skill levels, from beginners to veterans. Battles unfolding across the chasm heighten tension, with control of the central gorge often determining victory. Beginners should focus on utilizing the wide sightlines and defensive positions within the canyon, while experienced players can leverage resource management, troop timing, and coordinated attacks to gain an advantage. The map’s expansive terrain means even minor mistakes can lead to significant setbacks, so studying the layout and planning strategies beforehand is essential. Team melee also demands strong coordination and communication, making practice in syncing with teammates a key part of success. As a quintessential example of *StarCraft*’s team melee genre, "Big Game Hunters" has remained a beloved choice among players for years. Its blend of open space and mid-scale combat captures the essence of *StarCraft*, offering both accessibility for newcomers and strategic depth for veterans. The desolate, desert aesthetic further amplifies the map’s intense atmosphere. New players will find it easy to jump in, but those seeking a challenge will discover layers of strategy to master. Analyzing the chasm’s terrain and carefully dividing roles with teammates before diving in will ensure a far more engaging and rewarding experience.
본 캐년 (Bone Canyon)
‘본 캐년(Bone Canyon)’은 스타크래프트 브루드워의 유즈맵으로, 황무지 테마의 맵에서 프로토스와 테란이 대결하는 밀리 장르의 맵이다. 맵 이름은 ‘뼈 계곡’이라는 뜻으로, 지형 자체가 마치 뼈가 산재해 있는 듯한 느낌을 준다. 중앙에 넓은 평지가 있으며, 그 주위를 언덕과 협곡이 둘러싸고 있어 시야 확보와 기지 방어에 전략적인 포인트를 제공한다. 특히 협곡 지형은 프로토스가 테란의Siege Tanks를 상대하기 어렵도록 유도하며, 반대로 테란은 시즈 탱크의 사정 거리를 활용해 프로토스의 기지를 압박할 수 있는 기회를 제공한다. 맵의 구조상 초반 러시가 치열할 수 있으며, 중반부터는 중앙 평지에서 벌어지는 대규모 전투가 승부를 가를 가능성이 높다. 이 맵은 1:2 또는 2:2와 같은 대등한 구도로도 플레이가 가능한데, 특히 컴퓨터를 상대로 한 ‘컴까기’ 형식으로도 즐길 수 있도록 디자인된 것으로 추정된다. 맵의 제목과 설명에 ‘clever comps always win’이라는 문구가 포함되어 있어 AI의 전략적 우위를 강조하고 있으며, 이는 플레이어들이 컴까기에서 전략과 타이밍을 중요시해야 함을 시사한다. 또한, ‘Modified by [GG] Sir W@11er’라는 제작자 정보와 ‘gg-clan.narod.ru’라는 배포 채널이 함께 제공되어, 이 맵이 특정 커뮤니티를 중심으로 배포되고 개선되었음을 알 수 있다. 본 캐년은 밀리 맵으로서의 기본적인 밸런스를 갖추고 있지만, 협곡과 언덕 지형이 프로토스와 테란의 상성을 극명하게 드러내기 때문에, 플레이어는 자신의 종족에 맞는 전략을 carefully 준비해야 한다. 초보자의 경우, 지형에 익숙해지기까지 다소 시간이 걸릴 수 있으며, 중급자 이상의 플레이어라면 중앙 평지에서 벌어지는 전투를 주도적으로 이끌어나갈 수 있을 것이다. 맵의 분위기는 황무지 테마답게 삭막하고 차가운 느낌을 주지만, 그 속에서 벌어지는 전투만큼은 뜨겁고 박진감 넘치는 경험을 제공할 것이다. 특히 컴퓨터를 상대로 한 플레이에서는 AI의 예측 불가능한 움직임에 대응하며 승부를 가려야 하므로, 전략적 사고가 요구된다. 이 맵은 밀리 장르의 팬이라면 한번쯤 플레이해볼 만한 가치가 있으며, 특히 프로토스와 테란의 상성을 이해하고자 하는 플레이어들에게 유용한 연습 공간이 될 것이다. 또한, 유즈맵으로서의 재미 요소도 충분히 갖추고 있어, 밀리 매니아뿐만 아니라 스타크래프트의 다양한 유즈맵을 즐기는 이들에게도 추천할 만하다. 맵을 플레이하기 전에는 자신의 종족에 맞는 빌드와 전략을 미리 준비하고, 지형의 특징을 숙지하는 것이 중요하다. ‘Bone Canyon’ is a custom map from *StarCraft: Brood War*, set in a wasteland-themed battlefield where Protoss and Terran clash in a classic melee-style match. The map’s name translates to "Bone Canyon," reflecting its terrain, which resembles scattered bones across the landscape. A wide central plain is surrounded by hills and ravines, offering strategic vantage points for vision control and base defense. The ravine terrain is designed to hinder Protoss players against Terran Siege Tanks, while Terran players can leverage the tanks’ range to pressure Protoss bases. Given the map’s structure, early rushes can be intense, and large-scale battles in the central plain often decide the outcome from the mid-game onward. This map supports balanced matchups like 1v2 or 2v2 and appears to be designed for "comp stomping" (AI grinding), as suggested by the phrase *"clever comps always win"* included in its title and description. This implies that players must prioritize strategy and timing when facing AI opponents. The map’s credits—*"Modified by [GG] Sir W@11er"* and its distribution channel *"gg-clan.narod.ru"*—indicate it was developed and refined within a specific community. While *Bone Canyon* maintains solid balance as a melee map, its ravines and elevated terrain starkly highlight the strengths and weaknesses of Protoss and Terran, requiring players to tailor their strategies accordingly. Newcomers may need time to adapt to the terrain, but intermediate and advanced players can take full advantage of the central battles. The wasteland aesthetic gives the map a stark, cold atmosphere, yet the battles unfolding within are intense and exhilarating. Playing against AI adds an extra layer of challenge, as unpredictable movements demand sharp strategic thinking. The map is worth trying for melee fans, especially those looking to refine their Protoss vs. Terran matchups. It also offers strong replay value as a custom map, appealing not only to melee enthusiasts but also to players who enjoy exploring diverse *StarCraft* custom maps. Before jumping in, players should prepare faction-specific builds, study the terrain, and plan their approach accordingly.
언데드 광기 V2.0 (The Undead Madness! V2.0)
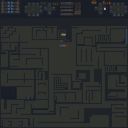
‘The Undead Madness! V2.0’은 스타크래프트: 브루드 워의 유즈맵으로, 얼음과 설원으로 이루어진 넓은 맵에서Undead 종족을 중심으로 펼쳐지는 디펜스 장르의 맵이다. 맵 중앙에 위치한 넥서스와 세 곳의 확장 기지 주변에는 다수의 언덕과 협곡이 존재하며, 각 기지 주변을 둘러싸고 있는 커다란 빙벽은 초반 방어선을 형성하고 있다. 빙벽 뒤쪽으로는 다수의 언데드 유닛들이 끊임없이 스폰되어 플레이어의 기지를 향해 공격을 퍼붓는다. 플레이어는 이 언데드 무리를 방어하면서 동시에 주변의 자원을 확보하고 기지를 확장해야 한다. 맵의 주요 특징은 빙벽을 파괴하거나 빙벽 뒤에 숨은 언데드 기지를 공격할 수 있는 구조로, 이를 통해 적극적인 공격 전략을 펼칠 수도 있지만 방어에 실패하면 순식간에 기지가 무너질 위험이 있다. 또한 넓은 맵을 활용한 길막과 협곡을 통한 병력 이동, 언덕을 이용한 시야 확보가 게임의 핵심 전략 요소로 작용한다. 맵의 분위기는 어두운 얼음 왕국으로, 배경의 푸른 조명과 빙결된 지형이 어우러져 독특한mosphere를 자아낸다. 초보 플레이어는 방어에 집중하되 자원 확보를 소홀히 하지 않도록 주의해야 하며, 숙련된 플레이어는 언데드 기지를 적극적으로 공략하여 보너스 자원을 확보하거나 방어선의 약점을 노릴 수 있는 선택지가 주어진다. 맵의 볼륨이 크고 전략적 깊이가 깊어 한 판당 플레이 시간은 30분 이상으로 예상되며, 팀플레이보다는 개인 또는 소수의 플레이어가 협력하여 방어선을 유지하는 방식이 어울린다. 특히, 동시 다발적인 언데드 웨이브를 효과적으로 방어하는 것이 관건으로, 이를 위해 플레이어는 기지 배치, 자원 관리, 병력 조합을 신중히 고려해야 한다. ‘The Undead Madness! V2.0’ is a *StarCraft: Brood War* custom map where players defend against endless waves of Undead units in a sprawling, ice-covered landscape. The map centers around a Nexus and three expansion bases, each surrounded by hills, ravines, and towering ice walls that form the first line of defense. Behind these walls, hordes of Undead spawn continuously, charging toward your base—your goal is to hold them off while securing resources and expanding. A key feature is the ability to breach the ice walls or strike at hidden Undead bases behind them, allowing aggressive counterattacks, though failing to defend properly risks a swift base collapse. The vast terrain demands smart positioning: blocking paths, navigating ravines, and using hills for scouting are critical. The eerie, frozen kingdom setting enhances the atmosphere with deep blue lighting and icy landscapes. Beginners should prioritize defense but avoid neglecting resource gathering, while experienced players can actively assault Undead bases for bonuses or exploit weak points in the enemy’s line. With high replay value and deep strategy, matches typically last over 30 minutes, favoring solo or small-team play over large-scale team battles. The real challenge lies in surviving simultaneous Undead waves, requiring careful base layout, resource management, and troop composition to turn the tide.
에픽 워 3011! (The Epic War 3011!)
《The Epic War 3011!》은 스타크래프트 브루드워의 대규모 유즈맵으로, 4096×4096 크기의 황무지 타일셋을 배경으로 펼쳐지는 전략 디펜스 장르의 정점이라 할 수 있다. 맵 중앙을 가로지르는 협곡과 주변의 잔해가 뒤섞인 지형은 전장의 위엄을 한층 끌어올리며, 플레이어는 이 넓은 공간에서 적의 공격과 끊임없이 몰려오는 웨이브를 막아내야 한다. 이미지 상으로는 중앙 협곡 양옆으로 넓게 배치된 고지대가 주요據點으로 보이며, 이 지형적 특징 덕분에 방어선을 구축할 수 있는 전략적 요충지가 다수 존재한다. 파괴된 건물 잔해와 흩어진 상자 등은 맵의 몰입감을 높이는 요소로 작용한다. 맵 제목에서 짐작할 수 있듯이 ‘3011’이라는 숫자는 일종의 스토리적 맥락이나 시대를 나타내는 것으로 추정되며, 파괴와 재건의 주제가 담긴 듯한 느낌을 준다. 이 맵의 핵심은 방어와Resource 관리다. 플레이어는 중앙 협곡을 따라 끊임없이 밀려오는 적 유닛들을 막아내며, 각據點을 방어하는 동시에 자원의 확보와 건물을 건설하는 균형을 맞춰야 한다. 이미지 상으로는 맵 가장자리에 위치한 넥서스나 커맨드 센터가 주요 기지 역할을 할 것으로 보이며, 이 기지들 주변의 좁은 통로를 통해서만 접근할 수 있는 구조는 방어의 난이도를 한층 높인다. 또한 맵 곳곳에 흩어진 미네랄과 베스핀 가스는 자원의 확보 여부를 좌우하는 중요한 요소로,Resource 관리와 타이밍을 어떻게 잡느냐가 승패를 가를 것이다. 맵이 제공하는 넓은 시야와 전략적 요충지는 플레이어 간의 협력과 경쟁을 동시에 유도하며, 특히 협동 디펜스가 강조된 맵으로 보인다. 이 맵의 추천 대상은 전략 디펜스와 대규모 유즈맵을 좋아하는 플레이어들이다. 특히 팀플레이가 가능한 구조로 보이며, 넓은 맵과 복잡한 지형은 팀원 간의 전략적 협의와 개개인의 실력을 동시에 요구한다. 또한 방어선을 구축하고Resource를 관리하는 동시에 끊임없이 몰아치는 적들을 상대해야 하는 만큼, 집중력과 전략적 사고가 요구된다. 초보자의 경우 맵의 규모와 복잡한 지형 때문에 어려움을 느낄 수 있지만, 경험이 쌓이면 그 넓은 공간을 활용한 다양한 전략을 구사할 수 있다는 장점이 있다. 플레이 전에는 맵의 주요據點과Resource 분포, 그리고 적의 웨이브 패턴을 미리 숙지하는 것이 중요할 것이다. The Epic War 3011! is a grand-scale user-made map (UMS) in StarCraft: Brood War, set against a desolate 4096×4096 tileset terrain. The map features a central canyon flanked by elevated ruins, creating a strategic battlefield where players must defend against relentless enemy waves. The terrain suggests multiple high-ground chokepoints ideal for establishing defensive positions. The map’s title, '3011', hints at a thematic or narrative context—perhaps a futuristic era of destruction and reconstruction—enhancing immersion with scattered debris and ruins. The core gameplay revolves around defense and resource management. Players must protect key locations along the central canyon while securing resources like minerals and vespene gas, which are scattered across the map. The edge structures, likely command centers or Nexus, act as primary bases with limited access points, raising the challenge of maintaining supply lines. The wide field of view and strategic terrain encourage both cooperation and competition, particularly in team-based modes. The map’s scale and complexity demand strong strategic planning, concentration, and teamwork. This map is best suited for players who enjoy large-scale strategy defense UMS maps, especially those who appreciate team-based gameplay. Beginners may find the vast terrain overwhelming, but experienced players will appreciate the depth and strategic flexibility the map offers. Before playing, it’s crucial to study key locations, resource distribution, and enemy wave patterns to optimize defensive strategies.
스턴다운 (Standoff)
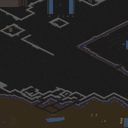
스타크래프트: 브루드워 유즈맵 <스턴다운(Standoff)>은 한 명의 방어자 플레이어가 6명의 공격자 플레이어와 맞서는 대전형 디펜스 맵이다. 방어자는 좁은 협곡에 위치한 본거지를 지키며, 공격자들은 각각의 입구로 진입해 건물을 파괴하거나 유닛을 몰고 오는 방식으로 공격을 펼친다. 맵은 황무지 타일셋을 기반으로 디자인되어 있으며, 협곡을 중심으로 양쪽에 공격로와 방어 거점이 배치되어 있다. 방어자는 제한된 자원으로 끊임없이 밀려드는 적을 상대해야 하며, 전략적인 자원 관리와 유닛 배치, 그리고 협곡을 활용한 입구 통제력이 요구된다. 공격자들은 각자의 경로를 선택해 방어선을 돌파하거나, 협공으로 방어자를 압박하는 방식으로 승리를 노릴 수 있다. 맵의 핵심은 ‘균형의 싸움’으로, 방어자는 협곡을 최대한 활용해 공격로를 좁히고, 공격자들은 유연하게 협공을 펼쳐 방어자를 혼란에 빠뜨려야 한다. 초보 플레이어는 방어와 공격의 기본 메커니즘을 익히는 데 적합하며, 숙련자는 전략적인 자원 관리와 예상치 못한 공격 패턴에 대응하는 능력을 키울 수 있다. 맵을 플레이하기 전에는 협곡의 입구 위치와 본거지의 건물이 배치된 곳을 정확히 확인하고, 방어와 공격의 기본 전술을 연습해 보는 것이 좋다. 또한, 맵의 특성상 다수의 공격자 플레이어와 협동이 필요한 경우가 많으므로, 팀워크가 중요하다는 점을 명심해야 한다. 이 맵은 디펜스와 대전형 유즈맵을 좋아하는 플레이어들에게 특히 추천하며, 좁은 공간에서의 전투와 전략적 판단력이 요구되는 점에서 흥미로운 경험을 제공할 것이다. 또한, 방어자와 공격자 간의 긴장감이 지속되는 구조로 인해 플레이 시간도 자연스럽게 길어질 수 있어, 단시간 내에 승부를 가리는 맵보다는 몰입감 있는 플레이를 원하는 유저들에게 적합하다. Standoff is a Brood War custom map where one defender faces off against six attacking players in a strategic defensive battle. The defender must protect their base located in a narrow canyon, while the attackers attempt to breach the entrance and destroy buildings or swarm in with units. The map features a wasteland tileset, with pathways and defensive structures arranged symmetrically around the canyon. The defender is challenged with limited resources to fend off relentless waves of enemies, requiring smart resource management, unit positioning, and control of the canyon’s choke points. Attackers must coordinate their paths, choose between direct assaults or coordinated strikes, and exploit weaknesses in the defender’s strategy. The core of the gameplay revolves around balance—defenders aim to narrow attack routes and control the canyon, while attackers must adapt their tactics to overwhelm the defender’s defenses. Beginners can use this map to practice basic defensive and offensive mechanics, while experienced players can refine their resource management and ability to counter unexpected attack patterns. Before playing, it’s crucial to study the canyon’s entrance locations and the defender’s base structure to plan effective strategies. Teamwork is especially important, as attackers often need to synchronize their efforts to succeed. This map is highly recommended for fans of defensive and versus-type custom maps, offering an engaging experience that tests strategic thinking and spatial control in tight combat scenarios. The tension between the defender and attackers ensures a prolonged and immersive gameplay session, making it ideal for players seeking depth over quick matches.
마운트 임파서블 2.3.a (Mount Impossible 2.3.a)
《Mount Impossible 2.3.a》는 스타크래프트: 브루드워의 유즈맵으로, вулкан 타일셋을 기반으로 한 7인용 디펜스/강화형 맵이다. 맵 중앙에는 거대한 산(mount)이 자리 잡고 있으며, 주변 언덕과 협곡을 따라 플레이어们이 건물을 배치하고 방어선을 구축할 수 있는 구조로 구성되어 있다. 맵의 가장 큰 특징은 산의 정상에 도달하는 경로가 매우 제한적이라는 점으로, 이로 인해 상대방의 공격 루트를 예측하고 방어 시설을 효율적으로 배치하는 것이 중요해진다. 또한, 맵 여기저기에 배치된 미네랄과 가스 멀티는 자원 확보 경쟁을 유도하며, 협곡을 따라 이어지는 좁은 길목은 입구막기나 매복 플레이가 필수적인 전략적 요소를 제공한다. 산의 정상에는 승리 조건이 마련되어 있으며, 이를 달성하기 위해 플레이어들은 산을 오르는 경로를 확보하거나, 상대방을 방해하며 자신의 진로를 확보해야 한다. 맵의 난이도는 중간 정도로, 초보자의 경우 방어 전략 수립과 자원 관리에 어려움을 느낄 수 있지만, 경험이 쌓이면 입구막기와 협곡 전투에서 우위를 점할 수 있다. 이 맵은 특히 팀플레이보다는 솔로 플레이에 최적화되어 있으며, 맵의 복잡한 지형과 제한적인 통로를 활용한 심리전과 스킬이 요구된다. 또한, 맵의 симметричность(대칭성)이 떨어지는 구조로 인해, 각 플레이어의 시작 위치가 운에 좌우되는 요소도 존재한다.Mount Impossible 2.3.a is a StarCraft: Brood War custom map featuring a volcanic tileset designed for 7 players. The map centers around a massive mountain structure, with players positioned on surrounding hills and valleys where they can construct buildings and defensive lines. A key feature is the limited access routes to the mountain's summit, forcing players to strategically predict enemy movements and optimize their defensive layouts. Distributed mineral and gas expansions along the map introduce resource competition, while narrow canyon paths encourage choke-point defense and ambush tactics. Victory is achieved by securing the summit path or disrupting opponents' progress. With a moderate difficulty level, this map challenges beginners in resource management and strategic planning but rewards experienced players with opportunities for superior choke-point control and psychological gameplay. The asymmetrical starting positions add an element of unpredictability, enhancing replayability. It is best suited for solo play rather than team-based strategies.
문글레이브 2.1 (MoonGlaive 2.1)
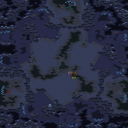
MoonGlaive 2.1은 4096×4096 화산 타일셋을 기반으로 한 8인용 유즈맵으로, 자유로운 위치 선정이 가능한 대규모 전장을 제공한다. 맵 중앙에는 넓은 평지가 배치되어 있어 초반에 기지를 신속히 건설할 수 있으며, 주변에는 자연스럽게 형성된 용암 협곡과 바위 지형이 방어용 고지대를 만든다. 자원은 중앙 평지와 외곽 고지에 고르게 분포돼 있어, 초기 확장과 방어 전략을 동시에 고민하게 만든다. 특히, 협곡을 이용한 급습 루트와 고지를 점령했을 때 얻는 시야 확보가 게임 흐름을 크게 좌우한다. 플레이어는 자신의 기지를 원하는 위치에 건설하고, 적의 확장을 차단하거나 직접 공격하는 두 가지 스타일을 자유롭게 선택할 수 있다. 초반에는 자원 확보와 방어 타워 배치가 핵심이며, 중반 이후에는 상대의 핵심 건물을 압박하는 공격 전환이 효과적이다. 맵은 대규모 전투를 염두에 두고 설계됐기 때문에, 유닛 이동 경로를 미리 파악하고 협곡을 통한 기습을 대비하는 것이 중요하다. 또한, 화산 지형 특성상 건물 배치 시 지형과의 충돌을 주의해야 하며, 높은 지대에 방어 시설을 배치하면 시야와 사거리 면에서 유리하다. 전체적인 흐름은 빠른 확장‑방어‑공격 순환을 반복하도록 설계돼 있어, 빠른 판단력과 다각적인 전략을 구사할 수 있는 플레이어에게 특히 추천한다. MoonGlaive 2.1 is a user‑made map for up to eight players, built on a 4096×4096 volcanic tileset that offers a large, freely selectable battlefield. The central area features a wide plain where players can quickly establish their base at the start, while surrounding lava canyons and rocky terrain naturally create elevated defensive positions. Resources are evenly distributed between the central plain and outer high grounds, prompting players to balance early expansion with defensive planning. Notably, the canyons provide rapid‑strike routes, and securing the high grounds grants superior vision that can dominate the flow of the match. Players may place their bases wherever they prefer, allowing either a defensive fortification style or an aggressive rush approach. In the early game, securing resources and positioning defensive towers are crucial; in the mid‑game, pressuring an opponent’s core structures becomes effective. Because the map is designed for large‑scale battles, anticipating unit movement paths and preparing for canyon ambushes are essential. Additionally, the volcanic terrain requires careful building placement to avoid terrain collisions, and positioning defenses on higher ground offers advantages in sight and range. Overall, the map encourages a cycle of rapid expansion, defense, and attack, making it especially suitable for players who can make swift decisions and employ versatile strategies.
헬름즈 딥 v. 아나타 13.0 (Helms Deep v. Annatar 13.0)
《헬름즈 딥 v. 아나타 13.0》는 스타크래프트 브루드워의 유즈맵으로, J.R.R. 톨킨의 반지의 제왕 세계관을 재해석한 디펜스 장르의 대표작 중 하나다. 이 맵은Middle-earth의 요정 왕국 로한의 헬름 협곡 요새를 배경으로 펼쳐지며, 플레이어는 로한의 기마민족과 엔트의 연합군 역할을 맡아 끊임없이 몰려오는 어둠의 군세를 상대로 요새를 지켜내는 임무를 수행한다. 맵의 핵심은 ‘방어’와 ‘전략적 배치’에 중점을 두고 있으며, 맵 중앙의 요새를 지키면서 적의 공격을 물리치는 것이 주 목표로 보인다. 특히, 맵의 지형은 협곡과 산맥으로 이루어져 있어 자연스러운 입구와 방어 거점을 형성하고 있으며, 플레이어는 이러한 지형을 활용해 병력을 효율적으로 배치하고, 적의 공격 루트를 차단해야 한다. 맵의 구조는 협소한 통로와 넓은 평야가 혼재되어 있어, 밀집된 방어선과 산개된 병력 운용을 요구하는 전략적 깊이를 제공한다. 또한, 맵의 왼쪽과 오른쪽에는 각각의 방어 거점이 마련되어 있어, 플레이어는 전선을 분산시켜 적의 공격에 대응할 수 있다. 맵의 디자인에서 눈여겨볼 점은, 요새의 중심부에 위치한 главное здание(주요 건물)이 있으며, 이 건물이 파괴되면 게임이 종료되는 패배 조건으로 추정된다. 맵의 진행은 대체로 ‘라운드’ 형식으로 이루어지며, 각 라운드마다 적의Wave가 증가하는 방식으로 진행되는 것이 보이며, 후반부로 갈수록 적의 숫자와 공격력이 급격히 상승하여 플레이어의 전략과 협력이 더욱 중요해진다. 이 맵은 특히 ‘컴퓨터 상대 디펜스’ 장르에 특화되어 있어, AI가 조종하는 적군과 실시간으로 전투를 벌이며, 플레이어는 자원 관리와 병력 업그레이드를 통해 요새를 방어해야 한다. 추천 대상은 스타크래프트의 전략적 깊이를 즐기는 플레이어, 특히 디펜스 장르와 팀플레이를 좋아하는 유저들에게 적합하며, 혼자서도 충분히 즐길 수 있지만 2인 이상의 팀 플레이가 더 높은 승률과 몰입도를 제공할 것으로 보인다. 플레이 전에는 맵의 지형과 주요 거점을 숙지하는 것이 중요하며, 각 라운드마다 적의 공격 패턴을 분석해 방어 전략을 수립하는 것이 필수적이다. 또한, 자원 관리와 병력 업그레이드를 꾸준히 진행해야 장기전을 버틸 수 있으므로, 자원의 중요성을 간과해서는 안 된다. 맵의 난이도는 라운드가 진행될수록 급격히 상승하므로, 초보자의 경우 쉬운 난이도부터 시작해 점차 трудность를 높이는 것이 좋다. 이 맵은 오랜 기간 동안 인기 있는 유즈맵으로, 지속적인 업데이트를 통해 밸런스가 조정되어 왔으며, 현재 버전인 13.0은 안정적인 플레이 환경을 제공하는 것으로 보인다. 《Helm’s Deep v. Anata 13.0》 is a custom *StarCraft: Brood War* defense map that reimagines J.R.R. Tolkien’s *The Lord of the Rings* universe. Set in Helm’s Deep, the fortress of Rohan’s horse-lords, the map challenges players to defend Middle-earth as the allied forces of the Rohirrim and Ents against endless waves of darkness. The core focus lies in defense and strategic positioning, with players tasked with protecting the central fortress from relentless enemy assaults. The terrain is defined by narrow canyons and towering mountains, creating natural choke points and vantage points for defense. Players must utilize these features to deploy troops efficiently, block enemy routes, and adapt their formations—whether through tight defensive lines or dispersed forces. The map balances tight corridors with open plains, demanding both precision and adaptability in combat. Two additional defensive strongholds are positioned on the left and right flanks, allowing players to split their forces and counter attacks from multiple directions. A key design element is the main structure at the fortress’s heart, which serves as the game’s defeat condition—its destruction ends the match. Gameplay follows a round-based structure, with each wave growing progressively stronger in both numbers and firepower. Later stages escalate drastically, requiring sharper strategy, coordination, and real-time adaptation. Tailored for the "computer vs. player defense" genre, the map pits players against AI-controlled enemies in real-time battles, where resource management and unit upgrades are essential to survival. Ideal for *StarCraft* fans who enjoy deep strategy, this map particularly suits defense enthusiasts and team players. While playable solo, team-based coordination significantly boosts success rates and immersion. Prior to playing, familiarizing yourself with the terrain and key strongholds is crucial, as is analyzing enemy attack patterns each round to refine your defense. Consistent resource allocation and unit upgrades are vital for sustaining long battles—neglecting them risks early collapse. Difficulty ramps up sharply with each round, so beginners are advised to start on easier settings before gradually increasing the challenge. A longtime fan favorite, this map has undergone continuous updates to balance mechanics, and version 13.0 delivers a stable and polished experience.
맵 선택 가이드
태그는 맵의 핵심 특징을 빠르게 설명하지만 제작 버전마다 규칙이 다를 수 있습니다. 상세 설명에서 권장 인원, 난이도, 플레이 시간과 버전을 함께 확인한 뒤 다운로드하세요.