
함정 스타크래프트 맵 모음
'함정' 태그가 등록된 맵을 모았습니다. 장르 하나로 찾기 어려운 플레이 방식, 난이도와 특징을 중심으로 인기 맵과 최신 맵을 비교해 보세요.
- 등록 맵
- 22개
- 누적 다운로드
- 0
- 누적 조회
- 716
인기 맵
다운로드와 조회 반응이 높은 맵입니다.
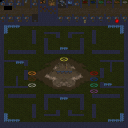
랜덤 고양이와 쥐 정글 2.2! (Random Cat n Mouse Jungle 2.2!)
스타크래프트 브루드워의 대표적인 숨바꼭질 형식의 유즈맵인 <랜덤 고양이와 쥐 정글 2.2!>는 7명의 플레이어가 참여하는 흥미진진한 팀플레이 경험을 제공한다. 맵 제목에서 느껴지는 대로, 이 맵은 고양이와 쥐의 역할 분담을 기반으로 하며, 랜덤한 배치와 변수 요소로 매 게임마다 새로운 전략과 재미를 선사한다. 시작 직후 각 플레이어는 고양이 또는 쥐로 무작위로 선택되며, 고양이는 쥐를 사냥하는 동시에 쥐는 안전지대인 구멍으로 탈출해야 한다. 지형은 사막 타일셋을 활용한 맵으로, 복잡한 언덕과 협곡, 폐허가 섞인 구조가 숨바꼭질의 긴장감을 한층 높인다. 특히, 맵 중앙의 넓은 평지에서는 고양이와 쥐의 속도와 시야가 중요한 전투가 벌어지며, 주변의 굴이나 덤불은 쥐에게는 피신처가 되고 고양이에게는 함정으로 작용할 수 있다. 맵의 특징 중 하나는 맵 곳곳에 배치된 각종 아이템과 함정인데, 아이템을 획득한 쥐는 일시적으로 속도나 방어력이 증가할 수 있으며, 고양이는 함정을 설치해 쥐의 움직임을 방해할 수 있다. 이러한 요소들이 조합되면서 게임은 예측불허의 진행을 보장하며, 초보자와 숙련자 모두에게 매력적인 플레이 경험을 제공한다. 특히 팀플레이가 강조되는 이 맵에서는 역할 분담과 협동 전략이 승부를 좌우하는 핵심 요소로 작용한다. 시작 전에 맵의 구조와 아이템 위치, 쥐의 탈출 루트와 고양이의 사냥 루트를 미리 숙지하는 것이 중요하며, 이를 통해 좀 더 전략적인 플레이가 가능하다. 또한, 맵의 랜덤 요소로 인해 매 게임마다 새로운 변수가 등장하므로, 플레이어는 유연하게 대처할 수 있는 능력을 키워야 한다. 이 맵은 2006년에 제작된 고전 유즈맵이지만, 그 긴장감과 재미는 지금도 손색없다. 숨바꼭질과 전략의 조합, 그리고 팀워크의 중요성이 돋보이는 이 맵은 스타크래프트 유즈맵의 정수를 느낄 수 있는 작품으로 추천할 만하다. 특히, 친구들과 함께 팀을 이루어 플레이할 때 그 재미가 배가되는 맵이므로, 그룹 플레이를 즐기는 유저들에게Strongly 추천한다. "Random Cat and Mouse Jungle 2.2!" is a classic Brood War hide-and-seek custom map where seven players engage in thrilling team-based gameplay. As the title suggests, the game revolves around the roles of cats and mice, with random assignments and variable elements ensuring fresh strategies and excitement in every match. Right from the start, each player is randomly assigned as either a cat or a mouse—the cats hunt the mice while the mice must escape to safety zones called holes. The map features a desert tileset with a mix of rugged hills, canyons, and ruins, adding to the tension of the hide-and-seek experience. The wide central plain is where most intense battles unfold, with speed and visibility becoming crucial factors for both cats and mice. Surrounding bushes and holes serve as hiding spots for mice and potential traps for cats. A key feature of the map is the various items and traps scattered throughout—mice can temporarily boost their speed or defense by collecting items, while cats can set traps to hinder the mice’s movement. These elements combine to create unpredictable gameplay, offering an engaging experience for both beginners and seasoned players alike. Teamwork and role distribution are vital, as coordinated strategies often determine the outcome. Familiarizing yourself with the map layout, item locations, escape routes for mice, and hunting paths for cats before starting can give you a strategic edge. Since the random elements introduce new variables each game, players should develop adaptability to respond effectively. Though originally released in 2006, the map’s suspense and fun remain undiminished. The perfect blend of hide-and-seek, strategy, and teamwork makes it a quintessential StarCraft custom map worth trying. It’s especially recommended for groups, as playing with friends amplifies the enjoyment.
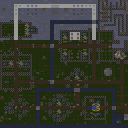
룬스케이프 탈출 (Escape from Runescape)
스타크래프트 브루드워의 퍼즐형 유즈맵 'Escape from Runescape'는 플레이어가 '룬스케이프'라는 가상 공간에 갇혀 탈출해야 하는 독특한 컨셉의 맵이다. 맵은 넓은 평야와 숲, 강, 절벽 등으로 구성되어 있으며, 곳곳에 숨겨진 기계식 스위치, 문, 함정 등이 플레이어의 탈출을 방해하거나 도와준다. 맵 중앙의 거대한 성벽과 성문은 탈출의 주요 관문으로 보이며, 벽에 설치된 스위치나 기계 장치와 상호작용해야만 열리게 설계된 듯하다. 숲과 강은 길찾기 요소를 강화하는 동시에, 절벽이나 장애물은 플레이어의 진행을 방해하는 요소로 기능할 것으로 추정된다. 맵의 외곽부는 절벽으로 둘러싸여 있어 탈출로가 제한적이며, 성벽 너머로 탈출구가 존재하는 것으로 보인다. 퍼즐의 핵심은 맵 곳곳에 흩어져 있는 스위치나 장치를 조작하여 성문을 열고, 성벽을 넘어 탈출하는 데 있다. 난이도는 스위치의 배치와 함정의 복잡성에 따라 달라질 수 있으며, 플레이어는 맵을 탐색하며 탈출 경로를 계획해야 한다. 맵의 분위기는 판타지나 중세풍으로 보이며, 탈출을 성공하려면 논리적 사고와 맵 리딩 능력이 요구된다. 초보자와 숙련자 모두 즐길 수 있지만, 함정이나 스위치의 위치를 파악하지 못할 경우 난이도가 급격히 상승할 수 있다. 추천 대상은 퍼즐과 전략적 사고를 좋아하는 스타크래프트 유즈맵 팬이며, 특히 혼자 또는 소규모 팀으로 탈출을 시도하는 플레이 경험을 원하는 유저에게 적합하다. 플레이 전에는 맵의 주요 스위치 위치와 함정 여부를 미리 확인하는 것이 중요하며, 맵의 전체 구조를 파악한 뒤 탈출 계획을 세워야 원활한 진행이 가능하다. 맵의 제목처럼 '룬스케이프'라는 가상의 세계에서 탈출하는 컨셉이 흥미를 유발하며, 단순 반복보다는 한 번의 시도에서 성공을 이루는 성취감을 느낄 수 있을 것이다. Escape from Runescape is a puzzle-style custom map in StarCraft: Brood War where players are trapped in a virtual space called "Runescape" and must find a way out. The map features wide plains, forests, rivers, and cliffs, with hidden mechanical switches, doors, and traps scattered throughout that either hinder or aid the player's escape. The massive central wall and gate appear to be the main exit, likely requiring interaction with switches or mechanical devices on the wall to open. The forests and rivers enhance navigation elements, while cliffs and obstacles serve as barriers to progression. The outer edges of the map are surrounded by cliffs, limiting escape routes, and an exit seems to exist beyond the wall. The core of the puzzle involves manipulating switches and devices to open the gate and scale the wall to escape. Difficulty varies based on switch placement and trap complexity, requiring players to explore the map and plan their escape route. The atmosphere suggests a fantasy or medieval setting, demanding logical thinking and map-reading skills for success. Both beginners and experienced players can enjoy it, though missing traps or switch locations can significantly increase the challenge. It’s recommended for fans of puzzle and strategic thinking in StarCraft custom maps, especially those seeking a solo or small-team escape experience. Before playing, it’s important to check the key switch and trap locations, and understanding the map’s overall structure is crucial for smooth progression. The concept of escaping a fictional world like "Runescape" is intriguing, offering a sense of achievement from a single successful attempt rather than repetitive play.
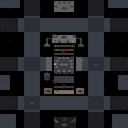
픽 유어 디펜스 (Pick Your Defence)
픽 유어 디펜스는 이름 그대로 방어 중심의 유즈맵으로, 6명의 플레이어가 동시에 참여해 각자 방어 라인을 구축하고 상대의 공격을 막는 형태를 취합니다. 맵 전체가 4096×4096 타일 기반 우주 테마로 디자인돼 넓은 공간에 다양한 고지대와 함정 구역이 배치되어 있어, 초반에 방어 위치를 선정하는 것이 승패를 좌우합니다. 플레이어는 기본 유닛과 건물을 자유롭게 배치할 수 있으며, 맵에 숨겨진 자원 포인트를 확보하면 추가 방어 타워나 특수 유닛을 생산할 수 있습니다. 전투는 주로 상대의 진입로를 차단하고, 타워와 유닛의 시너지를 활용해 지속적인 압박을 가하는 방식이며, 특정 구역에서는 숨겨진 스위치를 활성화해 함정을 작동시킬 수도 있습니다. 방어 라인을 어떻게 구성하느냐에 따라 공격적인 전술과 방어적인 전술이 교차하므로, 전략적 사고와 상황 판단이 중요한 포인트입니다. 특히 초반에 자원을 효율적으로 분배하고, 중반 이후에 나타나는 강력한 적 파동에 대비해 방어 구조를 강화하는 것이 핵심입니다. 맵은 복수의 진입로와 비대칭적인 지형을 제공하므로, 팀플레이보다는 개인 플레이에 더 적합하며, 방어 전략을 실험하고 싶은 플레이어에게 추천됩니다. 플레이 전에는 맵 내 자원 위치와 함정 트리거 지점을 미리 파악하고, 방어 타워와 유닛의 조합을 미리 구상해 두는 것이 좋습니다. Pick Your Defence is a user‑made map that focuses on defensive play for up to six players simultaneously. Set on a large 4096×4096 space‑themed tile grid, the map offers high ground, trap zones and hidden resource points that influence where you place your base and defenses. Players can freely position basic units and structures, then harvest hidden resources to build additional towers or special units. Combat revolves around blocking enemy entry paths and using the synergy of towers and units to maintain pressure, while secret switches in certain areas can trigger traps for extra tactical depth. Choosing the right defensive layout is crucial, as it determines whether you adopt a more aggressive or a purely defensive stance. Early resource allocation and mid‑game preparation for powerful enemy waves are key strategies. The map features multiple asymmetric entry points, making it better suited for solo or free‑for‑all matches rather than coordinated team play, and it is ideal for players who want to experiment with defensive tactics. Before starting, familiarize yourself with resource locations and trap triggers, and plan your tower‑unit combinations in advance.
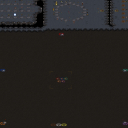
아토마드니스 3 (ATOMADNESS 3)
ATOMADNESS 3는 스타크래프트 브루드워의 유즈맵으로, 주인공 캐릭터를 조종해 적들을 섬멸하는 액션 중심의 디펜스 장르 맵이다. 맵의 전체적인 구조는 중앙 하단에 위치한 시작 지점에서 출발해, 상단과 좌우로 뻗어나가는 길목과 요새를 거쳐 적의 본진으로 진격하는 형태로 구성되어 있다. 맵 곳곳에는 다양한 장애물과 함정이 배치되어 있어, 플레이어는 이를 피해가며 전진하거나 적절히 활용해야 한다. 적들은 맵 상단에서 끊임없이 스폰되며, 플레이어는 그들을 efficiently 제압하는 동시에 본진으로 도달하는 길을 개척해야 한다. 맵의 분위기는 우주 테마로 연출되어 있으며, 어두운 배경과 밝은 빛 효과가 조화를 이루어 긴장감을 고조시킨다. 플레이어는 맵의 특성에 맞게 영웅 유닛을 활용하거나, 주변 자원을 수집해 능력을 강화하는 등 다양한 전략을 구사할 수 있다. 특히 맵의 난이도는 적의 수가 많고 배치된 함정이 복잡할수록 상승하므로, 초보자는 비교적 단순한 루트를 선택하는 것이 좋으며, 경험이 쌓이면 더 어려운 길목을 공략해 보상을 얻는 방식이 권장된다. 맵의 핵심은 지속적인 전진과 방어, 그리고 순간적인 판단력이다. 한 번 실수하면 전선이 무너질 수 있으므로, 신중한 플레이가 요구된다. 추천하는 플레이 대상은 액션 디펜스 장르를 좋아하는 플레이어이며, 특히 팀 플레이보다는 개인의 실력이 중요시되는 맵이라는 점도 염두에 둬야 한다. 플레이 전 맵의 구조와 함정 위치를 숙지하는 것이 무엇보다 중요하며, 영웅의 능력과 맵 상의 리소스를 잘 활용하는 연습이 필요하다. 또한, 적의 스폰 타이밍과 패턴을 파악하는 것도 승리 조건을 달성하는 데 큰 도움이 된다. 이 맵은 단순히 적을 죽이는 것뿐만 아니라, 맵 자체의 디자인과 상호작용하는 재미가 큰 만큼, 여러 번 플레이해 보며 최적의 전략을 찾아보는 것을 추천한다. 또한, 난이도가 높아질수록 더욱 전략적인 플레이가 요구되므로, 꾸준한 연습과 분석이 필요하다. 이 맵은 디펜스와 액션의 조화가 돋보이는 유즈맵으로, 스타크래프트의 유즈맵 среди에서 독특한 입지를 차지하고 있다. 플레이어는 맵의 긴장감 속에서 몰입감을 느낄 수 있으며, 매번 새로운 도전으로 재방문이 권장된다. 특히 맵의 구조적 특징과 함정 배치에 익숙해지면, 더 높은 점수를 획득할 수 있는 기회가 많아진다. 맵의 완성도가 높아 디자인적 측면에서도 호평을 받을 만한 요소들이 가득하다. 이 맵을 즐기기 위해서는 맵의 전체적인 흐름을 이해하고, 자신의 플레이 스타일에 맞게 전략을 조정하는 것이 중요하다. 또한, 맵의 난이도를 낮추고 싶다면, 적을 한 번에 몰아서 처리하는 방법보다는 한 명씩 차분히 처리하는 방법을 택하는 것이 좋다. 맵의 진행 속도는 플레이어의 실력에 따라 달라지므로, 자신에게 맞는 템포를 찾는 것이 핵심이다. 마지막으로, 이 맵은 경쟁보다는 성취감을 느끼는 데 중점을 둔 장르이므로, 부담 없이 즐기는 것이 가장 중요하다. ATOMADNESS 3는 디펜스와 액션의 조화가 돋보이는 유즈맵으로, 스타크래프트의 유즈맵 среди에서 독특한 입지를 차지하고 있다. 플레이어는 맵의 긴장감 속에서 몰입감을 느낄 수 있으며, 매번 새로운 도전으로 재방문이 권장된다. 특히 맵의 구조적 특징과 함정 배치에 익숙해지면, 더 높은 점수를 획득할 수 있는 기회가 많아진다. 맵의 완성도가 높아 디자인적 측면에서도 호평을 받을 만한 요소들이 가득하다. 이 맵을 즐기기 위해서는 맵의 전체적인 흐름을 이해하고, 자신의 플레이 스타일에 맞게 전략을 조정하는 것이 중요하다. 또한, 맵의 난이도를 낮추고 싶다면, 적을 한 번에 몰아서 처리하는 방법보다는 한 명씩 차분히 처리하는 방법을 택하는 것이 좋다. 맵의 진행 속도는 플레이어의 실력에 따라 달라지므로, 자신에게 맞는 템포를 찾는 것이 핵심이다. 마지막으로, 이 맵은 경쟁보다는 성취감을 느끼는 데 중점을 둔 장르이므로, 부담 없이 즐기는 것이 가장 중요하다. ATOMADNESS 3 is a custom map for *StarCraft: Brood War*, a defense-focused action game where players control a protagonist to eliminate enemies. The map’s structure starts from a central starting point at the bottom and progresses upward and outward through branching paths and forts, culminating in an assault on the enemy’s main base. Scattered across the map are various obstacles and traps, forcing players to either evade them or use them strategically. Enemies continuously spawn from the top of the map, requiring players to efficiently suppress them while forging a path to the main base. The atmosphere is space-themed, with a dark backdrop accented by bright lighting effects that heighten tension. Players can adapt their strategies by utilizing hero units or gathering resources to enhance abilities. The difficulty escalates with denser enemy spawns and more complex trap placements, so beginners should opt for simpler routes, while veterans are encouraged to tackle harder paths for greater rewards. The core gameplay revolves around relentless advancement, defense, and quick decision-making—mistakes can collapse the front line, demanding careful play. This map is ideal for fans of action-defense games, particularly those who value individual skill over team coordination. Before playing, it’s crucial to memorize the map layout and trap locations, along with mastering hero abilities and resource management. Recognizing enemy spawn timings and patterns is also key to securing victory. Beyond mere combat, the map’s design and interactive elements offer deep engagement, making repeated playthroughs valuable for refining optimal strategies. As difficulty rises, more tactical approaches become necessary, requiring consistent practice and analysis. ATOMADNESS 3 stands out in the *StarCraft* custom map scene for its seamless blend of defense and action, immersing players in its high-stakes atmosphere. Revisiting the map is highly recommended, as familiarity with its structure and traps unlocks opportunities for higher scores. The map’s polished design and attention to detail have earned it acclaim, but enjoying it fully means understanding its flow and tailoring strategies to personal playstyles. To ease difficulty, it’s better to engage enemies one at a time rather than overwhelming them in batches. The pace of progression depends on player skill, so finding a comfortable tempo is essential. Ultimately, this map prioritizes the sense of achievement over competition, so the best way to experience it is without pressure.
뉴 메이즈 디펜스 익스트림 (New Maze Defense Extreme)
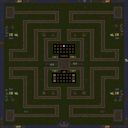
스타크래프트 브루드워의 유즈맵 'N3w M4z3 D3f 3xt OYO'는 미로 형태의 디펜스 맵으로, 플레이어는 좁고 복잡한 통로 속에서 적의 공격을 방어해야 한다. 맵 중앙에는 넓은 미로가 있으며, 각 플레이어는 시작 지점에서 출발해 미로 내의 자원으로 체력을 회복하거나 무기 아이템을 획득할 수 있다. 미로 곳곳에는 함정이 설치되어 있어 신중한 진행이 필요하다. 적 유닛은 주기적으로 미로 입구에서 스폰되며, 이를 저지하는 것이 주요 목표다. 맵 구조상 시야가 제한되어 있어 전략적인 자원 관리와 시야 확보가 중요하다. 초기 자원과 체력이 제한적이므로 초반 전략 수립이 관전 포인트다. 또한, 미로 내의 아이템 배치와 함정의 위치를 숙지하는 것이 생존의 관건이며, 팀 플레이가 강제되는 구조는 아니다. 제한된 공간에서 벌어지는 전투는 긴장감을 높이며, 특히 아이템 활용과 함정 회피가 승패를 가를 수 있다. 초보 플레이어는 맵의 구조와 아이템 위치 파악에 집중해야 하며, 숙련자는 함정과 아이템을 적극 활용한 전략적 플레이가 요구된다. 맵의 난이도는 보통 수준으로 추정되며, 플레이 시간은 20~30분 내외로 예상된다. 미로 디펜스는 전략적 사고와 빠른 적응력이 필요한 장르로, 같은 맵을 여러 번 플레이하며 최적의 전략을 찾는 재미가 있다. StarCraft: Brood War's custom map "N3w M4z3 D3f 3xt OYO" is a maze-style defense map where players must defend against enemy attacks in narrow, complex corridors. At the center of the map is a sprawling maze where each player starts, allowing them to recover health or obtain weapon items within the maze. Traps are scattered throughout, requiring careful navigation. Enemy units spawn periodically at the maze entrance, and preventing their advance is the main objective. Due to the map's structure, vision is limited, making strategic resource management and securing sightlines crucial. With initial resources and health being scarce, establishing a strong early-game strategy is key. Additionally, knowing the item placements and trap locations is vital for survival, though the map doesn't enforce team play. The confined combat spaces heighten tension, and victory often hinges on item utilization and trap avoidance. Beginners should focus on understanding the maze layout and item positions, while experienced players must employ strategic gameplay that leverages traps and items effectively. The map's difficulty is moderate, with playtime estimated between 20 to 30 minutes. Maze defense maps demand strategic thinking and quick adaptability, offering the fun of refining optimal strategies through repeated plays.
플로어 트랩 디펜스 (Floor Trap Defense)
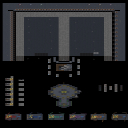
우주 타일셋을 기반으로 3072x4096 픽셀(96x128 타일) 크기의 널찍한 전장에서 진행되며, 파일명과 내부 설명에 기록된 V6.7 버전이 현재 확인되는 최신판이다. 맵 이름에서 알 수 있듯 '바닥 함정(Floor Trap)'이 핵심 기믹으로 설계되어 있어, 단순히 입구를 막고 유닛을 뽑아내는 정석 디펜스와는 결이 다른 플레이 경험을 제공한다. 주기적으로 몰려오는 적 웨이브를 상대하면서 맵 곳곳에 산재한 함정 지대를 피하거나 역이용해야 하며, 함정 발동 타이밍과 안전 지대 파악이 생존의 열쇠가 된다. 최대 6인이 단일 팀으로 협력하는 구조라 자원 분배, 테크트리 조율, 병력 배치 등 팀워크가 필수적이며, 인원이 부족할 경우 난이도가 급격히 상승하는 전형적인 협동 디펜스 밸런스를 보인다. 고전 맵 특유의 직관적인 트리거 구성과 점진적인 웨이브 난이도 상승 곡선은 올드 유저에게 향수를, 신규 유저에게는 순수 디펜스 재미를 선사한다. 플레이 전에는 버전별 변경점(V6.6 대비 V6.7 수정 사항), 제작자별 밸런스 조정 내역, 인원 수에 따른 권장 난이도 설정 여부를 확인하고 시작하면 보다 쾌적한 공략이 가능하다. Floor Trap Defense is a 6-player cooperative defense UMS map created and updated by speed_limit and Waluigi on August 15, 2004. It remains a frequently mentioned title in the StarCraft Brood War classic UMS archive. The map runs on a spacious 3072x4096 pixel (96x128 tiles) battlefield using the Space tileset, with the file name and internal description indicating V6.7 as the latest confirmed version. As the name suggests, 'Floor Trap' is the core gimmick, offering a play experience distinct from standard entrance-blocking defense maps. Players must fend off periodic enemy waves while avoiding or utilizing trap zones scattered across the map; recognizing trap activation timing and safe zones is key to survival. With up to 6 players forming a single team, teamwork is essential for resource distribution, tech tree coordination, and unit positioning, and the difficulty spikes sharply when player count is low, typical of cooperative defense balance. The intuitive trigger design and progressive wave difficulty curve characteristic of classic maps provide nostalgia for veterans and pure defense fun for newcomers. Before playing, checking version changes (V6.6 vs V6.7), balance adjustments by each creator, and recommended difficulty settings based on player count will ensure a smoother clear.
고스트 타운 (Ghost Town)
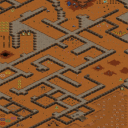
스타크래프트 브루드워의 공포 테마 유즈맵 '고스트 타운'은 플레이어가 유령 마을에서 미션을 수행하거나 생존을 목표로 하는 디펜스 장르의 맵으로, 섬뜩한 분위기와 전략적인 구조가 돋보이는 작품이다. 맵은 황혼 타일셋을 기반으로 제작되어 어두운 분위기를 연출하며, 지형은 마을 중심부를 둘러싼 좁은 길과 여러 건물로 구성되어 있다. 플레이어는 제한된 공간에서 공격을 방어하거나 목표를 완수해야 하는데, 내부 설명에 'new traps'와 'sounds'가 언급된 점으로 보아 함정이나 퍼즐 요소가 포함되어 있는 것으로 추정된다. 또한, 맵 제목과 설명의 'Haunted House'와 연결 지어 보면 공포 게임의 전형적인 요소인 스릴과 긴장감을 조성하는 구조가 예상된다. 공략 시에는 지형의 협소함을 활용한 입구 관리와 함정 배치, 또는 팀워크가 중요할 것으로 보이며, 특히 복도와 건물 사이의 틈을 활용한 수비 전략이 핵심 포인트가 될 것이다. 초보자보다는 중간 이상의 실력을 가진 플레이어에게 어울리며, 공포 테마에 익숙한 유저라면 더욱 몰입도 높은 경험을 즐길 수 있을 것이다. 다만, 맵의 상세한 플레이 방식이나 승리 조건은 확인되지 않지만, '트랩'과 '사운드'가 추가되었다는 점에서 시각적 요소와 청각적 공포 요소가 조화를 이룰 가능성이 높다. 플레이 전에는 함정의 위치와 지형의 틈새를 미리 숙지하고, 팀원과의 역할 분배를 사전에 조율하는 것이 중요할 것이다. 추천 대상은 공포 테마를 좋아하는 유저와 디펜스 맵을 즐기는 플레이어로, 특히 팀 플레이를 선호하는 경우 더욱 재미있게 즐길 수 있을 것이다. This Brood War custom map, 'Ghost Town', immerses players in a horror-themed survival or mission-based defense scenario set in a ghostly village. Crafted with the Twilight tileset, the map delivers an eerie atmosphere through its dark, detailed terrain of narrow streets, buildings, and central structures. The description hints at 'new traps' and 'sounds', suggesting an intricate defense system or puzzle-like mechanics for players to navigate. Given the reference to 'Haunted House' in the creator notes, the map likely incorporates classic horror elements such as tension-building traps and atmospheric audio cues. Strategic focus will revolve around managing choke points, utilizing building gaps, and coordinating with teammates to fend off threats. While the exact victory conditions remain unclear, the emphasis on traps and sound design implies a multi-sensory experience where visual and auditory elements work together to heighten the scare factor. Players unfamiliar with horror-themed maps may find the experience intense, making it ideal for those seeking a challenge beyond standard UMS maps. Before diving in, it’s advisable to study the map’s terrain for hidden traps and to plan defensive formations with teammates. Targeted at horror fans and defense-map enthusiasts, 'Ghost Town' promises a thrilling team-based experience for those who enjoy strategic depth and atmospheric dread.
헤븐 앤 헬 2 (Heaven and Hell 2)
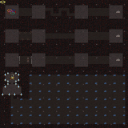
「헤븐 앤 헬 2」는 스타크래프트 브루드워의 유즈맵으로, 플레이어가 지옥에서 천국으로 통하는 관문을 향해 탈출하는 여정을 펼치는 디펜스 장르의 맵이다. 맵의 핵심은 복잡한 함정과 장애물로 가득한 지옥 지대를 통과하는 것이며, 플레이어는 자신의 유닛과 전략을 활용해 traps와 적들을 피해가며 목표를 달성해야 한다. 맵의 구조는 세로로 긴 통로와 여러 갈래 길로 나뉘어져 있으며, 각 구간마다 함정이 설치되어 있어 신중한 진행이 요구된다. 특히, 관문까지 도달하는 데 성공하더라도 함정이나 적의 공격으로 인해 추가적인 위협이 발생할 수 있어, 미처 다 제거하지 못한 적이나 함정을 재빨리 처리하는 것이 중요하다. «Hèàv£ñ ßöÚñл «2»의 특징은 맵의 분위기다. 정글 타일셋을 기반으로 한 어두운 색감과 붉은 빛의 함정 효과가 조화를 이루며, 플레이어에게 긴장감을 더한다. 또한, 맵의 이름에서 유추할 수 있듯이 천국과 지옥의 대비를 느낄 수 있는 디자인 요소들이 곳곳에 배치되어 있어, 단순한 탈출 게임을 넘어 신화적 스토리를 간접적으로 체험할 수 있는 장치로도 작용한다. 이 맵은 초보자와 숙련자 모두에게 접근 가능한 난이도를 가지고 있으며, 특히 팀 플레이를 강조하지는 않지만, 6명의 플레이어가 각각의 길을 탐색하며 협력하거나 경쟁할 수 있는 구조로 설계되어 있다. 플레이 전에는 맵의 함정 분포와 관문의 위치를 미리 숙지하는 것이 필수이며, 통로의 폭이 좁고 함정이 밀집된 구간이 많기 때문에 속도와 정확성이 관건이다. 또한, 유닛의 종류나 스킬에 따라 진행 방식이 달라질 수 있으므로, 자신의 플레이 스타일에 맞는 전략을 세우는 것이 중요하다. «Hèàv£ñ ßöÚñл «2»는 디펜스와 피하기 요소가 결합된 유즈맵으로, 긴장감 넘치는 진행과 아름다운 맵 디자인으로 스타크래프트 유저들에게 인기 있는 맵 중 하나다. 이 맵을 즐기기 위해서는 맵의 구조를 충분히 이해하고, 함정을 피하거나 제거하는 데 집중해야 한다. 또한, 관문까지 도달하는 것뿐만 아니라, 도달 후에도 발생할 수 있는 추가적인 위협을 대비해야 하기 때문에, 항상 긴장감을 유지하며 플레이하는 것이 중요하다. «Hèàv£ñ ßöÚñл «2»는 혼자 플레이해도 즐겁지만, 팀원들과 협력하거나 경쟁하며 플레이할 때 더욱 재미를 느낄 수 있는 맵이다. "Hell and Heaven 2" is a custom map in *StarCraft: Brood War* where players embark on a defensive journey, escaping from hell toward a gateway to heaven. The core challenge lies in navigating a hellish terrain filled with intricate traps and obstacles, requiring players to use their units and strategies to evade both traps and enemies to reach their goal. The map features a vertically elongated corridor split into multiple branching paths, each lined with deadly traps that demand careful progression. Even upon reaching the gateway, players aren’t safe—additional threats from lingering enemies or hidden traps can still disrupt their escape, making it crucial to quickly eliminate any remaining foes or hazards. The defining feature of "Hell and Heaven 2" is its atmosphere. Built on a jungle tileset, the map blends dark, somber colors with glowing red trap effects, creating an intense and immersive experience. The name itself hints at the thematic contrast between heaven and hell, reinforced by design elements scattered throughout the map that evoke a mythical narrative beyond a simple escape challenge. The difficulty is balanced to appeal to both beginners and veterans, though team play isn’t mandatory. Instead, the map accommodates six players who can explore different paths, cooperate, or compete with one another. Before playing, it’s essential to familiarize yourself with trap locations and the gateway’s position, as narrow corridors and densely packed traps demand both speed and precision. Strategy also varies depending on unit types and abilities, so tailoring your approach to your playstyle is key. "Hell and Heaven 2" blends defense and evasion mechanics into a tense, engaging experience, supported by striking map design that has earned it popularity among *StarCraft* players. To fully enjoy it, you must master the layout, prioritize avoiding or dismantling traps, and stay alert even after reaching the gateway—because danger doesn’t end there. Whether played solo or with others, the map offers excitement, especially when teaming up or competing with friends.
미끼 (Bait)
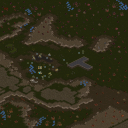
스타크래프트 브루드워 유즈맵 '미끼'는 단일 플레이어 시나리오 형태로 제작된 캠페인 스타일 맵이다. 내부 설명에 따르면 플레이어는 집행관으로서 저그 군단에 맞서 자신을 방어하면서, 정신체가 이끄는 저그 병력을 테란이 준비한 함정으로 유인하는 임무를 수행한다. 이 과정에서 이카루스의 잔존 세력과 정의 병력이라는 테란 아군 진영의 지원을 받을 수 있어, 단독 방어가 아닌 연합 전선 구축이라는 전략적 깊이를 더한다. 맵 파일명 'Defensores12.scx'에서 알 수 있듯 '수호자들' 시리즈의 열두 번째 작품으로 추정되며, 사막 타일셋 위에서 128×128 타일 크기의 전장이 펼쳐진다. 1인용으로 설계되어 협동이나 대전 요소 없이 몰입감 있는 싱글 플레이 경험에 집중한다. 진행 방식은 저그 공세를 막아내며 아군 기지와 연계해 유인 작전을 펼치는 디펜스와 트리거 기반 미션이 혼합된 형태다. 난이도와 클리어 시간은 별도 표기되지 않았으나, 캠페인 미션 특성상 20~40분 내외 소요될 것으로 보인다. 스토리텔링과 연출을 중시하는 유저, 브루드워 오리지널 캠페인 이후의 비공식 시나리오를 즐기는 플레이어에게 추천한다. 플레이 전에는 트리거 작동 여부와 동맹 AI 행동 패턴, 자원 배치 및 유닛 생산 제한 등을 확인하는 것이 좋다. Starcraft Brood War use map 'Bait' is a campaign-style map designed as a single-player scenario. According to the internal description, the player takes on the role of an Executor defending against the Zerg swarm while luring the Overmind's Zerg forces into traps prepared by Terran allies. During this process, the player can receive support from Terran allied forces—Icarus's remnants and Jung's troops—adding strategic depth through building a united front rather than solo defense. As suggested by the map filename 'Defensores12.scx', it appears to be the twelfth installment in a 'Defenders' series, unfolding on a desert tileset with a 128×128 tile battlefield. Designed for solo play, it focuses on an immersive single-player experience without cooperative or competitive elements. The gameplay blends defense mechanics—holding off Zerg offensives—with trigger-based mission objectives centered on lure operations coordinated with allied bases. While difficulty and clear time are not officially listed, campaign missions of this type typically take 20 to 40 minutes. Recommended for players who value storytelling and cinematic presentation, as well as those enjoying unofficial scenarios beyond the original Brood War campaigns. Before playing, it is advisable to verify trigger functionality, allied AI behavior patterns, resource placement, and unit production restrictions.
낚시맵 서든어택 드래곤로드 2.0 (Fishing Map Sudden Attack Dragon Road 2.0)
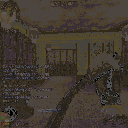
스타크래프트 브루드워 유즈맵 '낚시맵 서든어택 드래곤로드 2.0'은 파일명과 내부 설명에서 드러나듯 제작자 fishinggosuman이 선보인 11번째이자 마지막 낚시맵이다. 현재 사이트 분류는 밀리(MELEE)로 표기되어 있으나, 실제로는 황무지 타일셋의 128x128 타일, 4096x4096 크기 전장에서 최대 7인이 참여하는 트릭 기반 유즈맵(UMS)에 가깝다. 맵 제목에 '서든어택'과 '드래곤로드'라는 밀리풍 명칭을 사용해 플레이어를 방심하게 만드는 것이 핵심 의도로, 시작 직후 자원 채취와 병력 생산을 시도하는 순간 예기치 못한 트리거가 발동하거나 특정 구역 진입 시 유닛이 강제 이동·제거되는 등 일반적인 밀리 감각으로는 대처하기 어려운 상황이 연출된다. 7인 자유 대결 구도에서 서로 경계하며 탐색전을 벌이다가 함정에 걸려 탈락하는 과정이 핵심 재미 요소이며, 맵 구조를 미리 아는 플레이어와 초행길인 플레이어 사이의 정보 비대칭이 승부를 가른다. 제작자가 '앞으로는 재미있고 유익한 맵만 만들겠다'고 밝힌 점으로 미루어 볼 때, 이 맵은 그동안 쌓아온 낚시맵 노하우를 집대성한 일종의 작별 작품 성격을 띤다. 플레이 타임은 함정 발동 시점과 생존자 수에 따라 10분 내외에서 30분까지 다양하게 분포하며, 난이도는 밀리 실력보다 맵 이해도와 순발력이 중요하므로 '보통'에서 '어려움' 사이로 평가된다. 밀리 대전을 기대하고 입장했다가 당황스러운 상황을 즐기고 싶은 유저, 친구들과 함께 낚시맵 특유의 반전을 공유하고 싶은 파티 플레이어에게 추천한다. 플레이 전에는 맵 설명과 파일명에 '낚시맵' 표기가 있음을 확인하고, 일반적인 빌드 오더보다는 정찰과 생존 위주로 초반을 운영하는 것이 좋다. StarCraft Brood War UMS map 'Fishing Map Sudden Attack Dragon Road 2.0' is, as revealed by the filename and internal description, the 11th and final fishing map by creator fishinggosuman. Although the site currently classifies it as Melee (MELEE), it is essentially a trick-based UMS map where up to 7 players participate on a 4096x4096 Badlands tileset with 128x128 tiles. The map title uses Melee-style names like 'Sudden Attack' and 'Dragon Road' to lull players into a false sense of security; the core design intent is to catch them off guard. The moment players attempt to gather resources and produce units at the start, unexpected triggers fire, and entering certain zones forces units to move or be removed—situations that standard Melee instincts cannot handle. In a 7-player free-for-all, the core fun lies in the tense scouting phase where players watch each other, only to fall into traps and be eliminated. Information asymmetry between those who know the map layout and first-timers decides the outcome. The creator's remark about making 'fun and useful maps from now on' suggests this work serves as a farewell piece consolidating years of fishing map know-how. Playtime ranges from around 10 minutes to 30 minutes depending on when traps trigger and how many survive. Difficulty sits between 'Normal' and 'Hard' because map knowledge and reflexes matter more than Melee skill. Recommended for users who enjoy the panic of entering expecting a Melee game, and for party players wanting to share the unique twists of fishing maps with friends. Before playing, confirm the 'fishing map' label in the description and filename, and focus on scouting and survival rather than standard build orders in the early game.
11가지버그 (11 Bugs)
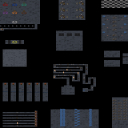
스타크래프트 브루드워의 대표적인 유즈맵 중 하나인 '11가지버그'는 이름에서부터 느껴지듯 플레이어에게 다양한 버그와 특수 효과를 경험하게 만드는 독특한 구조를 자랑합니다. 맵의 제목과 내부 설명에서도 강조하듯, 단순히 맵을 클리어하는 것이 아니라 '11가지 버그'를 모두 활용해야만 완료할 수 있는 도전 과제가 숨겨져 있습니다. 화면 중앙에 위치한 커다란 구조물은 게임의 핵심으로, 플레이어는 이 구조물을 둘러싼 복잡한 미로와 함정들을 돌파해야 합니다. 맵 곳곳에는 숨겨진 트리거, 예기치 못한 이벤트, 그리고 플레이어를 혼란스럽게 하는 시각적 요소들이 배치되어 있어, 익숙하지 않은 플레이어는 쉽게 좌절할 수 있습니다. 특히 맵의 구조는 중앙을 중심으로 대칭을 이루고 있으나, 곳곳에 숨겨진 비밀 통로나 함정들이 존재해, 한 번의 실수가 치명적인 결과를 초래할 수 있습니다. 게임의 난이도는 단순히 맵의 복잡성뿐 아니라, 예상치 못한 버그와 트리거의 발동 여부에 따라 완전히 달라지므로, 숙련된 플레이어라도 새로운 전략을 세워야 합니다. 이 맵은 단순히 클리어하는 것을 넘어, 스타크래프트의 숨은 가능성을 탐구하고자 하는 플레이어들에게 더할 나위 없이 훌륭한 경험을 제공합니다. 초보자는 물론이고, 유즈맵에 익숙한 플레이어들도 새로운 도전과 재미를 느낄 수 있는 작품으로, 특히 버그와 트리거에 대한 이해가 깊은 유저들에게 추천할 만합니다. 플레이 전에는 맵의 구조와 트리거에 대한 기본적인 이해를 갖추고, 다양한 버그를 경험해보는 것을 권장합니다. 또한, 중앙 구조물의 기능을 파악하고, 함정이나 비밀 통로의 위치를 미리 숙지하는 것이 성공 확률을 높이는 핵심입니다. 이 맵은 단순히 재미뿐 아니라, 스타크래프트의 메커니즘을 깊게 이해하고자 하는 플레이어들에게는 학습의 장으로도 손색이 없을 것입니다. six player対応의 맵으로, 팀 플레이보다는 각 플레이어의 개별 실력이 더 중요하게 작용한다는 점도 특징입니다. 맵의 난이도는 대체로 어려움에 가깝지만, 플레이어의 숙련도에 따라 조절이 가능하다는 점에서 재玩性이 매우 높습니다. 마지막으로, 이 맵은 단순히 클리어하는 것을 넘어, '11가지 버그'를 모두 경험하고자 하는 플레이어들에게는 필수적인 작품으로 자리잡고 있습니다. 재미와 도전의 균형을 잘 잡은 이 맵은, 스타크래프트 유즈맵의 새로운 장을 opened했다는 평가를 받고 있습니다. This classic Brood War custom map, "11 Types of Bugs," stands out among StarCraft's most famous user-made maps by offering players a unique experience filled with diverse bugs and special effects. As the title and in-game descriptions suggest, the challenge isn't just completing the map—it's uncovering and mastering all eleven bugs to truly finish it. At the heart of the game lies a massive central structure, which players must navigate by breaking through intricate mazes and traps surrounding it. Scattered throughout the map are hidden triggers, unexpected events, and visual elements designed to disorient, making it easy for inexperienced players to feel overwhelmed. While the layout maintains symmetry around the center, secret passages and traps lurk in unexpected places, turning even a single mistake into a costly failure. The difficulty isn't just about the map's complexity—it shifts dramatically based on unpredictable bugs and triggered events, forcing even seasoned players to adapt their strategies. Beyond mere completion, this map serves as an exceptional experience for those eager to explore StarCraft's hidden potential. Whether you're a beginner or a veteran of custom maps, it offers fresh challenges and enjoyment, especially for players who understand bugs and triggers deeply. Before playing, it's wise to familiarize yourself with the map's layout and triggers, experiment with the various bugs, and study the central structure's functions. Knowing the locations of traps and secret paths is key to increasing your chances of success. More than just fun, this map also serves as an educational tool for players looking to deepen their understanding of StarCraft's mechanics. Designed for six players, it emphasizes individual skill over teamwork, and while generally difficult, its challenge can be adjusted based on player skill, making it highly replayable. Ultimately, for those aiming to experience all eleven bugs, this map is essential, earning praise for striking the perfect balance between enjoyment and challenge and opening new possibilities for StarCraft custom maps.
게임을 시작하지 마세요 (I will NOT start game)
스타크래프트 브루드워 맵 'I will NOT start game'는 제목부터 범상치 않은 분위기를 풍긴다. 사이트 표시 제목과 원본 파일명, 내부 맵 제목이 모두 동일하게 'I will NOT start game'로 표기되어 있으며, 내부 설명에는 'DON'T START !!Created by: Pussies.'라는 경고성 문구가 적혀 있다. 현재 사이트 분류는 밀리(MELEE)로 되어 있으나, 제목과 설명 모두 일반적인 밀리 대전 맵이 아님을 강하게 시사한다. 맵 크기는 2048×2048 픽셀, 타일 단위 64×64로 표준적인 대형 맵 규모이며, 타일셋은 사막(Desert)으로 설정되어 있다. 인코딩은 cp949로 한글 환경에서도 제목이 깨지지 않고 정상적으로 표시된다. 실제 플레이 경험을 유추해 보면, '게임을 시작하지 마라'는 경고와 제작자명 'Pussies'가 장난기 어린 의도를 드러낸다. 이는 밀리 대전을 가장한 함정 맵이거나, 게임 시작 즉시 특수 트리거가 작동해 유머러스한 상황을 연출하는 일종의 농담·트롤 맵으로 보인다. 사막 지형 위에 8인용 시작 위치가 배치된 것으로 미루어, 겉보기엔 평범한 팀 프리포올 밀리 맵처럼 꾸며 두었으나 실제로는 시작과 동시에 패배 처리, 유닛 소환, 메시지 출력 등 의도된 이벤트가 발생할 가능성이 높다. 따라서 진지한 밀리 연습이나 래더용으로는 부적합하며, 가벼운 웃음이나 친구와의 장난용으로 한두 판 즐기기에 알맞다. 추천 대상은 색다른 유즈맵을 찾아보는 플레이어, 트롤 맵 문화를 체험해 보고 싶은 유저, 짧은 시간 안에 웃음을 주고받고 싶은 파티 플레이어다. 플레이 전 확인 포인트는 맵 설명의 경고 문구를 숙지하고, 실제 게임 시작 시 어떤 이벤트가 터지는지 관찰하는 것이다. 밀리 분류로 노출되어 있어 검색 시 혼동을 줄 수 있으므로, 유즈맵(UMS) 카테고리로 재분류하여 검색 정확도를 높이는 것이 바람직하다. The StarCraft Brood War map 'I will NOT start game' exudes an unusual atmosphere from its title alone. The site display title, original filename, and internal map title are all identically labeled 'I will NOT start game,' while the internal description bears a warning phrase: 'DON'T START !!Created by: Pussies.' The current site classification lists it as Melee (MELEE), yet both the title and description strongly suggest this is not a standard melee map. The map dimensions are 2048×2048 pixels with a 64×64 tile grid, a typical large-map scale, and the tileset is set to Desert. Encoding is cp949, so the title displays correctly without character corruption in Korean environments. Inferring the actual play experience, the warning 'DO NOT START' and the creator name 'Pussies' reveal a playful, mischievous intent. This appears to be a trap map disguised as a melee match, or a joke/troll map where a special trigger fires the moment the game starts to produce a humorous situation. Given that eight player start locations are placed on the desert terrain, it mimics a standard team free-for-all melee map on the surface, but in reality, an intended event—such as instant defeat, unit spawns, or message displays—likely triggers upon start. Consequently, it is unsuitable for serious melee practice or ladder play, but fits well for a quick laugh or a lighthearted prank among friends. The recommended audience includes players seeking unique UMS maps, users wanting to experience troll-map culture, and party players looking for a short burst of amusement. Pre-play checkpoints are to heed the warning in the map description and observe what event unfolds when the game actually begins. Since it is currently exposed under the Melee category, it can cause search confusion; reclassifying it as UMS (Use Map Settings) would improve search accuracy.
최근 등록된 맵
새로 추가된 파일과 버전을 확인하세요.
_TRUE RPG Act 4: 디아블로의 제단 (TRUE RPG Act 4: Altar of Diablo)
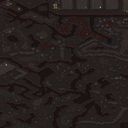
스타크래프트 브루드워의 유즈맵 'T®ÙË ÐÏÄßLÕ ][][ RPG ÅÇT 4'는 다크 나이트(Dark Knight) 시리즈의 네 번째 액트로, 플레이어들이 지옥으로 침투해 강력한 악마인 디아블로를 처치하는 하이 RPG 장르의 도전형 맵이다. 맵은 정글 타일셋으로 구성되어 있으며, 어두운 분위기의 배경과 섬뜩한 장식들이 플레이어의 긴장감을 고조시킨다. 내부 설명문에 따르면 제작자는 (DB)Baal로, '가장 어린 프라임빌(Primevil)이 기다리고 있으니, 때가 늦기 전에 디아블로를 처치하라'는 구절에서 알 수 있듯 스토리적 긴장감이 느껴지는 서사 구조를 갖추고 있다. 플레이 방식은 단일 플레이어 중심의 퀘스트 진행형으로, 맵 곳곳에 배치된 적들을 물리치며 목표를 달성하는 구조다. 전체 맵 크기는 6144x6144로 넓고 복잡한 길목과 함정이 곳곳에 숨겨져 있어 전략적인 진행이 요구된다. 특히 지옥 테마에 걸맞게 붉은색과 어두운 톤의 디자인으로 구성되어 있으며, 보스전을 위한 넓은 공간도 마련되어 있다. 진행 중에는 아이템 획득, 능력치 강화, 퍼즐 요소 등이 포함될 것으로 추정되며, 난이도는 중간 정도로 예상된다. 이 맵은 RPG 요소와 액션형 전투가 조합된 장르로, 스토리tel을 중시하는 플레이어에게 적합하다. 또한 단일 플레이어용으로 설계되어 있어 개인 역량을 시험하는 데 초점을 맞추고 있다. 다만, 복잡한 맵 구조와 함정 요소 때문에 초보자는 진입장벽이 있을 수 있으니, 충분한 연습과 страте지 계획이 필요할 것이다. 또한, 내부 설명문에서 언급된 '프라임빌'과 '디아블로'라는 용어는 워크래프트 시리즈의 요소와 유사해 일부 플레이어들에게는 친숙한 느낌을 줄 수도 있다. 플레이 전에는 맵의 특수 능력이나 트리거가 어떤 방식으로 작동하는지 미리 확인하는 것을 권장하며, 특히 보스전 직전에는 충분한 자원과 준비를 갖추는 것이 중요하다. 또한, 지옥 테마에 맞게 어두운 분위기 속에서 진행되므로, 밝은 화면 환경에서 플레이하는 것이 시야 확보에 도움이 될 것이다. 전체적으로는 긴장감 넘치는 RPG 경험을 제공하는 유즈맵으로, 액션과 전략의 조화를 즐기고자 하는 플레이어들에게Strong 추천할 만한 작품이다. This StarCraft: Brood War custom map, *"T®ÙË ÐÏÄßLÕ ][][ RPG ÅÇT 4"*, is the fourth act in the *Dark Knight* series, challenging players to infiltrate hell and defeat the mighty demon Diablo in a hardcore RPG-style map. The jungle-themed tileset, dark atmosphere, and eerie decorations heighten the tension, while the creator, (DB)Baal, weaves a narrative-driven experience with lines like *"The youngest Primevil awaits—slay Diablo before it’s too late."* The gameplay revolves around a single-player quest structure, where players progress by defeating enemies scattered across the map. Spanning 6144x6144 tiles, the expansive and intricate layout hides traps, narrow paths, and strategic chokepoints. The hell-themed design leans into deep reds and dark tones, with ample space for boss battles. Along the way, players can expect loot acquisition, stat upgrades, and puzzle elements, with an estimated mid-tier difficulty. Blending RPG depth with fast-paced combat, this map caters to story-focused players, emphasizing individual skill in a solo experience. However, its complex layout and hidden traps may pose a challenge for beginners, requiring practice and strategic planning. The terms *"Primevil"* and *"Diablo"* might also feel familiar to fans of the *Warcraft* series. Before diving in, players should familiarize themselves with the map’s special abilities and triggers, especially ensuring they’re well-prepared for boss encounters. Given its hellish setting, playing in a well-lit environment can help visibility. Overall, this custom map delivers a tense, immersive RPG experience—highly recommended for those seeking a mix of action and strategy.
레지던트 이블: 라스트 이스케이프 (Resident Evil: Last Escape)
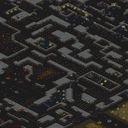
《Resident Evil: Last Escape》는 스타크래프트: 브루드워의 퍼즐형 유즈맵으로, 호러·어드벤처 장르의 스토리텔링을 통해 플레이어에게 긴장감 넘치는 경험을 제공하는 작품이다. 맵은 4096x4096 크기의 거대한 황무지 타일셋으로 구성되어 있으며, 곳곳에 숨겨진 퍼즐과 함정, 적대적 유닛들이 플레이어를 기다리고 있다. 내부 제목과 설명에서 확인되는 'Last Escape'는 말 그대로 '최후의 탈출'을 의미하며, 제목에서도 알 수 있듯이 《레지던트 이블》 프랜차이즈의 분위기를 오마주한 듯한 디자인 요소가 곳곳에 배치되어 있다. 맵의 구조는 선형과 비선형이 혼합된 형태로, 특정 영역을 클리어하지 않으면 진행이 불가능한 '퍼즐 블록'과 선택적 루트를 제공하는 '분기점'으로 나뉘어 있으며, 이는 플레이어의 전략적 사고와 패턴 인식을 요구한다. 또한, 맵 곳곳에 배치된 적대적 유닛(좀비, 돌연변이 등)과 함정들은 단순히 장애물이 아니라 퍼즐의 핵심 요소로 작용하는데, 예를 들어 특정 유닛을 제거하거나 유인해야만 숨겨진 통로나 아이템을 획득할 수 있다. 8명의 플레이어는 각자 독립적인 경로를 따라 진행하거나, 팀을 이루어 협력해야 하며, 이는 퍼즐의 난이도와 플레이 경험을 조절하는 주요 요소로 작용한다. 특히, 맵의 후반부로 갈수록 퍼즐의 복잡도가 증가하고 함정의 배치Density가 높아지는데, 이는 플레이어의 집중력을 요구하며 긴장감을 배가시킨다. 또한, 맵의 배경 음악(제공되지 않았지만 추정되는 atmospheric sound)과 시각 효과는 호러 분위기를 강조하는 데 핵심적인 역할을 할 것으로 보인다. 추천하는 플레이 방식은 먼저 맵의 전체적인 구조를 파악한 후, 각 퍼즐의 해결책을 단계적으로 시도하는 것이다. 초보자의 경우, 팀원과의 협력을 통해 퍼즐을 공략하는 것이 유리하며, 경험이 풍부한 플레이어는 단독 진행을 통해 맵의 숨겨진 요소나 이스터 에그를 발견할 수 있다. 또한, 맵의 난이도는 퍼즐의 복잡도와 함정의 배치에 따라 개인차가 크므로, 처음 플레이 시에는Easy 모드(있는 경우)나 팀 플레이를 권장한다. 마지막으로, 이 맵은 단순한 퍼즐 해결을 넘어 스토리텔링과 атмос피어의 조화를 중시한다는 점에서, 단순히 '퍼즐을 푸는' 경험을 넘어서 '이야기를 경험하는' immersive한 플레이를 기대할 수 있다. 다만, 맵의 크기가 크고 퍼즐의 난이도가 높기 때문에, 플레이 시간은 예상보다 길어질 수 있으며, 집중력이 요구되는 만큼 충분한 시간이 필요하다는 점을 유념해야 한다. 《Resident Evil: Last Escape》 is a puzzle-style custom map for *StarCraft: Brood War* that immerses players in a tense horror-adventure experience through its storytelling. The map spans a massive 4096x4096 wasteland tileset, where hidden puzzles, traps, and hostile units await at every turn. The title "Last Escape" literally means "final escape," and the map incorporates design elements reminiscent of the *Resident Evil* franchise, from its atmosphere to its details. The structure blends linear and nonlinear progression, featuring mandatory "puzzle blocks" that block advancement until solved and optional branching paths that test the player's strategic thinking and pattern recognition. Hostile units like zombies and mutants, along with traps scattered throughout, aren’t just obstacles—they’re integral to the puzzles. For example, players must eliminate or lure specific units to uncover hidden passages or collect items. Eight players can either tackle the puzzles solo along independent routes or team up for cooperation, which significantly influences difficulty and gameplay experience. As players advance, the puzzles grow more complex and traps denser, demanding sharper focus and heightening tension. The atmospheric soundtrack (though not provided) and visual effects are expected to play a key role in reinforcing the horror ambiance. For optimal play, first familiarize yourself with the map’s layout, then systematically attempt each puzzle. Beginners will benefit from teamwork, while experienced players may uncover hidden elements by going solo. Difficulty varies widely based on puzzle complexity and trap density, so newcomers should consider an Easy mode (if available) or cooperative play. Beyond mere puzzle-solving, this map emphasizes storytelling and atmosphere, offering an immersive experience akin to "living the story." However, given its size and high difficulty, expect longer playtimes and prepare for extended sessions requiring sustained concentration.
픽 유어 디펜스 (Pick Your Defence)
픽 유어 디펜스는 이름 그대로 방어 중심의 유즈맵으로, 6명의 플레이어가 동시에 참여해 각자 방어 라인을 구축하고 상대의 공격을 막는 형태를 취합니다. 맵 전체가 4096×4096 타일 기반 우주 테마로 디자인돼 넓은 공간에 다양한 고지대와 함정 구역이 배치되어 있어, 초반에 방어 위치를 선정하는 것이 승패를 좌우합니다. 플레이어는 기본 유닛과 건물을 자유롭게 배치할 수 있으며, 맵에 숨겨진 자원 포인트를 확보하면 추가 방어 타워나 특수 유닛을 생산할 수 있습니다. 전투는 주로 상대의 진입로를 차단하고, 타워와 유닛의 시너지를 활용해 지속적인 압박을 가하는 방식이며, 특정 구역에서는 숨겨진 스위치를 활성화해 함정을 작동시킬 수도 있습니다. 방어 라인을 어떻게 구성하느냐에 따라 공격적인 전술과 방어적인 전술이 교차하므로, 전략적 사고와 상황 판단이 중요한 포인트입니다. 특히 초반에 자원을 효율적으로 분배하고, 중반 이후에 나타나는 강력한 적 파동에 대비해 방어 구조를 강화하는 것이 핵심입니다. 맵은 복수의 진입로와 비대칭적인 지형을 제공하므로, 팀플레이보다는 개인 플레이에 더 적합하며, 방어 전략을 실험하고 싶은 플레이어에게 추천됩니다. 플레이 전에는 맵 내 자원 위치와 함정 트리거 지점을 미리 파악하고, 방어 타워와 유닛의 조합을 미리 구상해 두는 것이 좋습니다. Pick Your Defence is a user‑made map that focuses on defensive play for up to six players simultaneously. Set on a large 4096×4096 space‑themed tile grid, the map offers high ground, trap zones and hidden resource points that influence where you place your base and defenses. Players can freely position basic units and structures, then harvest hidden resources to build additional towers or special units. Combat revolves around blocking enemy entry paths and using the synergy of towers and units to maintain pressure, while secret switches in certain areas can trigger traps for extra tactical depth. Choosing the right defensive layout is crucial, as it determines whether you adopt a more aggressive or a purely defensive stance. Early resource allocation and mid‑game preparation for powerful enemy waves are key strategies. The map features multiple asymmetric entry points, making it better suited for solo or free‑for‑all matches rather than coordinated team play, and it is ideal for players who want to experiment with defensive tactics. Before starting, familiarize yourself with resource locations and trap triggers, and plan your tower‑unit combinations in advance.
뉴 메이즈 디펜스 익스트림 (New Maze Defense Extreme)
스타크래프트 브루드워의 유즈맵 'N3w M4z3 D3f 3xt OYO'는 미로 형태의 디펜스 맵으로, 플레이어는 좁고 복잡한 통로 속에서 적의 공격을 방어해야 한다. 맵 중앙에는 넓은 미로가 있으며, 각 플레이어는 시작 지점에서 출발해 미로 내의 자원으로 체력을 회복하거나 무기 아이템을 획득할 수 있다. 미로 곳곳에는 함정이 설치되어 있어 신중한 진행이 필요하다. 적 유닛은 주기적으로 미로 입구에서 스폰되며, 이를 저지하는 것이 주요 목표다. 맵 구조상 시야가 제한되어 있어 전략적인 자원 관리와 시야 확보가 중요하다. 초기 자원과 체력이 제한적이므로 초반 전략 수립이 관전 포인트다. 또한, 미로 내의 아이템 배치와 함정의 위치를 숙지하는 것이 생존의 관건이며, 팀 플레이가 강제되는 구조는 아니다. 제한된 공간에서 벌어지는 전투는 긴장감을 높이며, 특히 아이템 활용과 함정 회피가 승패를 가를 수 있다. 초보 플레이어는 맵의 구조와 아이템 위치 파악에 집중해야 하며, 숙련자는 함정과 아이템을 적극 활용한 전략적 플레이가 요구된다. 맵의 난이도는 보통 수준으로 추정되며, 플레이 시간은 20~30분 내외로 예상된다. 미로 디펜스는 전략적 사고와 빠른 적응력이 필요한 장르로, 같은 맵을 여러 번 플레이하며 최적의 전략을 찾는 재미가 있다. StarCraft: Brood War's custom map "N3w M4z3 D3f 3xt OYO" is a maze-style defense map where players must defend against enemy attacks in narrow, complex corridors. At the center of the map is a sprawling maze where each player starts, allowing them to recover health or obtain weapon items within the maze. Traps are scattered throughout, requiring careful navigation. Enemy units spawn periodically at the maze entrance, and preventing their advance is the main objective. Due to the map's structure, vision is limited, making strategic resource management and securing sightlines crucial. With initial resources and health being scarce, establishing a strong early-game strategy is key. Additionally, knowing the item placements and trap locations is vital for survival, though the map doesn't enforce team play. The confined combat spaces heighten tension, and victory often hinges on item utilization and trap avoidance. Beginners should focus on understanding the maze layout and item positions, while experienced players must employ strategic gameplay that leverages traps and items effectively. The map's difficulty is moderate, with playtime estimated between 20 to 30 minutes. Maze defense maps demand strategic thinking and quick adaptability, offering the fun of refining optimal strategies through repeated plays.
킬러 헌티드 맨션 (Killer Haunted Mansion)
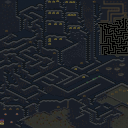
스타크래프트 브루드워의 공포 분위기 가득한 유즈맵 '킬러 헌티드 맨션(Killer Haunted Mansion)'은 플레이어가 유령 저택 안에서 살아남아 탈출해야 하는 생존형 디펜스 맵이다. 저택 내부 곳곳에 배치된 함정과 유령 몬스터를 피해 안전지대를 확보하고, 제한된 시간을 버티며 출구를 찾아야 한다. 맵은 넓은 저택 구조를 기반으로 여러 층으로 나뉘어 있으며, 각 층마다 독특한 함정이 설치되어 있다. 플레이어는 개별적으로 움직이며, 몬스터의 공격과 함정 피해를 최소화해야 한다. 저택 곳곳의 아이템과 숨겨진 통로도 탈출의 열쇠가 된다. 특히 맵의 설원 타일셋과 어두운 분위기가 공포감을 배가시킨다. 초반에는 비교적 안전하지만 시간이 지날수록 몬스터의 수가 증가하고 함정도 작동되므로 신중한 움직임을 요구한다. 이 맵은 공포 분위기를 즐기며 전략적 디펜스를 추구하는 플레이어에게 적합하다. 추천 대상이지만, 함정과 몬스터의 패턴을 익히지 않으면 빠르게 실패할 수 있으므로 초보자는 주의가 필요하다. 플레이 전에는 맵 구조와 함정 위치를 미리 확인하고, 아이템 사용 타이밍을 연습하는 것이 좋다. 맵의 긴 플레이 시간과 치밀한 설계는 도전욕을 자극하며, 여러 번 플레이할수록 저택의 비밀을 발견할 수 있는 재미가 있다. 특히 팀 플레이보다는 솔로 플레이에 최적화되어 있어, 개인 실력과 순간 판단력이 승패를 좌우한다. The "Killer Haunted Mansion" survival defense map from *StarCraft: Brood War* immerses players in a ghostly mansion where they must survive and escape. Players must secure safe zones while avoiding traps and ghostly monsters, all within a limited time, navigating the mansion's multi-level structure. Each floor features unique traps, and players move individually, minimizing damage from monsters and hazards. Hidden passages and scattered items serve as key tools for escape, with the snowy tileset and dark atmosphere amplifying the eerie mood. While the early game offers relative safety, the challenge escalates as monsters spawn and traps activate, demanding careful movement. Ideal for players who enjoy horror atmospheres and strategic defense, this map rewards those who master its traps and monster patterns—but newcomers should proceed with caution, as unfamiliarity can lead to quick failure. Before playing, it's wise to study the map layout, memorize trap locations, and practice item usage timing. Its long playtime and intricate design spark repeated challenges, with each attempt revealing new secrets of the mansion. Optimized for solo play, victory hinges on personal skill and quick decision-making rather than teamwork.
IQ Test
스타크래프트 브루드워의 유즈맵 <IQ Test>는 플레이어가 맵 상의 장애물을 빠르게 통과하며 최단 시간을 기록하는 퍼즐형 맵입니다. 내부 설명에서도 알 수 있듯이 '코스를 가능한 한 빠르게 통과하라'는 목표가 명확하며, 좁은 길목과 함정, 지뢰, 함정 건물 등이 복잡하게 배치된 구조가 특징입니다. 맵의 전체적인 분위기는 어두운 황무지 타일셋을 기반으로 하여 침울하고 긴장감이 느껴지지만, 밝은 색상의 시작 지점과 엔딩 지점이 대비되어 진행 과정을 시각적으로 구분할 수 있습니다. 플레이어는 시작 지점에서 출발하여 지정된 루트를 따라 이동해야 하며, 도중에 등장하는 장애물이나 함정을 피하거나 제거하는 방식으로 시간을 단축해야 합니다. 맵의 난이도는 장애물의 밀도와 복잡도에 따라 달라질 수 있으며, 특히 좁은 통로나 연속된 함정 구간에서 실수가 발생하기 쉽습니다. 제한된 공간 안에서 빠른 판단과 정확한 조작이 요구되는 만큼, 전략적인 움직임과 타이밍이 승패를 좌우합니다. 초보 플레이어는 맵의 구조를 숙지하지 못해 여러 번 실패할 가능성이 높으므로, 반복 플레이를 통해 루트를 암기하는 것이 중요합니다. 또한, 맵의 특성상 단일 플레이어나 소규모 팀 플레이에 적합하며, 6인까지 참여할 수 있는 구조로 설계되었습니다. 맵의 완성도는 간결하면서도 도전적인 퍼즐 요소와 시각적 디자인으로 구성되어 있으며, 스타크래프트 유즈맵의 특색을 잘 살린 작품 중 하나로 평가됩니다. 특히, 짧은 플레이 타임과 높은 재플레이 가치를 제공하는 점에서 유즈맵爱好者들에게 인기 있을 만한 요소들이 포함되어 있습니다. 플레이 전에는 맵의 전체적인 구조를 미리 파악하고, 가능한 한 빠른 루트를 찾는 연습을 추천합니다. 또한, 함정이나 장애물의 패턴을 분석하여 효율적인 통과 방법을 찾아내는 것이 핵심입니다. 맵의 난이도는 초반에는 쉬울 수 있으나, 후반부로 갈수록 복잡해지는 구조로 인해 숙련된 플레이어에게 더 적합하다는 점도 고려해야 합니다. StarCraft: Brood War's custom map *IQ Test* is a puzzle-style map where players navigate through obstacles on the map to record the fastest possible time. As indicated in the in-game description, the clear objective is to "pass through the course as quickly as possible," and the map features a complex layout with narrow passages, traps, landmines, and hazardous buildings. The overall atmosphere is based on a dark, desolate tileset, giving it a somber and tense feel, though the bright-colored start and end points contrast sharply, visually separating the progression stages. Players must begin at the starting point and follow the designated route, shortening their time by either avoiding or eliminating obstacles and traps encountered along the way. The difficulty varies depending on the density and complexity of the obstacles, with mistakes being especially easy to make in tight corridors or sequences of traps. Since quick decision-making and precise control are required within limited space, strategic movement and timing determine victory or defeat. Novice players may struggle due to unfamiliarity with the map’s layout and fail repeatedly, so memorizing the route through repeated play is essential. Given the map’s nature, it is best suited for solo play or small team formats, though it is designed to accommodate up to six players. The map’s polished design combines concise yet challenging puzzle elements with strong visual aesthetics, earning recognition as a well-crafted custom map that captures the essence of StarCraft’s custom map scene. Its short playtime and high replay value make it particularly appealing to custom map enthusiasts. Before playing, it’s recommended to familiarize yourself with the overall structure and practice finding the fastest route possible. Analyzing trap and obstacle patterns to discover efficient passage methods is also key. While the early sections may seem easier, the increasing complexity toward the later stages makes this map more suitable for experienced players.
게임을 시작하지 마세요 (I will NOT start game)
스타크래프트 브루드워 맵 'I will NOT start game'는 제목부터 범상치 않은 분위기를 풍긴다. 사이트 표시 제목과 원본 파일명, 내부 맵 제목이 모두 동일하게 'I will NOT start game'로 표기되어 있으며, 내부 설명에는 'DON'T START !!Created by: Pussies.'라는 경고성 문구가 적혀 있다. 현재 사이트 분류는 밀리(MELEE)로 되어 있으나, 제목과 설명 모두 일반적인 밀리 대전 맵이 아님을 강하게 시사한다. 맵 크기는 2048×2048 픽셀, 타일 단위 64×64로 표준적인 대형 맵 규모이며, 타일셋은 사막(Desert)으로 설정되어 있다. 인코딩은 cp949로 한글 환경에서도 제목이 깨지지 않고 정상적으로 표시된다. 실제 플레이 경험을 유추해 보면, '게임을 시작하지 마라'는 경고와 제작자명 'Pussies'가 장난기 어린 의도를 드러낸다. 이는 밀리 대전을 가장한 함정 맵이거나, 게임 시작 즉시 특수 트리거가 작동해 유머러스한 상황을 연출하는 일종의 농담·트롤 맵으로 보인다. 사막 지형 위에 8인용 시작 위치가 배치된 것으로 미루어, 겉보기엔 평범한 팀 프리포올 밀리 맵처럼 꾸며 두었으나 실제로는 시작과 동시에 패배 처리, 유닛 소환, 메시지 출력 등 의도된 이벤트가 발생할 가능성이 높다. 따라서 진지한 밀리 연습이나 래더용으로는 부적합하며, 가벼운 웃음이나 친구와의 장난용으로 한두 판 즐기기에 알맞다. 추천 대상은 색다른 유즈맵을 찾아보는 플레이어, 트롤 맵 문화를 체험해 보고 싶은 유저, 짧은 시간 안에 웃음을 주고받고 싶은 파티 플레이어다. 플레이 전 확인 포인트는 맵 설명의 경고 문구를 숙지하고, 실제 게임 시작 시 어떤 이벤트가 터지는지 관찰하는 것이다. 밀리 분류로 노출되어 있어 검색 시 혼동을 줄 수 있으므로, 유즈맵(UMS) 카테고리로 재분류하여 검색 정확도를 높이는 것이 바람직하다. The StarCraft Brood War map 'I will NOT start game' exudes an unusual atmosphere from its title alone. The site display title, original filename, and internal map title are all identically labeled 'I will NOT start game,' while the internal description bears a warning phrase: 'DON'T START !!Created by: Pussies.' The current site classification lists it as Melee (MELEE), yet both the title and description strongly suggest this is not a standard melee map. The map dimensions are 2048×2048 pixels with a 64×64 tile grid, a typical large-map scale, and the tileset is set to Desert. Encoding is cp949, so the title displays correctly without character corruption in Korean environments. Inferring the actual play experience, the warning 'DO NOT START' and the creator name 'Pussies' reveal a playful, mischievous intent. This appears to be a trap map disguised as a melee match, or a joke/troll map where a special trigger fires the moment the game starts to produce a humorous situation. Given that eight player start locations are placed on the desert terrain, it mimics a standard team free-for-all melee map on the surface, but in reality, an intended event—such as instant defeat, unit spawns, or message displays—likely triggers upon start. Consequently, it is unsuitable for serious melee practice or ladder play, but fits well for a quick laugh or a lighthearted prank among friends. The recommended audience includes players seeking unique UMS maps, users wanting to experience troll-map culture, and party players looking for a short burst of amusement. Pre-play checkpoints are to heed the warning in the map description and observe what event unfolds when the game actually begins. Since it is currently exposed under the Melee category, it can cause search confusion; reclassifying it as UMS (Use Map Settings) would improve search accuracy.
헤븐 앤 헬 2 (Heaven and Hell 2)
「헤븐 앤 헬 2」는 스타크래프트 브루드워의 유즈맵으로, 플레이어가 지옥에서 천국으로 통하는 관문을 향해 탈출하는 여정을 펼치는 디펜스 장르의 맵이다. 맵의 핵심은 복잡한 함정과 장애물로 가득한 지옥 지대를 통과하는 것이며, 플레이어는 자신의 유닛과 전략을 활용해 traps와 적들을 피해가며 목표를 달성해야 한다. 맵의 구조는 세로로 긴 통로와 여러 갈래 길로 나뉘어져 있으며, 각 구간마다 함정이 설치되어 있어 신중한 진행이 요구된다. 특히, 관문까지 도달하는 데 성공하더라도 함정이나 적의 공격으로 인해 추가적인 위협이 발생할 수 있어, 미처 다 제거하지 못한 적이나 함정을 재빨리 처리하는 것이 중요하다. «Hèàv£ñ ßöÚñл «2»의 특징은 맵의 분위기다. 정글 타일셋을 기반으로 한 어두운 색감과 붉은 빛의 함정 효과가 조화를 이루며, 플레이어에게 긴장감을 더한다. 또한, 맵의 이름에서 유추할 수 있듯이 천국과 지옥의 대비를 느낄 수 있는 디자인 요소들이 곳곳에 배치되어 있어, 단순한 탈출 게임을 넘어 신화적 스토리를 간접적으로 체험할 수 있는 장치로도 작용한다. 이 맵은 초보자와 숙련자 모두에게 접근 가능한 난이도를 가지고 있으며, 특히 팀 플레이를 강조하지는 않지만, 6명의 플레이어가 각각의 길을 탐색하며 협력하거나 경쟁할 수 있는 구조로 설계되어 있다. 플레이 전에는 맵의 함정 분포와 관문의 위치를 미리 숙지하는 것이 필수이며, 통로의 폭이 좁고 함정이 밀집된 구간이 많기 때문에 속도와 정확성이 관건이다. 또한, 유닛의 종류나 스킬에 따라 진행 방식이 달라질 수 있으므로, 자신의 플레이 스타일에 맞는 전략을 세우는 것이 중요하다. «Hèàv£ñ ßöÚñл «2»는 디펜스와 피하기 요소가 결합된 유즈맵으로, 긴장감 넘치는 진행과 아름다운 맵 디자인으로 스타크래프트 유저들에게 인기 있는 맵 중 하나다. 이 맵을 즐기기 위해서는 맵의 구조를 충분히 이해하고, 함정을 피하거나 제거하는 데 집중해야 한다. 또한, 관문까지 도달하는 것뿐만 아니라, 도달 후에도 발생할 수 있는 추가적인 위협을 대비해야 하기 때문에, 항상 긴장감을 유지하며 플레이하는 것이 중요하다. «Hèàv£ñ ßöÚñл «2»는 혼자 플레이해도 즐겁지만, 팀원들과 협력하거나 경쟁하며 플레이할 때 더욱 재미를 느낄 수 있는 맵이다. "Hell and Heaven 2" is a custom map in *StarCraft: Brood War* where players embark on a defensive journey, escaping from hell toward a gateway to heaven. The core challenge lies in navigating a hellish terrain filled with intricate traps and obstacles, requiring players to use their units and strategies to evade both traps and enemies to reach their goal. The map features a vertically elongated corridor split into multiple branching paths, each lined with deadly traps that demand careful progression. Even upon reaching the gateway, players aren’t safe—additional threats from lingering enemies or hidden traps can still disrupt their escape, making it crucial to quickly eliminate any remaining foes or hazards. The defining feature of "Hell and Heaven 2" is its atmosphere. Built on a jungle tileset, the map blends dark, somber colors with glowing red trap effects, creating an intense and immersive experience. The name itself hints at the thematic contrast between heaven and hell, reinforced by design elements scattered throughout the map that evoke a mythical narrative beyond a simple escape challenge. The difficulty is balanced to appeal to both beginners and veterans, though team play isn’t mandatory. Instead, the map accommodates six players who can explore different paths, cooperate, or compete with one another. Before playing, it’s essential to familiarize yourself with trap locations and the gateway’s position, as narrow corridors and densely packed traps demand both speed and precision. Strategy also varies depending on unit types and abilities, so tailoring your approach to your playstyle is key. "Hell and Heaven 2" blends defense and evasion mechanics into a tense, engaging experience, supported by striking map design that has earned it popularity among *StarCraft* players. To fully enjoy it, you must master the layout, prioritize avoiding or dismantling traps, and stay alert even after reaching the gateway—because danger doesn’t end there. Whether played solo or with others, the map offers excitement, especially when teaming up or competing with friends.
맵 선택 가이드
태그는 맵의 핵심 특징을 빠르게 설명하지만 제작 버전마다 규칙이 다를 수 있습니다. 상세 설명에서 권장 인원, 난이도, 플레이 시간과 버전을 함께 확인한 뒤 다운로드하세요.