
하이브리드 디펜스 스타크래프트 맵 모음
'하이브리드 디펜스' 태그가 등록된 맵을 모았습니다. 장르 하나로 찾기 어려운 플레이 방식, 난이도와 특징을 중심으로 인기 맵과 최신 맵을 비교해 보세요.
- 등록 맵
- 4개
- 누적 다운로드
- 0
- 누적 조회
- 102
인기 맵
다운로드와 조회 반응이 높은 맵입니다.
스타게이트 갤럭시 (Stargate Galaxy mod)
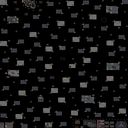
스타크래프트 브루드워의 유즈맵 중에서도 독특한 세계관을 구축한 작품으로, <스타게이트 갤럭시>는 스타트렉 아마다와 스타게이트 디플로메시의 요소를 결합한 하이브리드 디펜스 맵이다. 이 맵은 플레이어가 우주 공간에서 다양한 스타게이트 종족의 함선과 건물을 조종하며 외계 세력의 침공을 방어하는 구조로 구성되어 있다. 맵 중앙의 거대한 우주 공간에는 플레이어의 기지가 위치하며, 주변으로 몰려드는 적의 웨이브를 막아내야 한다. 적군은 랜덤한 위치에서 끊임없이 등장하며, 각 웨이브마다 난이도가 점차 상승하는 특징을 보인다. 특히 우주 배경에 맞는 스타크래프트의 특수 유닛과 건물이 배치되어 있어, 우주전을 체험할 수 있는 몰입감을 제공한다. 맵의 특징 중 하나는 스타게이트 시리즈의 팬들을 위해 제작되었다는 점으로, 맵 곳곳에 스타게이트 프랜차이즈의 요소들이 숨겨져 있어 팬이라면 더욱 즐겁게 플레이할 수 있을 것이다. 또한 맵 제작자의 공지를 통해 알 수 있듯이, 무단 수정을 금지하고 있어 원작의 품질을 유지하려는 노력이 엿보인다. 플레이어는 초반에 주어진 자원으로 기지를 확충하며, 적의 공격 패턴을 분석해가며 방어 전략을 세우는 것이 중요하다. 웨이브 디펜스 장르의 특성상 긴장감과 성취감을 동시에 느낄 수 있는 맵으로, 우주 SF 팬과 디펜스 게임을 좋아하는 플레이어 모두에게 추천할 만하다. 다만, 7인 플레이는 팀워크가 중요하므로 팀원과의 원활한 소통이 필요할 것이다. 또한, 맵의 난이도가 높은 편이므로 초보자는 어려움을 느낄 수 있으니, 난이도를 낮춘 버전이나 튜토리얼을 먼저 플레이해보는 것도 좋다. 맵의 전체적인 균형과 디자인 면에서는 스타크래프트의 우주 맵 디자인에 익숙한 플레이어라면 금방 적응할 수 있을 것이다. 마지막으로, 맵의 규모가 크고 복잡하기 때문에 맵 에디터를 통해 미리 구조를 파악해두면 플레이에 큰 도움이 된다. 우주 공간의 웅장함과 together with the progressive difficulty of enemy waves, this map offers a unique challenge that keeps players engaged throughout the session. The inclusion of StarGate-themed units and structures enhances the thematic experience, making it a standout choice for fans of sci-fi defense games. Among the custom maps of *StarCraft: Brood War*, *StarGate Galaxy* stands out for its unique worldbuilding, blending elements from *Star Trek Armada* and *StarGate: Diplomacy* into a hybrid defense map. Players take command of fleets and structures from various StarGate factions, defending their base in the vast expanse of space against relentless alien invasions. The map centers around a massive cosmic battlefield where your base must withstand waves of enemies spawning randomly from all directions, with each successive assault growing progressively more challenging. The inclusion of specialized units and buildings tailored to the space setting immerses players in a true sci-fi warfare experience. What makes this map particularly noteworthy is its dedication to StarGate fans—subtle references and Easter eggs from the franchise are scattered throughout, rewarding those familiar with the series with extra layers of enjoyment. The map’s creator has also enforced strict no-modification rules, ensuring the original vision remains intact. Early gameplay revolves around expanding your base with limited starting resources while analyzing enemy attack patterns to refine your defense strategy. As a wave-based defense title, it balances tension and satisfaction, making it ideal for both sci-fi enthusiasts and defense game lovers. However, seven-player mode demands strong teamwork, so clear communication with teammates is essential. The map’s difficulty may also pose a challenge for newcomers, so beginners might benefit from trying a lower-difficulty version or a tutorial first. Those already familiar with StarCraft’s space maps will find the mechanics and layout intuitive. Given its scale and complexity, reviewing the map layout in the editor beforehand can significantly improve your performance. With its grand space vistas and escalating enemy threats, *StarGate Galaxy* delivers a compelling challenge that keeps players hooked from start to finish. The fusion of StarGate’s iconic aesthetic with strategic depth makes it a must-try for fans of sci-fi defense games.
Lurker Defense On Your Own!2.0 (라커 디펜스 온 유어 오운! 2.0)
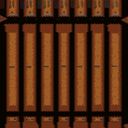
스타크래프트 브루드워의 대표적인 디펜스 유즈맵인 <Lurker Defense On Your Own!2.0>는 30단계에 걸쳐 끊임없이 몰려오는 적 유닛을 방어하는 하이브리드 디펜스 게임이다. 맵 이미지 상단은 방어 진영, 하단은 적의 시작 지점으로 확인되며, 중앙의 좁은 길목을 중심으로 리버, 캐리어, 스카웃 등 강력한 공중 유닛과 지상 유닛들이 끊임없이 진격해 온다. 플레이어는 각 단계마다 주어지는 제한된 자원으로 방어 건물을 배치하고, 유닛을 생산해 적을 저지해야 한다. 특히 저글링, 히드라리스크, 뮤탈리스크 같은 저렴하고 빠른 유닛들이 다수 등장해 초반 방어선을 무너뜨리기 쉽기 때문에 신중한 자원 관리와 배치 전략이 요구된다. 이 맵의 가장 큰 특징은 단계별로 점점 강화되는 적의 조합과 패턴이다. 초반에는 저글링과 히드라가 주를 이루지만, 후반부로 갈수록 캐리어, 디바우러, 울트라리스크 같은 고급 유닛들이 등장해 방어 난이도가 급격히 상승한다. 또한 특정 단계에서는 특수 유닛이나 버프가 주어지기도 하는데, 이는 맵 이미지에서 확인하기 어려운 부분이지만 게임 내 트리거로 구현된 것으로 추정된다. 방어 건물로는 성큰 콜로니, 포톤 캐논, 터렛, 미사일 터렛을 사용할 수 있으며, 각 건물이 가진 특성과 사정거리를 고려해 배치해야 한다. 플레이어는 7명의 인원으로 구성되며, 각자 독립된 미네랄과 가스 자원을 보유하고 있다. 하지만 중앙의 주요 방어 지점은 공유하기 때문에 팀원 간의 협력이 필수적이다. 자원의 분배와 건물 배치, 유닛 생산 타이밍을 조율하지 않으면 특정 단계에서 방어에 실패할 가능성이 크다. 맵의 전체 크기가 6144x6144로 넓고 황혼 타일셋을 사용해 시각적으로도 깔끔한 디자인을 자랑하지만, 디펜스 게임의 특성상 좁은 길목에 집중된 전투가 대부분이다. 또한 맵의 해상도가 높고 타일 단위가 192x192로 큰 편이어서 미세한 건물 배치가 어려울 수 있어, 초보자의 경우 어려움을 느낄 수 있다. 이 맵은 디펜스 유즈맵의 정석을 보여주는 작품으로, 단순한 방어 게임의 틀을 넘어서 전략적 깊이를 더한 점이 인상적이다. 각 단계마다 주어지는 제한된 자원으로 최적의 방어선을 구축해야 하며, 적의 패턴을 읽고 대응하는 능력이 요구된다. 특히 30단계에 걸쳐 진행되는 긴 플레이 시간 동안 지치지 않고 전략을 유지할 수 있는 인내심과 집중력이 필요하다. 초보자의 경우 처음 몇 단계는 무난하게 클리어할 수 있지만, 후반부로 갈수록 방어 난이도가 급격히 상승하기 때문에 꾸준한 연습과 팀원 간의 협력이 필수적이다. 디펜스 게임을 좋아하는 유저라면 한번쯤 도전해 볼 만한 작품이다. This classic StarCraft: Brood War defense custom map, <Lurker Defense On Your Own!2.0>, challenges players to hold the line against relentless waves of enemy units across 30 escalating stages. The map features a clear split between the player-controlled upper section and the enemy spawn zone below, connected by narrow chokepoints that force strategic engagements. Players must allocate limited resources to construct defensive structures like Sunken Colonies, Photon Cannons, and Missile Turrets while producing units to counter the onslaught of Zerg and Protoss forces. The map's hybrid defense system allows for both static defenses and active unit production, adding depth to the strategy required. A standout feature of this map is its progressive difficulty, where early stages are dominated by cost-effective units like Zerglings and Hydralisks, but later stages introduce elite units such as Carriers, Devourers, and Ultralisks, demanding precise micro-management and adaptive tactics. While the map's image doesn't reveal specific triggers or unique mechanics, internal descriptions suggest that certain stages may unlock special units or buffs, adding unpredictability to the challenge. The shared defensive chokepoint in the center of the map encourages coordination among the seven players, each controlling independent mineral and gas resources, making teamwork a critical factor in survival. Visually, the map utilizes the Twilight tileset with a high resolution of 6144x6144, providing a clean and immersive aesthetic, though the large tile size (192x192) can make fine adjustments to building placements tricky for newcomers. The gameplay revolves around narrow corridors and concentrated battles, typical of defense maps, but the map's hybrid nature—combining resource management, unit production, and strategic positioning—sets it apart from simpler tower defense variants. Players must balance immediate threats with long-term planning, as poor early-game decisions can cascade into failure in later stages. Ideal for defense map enthusiasts, <Lurker Defense On Your Own!2.0> offers a rewarding experience for those who enjoy strategic depth and escalating challenges. While the early stages are accessible, the later levels demand sharp reflexes, adaptive strategies, and strong team coordination. The map's longevity is evident in its 30-stage structure, which tests both patience and tactical acumen. For players seeking a robust defense experience that goes beyond basic tower placement, this map delivers a compelling and engaging challenge.
하이브리드 디펜스: 천국과 지옥의 전투 (Heaven's Last Defense G)
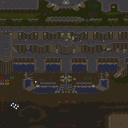
하이브리드 디펜스 장르로 renowned된 ‘Heaven’s Last Defense G’는 전설적인 Heaven vs Hell 대전을 재현한 유즈맵이다. 맵은 사막 타일셋으로 구성되어 있으며, 4096x4096의 거대한 공간에서 진행된다. 디자인 측면에서 ‘Heaven’s Last Defense G’는 전형적인 디펜스 맵의 구조를 따르지만, 유닛 배치와 트리거가 조화를 이룬다. 크게 천국 측과 지옥 측으로 나뉘어 각각의 유닛이 상대방 넥서스를 파괴하는 것이 목표로 추정된다. 맵의 중앙부는 넓은 평지 형태이며, 양측에는 각각의 본진과 방어 시설이 배치되어 있는 것이 보인다. 맵 상단과 하단에는 미네랄과 가스가 배치되어 자원 수급이 가능한 구조로 보인다. 특히, 중앙부에 위치한 넓은 공간은 대규모 전투가 벌어질 수 있는 전장 역할을 한다. 맵의 난이도는 초중반에는 비교적 단순하게 느껴지지만, 후반부로 갈수록 유닛의 조합과 배치, 그리고 상대방의 전략에 따라 난이도가 급격히 상승할 가능성이 있다. 플레이어는 각자 맡은 역할을 충실히 수행해야 하며, 특히 방어 라인을 지키는 데 주력해야 한다. 맵의 특징 중 하나는 ‘Heaven’s Last Defense Godly’라는 파일명에서 알 수 있듯이, 이전 버전에서 발생했던 밸런스 문제를 개선한 버전이라는 점이다. 내부 맵 설명에 따르면, 이전 버전들은 밸런스가 맞지 않는 경우가 많았으며, 제작자는 이를 개선하기 위해 직접 플레이하며 피드백을 반영했다고 한다. 하지만, 여전히 맵의 밸런스는 유저의 플레이 스타일에 따라 크게 좌우될 수 있어, 새로운 플레이어는 여러 번의 플레이를 통해 맵의 특성과 전략을 익히는 것이 중요하다. 이 맵은 디펜스 장르를 좋아하는 유저들에게는 색다른 경험을 제공할 수 있으며, 특히 대규모 전투와 전략적 플레이를 즐기는 유저들에게 추천할 만하다. 다만, 맵의 규모가 크고 복잡한 구조를 가지고 있어, 초보 유저는 접근성이 떨어질 수 있다. 따라서, 디펜스 맵에 익숙한 유저나 전략적 사고를 즐기는 유저들이 플레이하기에 적합하다. 맵을 플레이하기 전에는 각 팀의 유닛 구성과 배치, 그리고 주요 방어 지점을 미리 숙지하는 것이 좋다. 또한, 맵의 밸런스를 고려하여, 천국 측과 지옥 측의 유닛 밸런스를 맞춰주는 것도 중요하다. 맵의 분위기는 신화적이고 영적인 요소로 가득 차 있어, 플레이어에게 특별한 몰입감을 제공한다. 사막 타일셋과 조화된 디자인은 맵의 분위기를 한층 더 돋보이게 한다. 이 맵을 통해 디펜스 장르의 새로운 경험을 해보고자 한다면, 충분한 준비와 전략을 갖추고 도전해 볼 것을 권장한다. 맵의 규모와 복잡한 구조는 마치 거대한 전쟁터를 방불케 하며, 플레이어는 그 전쟁터의 지휘관으로 변신하게 될 것이다. 특히, 팀 플레이를 중시하는 유저라면, 팀원과의 원활한 소통과 협력이 필수적이다. 맵의 특징을 충분히 이해하고, 각자의 역할을 다하는 것이 승리를 위한 지름길이 될 것이다. 이 맵은 단순한 디펜스 맵을 넘어서, 전략과 협력의 중요성을 강조하는 유즈맵으로 자리매김할 수 있을 것이다. 특히, 대규모 전투와 긴장감 있는 순간들이 플레이어에게 강한 인상을 남길 것이다. 디펜스 맵을 любить한다면, 이 맵은 반드시 플레이해 봐야 할 작품 중 하나이다. 맵의 구조와 디자인은 물론, 플레이어의 전략적 사고를 자극하는 요소들이 가득하기 때문이다. 새로운 도전을 원한다면, 이 맵을 플레이해 보길 바란다. 새로운 전략과 전술을 발견하는 재미가 이 맵의 큰 매력 중 하나다. 특히, 다양한 유닛과 방어 시설의 조합을 통해, 플레이어는 끊임없는 변수와 전략적 선택을 경험할 수 있을 것이다. 이 맵은 디펜스 장르의 한계를 넘어서는 새로운 경험을 제공할 것이다. 마지막으로, 맵의 밸런스와 플레이어의 실력이 맞물려 새로운 재미를 창출할 수 있는 유즈맵으로, 많은 유저들에게 사랑받을 것으로 기대된다. 특히, 디펜스 맵의 팬이라면 이 맵을 놓치지 말고 플레이해 보길 바란다. 새로운 전략적 깊이를 느낄 수 있을 것이다. ‘Heaven’s Last Defense G’ is a renowned hybrid defense map that recreates the legendary Heaven vs Hell battle. The map features a desert tileset and unfolds across a massive 4096x4096 space. While it follows the structure of a classic defense map, its unit placements and triggers are finely balanced. The map is divided into Heaven and Hell sides, each aiming to destroy the opponent’s nexus. The central area is a wide plain, with each side’s base and defensive structures positioned nearby. Mineral and gas deposits at the top and bottom allow for resource gathering. The expansive central space serves as a battlefield where large-scale combat can erupt. Though the early and mid-game may feel straightforward, difficulty escalates sharply in the late game based on unit compositions, placements, and opponent strategies. Players must fulfill their roles diligently, with a strong focus on defending their lines. As suggested by the filename ‘Heaven’s Last Defense Godly,’ this version addresses balance issues from previous iterations. According to internal notes, earlier versions often suffered from imbalances, which the creator refined through extensive playtesting and feedback. However, balance still depends heavily on player style, so newcomers should experiment repeatedly to grasp the map’s mechanics and strategies. Ideal for defense genre enthusiasts, especially those who enjoy large-scale battles and strategic depth, this map may pose accessibility challenges for beginners due to its scale and complexity. Thus, it’s best suited for experienced defense players or those who relish tactical thinking. Before playing, familiarize yourself with each team’s unit compositions, placements, and key defensive points. Balancing unit distributions between Heaven and Hell sides is also crucial for maintaining fairness. The map’s mythical and spiritual atmosphere immerses players, enhanced by its desert-themed design. For those seeking a fresh defense experience, approach this map with preparation and strategy. Its vast, intricate layout evokes a sprawling battlefield, transforming players into commanders. Teamwork is essential, requiring clear communication and cooperation among teammates. Mastering the map’s features and fulfilling individual roles paves the way to victory. Beyond a simple defense map, this custom map emphasizes the importance of strategy and collaboration. Its large-scale battles and tense moments leave a lasting impression. A must-play for defense genre fans, the map’s structure, design, and strategic depth make it a standout title. For those craving new challenges, ‘Heaven’s Last Defense G’ delivers fresh tactics and discoveries. The interplay of diverse units and defensive structures offers endless variables and strategic choices, pushing the boundaries of the defense genre. Its balanced design and player skill create dynamic, engaging gameplay, promising widespread appeal—especially among defense map enthusiasts who won’t want to miss it.
Cat'nMiceUnderground/w tunnels
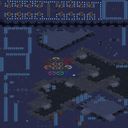
스타크래프트 브루드워의 숨은 명작 유즈맵으로 꼽히는 <Cat'nMiceUnderground/w tunnels>은 플레이어들이 쥐와 고양이의 입장에서 전략적으로 대결하는 디펜스 장르의 정수를 보여주는 맵입니다. 맵 중앙에 위치한 복잡한 터널 시스템과 지형의 굴곡이 특징으로, 고양이(플레이어)는 쥐(컴퓨터 AI)를 사냥하는 동시에 터널을 통제해야 합니다. 특히 터널의 입구와 출구가 여러 층으로 얽혀 있어 시야 확보와 길막 전략이 핵심인데, 쥐가 터널을 통해 끊임없이 이동하면서 플레이어의 시야 밖에서 공격을 감행하기 때문에 긴장감이 지속됩니다. 초보자들은 터널의 구조를 파악하는 데 어려움을 겪을 수 있지만, 익숙해지면 쥐의 이동 패턴을 예측하고 효율적으로 사냥하는 재미를 느낄 수 있습니다. 이 맵의 가장 큰 특징은 맵의 밀도와 복잡성입니다. 화산 테마의 어두운 분위기와 굴곡진 지형이 쥐와 고양이의 숨바꼭질 같은 대결을 한층 더 흥미롭게 만듭니다. 플레이어는 제한된 시야 속에서 쥐를 쫓아다니며 터널을 점령하거나, 반대로 쥐는 터널을 이용해 도망치는 등 다양한 전략을 구사할 수 있습니다. 또한, 쥐가 터널을 통해 끊임없이 스폰되고 이동하기 때문에 맵의 Here and There(여기저기) 구조가 플레이어의 집중력을 요구합니다. 맵의 난이도는 보통 수준으로, 터널의 구조를 이해하고 쥐의 움직임을 예측하는 능력이 중요합니다. 특히, 쥐가 터널을 통해 대량으로 스폰되는 구간에서는 신속한 대응이 필요해 초보자에게는 다소 어려울 수 있습니다. 이 맵은 7명이 플레이할 수 있도록 설계되었지만, 실제로는 1~4명이 플레이하는 경우가 많습니다. 이유는 쥐를 담당하는 AI가 다수의 플레이어를 상대할 수 있도록 최적화되어 있기 때문입니다. 또한, 맵의 특성상 혼자 플레이하는 것도 가능하지만, 팀 플레이를 통해 쥐를 사냥하는 효율성을 높일 수 있습니다. 맵의 플레이 시간은 약 20~40분 정도로 예상되지만, 쥐의 스폰 빈도와 플레이어의 전략에 따라 크게 달라질 수 있습니다. 이 맵은 디펜스와 사냥의 조합을 경험하고자 하는 플레이어들에게 특히 추천되며,Mouse Hunting'이라는 장르의 정수를 느낄 수 있는 명작으로 손꼽힙니다. Cat'nMiceUnderground/w tunnels is a hidden gem among StarCraft: Brood War custom maps, offering a thrilling defense experience where players take on the role of cats hunting mice in a strategically designed underground tunnel system. The map's defining feature is its intricate network of tunnels, with multiple entry and exit points layered across different elevations. This complexity forces players to master line-of-sight control and choke point management, as mice constantly infiltrate through unseen tunnel routes. Beginners may struggle initially with the map's dense fog-of-war and maze-like structure, but once familiar, the challenge shifts to predicting mouse movement patterns and executing efficient hunts. The map's volcanic-themed terrain with jagged cliffs and dark passages enhances the cat-and-mouse dynamic, creating an immersive atmosphere of stealth and pursuit. Players must balance hunting mice with controlling tunnel access, while mice continuously spawn and scatter through the labyrinth to evade capture. The difficulty is moderate—requiring spatial awareness and quick decision-making—but the reward lies in the satisfying strategy of outmaneuvering AI-controlled mice in a dynamic environment. Solo play is viable, though team coordination significantly improves efficiency when dealing with clustered mouse spawns. Designed for up to 7 players, the map often works best with 1-4 participants due to the AI's optimized behavior against multiple hunters. Playtime ranges from 20 to 40 minutes, depending on mouse spawn rates and player tactics. This map is ideal for fans of hybrid defense-hunting mechanics, offering a fresh take on the classic 'Mouse Hunting' genre. Its blend of strategy, tension, and replayability makes it a must-try for custom map enthusiasts seeking depth beyond conventional defense titles.
최근 등록된 맵
새로 추가된 파일과 버전을 확인하세요.
스타게이트 갤럭시 (Stargate Galaxy mod)
스타크래프트 브루드워의 유즈맵 중에서도 독특한 세계관을 구축한 작품으로, <스타게이트 갤럭시>는 스타트렉 아마다와 스타게이트 디플로메시의 요소를 결합한 하이브리드 디펜스 맵이다. 이 맵은 플레이어가 우주 공간에서 다양한 스타게이트 종족의 함선과 건물을 조종하며 외계 세력의 침공을 방어하는 구조로 구성되어 있다. 맵 중앙의 거대한 우주 공간에는 플레이어의 기지가 위치하며, 주변으로 몰려드는 적의 웨이브를 막아내야 한다. 적군은 랜덤한 위치에서 끊임없이 등장하며, 각 웨이브마다 난이도가 점차 상승하는 특징을 보인다. 특히 우주 배경에 맞는 스타크래프트의 특수 유닛과 건물이 배치되어 있어, 우주전을 체험할 수 있는 몰입감을 제공한다. 맵의 특징 중 하나는 스타게이트 시리즈의 팬들을 위해 제작되었다는 점으로, 맵 곳곳에 스타게이트 프랜차이즈의 요소들이 숨겨져 있어 팬이라면 더욱 즐겁게 플레이할 수 있을 것이다. 또한 맵 제작자의 공지를 통해 알 수 있듯이, 무단 수정을 금지하고 있어 원작의 품질을 유지하려는 노력이 엿보인다. 플레이어는 초반에 주어진 자원으로 기지를 확충하며, 적의 공격 패턴을 분석해가며 방어 전략을 세우는 것이 중요하다. 웨이브 디펜스 장르의 특성상 긴장감과 성취감을 동시에 느낄 수 있는 맵으로, 우주 SF 팬과 디펜스 게임을 좋아하는 플레이어 모두에게 추천할 만하다. 다만, 7인 플레이는 팀워크가 중요하므로 팀원과의 원활한 소통이 필요할 것이다. 또한, 맵의 난이도가 높은 편이므로 초보자는 어려움을 느낄 수 있으니, 난이도를 낮춘 버전이나 튜토리얼을 먼저 플레이해보는 것도 좋다. 맵의 전체적인 균형과 디자인 면에서는 스타크래프트의 우주 맵 디자인에 익숙한 플레이어라면 금방 적응할 수 있을 것이다. 마지막으로, 맵의 규모가 크고 복잡하기 때문에 맵 에디터를 통해 미리 구조를 파악해두면 플레이에 큰 도움이 된다. 우주 공간의 웅장함과 together with the progressive difficulty of enemy waves, this map offers a unique challenge that keeps players engaged throughout the session. The inclusion of StarGate-themed units and structures enhances the thematic experience, making it a standout choice for fans of sci-fi defense games. Among the custom maps of *StarCraft: Brood War*, *StarGate Galaxy* stands out for its unique worldbuilding, blending elements from *Star Trek Armada* and *StarGate: Diplomacy* into a hybrid defense map. Players take command of fleets and structures from various StarGate factions, defending their base in the vast expanse of space against relentless alien invasions. The map centers around a massive cosmic battlefield where your base must withstand waves of enemies spawning randomly from all directions, with each successive assault growing progressively more challenging. The inclusion of specialized units and buildings tailored to the space setting immerses players in a true sci-fi warfare experience. What makes this map particularly noteworthy is its dedication to StarGate fans—subtle references and Easter eggs from the franchise are scattered throughout, rewarding those familiar with the series with extra layers of enjoyment. The map’s creator has also enforced strict no-modification rules, ensuring the original vision remains intact. Early gameplay revolves around expanding your base with limited starting resources while analyzing enemy attack patterns to refine your defense strategy. As a wave-based defense title, it balances tension and satisfaction, making it ideal for both sci-fi enthusiasts and defense game lovers. However, seven-player mode demands strong teamwork, so clear communication with teammates is essential. The map’s difficulty may also pose a challenge for newcomers, so beginners might benefit from trying a lower-difficulty version or a tutorial first. Those already familiar with StarCraft’s space maps will find the mechanics and layout intuitive. Given its scale and complexity, reviewing the map layout in the editor beforehand can significantly improve your performance. With its grand space vistas and escalating enemy threats, *StarGate Galaxy* delivers a compelling challenge that keeps players hooked from start to finish. The fusion of StarGate’s iconic aesthetic with strategic depth makes it a must-try for fans of sci-fi defense games.
Cat'nMiceUnderground/w tunnels
스타크래프트 브루드워의 숨은 명작 유즈맵으로 꼽히는 <Cat'nMiceUnderground/w tunnels>은 플레이어들이 쥐와 고양이의 입장에서 전략적으로 대결하는 디펜스 장르의 정수를 보여주는 맵입니다. 맵 중앙에 위치한 복잡한 터널 시스템과 지형의 굴곡이 특징으로, 고양이(플레이어)는 쥐(컴퓨터 AI)를 사냥하는 동시에 터널을 통제해야 합니다. 특히 터널의 입구와 출구가 여러 층으로 얽혀 있어 시야 확보와 길막 전략이 핵심인데, 쥐가 터널을 통해 끊임없이 이동하면서 플레이어의 시야 밖에서 공격을 감행하기 때문에 긴장감이 지속됩니다. 초보자들은 터널의 구조를 파악하는 데 어려움을 겪을 수 있지만, 익숙해지면 쥐의 이동 패턴을 예측하고 효율적으로 사냥하는 재미를 느낄 수 있습니다. 이 맵의 가장 큰 특징은 맵의 밀도와 복잡성입니다. 화산 테마의 어두운 분위기와 굴곡진 지형이 쥐와 고양이의 숨바꼭질 같은 대결을 한층 더 흥미롭게 만듭니다. 플레이어는 제한된 시야 속에서 쥐를 쫓아다니며 터널을 점령하거나, 반대로 쥐는 터널을 이용해 도망치는 등 다양한 전략을 구사할 수 있습니다. 또한, 쥐가 터널을 통해 끊임없이 스폰되고 이동하기 때문에 맵의 Here and There(여기저기) 구조가 플레이어의 집중력을 요구합니다. 맵의 난이도는 보통 수준으로, 터널의 구조를 이해하고 쥐의 움직임을 예측하는 능력이 중요합니다. 특히, 쥐가 터널을 통해 대량으로 스폰되는 구간에서는 신속한 대응이 필요해 초보자에게는 다소 어려울 수 있습니다. 이 맵은 7명이 플레이할 수 있도록 설계되었지만, 실제로는 1~4명이 플레이하는 경우가 많습니다. 이유는 쥐를 담당하는 AI가 다수의 플레이어를 상대할 수 있도록 최적화되어 있기 때문입니다. 또한, 맵의 특성상 혼자 플레이하는 것도 가능하지만, 팀 플레이를 통해 쥐를 사냥하는 효율성을 높일 수 있습니다. 맵의 플레이 시간은 약 20~40분 정도로 예상되지만, 쥐의 스폰 빈도와 플레이어의 전략에 따라 크게 달라질 수 있습니다. 이 맵은 디펜스와 사냥의 조합을 경험하고자 하는 플레이어들에게 특히 추천되며,Mouse Hunting'이라는 장르의 정수를 느낄 수 있는 명작으로 손꼽힙니다. Cat'nMiceUnderground/w tunnels is a hidden gem among StarCraft: Brood War custom maps, offering a thrilling defense experience where players take on the role of cats hunting mice in a strategically designed underground tunnel system. The map's defining feature is its intricate network of tunnels, with multiple entry and exit points layered across different elevations. This complexity forces players to master line-of-sight control and choke point management, as mice constantly infiltrate through unseen tunnel routes. Beginners may struggle initially with the map's dense fog-of-war and maze-like structure, but once familiar, the challenge shifts to predicting mouse movement patterns and executing efficient hunts. The map's volcanic-themed terrain with jagged cliffs and dark passages enhances the cat-and-mouse dynamic, creating an immersive atmosphere of stealth and pursuit. Players must balance hunting mice with controlling tunnel access, while mice continuously spawn and scatter through the labyrinth to evade capture. The difficulty is moderate—requiring spatial awareness and quick decision-making—but the reward lies in the satisfying strategy of outmaneuvering AI-controlled mice in a dynamic environment. Solo play is viable, though team coordination significantly improves efficiency when dealing with clustered mouse spawns. Designed for up to 7 players, the map often works best with 1-4 participants due to the AI's optimized behavior against multiple hunters. Playtime ranges from 20 to 40 minutes, depending on mouse spawn rates and player tactics. This map is ideal for fans of hybrid defense-hunting mechanics, offering a fresh take on the classic 'Mouse Hunting' genre. Its blend of strategy, tension, and replayability makes it a must-try for custom map enthusiasts seeking depth beyond conventional defense titles.
Lurker Defense On Your Own!2.0 (라커 디펜스 온 유어 오운! 2.0)
스타크래프트 브루드워의 대표적인 디펜스 유즈맵인 <Lurker Defense On Your Own!2.0>는 30단계에 걸쳐 끊임없이 몰려오는 적 유닛을 방어하는 하이브리드 디펜스 게임이다. 맵 이미지 상단은 방어 진영, 하단은 적의 시작 지점으로 확인되며, 중앙의 좁은 길목을 중심으로 리버, 캐리어, 스카웃 등 강력한 공중 유닛과 지상 유닛들이 끊임없이 진격해 온다. 플레이어는 각 단계마다 주어지는 제한된 자원으로 방어 건물을 배치하고, 유닛을 생산해 적을 저지해야 한다. 특히 저글링, 히드라리스크, 뮤탈리스크 같은 저렴하고 빠른 유닛들이 다수 등장해 초반 방어선을 무너뜨리기 쉽기 때문에 신중한 자원 관리와 배치 전략이 요구된다. 이 맵의 가장 큰 특징은 단계별로 점점 강화되는 적의 조합과 패턴이다. 초반에는 저글링과 히드라가 주를 이루지만, 후반부로 갈수록 캐리어, 디바우러, 울트라리스크 같은 고급 유닛들이 등장해 방어 난이도가 급격히 상승한다. 또한 특정 단계에서는 특수 유닛이나 버프가 주어지기도 하는데, 이는 맵 이미지에서 확인하기 어려운 부분이지만 게임 내 트리거로 구현된 것으로 추정된다. 방어 건물로는 성큰 콜로니, 포톤 캐논, 터렛, 미사일 터렛을 사용할 수 있으며, 각 건물이 가진 특성과 사정거리를 고려해 배치해야 한다. 플레이어는 7명의 인원으로 구성되며, 각자 독립된 미네랄과 가스 자원을 보유하고 있다. 하지만 중앙의 주요 방어 지점은 공유하기 때문에 팀원 간의 협력이 필수적이다. 자원의 분배와 건물 배치, 유닛 생산 타이밍을 조율하지 않으면 특정 단계에서 방어에 실패할 가능성이 크다. 맵의 전체 크기가 6144x6144로 넓고 황혼 타일셋을 사용해 시각적으로도 깔끔한 디자인을 자랑하지만, 디펜스 게임의 특성상 좁은 길목에 집중된 전투가 대부분이다. 또한 맵의 해상도가 높고 타일 단위가 192x192로 큰 편이어서 미세한 건물 배치가 어려울 수 있어, 초보자의 경우 어려움을 느낄 수 있다. 이 맵은 디펜스 유즈맵의 정석을 보여주는 작품으로, 단순한 방어 게임의 틀을 넘어서 전략적 깊이를 더한 점이 인상적이다. 각 단계마다 주어지는 제한된 자원으로 최적의 방어선을 구축해야 하며, 적의 패턴을 읽고 대응하는 능력이 요구된다. 특히 30단계에 걸쳐 진행되는 긴 플레이 시간 동안 지치지 않고 전략을 유지할 수 있는 인내심과 집중력이 필요하다. 초보자의 경우 처음 몇 단계는 무난하게 클리어할 수 있지만, 후반부로 갈수록 방어 난이도가 급격히 상승하기 때문에 꾸준한 연습과 팀원 간의 협력이 필수적이다. 디펜스 게임을 좋아하는 유저라면 한번쯤 도전해 볼 만한 작품이다. This classic StarCraft: Brood War defense custom map, <Lurker Defense On Your Own!2.0>, challenges players to hold the line against relentless waves of enemy units across 30 escalating stages. The map features a clear split between the player-controlled upper section and the enemy spawn zone below, connected by narrow chokepoints that force strategic engagements. Players must allocate limited resources to construct defensive structures like Sunken Colonies, Photon Cannons, and Missile Turrets while producing units to counter the onslaught of Zerg and Protoss forces. The map's hybrid defense system allows for both static defenses and active unit production, adding depth to the strategy required. A standout feature of this map is its progressive difficulty, where early stages are dominated by cost-effective units like Zerglings and Hydralisks, but later stages introduce elite units such as Carriers, Devourers, and Ultralisks, demanding precise micro-management and adaptive tactics. While the map's image doesn't reveal specific triggers or unique mechanics, internal descriptions suggest that certain stages may unlock special units or buffs, adding unpredictability to the challenge. The shared defensive chokepoint in the center of the map encourages coordination among the seven players, each controlling independent mineral and gas resources, making teamwork a critical factor in survival. Visually, the map utilizes the Twilight tileset with a high resolution of 6144x6144, providing a clean and immersive aesthetic, though the large tile size (192x192) can make fine adjustments to building placements tricky for newcomers. The gameplay revolves around narrow corridors and concentrated battles, typical of defense maps, but the map's hybrid nature—combining resource management, unit production, and strategic positioning—sets it apart from simpler tower defense variants. Players must balance immediate threats with long-term planning, as poor early-game decisions can cascade into failure in later stages. Ideal for defense map enthusiasts, <Lurker Defense On Your Own!2.0> offers a rewarding experience for those who enjoy strategic depth and escalating challenges. While the early stages are accessible, the later levels demand sharp reflexes, adaptive strategies, and strong team coordination. The map's longevity is evident in its 30-stage structure, which tests both patience and tactical acumen. For players seeking a robust defense experience that goes beyond basic tower placement, this map delivers a compelling and engaging challenge.
하이브리드 디펜스: 천국과 지옥의 전투 (Heaven's Last Defense G)
하이브리드 디펜스 장르로 renowned된 ‘Heaven’s Last Defense G’는 전설적인 Heaven vs Hell 대전을 재현한 유즈맵이다. 맵은 사막 타일셋으로 구성되어 있으며, 4096x4096의 거대한 공간에서 진행된다. 디자인 측면에서 ‘Heaven’s Last Defense G’는 전형적인 디펜스 맵의 구조를 따르지만, 유닛 배치와 트리거가 조화를 이룬다. 크게 천국 측과 지옥 측으로 나뉘어 각각의 유닛이 상대방 넥서스를 파괴하는 것이 목표로 추정된다. 맵의 중앙부는 넓은 평지 형태이며, 양측에는 각각의 본진과 방어 시설이 배치되어 있는 것이 보인다. 맵 상단과 하단에는 미네랄과 가스가 배치되어 자원 수급이 가능한 구조로 보인다. 특히, 중앙부에 위치한 넓은 공간은 대규모 전투가 벌어질 수 있는 전장 역할을 한다. 맵의 난이도는 초중반에는 비교적 단순하게 느껴지지만, 후반부로 갈수록 유닛의 조합과 배치, 그리고 상대방의 전략에 따라 난이도가 급격히 상승할 가능성이 있다. 플레이어는 각자 맡은 역할을 충실히 수행해야 하며, 특히 방어 라인을 지키는 데 주력해야 한다. 맵의 특징 중 하나는 ‘Heaven’s Last Defense Godly’라는 파일명에서 알 수 있듯이, 이전 버전에서 발생했던 밸런스 문제를 개선한 버전이라는 점이다. 내부 맵 설명에 따르면, 이전 버전들은 밸런스가 맞지 않는 경우가 많았으며, 제작자는 이를 개선하기 위해 직접 플레이하며 피드백을 반영했다고 한다. 하지만, 여전히 맵의 밸런스는 유저의 플레이 스타일에 따라 크게 좌우될 수 있어, 새로운 플레이어는 여러 번의 플레이를 통해 맵의 특성과 전략을 익히는 것이 중요하다. 이 맵은 디펜스 장르를 좋아하는 유저들에게는 색다른 경험을 제공할 수 있으며, 특히 대규모 전투와 전략적 플레이를 즐기는 유저들에게 추천할 만하다. 다만, 맵의 규모가 크고 복잡한 구조를 가지고 있어, 초보 유저는 접근성이 떨어질 수 있다. 따라서, 디펜스 맵에 익숙한 유저나 전략적 사고를 즐기는 유저들이 플레이하기에 적합하다. 맵을 플레이하기 전에는 각 팀의 유닛 구성과 배치, 그리고 주요 방어 지점을 미리 숙지하는 것이 좋다. 또한, 맵의 밸런스를 고려하여, 천국 측과 지옥 측의 유닛 밸런스를 맞춰주는 것도 중요하다. 맵의 분위기는 신화적이고 영적인 요소로 가득 차 있어, 플레이어에게 특별한 몰입감을 제공한다. 사막 타일셋과 조화된 디자인은 맵의 분위기를 한층 더 돋보이게 한다. 이 맵을 통해 디펜스 장르의 새로운 경험을 해보고자 한다면, 충분한 준비와 전략을 갖추고 도전해 볼 것을 권장한다. 맵의 규모와 복잡한 구조는 마치 거대한 전쟁터를 방불케 하며, 플레이어는 그 전쟁터의 지휘관으로 변신하게 될 것이다. 특히, 팀 플레이를 중시하는 유저라면, 팀원과의 원활한 소통과 협력이 필수적이다. 맵의 특징을 충분히 이해하고, 각자의 역할을 다하는 것이 승리를 위한 지름길이 될 것이다. 이 맵은 단순한 디펜스 맵을 넘어서, 전략과 협력의 중요성을 강조하는 유즈맵으로 자리매김할 수 있을 것이다. 특히, 대규모 전투와 긴장감 있는 순간들이 플레이어에게 강한 인상을 남길 것이다. 디펜스 맵을 любить한다면, 이 맵은 반드시 플레이해 봐야 할 작품 중 하나이다. 맵의 구조와 디자인은 물론, 플레이어의 전략적 사고를 자극하는 요소들이 가득하기 때문이다. 새로운 도전을 원한다면, 이 맵을 플레이해 보길 바란다. 새로운 전략과 전술을 발견하는 재미가 이 맵의 큰 매력 중 하나다. 특히, 다양한 유닛과 방어 시설의 조합을 통해, 플레이어는 끊임없는 변수와 전략적 선택을 경험할 수 있을 것이다. 이 맵은 디펜스 장르의 한계를 넘어서는 새로운 경험을 제공할 것이다. 마지막으로, 맵의 밸런스와 플레이어의 실력이 맞물려 새로운 재미를 창출할 수 있는 유즈맵으로, 많은 유저들에게 사랑받을 것으로 기대된다. 특히, 디펜스 맵의 팬이라면 이 맵을 놓치지 말고 플레이해 보길 바란다. 새로운 전략적 깊이를 느낄 수 있을 것이다. ‘Heaven’s Last Defense G’ is a renowned hybrid defense map that recreates the legendary Heaven vs Hell battle. The map features a desert tileset and unfolds across a massive 4096x4096 space. While it follows the structure of a classic defense map, its unit placements and triggers are finely balanced. The map is divided into Heaven and Hell sides, each aiming to destroy the opponent’s nexus. The central area is a wide plain, with each side’s base and defensive structures positioned nearby. Mineral and gas deposits at the top and bottom allow for resource gathering. The expansive central space serves as a battlefield where large-scale combat can erupt. Though the early and mid-game may feel straightforward, difficulty escalates sharply in the late game based on unit compositions, placements, and opponent strategies. Players must fulfill their roles diligently, with a strong focus on defending their lines. As suggested by the filename ‘Heaven’s Last Defense Godly,’ this version addresses balance issues from previous iterations. According to internal notes, earlier versions often suffered from imbalances, which the creator refined through extensive playtesting and feedback. However, balance still depends heavily on player style, so newcomers should experiment repeatedly to grasp the map’s mechanics and strategies. Ideal for defense genre enthusiasts, especially those who enjoy large-scale battles and strategic depth, this map may pose accessibility challenges for beginners due to its scale and complexity. Thus, it’s best suited for experienced defense players or those who relish tactical thinking. Before playing, familiarize yourself with each team’s unit compositions, placements, and key defensive points. Balancing unit distributions between Heaven and Hell sides is also crucial for maintaining fairness. The map’s mythical and spiritual atmosphere immerses players, enhanced by its desert-themed design. For those seeking a fresh defense experience, approach this map with preparation and strategy. Its vast, intricate layout evokes a sprawling battlefield, transforming players into commanders. Teamwork is essential, requiring clear communication and cooperation among teammates. Mastering the map’s features and fulfilling individual roles paves the way to victory. Beyond a simple defense map, this custom map emphasizes the importance of strategy and collaboration. Its large-scale battles and tense moments leave a lasting impression. A must-play for defense genre fans, the map’s structure, design, and strategic depth make it a standout title. For those craving new challenges, ‘Heaven’s Last Defense G’ delivers fresh tactics and discoveries. The interplay of diverse units and defensive structures offers endless variables and strategic choices, pushing the boundaries of the defense genre. Its balanced design and player skill create dynamic, engaging gameplay, promising widespread appeal—especially among defense map enthusiasts who won’t want to miss it.
맵 선택 가이드
태그는 맵의 핵심 특징을 빠르게 설명하지만 제작 버전마다 규칙이 다를 수 있습니다. 상세 설명에서 권장 인원, 난이도, 플레이 시간과 버전을 함께 확인한 뒤 다운로드하세요.