
하이브리드 스타크래프트 맵 모음
'하이브리드' 태그가 등록된 맵을 모았습니다. 장르 하나로 찾기 어려운 플레이 방식, 난이도와 특징을 중심으로 인기 맵과 최신 맵을 비교해 보세요.
- 등록 맵
- 21개
- 누적 다운로드
- 1
- 누적 조회
- 1,359
인기 맵
다운로드와 조회 반응이 높은 맵입니다.
스타 랜드 (Star Land)
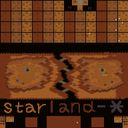
스타크래프트 브루드워의 유즈맵 〈☆ Star Land ☆〉는 ‘신전부수기 외전’이라는 부제를 달고 등장한 맵으로, 프로게이머를 육성하여 적을 제압하는 전투형 시나리오 맵이다. 맵은 6144x6144의 넓은 황혼 테마의 타일셋으로 구성되어 있으며, 중앙을 가로지르는 거대한 호수가 맵의 특징적인 지형으로 작용한다. 호수 주변에는 여러 개의 섬 형태의 지역이 배치되어 있고, 각 섬은 프로게이머를 키워내는 생산 기지 역할을 한다. 플레이어는 각 섬의 자원을 확보하고 건물을 건설하여 유닛을 생산한 뒤, 적 섬으로 진출해 신전을 파괴하는 것이 주요 목표로 보인다. 맵은 8인 대전이 가능한 구조로 설계되어 있으며, 각 플레이어는 시작 시 프로게이머로 추정되는 영웅 유닛을 보유하고 있는 것으로 보인다. 섬별로 자원 밸런스가 맞춰져 있는지는 명확하지 않지만, 섬의 구조상 초반 자원 확보가 중요할 것으로 예상된다. 중앙 호수는 지형적 장애물로 기능할 뿐만 아니라, 일부 섬은 호수 건너편으로만 연결되어 있어 전략적인 진격로를 제한하는 요소로 작용할 수 있다. 맵 상단의〈〉 기호와〈〉 기호로 표시된 구역은 아마도 시작 지역과 주요 건물을 배치할 수 있는 핵심 지역으로 추정된다. 플레이 방식은 프로게이머를 육성하는 키우기 요소와 적 섬의 신전을 파괴하는 전투 요소가 결합된 하이브리드 장르로 보인다. 프로게이머의 성장 여부가 승패를 좌우할 가능성이 높기 때문에, 자원 관리와 유닛 생산, 그리고 섬 간의 협공 및 방어 전략이 중요한 포인트가 될 것이다. 맵의 난이도는 제작자의 언급이 없지만, 섬 간의 이동이 제한적이고 중앙 호수가 장애물로 작용하기 때문에 초보자는 careful play가 요구될 것으로 보인다. 추천 대상은 스타크래프트 유즈맵을 즐기는 플레이어, 특히 시나리오와 키우기 요소가 결합된 맵을 선호하는 유저들에게 적합할 것으로 판단된다. 플레이 전에는 각 섬의 자원 분배와 프로게이머의 성장 curve, 그리고 신전 파괴에 필요한 조건을 미리 확인하는 것이 좋다. Star Land is a StarCraft: Brood War custom map titled "Sinjeon Buseogi Side Story: Star Land," where players train a pro-gamer unit to dominate enemies. The map features a vast 6144x6144 Twilight-themed terrain with a central lake dividing multiple island-like regions, each serving as a base for resource gathering and unit production. Players begin with a hero unit assumed to be a pro-gamer and must expand their base, secure resources, and launch attacks to destroy enemy temples. Designed for 8-player melee, the map emphasizes strategic movement due to the central lake acting as a natural barrier, forcing players to navigate around islands. Resource balance and early-game expansion are critical, as each island likely offers distinct advantages. The hybrid gameplay combines RPG-like unit growth with tower-defense and destruction mechanics, requiring players to balance defense, resource management, and offensive tactics. While the difficulty is unspecified, the map’s mechanics suggest it favors intermediate to advanced players who can adapt to terrain constraints and multi-island warfare. Recommended for custom map enthusiasts who enjoy scenario-driven or hybrid-style maps, Star Land offers a fresh take on pro-gamer training and territorial conquest. Players should scout island layouts early, assess resource distribution, and plan temple-destruction strategies to maximize their chances of victory.
네오 다크 오리진 2.1 (Neo Dark Origin 2.1)
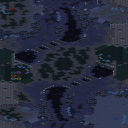
《Neo Dark Origin 2.1》은 스타크래프트: 브루드워의 밀리 맵으로, 프로토스와 저그의 하이브리드 테스트 베드라는 독특한 컨셉을 내세운 작품이다. 맵의 전체적인 분위기는 어두운 톤의 화산 지형으로 채워져 있으며, 중앙에 위치한 거대한 분화구가 주요 전투 공간으로 활용된다. 맵의 구조는 중앙 분화구를 중심으로 대칭형을 이루고 있어 양측 플레이어 간의 균등한 시작 조건을 제공한다. 테두리에는Resource 지역이 배치되어 있으며, 이곳에서 미네랄과 가스가 풍부하게 공급된다. 맵의 테마는 SF 호러에 가까운 분위기를 자아내며, 프로토스와 저그의 혼종 테스트라는 설정은 플레이어들에게 새로운 전투 경험을 제공한다. 전투는 주로 중앙 분화구 주변에서 벌어지며, 좁은 길목을 활용한 전략적 교전이 중요하다. 맵의 특징 중 하나는 psionic 에너지가 최소화되어 있다는 설정인데, 이는 프로토스의 스킬 사용에 제약을 가할 가능성이 있다. 또한, 가상 테스트 베드라는 설정은 맵의 스토리적 깊이를 더해 주지만, 실제 게임 플레이에서는 큰 영향을 미치지 않는다. 이 맵은 밀리 맵이지만 하이브리드 테스트라는 독특한 설정을 통해 다른 밀리 맵과는 차별화된 플레이 경험을 제공한다. 초보자와 숙련자 모두 즐길 수 있지만, 프로토스와 저그의 조합을 활용한 전략적 플레이가 요구된다. 특히,Resource 관리와 중앙 분화구에서의 전투 타이밍이 승패를 좌우할 수 있다. 플레이 전에는Resource 분포와 테두리 방어 구조를 미리 확인하고, 프로토스와 저그의 특성을 잘 이해한 상태에서 임하는 것이 좋다. 이 맵은 밀리 맵이지만, 그 설정과 구조는 유즈맵에 가까운 독특한 재미를 제공한다. 특히, 프로토스와 저그의 혼종 테스트라는 설정은 단순히 전투를 넘어 전략적 사고를 요하는 요소가 많다. 맵의 분위기와 구조는 SF 팬들에게 특히 매력적으로 다가갈 것이며, 다양한 전략을 시도해 볼 수 있는 공간으로 활용할 수 있다. 다만, psionic 에너지가 제한된다는 설정은 프로토스 플레이어에게는 다소 부담으로 다가올 수 있다. 《Neo Dark Origin 2.1》 is a StarCraft: Brood War melee map featuring a unique concept as a hybrid testing ground for Protoss and Zerg. The map is dominated by a dark-toned volcanic terrain, with a massive crater at its center serving as the primary battleground. Its symmetrical design around the central crater ensures balanced starting conditions for both players. Resource areas are placed along the edges, providing abundant mineral and gas supplies. The map’s theme evokes a sci-fi horror atmosphere, and the hybrid testing premise of Protoss and Zerg offers players a fresh combat experience. Most battles unfold around the central crater, where strategic engagements through narrow passages play a crucial role. One notable feature is the minimized psionic energy, which may restrict Protoss abilities. While the virtual testing ground adds narrative depth, it has little impact on actual gameplay. Though designed as a melee map, its hybrid testing concept sets it apart, delivering a distinct playstyle unlike other melee maps. Both beginners and veterans can enjoy it, but success requires leveraging the unique strengths of Protoss and Zerg. Resource management and timing in the central crater are key factors in determining victory. Before playing, it’s wise to check resource distribution and border defenses, and to familiarize yourself with the traits of Protoss and Zerg. While a melee map, its setting and structure offer a user-made map-like experience. The hybrid testing premise pushes players beyond simple combat, demanding deeper strategic thinking. Its atmosphere and layout will especially appeal to sci-fi fans, providing ample room for experimentation. However, the limited psionic energy could pose a challenge for Protoss players.
마운트 임파서블 2.5 (Mount Impossible 2.5)
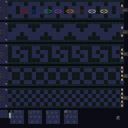
스타크래프트 브루드워의 유즈맵 시리즈로 유명한 〈마운트 임파서블〉의 최신 버전인 〈Mount Impossible 2.5.al〉은 7명의 플레이어가 함께 도전하는 하이브리드 디펜스와 서바이벌 장르의 맵입니다. 맵 이름은 'Mount Impossible'이라는 이름 그대로, 중앙에 위치한 거대한 산(또는 구조물)을 progressively 파괴해 나가며 마지막 스테이지를 클리어하는 것이 목표로 보입니다. 화산 타일셋을 기반으로 한 어두운 분위기의 맵은 게임의 긴장감을 한층 높이며, 다양한 스테이지와 난이도 변환을 통해 반전을 제공합니다. 플레이어들은 각자의 위치에서 시작해, 중앙의 목표물을 향해 끊임없이 몰려오는 적들을 방어하거나, 산을 무너뜨리는 데 필요한 자원을 확보하는 등 다채로운 플레이를 경험할 수 있습니다. 맵의 구조는 세로로 긴 형태를 띠고 있으며, 각 스테이지마다 새로운 기믹이나 적 패턴이 등장하여 플레이어의 적응력을 요구합니다. 특히, 후반부로 갈수록 적의 공격 패턴이 복잡해지고, 방어 구조물의 중요성이 커지므로 전략적 사고가 요구됩니다. 이 맵은 7인 플레이를 전제로 설계되어 있으며, 팀 플레이보다는 개인의 판단력과 협동이 중요한 요소로 작용합니다. 맵의 전체적인 분위기는dark fantasy 또는 sf와 같은 분위기를 연상시키며, 플레이어들에게 긴장감과 성취감을 동시에 제공할 것입니다. 초보자보다는 중급 이상의 플레이어에게 더 적합한 난이도를 가지고 있으며, 반복 플레이를 통해 새로운 전략을 세워볼 수 있는 요소도 포함되어 있습니다. 플레이 전에는 맵의 구조와 각 스테이지의 목표를 미리 숙지하고, 방어용 건물의 배치와 자원 관리에 신경을 쓰는 것이 중요합니다. 또한, 중앙의 목표물을 파괴하는 데 필요한 조건이나 트리거가 어떤 것인지 확인해 두면 게임 진행이 smoother할 것입니다. 맵의 긴장감과 흥미로운 전개로 인해, 스타크래프트 유즈맵의 팬이라면 한번쯤 도전해 볼 만한 가치가 있는 작품입니다. This StarCraft: Brood War custom map, Mount Impossible 2.5.al, is a hybrid defense and survival game designed for 7 players. The map's name, 'Mount Impossible,' hints at the core challenge: progressively destroying a large central mountain (or structure) across multiple stages to reach the final objective. Crafted with a volcanic tileset, the dark, foreboding atmosphere amplifies the tension, while varying stages and dynamic difficulty shifts introduce unexpected twists. Players begin in distinct starting positions, tasked with either defending against relentless waves of enemies or securing resources to dismantle the mountain. The map's vertical layout ensures a compact yet strategic space where each stage introduces new mechanics or enemy patterns, demanding adaptability and quick decision-making from players. As the game progresses, enemy attacks grow more complex, and the role of defensive structures becomes critical, rewarding foresight and coordination. Built for 7-player matches, the map emphasizes individual judgment and teamwork over rigid team roles. The aesthetic leans into a dark fantasy or sci-fi vibe, immersing players in a world where strategy and perseverance are key. While approachable for intermediate players, its challenge curve makes it less ideal for absolute beginners, though replayability is high thanks to evolving strategies and hidden mechanics. Before playing, familiarize yourself with the map's layout and each stage's objectives, paying close attention to where defensive structures and resources are placed. Understanding the conditions required to destroy the central objective will streamline your progress. With its gripping tension and layered gameplay, Mount Impossible 2.5.al is a must-try for StarCraft custom map enthusiasts seeking a fresh yet familiar challenge.
마이크로 스플래시 디펜스 (Micro Splash Defence)
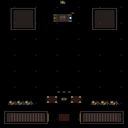
마이크로 스플래시 디펜스(Micro Splash Defence)는 아레나 스타일의 근접 전투와 스플래시 데미지를 활용한 디펜스 요소를 결합한 하이브리드 유즈맵이다. 정글 타일셋 위에 3072x4096 크기로 구성된 전장은 6인 플레이를 기준으로 하며, 파일명에 표기된 1.0 버전이 배포된 것으로 보인다. 맵 설명에 따르면 '마이크로 아레나와 스플래시 디펜스의 혼합'을 표방하는데, 이는 유닛 컨트롤 중심의 아레나 대전과 특정 구역이나 오브젝트를 지키며 몰려오는 적을 처리하는 디펜스 진행이 동시에 요구됨을 의미한다. 플레이어는 제한된 자원과 유닛으로 웨이브 단위 공세를 막아내면서 동시에 타 플레이어와 생존 경쟁을 벌이거나 협력 구도를 형성하게 된다. 스플래시 데미지를 보유한 유닛이나 스킬이 핵심 변수로 작용하므로, 뭉쳐서 이동하는 적 무리를 효율적으로 제압하는 범위 공격 운영과 개별 유닛의 정교한 마이크로 컨트롤이 승부를 가른다. 정글 지형의 시야 제한과 지형지물을 활용한 진형 짜기, 어그로 분산, 집중 포화 타이밍 등이 실시간 판단력으로 이어진다. 6인 기준이라 인원이 모자랄 경우 난이도가 급격히 상승할 수 있으며, 팀 수나 승리 조건이 별도 표기되지 않아 FFA 형태이거나 생존자 1인이 남을 때까지 진행되는 라스트맨 스탠딩 방식일 가능성이 높다. 입문자는 스플래시 범위와 쿨타임, 유닛 상성을 먼저 익히고, 숙련자는 다중 웨이브 동시 처리와 타 플레이어 견제 사이의 밸런스를 조율하는 고단수 운영이 요구된다. 마이크로 컨트롤 연습과 디펜스 감각을 동시에 기르고 싶은 유저, 짧은 호흡 안에 긴장감 있는 판단을 반복하고 싶은 유저에게 적합하다. 플레이 전에는 버전별 밸런스 패치 내역, 트리거 작동 방식, 웨이브 구성표, 유닛 업그레이드 트리 유무를 확인하면 초반 시행착오를 줄일 수 있다. Micro Splash Defence is a hybrid UMS map that blends arena-style close-quarters combat with splash-damage-based defense mechanics. Built on the Jungle tileset at 3072x4096, the map supports six players and appears to have been released as version 1.0 according to the filename. The description calls it a mix of 'Micro Arena and Splash Defence,' meaning players must simultaneously manage precise unit control typical of arena duels and hold positions or objectives against incoming waves characteristic of defense maps. Splash-damage units or abilities become the pivotal variable, so efficient area-of-effect targeting against clustered enemies and fine micro-management of individual units decide the outcome. Jungle terrain limits vision and creates chokepoints, encouraging formation play, aggro distribution, and timed focus fire. With six players expected, missing participants can spike difficulty sharply; team count and victory conditions are not explicitly listed, so a free-for-all or last-man-standing structure is likely. Beginners should first learn splash ranges, cooldowns, and unit matchups, while veterans must balance multi-wave clearing with pressure on other players. The map suits users who want to practice micro control and defense sense together, and who enjoy repeated high-tension decision-making in short sessions. Before playing, checking version-specific balance notes, trigger logic, wave composition tables, and upgrade trees will reduce early trial-and-error.
네크서스 디스트로이어 익스트림 카오스 (Nexus Destroyers Xtreme Chaos)
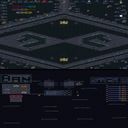
스타크래프트 브루드워의 유즈맵인 <네크서스 디스트로이어 익스트림 카오스>는 8명의 플레이어가 한꺼번에 즐길 수 있는 대규모 디펜스+밀리 하이브리드 장르의 맵이다. 맵의 메인 목표는 상대방의 넥서스를 파괴하는 동시에 자신의 넥서스를 지키며, 이를 위해 지속적인 자원 관리와 병력 생산이 요구된다. 맵은 거대한 화산 지형을 배경으로 펼쳐지며, 중앙에는 넓은 평야가 있고 각 플레이어의 진영은 고지대에 배치되어 있어 전략적 시야와 방어에 유리한 구조를 갖추고 있다. 맵의 가장 큰 특징은 ‘익스트림 카오스’라는 이름에서 알 수 있듯이 예측 불가능한 요소들이 게임 throughout에 영향을 미친다는 점이다. 지형 곳곳에 배치된 중립 건물이 랜덤으로 스폰되며, 이 건물들은 추가 자원이나 특수 유닛을 제공하기도 하고 적대적 요인으로 변하기도 한다. 또한 맵 상단과 하단에 위치한 ‘카오스 존’에서는 예기치 못한 이벤트가 발생할 가능성이 있으며, 이벤트의 종류는 맵의 난이도와 진행 상황에 따라 변동된다. 플레이어는 초반부터 중반까지는 자원을 모아 기본 병력을 꾸준히 생산해야 하며, 중반 이후에는 상대방의 전략에 맞춰 방어선을 구축하거나 공격적 확장을 시도해야 한다. 특히, 넥서스 방어는 단순히 건물을 보호하는 차원을 넘어, 방어용 유닛을 배치하고 자원 라인을 안정적으로 유지하는 전략적 요소가 포함된다. 맵의 밸런스는 8명의 플레이어가 경쟁하는 만큼 치열한데, 초보자의 경우 자원 관리와 병력 조합에 어려움을 느낄 수 있으며, 숙련자의 경우 카오스 이벤트를 활용한 역전극을 노릴 수도 있다. 추천하는 플레이 방식은 팀전보다는 개인전으로 진행하는 것이 효과적이며, 특히 초보자는 방어 위주로 플레이를 하며 자원을 안정적으로 확보하는 데 집중해야 한다. 맵을 플레이하기 전에는 맵의 지형과 카오스 존의 위치를 숙지하고, 중립 건물의 스폰 위치를 예측하는 연습을 해두는 것이 좋다. 또한, 넥서스 파괴를 위한 공격 루트와 방어 루트를 미리 계획해두면 게임 throughout에서 큰 이득을 볼 수 있을 것이다. 이 맵은 스타크래프트 유즈맵의 장르적 다양성을 극대화한 작품으로, 디펜스와 밀리의 조합을 통해 긴장감과 전략적 깊이를 동시에 제공한다. 특히, 8인 동시 플레이가 가능한 대규모 맵이라는 점에서 그룹 플레이나 길드 활동에도 적합한 콘텐츠다. 마지막으로, 맵의 난이도는 플레이어의 숙련도에 따라 크게 달라지므로, 초보자는 ‘어려움’ 이하로 설정하고 숙련자는 ‘매우 어려움’이나 ‘최상’ 난이도를 도전해보는 것을 추천한다. Starcraft: Brood War's custom map *Nexus Destroyer Extreme Chaos* is a large-scale hybrid defense + melee map designed for eight players to enjoy simultaneously. The main objective is to destroy the opponent's Nexus while protecting your own, requiring constant resource management and troop production. The map unfolds against a backdrop of a massive volcanic terrain, featuring a wide plain at its center with each player's base positioned on elevated ground for strategic visibility and defense. As the name "Extreme Chaos" suggests, the map's defining feature is its unpredictable elements that influence gameplay throughout. Neutral buildings scattered across the terrain spawn randomly, providing additional resources or special units—or even turning hostile. Additionally, the "Chaos Zones" located at the top and bottom of the map can trigger unexpected events that vary in type depending on the game's difficulty and progression. Players must gather resources and continuously produce basic troops from the early to mid-game, then adapt by either fortifying defenses or launching aggressive expansions based on the opponent's strategy. Nexus defense goes beyond merely protecting the structure, incorporating strategic elements like deploying defensive units and maintaining stable resource lines. With eight players competing, the map's balance is intense, posing challenges for beginners in resource management and troop composition, while offering skilled players opportunities for dramatic comebacks by leveraging Chaos events. For optimal play, individual matches are recommended over team play, especially for beginners who should focus on defensive strategies to secure resources steadily. Before playing, familiarizing yourself with the terrain and Chaos Zone locations, as well as predicting neutral building spawns, is crucial. Planning attack and defense routes to destroy the Nexus can also provide significant advantages throughout the game. This map exemplifies the genre diversity of Starcraft custom maps, blending defense and melee to deliver both tension and strategic depth. Its large-scale design for eight simultaneous players makes it ideal for group play or guild activities. Finally, difficulty varies greatly depending on player skill, so beginners are advised to start on "Hard" or lower, while experienced players can challenge themselves with "Very Hard" or "Maximum" difficulty settings.
S.W.A.T. 워즈 울트라 + 스나이퍼즈 (S.W.A.T. Wars Ultra + Snipers)
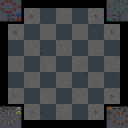
스타크래프트 브루드워 유즈맵 'S.W.A.T. Wars Ultra + Snipers'는 고전 명작 'S.W.A.T. Wars' 시리즈의 확장판으로, 기존 21개 존에서 45개 존으로 대폭 늘어난 맵 규모가 특징이다. 우주 타일셋 기반의 3072x3072 대형 맵에서 최대 8명이 동시에 즐길 수 있도록 설계되었으며, 제작자 Emperor Fluppe가 하이브리드 형태로 재구성한 버전이다. 기본 플레이는 일정 구역(존)을 점령하고 유지하여 점수를 획득하는 '존 컨트롤' 방식이며, 제목에 명시된 'Snipers(스나이퍼)' 유닛이 추가되어 원거리 저격전과 견제 플레이가 강화된 것이 핵심 차별점이다. 맵 중앙을 중심으로 방사형 또는 격자형으로 배치된 45개의 존은 플레이어들에게 끊임없는 이동과 교전을 유도한다. 존 수가 많아진 만큼 초반 확장 경쟁이 치열하며, 특정 존을 거점으로 삼아 주변을 장악하는 매크로 운영과 스나이퍼를 활용한 마이크로 컨트롤이 동시에 요구된다. 우주 배경 특성상 지형 장애물이 적어 시야가 탁 트여 있으며, 공중 유닛과 스나이퍼의 사거리가 맵 전체에 영향을 미칠 수 있어 수비적 운영보다 적극적인 난전 유도가 유리해 보인다. 플레이 타임은 인원 수와 숙련도에 따라 20분에서 40분 내외로 예상되며, 8인 풀방 기준 난전 양상이 짙어 초보자는 초반 생존이 어려울 수 있다. 팀플레이 지원 여부는 별도 표기가 없으나, 8인 기준 1:1:1:1:1:1:1:1 프리포올(FFA) 또는 4:4 팀전으로 즐기는 것이 일반적일 것으로 보인다. 승리 조건은 대부분의 존 컨트롤 맵과 유사하게 일정 점수 선점 또는 시간 종료 시 최고 점수 달성일 것으로 추정된다. 이 맵은 클래식한 존 컨트롤 룰에 대규모 맵과 스나이퍼라는 변주를 더해 전략적 깊이를 더한 수작이다. 밀리(Melle) 실력보다는 맵 이해도, 멀티태스킹, 유닛 조합 운용 능력이 승부를 가른다. 올드 유저에게는 추억의 'S.W.A.T. Wars'를 대규모로 즐기는 재미를, 신규 유저에게는 브루드워 유즈맵 특유의 난전 운영 감각을 익히기 좋은 교재가 될 것이다. 플레이 전에는 스나이퍼의 사거리와 은폐 메커니즘, 존 점수 시스템을 숙지하고 진입하는 것을 권장한다. StarCraft Brood War UMS map 'S.W.A.T. Wars Ultra + Snipers' is an expansion of the classic 'S.W.A.T. Wars' series, featuring a significantly increased map scale with 45 zones compared to the original 21. Designed for up to 8 players on a massive 3072x3072 space tileset map, this version was reconstructed as a hybrid by creator Emperor Fluppe. The core gameplay follows a 'Zone Control' mechanic where players capture and hold designated areas to earn points, with the key differentiator being the addition of 'Sniper' units as indicated in the title, enhancing long-range sniping and harassment play. The 45 zones arranged radially or in a grid around the map center induce constant movement and engagement. With more zones, early expansion competition is fierce, demanding both macro management to secure key zones as footholds and micro control utilizing Snipers. The space background offers open sightlines with few terrain obstacles, allowing air units and Sniper range to influence the entire map, making aggressive skirmishing more favorable than passive defense. Playtime is estimated at 20-40 minutes depending on player count and skill level; with a full 8-player lobby, chaotic skirmishes are intense, potentially difficult for beginners to survive early on. Team play support is not explicitly noted, but an 8-player Free-For-All (FFA) or 4v4 team match is likely standard. Victory conditions are presumed similar to most Zone Control maps: reaching a target score first or having the highest score at time limit. This map is a well-crafted work adding strategic depth to classic Zone Control rules with a large map and the Sniper variable. Map understanding, multitasking, and unit composition management decide victory more than raw melee skill. For veterans, it offers the nostalgia of 'S.W.A.T. Wars' on a grand scale; for newcomers, it serves as excellent material to learn the chaotic management sense unique to Brood War UMS. Before playing, it is recommended to familiarize oneself with Sniper range and cloaking mechanics, and the zone scoring system.
신의 최후의 보루: Heaven's Last Stand vMagic (Heaven's Last Stand vMagic)
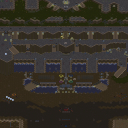
하이브리드 디펜스와 생존형 전략이 조합된 스타크래프트 유즈맵 「Heaven's Last Stand vMagic」은 8명의 플레이어가 한 팀을 이루어 신의 옥좌를 지키며 몰려드는 적군을 물리치는 구조로 구성되어 있다. 맵 중앙에 위치한 거대한 신전의 구조물 주변으로 사막 지형이 펼쳐지며, 각 플레이어는 중앙의 성역을 중심으로 배치된 건물을 방어하면서 끊임없이 생성되는 적을 상대해야 한다. 맵의 특징은 맵 전체가 사막 테마로 꾸며져 있으며, 건물을 보호하는 벽과 수비용 건물이 전략적으로 배치되어 있다는 점이다. 플레이어는 건물을 업그레이드하고 자원을 확보하면서 점차 증가하는 적의 물량과 스테이지 형식의 보스를 상대하게 된다. 특히, 적의 공격 패턴이 단계적으로 강화되면서 전략적 대비를 요구하는 구조로, 초반에는 약한 적들이 몰려오지만 후반으로 갈수록 강력한 유닛과 혼종형 적들이 등장한다. 맵의 분위기는 웅장하면서도 긴장감이 넘치며, 신의 권능을 상징하는 듯한 디자인 요소들이 곳곳에 배치되어 atmospherically한 경험을 제공한다. 초보자의 경우 건물 보호와 자원 관리에 어려움을 느낄 수 있지만, 팀원 간의 협력이 필수적이기 때문에 커뮤니케이션이 중요한 요소로 작용한다. 또한, 맵의 난이도는 플레이어들의 조합과 전략에 따라 크게 달라질 수 있어, 다양한 시도를 해보면서 최적의 방어 전략을 찾아야 한다. 맵을 플레이하기 전에 건물을 보호하는 데 필요한 업그레이드 경로와 주요 방어 포인트를 미리 숙지하는 것이 좋다. 특히, 중앙 성역의 건물이 파괴되지 않도록 보호를 우선시해야 하며, 자원 채취와 생산 건물의 균형을 맞추는 것이 핵심이다. 또한, 보스가 등장하는 시점을 예상하고 그에 맞는 준비를 갖춰야 한다. 이 맵은 디펜스와 서바이벌의 요소를 동시에 제공하므로, 지속적인 적응력과 전략적 사고가 요구되는 재미있는 유즈맵으로 평가된다. 초보자부터 숙련자까지 모두 즐길 수 있지만, 팀워크가 중요하다는 점을 염두에 두어야 한다. Heaven's Last Stand vMagic is a StarCraft custom map that blends hybrid defense and survival strategy, where eight players team up to protect the throne of the gods against waves of enemies. The map features a sprawling desert terrain centered around a massive temple structure, with players defending buildings arranged around the central sanctuary while fending off relentless enemy spawns. The map’s desert theme sets a grand yet tense atmosphere, with defensive walls and strategically placed structures reinforcing key positions. Players must upgrade buildings, secure resources, and face progressively stronger enemies, including stage-based bosses that escalate in difficulty. Early waves consist of weaker foes, but later stages introduce powerful units and hybrid threats, demanding careful preparation and adaptability. While the map’s scale and mechanics may overwhelm beginners—especially in managing building protection and resource allocation—teamwork is essential, making communication a critical factor. The difficulty varies widely depending on player coordination and strategy, encouraging experimentation to refine the best defensive approach. Before playing, it’s crucial to study upgrade paths, key defensive points, and prioritize safeguarding the central sanctuary’s structures. Balancing resource gathering with production buildings is vital, and anticipating boss encounters ensures readiness. Offering a mix of defense and survival elements, this custom map delivers an engaging experience that challenges both adaptability and strategic thinking, appealing to players of all skill levels—though success hinges on strong teamwork.
음악 만들기 (Can You Make Music?)
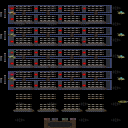
스타크래프트 브루드워 유즈맵 <Can You Make Music ?>은 음악과 리듬을 테마로 한 독특한 디펜스 장르의 맵으로, 플레이어가 특수한 조작을 통해 재미있는 비트를 연출하는 것이 핵심 목표다. 맵은 가로로 긴 2048x4096 크기의 우주 테마 맵으로, 중앙에 위치한 음악 생성 구역과 주변의 방어 타워가 배치된 구조를 가지고 있다. 플레이어는 각자 독립된 구역에서 음표가 떨어지는 타이밍에 맞춰 특정 명령을 내려 일정한 리듬을 생성해야 하며, 이를 통해 맵 곳곳에 표시되는 음악 이펙트와 연동되는 재미를 느낄 수 있다. 방어 타워는 기본적으로 제공되지만, 리듬 생성과 방어의 밸런스를 맞추는 것이 관건으로 보인다. 맵의 제목과 설명에서 'Make Funny Beats'라는 문구가 강조되는 점으로 미루어, 단순히 방어만 하는 것이 아니라 음악적 재미를 추구하는 하이브리드 디펜스 맵으로 추정된다. 음악 게임의 요소와 RTS의 방어 메커니즘이 결합된 이색적인 경험을 제공할 것으로 예상되며, 특히 음악에 관심이 있거나 새로운 스타일의 유즈맵을 즐기는 플레이어에게 추천할 만한 작품이다. 플레이 전에는 맵의 조작법과 리듬 생성 방식에 대한 간단한 설명이나 튜토리얼이 제공되는지 확인하는 것이 좋다. 또한, 음악 생성 구역의 위치와 타워 배치, 맵의 전체적인 흐름을 미리 파악해 두면 게임을 더 원활히 진행할 수 있을 것이다. 맵의 긴 가로 길이는 넓은 시야와 함께 음악적 연출을 위해 설계된 것으로 보이며, 우주 테마는 감각적인 분위기를 한층 더해준다. 이 맵은 기존의 정형화된 디펜스 맵과는 차별화된 경험을 제공할 가능성이 높으므로, 새로운Try를 즐기는 플레이어에게 특히 매력적으로 다가올 것이다. StarCraft: Brood War custom map *Can You Make Music?* is a unique defense-style game with a theme centered around music and rhythm, where the core objective is for players to create fun beats through special controls. The map features a long, horizontal 2048x4096 space-themed layout, structured with a central music-generation zone surrounded by defensive towers. Players must issue specific commands in sync with the timing of falling musical notes in their individual zones to generate a steady rhythm, allowing them to enjoy musical effects displayed across the map. While towers are provided by default, balancing rhythm creation with defense is key to success. The map’s title and description emphasize the phrase "Make Funny Beats," suggesting it’s a hybrid defense game that blends musical fun with strategy rather than focusing solely on defense. This fusion of music-game elements and RTS-style mechanics promises an unusual experience, making it especially appealing to players who enjoy music or are looking for fresh custom map styles. Before playing, it’s wise to check whether a brief tutorial or explanation of controls and rhythm mechanics is provided. Familiarizing yourself with the music-generation zone’s location, tower placements, and overall map flow will also help you progress more smoothly. The map’s extended horizontal length seems designed to offer wide visibility while enhancing the musical spectacle, and the space theme adds an immersive atmosphere. Given its departure from conventional defense maps, this title could be particularly engaging for players who enjoy trying new things.
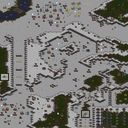
스페셜 포스 어드밴스드 II (Special Forces Advanced II)
스타크래프트 브루드워 유즈맵의 숨은 명작으로 꼽히는 <Special Forces Advanced II>는 FPS와 디펜스 장르가 결합된 하이브리드형 맵으로, 플레이어에게 긴장감 넘치는 전략적 전투 경험을 제공합니다. 맵의 전체적인 구조는 넓은 평지 위주로 펼쳐지며, 중앙에 위치한 주요 거점이 수시로 적의 공격을 받습니다. 플레이어는 각자의 영웅 유닛을 조종하거나, 방어선을 구축하는 방식으로 게임을 진행하는데, 맵 곳곳에서 끊임없이 몰려오는 적군 무리들을 막아내며 생존을 위해 전략을 짜야 합니다. 특히, 맵의 지형이 비교적 평탄하다는 특징 덕분에 빠른 이동과 전투가 가능해 실시간 전략과 액션의 조화가 돋보입니다. 게임은 주로 6인 대전을 기본으로 하며, 각 플레이어가 고유의 역할과 특수 능력을 지닌 영웅을 선택할 수 있어 팀워크와 개인의 전략적 선택이 매우 중요합니다. 맵의 구조상 중앙 거점 주변에 방어 시설이나 보급 기지를 설치할 공간이 마련되어 있으며, 이를 통해 플레이어는 끊임없이 변화하는 전투 상황에 유연하게 대응해야 합니다. 맵의 디자인 자체가 방어와 공격을 균형 있게 고려한 만큼, 초보자는 물론 숙련된 플레이어에게도 흥미로운 전투를 선사합니다. 추천 대상으로는 스타크래프트의 기본적인 조작법에 익숙한 플레이어부터, 팀플레이와 전략적 사고를 즐기는 유저까지 폭넓은 팬층을 확보하고 있습니다. 또한, 다양한 영웅의 특수 능력과 맵의 랜덤 요소들이 게임의 재-playability를 높여주어, 한 번 플레이한 후에도 다시 도전하고 싶은 매력이 있습니다. 다만, 방어선을 구축하는 타이밍이나 영웅의 능력 배분이 잘못되면 쉽게 무너질 수 있으니, 초반의 전략 수립이 매우 중요합니다. Special Forces Advanced II is a hidden gem among StarCraft: Brood War custom maps, blending FPS and defense genres to deliver a tense, strategic combat experience. The map’s structure is primarily flat terrain centered around a main base that frequently comes under enemy assault. Players control unique hero units or build defensive lines to fend off waves of enemies, requiring constant strategic adjustments to survive. The relatively even terrain allows for swift movement and combat, making real-time strategy and action seamlessly integrated. The game typically supports six-player battles, where each player selects a hero with distinct abilities, emphasizing teamwork and individual strategy. Central to the map design is a core base area surrounded by space for defensive structures or supply depots, enabling players to adapt flexibly to evolving combat scenarios. The balanced design ensures engaging gameplay for both beginners and seasoned players. Recommended for players familiar with StarCraft’s basic mechanics and those who enjoy team-based strategy, this map offers high replayability thanks to diverse hero abilities and random map elements. However, poor early-game strategy or misaligned hero skill allocation can lead to quick defeats, making initial planning critical.
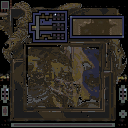
Bound&Destroy2
스타크래프트 브루드워의 유즈맵 장인 Koltz ratsin(aka ratsin[pb])과 S.Fox(aka SpiritedFox)가 제작한 Bound&Destroy2는 전략적 디펜스와 경계 유지를 동시에 요구하는 흥미로운 게임플레이를 제공하는 맵이다. 이 맵은 6명의 플레이어가 각각의 기지를 방어하며 적의 침공을 저지하는 구조로,_UMS(Use Map Settings)_ 장르에 속하며 디펜스와 전략적 요소가 혼합된 하이브리드형 플레이를 즐길 수 있다. 내부 맵 제목과 파일명이 동일하게 유지된 점에서도 제작자의 철저한 관리가 느껴진다. 맵의 가장 큰 특징은 중앙에 위치한 넓은 공간으로, 이곳에서 적과 아군의 전투가 집중된다는 점이다. 플레이어는 각자의 기지에서 자원을 수집하고 유닛을 생산하여 방어선을 구축해야 하며, 동시에 중앙 지역을 장악하기 위한 전략적 움직임을 펼쳐야 한다. 맵의 황무지 타일셋은 건조하고 삭막한 분위기를 연출하며, 이는 전투의 긴장감을 한층 높이는 역할을 한다. 특히 4096x4096의 거대한 맵 크기는 넓은 시야와 전략적 깊이를 제공하여, 플레이어 간의 심리전과 위치 선점이 중요해진다. Bound&Destroy2는 단순히 디펜스에 그치지 않고, 적의 기지 파괴와 자원 탈취라는 추가적인 목표를 설정할 가능성이 있어 전략의 다양성을 높인다. 맵의 구조상 중앙 교두보를 차지하기 위한 전투가 자주 발생할 것으로 추정되며, 이는 플레이어 간의 협력과 배신, 동맹의 형성 등 다채로운 인간 관계를 유도할 수 있는 요소로 작용할 것이다. 다만, 맵의 난이도나 승리 조건, 트리거는 파일명과 내부 설명만으로는 명확히 알 수 없어, 플레이 전 내부 설명을 꼼꼼히 확인할 필요가 있다. 이 맵은 전략적 사고와 실시간 판단력이 요구되는 유즈맵을 선호하는 플레이어들에게 강력히 추천할 만한 작품이다. 특히 팀 플레이를 중시하는 그룹이나, 디펜스와 공격의 균형을 추구하는 유저들에게 적합할 것으로 보인다. 플레이 전에는 중앙 지역에서의 전투 패턴을 미리 예상해 보고, 각자의 기지에서 생산 가능한 유닛의 종류와 특성을 숙지하는 것이 중요하다. 또한, 맵의 넓은 공간을 활용한 기습 공격이나 후방 침투 시도가 빈번할 수 있으므로, 방어 라인을 구축할 때 이러한 가능성을 고려해야 한다. Bound&Destroy2는 단순히 방어에만 치중하는 것이 아니라, 적의 움직임을 읽고 역공하는 전략적 깊이가 있는 맵이므로, 초보 플레이어보다는 전략적 사고력이 풍부한 중급 이상의 플레이어에게 더 어울릴 것으로 판단된다. Bound&Destroy2, a custom map for StarCraft: Brood War created by renowned UMS map designers Koltz ratsin (aka ratsin[pb]) and S.Fox (aka SpiritedFox), delivers an engaging gameplay experience that blends strategic defense with perimeter control. Designed for six players, it falls under the UMS (Use Map Settings) genre, where each player must defend their base while repelling enemy invasions, offering a hybrid playstyle that combines defense and strategy. The consistent internal map title and file name reflect the creators' meticulous attention to detail. The map’s standout feature is the vast central area where most combat between allies and foes takes place. Players gather resources and produce units from their own bases while strategically maneuvering to control the central zone. The barren, desolate tile set enhances the tense atmosphere of battle, further amplified by the map’s massive 4096x4096 size, which provides expansive visibility and deep strategic layers. This scale demands strong positional awareness and psychological play, as players compete for early control and map dominance. Beyond pure defense, Bound&Destroy2 introduces the potential for additional objectives such as destroying enemy bases or stealing resources, broadening strategic variety. Given the map’s layout, frequent clashes over the central foothold are expected, fostering dynamic interactions—cooperation, betrayal, and alliance formation among players. However, details like difficulty, win conditions, and trigger mechanics aren’t immediately clear from the file name or internal description, so players should review the in-game instructions carefully before starting. This map is highly recommended for those who enjoy custom maps that emphasize strategic thinking and real-time decision-making. It’s particularly well-suited for groups that value teamwork or players who seek a balance between defense and offense. Before jumping in, it’s wise to anticipate combat patterns in the central area, understand the unit types and strengths available from each base, and prepare for potential ambushes or rear infiltration due to the map’s vast open spaces. Bound&Destroy2 rewards strategic depth over brute-force defense, making it a better fit for intermediate or advanced players rather than beginners.
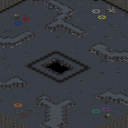
레지던트 이블 매드니스 (Resident Evil Madness)
《Resident Evil Madness》는 스타크래프트: 브루드워의 유즈맵으로, ‘바이오하자드’ 시리즈의 분위기를 재현한 디펜스형 UMS 맵이다. 플레이어는 총 네 가지 진영(Zombies, S.T.A.R.S., R.P.D, Umbrella Corp) 중 하나를 선택해 진행하며, 맵 곳곳에 배치된 방어 건물과 유닛을 활용해 적의 공격을 막아내야 한다. 맵 구조는 중앙을 가로지르는 큰 길이와 그 주변의 건물이 특징적이며, 지형은 비교적 평탄한 편이지만 일부 구역은 장애물이 있어 진영 선택과 배치 전략이 중요하다. 특히 Umbrella Corp 진영은 기술력과 방어 시설을 활용한 플레이가 가능하고, Zombies 진영은 물량과 돌파력을 앞세운 공격이 주를 이룬다. S.T.A.R.S.와 R.P.D는 균형 잡힌 유닛 구성을 제공해 초보자도 쉽게 접근할 수 있지만, 각 진영의 특성을 이해하지 못하면 난이도가 급상승할 수 있다. 맵의 디자인적 특징으로는 어두운 톤의 색채와 건조한 분위기가 ‘바이오하자드’의 고딕 호러와 공포감을 잘 살렸다는 점이다. 또한, 맵 중앙의 넓은 개활지는 대규모 전투가 벌어질 수 있는 관전 포인트로, 전략적 선택이 승리 여부를 가를 수 있다. 이 맵은 디펜스와 동시에 진영 간 전투가 가능한 하이브리드형으로, 한 번의 전투에서 승패가 갈리는 경우가 많아 긴 플레이 타임보다는 짧은 집중전이 특징이다. 초보자도 쉽게 따라 할 수 있도록 조절된 난이도와 다양한 전략적 선택지가 제공되는 점이 장점이지만, 진영 간의 밸런스가 완벽히 맞지는 않을 수 있어 플레이어 간의 커뮤니케이션이 원활하지 않으면 균열이 생길 수 있다. 추천하는 대상은 디펜스와 전략 게임을 좋아하는 플레이어이며, 특히 ‘바이오하자드’ 팬이라면 더욱 몰입감을 느낄 수 있을 것이다. 플레이 전에는 각 진영의 특성과 맵의 주요 거점 위치를 숙지하는 것이 중요하다. 또한, 방어 건물의 배치와 유닛 생산 타이밍을 잘 조절하지 않으면 적의 공격에 무너지기 쉽기 때문에 신중한 플레이가 요구된다. Resident Evil Madness is a UMS custom map for StarCraft: Brood War, recreating the atmosphere of the Resident Evil series in a defense-focused gameplay. Players choose from four factions—Zombies, S.T.A.R.S., R.P.D, and Umbrella Corp—and must defend against enemy attacks using buildings and units scattered across the map. The map features a long central pathway flanked by structures, with relatively flat terrain that is occasionally interrupted by obstacles, making faction selection and strategic placement crucial. The Umbrella Corp faction excels with advanced technology and defensive structures, while the Zombies rely on overwhelming numbers and brute force. S.T.A.R.S. and R.P.D. offer balanced unit compositions, making them accessible to beginners, though mastering each faction’s strengths is key to overcoming higher difficulties. The map’s dark, desolate aesthetic effectively captures the gothic horror and tension of Resident Evil, while the central open area serves as a focal point for large-scale battles where strategic decisions can determine victory. This hybrid map combines defense mechanics with faction-based combat, resulting in short, intense matches rather than long-drawn-out sessions. While the balanced difficulty and variety of strategic options make it appealing to beginners, faction balance may not be perfect, and lack of communication among players can lead to imbalances. Ideal for fans of defense and strategy games, particularly those familiar with the Resident Evil franchise, this map rewards players who study faction traits and key locations before diving in. A careful approach to defensive building placement and unit production timing is essential, as poor decisions can quickly lead to defeat.
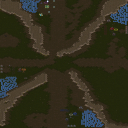
FINAL FANTASY
《FINAL FANTASY》는 스타크래프트 브루드워의 유즈맵으로, 본격적인 디펜스와 밀리 요소가 결합된 하이브리드 장르의 맵입니다. 맵의 중심에는 영웅 캐릭터들이 등장하며, 플레이어는 적 건물 파괴와 영웅 보호라는 두 가지 목표를 동시에 달성해야 합니다. 화면 상단에 위치한 영웅 선택 버튼을 통해 클라우드, 바렛, 루푸스, 세피로스 중 한 명을 선택할 수 있는데, 각 영웅은 고유한 스킬과 특성을 가지고 있어 전략적 선택이 중요합니다. 맵은 사막 타일셋으로 구성되어 있으며, 오브젝트와 건물 배치로 인해 시야가 제한되는 구간이 많습니다. 이러한 환경은 맵 리딩 능력을 요구하며,突然间의 적 공격이나 기습을 대비한 대비를 필요로 합니다. 맵의 진행은 주로 적 건물을 파괴하는 방향으로 흘러가지만, 영웅의 생존 여부가 승패를 좌우하는 만큼 리스크 관리도 필수적입니다. 전투는 주로 멀티 중앙 지역이나 좁은 통로에서 벌어지며, 넓은 평야보다는 요충지를 차지하는 전략이 유리합니다. 초보자는 영웅의 스킬 사용 타이밍과 위치 선정이 어렵겠지만, 경험을 쌓을수록 맵의 숨은 패턴을 발견하고 효율적인 플레이가 가능해질 것입니다. 특히 영웅 보호가 어려운 경우라면 방어 타워 건설이나 자원 수집에 치중하는 플레이도 고려해 볼 만합니다. 맵의 난이도는 영웅 선택과Micro 컨트롤에 따라 크게 달라지며, 팀플레이가 가능한 경우 협동 플레이로 더 높은 승률을 기대할 수 있습니다. 추천 대상은 디펜스와 밀리 장르를 좋아하는 유저들로, 특히 영웅을 조작하는 재미를 느끼고 싶은 플레이어에게 적합합니다. 플레이 전 영웅의 스킬과 맵의 주요 거점을 숙지하고, 초반 자원 확보와 영웅의 레벨링 전략을 미리 계획하는 것이 중요합니다. Final Fantasy is a StarCraft: Brood War custom map that blends defense and melee mechanics into a hybrid genre. The map features a roster of hero characters, each offering unique skills and traits, allowing players to choose between Cloud, Barrett, Rufus, or Sephiroth. The primary objectives involve destroying enemy structures while protecting your chosen hero—a balance that adds strategic depth. The desert-themed map features limited visibility in certain areas due to terrain and object placement, requiring strong map awareness and quick decision-making. Battles predominantly occur in central multi areas or narrow passages, where controlling chokepoints becomes crucial. For beginners, mastering hero skill timing and positioning may pose a challenge, but as experience grows, uncovering hidden map patterns will lead to more efficient gameplay. The difficulty varies significantly based on hero selection and micro-management, with team play offering a strategic advantage. This map is ideal for players who enjoy defense and melee genres, especially those seeking the thrill of controlling powerful heroes. Before starting, familiarize yourself with hero abilities and key map locations, and plan your early resource gathering and leveling strategy to maximize your chances of success.
최근 등록된 맵
새로 추가된 파일과 버전을 확인하세요.
하이드라 양치기 (Hydra Rancherz mass&minerals)
스타크래프트 브루드워의 유즈맵인 ‘하이드라 양치기(Hydra Rancherz mass&minerals)’는 8명의 플레이어가 참여하는 독특한 하이브리드 장르의 맵으로, 자원 관리와 유닛 육성이라는 두 가지 핵심 요소를 동시에 즐길 수 있도록 설계되었다. 맵의 배경은 사막 타일셋으로 통일되어 있으며, 중앙에 위치한 대규모 광물 지대와 가스 채취 지점을 중심으로 플레이어는 자원을 채취하고, 이 자원으로 테란, 저그, 프로토스의 유닛을 조합해 하이드라(히드라리스크)를 포함한 다양한 병력을 양성하는 것이 목표다. 맵의 이름은 ‘Rancherz’라는 단어에서 알 수 있듯이, 마치 가축을 키우듯 유닛을 육성하고 성장시키는 재미가 주된 포인트다. 또한, ‘mass&minerals’라는 부제에서 알 수 있듯이, 광물과 가스를 동시에 관리해야 하므로 자원 운영의 전략적 깊이가 상당히 깊다. 플레이어는 맵 중앙의 광물과 가스를 차지하기 위한 경쟁뿐만 아니라, 양성한 유닛을 이용해 적 플레이어를 공격하거나 방어하는 동시에 자신의 하이드라 무리를 지속적으로 강화할 수 있다. 맵의 구조는 비교적 평탄한 지형 위에 주요 자원 지점이 분포되어 있어, 초반에는 자원 확보 경쟁이 치열해질 수 있지만, 중반 이후에는 각 플레이어의 유닛 육성 전략에 따라 승부가 갈린다. 특히, 하이드라를 포함한 저그의 유닛들은 체력이 낮더라도 빠른 생산 속도와 다수의 수를 앞세운 전술을 구사할 수 있어, 플레이어는 자신의 병력 조합을 신중히 결정해야 한다. 이 맵의 가장 큰 매력은 ‘성장’이라는 키워드에 있다. 단순히 유닛을 생산하는 것이 아니라, 자원을 투자해 유닛의 체력, 공격력, 방어력을 지속적으로 강화할 수 있는 시스템이 포함되어 있어, 초보자부터 숙련자까지 모두 즐길 수 있는 요소다. 또한, 8명의 플레이어가 참여할 수 있도록 맵이 넓게 설계되어 있어, 각 플레이어의 전략과 플레이 스타일이 다양하게 빛을 발할 수 있다. 다만, 맵의 난이도는 자원 관리와 병력 육성의 밸런스에 따라 크게 달라질 수 있으므로, 초보자라면 자원 채취와 유닛 생산의 기본기를 먼저 연마하는 것이 중요하다. 하이드라 양치기는 자원 관리와 유닛 육성이라는 두 마리 토끼를 잡는 재미가 있는 맵으로, 특히 저그 유닛에 관심이 있거나 하이드라를 주력으로 활용하고 싶은 플레이어에게 강력히 추천할 수 있다. 또한, 타 종족의 유닛을 조합해 나만의 독특한 전략을 구사하고 싶다면, 이 맵을 통해 다양한 조합을 시도해 볼 수 있을 것이다. 다만, 맵의 구조상 자원 경쟁이 치열할 수 있으므로, 초반 자원 확보에 실패하지 않도록 주의가 필요하다. 플레이 전에는 맵의 자원 분포와 주요 진출로, 그리고 하이드라를 포함한 저그의 유닛 특징을 미리 숙지하는 것이 좋다. 또한, 자원 관리와 유닛 육성의 밸런스를 맞추기 위해, 초반에는 자원 채취에 집중하고, 중반 이후부터는 병력 생산과 강화에 집중하는 것이 승률을 높이는 데 도움이 될 것이다. StarCraft: Brood War’s custom map *Hydra Rancherz (mass&minerals)* is a unique hybrid-style map for eight players, designed to blend resource management and unit production into a single experience. Set in a unified desert tileset, the map centers around a large mineral field and gas geysers, where players gather resources to train Terran, Zerg, and Protoss units—including Hydralisks—and build diverse armies. The name *Rancherz* hints at the core appeal: the fun of nurturing and growing units like livestock, while the subtitle *mass&minerals* emphasizes the need to balance mineral and gas income, adding strategic depth to resource play. Players compete not only for control of the central minerals and gas but also use their trained units to attack or defend while continuously reinforcing their Hydralisk forces. The terrain is mostly flat with key resources distributed across it, making early-game resource competition fierce. However, as the game progresses, victory often hinges on how well players develop their unit production strategies. Zerg units like Hydralisks, despite their lower individual health, excel with rapid production and numerical superiority, forcing players to carefully plan their army compositions. The standout feature of this map is its focus on *growth*. Rather than just producing units, players can invest resources to permanently upgrade their units’ health, attack power, and defense, creating a system that appeals to both beginners and veterans. The spacious design, accommodating eight players, allows diverse strategies and playstyles to shine. That said, the map’s difficulty heavily depends on balancing resource income and unit upgrades, so newcomers should first master basic resource gathering and unit production. *Hydra Rancherz* is a map that lets players juggle resource management and unit development, making it especially appealing to those interested in Zerg units or Hydralisks. It also offers a great sandbox for experimenting with cross-faction unit combinations to craft unique strategies. Just be mindful that the map’s layout can lead to intense early resource competition—securing minerals and gas in the opening phase is crucial. Before playing, familiarize yourself with resource distribution, key chokepoints, and the traits of Zerg units like Hydralisks. To maximize your chances of winning, prioritize resource gathering in the early game and shift focus to unit production and upgrades in the mid-game to strike a sustainable balance.
라커 DGolemz Hybrid 3.0 (Lurker DGolemz Hybrid 3.0)
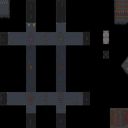
스타크래프트 브루드워의 유즈맵 ‘라커 DGolemz Hybrid 3.0’은 8방향에서 끊임없이 몰려오는 적군을 상대로 golems를 만들고 방어전을 펼쳐나가는 하이브리드 디펜스 장르의 맵이다. 내부 설명에 따르면 플레이어는 30레벨에 달하는 웨이브를 돌파해야 하며, 맵 곳곳에 배치된 네 개의 유닛이 각각 다른 방향으로 보석을 부팅하는 메커니즘이 특징으로 보인다. 보석을 부팅하지 말아야 할 붉은 보석도 함께 존재해 전략적 선택을 요구한다. 맵의 전장 중앙에는 golems를 생성할 수 있는 건물이 배치되어 있어, 유닛을 소환해 적군을 막아내는 동시에 공격적인 플레이도 가능하다는 점에서 타워 디펜스와 액션 디펜스가 혼합된 구조다. 이미지에서는 맵 중심부의 넓은 공간과 외곽의 좁아지는 길목이 보이며, 외곽 각 방향마다 적군이 진입할 수 있는 입구가 확인된다. 특히 맵 좌측 상단과 우측 하단에는 붉은 색으로 강조된 보석들이 배치되어 있어 부팅 여부를 신중히 판단해야 할 것이다. 플레이어는 초반에 자원을 모아 golems를 빠르게 생산해야 하며, 각 웨이브가 끝날 때마다 적의 공격 패턴이 변한다는 점에서 끊임없는 대처가 요구된다. 추천 대상은 디펜스와 전략적 건물 관리 모두를 좋아하는 유저들로, 특히 중수 이상이 즐기기에 알맞은 난이도로 보인다. 시작 전 확인해야 할 포인트는 네 개의 보석 부팅 여부와 초반 자원 관리, 그리고 golems의 생산 우선순위다. 맵의 구조상 외곽 입구 주변에 방어 건물을 집중 배치하는 것이 효율적일 수 있으며, 레벨이 올라갈수록 등장하는 적군의 수가 급격히 증가하므로 유닛의 효율적인 배치와 컨트롤이 victory의 열쇠가 될 것이다. This StarCraft: Brood War custom map, 'Lurker DGolemz Hybrid 3.0,' blends tower defense and action defense mechanics by challenging players to survive 30 waves of enemies attacking from eight directions. The map features a central structure for summoning golems while requiring players to strategically boot gems—avoiding red ones—to control enemy approach paths. The terrain includes wide central areas with narrow chokepoints, forcing players to balance resource management, unit production, and adaptive defense strategies. Early gameplay demands rapid golem production to counter initial waves, with later levels introducing increased enemy density and varied attack patterns. Ideal for players who enjoy micromanagement and strategic depth, this map rewards efficient unit placement and timely upgrades. Key pre-game considerations include gem booting priorities, early resource allocation, and prioritizing golem production over direct combat. The hybrid nature ensures dynamic gameplay, appealing to those seeking both challenge and replayability in custom map experiences.
스타 랜드 (Star Land)
스타크래프트 브루드워의 유즈맵 〈☆ Star Land ☆〉는 ‘신전부수기 외전’이라는 부제를 달고 등장한 맵으로, 프로게이머를 육성하여 적을 제압하는 전투형 시나리오 맵이다. 맵은 6144x6144의 넓은 황혼 테마의 타일셋으로 구성되어 있으며, 중앙을 가로지르는 거대한 호수가 맵의 특징적인 지형으로 작용한다. 호수 주변에는 여러 개의 섬 형태의 지역이 배치되어 있고, 각 섬은 프로게이머를 키워내는 생산 기지 역할을 한다. 플레이어는 각 섬의 자원을 확보하고 건물을 건설하여 유닛을 생산한 뒤, 적 섬으로 진출해 신전을 파괴하는 것이 주요 목표로 보인다. 맵은 8인 대전이 가능한 구조로 설계되어 있으며, 각 플레이어는 시작 시 프로게이머로 추정되는 영웅 유닛을 보유하고 있는 것으로 보인다. 섬별로 자원 밸런스가 맞춰져 있는지는 명확하지 않지만, 섬의 구조상 초반 자원 확보가 중요할 것으로 예상된다. 중앙 호수는 지형적 장애물로 기능할 뿐만 아니라, 일부 섬은 호수 건너편으로만 연결되어 있어 전략적인 진격로를 제한하는 요소로 작용할 수 있다. 맵 상단의〈〉 기호와〈〉 기호로 표시된 구역은 아마도 시작 지역과 주요 건물을 배치할 수 있는 핵심 지역으로 추정된다. 플레이 방식은 프로게이머를 육성하는 키우기 요소와 적 섬의 신전을 파괴하는 전투 요소가 결합된 하이브리드 장르로 보인다. 프로게이머의 성장 여부가 승패를 좌우할 가능성이 높기 때문에, 자원 관리와 유닛 생산, 그리고 섬 간의 협공 및 방어 전략이 중요한 포인트가 될 것이다. 맵의 난이도는 제작자의 언급이 없지만, 섬 간의 이동이 제한적이고 중앙 호수가 장애물로 작용하기 때문에 초보자는 careful play가 요구될 것으로 보인다. 추천 대상은 스타크래프트 유즈맵을 즐기는 플레이어, 특히 시나리오와 키우기 요소가 결합된 맵을 선호하는 유저들에게 적합할 것으로 판단된다. 플레이 전에는 각 섬의 자원 분배와 프로게이머의 성장 curve, 그리고 신전 파괴에 필요한 조건을 미리 확인하는 것이 좋다. Star Land is a StarCraft: Brood War custom map titled "Sinjeon Buseogi Side Story: Star Land," where players train a pro-gamer unit to dominate enemies. The map features a vast 6144x6144 Twilight-themed terrain with a central lake dividing multiple island-like regions, each serving as a base for resource gathering and unit production. Players begin with a hero unit assumed to be a pro-gamer and must expand their base, secure resources, and launch attacks to destroy enemy temples. Designed for 8-player melee, the map emphasizes strategic movement due to the central lake acting as a natural barrier, forcing players to navigate around islands. Resource balance and early-game expansion are critical, as each island likely offers distinct advantages. The hybrid gameplay combines RPG-like unit growth with tower-defense and destruction mechanics, requiring players to balance defense, resource management, and offensive tactics. While the difficulty is unspecified, the map’s mechanics suggest it favors intermediate to advanced players who can adapt to terrain constraints and multi-island warfare. Recommended for custom map enthusiasts who enjoy scenario-driven or hybrid-style maps, Star Land offers a fresh take on pro-gamer training and territorial conquest. Players should scout island layouts early, assess resource distribution, and plan temple-destruction strategies to maximize their chances of victory.
트리비아 터렛: 네임 더 이어 V2 (TriviaTurret: NameTheYear V2)
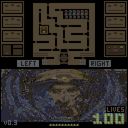
트리비아 터렛: 네임 더 이어 V2(TriviaTurret: NameTheYear V2)는 클래식 타워 디펜스 '어메이징 터렛(AmazingTurret)'과 퀴즈 대결 맵 '트리비아 배틀(Trivia Battle)'을 결합한 독특한 하이브리드 유즈맵이다. 황무지(Badlands) 타일셋 기반의 128×128 타일 전장에서 최대 6인이 한 팀이 되어 몰려오는 적 웨이브를 막아내며, 동시에 연도 맞추기 퀴즈를 풀어 보상이나 유닛 강화 혜택을 얻는 구조로 보인다. 내부 설명에 'PUBLIC BETA!' 표기가 있어 밸런스나 트리거 완성도는 정식 버전과 다를 수 있으며, 퀴즈 출제자 'DiaperBoy'와 맵 제작자 'CrashImpact'가 별도 명시되어 있다. 플레이어는 터렛 건설·업그레이드와 퀴즈 정답 입력을 병행해야 하므로 멀티태스킹 능력과 역사·상식 지식이 동시에 요구된다. 퀴즈 난이도와 웨이브 구성이 베타 단계라 변동 가능성이 크지만, 디펜스와 퀴즈 장르를 즐기는 유저에게 신선한 경험을 줄 것으로 기대된다. 입문 전에는 퀴즈 인터페이스 키 바인딩과 터렛 단축키를 익혀두면 진행이 수월하다. 협동 디펜스에 지루함을 느끼거나 지식 대결을 곁들인 색다른 유즈맵을 찾는 3~6인 파티에 추천한다. TriviaTurret: NameTheYear V2 is a unique hybrid use-map that combines the classic tower defense 'AmazingTurret' with the quiz battle map 'Trivia Battle'. On a 128×128 tile Badlands battlefield, up to six players cooperate as a single team to hold off incoming enemy waves while simultaneously solving year-identification quizzes to earn rewards or unit upgrades. The internal description marks it as a 'PUBLIC BETA!', so balance and trigger completeness may differ from a final release; quiz author 'DiaperBoy' and map maker 'CrashImpact' are credited separately. Players must juggle turret construction and upgrades with quiz answer input, demanding both multitasking skill and historical/general knowledge. Since quiz difficulty and wave composition are still in beta and subject to change, the experience may vary, but it offers a fresh twist for fans of both defense and trivia genres. Before starting, learning the quiz interface key bindings and turret hotkeys will smooth progression. Recommended for parties of three to six looking for a cooperative defense with a knowledge‑quiz twist.
스페셜 포스 어드밴스드 II (Special Forces Advanced II)
스타크래프트 브루드워 유즈맵의 숨은 명작으로 꼽히는 <Special Forces Advanced II>는 FPS와 디펜스 장르가 결합된 하이브리드형 맵으로, 플레이어에게 긴장감 넘치는 전략적 전투 경험을 제공합니다. 맵의 전체적인 구조는 넓은 평지 위주로 펼쳐지며, 중앙에 위치한 주요 거점이 수시로 적의 공격을 받습니다. 플레이어는 각자의 영웅 유닛을 조종하거나, 방어선을 구축하는 방식으로 게임을 진행하는데, 맵 곳곳에서 끊임없이 몰려오는 적군 무리들을 막아내며 생존을 위해 전략을 짜야 합니다. 특히, 맵의 지형이 비교적 평탄하다는 특징 덕분에 빠른 이동과 전투가 가능해 실시간 전략과 액션의 조화가 돋보입니다. 게임은 주로 6인 대전을 기본으로 하며, 각 플레이어가 고유의 역할과 특수 능력을 지닌 영웅을 선택할 수 있어 팀워크와 개인의 전략적 선택이 매우 중요합니다. 맵의 구조상 중앙 거점 주변에 방어 시설이나 보급 기지를 설치할 공간이 마련되어 있으며, 이를 통해 플레이어는 끊임없이 변화하는 전투 상황에 유연하게 대응해야 합니다. 맵의 디자인 자체가 방어와 공격을 균형 있게 고려한 만큼, 초보자는 물론 숙련된 플레이어에게도 흥미로운 전투를 선사합니다. 추천 대상으로는 스타크래프트의 기본적인 조작법에 익숙한 플레이어부터, 팀플레이와 전략적 사고를 즐기는 유저까지 폭넓은 팬층을 확보하고 있습니다. 또한, 다양한 영웅의 특수 능력과 맵의 랜덤 요소들이 게임의 재-playability를 높여주어, 한 번 플레이한 후에도 다시 도전하고 싶은 매력이 있습니다. 다만, 방어선을 구축하는 타이밍이나 영웅의 능력 배분이 잘못되면 쉽게 무너질 수 있으니, 초반의 전략 수립이 매우 중요합니다. Special Forces Advanced II is a hidden gem among StarCraft: Brood War custom maps, blending FPS and defense genres to deliver a tense, strategic combat experience. The map’s structure is primarily flat terrain centered around a main base that frequently comes under enemy assault. Players control unique hero units or build defensive lines to fend off waves of enemies, requiring constant strategic adjustments to survive. The relatively even terrain allows for swift movement and combat, making real-time strategy and action seamlessly integrated. The game typically supports six-player battles, where each player selects a hero with distinct abilities, emphasizing teamwork and individual strategy. Central to the map design is a core base area surrounded by space for defensive structures or supply depots, enabling players to adapt flexibly to evolving combat scenarios. The balanced design ensures engaging gameplay for both beginners and seasoned players. Recommended for players familiar with StarCraft’s basic mechanics and those who enjoy team-based strategy, this map offers high replayability thanks to diverse hero abilities and random map elements. However, poor early-game strategy or misaligned hero skill allocation can lead to quick defeats, making initial planning critical.
심시티 옵션 갓+ 밸런스 (SimCity Optional God+Balance)
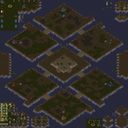
《SimCity Optional God+Balance》는 스타크래프트: 브루드워의 유즈맵 시장으로, 기존의 인기 맵인 《Sim City》 시리즈의 개선판으로 주목받는 작품이다. 이 맵은 플레이어가 신(God) 역할을 맡아 도시를 건설하고 방어하는 동시에, 유닛을 직접 조종하며 플레이하는 독특한 하이브리드 구조를 가지고 있다. 맵의 이름은 'God+'라는 선택적 신 시스템과 밸런스 개선이 강조된 점에서 유래했으며, 실제 게임에서는 신의 능력이 선택적으로 제공되어 플레이어의 전략적 선택을 넓히는 특징을 보인다. 맵의 구조는 도시 중앙에 위치한 '신전'을 중심으로 펼쳐진다. 중앙의 신전은 방어의 핵심으로, 플레이어는 유닛을 생산해 이 곳을 침략하는 적 세력(주로 저그와 프로토스)을 막아야 한다. 신의 역할은 도시 내 자원 관리와 유닛 지원으로,God+ 시스템을 통해 추가적인 영웅 유닛이나 특수 능력을 제공받아 전투를 보조할 수 있다. God+는 선택 사항이지만, 제공되는 경우 게임의 난이도를 크게 변화시킬 수 있어 전략의 다양성을 높인다. 플레이 방식은 크게 두 가지로 나뉜다. 첫째, 신의 관점에서 도시를 관리하며 자원을 확보하고 방어선을 구축하는 ‘관리자’ 역할, 둘째, 직접 유닛을 조종해 적을 공격하거나 방어선에 참여하는 ‘전투원’ 역할이다. 이 구조는 팀플레이에서 특히 빛을 발하는데, 각 플레이어의 역할 분담이 명확해지고 협력이 필수적이기 때문이다. 맵의 전체적인 밸런스는 God+ 시스템의 선택 여부에 따라 달라지므로, 플레이 전 팀원 간의 전략적 합의가 중요하다. 이 맵의 추천 대상은 팀플레이를 선호하는 유저들로, 특히 4v4 이상의 대형 팀전에서 전략적 깊이를 즐기고자 하는 플레이어에게 적합하다. 초보자는 God+ 시스템의 복잡한 능력과 유닛 컨트롤에 어려움을 느낄 수 있어, 먼저 기본 전투와 자원 관리에 익숙해진 후 도전하는 것이 좋다. 또한, 맵의 크기가 크고 도시 구조가 복잡해 타일셋의 특징인 사막 지형이 시각적으로 돋보이므로, 시야 확보와 유닛 이동 경로 설계에 신경을 써야 한다. 플레이 전 반드시 확인해야 할 점은 God+ 시스템의 활성화 여부와 팀원의 역할 분담이다. God+가 활성화된 경우, 신의 능력을 어떻게 활용할지, 어떤 유닛을 어떤 타이밍에 생산할지 사전에 논의하는 것이 승리 확률을 높이는 핵심이다. 또한, 맵의 중앙 신전 주변에는 주요 자원 지점이 집중되어 있으므로, 초기 자원 확보를 위해 신의 지원 없이도 안정적인 방어선을 구축할 수 있는 능력을 기르는 것이 중요하다. This map, 《SimCity Optional God+Balance》, is a UMS (User-Made Scenario) in StarCraft: Brood War, recognized as an enhanced version of the popular 《Sim City》 series. It uniquely blends the role of a city builder with direct unit control, where players can optionally take on the role of a deity (God) while commanding units in battle. The name reflects the optional God system and balance improvements, offering strategic depth through divine abilities that players can choose to utilize. The map’s layout centers around a pivotal ‘Temple’ in the middle of the city. This temple acts as the primary defense hub, where players must protect it from invading forces—typically Zerg and Protoss—by producing units and fortifying the area. The God+ system enhances gameplay by granting additional hero units or special abilities, though these powers are optional and can significantly alter the game’s difficulty and strategy if selected. Gameplay is split into two distinct roles: the ‘Manager,’ who oversees city resources and defensive structures, and the ‘Combatant,’ who directly controls units in battle. This dual-role system shines in team-based play, where clear role division and coordination are essential for success. The overall balance hinges on whether the God+ system is enabled, making pre-game discussions about strategy and role allocation critical. This map is best suited for players who enjoy team-based gameplay and seek strategic depth, particularly in large-scale matches like 4v4. Beginners may find the God+ system and unit control daunting, so mastering basic combat and resource management beforehand is advisable. The vast map size and intricate city layout, highlighted by the desert tileset, demand careful attention to vision control and unit movement paths. Before playing, players should verify the activation status of the God+ system and confirm team roles. If God+ is enabled, discussing how to leverage divine abilities and unit production timings is key to increasing victory chances. The central temple and surrounding areas house critical resources, so establishing a stable defense line early—even without God’s support—is vital for long-term success.
RPG vs RTS { 임페리얼 아웃브레이크 } (Rpg vs Rts { Im.O. })
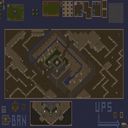
스타크래프트 브루드워의 「Rpg vs Rts { Im.O. }」는 RPG와 RTS 요소가 혼합된 독특한 유즈맵으로, 플레이어는 각자의 영웅을 조종하며 전략적 전투와 성장형 RPG의 재미를 동시에 느낄 수 있는 구조로 설계되었다. 맵은 넓은 사막 타일셋을 배경으로 펼쳐지며, 중앙에 위치한 대형 건물과 주위를 둘러싼 야외 지역으로 구성되어 있다. 이미지의 맵 배치와 아이콘을 보면 플레이어는 영웅을 성장시키며 경험치를 획득하고, 스킬을Upgrading하고, 아이템을 획득하는 RPG 시스템을 체험할 수 있는 것으로 추정된다. RTS 요소는 맵 곳곳에 배치된 적대적 유닛과 구조물, 그리고 전투를 통해 자원을 확보하는 방식을 통해 구현된다. 특히 맵 중앙의 거대한 건물은 주요 전투 지역으로 보이며, 주변의 좁은 길목은 방어와 진형을 짜기에 적합한 장소로 보인다. 플레이어는 팀을 이뤄 또는 개별로 행동하면서 적을 물리치고, 목표를 달성하는 방식으로 진행되는 것으로 보이며, 맵의 넓은 규모와 복잡한 지형은 전략적 판단과 빠른 반응을 요구한다. 이 맵은 단순히 전투만 벌이는 것이 아니라 영웅의 성장과 아이템 수집, 팀 간의 협력과 경쟁이 동시다발적으로 일어나는 하이브리드 장르의 정점을 보여준다. 초보자와 숙련자 모두 즐길 수 있는 난이도 밸런스가 조절되어 있으며, 특히 RPG 팬과 RTS 팬 모두가 공감할 수 있는 시스템으로 구성되어 있다. 플레이 전에는 영웅의 스킬 트리와 아이템 시스템, 맵의 주요 목표와 승리 조건을 미리 숙지하는 것이 중요하다. 또한 맵의 넓은 사이즈와 복잡한 지형 탓에 미리MINIMAP을 활용하여 전략을 짜는 것이 필수적이며, 팀 플레이 시에는 역할 분담을 명확히 하는 것이 좋다. 맵의 배경 음악과 효과음은 사막 분위기에 맞게 웅장하고 긴장감이 넘치도록 구성되어 있을 것으로 추정된다. 이 맵은 단순한 전투가 아닌 전략적 성장과 팀워크가 요구되는 만큼, 플레이어는 긴장감과 몰입감을 동시에 느낄 수 있을 것이다. Rpg vs Rts { Im.O. } is a unique StarCraft: Brood War custom map that blends RPG and RTS elements, allowing players to experience both strategic combat and RPG-style character growth. The map unfolds across a vast desert-themed tileset, featuring a central large building surrounded by outdoor areas. Based on the map layout and icons, players likely control heroes, gain experience points, upgrade skills, and collect items, integrating RPG mechanics. RTS elements appear through hostile units and structures scattered across the map, alongside resource management and combat-driven progression. The central structure seems to serve as a key battleground, while narrow pathways around it offer strategic vantage points for defense and formation. Players can team up or play solo, battling enemies and achieving objectives in a dynamic hybrid experience. The map's expansive scale and intricate terrain demand strategic foresight and quick reactions, appealing to both RPG and RTS enthusiasts. Designed to cater to a broad audience, from beginners to veterans, the map balances difficulty while delivering a rich blend of growth systems and tactical depth. Before playing, it's crucial to familiarize yourself with hero skill trees, item systems, primary objectives, and victory conditions. Given the map's size and complexity, utilizing the minimap for navigation and assigning roles in team play are essential. The background music and sound effects are likely tailored to evoke the grandeur and tension of a desert setting. This map offers more than mere combat—it delivers strategic growth and teamwork, ensuring players remain immersed and engaged throughout the experience.
RPG vs RTS 임페리얼 아웃브레이크 (RPG vs RTS Imperial Outbreak)
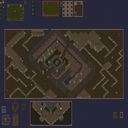
스타크래프트 브루드워 유즈맵 'RPG vs RTS 임페리얼 아웃브레이크(RPG vs RTS Imperial Outbreak)'는 eldavido와 Tiger_Nixon이 공동 제작한 6인용 하이브리드 장르 맵으로, 파일명과 내부 제목에 모두 'Imperial Outbreak'라는 부제가 붙어 있어 제국 테마의 돌발 상황이나 시나리오형 진행이 핵심 콘텐츠임을 암시한다. 사막 타일셋을 사용한 256x128 타일(8192x4096 픽셀) 크기의 대형 맵은 일반적인 밀리 맵보다 훨씬 넓은 전장을 제공하며, 이는 RPG 진영의 영웅이 맵 곳곳을 탐험하며 성장할 공간과 RTS 진영이 다수의 기지를 확보하고 병력을 집결할 전략적 거점을 동시에 마련해준다. 장르명에서 알 수 있듯 한쪽 팀은 단일 영웅 유닛을 조작해 경험치 획득, 레벨업, 스킬 습득, 아이템 조합 등 RPG 고유의 성장 루프를 돌고, 상대 팀은 자원 채취, 건물 건설, 유닛 생산, 업그레이드 등 정통 RTS 운영으로 영웅을 사냥하거나 목표 지점을 방어하는 비대칭 대결 구도가 펼쳐진다. 6인 플레이 기준으로 팀 배분은 3대3 혹은 1대5 등 다양한 구성이 가능해 보이지만, 핵심은 영웅의 초반 생존과 RTS 측의 초반 견제 밸런스에 달려 있을 것으로 추정된다. 트리거 기반의 커스텀 승리 조건, 이벤트 연출, 유닛 특수 능력이 밀리 엔진 위에 얹어져 있으므로 최신 패치 버전과의 호환성이나 버전별 밸런스 패치 내역을 플레이 전 반드시 확인해야 한다. 비대칭 PvP의 긴장감과 RPG 육성의 성취감을 동시에 맛보고 싶은 유즈맵 애호가, 정해진 빌드 오더를 벗어나 창의적인 운영을 즐기는 플레이어 그룹에게 특히 추천한다. StarCraft Brood War UMS map 'RPG vs RTS Imperial Outbreak' is a 6-player hybrid genre map co-created by eldavido and Tiger_Nixon. The subtitle 'Imperial Outbreak' appears in both the filename and internal title, implying an imperial-themed outbreak scenario or campaign-style progression as core content. The vast 256x128 tile (8192x4096 pixel) map using the Desert tileset provides a much larger battlefield than standard melee maps, offering ample space for RPG-side heroes to explore and grow while giving the RTS side strategic footholds to secure multiple bases and amass armies. As the genre name suggests, one team controls a single hero unit, cycling through RPG growth loops of experience gain, level-ups, skill acquisition, and item combination, while the opposing team engages in classic RTS management—resource gathering, building construction, unit production, and upgrades—to hunt the hero or defend objectives in an asymmetric showdown. With 6 players, team splits like 3v3 or 1v5 seem possible, but the core balance likely hinges on the hero's early survival versus the RTS side's early pressure. Since custom victory conditions, event cinematics, and special unit abilities are layered on the melee engine via triggers, verifying compatibility with the latest patch and checking version-specific balance notes is essential before playing. This map is highly recommended for UMS enthusiasts craving the tension of asymmetric PvP and the satisfaction of RPG progression, as well as player groups who enjoy creative strategies beyond fixed build orders.
맵 선택 가이드
태그는 맵의 핵심 특징을 빠르게 설명하지만 제작 버전마다 규칙이 다를 수 있습니다. 상세 설명에서 권장 인원, 난이도, 플레이 시간과 버전을 함께 확인한 뒤 다운로드하세요.