
하드코어 스타크래프트 맵 모음
'하드코어' 태그가 등록된 맵을 모았습니다. 장르 하나로 찾기 어려운 플레이 방식, 난이도와 특징을 중심으로 인기 맵과 최신 맵을 비교해 보세요.
- 등록 맵
- 51개
- 누적 다운로드
- 26
- 누적 조회
- 1,851
인기 맵
다운로드와 조회 반응이 높은 맵입니다.
번 오브 파이어 (Burn of Fire)
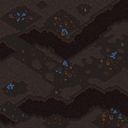
‘번 오브 파이어(Burn of Fire)’는 스타크래프트 브루드워의 유즈맵으로, 플레이어가 자연의 파괴력에 맞서 살아남는 디펜스 장르의 맵이다. 맵 제목과 내부 설명에 등장하는 ‘자연의 힘’이란 표현은 맵 전체에 걸쳐 불길과 화산 폭발, 지진 등으로 표현되며, 이벤트가 발생할 때마다 맵 곳곳의 지형이 변화하는 특징을 지닌다. 중앙과 외곽에 배치된 방어 타워는 물론이고, 플레이어는 자원 채취를 통해 건물을 건설하거나 유닛을 생산해 이 자연 재해를 버텨야 한다. 맵의 타일셋은 정글 테마로 구성되어 있어, 밝은 색상과 어두운 색상의 조합이 맵의 분위기를 한층 더 강화한다. 맵의 구조는 중앙에 넓은 평야가 있고, 그 주변으로 산맥과 숲이 둘러싸는 형태로 되어 있어, 자연 disastro가 발생할 때 맵의 일부가 파괴되거나 재구성되는 듯한 연출이 인상적이다. 플레이어는 단 한 명의 플레이어로 시작하며, 맵의 이벤트에 따라 유닛과 건물을 관리해야 한다. 초반에는 비교적 평온한 상태이지만, 점차 자연 disastro가 발생하면서 맵의 일부가 파괴되고,在这时에는 새로운 지역이 노출되어 자원 채취가 가능해진다. 이를 통해 자원을 확보하고 방어력을 강화하는 것이 주요 전략이다. 맵의 난이도는 이벤트의 빈도와 강도에 따라 달라지며, 초보자의 경우 자연 disastro에 대응하는 데 어려움을 느낄 수 있다. 반면, 고수 유저는 자연 disastro를 역이용해 추가 자원을 확보하거나 방어선을 재구축하는 등 다양한 전략을 구사할 수 있다. 이 맵은 자연 재해에 대응하는 전략적 사고와 자원 관리 능력을 요구하는 만큼, 디펜스 장르의 유즈맵 중에서도 다소 하드코어한 편에 속한다. 맵의 진행 방식은 비교적 명확하지만, 자연 disastro의 패턴을 미리 숙지하지 않으면 대응이 늦어질 수 있으므로, 플레이 전 맵의 구조와 이벤트 발생 위치를 미리 파악하는 것이 중요하다. 또한, 맵의 타일셋과 연출이 아름답고 몰입감 있게 구성되어 있어, 시각적인 측면에서도 즐거운 경험을 제공한다. 자연 재해와 싸우는 콘셉트는 다소 무겁지만, 맵의 디자인과 연출 덕분에 플레이어는 긴장감과 성취감을 동시에 느낄 수 있을 것이다. 이 맵은 자연 disastro를 컨트롤하는 재미와 함께, 플레이어의 전략적 선택이 결과에 큰 영향을 미치는 구조로 되어 있어, 반복 플레이를 통해 새로운 전략을 발견할 수 있는 매력이 있다. 특히, 자연 disastro가 발생할 때마다 맵의 모습이 변화하는 연출은 한 번 보는 것만으로는 완전히 파악하기 어려운 부분이 많아, 여러 번 플레이해 볼 가치가 있는 맵이다. 자연 disastro의 패턴을 분석하고, 그에 맞는 방어 전략을 수립하는 것이 이 맵의 핵심이며, 이를 통해 플레이어는 자연의 힘을 이기는 법을 배울 수 있을 것이다. 이 맵은 자연 재해와 싸우는 디펜스 장르의 유즈맵으로서, 전략적 사고와 자원 관리를 요구하는 하드코어한 콘텐츠를 제공한다. 맵의 연출과 구조가 뛰어나며, 자연 disastro의 패턴을 분석하고 대응하는 재미가 있는 만큼, 디펜스 장르를 좋아하는 플레이어들에게 strong 추천할 만한 작품이다. ‘Burn of Fire’ is a *StarCraft: Brood War* custom map where players survive a defense-style game against the destructive forces of nature. The phrase "power of nature," which appears in the map’s title and internal descriptions, is embodied throughout the map through flames, volcanic eruptions, and earthquakes, with terrain shifting every time an event occurs. In addition to defense towers placed in the center and outer areas, players must gather resources to build structures and produce units to endure these natural disasters. The tile set is jungle-themed, with a mix of bright and dark colors enhancing the map’s atmosphere. The layout features a wide plain at the center, surrounded by mountain ranges and forests, making the destruction and restructuring of parts of the map during natural disasters a striking visual experience. Players start as a single individual and must manage units and buildings based on in-game events. The early game is relatively calm, but as natural disasters intensify, parts of the map are destroyed, revealing new areas where resources can be gathered. Securing resources and strengthening defenses become key strategies. The difficulty varies depending on the frequency and intensity of the events—beginners may struggle to respond to natural disasters, while advanced players can leverage them to secure additional resources or rebuild defensive lines in creative ways. As a defense-style custom map that demands strategic thinking and resource management, ‘Burn of Fire’ leans toward the hardcore end of the genre. While the progression is straightforward, failing to familiarize yourself with the disaster patterns can lead to delayed responses, so understanding the map’s layout and event locations beforehand is crucial. The tile set and visual effects are beautifully and immersively designed, offering a satisfying experience from a visual standpoint as well. Though the concept of battling natural disasters may feel heavy, the map’s design and execution allow players to feel both tension and a sense of accomplishment. The map excels in offering the fun of controlling natural disasters while structuring gameplay so that players’ strategic choices significantly impact the outcome, encouraging repeated plays to discover new tactics. The way the map transforms with each disaster event makes it difficult to fully grasp after just one playthrough, making it well worth replaying. Analyzing disaster patterns and devising corresponding defense strategies is the core of this map, teaching players how to overcome the power of nature. As a defense-style custom map centered on battling natural disasters, ‘Burn of Fire’ delivers hardcore content that challenges strategic thinking and resource management. With its outstanding visuals, structure, and the engaging fun of analyzing and responding to disaster patterns, it comes highly recommended for fans of the defense genre.
![매트[9.1]완전판 (MATRIX 9.1) 맵 미리보기](https://cdn-star-data.huzy.net/thumbnail_417c450255b64fc9b9e3c6d967240e00.jpg)
매트[9.1]완전판 (MATRIX 9.1)
스타크래프트 브루드워의 정교한 유즈맵으로 유명한 MATRIX 9.1은 우주 배경의 디펜스 장르 맵이다. 맵의 중앙에는 거대한 구조물이 자리 잡고 있으며, 플레이어는 이 구조물을 보호하거나 공격하는 형태로 전투를 펼쳐야 한다. 맵 구조는 복잡한 길이와 방어 시설로 구성되어 있어, 전략적인 플레이가 요구된다. 맵의 하단과 상단에는 각각의 플레이어 기지가 배치되어 있으며, 기지 주변에는 방어 건물이 배치되어 있다. 맵의 상단과 하단에 위치한 광물 지대와 가스 채취 지역은 자원 관리를 통해 지속적인 전투를 가능하게 한다. MATRIX 9.1은Hardcore 모드와 같이 어려운 난이도를 자랑하며, 플레이어는 끊임없이 다가오는 적의 물량을 상대해야 한다. 맵의 디자인과 전투 시스템은 마치 영화 '매트릭스'의 세계관을 연상시키며, 플레이어는 마치 가상 현실 속에서 전투를 펼치는 듯한 경험을 느낄 수 있다. 이 맵은 주로 6인 플레이를 상정하고 있으며, 팀 플레이보다는 개인별 전투와 전략이 emphasized된다. MATRIX 9.1을 플레이하기 위해서는 맵의 구조와 방어 전략을 충분히 숙지하는 것이 중요하다. 특히, 기지 방어와 자원 관리, 그리고 적의 공격 패턴을 예측하는 능력이 요구된다. 맵의 난이도가 높기 때문에 초보 플레이어보다는 숙련된 플레이어에게 더 적합한 맵으로 평가된다. 또한, 맵의 Hardcore 모드는 일반적인 디펜스 맵과는 차별화된 긴장감을 제공한다. MATRIX 9.1은 단순히 방어하는 것을 넘어, 적극적인 공격과 전략을 요구하는 맵으로, 스타크래프트 유즈맵의 진수를 경험할 수 있는 작품 중 하나이다. MATRIX 9.1 is a sophisticated custom map in StarCraft: Brood War, renowned for its defense genre set in a cosmic environment. The map centers around a massive structure that players must either protect or attack, depending on the game mode. The layout features intricate pathways and defensive structures, demanding strategic thinking from players. Bases for each player are situated at the top and bottom of the map, surrounded by defensive buildings. Mineral fields and gas geysers at the top and bottom allow for resource management to sustain ongoing battles. Known for its Hardcore mode, MATRIX 9.1 presents a challenging difficulty, requiring players to fend off relentless enemy waves. The design and combat system evoke the cinematic world of 'The Matrix,' immersing players in a virtual reality-like battlefield. Designed primarily for 6 players, the map emphasizes individual combat and strategy over team play. To excel, players should thoroughly understand the map's layout, defensive tactics, resource management, and enemy attack patterns. The high difficulty makes it more suitable for experienced players rather than beginners. The Hardcore mode adds a layer of tension, distinguishing it from standard defense maps. MATRIX 9.1 transcends mere defense by incorporating proactive attacks and strategy, offering a quintessential experience of StarCraft custom maps.
벌쳐 1000부대막기 (Vulture 1000 Unit Defense)
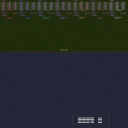
벌쳐 1000부대막기는 플랫폼 타일셋을 기반으로 한 세로로 긴 2048x8192 크기의 맵에서 최대 7인이 협동해 밀려드는 벌쳐 부대를 막아내는 디펜스 유즈맵이다. 맵 제목 그대로 천 마리 가까운 벌쳐가 웨이브 형태로 진격해 오며, 플레이어는 좁은 진입로를 이용해 입구를 막고 화력을 집중해야 한다. 제작자 HarAceLife가 'HARD'라고 표기한 만큼 난이도는 상당히 높게 설정되어 있어, 초반부터 강력한 유닛 조합과 업그레이드 타이밍, 자원 분배가 승패를 가른다. 벌쳐의 빠른 이동 속도와 숫적 우세를 감안하면 단일 플레이어의 힘만으로는 버티기 어렵고, 팀원 간 역할 분담과 집중 포화 지점 선정이 필수적이다. 맵 구조상 세로로 긴 형태라 유닛 이동 거리가 길고, 후방 지원이나 수비선 재배치에 시간이 걸리므로 전선 붕괴 시 복구가 까다롭다. 협동 디펜스 장르를 즐기면서 높은 난이도의 도전을 원하는 유저, 입구막기류 맵에서 화력 설계와 라인 관리를 연습하고 싶은 플레이어에게 적합하다. 플레이 전에는 팀 구성원 간 종족 조합과 초반 빌드 오더를 맞추고, 벌쳐 대응용 대공·지상 혼합 유닛을 미리 준비하는 것이 좋다. 또한 맵 크기가 큰 만큼 미니맵 확인과 병력 분산 배치에 익숙해져야 안정적인 수비가 가능하다. Vulture 1000 Unit Defense is a defense UMS map set on a vertically long 2048x8192 platform tileset where up to seven players cooperate to stop waves of vultures. As the title suggests, nearly a thousand vultures advance in wave formations, and players must block narrow chokepoints to concentrate firepower. Marked as 'HARD' by creator HarAceLife, the difficulty is set very high, making early unit composition, upgrade timing, and resource allocation critical to victory. Given the vultures' high speed and numerical advantage, a single player cannot hold the line alone; role assignment among teammates and selecting focus-fire positions are essential. The map's tall layout means long unit travel distances, so rear support and defensive line repositioning take time, making recovery difficult once the front collapses. This map suits players who enjoy cooperative defense and want a serious challenge, or those looking to practice firepower design and line management in chokepoint defense maps. Before playing, teams should coordinate race picks and early build orders, and prepare mixed anti-air and ground units to counter vultures. Familiarity with minimap awareness and distributed force placement is also necessary for stable defense given the large map size.
매트릭스 7.11 (Matrix 7.11)
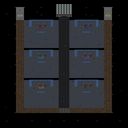
매트릭스 7.11 (Matrix 7.11)은 스타크래프트 브루드워 맵 유저들 사이에서 독특한 구조와 긴장감 넘치는 진행으로 알려진 디펜스 장르의 유즈맵이다. 전체적인 맵 구조를 살펴보면, 중앙의 길쭉한 통로를 기준으로 양옆에 플레이어들이 자리 잡을 수 있는 개별 구역이 대칭 형태로 배치된 모습을 확인할 수 있다. 상단에는 자원 채취를 위한 공간과 중립적인 오브젝트들이 배치되어 있으며, 각 진영마다 기지를 방어하기 위한 공간과 입구 쪽 구조물이 마련되어 있어 협동 플레이와 개인 방어 능력을 동시에 요구하는 형태로 추정된다. 내부 설명에 하드코어라는 문구가 포함된 만큼, 일반적인 디펜스 유즈맵에 비해 난이도가 높고 빈틈없는 방어 전략이 필수적일 것으로 보인다. 이 맵은 최대 6명이 함께 즐길 수 있는 다인용 유즈맵으로 설계되어 있어, 여러 플레이어가 각자의 구역을 맡아 몰려오는 적들을 막아내는 협동의 재미를 극대화한다. 중앙 통로와 주변 지형을 활용한 유닛 배치, 그리고 자원 관리 타이밍이 승패를 가르는 핵심 요소가 될 것이다. 평소 고난도 디펜스 장르를 선호하거나 친구들과 함께 손발을 맞춰 거세게 밀려오는 공세를 막아내는 짜릿함을 즐기는 유저들에게 알맞은 선택이 될 수 있다. 플레이를 시작하기 앞서 각 진영의 자원 수급 방식과 입구 구조를 미리 파악하고, 아군과의 소통을 통해 방어선을 구축하는 전략적인 접근을 권장한다. Matrix 7.11 is a defense-style custom map known among StarCraft: Brood War users for its unique structure and tense gameplay progression. Looking at the overall map layout, individual player zones are symmetrically arranged on both sides of a long central corridor. The upper section features spaces for resource gathering and neutral objects, while each faction has designated defensive areas and entrance structures, suggesting a design that requires both cooperative play and individual defense capabilities. Since the internal description includes the word hardcore, it appears to feature a higher difficulty level and demands flawless defensive strategies compared to typical defense use maps. This map is designed as a multiplayer custom map supporting up to six players, maximizing the fun of cooperation where multiple participants manage their respective zones to fend off incoming enemies. Unit placement utilizing the central corridor and surrounding terrain, along with resource management timing, will likely serve as key factors determining victory or defeat. It can be a suitable choice for users who usually prefer high-difficulty defense genres and enjoy the thrill of holding back relentless waves of attacks in coordination with friends. Before starting the game, it is recommended to examine the resource acquisition methods and entrance structures of each faction in advance and approach strategically by establishing defensive lines through communication with allies.
![폭컨[hard] 2.52차버젼업 맵 미리보기](https://cdn-star-data.huzy.net/thumbnail_1126a25ea06d4f0a86d88a97ef8a04f6.jpg)
폭컨[hard] 2.52차버젼업
스타크래프트 브루드워 유즈맵 '폭컨 하드 2.52 버전'은 제목 그대로 폭탄 컨트롤, 일명 '폭컨' 장르의 고난이도 버전이다. 128x128 크기의 황혼 타일셋 위에서 최대 6인이 동시에 즐길 수 있도록 설계되었으며, 맵 전역에 무작위로 생성되거나 패턴화된 폭탄과 투사체를 피하며 생존하는 것이 핵심 목표다. 하드 난이도가 명시된 만큼 일반 폭컨 맵보다 투사체 속도, 생성 주기, 패턴 복잡도가 크게 상승해 순발력과 암기력, 그리고 미세한 컨트롤이 동시에 요구된다. 플레이어는 보통 마린이나 고스트 등 기동성이 좋은 유닛을 조작해 좁은 안전지대를 찾아 이동하거나, 순간적인 멈춤과 방향 전환으로 탄막을 뚫어야 한다. 6인 동시 플레이 시 화면이 매우 혼잡해지며, 아군 유닛에 가려 자신의 위치를 놓치기 쉬워 극도의 집중력이 필수적이다. 버전업 이력(2.52차)이 보여주듯 밸런스 패턴 조정과 버그 수정이 반복되어 완성도가 높은 편이며, 혼자 연습하기보단 여럿이 경쟁하거나 협동하며 생존 시간을 겨루는 재미가 크다. 컨트롤 연습용으로도 훌륭하지만 초보자는 난이도 장벽이 높으니 이지/노말 버전부터 입문하길 권한다. 맵 파일명에 '리개주'라는 표현이 있는 점으로 보아 제작자가 지속적으로 피드백을 반영해온 것으로 보인다. StarCraft: Brood War UMS map 'Bomb Control Hard Ver 2.52' is, as the title suggests, a high-difficulty version of the 'Bomb Control' (Pokcon) genre. Designed for up to 6 players on a 128x128 Twilight tileset, the core objective is to survive by dodging randomly generated or patterned bombs and projectiles across the map. As indicated by the Hard difficulty, projectile speed, spawn rates, and pattern complexity are significantly increased compared to standard Pokcon maps, demanding both reflexes and memorization alongside precise micro-control. Players typically control mobile units like Marines or Ghosts, navigating tight safe zones or weaving through barrages with sudden stops and direction changes. With 6 players simultaneous, the screen becomes extremely cluttered, and allied units often obscure one's position, requiring intense focus. The version history (v2.52) suggests repeated balance pattern adjustments and bug fixes, resulting in a high level of polish. It is more enjoyable competing or cooperating with others to set survival records than practicing alone. While excellent for control practice, beginners should start with Easy/Normal versions due to the steep difficulty curve. The term 're-gae-ju' (re-fix/re-release) in the filename implies the creator has continuously incorporated feedback.
킬 18,000 저그 v2.1 (Kill 18,000 Zergs v2.1)
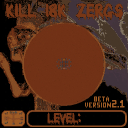
스타크래프트 브루드워의 유즈맵인 〈킬 18,000 저그〉는 한정된 자원으로 끊임없이 몰려드는 저그 무리를 상대하는 컴까기 스타일의 디펜스 맵이다. 맵 중앙에 위치한 본진을 중심으로 사방에서 저그가 끊임없이 생산되어 공격해 오며, 플레이어는 제한된 미네랄과 가스를 활용해 방어 건물을 건설하고 병력을 양성해야 한다. 섬세한 타워 배치와 멀티태스킹이 요구되는 이 맵은 초반부터 끊임없는 압박을 버텨내고 후반까지 안정된 수비를 유지하는 전략적 사고가 핵심이다. 맵의 대부분은 어두운 톤의 셰이딩으로 처리되어 있으며, 저그가 몰려오는 주요 루트는 밝은 색상의 타일로 구분되어 있어 시야를 확보하고 전략을 세우는 데 도움을 준다. 맵 우측 하단에는 제작자 정보와 버전 정보가 표시되어 있으며, 맵의 끝자락에는 ‘BETA’라는 표시가 확인된다. 초보자에게는 난이도가 높은 편이지만, 꾸준한 연습을 통해 방어 라인을 구축하고 병력 조합을 최적화하는 재미가 있는 맵으로 평가된다. 특히 타워를 통한 수비와 동시에 자원을 확보하는 균형 잡힌 플레이가 요구되며, 저그의 공격을 버티며 최종적으로 18,000마리의 저그를 처치하는 것이 목표로 추정된다. 맵의 구조상 중앙 본진 외곽에는 방어 건물을 짓기 어려운 공간이 있어, 초반부터 신중한 자원 관리와 멀티태스킹이 필수적이다. 저그의 공격 패턴은 일정하지 않지만, 특정 루트에서 집중적인 공격을 감행하는 경향이 보이므로 이를 예측하고 방어선을 재배치하는 것이 중요하다. 전체적으로는 디펜스와 리소스 관리, 그리고 전략적 플레이가 조합된 하드코어한 유즈맵으로, 숙련된 플레이어에게는 긴장감을 유발하는 재미있는 경험을 제공할 것으로 보인다. 초보자의 경우, 우선은 방어 타워의 위치와 병력 조합에 익숙해지는 것부터 시작하는 것이 좋다. 맵의 이름은 ‘킬 18,000 저그’로, 대량의 저그를 처치하는 것이 목표임을 명시하고 있으나, 실제 목표는 맵 내에서 확인된 정보에 따라 추정된 바이며, 제작자의 설명이나 내부 조건은 제공되지 않았다. nonetheless, 맵의 제목과 구조, 그리고 반복되는 저그의 공격 패턴을 고려할 때, 이 목표는 맵의 핵심 콘텐츠로 기능할 가능성이 높다. StarCraft: Brood War's custom map *Kill 18,000 Zerg* is a defense-style comp-stomping map where players must fend off endless waves of Zerg with limited resources. Zerg continuously spawn from all directions around the central main base, forcing the player to construct defenses and produce units using scarce minerals and gas. The map demands precise tower placement and multitasking, requiring players to withstand relentless early pressure while maintaining stable defenses into the late game. Most of the map is rendered in dark shading, but key Zerg attack routes are highlighted with bright tiles to help players secure vision and plan strategies. In the bottom right corner, the creator's information and version details are displayed, and a "BETA" label can be seen at the far edge of the map. While the difficulty is steep for beginners, consistent practice allows players to build defensive lines and optimize unit compositions, making it a rewarding challenge. The map requires a balanced approach—defending with towers while securing resources—and the goal appears to be defeating 18,000 Zerg units in total. Due to the map's layout, spaces around the central main base offer little room for defensive structures, making early resource management and multitasking essential. Though the Zerg's attack patterns aren't entirely predictable, they tend to focus on specific routes, so anticipating and adjusting defenses accordingly is crucial. Overall, *Kill 18,000 Zerg* is a hardcore custom map that blends defense, resource management, and strategic play, offering a tense and engaging experience for skilled players. Beginners should start by familiarizing themselves with tower placements and unit compositions. While the map's title explicitly states the goal of killing 18,000 Zerg, this objective is inferred from the map's structure and recurring attack patterns, as no official rules or internal conditions are provided—though it likely serves as the core gameplay focus.
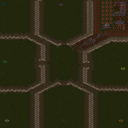
7v1Computer -((HARD))-
'7v1Computer -((HARD))-'는 7명의 플레이어가 하나의 강력한 컴퓨터를 상대로 협력해 기지를 섬멸하는 전형적인 '컴까기(Comp Stomp)' 유즈맵이다. 현재 사이트 분류는 '디펜스'로 되어 있으나, 맵 제목과 7인 플레이 인원, 'HARD' 난이도 표기 등을 종합하면 특정 거점을 지키는 타워 디펜스나 웨이브 디펜스가 아니라 적 본진을 직접 공략하는 공격 지향적 구조로 보인다. 사막 타일셋의 128x128 크기 맵은 자원 멀티와 진입로가 비교적 명확하게 배치되어 있어, 초반 빌드 오더와 테크트리 선택이 승패를 가르는 핵심 요소로 추정된다. 7명이 동시에 시작하므로 초반 러시나 멀티 확보 경쟁 없이 아군과의 역할 분담(탱커, 딜러, 서포터)이 중요하며, 컴퓨터 AI의 치트성 자원 생산과 업그레이드 속도를 감안하면 중반 이후 병력 조합과 업그레이드 타이밍 싸움이 치열해질 것으로 보인다. 'Good Luck'이라는 짤막한 설명만 있는 점으로 미루어 별도의 트리거 이벤트나 스토리, 특수 승리 조건보다는 순수한 실력 대결에 초점을 맞춘 맵일 가능성이 높다. 추천 대상은 협동전 감각을 익히고 싶은 입문자부터 고난도 AI 상대 연습을 원하는 숙련자까지 폭넓다. 플레이 전에는 아군 종족 조합과 빌드 통일 여부, 맵 중앙 및 측면 멀티 선점 전략을 미리 논의하는 것이 승률을 높이는 데 도움이 된다. '7v1Computer -((HARD))-' is a classic 'Comp Stomp' use-map where seven players cooperate to destroy a single powerful computer opponent. Although the site categorizes it as 'Defense', the map title, 7-player capacity, and 'HARD' difficulty label suggest an offense-oriented structure aimed at directly assaulting the enemy base rather than a tower defense or wave defense protecting a specific objective. The 128x128 Desert tileset map appears to feature clearly arranged resource expansions and chokepoints, making early build orders and tech choices the decisive factors. With seven players starting simultaneously, there is no early rush or competition for expansions among allies, so role assignment—tank, damage dealer, support—becomes crucial. Considering the computer AI's cheat-level resource production and upgrade speed, mid-to-late game army composition and upgrade timing battles are expected to be intense. The brief description 'Good Luck' implies a focus on pure skill confrontation without special trigger events, story, or unique victory conditions. It is recommended for a wide range of players, from beginners learning cooperative play to veterans seeking high-difficulty AI practice. Before playing, discussing allied race combinations, build synchronization, and strategies for securing central and side expansions will help increase win rates.
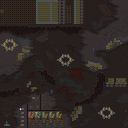
Carnage2 v2.2 Hard
카니지 2 v2.2 하드는 5인 협동 플레이를 전제로 한 유즈맵으로, 정글 타일셋 위에서 언데드 템플러라는 강력한 보스를 처치하는 것이 핵심 목표다. 맵 크기 128x128 타일 규모에서 펼쳐지는 진행은 일반적인 밀리 대전이 아닌, 정해진 보스 몬스터를 상대로 플레이어들이 힘을 합쳐 공략하는 보스 레이드 형식을 띤다. 내부 설명에 따르면 '언데드 템플러를 처치하라'는 단일 승리 조건이 제시되어 있어, 맵 전체가 해당 보스와의 결전에 집중되도록 설계된 것으로 보인다. 하드 난이도가 명시된 만큼 보스의 체력과 공격력, 스킬 구성이 상당히 까다로울 것으로 추정되며, 5인 파티의 역할 분담과 컨트롤, 아이템 파밍이나 업그레이드 선택이 승패를 가를 전망이다. 정글 지형 특성상 시야 확보와 이동 경로 제약이 변수로 작용할 수 있으며, 맵 곳곳에 숨겨진 트리거나 이벤트가 보스전 전개에 영향을 줄 가능성이 있다. 입문자보다는 유즈맵 협동 플레이 경험이 있고, 고난도 보스 공략을 즐기는 유저에게 적합하다. 플레이 전에는 버전 표기(v2.2)가 최신인지, 추가 패치나 밸런스 조정 내역이 있는지 확인하고 파티원을 모집하는 것이 좋다. Carnage2 v2.2 Hard is a UMS map designed for 5-player cooperative play, where the core objective is to defeat a powerful boss named the Undead Templar on a jungle tileset. The 128x128 tile map does not follow standard melee mechanics; instead, it adopts a boss raid format where players must combine forces to take down a predetermined boss monster. The internal description states a single victory condition—'kill the Undead Templar'—indicating the entire map is structured around this climactic encounter. With 'Hard' explicitly in the title, the boss's health, damage, and skill set are expected to be highly challenging, making role assignment, micro control, and item/upgrade choices among the five players critical to success. The jungle terrain may introduce variables such as limited vision and restricted movement paths, and hidden triggers or events scattered across the map could influence the boss fight progression. This map is better suited for players with experience in cooperative UMS content and those who enjoy high-difficulty boss encounters rather than beginners. Before playing, it is advisable to verify whether v2.2 is the latest version and check for any additional patches or balance changes before assembling a party.
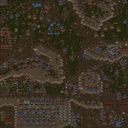
스페셜 포스: 데스 밸리 (Special Forces: Death Valley)
스타크래프트 브루드워 유즈맵 'Special Forces: Death Valley'는 6인 협동 서바이벌 장르로, 사막 타일셋의 광활한 96x96 맵에서 특수부대원들이 되어 지옥 같은 전장에서 살아남는 내용을 담고 있다. 파일명 'DIE IN HELL'에서 느껴지듯 높은 난이도와 긴장감을 예고하며, 제작자 NaTo-H3O의 의도가 고스란히 녹아 있다. 3072x3072 크기의 거대한 전장은 사막 타일셋 특유의 황량한 분위기가 '데스 밸리'라는 명칭과 잘 어우러지며, 맵 중앙을 가로지르는 협곡이나 오아시스 지형이 전략적 요충지로 활용될 가능성이 보인다. 일반적인 디펜스와 달리 고정된 타워 건설보다는 기동력 있는 영웅 유닛의 컨트롤과 아군 지원 스킬 연계가 핵심이며, 웨이브가 진행될수록 공중/지상 혼합 병력과 강력한 보스 몬스터가 등장해 전술적 대응을 강요한다. 6명 전원이 생존해야 클리어에 가까워지는 구조로 추정되며, 한 명이 전멸하면 전체 난이도가 급격히 상승하는 페널티 시스템이 적용되었을 수 있다. 난이도가 '어려움' 이상으로 설정되어 있어 무작위 매칭보다는 정예 멤버와의 사전 조율이 필수적이며, 맵 에디터로 트리거를 확인해 버그나 밸런스 패치 여부를 살펴보는 것도 좋다. 특수부대 컨셉의 밀리터리 감성과 하드코어 서바이벌의 긴장감을 동시에 즐기고 싶은 유저에게 최적의 선택지가 될 것이다. StarCraft Brood War UMS map 'Special Forces: Death Valley' is a 6-player cooperative survival genre set on a vast 96x96 desert tileset map where players become special forces operatives surviving a hellish battlefield. As the filename 'DIE IN HELL' suggests, it promises high difficulty and tension, reflecting creator NaTo-H3O's intent. The huge 3072x3072 battlefield captures the desolate atmosphere of the desert tileset, fitting the 'Death Valley' name, with canyons and oases likely serving as strategic chokepoints. Unlike standard tower defenses, the core gameplay appears to revolve around mobile hero unit control and allied skill synergy rather than static building. As waves progress, mixed air/ground forces and powerful bosses demand tactical responses. The structure likely requires all 6 players to survive for clearance, with a snowballing penalty upon ally death. With difficulty rated 'Hard' or above, premade teams with voice chat are essential over random matching. Checking triggers via the map editor for bugs or balance patches is advised. This map is an optimal choice for users seeking military special forces aesthetics combined with hardcore survival tension.
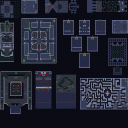
임파서블 니르바나 2010 (Impossible Nirvana 2010)
스타크래프트 브루드워의 유즈맵 <Impossible Nirvana 2010>은 플레이어 5명이 한 팀으로 협동하여 극한의 난관을 극복하는 디펜스 장르의 맵입니다. 맵 이미지에서 확인되는 여러 개의 요새와 방어 시설, serta 적의 끊임없는 공세가 인상적인 이 맵은 단순히 방어하는 것만이 아니라 전략적 계획과 빠른 판단력이 요구되는 하드코어 디펜스로 분류됩니다. 맵 중앙에는 거대한 요새가 자리 잡고 있으며, 외곽을 따라 배치된 방어 타워와 병영을 활용해 적의 공격을 저지해야 합니다. 특히, 맵의 구조상 일부 통로가 좁아져 있어 대량의 적 유닛을 한꺼번에 상대해야 하는 상황이 빈번히 발생하므로, 자원 관리와 유닛 조합에 신중한 접근이 필요합니다. 플레이 방식은 기본적으로 컴퓨터의 끊임없는 공격을 방어하는 컴까기(컴퓨터 상대 유즈맵)로 보이며, 맵 이미지에서 확인되는 다수의 적 시작 위치와 방어 시설의 배치가 이를 뒷받침합니다. 맵의 중앙 요새가 주요 방어 거점 역할을 하고, 외부 방어선에서 보조적으로 적을 막아내야 합니다. 또한, 맵 상단과 하단에 위치한 좁은 통로에서는 적의 대량 러시가 예상되므로, 초반 자원 확보와 병력 확충이 매우 중요합니다. 방어 타워의 배치를 최적화하고, 적의 공격 패턴을 예측하는 능력이 이 맵의 핵심 과제입니다. 이 맵은 초보자보다는 intermediates 이상의 플레이어에게 추천되며, 특히 스타크래프트의 디펜스 맵을 즐기는 유저들에게 큰 호응을 받을 만한 구성입니다. 단, 맵의 난이도가 높으므로 충분한 연습과 전략 수립이 필요합니다. 게임을 시작하기 전, 방어 시설의 배치와 자원 확보 타이밍을 미리 계획해 두는 것이 중요합니다. 또한, 맵의 복잡한 구조상 미니맵을 적극 활용해 적의 공격 루트를 실시간으로 확인하는 것이 성공의 열쇠가 될 것입니다. Impossible Nirvana 2010 is a hardcore defense-style custom map for StarCraft: Brood War where five players work together as a single team to withstand relentless enemy assaults. The map features a central fortress surrounded by defensive structures and tower placements, requiring players to strategically manage resources and unit compositions. Narrow pathways around the map force frequent encounters with waves of enemy units, making early resource collection and unit reinforcement critical to survival. The gameplay revolves around countering continuous computer-controlled attacks, evident from the multiple enemy starting positions and densely packed defensive layouts visible in the image. Players must prioritize fortifying the central fortress while maintaining auxiliary outer defenses. The top and bottom narrow corridors are hotspots for massive enemy rushes, demanding careful planning in the early game. Optimizing tower placements and predicting attack patterns are essential to overcoming the map's challenges. This map is recommended for intermediate to advanced players who enjoy StarCraft's defense custom maps. While the difficulty is high, the strategic depth and cooperative nature provide a rewarding experience for those willing to put in the effort. Before starting, players should plan their initial defenses and resource allocation. Utilizing the minimap to track enemy movements in real-time is crucial, given the map's intricate layout.
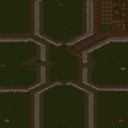
7vs1 hard computer
'7vs1 hard computer'는 7명의 플레이어가 하나의 매우 어려운 컴퓨터를 상대하는 전형적인 컴까기 맵이다. 사막 타일셋의 128x128 크기 맵에서 진행되며, 내부 설명에 따르면 컴퓨터가 초반부터 강력한 러시를 감행하므로 플레이어들은 신속하게 방어 진영을 갖춰야 한다. 7대 1 구도인 만큼 초반 병력 생산과 자원 공유, 입구 막기 등 팀워크가 승패를 가른다. 컴퓨터 AI가 일반 밀리보다 공격적으로 설정되어 있어 방심하면 순식간에 기지가 무너질 수 있다. 디펜스 장르로 분류되어 있으나 실제로는 협동 컴까기 성격이 강하며, 밀리 감각을 유지하면서 다수 인원이 함께 즐기기 좋다. 입문자는 초반 빌드 오더와 입구 방어 요령을 숙지한 뒤 도전하는 것이 권장된다. 맵 크기가 넓어 멀티 기지 확보와 병력 이동 경로 파악이 중요하다. '7vs1 hard computer' is a classic comp stomp map where seven players face a single very hard computer. Played on a 128x128 desert tileset, the internal description warns that the computer launches a powerful early rush, forcing players to establish defenses quickly. With a 7v1 structure, teamwork—early unit production, resource sharing, and walling off chokes—determines victory. The computer AI is more aggressive than standard melee, so carelessness can lead to a swift base collapse. Although categorized as defense, it plays more like a cooperative comp stomp, suitable for groups wanting a melee-style challenge. Beginners should familiarize themselves with early build orders and choke defense tactics. The large map size makes securing expansions and understanding army movement paths crucial.
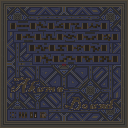
아쿠마 바운드 (Akuma-Bound)
《Akuma-Bound》는 스타크래프트 브루드워의 하드코어 디펜스 유즈맵으로, 중앙에 위치한 방어 포인트를 중심으로 끊임없이 몰려드는 적 유닛을 상대로 일정 시간 동안 버텨야 하는 긴장감 넘치는 구조가 특징이다. 맵의 중앙에는 플레이어가據守해야 할 핵심 건물이 있으며, 그 주변으로 좁은 통로와 장애물이 배치되어 있어 유닛의 진입을 통제하고 전략적 우위를 점할 수 있도록 설계되었다. ‘Obstacles: 18’이라는 설명에서 보듯, 장애물의 종류와 배치에 따라 공략 방식이 달라지며, Revives(부활 횟수) 3회와 Lives(목숨 횟수) 25+35+45+55라는 수치는 플레이어에게 치명적인 실수를 допу하더라도 다시 도전할 기회를 제공하는 동시에 높은 난이도를 암시한다. ‘Difficulty: 3-7/10’이라는 설명은 초보 플레이어에게는 비교적 접근하기 쉬운 반면, 숙련된 플레이어에게는 극한의 컨트롤과 자원 관리가 요구되는 구조임을 시사한다. 플레이어는 제한된 자원으로 방어선을 구축해야 하며, 적의 웨이브가 점점 강력해지는 패턴을 분석하여 방어 전략을 수립해야 한다. 맵의 황무지 타일셋은 황량한 전투의 분위기를 조성하며, 4096x4096의 넓은 공간은 시야를 확보하기 어렵게 만들어 긴장감을 고조시킨다. 특히 좁은 통로와 장애물은 적의 공격 루트를 제한하는 동시에 플레이어의 방어 타워나 유닛 배치를 최적화할 수 있는 기회를 제공한다. 이 맵은 혼자 또는 팀으로 플레이할 수 있으며, 제한된 부활 횟수와 생명 수를 고려할 때 지속적인 집중력과 적응력이 요구된다. 초보자는 기본적인 방어 전략을 숙지한 후 도전하는 것이 좋고, 숙련자는 장애물의 활용과 자원 관리를 극대화하여 최대한의 수명을 유지하는 데 집중해야 한다. 맵의 핵심은 ‘버티기’와 ‘적응’이므로, 초반의 실수는 후반으로 갈수록 치명적으로 작용할 수 있음을 명심해야 한다. Akuma-Bound is a hardcore defense custom map in StarCraft: Brood War, featuring a central defensive point where players must withstand relentless waves of enemy units for a prolonged period. The map is structured around a core building that must be defended, surrounded by narrow pathways and 18 obstacles designed to control enemy movement and create strategic advantages. The ‘Revives: 3’ and ‘Lives: 25+35+45+55’ mechanics indicate that players are granted multiple chances to recover from mistakes, though the high difficulty implied by the ‘Difficulty: 3-7/10’ rating ensures that only precise execution and adaptability will lead to success. Players must construct defensive lines with limited resources while analyzing the increasingly powerful enemy waves to formulate effective strategies. The wasteland tileset enhances the map’s harsh and tense atmosphere, with the vast 4096x4096 space making visibility challenging and heightening the sense of urgency. Narrow passages and obstacles restrict enemy routes while allowing players to optimize tower placements and unit positioning. This map supports solo or team play, requiring sustained focus and adaptability due to limited revives and life counts. Beginners should familiarize themselves with basic defensive tactics before attempting the map, while experienced players should focus on maximizing resource management and obstacle utilization to extend their survival. The core gameplay revolves around endurance and adaptation, as early mistakes can prove fatal in later stages.
최근 등록된 맵
새로 추가된 파일과 버전을 확인하세요.
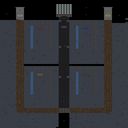
매트릭스 강화판 (Matrix Hardcore Edition)
‘매트릭스 강화판’은 스타크래프트 브루드워에서 즐기는 4인용 유즈맵으로, 디펜스와 서바이벌 요소가 혼합된 하드코어한 플레이 스타일을 제공한다. 맵 곳곳에 배치된 방어 시설과 다수의 적 유닛을 상대로 끊임없이 벌어지는 전투는 긴장감을 유지하게 만든다. 특히 ‘강화판’이라는 제목에 걸맞게 난이도가 상당해 초보자가 쉽게 클리어하기는 어려우며, 여러 번의 시도와 전략 수정이 필요한 구조로 설계되었다. 맵의 중앙과 외곽에는 각각의 방어 거점이 나뉘어져 있어 팀워크가 중요하다는 점도 특징이다. 적이 끊임없이 몰려드는 가운데 플레이어는 자원 수급과 방어 시설 건설, 유닛 컨트롤을 동시에 균형 있게 관리해야 한다. 맵의 배경은 어두운 톤으로 이루어져 있어 분위기가 무겁고 긴장감이 조성되며, 이는 ‘매트릭스’라는 제목과도 잘 어울린다. 맵의 구성이 비교적 복잡하고 디테일하게 배치되어 있어, 플레이어는 맵을 숙지하고 있는 상태에서 전투를 진행하는 것이 유리하다. 또한, 하드코어 버전이라는 점에서 난이도 조절이 거의 없으므로, 플레이 전 충분한 연습과 전략 수립이 필요하다. 이 맵은 디펜스와 서바이벌을 좋아하는 유저들에게 특히 추천되며, 팀플레이를 통해 협동심을 발휘할 수 있는 기회를 제공한다. 다만, 초보자나 단기간에 클리어하고자 하는 플레이어에게는 적합하지 않을 수 있으니, 자신의 실력과 팀원의 수준을 고려해 플레이하는 것이 좋다. ‘Matrix Enhanced’ is a four-player custom map in *StarCraft: Brood War* that blends defense and survival elements into a hardcore playstyle. Constant battles against waves of enemies and scattered defensive structures keep the tension high throughout. As the name suggests, the difficulty is steep, making it tough for beginners to clear without multiple attempts and strategic adjustments. The map features separate defensive strongholds in the center and outskirts, emphasizing the importance of teamwork. Players must juggle resource gathering, base building, and unit control while fending off relentless enemy waves. The dark, moody aesthetic reinforces the map’s intense, cinematic feel, aligning perfectly with its *Matrix* theme. With its intricate layout and detailed design, familiarizing yourself with the terrain before diving into combat is highly beneficial. Since this is the hardcore version, difficulty scaling is minimal, so thorough practice and pre-planning are essential. This map is especially recommended for defense and survival enthusiasts, offering a chance to showcase teamwork and coordination. However, it may not suit casual players or those aiming for quick clears, so assessing your skill level and your teammates’ abilities beforehand is wise.
매트[9.1]완전판 (MATRIX 9.1)
스타크래프트 브루드워의 정교한 유즈맵으로 유명한 MATRIX 9.1은 우주 배경의 디펜스 장르 맵이다. 맵의 중앙에는 거대한 구조물이 자리 잡고 있으며, 플레이어는 이 구조물을 보호하거나 공격하는 형태로 전투를 펼쳐야 한다. 맵 구조는 복잡한 길이와 방어 시설로 구성되어 있어, 전략적인 플레이가 요구된다. 맵의 하단과 상단에는 각각의 플레이어 기지가 배치되어 있으며, 기지 주변에는 방어 건물이 배치되어 있다. 맵의 상단과 하단에 위치한 광물 지대와 가스 채취 지역은 자원 관리를 통해 지속적인 전투를 가능하게 한다. MATRIX 9.1은Hardcore 모드와 같이 어려운 난이도를 자랑하며, 플레이어는 끊임없이 다가오는 적의 물량을 상대해야 한다. 맵의 디자인과 전투 시스템은 마치 영화 '매트릭스'의 세계관을 연상시키며, 플레이어는 마치 가상 현실 속에서 전투를 펼치는 듯한 경험을 느낄 수 있다. 이 맵은 주로 6인 플레이를 상정하고 있으며, 팀 플레이보다는 개인별 전투와 전략이 emphasized된다. MATRIX 9.1을 플레이하기 위해서는 맵의 구조와 방어 전략을 충분히 숙지하는 것이 중요하다. 특히, 기지 방어와 자원 관리, 그리고 적의 공격 패턴을 예측하는 능력이 요구된다. 맵의 난이도가 높기 때문에 초보 플레이어보다는 숙련된 플레이어에게 더 적합한 맵으로 평가된다. 또한, 맵의 Hardcore 모드는 일반적인 디펜스 맵과는 차별화된 긴장감을 제공한다. MATRIX 9.1은 단순히 방어하는 것을 넘어, 적극적인 공격과 전략을 요구하는 맵으로, 스타크래프트 유즈맵의 진수를 경험할 수 있는 작품 중 하나이다. MATRIX 9.1 is a sophisticated custom map in StarCraft: Brood War, renowned for its defense genre set in a cosmic environment. The map centers around a massive structure that players must either protect or attack, depending on the game mode. The layout features intricate pathways and defensive structures, demanding strategic thinking from players. Bases for each player are situated at the top and bottom of the map, surrounded by defensive buildings. Mineral fields and gas geysers at the top and bottom allow for resource management to sustain ongoing battles. Known for its Hardcore mode, MATRIX 9.1 presents a challenging difficulty, requiring players to fend off relentless enemy waves. The design and combat system evoke the cinematic world of 'The Matrix,' immersing players in a virtual reality-like battlefield. Designed primarily for 6 players, the map emphasizes individual combat and strategy over team play. To excel, players should thoroughly understand the map's layout, defensive tactics, resource management, and enemy attack patterns. The high difficulty makes it more suitable for experienced players rather than beginners. The Hardcore mode adds a layer of tension, distinguishing it from standard defense maps. MATRIX 9.1 transcends mere defense by incorporating proactive attacks and strategy, offering a quintessential experience of StarCraft custom maps.
번 오브 파이어 (Burn of Fire)
‘번 오브 파이어(Burn of Fire)’는 스타크래프트 브루드워의 유즈맵으로, 플레이어가 자연의 파괴력에 맞서 살아남는 디펜스 장르의 맵이다. 맵 제목과 내부 설명에 등장하는 ‘자연의 힘’이란 표현은 맵 전체에 걸쳐 불길과 화산 폭발, 지진 등으로 표현되며, 이벤트가 발생할 때마다 맵 곳곳의 지형이 변화하는 특징을 지닌다. 중앙과 외곽에 배치된 방어 타워는 물론이고, 플레이어는 자원 채취를 통해 건물을 건설하거나 유닛을 생산해 이 자연 재해를 버텨야 한다. 맵의 타일셋은 정글 테마로 구성되어 있어, 밝은 색상과 어두운 색상의 조합이 맵의 분위기를 한층 더 강화한다. 맵의 구조는 중앙에 넓은 평야가 있고, 그 주변으로 산맥과 숲이 둘러싸는 형태로 되어 있어, 자연 disastro가 발생할 때 맵의 일부가 파괴되거나 재구성되는 듯한 연출이 인상적이다. 플레이어는 단 한 명의 플레이어로 시작하며, 맵의 이벤트에 따라 유닛과 건물을 관리해야 한다. 초반에는 비교적 평온한 상태이지만, 점차 자연 disastro가 발생하면서 맵의 일부가 파괴되고,在这时에는 새로운 지역이 노출되어 자원 채취가 가능해진다. 이를 통해 자원을 확보하고 방어력을 강화하는 것이 주요 전략이다. 맵의 난이도는 이벤트의 빈도와 강도에 따라 달라지며, 초보자의 경우 자연 disastro에 대응하는 데 어려움을 느낄 수 있다. 반면, 고수 유저는 자연 disastro를 역이용해 추가 자원을 확보하거나 방어선을 재구축하는 등 다양한 전략을 구사할 수 있다. 이 맵은 자연 재해에 대응하는 전략적 사고와 자원 관리 능력을 요구하는 만큼, 디펜스 장르의 유즈맵 중에서도 다소 하드코어한 편에 속한다. 맵의 진행 방식은 비교적 명확하지만, 자연 disastro의 패턴을 미리 숙지하지 않으면 대응이 늦어질 수 있으므로, 플레이 전 맵의 구조와 이벤트 발생 위치를 미리 파악하는 것이 중요하다. 또한, 맵의 타일셋과 연출이 아름답고 몰입감 있게 구성되어 있어, 시각적인 측면에서도 즐거운 경험을 제공한다. 자연 재해와 싸우는 콘셉트는 다소 무겁지만, 맵의 디자인과 연출 덕분에 플레이어는 긴장감과 성취감을 동시에 느낄 수 있을 것이다. 이 맵은 자연 disastro를 컨트롤하는 재미와 함께, 플레이어의 전략적 선택이 결과에 큰 영향을 미치는 구조로 되어 있어, 반복 플레이를 통해 새로운 전략을 발견할 수 있는 매력이 있다. 특히, 자연 disastro가 발생할 때마다 맵의 모습이 변화하는 연출은 한 번 보는 것만으로는 완전히 파악하기 어려운 부분이 많아, 여러 번 플레이해 볼 가치가 있는 맵이다. 자연 disastro의 패턴을 분석하고, 그에 맞는 방어 전략을 수립하는 것이 이 맵의 핵심이며, 이를 통해 플레이어는 자연의 힘을 이기는 법을 배울 수 있을 것이다. 이 맵은 자연 재해와 싸우는 디펜스 장르의 유즈맵으로서, 전략적 사고와 자원 관리를 요구하는 하드코어한 콘텐츠를 제공한다. 맵의 연출과 구조가 뛰어나며, 자연 disastro의 패턴을 분석하고 대응하는 재미가 있는 만큼, 디펜스 장르를 좋아하는 플레이어들에게 strong 추천할 만한 작품이다. ‘Burn of Fire’ is a *StarCraft: Brood War* custom map where players survive a defense-style game against the destructive forces of nature. The phrase "power of nature," which appears in the map’s title and internal descriptions, is embodied throughout the map through flames, volcanic eruptions, and earthquakes, with terrain shifting every time an event occurs. In addition to defense towers placed in the center and outer areas, players must gather resources to build structures and produce units to endure these natural disasters. The tile set is jungle-themed, with a mix of bright and dark colors enhancing the map’s atmosphere. The layout features a wide plain at the center, surrounded by mountain ranges and forests, making the destruction and restructuring of parts of the map during natural disasters a striking visual experience. Players start as a single individual and must manage units and buildings based on in-game events. The early game is relatively calm, but as natural disasters intensify, parts of the map are destroyed, revealing new areas where resources can be gathered. Securing resources and strengthening defenses become key strategies. The difficulty varies depending on the frequency and intensity of the events—beginners may struggle to respond to natural disasters, while advanced players can leverage them to secure additional resources or rebuild defensive lines in creative ways. As a defense-style custom map that demands strategic thinking and resource management, ‘Burn of Fire’ leans toward the hardcore end of the genre. While the progression is straightforward, failing to familiarize yourself with the disaster patterns can lead to delayed responses, so understanding the map’s layout and event locations beforehand is crucial. The tile set and visual effects are beautifully and immersively designed, offering a satisfying experience from a visual standpoint as well. Though the concept of battling natural disasters may feel heavy, the map’s design and execution allow players to feel both tension and a sense of accomplishment. The map excels in offering the fun of controlling natural disasters while structuring gameplay so that players’ strategic choices significantly impact the outcome, encouraging repeated plays to discover new tactics. The way the map transforms with each disaster event makes it difficult to fully grasp after just one playthrough, making it well worth replaying. Analyzing disaster patterns and devising corresponding defense strategies is the core of this map, teaching players how to overcome the power of nature. As a defense-style custom map centered on battling natural disasters, ‘Burn of Fire’ delivers hardcore content that challenges strategic thinking and resource management. With its outstanding visuals, structure, and the engaging fun of analyzing and responding to disaster patterns, it comes highly recommended for fans of the defense genre.
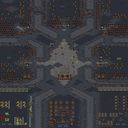
레벨컴까기 V1.7.9
레벨컴까기 V1.7.9는 스타크래프트 브루드워 유즈맵 중 대표적인 컴까기 장르에 속하는 맵으로, 최대 5명의 플레이어가 협력하여 점점 강해지는 컴퓨터 AI를 상대하는 진행형 구조를 갖추고 있다. 우주 타일셋을 배경으로 128x128 타일 크기의 널찍한 전장에서 펼쳐지며, 파일명에 포함된 'HARD-2222' 표기에서 알 수 있듯 높은 난이도를 지향하는 버전으로 추정된다. 맵의 핵심은 '레벨'이라는 명칭이 암시하듯 단계별로 상승하는 적의 공세와 유닛 구성에 대응하며 아군의 전력을 키워나가는 성장 루프에 있다. 플레이어는 초반 자원 확보와 입구 막기, 유닛 조합 최적화를 통해 웨이브를 버텨야 하며, 중반 이후에는 고급 테크 유닛과 특수 능력을 갖춘 보스급 유닛이 등장해 전술적 판단과 마이크로 컨트롤이 요구된다. 5인 협동 플레이가 기본이므로 팀원 간 역할 분담(탱커, 딜러, 서포터 등)과 자원 공유, 타이밍 맞춘 업그레이드가 승패를 가른다. 난이도가 높은 만큼 초보자는 초반 빌드 오더와 유닛 상성 이해가 필수적이며, 숙련자라도 무리한 확장이나 병력 낭비는 빠른 패배로 이어질 수 있다. 맵 크기가 넓은 편이라 멀티태스킹과 맵 장악력도 중요한 요소로 작용한다. 컴까기 장르 특유의 성취감과 협동의 재미를 원한다면 추천할 만하나, 난이도 곡선이 가파르므로 입문용보다는 어느 정도 실력을 갖춘 유저 그룹이 도전하기에 적합하다. 버전 표기가 V1.7.9로 세밀한 밸런스 패치가 거듭되었음을 시사하므로, 최신 버전 여부 확인 후 플레이하는 것이 좋다. 반복 플레이 시 웨이브 패턴 숙지와 최적 빌드 연구가 깊어지는 재미가 있으며, 클리어 시 높은 성취감을 제공한다. Level Com-ggagi V1.7.9 belongs to the classic 'Comp Stomp' (computer bashing) genre among Starcraft Brood War UMS maps, featuring a progressive structure where up to five players cooperate against increasingly powerful computer AI. Set on a spacious 128x128 tile battlefield with the Space tileset, the 'HARD-2222' suffix in the filename indicates this version targets a high difficulty level. As the name 'Level' suggests, the core gameplay loop revolves around scaling enemy waves and unit compositions while building up your own forces. Early game demands efficient resource gathering, chokepoint defense, and optimized unit mixes to survive waves; mid-to-late game introduces high-tech units and boss-type enemies with special abilities, requiring tactical decision-making and micro control. Since five-player cooperation is standard, role assignment (tank, damage, support), resource sharing, and timed upgrades determine success. The steep difficulty curve makes build-order knowledge and unit-counter understanding essential for newcomers, while even veterans can lose quickly from over-expansion or army waste. The large map size also makes multitasking and map control critical factors. This map is recommended for groups seeking the sense of achievement and cooperative fun unique to Comp Stomp maps, though the steep difficulty curve makes it better suited for players with some experience rather than beginners. The detailed V1.7.9 versioning suggests repeated balance patches, so verifying the latest version before playing is advised. Repeated playthroughs deepen wave-pattern memorization and build optimization, rewarding clears with a strong sense of accomplishment.
하드 터렛 디 스택 프로 v2.8 (Hard Turret D Stack Pro v2.8)
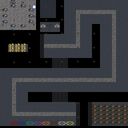
스타크래프트 브루드워 유즈맵 '하드 터렛 디 스택 프로 v2.8'은 6인 협동형 타워 디펜스 장르로, 우주 타일셋 위에서 밀려오는 적 웨이브를 터렛 건설과 업그레이드로 막아내는 맵이다. 원제 'Hard Turret D Stack Pro'에서 알 수 있듯 기본적인 터렛 디펜스 공식에 '스택(Stack)' 개념을 더해 같은 종류의 터렛을 중첩 배치하거나 성능을 누적시키는 독자적 메커니즘을 도입했다. 맵 크기는 2048×2048로 넓직하며, 64×64 타일 단위로 구성되어 다수의 플레이어가 각자 진영을 펼치거나 합동 방어선을 구축하기에 충분한 공간을 제공한다. 진행 방식은 전형적인 웨이브 디펜스 흐름을 따른다. 게임 시작 후 일정 준비 시간이 주어지면 플레이어는 미네랄과 가스를 투자해 터렛을 짓고, 업그레이드 센터나 별도 테크 트리를 통해 공격력, 사거리, 특수 능력을 강화한다. '스택' 시스템은 동일 터렛을 일정 범위 내에 추가 건설할 때마다 성능이 비례 상승하거나 특수 효과가 발동되도록 설계되어, 자원 분배와 배치 밀도 사이에서 전략적 선택을 요구한다. 난이도 표기 'Hard'답게 초반부터 다수의 고체력 유닛과 특수 능력이 섞인 웨이브가 몰려오며, 중반 이후에는 공중·지상 동시 러시와 보스급 유닛 등장으로 단일 라인 방어만으로는 버티기 어렵다. 협동 플레이의 핵심은 역할 분담과 자원 공유다. 6인 전원이 각자 터렛을 짓다 보면 자원이 분산되어 업그레이드 타이밍이 늦어지기 쉽다. 따라서 초반에는 1~2명이 핵심 터렛을 집중 육성하고 나머지는 보조 라인이나 탐지기, 수리 유닛을 맡는 식의 팀플레이가 승률을 높인다. 맵 제작자 Gh0sT(StOnEy-911)와 Hannah의 협업으로 트리거 구성은 안정적이며, 웨이브 간 인터벌 알림, 보스 등장 연출, 클리어/실패 조건 처리 등이 깔끔하게 구현되어 있다. 추천 대상은 타워 디펜스 장르에 익숙하고 고난도 협동전을 즐기는 유저다. 입문자는 'Hard' 표기보다 낮은 버전이나 일반 난이도 터렛 디펜스부터 경험해 보는 편이 좋다. 플레이 전 확인 포인트는 6인 풀파티 구성 여부, 음성 채팅 등 의사소통 수단, 그리고 v2.8 버전 특유의 밸런스 패치 내역(터렛 상한선·스택 배율 조정 등)을 숙지하는 것이다. 우주 배경의 시원한 시야와 화려한 이펙트 속에서 밀려드는 적을 터렛 숲으로 갈아 마시는 쾌감을 원한다면 이 맵이 좋은 선택이 될 것이다. StarCraft Brood War use map 'Hard Turret D Stack Pro v2.8' is a 6-player cooperative tower defense set on a space tileset where players must stop incoming enemy waves by building and upgrading turrets. As the title 'Hard Turret D Stack Pro' suggests, the map adds a unique 'Stack' mechanic to the classic turret defense formula, allowing identical turrets to be stacked or their stats accumulated when placed in proximity. The map size is 2048×2048 with 64×64 tiles, providing ample room for six players to establish individual sectors or a unified defensive line. Gameplay follows a standard wave defense flow. After a brief preparation period, players spend minerals and gas to construct turrets and enhance attack, range, and special abilities via upgrade centers or a dedicated tech tree. The stack system is designed so that each additional turret of the same type within range boosts performance proportionally or triggers special effects, forcing strategic decisions between resource distribution and placement density. True to its 'Hard' label, early waves already feature numerous high-HP units mixed with special abilities, while mid-to-late game brings simultaneous air-ground rushes and boss-class units that cannot be held by a single line alone. The core of cooperative play lies in role assignment and resource sharing. If all six players build turrets independently, resources are spread thin and upgrade timing suffers. A common winning approach has 1–2 players focusing on core turret upgrades while others handle support lines, detectors, or repair units. The map, created by Gh0sT (StOnEy-911) with help from Hannah, features stable trigger work: wave interval notifications, boss entrance effects, and clear win/loss conditions are cleanly implemented. Recommended for players familiar with tower defense who enjoy high-difficulty co-op. Beginners should try lower versions or standard difficulty turret defense maps first. Pre-play checks include securing a full 6-player party, voice chat or other communication, and reviewing v2.8-specific balance changes such as turret caps and stack multipliers. If you crave the thrill of shredding endless hordes with a forest of turrets against a crisp space backdrop, this map is a solid pick.
튜고워 파이널 (Build TuG-O-WaR FinaL)
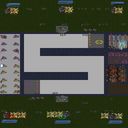
스타크래프트 브루드워의 유즈맵 〈Build TuG-O-WaR FinaL〉은 리소스 경쟁과 건설, 전투가 혼합된 독특한 장르의 맵으로, 플레이어는 초반 자원 수집을 통해 본진을 확장하고 병력을 양성해야 한다. 맵은 거대한 평야 위에 흩어진 미네랄 멀티와 가스 멀티를 중심으로 구성되어 있으며, 중앙에는 다양한 진영의 병력이 배치되어 있어 초반부터 빈번한 전투가 유발된다. 특히 건물 건설 속도가 빠르고, 자원 채취 효율도 높아 빠르게 병력을 모아 공격할 수 있는 구조로 설계되어 있다. 게임의 핵심은 ‘Build’를 통한 발전과 ‘TuG(당기기)’라는 전투 시스템에 있다. 플레이어는 초반에 자원을 확보한 후, 본진을 방어하는 동시에 멀티를 확보해야 하며, 상대방의 멀티를 점령하거나 파괴하는 것이 승리 조건으로 추정된다. 맵 곳곳에 배치된 중립 건물을 점령할 경우 추가 자원과 병력 생산이 가능해지며, 특히 중앙의 대형 건물을 차지하면 전황을 뒤집을 수 있는 전략적 이점을 제공한다. 전투는 주로 지상 유닛 위주로 진행되며, 공중 유닛도 일부 배치되어 있어 공중 방어와 대공 유닛 생산도 중요하다. 초보자의 경우 빠르게 멀티를 확보하고 방어 타워를 건설하는 것이 중요하며, 중수 이상은 상대방의 멀티를 공격하거나 중앙의 대형 건물을 선점하는 전략을 구사해야 한다. 맵의 밸런스는Resource와 Build의 조합으로 인해 상당히 복잡해질 수 있어, 초반 자원 확보와 멀티 관리 능력이 승패를 좌우할 가능성이 크다. 또한, 건물 건설 제한이나 자원 제한 같은 특수 규칙이 있는지는 명확하지 않지만, 빠른 진행을 위해선 자원 효율성을 높이는 것이 중요하다. 이 맵은 특히 건설과 전투가 동시에 진행되는 독특한 재미를 제공하며, 초반부터 끊임없이 몰아치는 전투와 본진 방어가 인상적이다. 플레이어는 자원 관리와 전략적 건물 점거를 동시에 수행해야 하므로, 멀티태스킹 능력이 요구된다. 맵의 디자인 또한 넓은 평야와 중립 건물의 배치로 인해 전략적 깊이를 더하며, 한 번의 실수가 치명적일 수 있어 신중한 플레이가 필요하다. 초보자보다는 중수 이상의 플레이어에게 추천되는 맵으로, 전략적 사고와 빠른 판단력이 요구되는 하드코어한 유즈맵이라고 할 수 있다. 플레이 전 확인해야 할 점은 맵 곳곳의 중립 건물을 점령할 경우 얻을 수 있는 추가 자원과 병력 생산 가능 여부, 그리고 상대방의 멀티를 파괴하는 것이 승리 조건인지 여부다. 또한, 건물 건설 속도나 자원 채취 효율 같은 밸런스 요소도 미리 확인해 두는 것이 좋다. 맵의 난이도는 다소 높지만, 그만큼 전략적 재미와 긴장감이 뛰어난 맵으로, 여러 번 플레이해 볼 만한 가치가 있다. StarCraft: Brood War's custom map *Build TuG-O-WaR FinaL* blends resource competition, construction, and combat into a unique genre. Players must gather resources early to expand their bases and train armies. The map features scattered mineral and gas expansions across a vast plain, with central forces from multiple factions triggering frequent early skirmishes. Designed for rapid building construction and efficient resource gathering, it allows players to quickly amass forces for attacks. The core gameplay revolves around progression through "Build" mechanics and the "TuG" (tug-of-war) combat system. Players secure resources early, defend their bases, and capture expansions while aiming to seize or destroy enemy multi-bases—likely the victory condition. Neutral buildings scattered across the map provide additional resources and unit production when occupied, with control of the central large structure offering a decisive strategic advantage. Battles primarily involve ground units, though some air units are present, making air defense and anti-air production crucial. Beginners should prioritize securing expansions and building defensive towers, while intermediate to advanced players can employ strategies like attacking enemy expansions or seizing the central large structure. The map's balance, heavily influenced by resource and construction mechanics, can become complex, with early resource control and expansion management often determining the outcome. While special rules like construction or resource limits aren't explicitly mentioned, optimizing resource efficiency is key for fast-paced play. This map uniquely combines construction and combat, delivering an engaging experience with relentless early assaults and base defense. Players must juggle resource management and strategic building control, requiring strong multitasking skills. The design—featuring wide open plains and neutral structures—adds depth, making even small mistakes costly and demanding careful play. It’s best suited for intermediate to advanced players, offering a hardcore experience that demands strategic thinking and quick decisions. Before playing, check whether occupying neutral buildings grants extra resources and unit production, and confirm if destroying enemy expansions is the victory condition. Also verify balance factors like building speed and resource gathering efficiency. While challenging, the map excels in strategic depth and tension, making it worth multiple playthroughs.
베헤모스 v0.38 (The Behemoth v0.38)
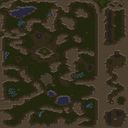
스타크래프트 브루드워 유즈맵 '베헤모스 v0.38'은 최대 7인이 협력해 거대 괴수 '베헤모스'를 상대로 생존을 겨루는 서바이벌형 맵이다. 사막 타일셋 위에 192×192 타일, 6144×6144 픽셀의 광활한 전장이 펼쳐지며, 맵 설명인 'The Behemoth is gonna eat you!'가 암시하듯 압도적인 체력과 공격력을 가진 단일 보스 유닛이 플레이어 진영을 끊임없이 압박한다. 일반적인 디펜스와 달리 고정된 웨이브가 아닌 보스의 패턴과 스킬에 맞춰 실시간으로 대처해야 하며, 자원 채취와 유닛 생산, 업그레이드 타이밍을 팀원과 조율하는 협동 플레이가 핵심이다. 7인 전원이 생존해야 승리하는 구조로 추정되며, 한 명이라도 전멸하면 게임 오버가 될 가능성이 높아 긴장감이 지속된다. 맵 크기가 넓은 만큼 초반 정찰과 기지 배치, 수비선 구축이 승패를 가른다. 트리거로 구현된 보스의 단계별 변신이나 광역기, 소환수 등장 등이 플레이 타임 내내 새로운 위기를 만든다. 맵 중앙에 위치한 베헤모스 둥지 주변으로 자원 지대가 분포해 있어 위험을 무릅쓰고 확장해야 하는 선택지도 존재한다. 7인 풀파티가 아니면 난이도가 급격히 오르므로 인원 모집이 선행되어야 한다. 난이도는 높은 편으로 보이며, 숙련된 유저들이 팀을 짜 도전하기 적합하다. 입문자는 보스의 공격 패턴을 익히는 데 시간이 필요하므로 관전이나 저난이도 연습 후 본격 플레이를 권한다. 파일명 The_Behemoth.scx와 내부 제목이 일치하며 버전 표기 v0.38이 그대로 쓰여 배포 버전 관리가 명확하다. 협동 서바이벌과 보스 레이드 재미를 동시에 원하는 유저에게 추천한다. StarCraft Brood War UMS map 'The Behemoth v0.38' is a survival-style map where up to seven players cooperate to survive against a giant monster called the Behemoth. A vast battlefield of 192×192 tiles (6144×6144 pixels) unfolds on the desert tileset, and as the map description 'The Behemoth is gonna eat you!' suggests, a single boss unit with overwhelming health and attack power constantly pressures the players' bases. Unlike typical defense maps with fixed waves, players must react in real time to the boss's patterns and skills, making coordinated resource gathering, unit production, and upgrade timing the core of cooperative play. The structure likely requires all seven players to survive for victory, and the loss of even one player may lead to game over, maintaining tension throughout. The large map size makes early scouting, base placement, and defensive line construction decisive. Triggers likely implement the boss's phase transformations, area-of-effect abilities, and minion spawns, creating fresh crises throughout the playtime. Resource fields distributed around the Behemoth's lair in the center force players to risk expansions. Difficulty spikes sharply without a full seven-player party, so recruiting a full team is essential. The difficulty appears high, making it suitable for experienced players forming a coordinated team. Newcomers need time to learn the boss's attack patterns, so spectating or practicing on lower difficulty is recommended before serious play. The filename The_Behemoth.scx matches the internal title, and the version notation v0.38 is used directly, indicating clear version management. This map is recommended for users seeking both cooperative survival and boss raid excitement.
테스트 오브 서바이벌 - 테란 - 하드 (Test of Survival-Terran-HARD!)
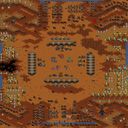
스타크래프트 브루드워 유즈맵 '테스트 오브 서바이벌 - 테란 - 하드'는 5인 협동 생존을 표방하는 대규모 서바이벌 맵이다. 황혼 타일셋 위에 펼쳐진 96×96 타일 전장은 넉넉한 기지 확보 공간과 다방향 공격로를 제공하며, 플레이어는 테란 종족으로 시작해 컴퓨터 상대의 유닛과 건물을 모두 섬멸해야 승리한다. 맵 설명에 'Stay Alive'라는 문구가 명시된 만큼 초반 생존 압박이 강하며, 난이도 표기인 HARD에 걸맞게 끊임없이 몰려오는 적 병력과 확장 기지 방어를 동시에 수행해야 한다. 진행 방식은 일반적인 컴까기 형태를 띠지만, 생존 조건이 추가되어 자원 관리와 병력 분배 판단이 승패를 가른다. 초반에는 벙커와 미사일 포탑으로 입구를 틀어막고, 중반 이후에는 공성 전차와 전투순양함 등 테란 중후반 조합으로 적 본진을 압박하는 흐름이 일반적이다. 5인 전원이 역할을 분담해 수비·정찰·공격을 유기적으로 이어가야 클리어 가능성이 높아지며, 단독 플레이는 사실상 불가능에 가깝다. 맵 크기가 3072×3072로 넓은 편이라 초반 정찰이 필수적이며, 적 본진 위치가 무작위로 배치되는지 고정인지는 확인되지 않았으나 다수의 확장 기지가 존재하는 것으로 보인다. 추천 대상은 팀워크 기반의 고난도 생존전을 즐기는 유저이며, 테란 운용 숙련도와 멀티태스킹 능력이 요구된다. 플레이 전에는 맵 버전(ver 3.0) 확인과 함께 동맹 설정, 자원 공유 여부를 미리 합의하는 것이 좋다. Test of Survival - Terran - HARD is a large-scale survival map designed for five-player cooperative play. The Twilight tileset provides a 96x96 tile battlefield with ample base-building room and multiple attack vectors. Players start as Terran and must destroy all enemy units and structures while staying alive, as the description emphasizes. The HARD difficulty rating reflects relentless enemy waves and the need to defend expansions simultaneously. Gameplay follows a classic comp-stomp pattern but adds a survival condition, making resource management and force allocation critical. Early game typically relies on bunkers and missile turrets to hold chokepoints, transitioning to siege tanks and battlecruisers for late-game pushes. Success requires the full team to coordinate defense, scouting, and offense; solo play is nearly impossible. The map's 3072x3072 size demands early scouting, and while enemy base placement randomness is unconfirmed, multiple expansion bases appear to exist. This map suits players who enjoy high-difficulty cooperative survival, demanding strong Terran mechanics and multitasking. Before starting, verify the map version (ver 3.0) and agree on allied settings and resource sharing.
맵 선택 가이드
태그는 맵의 핵심 특징을 빠르게 설명하지만 제작 버전마다 규칙이 다를 수 있습니다. 상세 설명에서 권장 인원, 난이도, 플레이 시간과 버전을 함께 확인한 뒤 다운로드하세요.