
하드 난이도 스타크래프트 맵 모음
'하드 난이도' 태그가 등록된 맵을 모았습니다. 장르 하나로 찾기 어려운 플레이 방식, 난이도와 특징을 중심으로 인기 맵과 최신 맵을 비교해 보세요.
- 등록 맵
- 4개
- 누적 다운로드
- 0
- 누적 조회
- 160
인기 맵
다운로드와 조회 반응이 높은 맵입니다.
리커 디펜스 솔로 하드 3.2b (Lurker Defense Solo HARD 3.2b)
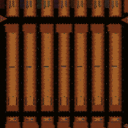
스타크래프트: 브루드워의 숨은 명작 디펜스 유즈맵인 <리커 디펜스 솔로 하드 3.2b>는 이름 그대로 리커(Lurker)라는 지상형 유닛을 중심으로 한 고전적인 디펜스 장르의 정수를 보여준다. 이 맵은 플레이어가 맵 하단에 배치된 방어 건물과 유닛을 활용해 끊임없이 몰려오는 적군 웨이브를 막아내야 하는 구조로, 30단계에 걸쳐 점점 강해지는 적군을 상대해야 한다. 각 웨이브는 다양한 조합의 저글링, 히드라리스크, 뮤탈리스크 등으로 구성되어 있으며, 리커의 특성상 지상 공격만 가능한 특수 능력을 적극 활용해야 효율적인 방어가 가능하다. 맵의 특징은 하드 난이도로, 초보자에게는 상당히 어려운 난이도를 자랑하지만 숙련된 플레이어라면 전략적으로 리커를 배치하고 자원을 효율적으로 관리하는 재미를 느낄 수 있다. 특히 리커의 땅굴 발사 능력은 하단에서 공격해오는 적군을 미리 차단할 수 있어 전략의 핵심으로 작용한다. 맵의 진행 방식은 웨이브가 시작될 때마다 맵 상단에서 적군이 하단으로 진격하는 방식이며, 플레이어는 각 웨이브를 통과할 때마다 일정량의 미네랄과 가스를 획득할 수 있어 자원 관리가 중요하다. 또한, 맵의 배경은 황혼 테마의 황량한 분위기로 구성되어 있어 플레이어에게 긴장감을 더해준다. 이 맵은 혼자서 플레이하는 솔로 디펜스라는 점에서 concentration과 patience가 요구되며, 실수를 допу할 경우 다음 웨이브에서 치명적인 타격을 입을 수 있어 신중한 플레이가 필요하다. 추천 대상은 디펜스 장르를 좋아하는 플레이어, 리커 유닛의 전략적 활용을 즐기는 유저, 그리고 혼자서 긴장감 넘치는 플레이를 원하는 게이머들에게 적합하다. 플레이 전에는 리커의 특성과 각 웨이브 별 적군 조합을 숙지하고, 방어 건물의 위치와 리소스 관리 계획을 미리 세워두는 것이 중요하다. 또한, 하드 난이도 특성상 실수 허용도가 낮기 때문에 충분한 연습을 거친 후에 도전하는 것이 바람직하다. Lurker Defense Solo HARD 3.2b is a classic defense-style custom map in StarCraft: Brood War that focuses on the Lurker unit, offering a challenging experience for solo players. The gameplay revolves around defending the bottom of the map against relentless enemy waves that escalate in difficulty over 30 levels. Each wave consists of ground-based units like Zerglings, Hydralisks, and Mutalisks, requiring players to strategically place Lurkers to maximize their ground attack capabilities. The "Hard" difficulty ensures a tough challenge, where even a single mistake can lead to devastating consequences. Players earn minerals and vespene gas with each cleared wave, enabling resource management for upgrades and unit production. The map's eerie Twilight-themed atmosphere enhances the tension, making every wave feel like a high-stakes battle. Solo play demands concentration and patience, as the absence of team support means all defensive strategies must be executed flawlessly. This map is ideal for players who enjoy defense genres, appreciate the strategic depth of Lurkers, and seek a solo experience filled with excitement. Before playing, it's crucial to understand Lurker mechanics, study enemy wave compositions, and plan resource distribution carefully. Given the Hard difficulty, ample practice is recommended to avoid costly mistakes during the later stages.
5v3 하드 컴즈 킬4미네랄 (5v3 Hard Comps Kill4Minerals)
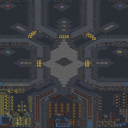
‘5v3 Hard Comps Kill4Minerals’는 스타크래프트 브루드워에서 즐기는 유즈맵으로, 5명의 플레이어가 한 팀을 이뤄 3명의 컴퓨터(컴퓨터 상대) 유닛을 상대하는 디펜스 장르의 맵이다. 맵의 제목과 내부 설명에서 느껴지는 ‘GAY BBQ TIME’이라는 유머러스한 문구는 다소 충격적이지만, 실제 플레이 경험은 전형적인 5:3 구도에서 벌어지는 방어전 양상을 띤다. 맵의 중앙에는 넓은 평지가 펼쳐져 있으며, 플레이어 기지와 컴퓨터 기지가 마주보는 구조로 되어 있어, 초반부터 끊임없이 밀려오는 적의 공격에 대응해야 한다. 특히 ‘Kill4Minerals’라는 제목에서 짐작할 수 있듯이, 미네랄 자원 획득이 vittoria 조건 중 하나일 가능성이 높아 보인다. 맵의 디자인과 배치된 건물 및 유닛들을 고려하면, 플레이어는 초반 방어와 자원 관리, 그리고 후반 반격을 동시에 신경 써야 하는 구조로 설계된 것으로 추정된다. 공격과 방어의 밸런스가 중요하며, 특히 컴퓨터의 조합이 ‘Hard’라는 점에서 초보자보다는 어느 정도의 전략적 이해와 피지컬이 요구되는 맵이다. 맵의 분위기는 어둡고 소름끼치는 요소는 없지만, 3:2로 불균형한 구도와 ‘Hard’라는 난이도 표기가 플레이어의 긴장감을 고조시킨다. 이 맵은 주로 디펜스 장르를 선호하는 유저들에게 적합하며, 팀워크와 자원 관리 능력을 시험하는 재미있는 경험을 제공할 것으로 보인다. 플레이 전에는 컴퓨터의 공격 패턴과 맵의 주요 길목(채널링 포인트)을 미리 숙지하는 것이 중요할 것이다. This is a custom *StarCraft: Brood War* map called "5v3 Hard Comps Kill4Minerals," where five players team up to defend against three AI-controlled opponents in a defensive-style game. While the map's title and internal descriptions feature the humorous yet jarring phrase "GAY BBQ TIME," the actual gameplay follows a classic 5v3 defensive format. A wide open field occupies the center of the map, with the players' base facing off against the AI's base, forcing constant early-game pressure from waves of enemies. As the title "Kill4Minerals" suggests, securing mineral resources likely plays a key role in the victory condition. The map's design and unit placements indicate that players must balance early defense, resource management, and late-game counterattacks. Given the "Hard" difficulty setting and the AI's unit compositions, the map demands a solid understanding of strategy and decent mechanical skill—making it more suited for experienced players than beginners. While the atmosphere isn't particularly dark or unsettling, the uneven 3:2 matchup and the "Hard" difficulty rating heighten the tension. This map is best suited for players who enjoy defensive games, offering a fun challenge that tests teamwork and resource management. Before diving in, it's crucial to study the AI's attack patterns and identify key chokepoints on the map.
카나지 1 v5.4 하드 (Carnage1 v5.4 Hard)
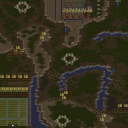
스타크래프트: 브루드워의 유즈맵 《카나지 1 v5.4 하드》는 컴퓨터 상대 전투형 디펜스 맵으로, 플레이어는 '선택받은 자(The Chosen One)'로 불리는 강력한 적을 상대로 전투를 펼치며 승리를 노려야 한다. 맵은 사막 테마의 넓은 평야와 굴곡진 지형을 바탕으로 구성되어 있으며, 중앙의 넓은 공간과 주변의 지형적 요충지를 활용해 방어 전략을 세울 수 있도록 설계되었다. 맵의 특징은 '선택받은 자'가 끊임없이 스폰되는 스테이션과, 이를 저지할 플레이어의 방어 시설을 구축하는 구조로, 플레이어는 미네랄과 가스를 확보해 유닛을 생산하고 건물을 건설해야 한다. 맵 곳곳에는资源 지역이 배치되어 있지만, 초반 자원 확보가 다소 제한적일 수 있어 신중한 판단이 요구된다. 유닛의 종류는 제한적이지만, '선택받은 자'는 매우 강력한 스펙을 지녔기 때문에 효율적인 유닛 조합과 배치 전략이 필수적이다. 예를 들어, 초반에는 방어용 유닛을 배치하고, 중반 이후에는 공격 유닛으로 전환해 '선택받은 자'를 압박하는 것이 일반적이다. 맵의 난이도는 v5.4 하드로 표기되어 있으며, 이는 적의 공격력이 강화되었거나 방어력이 상승했을 가능성이 크므로, 초보자는 하드 난이도 보다는 쉬운 버전을 먼저 시도해 보는 것을 권장한다. 또한, 맵의 난이도 조절을 위해 내부 설정을 조정할 수 있는 옵션이 제공될 수도 있으므로, 게임 시작 전 설정을 꼼꼼히 확인하는 것이 좋다. 이 맵은 5명의 플레이어가 동시에 참여할 수 있으며, 팀 플레이보다는 각자의 판단과 전략에 따라 진행되는 개별 전투형 디펜스 게임으로, 스타크래프트의 유즈맵 중에서도 손꼽히는 긴장감과 전략성을 자랑한다. 특히, '선택받은 자'의 스폰 위치와 패턴을 익히는 것이 승리의 핵심으로, 이를 위해 여러 번의 플레이를 통해 지형을 숙지하는 것이 중요하다. 또한, 맵의 중앙 지역은 넓은 평야로 이루어져 있어 대규모 전투가 벌어질 가능성이 높으므로, 방어 시설을 적절히 배치하고 유동적인 대처가 필요하다. 이 맵의 플레이 시간은 맵의 진행 속도와 난이도에 따라 다르지만, 보통 20분에서 40분 내외로 예상된다. 이 맵은 스타크래프트의 유즈맵 커뮤니티에서 오랫동안 사랑받아 온 작품으로, 특히 디펜스와 전략적 요소에 중점을 둔 유저들에게 strong한 추천을 받을 수 있는 맵이다. 플레이 전에는 맵의 특성을 충분히 숙지하고,Resource 관리와 유닛 생산 타이밍을 철저히 계획하는 것이 승리의 열쇠가 될 것이다. Carnage 1 v5.4 Hard is a computer-based defense map in StarCraft: Brood War where players battle against a relentless enemy known as 'The Chosen One.' Set in a desert-themed terrain, the map features open plains and strategic high-ground positions, allowing players to build defensive structures and control key areas. The core mechanic revolves around spawning waves of 'The Chosen One' from designated stations, requiring players to gather resources, construct buildings, and deploy units effectively. While resource nodes are scattered across the map, early-game resource access can be limited, demanding careful economic management. The enemy's high stats make unit composition and placement critical, as players must balance defense and offense to survive. The 'Hard' difficulty in v5.4 likely indicates enhanced enemy stats or mechanics, so beginners may want to start with easier versions before tackling this challenge. The map supports up to 5 players and emphasizes individual strategy over team coordination, offering a tense and rewarding experience for those who enjoy defense-focused gameplay. Mastering the spawn patterns and terrain of 'The Chosen One' is essential for victory, as central areas often become battlefronts for large-scale conflicts. With a typical playtime ranging from 20 to 40 minutes, this map has remained a staple in the StarCraft custom map community, particularly among players who appreciate strategic depth and defense mechanics. Before diving in, ensure you understand the map's mechanics, plan your resource flow, and time your unit production to maximize your chances of defeating the relentless enemy waves.
7vs1 하드 컴퓨터 (7vs1 Hard Computer)
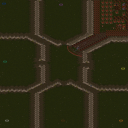
스타크래프트: 브루드워의 인기 유즈맵 장르인 ‘컴퓨터 상대 디펜스’ 중에서도 어려운 난이도로 정평이 난 작품인 〈7vs1 hard computer〉는 7명의 플레이어가 한 명의 강력하고 공격적인 컴퓨터를 상대로 방어전을 펼치는 흥미진진한 전투를 제공한다. 맵은 사막 테마의 넓은 평야에서 펼쳐지며, 중앙에 위치한 플레이어 기지 주변으로 적절한 mineral line과 확장 기지가 배치되어 있다. 7명의 플레이어는 협력하여 방어선을 구축하고, 초반부터 끊임없이 밀려오는 저그의 러쉬를 버텨내야 한다. 게임 시작 직후부터 적의 공격은 거세지며, 빠르게 방어 건물을 건설하고 병력을 배치하지 않으면 즉시 전멸할 수 있는 극한의 긴장감이 특징이다. 특히 컴퓨터의 난이도가 ‘하드’로 설정되어 있어, 초보자는 물론 숙련자도 전략과 협력이 요구되는 어려운 전투를 경험할 수 있다. 맵의 구조는 비교적 단순하지만, 7명의 플레이어가 동시에 효율적으로 방어 작전을 세우고 자원을 관리해야 한다는 점에서 팀워크가 무엇보다 중요하다. 또한, 중앙 기지 주변의 넓은 공간이 전투가 벌어지는 주요 전장이 되며, 이곳에서 벌어지는 접전은 맵의 긴장감을 한층 높인다. 이 맵을 추천하는 대상은 팀플레이를 즐기며 어려운 도전을 좋아하는 스타크래프트 유저들이다. 초보자의 경우 컴퓨터의 공격적인 전략에 당황할 수 있으므로, 방어 빌드와 병력 운영에 대한 기본적인 이해를 갖추고 도전하는 것이 좋다. 또한, 7명의 플레이어가 원활한 의사소통을 통해 전략을 공유하고 실시간으로 대응하는 능력이 이 맵의 성공 여부를 가른다. 게임을 시작하기 전에 방어 건물의 위치와 mineral line의 관리 방법을 미리 숙지하고, 컴퓨터의 공격 패턴을 빠르게 분석하는 연습을 해두면 훨씬 수월하게 플레이할 수 있을 것이다. StarCraft: Brood War’s popular custom map genre, "Computer Defense," is home to many challenging titles, and *7vs1 Hard Computer* stands out for its punishing difficulty. In this map, seven players must band together to defend against a single, relentlessly aggressive AI opponent. Set in a vast desert plain, the battlefield features a central player base surrounded by well-placed mineral lines and expansion sites. From the moment the game begins, the pressure is relentless—enemy Zerg swarm the defenses in waves, and without quick construction of defensive structures and strategic unit placement, instant defeat looms. The AI’s "Hard" difficulty ensures a grueling test of skill, demanding both coordination and adaptability from even seasoned players. While the map layout is straightforward, success hinges on seamless teamwork. The seven players must divide roles efficiently, manage resources, and synchronize their defenses to withstand the onslaught. The wide-open space around the central base becomes the primary battlefield, where every skirmish heightens the tension. This map is best suited for players who enjoy team-based challenges and crave a tough test of their StarCraft skills. Beginners may struggle with the AI’s aggressive tactics, so a solid grasp of defensive builds and unit management is essential before diving in. Clear communication and real-time strategy adjustments among the seven players are critical—without them, victory is nearly impossible. Before jumping into the game, study optimal defensive building placements, mineral line management, and practice recognizing the AI’s attack patterns. With preparation, the battle becomes far more manageable.
최근 등록된 맵
새로 추가된 파일과 버전을 확인하세요.
카나지 1 v5.4 하드 (Carnage1 v5.4 Hard)
스타크래프트: 브루드워의 유즈맵 《카나지 1 v5.4 하드》는 컴퓨터 상대 전투형 디펜스 맵으로, 플레이어는 '선택받은 자(The Chosen One)'로 불리는 강력한 적을 상대로 전투를 펼치며 승리를 노려야 한다. 맵은 사막 테마의 넓은 평야와 굴곡진 지형을 바탕으로 구성되어 있으며, 중앙의 넓은 공간과 주변의 지형적 요충지를 활용해 방어 전략을 세울 수 있도록 설계되었다. 맵의 특징은 '선택받은 자'가 끊임없이 스폰되는 스테이션과, 이를 저지할 플레이어의 방어 시설을 구축하는 구조로, 플레이어는 미네랄과 가스를 확보해 유닛을 생산하고 건물을 건설해야 한다. 맵 곳곳에는资源 지역이 배치되어 있지만, 초반 자원 확보가 다소 제한적일 수 있어 신중한 판단이 요구된다. 유닛의 종류는 제한적이지만, '선택받은 자'는 매우 강력한 스펙을 지녔기 때문에 효율적인 유닛 조합과 배치 전략이 필수적이다. 예를 들어, 초반에는 방어용 유닛을 배치하고, 중반 이후에는 공격 유닛으로 전환해 '선택받은 자'를 압박하는 것이 일반적이다. 맵의 난이도는 v5.4 하드로 표기되어 있으며, 이는 적의 공격력이 강화되었거나 방어력이 상승했을 가능성이 크므로, 초보자는 하드 난이도 보다는 쉬운 버전을 먼저 시도해 보는 것을 권장한다. 또한, 맵의 난이도 조절을 위해 내부 설정을 조정할 수 있는 옵션이 제공될 수도 있으므로, 게임 시작 전 설정을 꼼꼼히 확인하는 것이 좋다. 이 맵은 5명의 플레이어가 동시에 참여할 수 있으며, 팀 플레이보다는 각자의 판단과 전략에 따라 진행되는 개별 전투형 디펜스 게임으로, 스타크래프트의 유즈맵 중에서도 손꼽히는 긴장감과 전략성을 자랑한다. 특히, '선택받은 자'의 스폰 위치와 패턴을 익히는 것이 승리의 핵심으로, 이를 위해 여러 번의 플레이를 통해 지형을 숙지하는 것이 중요하다. 또한, 맵의 중앙 지역은 넓은 평야로 이루어져 있어 대규모 전투가 벌어질 가능성이 높으므로, 방어 시설을 적절히 배치하고 유동적인 대처가 필요하다. 이 맵의 플레이 시간은 맵의 진행 속도와 난이도에 따라 다르지만, 보통 20분에서 40분 내외로 예상된다. 이 맵은 스타크래프트의 유즈맵 커뮤니티에서 오랫동안 사랑받아 온 작품으로, 특히 디펜스와 전략적 요소에 중점을 둔 유저들에게 strong한 추천을 받을 수 있는 맵이다. 플레이 전에는 맵의 특성을 충분히 숙지하고,Resource 관리와 유닛 생산 타이밍을 철저히 계획하는 것이 승리의 열쇠가 될 것이다. Carnage 1 v5.4 Hard is a computer-based defense map in StarCraft: Brood War where players battle against a relentless enemy known as 'The Chosen One.' Set in a desert-themed terrain, the map features open plains and strategic high-ground positions, allowing players to build defensive structures and control key areas. The core mechanic revolves around spawning waves of 'The Chosen One' from designated stations, requiring players to gather resources, construct buildings, and deploy units effectively. While resource nodes are scattered across the map, early-game resource access can be limited, demanding careful economic management. The enemy's high stats make unit composition and placement critical, as players must balance defense and offense to survive. The 'Hard' difficulty in v5.4 likely indicates enhanced enemy stats or mechanics, so beginners may want to start with easier versions before tackling this challenge. The map supports up to 5 players and emphasizes individual strategy over team coordination, offering a tense and rewarding experience for those who enjoy defense-focused gameplay. Mastering the spawn patterns and terrain of 'The Chosen One' is essential for victory, as central areas often become battlefronts for large-scale conflicts. With a typical playtime ranging from 20 to 40 minutes, this map has remained a staple in the StarCraft custom map community, particularly among players who appreciate strategic depth and defense mechanics. Before diving in, ensure you understand the map's mechanics, plan your resource flow, and time your unit production to maximize your chances of defeating the relentless enemy waves.
7vs1 하드 컴퓨터 (7vs1 Hard Computer)
스타크래프트: 브루드워의 인기 유즈맵 장르인 ‘컴퓨터 상대 디펜스’ 중에서도 어려운 난이도로 정평이 난 작품인 〈7vs1 hard computer〉는 7명의 플레이어가 한 명의 강력하고 공격적인 컴퓨터를 상대로 방어전을 펼치는 흥미진진한 전투를 제공한다. 맵은 사막 테마의 넓은 평야에서 펼쳐지며, 중앙에 위치한 플레이어 기지 주변으로 적절한 mineral line과 확장 기지가 배치되어 있다. 7명의 플레이어는 협력하여 방어선을 구축하고, 초반부터 끊임없이 밀려오는 저그의 러쉬를 버텨내야 한다. 게임 시작 직후부터 적의 공격은 거세지며, 빠르게 방어 건물을 건설하고 병력을 배치하지 않으면 즉시 전멸할 수 있는 극한의 긴장감이 특징이다. 특히 컴퓨터의 난이도가 ‘하드’로 설정되어 있어, 초보자는 물론 숙련자도 전략과 협력이 요구되는 어려운 전투를 경험할 수 있다. 맵의 구조는 비교적 단순하지만, 7명의 플레이어가 동시에 효율적으로 방어 작전을 세우고 자원을 관리해야 한다는 점에서 팀워크가 무엇보다 중요하다. 또한, 중앙 기지 주변의 넓은 공간이 전투가 벌어지는 주요 전장이 되며, 이곳에서 벌어지는 접전은 맵의 긴장감을 한층 높인다. 이 맵을 추천하는 대상은 팀플레이를 즐기며 어려운 도전을 좋아하는 스타크래프트 유저들이다. 초보자의 경우 컴퓨터의 공격적인 전략에 당황할 수 있으므로, 방어 빌드와 병력 운영에 대한 기본적인 이해를 갖추고 도전하는 것이 좋다. 또한, 7명의 플레이어가 원활한 의사소통을 통해 전략을 공유하고 실시간으로 대응하는 능력이 이 맵의 성공 여부를 가른다. 게임을 시작하기 전에 방어 건물의 위치와 mineral line의 관리 방법을 미리 숙지하고, 컴퓨터의 공격 패턴을 빠르게 분석하는 연습을 해두면 훨씬 수월하게 플레이할 수 있을 것이다. StarCraft: Brood War’s popular custom map genre, "Computer Defense," is home to many challenging titles, and *7vs1 Hard Computer* stands out for its punishing difficulty. In this map, seven players must band together to defend against a single, relentlessly aggressive AI opponent. Set in a vast desert plain, the battlefield features a central player base surrounded by well-placed mineral lines and expansion sites. From the moment the game begins, the pressure is relentless—enemy Zerg swarm the defenses in waves, and without quick construction of defensive structures and strategic unit placement, instant defeat looms. The AI’s "Hard" difficulty ensures a grueling test of skill, demanding both coordination and adaptability from even seasoned players. While the map layout is straightforward, success hinges on seamless teamwork. The seven players must divide roles efficiently, manage resources, and synchronize their defenses to withstand the onslaught. The wide-open space around the central base becomes the primary battlefield, where every skirmish heightens the tension. This map is best suited for players who enjoy team-based challenges and crave a tough test of their StarCraft skills. Beginners may struggle with the AI’s aggressive tactics, so a solid grasp of defensive builds and unit management is essential before diving in. Clear communication and real-time strategy adjustments among the seven players are critical—without them, victory is nearly impossible. Before jumping into the game, study optimal defensive building placements, mineral line management, and practice recognizing the AI’s attack patterns. With preparation, the battle becomes far more manageable.
5v3 하드 컴즈 킬4미네랄 (5v3 Hard Comps Kill4Minerals)
‘5v3 Hard Comps Kill4Minerals’는 스타크래프트 브루드워에서 즐기는 유즈맵으로, 5명의 플레이어가 한 팀을 이뤄 3명의 컴퓨터(컴퓨터 상대) 유닛을 상대하는 디펜스 장르의 맵이다. 맵의 제목과 내부 설명에서 느껴지는 ‘GAY BBQ TIME’이라는 유머러스한 문구는 다소 충격적이지만, 실제 플레이 경험은 전형적인 5:3 구도에서 벌어지는 방어전 양상을 띤다. 맵의 중앙에는 넓은 평지가 펼쳐져 있으며, 플레이어 기지와 컴퓨터 기지가 마주보는 구조로 되어 있어, 초반부터 끊임없이 밀려오는 적의 공격에 대응해야 한다. 특히 ‘Kill4Minerals’라는 제목에서 짐작할 수 있듯이, 미네랄 자원 획득이 vittoria 조건 중 하나일 가능성이 높아 보인다. 맵의 디자인과 배치된 건물 및 유닛들을 고려하면, 플레이어는 초반 방어와 자원 관리, 그리고 후반 반격을 동시에 신경 써야 하는 구조로 설계된 것으로 추정된다. 공격과 방어의 밸런스가 중요하며, 특히 컴퓨터의 조합이 ‘Hard’라는 점에서 초보자보다는 어느 정도의 전략적 이해와 피지컬이 요구되는 맵이다. 맵의 분위기는 어둡고 소름끼치는 요소는 없지만, 3:2로 불균형한 구도와 ‘Hard’라는 난이도 표기가 플레이어의 긴장감을 고조시킨다. 이 맵은 주로 디펜스 장르를 선호하는 유저들에게 적합하며, 팀워크와 자원 관리 능력을 시험하는 재미있는 경험을 제공할 것으로 보인다. 플레이 전에는 컴퓨터의 공격 패턴과 맵의 주요 길목(채널링 포인트)을 미리 숙지하는 것이 중요할 것이다. This is a custom *StarCraft: Brood War* map called "5v3 Hard Comps Kill4Minerals," where five players team up to defend against three AI-controlled opponents in a defensive-style game. While the map's title and internal descriptions feature the humorous yet jarring phrase "GAY BBQ TIME," the actual gameplay follows a classic 5v3 defensive format. A wide open field occupies the center of the map, with the players' base facing off against the AI's base, forcing constant early-game pressure from waves of enemies. As the title "Kill4Minerals" suggests, securing mineral resources likely plays a key role in the victory condition. The map's design and unit placements indicate that players must balance early defense, resource management, and late-game counterattacks. Given the "Hard" difficulty setting and the AI's unit compositions, the map demands a solid understanding of strategy and decent mechanical skill—making it more suited for experienced players than beginners. While the atmosphere isn't particularly dark or unsettling, the uneven 3:2 matchup and the "Hard" difficulty rating heighten the tension. This map is best suited for players who enjoy defensive games, offering a fun challenge that tests teamwork and resource management. Before diving in, it's crucial to study the AI's attack patterns and identify key chokepoints on the map.
리커 디펜스 솔로 하드 3.2b (Lurker Defense Solo HARD 3.2b)
스타크래프트: 브루드워의 숨은 명작 디펜스 유즈맵인 <리커 디펜스 솔로 하드 3.2b>는 이름 그대로 리커(Lurker)라는 지상형 유닛을 중심으로 한 고전적인 디펜스 장르의 정수를 보여준다. 이 맵은 플레이어가 맵 하단에 배치된 방어 건물과 유닛을 활용해 끊임없이 몰려오는 적군 웨이브를 막아내야 하는 구조로, 30단계에 걸쳐 점점 강해지는 적군을 상대해야 한다. 각 웨이브는 다양한 조합의 저글링, 히드라리스크, 뮤탈리스크 등으로 구성되어 있으며, 리커의 특성상 지상 공격만 가능한 특수 능력을 적극 활용해야 효율적인 방어가 가능하다. 맵의 특징은 하드 난이도로, 초보자에게는 상당히 어려운 난이도를 자랑하지만 숙련된 플레이어라면 전략적으로 리커를 배치하고 자원을 효율적으로 관리하는 재미를 느낄 수 있다. 특히 리커의 땅굴 발사 능력은 하단에서 공격해오는 적군을 미리 차단할 수 있어 전략의 핵심으로 작용한다. 맵의 진행 방식은 웨이브가 시작될 때마다 맵 상단에서 적군이 하단으로 진격하는 방식이며, 플레이어는 각 웨이브를 통과할 때마다 일정량의 미네랄과 가스를 획득할 수 있어 자원 관리가 중요하다. 또한, 맵의 배경은 황혼 테마의 황량한 분위기로 구성되어 있어 플레이어에게 긴장감을 더해준다. 이 맵은 혼자서 플레이하는 솔로 디펜스라는 점에서 concentration과 patience가 요구되며, 실수를 допу할 경우 다음 웨이브에서 치명적인 타격을 입을 수 있어 신중한 플레이가 필요하다. 추천 대상은 디펜스 장르를 좋아하는 플레이어, 리커 유닛의 전략적 활용을 즐기는 유저, 그리고 혼자서 긴장감 넘치는 플레이를 원하는 게이머들에게 적합하다. 플레이 전에는 리커의 특성과 각 웨이브 별 적군 조합을 숙지하고, 방어 건물의 위치와 리소스 관리 계획을 미리 세워두는 것이 중요하다. 또한, 하드 난이도 특성상 실수 허용도가 낮기 때문에 충분한 연습을 거친 후에 도전하는 것이 바람직하다. Lurker Defense Solo HARD 3.2b is a classic defense-style custom map in StarCraft: Brood War that focuses on the Lurker unit, offering a challenging experience for solo players. The gameplay revolves around defending the bottom of the map against relentless enemy waves that escalate in difficulty over 30 levels. Each wave consists of ground-based units like Zerglings, Hydralisks, and Mutalisks, requiring players to strategically place Lurkers to maximize their ground attack capabilities. The "Hard" difficulty ensures a tough challenge, where even a single mistake can lead to devastating consequences. Players earn minerals and vespene gas with each cleared wave, enabling resource management for upgrades and unit production. The map's eerie Twilight-themed atmosphere enhances the tension, making every wave feel like a high-stakes battle. Solo play demands concentration and patience, as the absence of team support means all defensive strategies must be executed flawlessly. This map is ideal for players who enjoy defense genres, appreciate the strategic depth of Lurkers, and seek a solo experience filled with excitement. Before playing, it's crucial to understand Lurker mechanics, study enemy wave compositions, and plan resource distribution carefully. Given the Hard difficulty, ample practice is recommended to avoid costly mistakes during the later stages.
맵 선택 가이드
태그는 맵의 핵심 특징을 빠르게 설명하지만 제작 버전마다 규칙이 다를 수 있습니다. 상세 설명에서 권장 인원, 난이도, 플레이 시간과 버전을 함께 확인한 뒤 다운로드하세요.