
하드 스타크래프트 맵 모음
'하드' 태그가 등록된 맵을 모았습니다. 장르 하나로 찾기 어려운 플레이 방식, 난이도와 특징을 중심으로 인기 맵과 최신 맵을 비교해 보세요.
- 등록 맵
- 18개
- 누적 다운로드
- 133
- 누적 조회
- 1,221
인기 맵
다운로드와 조회 반응이 높은 맵입니다.
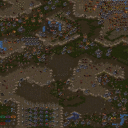
마린 키우기 하드 버전 (Marine Special Forces: Hard)
사막 타일셋의 황량한 전장을 배경으로 한 이 유즈맵은 원작의 명성을 이어받아 더욱 강화된 난이도를 자랑하는 마린 특수부대 시리즈의 하드 버전이다. 맵은 전체적으로 좁은 협곡과 개활지가 교차하는 구조로 설계되어 있어, 플레이어는 제한된 시야와 끊임없이 몰려오는 적의 공세 속에서 긴장을 늦출 수 없다. 기본적으로 마린 유닛 하나만을 조종하며, 주어진 특수 능력과 몇 안 되는 지원 유닛을 활용해 정해진 임무 목표를 달성해야 한다. 진행 방식은 전형적인 선형 미션 클리어 방식으로, 이전 구역의 적을 모두 제압해야 다음 경로가 열리거나 새로운 지형이 드러난다. 곳곳에 배치된 강력한 적 유닛과 예측 불가능한 매복은 플레이어의 집중력을 시험하며, 한 번의 실수로도 미션이 좌절될 수 있어 세밀한 컨트롤과 인내심이 절대적으로 요구된다. 플레이 경험은 마치 정밀한 전술 시뮬레이션을 방불케 한다. 단 한 기의 마린이 감당해야 하는 전투의 강도는 상상을 초월하며, 적의 공격 패턴을 익히고 최적의 교전 위치를 찾는 과정이 반복된다. 특히 좁은 통로에서의 교전은 스킬 사용 타이밍과 무빙 컨트롤의 완벽한 조화를 요구하기 때문에, 스타크래프트의 기본 전투 메커니즘에 능숙한 플레이어라도 상당한 도전을 느끼게 된다. 이 맵은 단순한 슈팅 게임이 아니라 퍼즐 요소가 가미된 전술적 두뇌 싸움에 가깝다. 원작의 컨셉을 계승하면서도 적 배치와 체력 수치를 더욱 가혹하게 조정하여, 한 방 한 방의 공격이 긴장감 넘치는 생존 게임으로 탈바꿈시켰다. 추천 대상은 유즈맵 중에서도 극한의 난이도를 즐기는 하드코어 게이머와, 마린 컨트롤의 정점을 경험하고 싶은 숙련자다. 반면, 가벼운 재미를 원하거나 인내심이 부족한 플레이어에게는 좌절감을 줄 수 있으니 주의가 필요하다. 플레이 전에는 반드시 맵에 내장된 간략한 설명을 숙지하고, 저장 기능을 수시로 활용할 준비를 해야 한다. 한 번의 실수로 긴 구간을 다시 반복해야 하는 구조이므로, 세이브와 로드는 단순한 편의를 넘어 필수 생존 전략이다. 이 맵은 뛰어난 완성도와 극적인 긴장감으로, 마린 유즈맵의 정수라 불릴만한 깊은 인상을 남긴다. The hard version of the Marine Special Forces series takes place across a desert tileset battlefield, inheriting the fame of the original while boasting a significantly intensified difficulty. The map is structured with a constant intersection of narrow canyons and open kill zones, forcing players to remain perpetually tense under limited vision and relentless enemy assaults. You control essentially a single Marine unit and must utilize special abilities and a handful of support units to achieve the designated mission objectives. The progression follows a typical linear mission style where clearing all enemies in one section unlocks the next path or reveals new terrain. Powerful enemy units and unpredictable ambushes are placed throughout the map, testing your concentration to the absolute limit; a single mistake can lead to instant failure, demanding meticulous control and extreme patience. The gameplay experience feels like a brutal combat simulation. The intensity of battle that a lone Marine must endure is beyond imagination, requiring you to memorize enemy attack patterns and repeatedly search for the optimal engagement route. Specifically, fighting in tight corridors demands a perfect harmony of skill timing and movement control, presenting a substantial challenge even for players proficient in StarCraft's basic combat mechanics. This map is less a simple shooting game and more a strategic mind game packed with puzzle elements. While inheriting the original concept, the enemy placement and health values have been adjusted to be far more punishing, transforming each attack into a high-stakes survival game. The recommended audience is hardcore gamers who enjoy extreme difficulty in UMS maps, and experts seeking to experience the pinnacle of Marine micro control. Conversely, this map can be a source of deep frustration for those seeking casual fun or lacking patience, so caution is advised. Before playing, you must read the brief in-game descriptions and prepare to utilize the save function frequently. Since a single failure can force you to replay a lengthy section, saving and loading is not a mere convenience but an essential survival strategy. With its outstanding polish and dramatic tension, this map leaves a profound impression that can only be called the gold standard of Marine UMS.
![7:1 컴까기 기독교 버전5[hard] 맵 미리보기](https://cdn-star-data.huzy.net/thumbnail_11b9e08b221e4bea99a48aec3b9506d7.jpg)
7:1 컴까기 기독교 버전5[hard]
7:1 컴까기 기독교 버전5는 스타크래프트: 브루드워의 유즈맵으로, 7명의 플레이어가 하나의 팀으로 뭉쳐서 끊임없이 몰려오는 적군Wave를 상대로 건물을 지어 방어하는 디펜스 장르의 맵이다. 맵 제목에서 알 수 있듯 7:1의 불균형한 구도에서 시작하며, 특히 [hard]라는 난이도 표기는 일반적인 방어전과는 차별화된 높은 난이도를 암시한다. 내부 설명에 따르면 기존 버전의 건물 건설 오류를 수정하고, 난이도를 3에서 5까지 단계적으로 높인 버전으로, 특히 5버전에서는 적팀의 시야가 확장되어 플레이어의 위치를 더 쉽게 파악할 수 있도록 조정되었다고 한다. 맵의 구조는 중앙에 플레이어의 건물을 건설할 수 있는 공간이 배치되어 있으며, 그 주위를 둘러싼 외곽 지역에는 적군의 Spawn Point가 여러 곳에 분포해 있다. 건물을 지어 방어선을 구축하는 classic 디펜스 요소 외에도, 기독교적 요소나 스토리성이 내재되어 있는지는 명확하지 않지만, 제목과 버전명에서 유추할 수 있는 '기독교'라는 키워드는 맵의 테마나 배경 설정에 영향을 미쳤을 가능성이 있다. 플레이어는 제한된 자원과 시간 속에서 건물을 건설하고 업그레이드하며, 끊임없이 밀려오는 적군을 상대해야 한다. 맵의 레이아웃은 중앙의 건물을 중심으로 방어선을 형성할 수 있도록 설계되어 있으며, 외곽의 Spawn Point를 통제하는 것이 핵심 전략이 된다. 난이도가 [hard]로 표기된 만큼, 초보자가 쉽게 클리어하기 어려운 구조로 보이며, 숙련된 플레이어에게는 전략적 깊이와 긴장감을 제공할 것으로 예상된다. 특히 7:1이라는 불리한 구도에서 승리를 거두기 위해서는 빠른 건물 건설과 효율적인 자원 관리, 그리고 적군의 패턴을 읽는 능력이 요구된다. 추천 대상은 디펜스 장르에 익숙한 플레이어이며, 특히 7:1의 극한 상황에서의 전략 수립과 대처 능력을 테스트하고 싶은 유저에게 적합하다. 플레이 전에는 건물 건설 위치와 Spawn Point의 분포를 미리 파악하고, 각 버전의 난이도 차이를 고려해 자신에게 맞는 난이도를 선택하는 것이 중요하다. 또한, 맵의 설명에 언급된 제작자의 연락처를 참고한다면, 버그 리포트나 추가적인 정보를 얻을 수 있을 것으로 보인다. 7:1 Compkagi Christian Version 5 is a StarCraft: Brood War user-made map where a team of 7 players defends against endless waves of enemy units in a defense genre map. The title '7:1' indicates an unbalanced starting situation, and the [hard] difficulty suggests a significantly higher challenge compared to typical defense maps. According to the internal description, this version fixes construction bugs from previous versions, adjusts the difficulty to a higher level (from 3 to 5), and enhances enemy visibility to make player locations easier to track. The map layout features a central area for building player structures, surrounded by outer regions where multiple enemy spawn points are located. Beyond the classic defense mechanics of constructing and upgrading buildings, the map may incorporate Christian themes or narrative elements, though this is not explicitly confirmed. Players must strategically build defenses with limited resources and time, countering relentless enemy waves. The design allows for central building placement to form defensive lines, with control over outer spawn points being crucial. The [hard] difficulty implies a steep learning curve, making it less suitable for beginners, while offering strategic depth and tension for experienced players. The extreme 7:1 scenario demands quick construction, efficient resource management, and the ability to predict enemy patterns. This map is recommended for players familiar with defense genre maps, particularly those seeking to test their strategic prowess in high-difficulty, unbalanced situations. Before playing, it is advisable to study the building placement spots and spawn point distribution, and to choose a difficulty level that matches the player's skill. The creator's contact information mentioned in the map description may also be useful for reporting bugs or seeking additional insights.
뉴 히드라리스크 어택 20k 하드 (New Hydralisk Attack 20k Hard)
‘뉴 히드라리스크 어택 20k 하드’는 스타크래프트 브루드워의 유즈맵으로, 디펜스 장르에 속하는 하드코어한 방어형 맵이다. 맵의 구조는 긴 직선 형태로 펼쳐져 있으며, 오른쪽 끝에서 끊임없이 몰려드는 히드라리스크 무리를 왼쪽 기지에서 저지하는 것이 핵심이다. 기지 앞에는 방어진이 촘촘히 배치되어 있어, 플레이어는 자원 관리와 방어 건물의 배치, 업그레이드를 통해 끊임없이 쏟아지는 적을 상대해야 한다. 특히 하드 난이도답게 적의 수가 매우 많고, 스폰 주기도 빨라 지속적인 집중을 요구하는 것이 특징이다. 맵의 배경은 어두운 톤으로, 긴장감을 고조시키며, 방어선이 무너지면 곧바로 게임 오버로 이어지는 긴박한 상황이 연출된다. 방어 건물로 사용할 수 있는 유닛은 제한되어 있으며, 자원 수급도 제한적이기 때문에 효율적인 플레이가 요구된다. 하드 난이도답게 초보자는 클리어하기 어려우며, 숙련된 플레이어라도 몇 번의 시도와 전략 수정이 필요할 정도로 난이도가 높다. 전체적으로는 ‘컴까기’와 ‘디펜스’의 조합으로, 방어와 자원 관리의 밸런스를 맞추는 것이 관건인 맵으로 평가할 수 있다. 추천 대상은 스타크래프트의 방어와 전략적 플레이를 좋아하는 유저들이며, 특히 긴장감 넘치는 플레이를 즐기는 유저들에게 적합하다. 플레이 전에는 방어 건물의 배치와 업그레이드 우선순위를 미리 계획하고, 자원 관리에 유의할 필요가 있다. 또한, 게임 시작 직후 첫-wave를 어떻게 넘기느냐가 이후의 진행을 좌우하는 중요한 포인트가 된다. This StarCraft: Brood War custom map, 'New Hydralisk Attack 20k Hard,' falls under the defense genre, offering a challenging hard-core defensive gameplay experience. The map features a long, linear structure where the player must defend their base on the left side against an endless stream of Hydralisks spawning from the right. The defense line is densely packed with structures, requiring players to manage resources, strategically place defensive buildings, and prioritize upgrades to withstand the relentless enemy waves. The hard difficulty ensures a high enemy count with rapid spawn intervals, demanding constant focus and adaptability. The dark-toned background enhances the intense atmosphere, with failure leading to an immediate game over. Limited unit options for defense and restricted resource income add to the challenge, making efficient resource and upgrade management crucial. The high difficulty makes it inaccessible for beginners, and even experienced players may need multiple attempts and strategic adjustments. The map blends elements of 'computer-killing' and 'defense,' emphasizing the balance between defense and resource management. It is recommended for players who enjoy strategic defense mechanics and high-pressure gameplay. Before playing, planning defensive structure placement, prioritizing upgrades, and managing resources are essential. The initial wave often sets the tone for the rest of the game, making it a critical moment to handle effectively.
썬크 D 10웨이 하드 (SunkenD 10-Way Hard)
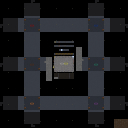
스타크래프트: 브루드워의 대표적인 디펜스 유즈맵인 '썬크 D 10웨이(10-Way)' 시리즈의 하드 난이도 버전으로, Sunken Defense 10-Way 시리즈의 최신작 중 하나로 추정된다. 이 맵은 중앙에 위치한 본진을 중심으로 10방향으로 뻗어나가는 길이 배치되어 있으며, 각 길마다 적절한 방어 포인트가 분배되어 있다. 플레이어는 본진에서 시작해 10개의 길 중 하나를 선택하여 적 유닛의 끊임없는 공세를 방어해야 한다. 맵의 특징인 '썬크(침수)'는 중앙 본진 주위에 물지형이 펼쳐져 있어 기지 방어와 길 선택의 전략적 고민을 유도한다. 플레이 방식은 기본적으로 컴까기(컴퓨터 상대 키우기) 형식으로, 10개의 길에서 등장하는 적들을 모두 격퇴해야만 승리할 수 있다. 각 길은 난이도별로 다른 패턴의 적이 등장하며, 하드 버전에서는 더 강력한 유닛 조합과 빠른 스폰 주기로 난이도가 급격히 상승한다. 중앙 본진의 보호 외에도 길 중간중간에 배치된 포인트 방어 타워나 유닛 생산 시설이 있어 전략의 다양성을 제공한다. 특히 물지형은 일정한 시간마다 상승하는 물결로 인해 기지 방어의 타이밍을 맞추는 것이 중요하다. 이 맵의 가장 큰 특징은 10개의 길 중 어느 곳을 선택하느냐에 따라 플레이 스타일이 완전히 달라진다는 점이다. 초반에는 중앙 본진의 방어에 집중해야 하지만, 시간이 지날수록 각 길의 중요도가 달라지며, 특정 길의 방어에 실패하면 전체적인 균형이 깨질 수 있다. 또한 하드 난이도에서는 적의 공격 패턴이 복잡해지고, 때로는 예상치 못한 방향으로의 공격을 감행하기 때문에 플레이어의 반사신경과 상황 판단력이 요구된다. 맵의 난이도 조절이 잘 되어 있어 초보자는 길 선택과 방어에 어려움을 겪지만, 숙련자는 효율적인 자원 관리와 타워 배치로 상대를 압도할 수 있다. 이 맵은 특히 디펜스 장르에 익숙한 플레이어들에게 강추하며, 타워 디펜스와 컴까기의 혼합형으로 전략적 깊이가 깊은 편이다. 다만 하드 난이도의 경우, 적의 공격력이 어느 수준 이상으로 상승하기 때문에 빠른 판단과 효율적인 자원 운용이 필수적이다. 맵의 구조상 중앙 본진을 중심으로 10개의 길로 나뉘어져 있어, 길 선택과 방어 전략에 대한 사전 학습이 도움이 된다. 맵을 플레이하기 전에는 본진 주변의 물지형 변화 패턴과 각 길이 연결되는 주요 포인트를 숙지하는 것이 중요하다. 또한 하드 버전에서는 적의 공격 주기가 짧아지기 때문에, 초반 자원 확보와 타워 건설 타이밍을 잘 맞추는 것이 승리의 관건이다. 이 맵은 시리즈 내에서도 하드 난이도답게 높은 난이도를 자랑하며, 디펜스 장르를 좋아하는 플레이어라면 도전해 볼 만한 가치가 충분하다. 맵의 난이도와 구조가 플레이어의 실력에 따라 차별화된 경험을 제공하기 때문에, 반복 플레이를 통해 전략을 다듬어나가는 재미가 있다. 특히 10개의 길 중 어느 곳을 선택하느냐에 따라 플레이 스타일이 완전히 달라지기 때문에, 다양한 전략을 연습할 수 있다. This is a hard-difficulty entry in the Sunken Defense 10-Way series, a renowned defense-style custom map for StarCraft: Brood War. The map features a central base surrounded by ten branching paths, each leading to different defensive zones where players must fend off relentless waves of enemy units. The defining characteristic of this series is the 'Sunken' terrain—flooded areas around the base that rise periodically, adding a layer of strategy to base defense timing. The gameplay follows a typical UMS (Use Map Settings) defense format, where players must protect their base from 10 distinct assault paths. In the hard version, enemies spawn more frequently and with stronger compositions, escalating the challenge significantly compared to easier difficulties. Players start at the central base but must strategically choose which paths to prioritize, as neglecting any path can lead to overwhelming pressure. The map’s water mechanics introduce dynamic elements, as rising tides periodically restrict movement and require precise timing for unit deployment and tower placement. One of the map’s standout features is its branching path design, which forces players to adapt their strategies based on their path selection. Early gameplay revolves around fortifying the base, but as the rounds progress, the importance of each path shifts, demanding constant evaluation. The hard difficulty ramps up the complexity with unpredictable enemy patterns, including sudden multi-directional attacks that test a player’s reflexes and decision-making. While beginners may struggle with the sheer number of variables, experienced players can optimize resource management and tower placement to dominate the game. This map is highly recommended for fans of the defense genre, especially those who enjoy a mix of tower defense and computer-raiding mechanics. The hybrid design offers deep strategic layers, though the hard version demands quick thinking and efficient resource allocation. Before diving in, players should familiarize themselves with the water terrain’s cycle and the key choke points along each path. Early-game priorities include securing resources and timing tower construction to counter the accelerated spawn rates of the hard difficulty. The map’s replayability lies in its ability to offer varied experiences based on path selection, making it a rewarding challenge for those willing to refine their strategies through repeated play.
프로스트 바이트 (Frost Bite)
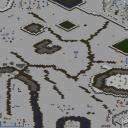
프로스트 바이트(Frost Bite)는 2인용 유즈맵으로, 플랫폼 타일셋 위에 192×192 타일 32×32 크기로 구성된 대형 맵이다. 내부 설명에 따르면 DLPlayer가 제작했으며, 60분 안에 프로토스 왕을 처치하는 것이 목표로 제시되어 있다. 맵 제목과 설명에서 ‘Hard Ass Map!’이라는 표현이 쓰인 점으로 보아 난이도가 상당히 높게 설정된 컴까기 스타일의 보스전으로 추정된다. 플레이어는 제한된 자원과 시간 안에서 프로토스 유닛과 구조물을 공략해야 하며, 맵 전체가 넓은 평원 형태라 기동성과 병력 분배가 승패를 가른다. 2인 협력 플레이가 기본이지만, 단독으로도 도전 가능하도록 트리거가 구성되어 있을 것으로 보인다. 맵 크기가 6144×6144로 넓어 탐색과 전개에 시간이 소요되며, 60분 제한이 긴장감을 더한다. 추천 대상은 고난도 컴까기나 보스전 스타일을 즐기는 유저이며, 초보자는 연습용으로 다른 맵을 먼저 경험하는 것이 좋다. 플레이 전에는 자원 분배 전략과 프로토스 왕의 공격 패턴을 파악하는 것이 중요하다. 또한 맵 중앙에 위치한 주요 기지와 주변 방어선을 어떻게 돌파할지 미리 시뮬레이션해 두면 클리어 확률이 높아진다. Frost Bite is a two‑player UMS map built on the Platform tileset with a 192×192 tile grid forming a 32×32 large arena. According to the internal description it was created by DLPlayer, and the objective is to destroy the Protoss King within 60 minutes. The phrase “Hard Ass Map!” in the title and description suggests a very high difficulty, typical of a comp‑stomp boss fight. Players must manage limited resources and time while assaulting Protoss units and structures across a wide open plain, where mobility and force distribution decide the outcome. Although designed for cooperative play, the triggers likely allow a solo challenge as well. The 6144×6144 map size makes scouting and deployment time‑consuming, and the 60‑minute limit adds pressure. It is recommended for fans of hardcore comp‑stomp or boss‑style maps; beginners should practice on easier maps first. Before starting, planning resource allocation and learning the Protoss King’s attack patterns is crucial. Simulating how to breach the central base and surrounding defenses in advance will increase the clear rate.
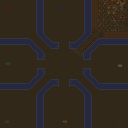
7vs1 하드 컴까기 B2-V1.15B
스타크래프트 브루드워의 대표적인 컴까기 유즈맵 7vs1 Hard Comp B2-V1.15B는 7명의 플레이어가 한 팀을 이뤄 강력한 적 병력을 상대로 방어전을 펼치는 도전형 디펜스 맵이다. 맵은 황무지 타일셋으로 구성되어 있으며, 4096x4096의 넓은 공간에서 펼쳐지는 전투는 마치 공성전을 연상시킨다. 맵의 특징은 ‘Mass’, ‘FastBuild’, ‘Instant Upgrades(5)’ 등으로 요약되며, 특히 5단계의 즉시 업그레이드는 플레이어의 전략적 선택지를 크게 넓힌다. ‘Semi-Heros’라는 설명은 영웅 유닛이 제한적으로 등장하거나 강화된 상태에서 전투가 벌어짐을 추측케 한다. 맵 제목에 포함된 ‘Hard’는 난이도가 매우 높다는 점을 강조하며, ‘Comp’는 컴퓨터 상대를 의미하는 것으로 보인다. 이 맵은 컴까기의 정석을 보여준다. 7명의 플레이어는 각자의 기지에서 시작해 자원을 채취하고 병력을 생산하며, 동시에 끊임없이 밀려오는 적의 공격을 방어해야 한다. 적의 병력은 점점 강해지고 규모가 커지므로, 초반의 안정적인 자원 관리와 방어선이 무엇보다 중요하다. 맵의 넓은 공간은 전략적 위치를 선점하기 위한 전투와Resource Gathering을 동시에 요구한다. 또한, ‘Instant Upgrades(5)’는 빠른 기술 개발을 통해 전투력을 극대화할 수 있는 기회를 제공하지만, 이를 어떻게 활용하느냐에 따라 승패가 갈릴 수 있다. ‘Semi-Heros’는 특정 유닛이 강력한 능력을 발휘할 수 있음을 시사하며, 이를 활용한 전략이 관건이다. 이 맵을 플레이하기 위해서는 최소한의 스타크래프트 브루드워 멀티플레이어 조작 경험이 요구되며, 특히 ‘컴까기’라는 장르에 익숙하지 않다면 난이도가 상당할 수 있다. 초보자의 경우 방어선 구축과 자원 관리에 집중하는 것이 좋으며, 점차 경험을 쌓아가며 업그레이드와 영웅 유닛 활용에 익숙해져야 한다. 맵의 ‘VERY challangeing’이라는 설명은 플레이어의 실력과 전략이 곧 승패를 좌우함을 강조한다. 따라서 이 맵은 숙련된 플레이어에게 더 어울리며, 팀워크와 전략적 사고가 요구되는 하드코어한 게임플레이를 제공한다. 이 맵은 디펜스 장르의 정수를 담은 동시에, 컴까기의 특징인 ‘컴퓨터 상대’를 극대화한 형태로 구성되어 있다. 넓은 맵과 끊임없는 적의 공격은 플레이어에게 끊임없는 긴장감을 안겨주며, 전략적 깊이를 더한다. 또한, ‘FastBuild’와 ‘Instant Upgrades’는 게임의 속도를 빠르게 하고, 플레이어 간의 경쟁을 치열하게 만든다. 이러한 요소들은 맵을 한층 더 흥미롭게 만들고, 반복 플레이를 이끌어내는 핵심 요소로 작용한다. 이 맵을 플레이한다면, 디펜스와 컴까기의 묘미를 동시에 느낄 수 있을 것이다. This StarCraft: Brood War custom map, 7vs1 Hard Comp B2-V1.15B, delivers a hardcore defense experience where seven players unite to withstand relentless AI-driven assaults. Set on a vast 4096x4096 desert-themed battlefield, the map emphasizes strategic positioning, resource management, and rapid upgrades, embodying the essence of team-based tower defense. The inclusion of 'Mass', 'FastBuild', and 'Instant Upgrades(5)' mechanics accelerates gameplay, forcing players to make quick yet critical decisions to reinforce their defenses. The term 'Semi-Heros' hints at the presence of partially upgraded or enhanced units that can turn the tide in battles if utilized effectively. Designed for seasoned players, this map challenges team coordination and individual micro-management to the limit. Each player starts in a separate base, requiring them to balance base expansion, resource gathering, and frontline defense simultaneously. The AI opponents escalate in difficulty, demanding adaptive strategies—whether it's fortifying chokepoints, timing unit productions, or leveraging the five instant upgrades to gain an edge. The map's difficulty, as noted in its title, ensures that casual players may find it overwhelming, but its depth rewards those who invest time into mastering its mechanics. The gameplay loop revolves around surviving increasingly aggressive waves while optimizing unit compositions and upgrades. The desert terrain provides natural choke points and open spaces, allowing for both defensive fortifications and strategic offensives. The 'VERY challangeing' label isn't an exaggeration; success hinges on seamless teamwork, precise unit control, and the ability to adapt to the AI's evolving tactics. For fans of hardcore UMS maps, 7vs1 Hard Comp B2-V1.15B offers a quintessential experience that tests endurance, strategy, and collaboration under pressure.
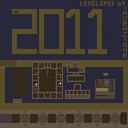
리엔 디펜스 (LiNG DeFeNSe)
LiNG DeFeNSe.Hard6.2는 기존 디펜스 맵의 기본 틀에 새로운 콤보와 섹터를 추가한 하드 난이도 유즈맵이다. 맵은 황무지 타일셋을 사용해 넓은 4096×4096 크기의 전장을 제공하며, 6명의 플레이어가 동시에 방어 라인을 구축한다. 초반에는 기본 유닛과 방어 타워를 배치해 적의 첫 물결을 막아내야 하고, 중반에 등장하는 새로운 콤보 유닛은 기존 방어를 보완하거나 새로운 전술을 가능하게 한다. 특히 맵 중앙에 위치한 새로운 섹터는 자원과 강화 포인트가 집중돼 있어, 이 지역을 장악하면 방어 효율이 크게 상승한다. 그러나 해당 섹터는 적의 공격 경로와 겹치기 쉬워, 지나치게 집중하면 방어가 붕괴될 위험이 있다. 따라서 플레이 전에는 방어 라인을 여러 층으로 나누고, 새로운 유닛을 언제 투입할지 타이밍을 조절하는 것이 핵심이다. 맵은 하드 난이도라서 초보자보다는 중급 이상 플레이어에게 적합하며, 팀 플레이보다는 개인 실력을 시험해 보는 솔로 플레이에 더 알맞다. 방어 구조를 설계할 때는 적의 스폰 위치와 파동 패턴을 파악하고, 자원 수급을 균형 있게 배분하는 것이 승리의 관건이다. 또한, 새로운 아이디어가 반영된 맵이므로 기존 디펜스 맵에 익숙한 유저라면 새로운 전략을 시도해 보는 재미를 느낄 수 있다. LiNG DeFeNSe.Hard6.2 is a hard‑difficulty custom defense map that builds on the classic defense framework by adding new unit combos and a fresh sector. The map uses the Wilderness tileset and offers a large 4096×4096 battlefield where up to six players can construct their defenses simultaneously. Early game focuses on placing basic units and towers to stop the first wave, while mid‑game introduces new combo units that either reinforce existing defenses or enable novel tactics. The central sector, packed with resources and power‑up points, becomes a strategic hotspot; controlling it greatly boosts defensive efficiency, but its proximity to enemy spawn paths makes it a risky focal point. Successful play requires layering defenses, timing the deployment of the new units, and balancing resource allocation. Because of its hard difficulty, the map suits intermediate to advanced players more than beginners, and it shines in solo play rather than team matches. Understanding enemy spawn locations and wave patterns, as well as maintaining a balanced economy, are key to victory. Fans of traditional defense maps will appreciate the fresh strategic possibilities introduced by this design.
Hydra Attack 1000 ■ HARD ■
Hydra Attack 1000은 7명의 플레이어가 동시에 참여해 자신의 기지를 방어하는 디펜스형 유즈맵이다. 맵 전체가 2048×8192 타일로 구성돼 넓은 전장을 제공하며, 하이드라 유닛이 파동처럼 몰려오는 파형을 따라 일정 구역에 배치된다. 플레이 초반에는 기본 방어 건물과 유닛을 배치해 첫 번째 물결을 버텨야 하고, 물결이 진행될수록 하이드라의 수와 체력이 급격히 증가한다. 따라서 방어 라인을 여러 층으로 나누어 배치하고, 자원 수급을 효율적으로 관리해 재건과 업그레이드를 지속하는 것이 핵심이다. 맵은 ‘HARD’ 난이도로 지정돼 있어 적절한 유닛 조합과 타이밍이 요구되며, 방어 건물의 위치 선정이 승패를 좌우한다. 플레이 전에는 시작 자원량과 방어 건물 종류를 확인하고, 하이드라의 스폰 위치와 경로를 파악해 미리 대비책을 세우는 것이 좋다. 초보자보다는 기본 방어 전략에 익숙한 유저에게 추천되며, 팀 플레이보다는 개인 혹은 자유 대전에서 자신의 방어 실력을 시험해 보고 싶은 플레이어에게 적합하다. Hydra Attack 1000 is a defense‑type use map that allows up to 7 players to simultaneously defend their bases. The map spans a massive 2048×8192 tile area, providing a wide battlefield where Hydra units surge in wave‑like patterns across designated zones. At the start, players place basic defensive structures and units to survive the first wave, but as the waves progress the number and health of Hydras increase sharply. Consequently, arranging multiple layers of defense lines and efficiently managing resources for rebuilding and upgrades becomes essential. Labeled as ‘HARD’, the map demands proper unit composition and timing, with the placement of defensive buildings often deciding victory or defeat. Before playing, check the initial resource amount, available defensive structures, and study Hydra spawn points and paths to prepare strategies in advance. This map is best suited for players familiar with basic defense tactics rather than beginners, and it caters to solo or free‑for‑all matches where individuals can test their defensive skills.
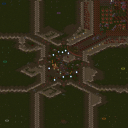
7 vs 1 하드 컴퓨터 (영웅) (7 vs 1 Hard Computer w/Heroes)
스타크래프트 브루드워의 고난이도 컴까기 디펜스 맵으로, 7명의 플레이어가 단일 영웅 캐릭터로 강력한 컴퓨터 AI를 상대하는 하드코어한 유즈맵이다. 맵 제목에서 알 수 있듯이 '7 vs 1 Hard Computer w/Heroes'라는 컨셉으로, 초반 빠른 기지 건설과 영웅 디펜스가 필수적인 구조로 설계되었다. 내부 맵 설명에 따르면 'Build D quick or u will probably die'라는 문구에서 볼 수 있듯이, 방어 타워를 빠르게 건설하지 않으면 초반 러시에서 무너지기 십상인 극한의 난이도를 자랑한다. 영웅 시스템이 추가되면서 개별 플레이어의 전략적 선택과 조합 능력이 중요해졌으며, 맵 중앙에 위치한 영웅 선택 창에서 다양한 영웅을 골라 사용할 수 있다. 고정된 5명의 영웅 외에도 추가로 영웅이 제공된다는 설명에서 영웅 간의 시너지와 조합 플레이가 핵심 전략 요소로 부각된다. 이러한 구조는 플레이어들에게 끊임없는 긴장감과 전략적 깊이를 요구하며, 컴퓨터 AI의 끊임없는 공격 패턴과 영웅의 스킬 활용을 통해 플레이어의 실력을 시험하는 데 중점을 두고 있다. 초보자보다는 어느 정도 스타크래프트 경험이 있는 플레이어들에게 추천되며, 특히 영웅 간의 조합과 빠른 판단력이 요구되는 맵으로, 한 판 한 판이 긴장감 넘치는 전투로 구성되어 있다. 맵의 디자인상으로는 사막 타일셋을 사용하여 건조한 환경이 연출되며, 방어 건물을 건설할 수 있는 공간과 초반 자원 확보가 가능한 위치가 strategic 하게 배치되어 있다. 이 맵을 플레이하기 위해서는 빠른 기지 건설과 영웅 관리, 그리고 컴퓨터의 다양한 공격 패턴에 대응할 수 있는 역량이 필요하다. 무엇보다도, 한 번 실수하면 게임이 급격히 불리해질 수 있는 구조이기 때문에, 신중한 플레이와 전략적 사고가 무엇보다 중요하다. This is a hardcore UMS defense map in StarCraft: Brood War where seven players control individual hero units against a powerful AI opponent. The map's title, '7 vs 1 Hard Computer w/Heroes,' immediately signals its punishing difficulty and unique hero-based gameplay. The internal description emphasizes the need for rapid base construction with the warning 'Build D quick or u will probably die,' highlighting the map's brutal early-game rush mechanics. The addition of a hero system allows players to select from various unique characters, each with distinct abilities, adding a layer of strategic depth. The map's notes mention at least five fixed heroes, with additional options provided by the 'agm_ultimatex' mod, encouraging players to experiment with synergies and team compositions. This setup demands constant vigilance, as the AI's relentless assaults test both individual skill and coordinated teamwork. The desert-themed tileset enhances the map's tense atmosphere, while the strategic placement of resource nodes and defensive structures ensures that every decision—from tower placement to hero selection—carries significant weight. While accessible to intermediate players familiar with StarCraft mechanics, the map's punishing difficulty and reliance on micro-management and quick decision-making make it unsuitable for beginners. Success hinges on adaptability, precise base building, and efficient hero utilization to counter the AI's evolving strategies.
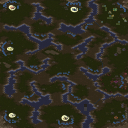
5 vs 3 Hard Comp
'5 vs 3 하드 컴'은 제목 그대로 5명의 플레이어가 3명의 하드 난이도 컴퓨터와 대결하는 컴까기(Comp Stomp) 유즈맵이다. 사막 타일셋의 128x128 크기 맵에서 진행되며, 파일명에 포함된 'STACK' 표기로 미루어 자원이나 시작 유닛이 뭉쳐 있어 초반 빌드 속도가 빠를 것으로 보인다. 내부 설명에 '2-8인 컷스로트(Cutthroat)'라 표기되어 있으나, 맵 제목과 일반적인 컴까기 구성을 고려하면 5인 협력 대 3컴퓨터의 팀 대전 형태가 주된 플레이 방식일 것으로 추정된다. 하드 난이도 컴퓨터는 초반부터 강한 압박을 가하므로, 입구 막기나 수비 타워 건설 등 초반 생존 전략이 중요하다. 5명이 뭉쳐서 한 방향을 밀어내거나, 각자 입구를 맡아 버티며 테크를 올리는 협력 플레이가 핵심이다. 긴박한 수비전과 후반 역습의 쾌감을 원하는 유저, 친구들과 부담 없이 컴퓨터를 상대로 합을 맞춰보기 좋은 맵이다. 플레이 전 인원 수에 맞춰 빈 슬롯을 컴퓨터로 채우거나 관전으로 돌려 밸런스를 조절하는 것이 좋다. '5 vs 3 Hard Comp' is a Comp Stomp UMS map where five players face three Hard difficulty computers, as the title suggests. Played on a 128x128 Desert tileset, the 'STACK' in the filename suggests stacked resources or starting units for a faster early game. While the internal description mentions '2-8 player Cutthroat,' the map title and typical Comp Stomp structure imply a 5-human vs 3-computer team battle. Hard AIs pressure early, making wall-ins and defensive towers critical for survival. Core gameplay revolves around cooperative play—either pushing one lane together or holding individual chokes while teching up. Recommended for users seeking tense defense and late-game counterattack thrills, or groups wanting to practice teamwork against AI. Before starting, fill empty slots with computers or set them to observer to balance the match.
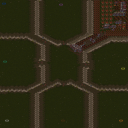
7vs1 hard computer
스타크래프트 브루드워 유즈맵 '7대1 하드 컴퓨터'는 제목 그대로 7명의 플레이어가 하나의 매우 어려운 난이도 인공지능과 맞서는 컴까기(Comp Stomp) 형태의 맵이다. 사막 타일셋 위에서 펼쳐지며, 맵 설명에 따르면 컴퓨터가 초반부터 강력한 러시를 감행하므로 플레이어들은 즉시 방어 시설을 갖춰야 생존할 수 있다. 7인 협동이라는 인원 수 덕분에 다수의 병력과 자원을 운용하는 재미가 있지만, 그만큼 컴퓨터의 공세도 거세져 순발력 있는 대처와 팀원 간 자원 지원, 병력 조합이 승패를 가른다. 일반적인 디펜스 맵처럼 고정된 웨이브를 막는 방식이 아니라, 밀리 수준의 인공지능이 전방위로 압박해 들어오는 구성이라 실전 감각을 익히거나 친구들과 호흡을 맞추기에 적합하다. 난이도가 'Very Hard'로 표기된 만큼 초보자보다는 기본 빌드 오더와 멀티태스킹이 가능한 중급 이상 유저에게 권장된다. 플레이 전에는 동맹 설정과 자원 공유 여부, 그리고 컴퓨터의 종족이 랜덤인지 고정인지 확인하는 것이 좋다. StarCraft Brood War UMS map '7vs1 Hard Computer' is exactly as the title suggests: a Comp Stomp style map where 7 players face a single Very Hard AI. Played on a Desert tileset, the description warns that the computer launches a powerful rush early on, forcing players to establish defenses immediately to survive. The 7-player co-op format offers the fun of managing large armies and resources, but the AI's offensive scales accordingly, demanding quick reflexes, resource sharing among teammates, and proper unit composition. Unlike typical defense maps with fixed waves, this map features a melee-level AI pressuring from all sides, making it suitable for practicing real-game sense or coordinating with friends. Given the 'Very Hard' difficulty rating, it is recommended for intermediate or advanced users who have basic build orders and multitasking skills rather than beginners. Before playing, it is advisable to check ally settings, resource sharing options, and whether the AI's race is random or fixed.
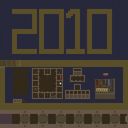
올랜덤저글링막기 Hard (All Random Zergling Block Hard)
이 맵은 스타크래프트: 브루드워의 유즈맵으로, 저글링을 막아내는 디펜스 장르의 맵이다. 황무지 테마의 넓은 공간에 6개의 입구가 배치되어 있으며, 플레이어는 이 입구들을 방어하며 끊임없이 쏟아지는 저글링 무리를 처치해야 한다. 맵의 중앙에는 본진 건물이 위치하고 있으며, 입구 주변에는 적절한 방어 시설물 배치 공간이 마련되어 보인다. 저글링의 공격 패턴은 무작위로 추정되지만, 입구당 일정 수의 저글링이 지속적으로 리젠되는 구조로 보인다. 방어 시설을 효율적으로 배치하지 않으면 순식간에 본진이 무너질 위험이 있어, strategic한 플레이가 요구된다. 또한, 맵의 난이도는 'Hard'로 명시되어 있어 초보자보다는 어느 정도 경험이 있는 플레이어에게 적합할 것으로 추정된다. 저글링의 속도와 리젠 속도, 방어 시설의 효율성 등에서 밸런스가 조절된 맵으로 보이며, 디펜스 장르 특유의 긴장감과 성취감을 느낄 수 있는 구조다. 초보자는 방어 시설의 배치 방법과 자원의 관리 방법을 익히는 데 어려움을 느낄 수 있으며, 숙련자는 더 빠른 리젠 속도나 더 어려운 패턴에 대처해야 할 수도 있다. 맵을 플레이하기 전에는 방어 시설물의 종류와 배치 가능한 위치, 저글링의 리젠 포인트 위치를 미리 확인하는 것이 좋다. This StarCraft: Brood War custom map is a defense genre map where players must defend against waves of zerglings. Set in a barren terrain, the map features six entrances with a main base located in the center. Players must strategically place defensive structures near each entrance to fend off the continuously spawning zerglings. The difficulty is indicated as 'Hard,' suggesting it is designed for players with some experience in defense maps. The randomness in zergling spawn patterns adds unpredictability, requiring players to adapt their strategies dynamically. Efficient resource management and optimal placement of defensive buildings are crucial to surviving the waves. Beginners may struggle with understanding the mechanics and resource allocation, while advanced players may face challenges with faster spawn rates or more complex patterns. Before playing, it is advisable to familiarize yourself with the types of defensive structures available and their placements, as well as the locations of zergling spawn points to maximize your chances of success.
최근 등록된 맵
새로 추가된 파일과 버전을 확인하세요.
뉴 히드라리스크 어택 20k 하드 (New Hydralisk Attack 20k Hard)
‘뉴 히드라리스크 어택 20k 하드’는 스타크래프트 브루드워의 유즈맵으로, 디펜스 장르에 속하는 하드코어한 방어형 맵이다. 맵의 구조는 긴 직선 형태로 펼쳐져 있으며, 오른쪽 끝에서 끊임없이 몰려드는 히드라리스크 무리를 왼쪽 기지에서 저지하는 것이 핵심이다. 기지 앞에는 방어진이 촘촘히 배치되어 있어, 플레이어는 자원 관리와 방어 건물의 배치, 업그레이드를 통해 끊임없이 쏟아지는 적을 상대해야 한다. 특히 하드 난이도답게 적의 수가 매우 많고, 스폰 주기도 빨라 지속적인 집중을 요구하는 것이 특징이다. 맵의 배경은 어두운 톤으로, 긴장감을 고조시키며, 방어선이 무너지면 곧바로 게임 오버로 이어지는 긴박한 상황이 연출된다. 방어 건물로 사용할 수 있는 유닛은 제한되어 있으며, 자원 수급도 제한적이기 때문에 효율적인 플레이가 요구된다. 하드 난이도답게 초보자는 클리어하기 어려우며, 숙련된 플레이어라도 몇 번의 시도와 전략 수정이 필요할 정도로 난이도가 높다. 전체적으로는 ‘컴까기’와 ‘디펜스’의 조합으로, 방어와 자원 관리의 밸런스를 맞추는 것이 관건인 맵으로 평가할 수 있다. 추천 대상은 스타크래프트의 방어와 전략적 플레이를 좋아하는 유저들이며, 특히 긴장감 넘치는 플레이를 즐기는 유저들에게 적합하다. 플레이 전에는 방어 건물의 배치와 업그레이드 우선순위를 미리 계획하고, 자원 관리에 유의할 필요가 있다. 또한, 게임 시작 직후 첫-wave를 어떻게 넘기느냐가 이후의 진행을 좌우하는 중요한 포인트가 된다. This StarCraft: Brood War custom map, 'New Hydralisk Attack 20k Hard,' falls under the defense genre, offering a challenging hard-core defensive gameplay experience. The map features a long, linear structure where the player must defend their base on the left side against an endless stream of Hydralisks spawning from the right. The defense line is densely packed with structures, requiring players to manage resources, strategically place defensive buildings, and prioritize upgrades to withstand the relentless enemy waves. The hard difficulty ensures a high enemy count with rapid spawn intervals, demanding constant focus and adaptability. The dark-toned background enhances the intense atmosphere, with failure leading to an immediate game over. Limited unit options for defense and restricted resource income add to the challenge, making efficient resource and upgrade management crucial. The high difficulty makes it inaccessible for beginners, and even experienced players may need multiple attempts and strategic adjustments. The map blends elements of 'computer-killing' and 'defense,' emphasizing the balance between defense and resource management. It is recommended for players who enjoy strategic defense mechanics and high-pressure gameplay. Before playing, planning defensive structure placement, prioritizing upgrades, and managing resources are essential. The initial wave often sets the tone for the rest of the game, making it a critical moment to handle effectively.
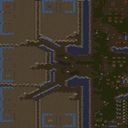
5-3헌터 컴퓨터70업글 V2 HARD
이 맵은 다섯 명의 플레이어가 협력하여 빠르게 성장하는 세 개의 적대적 컴퓨터를 상대하는 독특한 유즈맵이다. 제목에 명시된 대로 컴퓨터는 기본 유닛의 공격력과 방어력이 70단계까지 업그레이드된 상태로 시작하며, 이는 일반적인 스타크래프트 게임과 완전히 다른 차원의 압박을 의미한다. 사막 타일셋으로 구성된 전장은 자원이 풍부한 편이지만, 컴퓨터의 공격이 예측 불가능한 타이밍에 여러 방향에서 밀려오기 때문에 안정적인 기지 방어가 매우 까다롭다. 일반적인 컴퓨터 상대 맵과 달리, 적의 업그레이드 수치가 극단적으로 높아 초반부터 저글링이나 질럿 같은 기본 유닛조차 엄청난 위력을 발휘한다. 플레이 방식은 다섯 명의 인간 플레이어가 동맹을 맺고 세 개의 컴퓨터 진영을 상대하는 협력 생존 및 공성전에 가깝다. 각 플레이어는 초반부터 방어선을 구축하고 자원을 확보해야 하며, 한 명이라도 초반 러시에 무너지면 그 틈을 타고 컴퓨터가 파고들어 순식간에 진영 전체가 붕괴될 수 있다. 따라서 팀원 간의 역할 분담과 지속적인 소통이 생존의 핵심이다. 컴퓨터의 업그레이드가 70이라는 점은 단순히 수치가 높은 것을 넘어, 일반적인 유닛 상성 관계를 무색하게 만든다. 예를 들어 기본 공격력이 비정상적으로 높은 마린이나 히드라리스크는 방어 건물조차 순식간에 녹여버리며, 후반으로 갈수록 강력한 상위 유닛이 쏟아져 나와 압도적인 물량과 화력으로 플레이어를 압박한다. 이 맵의 진정한 재미는 불리함을 극복하는 과정에서 나온다. 초반의 버티기 단계를 넘기고 나면 플레이어들도 자원을 축적하여 업그레이드와 대규모 병력 생산에 돌입할 수 있는데, 이때부터는 컴퓨터의 맹공을 뚫고 어떻게 영토를 확장하며 역습을 준비할지가 관건이 된다. 방어에만 치중하다 보면 자원이 말라 결국 패배하기 때문에, 적절한 타이밍에 과감한 진출과 멀티 확보가 필요하다. 컴퓨터의 인공지능은 단순하지만 압도적인 스펙으로 이를 보완하기 때문에, 기계적인 패턴을 파악하는 것만으로는 승리를 장담할 수 없다. 오히려 예측을 벗어난 타이밍에 밀려드는 물량에 당황하기 쉬우며, 이로 인해 매 판 긴장감이 상당하다. 이 맵은 강력한 적을 상대로 극한의 협력 플레이를 즐기고자 하는 숙련된 플레이어에게 특히 추천한다. 초보자나 일반적인 컴퓨터 상대에 익숙한 유저라면 초반부터 느껴지는 극심한 압박에 쉽게 좌절할 수 있기 때문에, 충분한 사전 경험이나 팀원과의 전략 공유가 필요하다. 플레이 전에 반드시 확인해야 할 점은 모든 참여자가 같은 목표를 이해하고 있어야 한다는 것이다. 한 명이라도 개인 플레이에 집중하거나 방어를 소홀히 하면 전체 팀이 빠르게 무너지므로, 시작 전에 역할과 방어 구역을 명확히 정하는 것이 좋다. 컴퓨터의 70업글이라는 극단적인 설정은 단순한 난이도 상승을 넘어 기존의 스타크래프트 전투 공식을 뒤집는 신선한 도전을 제공한다는 점에서, 협동 플레이의 묘미를 극대화한 수작이라고 할 수 있다. This map is a distinctive use-map-settings scenario in which five players must cooperate against three rapidly advancing computer opponents. As the title suggests, the computer starts with unit attack and defense upgrades set to an extreme level of 70, creating a completely different dimension of pressure compared to a standard StarCraft game. The desert tileset battlefield offers abundant resources, but the computer’s unpredictable attack timings and multi-directional assaults make stable base defense exceptionally difficult. Unlike typical computer matches, the absurdly high upgrade values mean that even basic units like Zerglings or Marines deliver devastating damage from the very beginning. The gameplay resembles a cooperative survival and siege mission where five human players are allied against three computer factions. Each player must establish a defensive line and secure resources from the start, because if one player collapses under an early rush, the computer will exploit that gap and cause the entire team's formation to crumble in moments. Therefore, clear role division and continuous support among teammates are essential for survival. The level 70 upgrades do more than just raise numbers; they fundamentally undermine the usual unit counter relationships. For instance, Marines and Hydralisks with abnormally high base attack power can melt defensive structures in seconds, and as the game progresses, the computer sends waves of advanced units that overwhelm players with sheer firepower and numbers. The true enjoyment of this map comes from overcoming that disadvantage. Once players survive the initial holding phase, they can accumulate resources to begin their own upgrades and mass unit production. From that point on, the key is figuring out how to push through the computer's massive forces, expand territory, and prepare a counterattack. Focusing solely on defense will eventually drain resources and lead to defeat, so securing expansions and launching bold attacks at the right moment is mandatory. The computer's artificial intelligence is simple, but its overwhelming stats compensate for this, meaning that memorizing mechanical patterns does not guarantee victory. Instead, the unpredictable timing of its massive waves often catches players off guard, keeping the tension high throughout every match. This map is especially recommended for experienced players who want to enjoy extreme cooperative play against a powerful foe. Beginners or those accustomed to standard computer opponents can easily become frustrated by the intense pressure from the start, so sufficient prior experience or strategic coordination with a team is necessary. One critical thing to check before playing is that every participant must understand the shared objective. If even one player focuses on individual play or neglects defense, the entire team will collapse quickly, so it is crucial to clearly define strategies and defensive zones before the game begins. The extreme setting of 70 upgrades goes beyond a simple difficulty increase and flips the established StarCraft strategy formula on its head, making this a map that maximizes the thrill of cooperative play.
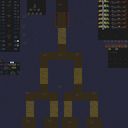
나무 디펜스 하드 (Tree Defense Hardest)
스타크래프트 브루드워 유즈맵의 대표적 디펜스 장르인 ‘Tree Defense Hardest’는 이름 그대로 가장 어려운 난이도로 설계된 트리 디펜스 맵으로, 플레이어는 끊임없이 몰려오는 적 유닛으로부터 거대한 나무를 지켜내야 한다. 맵 중앙에 위치한 거대한 나무는 맵의 핵심 목표로, 주변을 흐르는 길과 좁은 통로를 따라 끊임없이 쏟아지는 저글링, 히드라리스크, 울트라리스크, 캐리어 등 다양한 적군에게 노출되어 있다. 게임은 고정된 SC 버전 기준으로 제작되었으며, Timber-Wolf에 의해 원작이 만들어졌고, FenixFlame과 Hero[D]에 의해 업데이트되었으며, R[D]aneel이 텍스트를 담당하고 Spikeofjaps에 의해 하드 모드가 편집되었다고 한다. 맵의 배경은 황무지 타일셋으로 구성되어 있으며, 4096x4096의 대형 맵에서 펼쳐지는 전투는 전략적 배치와 빠른 반응력이 요구된다. 이 맵은 7인 플레이를 상정하고 있으며, 방어선을 구축하고 적의 공격 루트를 차단하는 동시에 자원 관리와 유닛 생산 타이밍을 조율해야 한다. 적의 공격 패턴은 일정 주기로 강화되어 progresseively難易度가 높아지므로, 초반에 방어선을 구축하고 후반까지 버티는 데 집중해야 한다. 특히 좁은 통로와 업그레이드 포인트를 효율적으로 활용하지 않으면 순식간에 나무가 파괴될 위험이 커진다. 플레이어는 자신의 위치에서 최적의 방어 지점을 선택하고, 각 유닛의 장단점을 고려한 조합을 구성해야 한다. 예를 들어, 지상 유닛이 많은 초반에는 마린과 탱크, 공중 유닛이 많아지면 벌처와 골리앗을 섞는 등 유연한 대처가 필요하다. 맵의 구조상 고지대와 낮은 지형의 차이가 크기 때문에, 고지대에서 방어선을 구축하는 것이 유리하다. 또한, 나무 주변의 좁은 길목에서 적을 막아내야 하므로, 미리 설치한 포토캐논이나 스포어 콜로니가 큰 역할을 한다. 하드 모드답게 적의 공격력이 매우 강력하므로, 초보자는 물론 숙련자도 방심할 수 없는 구조로 구성되어 있다. 이 맵은 디펜스 장르의 정수를 담은 만큼, 디펜스 맵을 좋아하는 유저들에게 강력히 추천할 만하다. 특히 방어와 자원 관리, 타이밍 감각을 동시에 요구하는 점에서 전략적 깊이가 뛰어나며, 하드 모드답게 치열한 전투가 예상된다. 혼자서 모든 공격을 막아내야 하는 구조는 긴장감을 고조시키며, 팀 플레이가 필수적인 맵은 아니지만, 7인의 플레이어 모두가 각자의 역할을 맡아 협력한다면 더 높은 생존률을 기대할 수 있을 것이다. 다만, 맵의 난이도가 매우 높기 때문에, 초심자는 난이도를 낮춘 버전이나 연습 모드를 먼저 플레이해보는 것을 권장한다. 마지막으로, 나무를 지키기 위한 전투는 단순히 방어만으로는 부족하며, 적의 공격을 유도하고 효율적으로 막아내는 전략적 사고가 무엇보다 중요하다. Tree Defense Hardest is a challenging defense-style custom map in StarCraft: Brood War where players must protect a massive tree from relentless enemy waves. Set on a 4096x4096 map using the wasteland tileset, the game features a fixed SC version with updates from multiple creators, including Timber-Wolf, FenixFlame, and Hero[D], with Spikeofjaps responsible for the Hardest edition. The core objective is to defend the central tree from waves of Zerglings, Hydralisks, Ultralisks, and even Carriers that continuously spawn along narrow pathways. Designed for 7 players, this map demands strategic placement of defensive structures, precise resource management, and quick decision-making to counter evolving enemy patterns. The difficulty ramps up progressively, making early-game preparation and mid-to-late game survival critical. Narrow choke points and elevated positions play a crucial role, as high ground offers better defensive advantages. Players should focus on balancing unit compositions—such as combining Marines and Tanks for ground dominance or Vultures and Goliaths to counter air threats. The map’s layout forces players to adapt quickly, as failing to block key paths or upgrade defenses will lead to rapid tree destruction. Ideal for defense map enthusiasts, Tree Defense Hardest delivers intense strategic depth and high-stakes gameplay. While it’s not strictly a team-based map, coordinated efforts among players can significantly improve survival chances. Beginners may find the Hardest mode overwhelming, so practicing on easier versions is advisable. Ultimately, success hinges not just on defense but on proactive strategy, resource allocation, and adaptability to increasingly aggressive enemy waves.
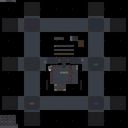
선켄 10웨이 60드론 하드 ver. (Sunken 10-Way 60 Drone hard ver.)
《Sunken10-Way60 Drones hard ver.》는 스타크래프트 브루드워의 UMS(유즈맵) 디펜스 장르로, ‘선켄’(Sunken) 시리즈의 하드 버전이다. 맵의 핵심은 중앙에 위치한 방어 건물 주변으로 무려 60마리의 드론이 10방향에서 끊임없이 몰려드는 적을 상대하는 것이다. 방어 건물은 맵 중앙의 해변가에 설치된 듯한 구조로, 주변의 바위 지형과 수영장 같은 공간이 시각적인 특징을 이룬다. 플레이어는 이 건물을 지키며 지속적으로 쏟아지는 적을 방어해야 하며, 드론의 움직임과 공격 패턴이 맵의 난이도를 좌우한다. 구조적으로는 완전한 싱글 플레이용 맵으로 보이며, 방어 건물 주변에는 센서가 배치되어 있어 공격이 들어오면 즉각 반응할 수 있도록 설계되어 있다. 맵의 테두리에는 보라색, 파란색, 붉은색, 주황색, 초록색 등 다양한 색상의 오브젝트가 배치되어 있으며, 이는 시각적 안내뿐만 아니라 적의 공격 방향을 암시하는 역할도 할 것으로 추정된다. 맵의 하드 버전답게 드론의 공격력과 밀도가 높고, 방어 건물의 체력이나 방어력이 일반 버전에 비해 강화되어 있을 가능성이 크다. 이 맵은 디펜스 장르 특성상 호흡이 긴 편에 속하며, 플레이어는 긴장감을 유지하며 적의 공격을 끊임없이 방어해야 한다. 방어에 성공할 경우 보상으로 자원이나 추가 건물이 제공될 수 있지만, 맵 설명에 명시된 바는 없으므로 추정된다. 초보자의 경우 방어 건물의 위치와 센서의 범위를 숙지하지 못해 손실을 입을 수 있으므로, 맵을 처음 플레이할 때는 패턴을 익히는 것이 중요하다. 또한, 하드 버전답게 드론의 속도와 공격력이 높으므로, 효율적인 자원 관리와 건물을 최적화하는 전략이 필요하다. 이 맵은 디펜스 장르를 좋아하는 플레이어나, UMS 유즈맵의 긴장감과 전략성을 즐기는 게이머에게 추천할 만하다. 특히 하드 버전은 일반 버전에 비해 더 높은 집중력과 적응력을 요구하기 때문에 숙련자나 도전 욕구가 있는 플레이어에게 적합할 것이다. 맵의 시각적 디자인도 특색 있어, 스타크래프트의 우주 타일셋을 활용한 수중 테마가 맵의 분위기를 독특하게 만든다. 《Sunken10-Way60 Drones hard ver.》 is a UMS (user-made scenario) defense map in *StarCraft: Brood War*, specifically a hard version of the *Sunken* series. The core challenge revolves around defending a central defensive structure against relentless waves of 60 drones approaching from 10 different directions. The defensive building is strategically placed near a beach-like area in the map’s center, with rocky terrain and pool-like spaces adding to its visual appeal. Players must hold their ground against the constant onslaught, where the drones' movement and attack patterns heavily influence the map’s difficulty. Structurally, the map appears designed for single-player, featuring sensors around the defensive building that react instantly to incoming attacks. The map’s edges are lined with colorful objects—purple, blue, red, orange, green, and more—which serve both as visual guides and subtle indicators of enemy attack directions. As a hard version, it likely features stronger drones with higher attack power and density, along with reinforced defensive structures compared to the normal version. Given its defense-focused nature, the map demands sustained focus, as players must continuously fend off waves while maintaining high tension. Successful defenses may yield rewards like resources or additional buildings, though this isn’t explicitly stated in the description. Beginners might struggle if they fail to recognize the defensive building’s position or sensor ranges, so learning the attack patterns is crucial. Additionally, the hard version’s drones move faster and hit harder, requiring efficient resource management and optimized building placement to survive. This map is ideal for players who enjoy the defense genre or seek the strategic depth and tension of UMS custom maps. The hard version, in particular, demands greater concentration and adaptability, making it best suited for experienced players or those looking for a challenge. Its distinctive visual design, utilizing *StarCraft*’s space tileset to create an underwater theme, further enhances the map’s unique atmosphere.
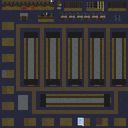
마인드 컨트롤 디펜스 HARD (Mind Control Defense HARD)
‘마인드 컨트롤 디펜스 HARD’는 스타크래프트: 브루드워의 디펜스 계열 유즈맵으로,Mind•Control•Defense¬ HARD’로 표기된 제목을 가진 이 맵은 플레이어에게Mind Control Defence Special Edition’이라는 설명과 함께 원작자인 HuyPhongLe와 개선·하드 모드 제작자인 Corp.fox의 이름을 강조한다. 맵의 구조는 중앙에 위치한 넥서스를 중심으로 방어 건물이 배치되어 있으며, 황무지 타일셋을 기반으로 한 어두운 톤의 배경이 시야를 제한하고 긴장감을 조성한다. 미니맵에서는 중앙 건물을 둘러싼 방어 건물과 자원 지점이 확인되며, 적의 공세는 주로 하단과 좌측, 우측에서 집중적으로 들어온다. 하드 버전답게 초당 공격 주기가 짧고, 방어선을 돌파하는 유닛의 종류와 수가 많아져 플레이어의 대처 능력을 시험한다. 게임의 핵심은 ‘마인드 컨트롤’이라는 컨셉에 맞춰 적 유닛을 잠시나마 조종할 수 있는 특수 능력을 활용하는 데 있다. 이 스킬은 방어선에서 밀려드는 적을 제어하거나, 자원 채취를 방해하는 유닛을 무력화하는 등 전략적 선택지를 제공한다. 방어 건물의 종류는 다채로우며, 포토캐논, 미사일 터렛, 터렛, 디펜시브 매트릭스 등 다양한 방어 건물이 배치되어 있어 플레이어는 상황에 따라 건물과 유닛을 조합해야 한다. 특히, 자원 관리와 방어 건물의 업그레이드는 게임의 승패를 좌우하는 주요 요소로, 초보자는 자원 부족으로 인한 방어 붕괴를, 숙련자는 적의 패턴을 읽고 효율적으로 방어선을 구축하는 것에 중점을 둬야 한다. 이 맵은 6인용으로 설계되어 있으며, 각 플레이어는 독립된 넥서스를 보유하고 있어 팀 플레이가 필수적이다. 게임의 난이도는 하드 버전답게 ‘매우 어려움’에 가깝지만, 맵의 밸런스가 잘 조정된 덕분에 플레이어 간의 실력 격차가 발생할 수 있다. 초보자도 기본적인 방어 전략과 자원 관리법을 익히면 충분히 즐길 수 있지만, 하드 버전 특유의 빠른 공세와 다수의 적을 상대해야 하므로 꾸준한 연습이 필요하다. 맵의 분위기는Darkness of the Void’라는 부제처럼 어둠과 공포를 연상시키며, 긴장감 넘치는 전투를 즐기고 싶은 유즈맵 애호가들에게 strong>강력히 추천할 수 있다. 플레이 전에는 반드시 방어 건물의 배치와 자원 분포를 확인하고, 마인드 컨트롤 스킬의 쿨타임을 숙지해야 한다. 또한, 하드 버전의 경우 적의 공격 패턴이 변칙적이므로, 맵의 특성을 파악한 후 실전에 임하는 것이 중요하다. 이 맵은 디펜스 장르의 정교한 밸런스와 전략적 깊이를 제공하며, 특히Mind Control Defence 시리즈의 팬이라면 놓치지 말아야 할 작품이다. 마인드 컨트롤이라는 독특한 메커니즘과 하드 모드의 도전 과제가 결합된 이 맵은, 디펜스 유즈맵의 새로운 지평을 열어줄 것으로 기대된다. ‘Mind Control Defense HARD’ is a defense-type custom map in *StarCraft: Brood War*, featuring the title ‘Mind•Control•Defense¬ HARD.’ Alongside the description ‘Mind Control Defence Special Edition,’ the map highlights the original creator, HuyPhongLe, and the hard mode improver, Corp.fox. The layout centers around a Nexus in the middle, surrounded by defensive structures, set against a dark, barren tileset that restricts visibility and heightens tension. The minimap shows defensive buildings encircling the central structure and resource points, while enemy attacks primarily surge from the bottom, left, and right sides. True to its hard mode, the attack cycle is rapid, with a greater variety and number of units breaking through the defenses, testing the player’s adaptability. The core gameplay revolves around the ‘Mind Control’ mechanic, allowing players to temporarily control enemy units. This ability lets players manage incoming waves, neutralize resource-harassing units, and create strategic advantages. Defensive structures are diverse, including photon cannons, missile turrets, turrets, and defensive matrices, requiring players to combine buildings and units based on the situation. Resource management and defensive upgrades are critical to victory—novices risk collapsing defenses from shortages, while experts must predict enemy patterns and optimize their lines. Designed for six players, each with their own Nexus, teamwork is essential. The difficulty, as expected from the hard mode, borders on ‘very hard,’ though the map’s balanced design minimizes skill gaps between players. Beginners can enjoy the map by mastering basic defense strategies and resource management, but the hard mode’s fast-paced assaults and sheer enemy numbers demand consistent practice. The atmosphere, suggested by the subtitle ‘Darkness of the Void,’ evokes darkness and dread, making it a thrilling choice for defense map enthusiasts. Before playing, players should familiarize themselves with defensive building placements, resource distribution, and the cooldown of the Mind Control skill. In hard mode, enemy attack patterns are unpredictable, so understanding the map’s mechanics is crucial before jumping into action. This map delivers refined balance and strategic depth for the defense genre, and fans of the *Mind Control Defense* series should not miss it. Combining the unique Mind Control mechanic with the challenges of hard mode, this map is poised to redefine what defense custom maps can offer.
리엔 디펜스 (LiNG DeFeNSe)
LiNG DeFeNSe.Hard6.2는 기존 디펜스 맵의 기본 틀에 새로운 콤보와 섹터를 추가한 하드 난이도 유즈맵이다. 맵은 황무지 타일셋을 사용해 넓은 4096×4096 크기의 전장을 제공하며, 6명의 플레이어가 동시에 방어 라인을 구축한다. 초반에는 기본 유닛과 방어 타워를 배치해 적의 첫 물결을 막아내야 하고, 중반에 등장하는 새로운 콤보 유닛은 기존 방어를 보완하거나 새로운 전술을 가능하게 한다. 특히 맵 중앙에 위치한 새로운 섹터는 자원과 강화 포인트가 집중돼 있어, 이 지역을 장악하면 방어 효율이 크게 상승한다. 그러나 해당 섹터는 적의 공격 경로와 겹치기 쉬워, 지나치게 집중하면 방어가 붕괴될 위험이 있다. 따라서 플레이 전에는 방어 라인을 여러 층으로 나누고, 새로운 유닛을 언제 투입할지 타이밍을 조절하는 것이 핵심이다. 맵은 하드 난이도라서 초보자보다는 중급 이상 플레이어에게 적합하며, 팀 플레이보다는 개인 실력을 시험해 보는 솔로 플레이에 더 알맞다. 방어 구조를 설계할 때는 적의 스폰 위치와 파동 패턴을 파악하고, 자원 수급을 균형 있게 배분하는 것이 승리의 관건이다. 또한, 새로운 아이디어가 반영된 맵이므로 기존 디펜스 맵에 익숙한 유저라면 새로운 전략을 시도해 보는 재미를 느낄 수 있다. LiNG DeFeNSe.Hard6.2 is a hard‑difficulty custom defense map that builds on the classic defense framework by adding new unit combos and a fresh sector. The map uses the Wilderness tileset and offers a large 4096×4096 battlefield where up to six players can construct their defenses simultaneously. Early game focuses on placing basic units and towers to stop the first wave, while mid‑game introduces new combo units that either reinforce existing defenses or enable novel tactics. The central sector, packed with resources and power‑up points, becomes a strategic hotspot; controlling it greatly boosts defensive efficiency, but its proximity to enemy spawn paths makes it a risky focal point. Successful play requires layering defenses, timing the deployment of the new units, and balancing resource allocation. Because of its hard difficulty, the map suits intermediate to advanced players more than beginners, and it shines in solo play rather than team matches. Understanding enemy spawn locations and wave patterns, as well as maintaining a balanced economy, are key to victory. Fans of traditional defense maps will appreciate the fresh strategic possibilities introduced by this design.
올랜덤저글링막기 Hard (All Random Zergling Block Hard)
이 맵은 스타크래프트: 브루드워의 유즈맵으로, 저글링을 막아내는 디펜스 장르의 맵이다. 황무지 테마의 넓은 공간에 6개의 입구가 배치되어 있으며, 플레이어는 이 입구들을 방어하며 끊임없이 쏟아지는 저글링 무리를 처치해야 한다. 맵의 중앙에는 본진 건물이 위치하고 있으며, 입구 주변에는 적절한 방어 시설물 배치 공간이 마련되어 보인다. 저글링의 공격 패턴은 무작위로 추정되지만, 입구당 일정 수의 저글링이 지속적으로 리젠되는 구조로 보인다. 방어 시설을 효율적으로 배치하지 않으면 순식간에 본진이 무너질 위험이 있어, strategic한 플레이가 요구된다. 또한, 맵의 난이도는 'Hard'로 명시되어 있어 초보자보다는 어느 정도 경험이 있는 플레이어에게 적합할 것으로 추정된다. 저글링의 속도와 리젠 속도, 방어 시설의 효율성 등에서 밸런스가 조절된 맵으로 보이며, 디펜스 장르 특유의 긴장감과 성취감을 느낄 수 있는 구조다. 초보자는 방어 시설의 배치 방법과 자원의 관리 방법을 익히는 데 어려움을 느낄 수 있으며, 숙련자는 더 빠른 리젠 속도나 더 어려운 패턴에 대처해야 할 수도 있다. 맵을 플레이하기 전에는 방어 시설물의 종류와 배치 가능한 위치, 저글링의 리젠 포인트 위치를 미리 확인하는 것이 좋다. This StarCraft: Brood War custom map is a defense genre map where players must defend against waves of zerglings. Set in a barren terrain, the map features six entrances with a main base located in the center. Players must strategically place defensive structures near each entrance to fend off the continuously spawning zerglings. The difficulty is indicated as 'Hard,' suggesting it is designed for players with some experience in defense maps. The randomness in zergling spawn patterns adds unpredictability, requiring players to adapt their strategies dynamically. Efficient resource management and optimal placement of defensive buildings are crucial to surviving the waves. Beginners may struggle with understanding the mechanics and resource allocation, while advanced players may face challenges with faster spawn rates or more complex patterns. Before playing, it is advisable to familiarize yourself with the types of defensive structures available and their placements, as well as the locations of zergling spawn points to maximize your chances of success.
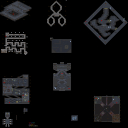
불가능한 집합체 (Impossible Amalgamation)
‘Impossible Amalgamation’은 스타크래프트: 브루드워의 유즈맵으로, 이름 그대로 불가능해 보이는 시나리오를 플레이어가 해결해 나가야 하는 도전형 디펜스 맵이다. 맵의 전체적인 분위기는 어둡고 실험적인 테마로 구성되어 있으며, 중앙에 위치한 거대한 구조물이 주요 무대가 된다. 이 구조물은 맵의 절반 이상을 차지할 정도로 거대하며, 플레이어는 그 내부에서 벌어지는 다양한 이벤트와 공격 패턴을 극복해야 한다. 맵 곳곳에 배치된 방어 건물과 자원 포인트를 활용해 최대한 오래 버티는 것이 주요 목표로 보이며, 맵의 구조상 중앙 구조물을 중심으로 여러 구역으로 나뉘어져 있어 전략적 움직임이 중요하다. 이미지 상단과 하단에 보이는 복잡한 구조물들은 단순히 배경이 아니라, 플레이어의 방어 라인을 형성하거나 공격을 방어하는 데 영향을 미치는 요소로 추정된다. 또한, 맵의 왼쪽과 오른쪽 하단에는Resource Vespene Geyser가 배치되어 있어 자원 수급이 비교적 용이한 편으로 보이며, 이를 바탕으로 방어와 공격을 조율할 수 있다. 맵의 난이도는 ‘불가능’이라는 제목처럼 상당히 높은 편으로 추정되며, 초보 플레이어보다는 숙련된 유저를 타깃으로 제작되었을 가능성이 크다. 플레이어는 끊임없이 쏟아지는 적의 공격을 버텨내고, 맵의 구조를 최대한 활용해 살아남아야 한다. 맵의 전체적인 색감은 어두운 톤으로 설정되어 있어 긴장감을 조성하며, 플레이어에게 스트레스와 도전감을 동시에 제공한다. ‘Impossible Amalgamation’을 즐기기 위해서는 빠른 판단력과 전략적 사고가 필수적이며, 특히 방어 라인을 어떻게 구축할지, 자원을 어떻게 분배할지가 승패를 가를 핵심 요소로 보인다. 이 맵은 단순히 방어만 하는 것이 아니라, 맵 곳곳에 숨겨진 비밀이나 페이즈 전환을 통해 새로운 도전 과제가 주어질 가능성도 배제할 수 없으므로, 플레이어는 맵의 모든 요소를 면밀히 살피며 플레이해야 한다. ‘Impossible Amalgamation’ is a user-made defense map in *StarCraft: Brood War*, where players tackle seemingly impossible scenarios. The map’s overall atmosphere is dark and experimental, with a massive central structure serving as the main stage—so large that it occupies over half the map. Players must overcome various events and attack patterns unfolding within this structure. The map is divided into multiple zones around the central structure, making strategic movement essential. The intricate structures visible at the top and bottom of the map aren’t just decorative; they form defensive lines or influence how attacks are repelled. Additionally, Resource Vespene Geysers placed at the bottom-left and bottom-right make resource gathering relatively easy, allowing players to balance defense and offense effectively. As the name suggests, the difficulty is extremely high, likely targeting experienced players rather than beginners. Survivors must endure relentless enemy assaults while leveraging the map’s layout to their advantage. The dark color palette heightens tension, delivering both stress and a sense of challenge. To master ‘Impossible Amalgamation,’ quick decision-making and strategic thinking are crucial. Key factors like building defenses and allocating resources can determine victory or defeat. The map may also feature hidden secrets or phase transitions that introduce new challenges, so players should thoroughly inspect every element to succeed.
맵 선택 가이드
태그는 맵의 핵심 특징을 빠르게 설명하지만 제작 버전마다 규칙이 다를 수 있습니다. 상세 설명에서 권장 인원, 난이도, 플레이 시간과 버전을 함께 확인한 뒤 다운로드하세요.