
피지컬 스타크래프트 맵 모음
'피지컬' 태그가 등록된 맵을 모았습니다. 장르 하나로 찾기 어려운 플레이 방식, 난이도와 특징을 중심으로 인기 맵과 최신 맵을 비교해 보세요.
- 등록 맵
- 4개
- 누적 다운로드
- 0
- 누적 조회
- 102
인기 맵
다운로드와 조회 반응이 높은 맵입니다.
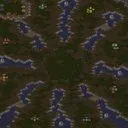
슈퍼 스매시 브라더스 [3] (Super Smash Brothers [3])
스타크래프트 브루드워의 인기 유즈맵 중 하나인 <¥§üpër §màsh ßröthërs [3]>는 8명의 플레이어가 참가하는 전투형 맵으로,Fast-paced action과 전략적 대결이 특징입니다. 맵은 넓은 사막 지형으로 구성되어 있으며, 중앙에는 넓은 개활지가 펼쳐져 있어 플레이어 간의 교전이 빈번하게 발생합니다. 맵 곳곳에는 소규모의 지형적 요충지가 있어, 이를 활용한 공격과 방어가 게임의 핵심 전략으로 작용합니다. 특히 맵의 좌우 구석에는 자원 수집 지역이 배치되어 있어, 초반 자원 확보가 중요하며, 이를 바탕으로 빠른 유닛 생산과 전투 준비가 가능합니다. 전투는 주로 근접 유닛을 중심으로 이루어지며, 맵의 중앙 개활지에서 대규모 교전이 펼쳐지는 경우가 많습니다. 또한, 맵의 구조상 높은 지형과 낮은 지형의 차이가 있어, 고지대에서 저격이나 방어에 유리한 위치를 선점하는 전략이 유효합니다. 이 맵은 8인의 플레이어가 각자의 스타일을 살려 전투를 펼칠 수 있도록 설계되어 있으며, 특히 팀 플레이보다는 개인의 능력이 더 부각되는 형식입니다. 초보자는 빠른 교전과 자원 관리에서 어려움을 느낄 수 있지만, 경험이 쌓일수록 전략적 깊이와 재미를 느낄 수 있는 맵입니다. 이 맵을 즐기기 위해서는 넓은 시야와 빠른 판단력이 요구되며, 맵의 지형을 충분히 숙지하는 것이 중요합니다. 특히 맵의 중앙 개활지에서 벌어지는 대규모 전투를 대비한 유닛 조합과micro positioning이 승패를 좌우할 수 있습니다. 또한, 자원 수집 지역과 지형적 요충지를 활용한 전략적 플레이가 가능하도록 맵을 미리 탐색해 두는 것이 좋습니다. 이 맵은 경쟁심이 강한 플레이어들에게 특히 추천되며, 빠른 템포의 전투와 전략적 깊이가 조화를 이룬 재미있는 경험을 제공합니다. This StarCraft: Brood War custom map, <¥§üpër §màsh ßröthërs [3]>, is a fast-paced battleground designed for up to eight players, emphasizing quick reflexes and strategic combat. The map features a vast desert landscape with a central open area where most engagements occur. Scattered across the map are small strategic high-ground spots that players can leverage for both offensive and defensive positioning. The corners of the map contain resource collection zones, making early-game resource management crucial for rapid unit production and battle readiness. Combat revolves around melee units, with large-scale clashes frequently taking place in the central open area. The terrain includes elevation differences, allowing players to gain vantage points for sniping or defensive advantages. The map is structured to highlight individual skills rather than team coordination, though group strategies can still play a role. Beginners may struggle with the fast-paced nature and resource balancing, but experienced players will appreciate the depth and excitement it offers. To excel, players need sharp situational awareness, quick decision-making, and a thorough understanding of the map's layout. Key areas like the central open area and resource zones demand strategic planning, while micro-positioning during large-scale battles can determine victory. This map is ideal for competitive players seeking a thrilling experience that blends speed and strategy seamlessly.
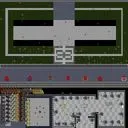
끝없는 디펜스 +Ban (Never Ending Defense +Ban)
스타크래프트: 브루드워의 고전 디펜스 장르 유즈맵인 '*Never Ending Defense +Ban'은 이름 그대로 끊임없는 웨이브의 적을 상대로 승리를 방어해야 하는 콘텐츠로, 플레이어의 전략적 판단력과 피지컬을 동시에 요구하는 재미를 제공한다. 맵은 중앙에 플레이어 기지가 위치하고, 사방으로 뻗어나가는 길목을 따라 끊임없이 몰려드는 저그 웨이브를 막아내는 구조로 되어 있다. 특히 '+Ban' 시스템이 특징인데, 이는 일정 조건 하에서 특정 유닛이나 빌드를 금지하는 규칙을 뜻하며, 이를 통해 맵의 전략적 깊이가 한층 더 깊어진다. 플레이어는 제한된 자원으로 효율적인 방어 라인을 구축해야 하며, 제한된 유닛 풀 속에서 창의적인 빌드를 짜내야 한다. 맵의 난이도는 웨이브가 지속될수록 점점 높아지며, 후반부로 갈수록 다수의 강력한 유닛들이 동시에 공격해 오기에 집중력과 빠른 판단력이 필수적이다. 초보 플레이어는 기본적인 방어 라인을 구축하는 데 중점을 두어야 하며, 숙련자들은 '+Ban' 규칙을 활용해 상대방을 압박하는 전략을 구사할 수 있다. 맵의 볼륨은 무려 100레벨에 달해 한판 한판이 긴장감 넘치는 도전 과제가 된다. 다만, '+Ban' 시스템은 초심자에게 다소 낯설 수 있어, 규칙을 충분히 숙지한 후 플레이하는 것이 좋다. 또한, 일정한 템포로 진행되는 웨이브 특성상 플레이어의 피로도가 상대적으로 높은 편이므로, 긴 플레이 세션을 계획할 때는 휴식 시간을 고려하는 것이 좋다. Never Ending Defense +Ban is a classic defense-style custom map in StarCraft: Brood War that challenges players to defend against endless waves of enemy units, offering a mix of strategic thinking and quick reflexes. The map features a central player base with multiple pathways branching out, where players must construct and maintain defensive lines to withstand relentless Zerg assaults. The '+Ban' system adds a unique twist by restricting certain units or builds under specific conditions, significantly increasing the map's strategic depth. Players must optimize their limited resources to build effective defenses while adapting their strategies within the constraints. The difficulty escalates with each wave, culminating in waves of powerful, multi-unit attacks that demand sharp focus and rapid decision-making. Beginners should prioritize establishing solid defensive structures, while advanced players can leverage the '+Ban' system to outmaneuver opponents. With a total of 100 levels, each playthrough presents a thrilling and challenging experience. However, the '+Ban' system may feel unfamiliar to newcomers, so it's advisable to study the rules before diving in. Given the map's steady pacing, it can be physically demanding over long sessions, so taking breaks during extended playtime is recommended.
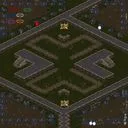
팀 마이크로 아리나 스페셜 (Team Micro Arena Special)
스타크래프트 브루드워 유즈맵 '팀 마이크로 아레나 스페셜(Team Micro Arena Special)'은 이름 그대로 섬세한 유닛 컨트롤, 즉 마이크로 컨트롤을 극한으로 시험하는 아레나 장르의 맵이다. 사막 타일셋으로 구성된 이 맵은 6명의 플레이어가 각각 하나의 유닛을 부여받아 좁은 공간에서 개인전 또는 팀전 방식으로 전투를 벌이도록 설계되어 있다. 맵 내부 설명에 따르면 원작자는 JaySmurff(일명 Cygnus[x.1])이며, '1-2-many'에 의해 스페셜 버전으로 수정된 것으로 보인다. 전체적인 레이아웃은 64x64 타일 크기로, 복잡한 지형보다는 장애물과 고저차가 적절히 섞인 소규모 전장으로 추정된다. 플레이어는 각 라운드마다 주어지는 유닛의 특성을 정확히 이해하고, 공격 타이밍, 거리 조절, 무빙샷 등 세밀한 조작으로 상대를 제압해야 한다. 진영, 퀸, 벌처, 마린 등 스타크래프트의 거의 모든 유닛이 등장할 수 있어 매 판매마다 새로운 조합과 전략이 요구된다. 이 맵은 대규모 병력 충돌이나 자원 관리 대신, 오롯이 개인 피지컬과 심리전에 집중할 수 있다는 점에서 마이크로 컨트롤 숙련자들에게 특히 추천할 만하다. 초보자라면 진입 장벽이 다소 높게 느껴질 수 있으나, 반복 플레이를 통해 유닛별 조작감을 익히기에 좋은 환경을 제공한다. 플레이 전 확인할 점으로는, 맵 제목에 특수 문자가 포함되어 있으므로 방 제목이나 파일명이 깨질 경우 내부 맵 제목을 참고하는 것이 좋다. 전반적으로 간결한 구성과 빠른 라운드 회전이 특징이며, 컨트롤 자신감을 키우고 싶은 유저들에게 탁월한 선택이 될 수 있다. Team Micro Arena Special is a StarCraft Brood War Use Map focused entirely on micro-control battles. Set on a desert tileset, this map is designed for up to six players who each control a single unit in a confined arena, engaging in free-for-all or team-based combat. According to the internal map description, the original creator is JaySmurff, also known as Cygnus[x.1], and the special version was modified by '1-2-many'. The layout appears to be a compact 64x64 tile arena with a balanced mix of obstacles and elevation changes, creating an environment where precise unit control is the only path to victory. Players must master timing, range, and unit-specific abilities each round, as the assigned units can vary from Marines and Zealots to Vultures and Queens. This map strips away macro management entirely, offering a pure test of reflexes and tactical micromanagement. While the learning curve can be steep for beginners, it serves as an excellent training ground for improving control skills. The rapid round rotation and diverse unit matchups keep the experience fresh and competitive. Before playing, note that the map title contains special characters that may appear broken in some lobby lists, so using the internal map name is advisable. For players seeking a focused and skill-intensive micro challenge, Team Micro Arena Special provides a compact, engaging, and highly replayable experience.
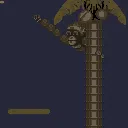
코코넛 도지 2 (CoCoNuT DoDgE 2)
스타크래프트: 브루드워의 유즈맵 중 하나로 알려진 <CoCoNuT DoDgE 2>는 이름에서부터 느껴지듯 도전과 스릴을 추구하는 미니게임 맵이다. 맵 제목에 포함된 'DoDgE'는 'Dodge(피하기)'를 의미하며, 이름 그대로 플레이어는 끊임없이 쏟아지는 위협을 피하고 생존하는 것에 집중해야 한다. 맵 구조는 중앙에 넓은 평지가 펼쳐져 있으며, 주변으로는 건물이나 장애물이 배치되어 있어 시야를 가리고 움직임을 제한하는 요소로 작용한다. 맵의 대부분은 어두운 색조로 구성되어 있어 특정 요소나 적의 위치를 파악하기가 쉽지 않다. 맵의 테두리에는 밝은 노란색 테두리가 둘러져 있어 맵의 경계를 명확히 구분할 수 있도록 돕고 있다. 맵의 분위기는 대체로 칙칙하고Dark하며, 공포스러운 요소보다는 압박감과 긴장감을 조성하는 데 중점을 두고 있는 것으로 보인다. 플레이 방식은 맵의 이름처럼 '피하기'가 핵심으로, 플레이어는 맵 중앙에서 시작하여 주변에서 끊임없이 등장하는 위협(예: 유닛, 폭발 효과, 함정 등)을 피해야 한다. 맵의 난이도는 맵의 크기와 장애물의 배치에 따라 달라지며, 플레이어의 반응속도와 판단력이 중요하다. 맵의 구조상 적의 등장 패턴이나 장애물의 위치가 고정되어 있지 않다면, 플레이어는 반복적인 플레이를 통해 패턴을 익히고 대응하는 전략을 세워야 한다. 맵의 어두운 색조와 제한된 시야는 플레이어에게 심리적 압박을 가하며, 이는 피하기 미니게임의 재미 요소 중 하나로 작용할 수 있다. 이 맵은 초보 플레이어보다는 경험이 있는 유저나 반응속도가 뛰어난 플레이어에게 더 적합할 것으로 보인다. 또한, 한정된 공간에서 끊임없이 움직이는 맵의 특성상 팀 플레이보다는 개인 플레이에 초점이 맞춰져 있으며, 경쟁보다는 순위를 겨루는 방식일 가능성이 높다. 맵의 타이틀과 구조를 고려했을 때, 공포나 서바이벌 요소가 강하게 느껴지지는 않지만, 피하기와 생존에 대한 도전 의식이 강조된 맵으로 평가할 수 있다. 플레이 전에는 맵의 경계와 장애물의 위치를 미리 숙지하는 것이 중요하며, 적의 패턴을 빠르게 파악할 수 있도록 연습하는 것이 좋다. This StarCraft: Brood War custom map, <CoCoNuT DoDgE 2>, stands out as a thrilling mini-game focused on dodging and survival challenges. The name 'DoDgE' directly hints at its core gameplay—avoiding relentless threats while navigating through a hazardous environment. The map features a spacious central area surrounded by buildings and obstacles that restrict visibility and movement, creating a tense atmosphere dominated by dark tones. A bright yellow border outlines the map, clearly marking its boundaries against the otherwise gloomy surroundings. Gameplay revolves around the 'dodge' mechanic, where players start in the center and must evade continuous dangers such as enemy units, explosions, or traps triggered as they appear. The difficulty fluctuates based on the map's layout and the unpredictability of threats, making quick reflexes and adaptability essential. If the threats follow fixed patterns, players can strategize by memorizing these sequences, but if they are randomized, the challenge shifts to raw reaction speed and improvisation. The dark visuals and limited visibility amplify the psychological pressure, enhancing the mini-game’s appeal as a test of agility and composure. This map is better suited for experienced players or those with sharp reflexes rather than beginners. Given the confined space and the need for constant movement, it leans toward solo play over team-based strategies, though it may include competitive ranking elements. While the title and design suggest a survival challenge, the emphasis lies more on dodging mechanics than horror or survival elements. Before diving in, players should familiarize themselves with the map’s boundaries and obstacle placements, and practice reacting swiftly to emerging threats to maximize their performance.
최근 등록된 맵
새로 추가된 파일과 버전을 확인하세요.
팀 마이크로 아리나 스페셜 (Team Micro Arena Special)
스타크래프트 브루드워 유즈맵 '팀 마이크로 아레나 스페셜(Team Micro Arena Special)'은 이름 그대로 섬세한 유닛 컨트롤, 즉 마이크로 컨트롤을 극한으로 시험하는 아레나 장르의 맵이다. 사막 타일셋으로 구성된 이 맵은 6명의 플레이어가 각각 하나의 유닛을 부여받아 좁은 공간에서 개인전 또는 팀전 방식으로 전투를 벌이도록 설계되어 있다. 맵 내부 설명에 따르면 원작자는 JaySmurff(일명 Cygnus[x.1])이며, '1-2-many'에 의해 스페셜 버전으로 수정된 것으로 보인다. 전체적인 레이아웃은 64x64 타일 크기로, 복잡한 지형보다는 장애물과 고저차가 적절히 섞인 소규모 전장으로 추정된다. 플레이어는 각 라운드마다 주어지는 유닛의 특성을 정확히 이해하고, 공격 타이밍, 거리 조절, 무빙샷 등 세밀한 조작으로 상대를 제압해야 한다. 진영, 퀸, 벌처, 마린 등 스타크래프트의 거의 모든 유닛이 등장할 수 있어 매 판매마다 새로운 조합과 전략이 요구된다. 이 맵은 대규모 병력 충돌이나 자원 관리 대신, 오롯이 개인 피지컬과 심리전에 집중할 수 있다는 점에서 마이크로 컨트롤 숙련자들에게 특히 추천할 만하다. 초보자라면 진입 장벽이 다소 높게 느껴질 수 있으나, 반복 플레이를 통해 유닛별 조작감을 익히기에 좋은 환경을 제공한다. 플레이 전 확인할 점으로는, 맵 제목에 특수 문자가 포함되어 있으므로 방 제목이나 파일명이 깨질 경우 내부 맵 제목을 참고하는 것이 좋다. 전반적으로 간결한 구성과 빠른 라운드 회전이 특징이며, 컨트롤 자신감을 키우고 싶은 유저들에게 탁월한 선택이 될 수 있다. Team Micro Arena Special is a StarCraft Brood War Use Map focused entirely on micro-control battles. Set on a desert tileset, this map is designed for up to six players who each control a single unit in a confined arena, engaging in free-for-all or team-based combat. According to the internal map description, the original creator is JaySmurff, also known as Cygnus[x.1], and the special version was modified by '1-2-many'. The layout appears to be a compact 64x64 tile arena with a balanced mix of obstacles and elevation changes, creating an environment where precise unit control is the only path to victory. Players must master timing, range, and unit-specific abilities each round, as the assigned units can vary from Marines and Zealots to Vultures and Queens. This map strips away macro management entirely, offering a pure test of reflexes and tactical micromanagement. While the learning curve can be steep for beginners, it serves as an excellent training ground for improving control skills. The rapid round rotation and diverse unit matchups keep the experience fresh and competitive. Before playing, note that the map title contains special characters that may appear broken in some lobby lists, so using the internal map name is advisable. For players seeking a focused and skill-intensive micro challenge, Team Micro Arena Special provides a compact, engaging, and highly replayable experience.
끝없는 디펜스 +Ban (Never Ending Defense +Ban)
스타크래프트: 브루드워의 고전 디펜스 장르 유즈맵인 '*Never Ending Defense +Ban'은 이름 그대로 끊임없는 웨이브의 적을 상대로 승리를 방어해야 하는 콘텐츠로, 플레이어의 전략적 판단력과 피지컬을 동시에 요구하는 재미를 제공한다. 맵은 중앙에 플레이어 기지가 위치하고, 사방으로 뻗어나가는 길목을 따라 끊임없이 몰려드는 저그 웨이브를 막아내는 구조로 되어 있다. 특히 '+Ban' 시스템이 특징인데, 이는 일정 조건 하에서 특정 유닛이나 빌드를 금지하는 규칙을 뜻하며, 이를 통해 맵의 전략적 깊이가 한층 더 깊어진다. 플레이어는 제한된 자원으로 효율적인 방어 라인을 구축해야 하며, 제한된 유닛 풀 속에서 창의적인 빌드를 짜내야 한다. 맵의 난이도는 웨이브가 지속될수록 점점 높아지며, 후반부로 갈수록 다수의 강력한 유닛들이 동시에 공격해 오기에 집중력과 빠른 판단력이 필수적이다. 초보 플레이어는 기본적인 방어 라인을 구축하는 데 중점을 두어야 하며, 숙련자들은 '+Ban' 규칙을 활용해 상대방을 압박하는 전략을 구사할 수 있다. 맵의 볼륨은 무려 100레벨에 달해 한판 한판이 긴장감 넘치는 도전 과제가 된다. 다만, '+Ban' 시스템은 초심자에게 다소 낯설 수 있어, 규칙을 충분히 숙지한 후 플레이하는 것이 좋다. 또한, 일정한 템포로 진행되는 웨이브 특성상 플레이어의 피로도가 상대적으로 높은 편이므로, 긴 플레이 세션을 계획할 때는 휴식 시간을 고려하는 것이 좋다. Never Ending Defense +Ban is a classic defense-style custom map in StarCraft: Brood War that challenges players to defend against endless waves of enemy units, offering a mix of strategic thinking and quick reflexes. The map features a central player base with multiple pathways branching out, where players must construct and maintain defensive lines to withstand relentless Zerg assaults. The '+Ban' system adds a unique twist by restricting certain units or builds under specific conditions, significantly increasing the map's strategic depth. Players must optimize their limited resources to build effective defenses while adapting their strategies within the constraints. The difficulty escalates with each wave, culminating in waves of powerful, multi-unit attacks that demand sharp focus and rapid decision-making. Beginners should prioritize establishing solid defensive structures, while advanced players can leverage the '+Ban' system to outmaneuver opponents. With a total of 100 levels, each playthrough presents a thrilling and challenging experience. However, the '+Ban' system may feel unfamiliar to newcomers, so it's advisable to study the rules before diving in. Given the map's steady pacing, it can be physically demanding over long sessions, so taking breaks during extended playtime is recommended.
슈퍼 스매시 브라더스 [3] (Super Smash Brothers [3])
스타크래프트 브루드워의 인기 유즈맵 중 하나인 <¥§üpër §màsh ßröthërs [3]>는 8명의 플레이어가 참가하는 전투형 맵으로,Fast-paced action과 전략적 대결이 특징입니다. 맵은 넓은 사막 지형으로 구성되어 있으며, 중앙에는 넓은 개활지가 펼쳐져 있어 플레이어 간의 교전이 빈번하게 발생합니다. 맵 곳곳에는 소규모의 지형적 요충지가 있어, 이를 활용한 공격과 방어가 게임의 핵심 전략으로 작용합니다. 특히 맵의 좌우 구석에는 자원 수집 지역이 배치되어 있어, 초반 자원 확보가 중요하며, 이를 바탕으로 빠른 유닛 생산과 전투 준비가 가능합니다. 전투는 주로 근접 유닛을 중심으로 이루어지며, 맵의 중앙 개활지에서 대규모 교전이 펼쳐지는 경우가 많습니다. 또한, 맵의 구조상 높은 지형과 낮은 지형의 차이가 있어, 고지대에서 저격이나 방어에 유리한 위치를 선점하는 전략이 유효합니다. 이 맵은 8인의 플레이어가 각자의 스타일을 살려 전투를 펼칠 수 있도록 설계되어 있으며, 특히 팀 플레이보다는 개인의 능력이 더 부각되는 형식입니다. 초보자는 빠른 교전과 자원 관리에서 어려움을 느낄 수 있지만, 경험이 쌓일수록 전략적 깊이와 재미를 느낄 수 있는 맵입니다. 이 맵을 즐기기 위해서는 넓은 시야와 빠른 판단력이 요구되며, 맵의 지형을 충분히 숙지하는 것이 중요합니다. 특히 맵의 중앙 개활지에서 벌어지는 대규모 전투를 대비한 유닛 조합과micro positioning이 승패를 좌우할 수 있습니다. 또한, 자원 수집 지역과 지형적 요충지를 활용한 전략적 플레이가 가능하도록 맵을 미리 탐색해 두는 것이 좋습니다. 이 맵은 경쟁심이 강한 플레이어들에게 특히 추천되며, 빠른 템포의 전투와 전략적 깊이가 조화를 이룬 재미있는 경험을 제공합니다. This StarCraft: Brood War custom map, <¥§üpër §màsh ßröthërs [3]>, is a fast-paced battleground designed for up to eight players, emphasizing quick reflexes and strategic combat. The map features a vast desert landscape with a central open area where most engagements occur. Scattered across the map are small strategic high-ground spots that players can leverage for both offensive and defensive positioning. The corners of the map contain resource collection zones, making early-game resource management crucial for rapid unit production and battle readiness. Combat revolves around melee units, with large-scale clashes frequently taking place in the central open area. The terrain includes elevation differences, allowing players to gain vantage points for sniping or defensive advantages. The map is structured to highlight individual skills rather than team coordination, though group strategies can still play a role. Beginners may struggle with the fast-paced nature and resource balancing, but experienced players will appreciate the depth and excitement it offers. To excel, players need sharp situational awareness, quick decision-making, and a thorough understanding of the map's layout. Key areas like the central open area and resource zones demand strategic planning, while micro-positioning during large-scale battles can determine victory. This map is ideal for competitive players seeking a thrilling experience that blends speed and strategy seamlessly.
코코넛 도지 2 (CoCoNuT DoDgE 2)
스타크래프트: 브루드워의 유즈맵 중 하나로 알려진 <CoCoNuT DoDgE 2>는 이름에서부터 느껴지듯 도전과 스릴을 추구하는 미니게임 맵이다. 맵 제목에 포함된 'DoDgE'는 'Dodge(피하기)'를 의미하며, 이름 그대로 플레이어는 끊임없이 쏟아지는 위협을 피하고 생존하는 것에 집중해야 한다. 맵 구조는 중앙에 넓은 평지가 펼쳐져 있으며, 주변으로는 건물이나 장애물이 배치되어 있어 시야를 가리고 움직임을 제한하는 요소로 작용한다. 맵의 대부분은 어두운 색조로 구성되어 있어 특정 요소나 적의 위치를 파악하기가 쉽지 않다. 맵의 테두리에는 밝은 노란색 테두리가 둘러져 있어 맵의 경계를 명확히 구분할 수 있도록 돕고 있다. 맵의 분위기는 대체로 칙칙하고Dark하며, 공포스러운 요소보다는 압박감과 긴장감을 조성하는 데 중점을 두고 있는 것으로 보인다. 플레이 방식은 맵의 이름처럼 '피하기'가 핵심으로, 플레이어는 맵 중앙에서 시작하여 주변에서 끊임없이 등장하는 위협(예: 유닛, 폭발 효과, 함정 등)을 피해야 한다. 맵의 난이도는 맵의 크기와 장애물의 배치에 따라 달라지며, 플레이어의 반응속도와 판단력이 중요하다. 맵의 구조상 적의 등장 패턴이나 장애물의 위치가 고정되어 있지 않다면, 플레이어는 반복적인 플레이를 통해 패턴을 익히고 대응하는 전략을 세워야 한다. 맵의 어두운 색조와 제한된 시야는 플레이어에게 심리적 압박을 가하며, 이는 피하기 미니게임의 재미 요소 중 하나로 작용할 수 있다. 이 맵은 초보 플레이어보다는 경험이 있는 유저나 반응속도가 뛰어난 플레이어에게 더 적합할 것으로 보인다. 또한, 한정된 공간에서 끊임없이 움직이는 맵의 특성상 팀 플레이보다는 개인 플레이에 초점이 맞춰져 있으며, 경쟁보다는 순위를 겨루는 방식일 가능성이 높다. 맵의 타이틀과 구조를 고려했을 때, 공포나 서바이벌 요소가 강하게 느껴지지는 않지만, 피하기와 생존에 대한 도전 의식이 강조된 맵으로 평가할 수 있다. 플레이 전에는 맵의 경계와 장애물의 위치를 미리 숙지하는 것이 중요하며, 적의 패턴을 빠르게 파악할 수 있도록 연습하는 것이 좋다. This StarCraft: Brood War custom map, <CoCoNuT DoDgE 2>, stands out as a thrilling mini-game focused on dodging and survival challenges. The name 'DoDgE' directly hints at its core gameplay—avoiding relentless threats while navigating through a hazardous environment. The map features a spacious central area surrounded by buildings and obstacles that restrict visibility and movement, creating a tense atmosphere dominated by dark tones. A bright yellow border outlines the map, clearly marking its boundaries against the otherwise gloomy surroundings. Gameplay revolves around the 'dodge' mechanic, where players start in the center and must evade continuous dangers such as enemy units, explosions, or traps triggered as they appear. The difficulty fluctuates based on the map's layout and the unpredictability of threats, making quick reflexes and adaptability essential. If the threats follow fixed patterns, players can strategize by memorizing these sequences, but if they are randomized, the challenge shifts to raw reaction speed and improvisation. The dark visuals and limited visibility amplify the psychological pressure, enhancing the mini-game’s appeal as a test of agility and composure. This map is better suited for experienced players or those with sharp reflexes rather than beginners. Given the confined space and the need for constant movement, it leans toward solo play over team-based strategies, though it may include competitive ranking elements. While the title and design suggest a survival challenge, the emphasis lies more on dodging mechanics than horror or survival elements. Before diving in, players should familiarize themselves with the map’s boundaries and obstacle placements, and practice reacting swiftly to emerging threats to maximize their performance.
맵 선택 가이드
태그는 맵의 핵심 특징을 빠르게 설명하지만 제작 버전마다 규칙이 다를 수 있습니다. 상세 설명에서 권장 인원, 난이도, 플레이 시간과 버전을 함께 확인한 뒤 다운로드하세요.