
퍼즐 디펜스 스타크래프트 맵 모음
'퍼즐 디펜스' 태그가 등록된 맵을 모았습니다. 장르 하나로 찾기 어려운 플레이 방식, 난이도와 특징을 중심으로 인기 맵과 최신 맵을 비교해 보세요.
- 등록 맵
- 10개
- 누적 다운로드
- 0
- 누적 조회
- 358
인기 맵
다운로드와 조회 반응이 높은 맵입니다.
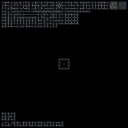
마인 디펜스 (Mind the Mine) 7.6
스타크래프트 브루드워의 유즈맵 계보에서 독특한 장르로 자리매김한 ‘마인’(Mine) 시리즈의 최신 버전, [EUD] Mind the Mine 7.6은 플레이어들에게 긴장과 전략을 동시에 요구하는 흥미로운 경험을 제공합니다. 이 맵은 EUD(Extended Unit Death) 기술을 적극 활용한 퍼즐 디펜스 장르로, 미로와 지뢰가 복잡하게 얽힌 구조 속에서 안전한 길을 찾아야 합니다. 맵의 중앙부에 위치한 다수의 지뢰는 플레이어의 실수 한 번으로도 치명적인 결과를 초래할 수 있으며, 제한된 시야와 순간적인 판단력이 요구됩니다. 맵 곳곳에 배치된 함정과 장애물을 피해 목적지까지 도달하는 것이 주 목표로 보이며, 특히 지뢰의 위치를 정확히 파악하지 못한 상태에서 무작정 전진했다가는 게임 오버로 직행할 수 있습니다. 맵의 디자인 자체는 8192x8192의 넓은 공간을 활용해 미로와 함정을 조화롭게 배치했으며, 우주 타일셋을 사용하여Dark, Mysterious한 분위기를 자아냅니다. 플레이어는 제한된 자원과 짧은 시간 내에 최적의 경로를 계산해야 하므로, 게임은 자연스럽게 전략적 사고와 손-눈 협응력을 동시에 요구합니다.Mind the Mine 시리즈는 오랜 기간 동안 유즈맵 커뮤니티에서 사랑받아 왔으며, 특히 EUD 기술을 활용한 지뢰 찾기 게임으로서의 정체성을 확고히 하고 있습니다. 이 맵은 초보자보다는 전략과 집중력이 요구되는 중급자 이상에게 추천되며, 한 번의 실수가 승패를 좌우할 수 있는 긴장감 넘치는 플레이가 특징입니다. 또한, 맵의 난이도는 지뢰의 밀도와 배치에 따라 조절할 수 있도록 설계되어 있어, 반복 플레이를 통해 점차 익숙해질 수 있는 구조를 갖추고 있습니다. [EUD] Mind the Mine 7.6, the latest installment in the *Mine* series—a unique genre in the StarCraft: Brood War custom map lineage—offers players a thrilling experience that demands both tension and strategy. Utilizing Extended Unit Death (EUD) technology, this map is a puzzle defense game where players must navigate a labyrinth of mines and traps to find a safe path. The numerous mines scattered across the map’s central area can instantly end the game with a single mistake, requiring sharp reflexes and quick decision-making under limited visibility. The primary objective is to reach the destination while avoiding traps and obstacles, though charging forward without accurately identifying mine locations will likely result in an immediate game over. The map’s design spans a vast 8192x8192 space, harmoniously blending mazes and traps while using a cosmic tileset to evoke a dark, mysterious atmosphere. Players must calculate the optimal route within tight resource constraints and time limits, naturally challenging both strategic thinking and hand-eye coordination. The *Mind the Mine* series has long been beloved in the custom map community, solidifying its identity as a mine-hunting game powered by EUD technology. This map is recommended for intermediate to advanced players rather than beginners, as it demands sharp strategy and focus—where even a single misstep can decide victory or defeat. The difficulty can also be adjusted through mine density and placement, allowing players to gradually grow accustomed to its mechanics through repeated plays.
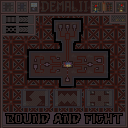
바운드 앤 파이트 골드 (Bound and Fight Gold)
‘바운드 앤 파이트 골드(Bound and Fight Gold)’는 스타크래프트 브루드워의 유즈맵 중 하나로, 일종의 퍼즐 디펜스와 액션을 결합한 독특한 장르의 맵이다. 이 맵은 플레이어가 제노타를 비롯한 적 유닛을 피해 복잡한 미로를 통과하는 ‘도망’과, 보스 및 미니보스를 상대하는 ‘전투’로 구성된 여러 스테이지를 순차적으로 클리어해야 한다. 각 스테이지는 점점 더 어려운 장애물과 적군을 배치해 플레이어의 반응 속도와 전략적 판단을 시험하며, 보상과 보너스 라운드를 통해 캐릭터의 업그레이드를 진행할 수 있도록 설계되었다. 팀 플레이가 권장되며, 팀워크와 개인의 실력이 모두 요구되는 구조로 이루어져 있다. 맵의 핵심은 ‘도망’과 ‘전투’의 반복적인 전환에 있다. 제노타나 기타 적군을 피해 미로를 통과하는 타이밍과 패턴을 익혀야 하며, 보스전에서는 적절한 공격 타이밍과 방어 전략을 세워야 한다. 미로의 구조는 복잡한 길목과 함정으로 가득해, 한 번의 실수가 치명적인 결과를 초래할 수 있다. 또한, 보너스 라운드를 통해 추가 업그레이드를 얻을 수 있어, 꾸준한 클리어와 보상을 통해 캐릭터를 강화할 수 있는 시스템이 특징이다. 팀원 간의 조율과 실시간 의사소통이 승리의 열쇠가 되는 만큼, 혼자보다는 팀으로 플레이하는 것이 권장된다. 이 맵은 스타크래프트의 기본 메커니즘을 활용하되, 유즈맵만의 새로운 플레이 경험을 제공하는 데 중점을 두고 있다. ‘도망’과 ‘전투’의 조합은 단순히 방어하거나 공격하는 기존의 디펜스나 미션과는 다른 감각을 느낄 수 있게 하며, 플레이어의 적응력과 순발력을 동시에 요구한다. 또한, 업그레이드 시스템을 통해 캐릭터의 성장감을 느낄 수 있어, 반복 플레이를 유도하는 장치로 작용한다. 초보자보다는 어느 정도 스타크래프트에 익숙한 플레이어에게 더 적합하며, 특히 팀 플레이를 즐기는 유저들에게 추천할 만한 맵이다. 플레이 전에는 맵의 구조와 각 스테이지의 패턴을 충분히 숙지하는 것이 중요하다. 또한, 팀원 간의 역할 분담을 미리 정해두면 더 효율적인 플레이가 가능하다. Bound and Fight Gold is a unique StarCraft: Brood War custom map that blends puzzle defense with action-based gameplay. Players navigate through maze-like stages filled with obstacles and enemies, primarily Zealots, while dodging their attacks. The map alternates between escape sequences and boss or miniboss battles, requiring players to adapt to increasingly challenging patterns and enemy behaviors. Rewards and bonus rounds allow for character upgrades, adding depth to the progression system. The core gameplay revolves around the seamless transition between dodging and combat. Players must memorize maze layouts and enemy timings to avoid fatal mistakes, while boss fights demand strategic timing and coordination. The maze’s intricate paths and traps make precision essential, as a single error can lead to failure. Bonus rounds provide additional upgrades, encouraging repeated play and mastery. Teamwork is highly emphasized, as real-time communication and role assignment significantly enhance survival rates and success. This map stands out by merging the familiar mechanics of StarCraft with fresh, custom-designed challenges. The combination of escape and combat sequences offers a distinct experience compared to traditional defense or mission maps, demanding both adaptability and quick reflexes. The upgrade system fosters a sense of progression, making repeated play rewarding. While accessible to beginners with practice, it is particularly suited for players familiar with StarCraft’s mechanics and those who enjoy team-based challenges. Prior familiarization with the map’s structure and enemy patterns is crucial for success. Pre-planning team roles and strategies before diving in can greatly improve efficiency and enjoyment.
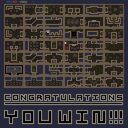
더 퍼즐링 (The Puzzling)
스타크래프트 브루드워의 유즈맵 <더 퍼즐링(The Puzzling)>은 이름 그대로 퍼즐 요소를 핵심으로 담은 전략형 디펜스 맵이다. 중앙에 위치한 커다란 퍼즐 판넬은 게임의 메인 플레이 공간으로, 플레이어는 here의 유닛을 배치하여 적의 공격을 방어하는 동시에 퍼즐을 해결해야 한다. 맵 구조는 사막 타일셋을 기반으로 깔끔하게 구성되어 있으며, 중앙 퍼즐 판넬 주변으로 방어 건물과 리소스 수집 지역이 배치되어 있다. 퍼즐 판넬은 마치 퍼즐 조각을 맞추듯 특정 패턴의 공격을 차단하는 구조로 보이며, 플레이어는 유닛의 배치와 생산을 전략적으로 조율해야 한다. 적의 공격 루트는 주로 좌측과 우측에서 몰려오며, 방어선은 중앙을 중심으로 삼는 것이 유리해 보인다. 인공지능이 조종하는 적군들은 끊임없이 밀어붙이므로, 방어塔와 유닛 생산을 병행하는 멀티태스킹 능력이 요구된다. 또한, 퍼즐 판넬의 해제 조건은 맵 설명에 'Everything has a purpose'라는 문구로 암시되는 것처럼, 단순히 방어만으로는 해결되지 않는 추가적인 단계가 존재하는 듯하다. 맵의 전체적인 분위기는 디펜스와 퍼즐의 결합으로, 전략적 사고와 빠른 반응이 동시에 필요한 하이브리드 장르라 할 수 있다. 초보자에게는 다소 난해할 수 있지만, 퍼즐과 디펜스의 조합을 즐기는 플레이어라면 큰 재미를 느낄 수 있는 맵이다. 플레이 전에는 퍼즐 판넬의 해제 조건과 방어 루트를 미리 숙지하고, 유닛 생산과 배치 타이밍을 연습하는 것이 중요하다. 맵의 디자인과 구성은 세심하게 짜여져 있어, 반복 플레이 시에도 새로운 전략을 시도해 볼 수 있는Depth가 있다. 특히, 중앙 퍼즐 판넬의 패턴을 분석하는 재미가 일품으로, 단순히 방어뿐만 아니라 퍼즐의 해체까지 완료해야 승리할 수 있는 구조로 보인다. 추천 대상은 전략형 디펜스를 즐기는 유저와 퍼즐 요소를 좋아하는 플레이어이며, 다소 복잡한 구조를 분석하는 즐거움을 느낄 수 있을 것이다. 플레이 시간은 방어와 퍼즐 해제까지 고려했을 때 약 30분 내외로 예상되며, 난이도는 보통 수준으로 조절되었다고 보인다. 맵의 배포자는 KhaosKreator와 Euryale Bacde로, 커스텀 맵으로서의 완성도가 돋보인다. 퍼즐 디펜스라는 독특한 장르의 조합은 스타크래프트 유즈맵의 새로운 가능성을 보여주며, 특히 퍼즐 요소에 대한 도전욕구를 자극하는 디자인이다. StarCraft: Brood War's custom map *The Puzzling* is a strategy defense map centered around puzzle elements, as its name suggests. The large puzzle panel in the center serves as the main gameplay area, where players must strategically place units to defend against enemy attacks while solving the puzzle. The map is cleanly designed with a desert tileset, featuring defensive structures and resource collection areas around the central puzzle panel. The puzzle panel appears to block attacks in specific patterns, much like fitting puzzle pieces together, requiring players to coordinate unit placement and production tactically. Enemy forces, controlled by AI, primarily attack from the left and right, making it advantageous to focus defenses around the center. Players must multitask by managing defensive towers and unit production simultaneously, as the AI relentlessly pushes forward. The puzzle panel's solution hints at an additional layer beyond mere defense, as suggested by the phrase *"Everything has a purpose"* in the map description. The overall atmosphere blends defense and puzzle-solving, creating a hybrid genre that demands both strategic thinking and quick reactions. While it may be challenging for beginners, players who enjoy the combination of puzzles and defense will find it highly engaging. Before playing, it's important to familiarize yourself with the puzzle panel's solution and attack routes, and to practice unit production and placement timing. The map's design allows for deep strategic exploration, with carefully crafted mechanics that encourage experimenting with new tactics in repeated plays. The central puzzle panel's patterns are particularly enjoyable to analyze, requiring players not only to defend but also to complete the puzzle to achieve victory. This map is recommended for those who enjoy strategic defense games and puzzle elements, offering the satisfaction of solving complex structures. With an estimated playtime of around 30 minutes, considering both defense and puzzle-solving, the difficulty is set to a moderate level. The map is distributed by KhaosKreator and Euryale Bacde, showcasing high-quality custom map design. The unique blend of puzzle and defense demonstrates the innovative potential of StarCraft custom maps, particularly in stimulating players' desire to tackle puzzle challenges.
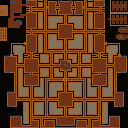
고양이와 쥐: 사막 미로 (Cat and Mice: Desert Maze)
스타크래프트 브루드워의Classic 유즈맵으로, ‘고양이와 쥐’ 컨셉을 기반으로 한 디펜스와 퍼즐 요소가 혼합된 맵이다. 플레이어는 쥐 역할을 맡아 고양이 무리에게 쫓기며, 맵 곳곳에 배치된 구조물과 미로를 활용해 생존을 도모해야 한다. 맵은 황혼 테마의 주황색 계통 색상으로 칠해져 있으며, 4096x4096 크기의 넓은 공간에 다양한 장애물과 지형이 배치되어 있다. 쥐 플레이어는 중앙에서 시작하며, 고양이 유닛들이 랜덤한 루트를 따라 추격해오는데, 이때 플레이어는 지형을 clever하게 활용해 고양이들을 유인하거나 막아야 한다. 맵 전반에 걸쳐 미로와 좁은 통로가 다수 배치되어 있어, 단순히 도망치는 것만으로는 진입로가 막히기 십상이다. 또한, 일부 구역에는 쥐가 숨을 수 있는 ‘구멍’이나 보급고가 배치되어 있어, 이를 활용해 체력을 회복하거나 일시적 безопа지대를 확보할 수 있다. 맵의 핵심은 ‘시간’과 ‘공간’을 어떻게 활용하느냐에 있으며, 초보자는 물론 숙련자까지 모두 즐길 수 있도록 디자인되어 있다. 특히, 고양이 유닛의 패턴을 파악하고, 맵의 숨겨진 루트를 발견하는 재미가 일품이다. 추천 대상은 스타크래프트 전략과 퍼즐을 좋아하는 유저들로, 1인 플레이가 가능하지만 팀 플레이 시 협동이 요구되지 않는 점에서 개인적 집중력이 요구된다. 플레이 전에는 맵의 구조를 미리 숙지하고, 고양이 유닛의 이동 패턴을 관찰하는 것이 중요하다. 또한, 맵의 넓은 공간을 활용해 ‘유인’ 전술을 연습하는 것도 도움이 된다. 고양이 유닛의 수가 많고, 맵의 복잡도가 높기 때문에, 플레이어는 빠른 판단력과 공간 인식력이 필요하다. 맵의 2.01 버전에서는 기존 버전 대비 미로의 배치와 장애물의 배치가 일부 수정되어, 더욱 전략적인 플레이가 가능해졌다. 맵의 난이도는 맵의 구조와 고양이 유닛의 수에 따라 조절할 수 있으며, 초보자와 숙련자 모두 즐길 수 있도록 설계되어 있다. 맵의 제작자 Infested[ID]의 이메일 주소가 제공되어 있어, 개선 사항이나 버그 리포트를 제출할 수 있다. 맵의 태그로는 ‘디펜스’, ‘퍼즐’, ‘유즈맵’, ‘고양이와 쥐’ 등이 어울리며, 특히 퍼즐과 디펜스의 조합으로 새로운 장르의 재미를 느낄 수 있다. 맵의 특성상, 반복 플레이를 통해 맵의 숨은 루트를 발견하고, 최적의 탈출 루트를 찾을 수 있기 때문에, 꾸준히 플레이하는 재미가 있다. 맵의 구조가 넓고 복잡하기 때문에, 초반에는 당황할 수 있지만, 익숙해지면 맵의 패턴을 익히고, 보다 효율적인 플레이가 가능해진다. 맵의 4096x4096 크기는 넓은 시야를 제공하지만, 그만큼 맵의 전체를 한눈에 파악하기 어렵기 때문에, 미니맵을 적극 활용하는 것이 좋다. 맵의 황혼 테마는 분위기를 고조시키며, 맵의 색상이 맵의 구조를 구분하는 데 도움이 된다. 맵의 2.01 버전에서는 고양이 유닛의 AI가 일부 개선되어, 보다 현실적인 추격이 가능해졌다. 맵의 이메일 주소와 버전 정보는 맵의 개선과 유지보수를 위해 제공된 것으로, 맵의 저작권을 존중하는 플레이가 필요하다. 맵의 특성상, 맵의 구조를 외우는 것이 중요하기 때문에, 맵의 스크린샷이나 간단한 메모를 준비하는 것도 도움이 된다. 맵의 플레이 시간은 맵의 구조와 플레이어의 숙련도에 따라 다르지만, 일반적으로 20~40분 내외로 예상된다. 맵의 난이도는 맵의 구조와 고양이 유닛의 수를 조절해 설정할 수 있으며, 초보자는 적은 수의 고양이로 시작해 점차 난이도를 높이는 것이 좋다. 맵의 태그는 맵의 특징을 잘 반영하며, ‘퍼즐 디펜스’, ‘고양이와 쥐’, ‘미로 탐험’ 등으로도 불릴 수 있다. 맵의 특성상, 맵의 구조를 파악하는 것이 중요하기 때문에, 초반에는 맵의 전체적인 구조를 파악하고, 점차 미로를 осво하는 것이 좋다. 맵의 2.01 버전에서는 맵의 밸런스가 일부 조정되어, 보다 공정한 플레이가 가능해졌다. 맵의 제작자 정보와 버전 정보는 맵의 신뢰성을 높이는 요소로, 맵의 개선과 유지보수를 위한 중요한 정보이다. 맵의 특성상, 맵의 구조와 고양이 유닛의 패턴을 파악하는 것이 중요하기 때문에, 꾸준한 플레이와 관전이 필요하다. 맵의 넓은 공간과 복잡한 구조는 맵의 매력을 높이는 요소로, 맵의 전체적인 분위기를 고조시킨다. 맵의 2.01 버전에서는 맵의 일부 구역이 리뉴얼되어, 보다 흥미로운 플레이가 가능해졌다. 맵의 태그는 맵의 특징을 잘 반영하며, ‘퍼즐’, ‘디펜스’, ‘고양이와 쥐’, ‘유즈맵’이라는 키워드가 어울린다. 맵의 특성상, 맵의 구조를 이해하고, 고양이 유닛의 패턴을 파악하는 것이 맵의 재미를 높이는 핵심 요소이다. 맵의 넓은 공간과 복잡한 구조는 맵의 매력을 높이며, 플레이어의 전략적 사고를 요구한다. 맵의 2.01 버전에서는 맵의 밸런스가 개선되어, 보다 즐거운 플레이가 가능해졌다. 맵의 제작자 정보와 버전 정보는 맵의 신뢰성을 높이며, 맵의 개선과 유지보수를 위한 중요한 정보로 활용된다. 맵의 특성상, 맵의 구조를 외우고, 고양이 유닛의 패턴을 익히는 것이 중요하다. 맵의 넓은 공간과 복잡한 구조는 맵의 매력을 높이며, 플레이어의 공간 인식력을 요구한다. 맵의 2.01 버전에서는 맵의 일부 구역이 개선되어, 보다 흥미로운 플레이가 가능해졌다. 맵의 태그는 맵의 특징을 잘 반영하며, ‘퍼즐 디펜스’, ‘고양이와 쥐’, ‘미로 탐험’이라는 키워드가 어울린다. A classic *Brood War* custom map in *StarCraft*, blending defense and puzzle elements around the "cat and mouse" concept. Players take on the role of the mouse, fleeing from a pack of cats while using the map's structures and mazes to survive. The map features an orange-tinted twilight theme and spans a vast 4096x4096 area filled with obstacles and terrain. The mouse starts in the center, while the cats pursue along random paths—players must cleverly use the terrain to lure or block them. With numerous mazes and narrow passages, simply running away often leads to dead ends. Some areas include hidden "holes" or supply depots where the mouse can recover health or secure temporary safety zones. The core challenge lies in managing time and space, making the map enjoyable for both beginners and veterans. The fun comes from studying the cats' patterns and discovering hidden routes. While single-player is possible, cooperative play isn't required, demanding strong personal focus. Before playing, familiarize yourself with the map's layout and observe the cats' movement patterns. Practicing "luring" tactics in the open spaces can also help. With many cats and complex terrain, quick decision-making and spatial awareness are key. Version 2.01 tweaks maze layouts and obstacle placements for more strategic depth. Difficulty can be adjusted by modifying the map's structure and cat numbers, ensuring accessibility for all skill levels. The creator, Infested[ID], provides an email for feedback or bug reports. Tags like "defense," "puzzle," "custom map," and "cat and mouse" fit well, offering a fresh blend of puzzle and defense mechanics. The map rewards repeated play with hidden paths and optimal escape routes, though its size and complexity may feel overwhelming at first. The twilight theme enhances the atmosphere, and its color scheme aids in navigating the terrain. Version 2.01 improves the cats' AI for more realistic chases. The map's structure demands memorization—consider taking screenshots or notes. Playtime varies from 20 to 40 minutes depending on skill and layout. Adjusting cat numbers lets players scale difficulty, ideal for gradually building mastery. Tags like "puzzle defense," "cat and mouse," and "maze exploration" capture its essence. Mastering the map's layout and cat patterns is essential for maximizing fun. The vast, intricate design heightens its appeal, testing strategic thinking. Version 2.01 further refines balance and some areas for a more engaging experience. Creator details and version info add credibility, supporting ongoing improvements. Memorizing the map and cat behaviors is crucial, with the terrain and complexity demanding strong spatial skills. The latest updates enhance replayability, solidifying its appeal.
저글링 마인유혹하기 (Zergling Mine Temptation - Ultra Extreme)
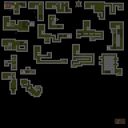
‘저글링 마인유혹하기 (초극악)’은 스타크래프트 브루드워에서 감상과 도전욕을 동시에 자극하는 유즈맵으로, 이름부터가 플레이어의 도전 정신을 자극한다. 맵의 제목이 시사하듯 저글링을 조종하여 지뢰나 함정 사이를 통과하거나 유도하는 플레이가 핵심인데, 단순히 통과하는 수준을 넘어 맵 곳곳에 배치된 마인을 clever 하게 유인하거나 조종해야 한다는 점이 특징이다. 맵 상단과 하단에 가로로 긴 구조가 반복되는 듯한 디자인으로 보아, 저글링의 기동성과 컨트롤력을 최대한 요구하는 퍼즐 디펜스에 가깝다. 특히 마인이 배치된 구간은 시야를 가리는 장애물과 연계되어 있어, 초심자는 물론 숙련자도 실수를 유발할 수밖에 없는 구조로 설계된 것이 눈에 띈다. 맵의 배경은 사막 타일셋을 사용해 황량한 분위기를 연출하며, 이는 긴장감을 더하는 요소로 작용한다. 맵 이미지에서 확인되는 대로, 저글링이 지나갈 수 있는 좁은 통로와 마인의 배치 패턴이 규칙적으로 반복되는 구조는 플레이어가 맵의 패턴을 익히고 이를 극복하는 재미를 제공한다. 저글링의 속도와 마인의 폭발 범위가 조화를 이룰 때 비로소 클리어할 수 있는 구조이기 때문에, 속도와 타이밍을 맞추는 것이 가장 큰 관건이다. 이 맵은 초보자가 처음 플레이할 경우 마인을 피하는 것만으로도 상당한 스트레스를 받겠지만, 패턴을 익히고 나면 점차 자신감이 생길 것이다. 또한 숙련자에게는 최단 시간 클리어와 퍼펙트 클리어를 노리는 도전 과제가 주어질 수 있다. 이 맵은 기본적으로 저글링을 조종하는 재미와 마인을 clever 하게 다루는 묘미를 동시에 제공하기 때문에, 스타크래프트의 기본 컨트롤과 전략적 사고를 모두 요구하는 유즈맵으로 평가할 수 있다. 플레이 전에는 마인의 배치 패턴을 미리 숙지하고, 저글링의 이동 경로를 미리 계획하는 것이 성공의 열쇠가 될 것이다. 특히 좁은 길목을 통과할 때는 저글링의 이동 속도를 조절하여 마인의 폭발 타이밍을 정확히 예측해야 하므로, 충분한 연습이 필요하다. ‘Zergling Mine Temptation (Extremely Difficult)’ is a user-made map in *StarCraft: Brood War* that simultaneously stimulates both appreciation and the desire to challenge oneself, as the name itself sparks the player’s competitive spirit. As the title suggests, the core gameplay revolves around controlling zerglings to navigate through or manipulate mines and traps, but what sets this map apart is the need to cleverly lure or guide the mines—far beyond just passing through them. The design, featuring repetitive horizontal structures at the top and bottom of the map, leans toward a puzzle defense that demands maximum mobility and control from the zerglings. The sections where mines are placed, combined with obstructive barriers that block vision, make the layout unforgiving—prone to mistakes even for experienced players. The map’s desert tile set enhances its desolate atmosphere, further heightening the tension. As seen in the map preview, the narrow corridors zerglings can traverse and the recurring mine placement patterns offer players the satisfaction of learning and overcoming the map’s challenges. The structure is designed so that success hinges on harmonizing the zerglings’ speed with the mines’ blast radius, making timing and precision the ultimate keys to victory. While beginners may find the stress of simply dodging mines overwhelming at first, mastering the patterns will gradually build confidence. For skilled players, the challenge extends to aiming for the fastest possible clear or a perfect run. By blending the fun of zergling control with the intricacy of outsmarting mines, this map stands out as a user-made experience that tests both fundamental StarCraft mechanics and strategic thinking. Before playing, studying the mine placement patterns and planning the zerglings’ path will be crucial to success. Special care is needed when navigating tight passages, where adjusting the zerglings’ speed to predict the mines’ explosion timing precisely becomes essential—requiring plenty of practice.
지나갈 수 없을 것이다 (Thou Shall Not Pass)
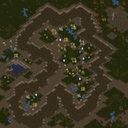
스타크래프트 브루드워의 유즈맵 ‘Thou Shall Not Pass’는 플레이어가 혼자서 미로를 통과하며 숨겨진 도서관에 도달하는 도전적인 퍼즐 디펜스 맵이다. 맵의 핵심은 ‘비밀 도서관의 열쇠’를 획득하는 것이며, 이 열쇠는 다른 플레이어(혹은 AI)가 소지하고 있어 strategic thinking가 요구된다. 사막 타일셋으로 구성된 넓은 공간은 황량한 분위기를 자아내며, 플레이어는 좁은 통로와 장애물을 피해 나아가야 한다. 맵 곳곳에는 트리거로 작동하는 함정이나 문이 배치되어 있어, 순간의 판단이 승리를 좌우한다. 특히 맵 중앙의 넓은 공간은 시야를 차단하는 구조물로 둘러싸여 있어, 주변 환경을 잘 살피며 움직여야 한다. 맵의 제목은 판타지 소설 ‘반지의 제왕’의 유명한 대사에서 영감을 받았을 가능성이 높으며, ‘지나갈 수 없을 것이다’라는 뜻의 제목이 주는 묵직한 분위기와 맵의 도전 과제가 시너지를 이룬다. 이 맵은 혼자서 플레이하는 구조로, 다른 플레이어의 움직임을 예측하고 타이밍을 조절하는 것이 중요하다. 맵의 디자인상으로는 초보자가 진입하기에는 어려울 수 있지만, 퍼즐 요소와 디펜스 요소가 결합되어 있어 전략적 사고를 즐기는 플레이어에게 추천할 만하다. 맵의 넓이와 복잡한 구조는 플레이 시간을 상당히 잡아먹을 수 있어, 여유 있는 플레이 타임을 확보하고 접근하는 것이 좋다. 또한, 맵의 난이도는 체감상 보통 이상으로 느껴질 수 있으며, 몇 번의 실패를 거듭하며 최적의 루트를 찾아내는 재미가 있다. 맵의 트리거나 승리 조건 등은 ‘USE MAP SETTINGS’를 통해 커스터마이징할 수 있어, 재플레이성을 높이는 요소로 작용한다. Thou Shall Not Pass는 특히 ‘혼자서 즐기는 미로 탈출’이라는 장르적 특색이 강해, 유즈맵 커뮤니티 내에서 ‘컴퓨터 상대 미션’ 또는 ‘퍼즐 디펜스’로 분류된다. 맵의 구조상으로는 입구막기나 넥서스 부수기와는 거리가 멀며, 오히려 미로와 함정, 그리고 숨겨진 열쇠를 찾는 재미에 초점이 맞춰져 있다. 따라서 이 맵을 플레이하기 전에는 맵의 주요 루트와 함정 위치를 미리 숙지하는 것이 중요하며, 반복 플레이를 통해 최적의 공략법을 찾는 것이 핵심이다. 맵의 디자인에서 noticeable한 요소는 중앙의 넓은 공간과 그 주변을 둘러싼 복잡한 통로 구조인데, 이 부분은 플레이어가 길을 잃기 쉬운 구조이므로 주의가 필요하다. 또한, 맵의 배경을 사막으로 설정해 난이도를 높이는 요소로 활용한 점도 흥미로운 디자인 포인트다. "Thou Shall Not Pass" is a challenging puzzle defense map from *StarCraft: Brood War* where players navigate a maze alone to reach a hidden library. The core objective is to obtain the "Key of the Secret Library," which is held by another player (or AI), requiring strategic thinking. The vast desert-themed space creates a desolate atmosphere, forcing players to maneuver through tight passages and obstacles. Traps and doors triggered throughout the map demand quick decision-making, as victory hinges on split-second choices. The central open area, surrounded by structures that block vision, forces players to carefully observe their surroundings. Designed for solo play, the map emphasizes predicting opponents' movements and timing. While its complex design may be difficult for beginners, its blend of puzzle-solving and defense mechanics makes it ideal for players who enjoy strategic challenges. The map's scale and intricate layout can consume significant playtime, so setting aside ample time is recommended. The difficulty is often perceived as above average, with the fun lying in repeatedly failing and refining the optimal route. Customizable triggers and win conditions via "USE MAP SETTINGS" enhance replayability. "Thou Shall Not Pass" stands out for its "solo maze escape" genre, often categorized in the custom map community as either a "computer opponent mission" or "puzzle defense." Unlike maps focused on blocking entrances or destroying nexuses, this one prioritizes maze navigation, traps, and hidden key retrieval. Familiarizing yourself with the main routes and trap locations beforehand is crucial, with the key to success lying in repeated play to master the optimal strategy. Notable design elements include the central open space and the surrounding maze-like passages—areas where players often get lost. The desert setting further amplifies the difficulty, adding an intriguing layer to the map's design.
Doggy BoUnD
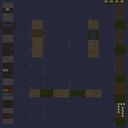
‘Doggy BoUnD’는 스타크래프트: 브루드워의 유즈맵으로, 6명의 플레이어가 참여하는 장애물 통과형 디펜스 맵이다. 맵 중앙을 가로지르는 넓은 구간에서 각각의 플레이어가 개(dog) 역할을 맡아 다양한 장애물을 통과하고, 일정 시간 내에 목표 지점에 도달하는 것이 목표로 보인다. 맵 곳곳에 배치된 기둥, 함정, 좁은 통로 등은 플레이어의 시야를 제한하고, 적절한 타이밍과 전략을 요구하는 요소로 추정된다. 특히 맵의 양쪽 끝과 중앙에 위치한 장애물들은 각각 다른 패턴으로 배치되어 있어, 플레이어 간 협력이 필수적일 것으로 보인다. 맵의 배경은 사막 타일셋을 사용해 건조한 환경이 연출되며, 개를 연상시키는 아이콘이나 장애물이 시각적으로 두드러진다. 플레이어들은 맵의 양쪽 끝에서 시작해 중앙의 목표 지점으로 이동해야 하며, 장애물 통과 중에는 공격이나 방어보다는 순발력과 속도에 중점을 둬야 할 것으로 보인다. 이 맵은 주로 속도와 반사신경, 그리고 팀워크를 테스트하는 퍼즐 디펜스 장르에 속하며, 개별 플레이어의 실력과 팀 간의 조율이 승패를 좌우할 것이다. 초보자의 경우 장애물의 패턴을 숙지하는 데 시간이 걸릴 수 있으며, 반복 플레이를 통해 점차 익숙해질 수 있을 것이다. 또한 맵의 난이도는 장애물의 배치와 속도에 따라 조절될 수 있으므로, 플레이어의 숙련도에 맞춰 난이도를 설정할 필요가 있다. 이 맵은 짧은 플레이 타임을 목표로 디자인되었을 가능성이 있으며, 주로 10분 내외의 플레이 시간이 예상된다. 개를 테마로 한 장애물 통과 게임은 스타크래프트 유즈맵 among에서 드물게 찾아볼 수 있는 장르이기 때문에, 새로운 경험을 원하는 플레이어들에게 추천할 만하다. 특히 팀 기반의 전략과 협동이 필요한 맵이기 때문에, 친구들과 함께 플레이할 때 더욱 재미를 느낄 수 있을 것이다. 맵을 플레이하기 전에는 장애물의 배치와 통과 방법을 미리 확인하고, 팀원 간의 역할 분담을 확실히 하는 것이 중요하다. 또한, 맵의 중앙에 위치한 장애물은 복잡한 패턴을 가질 가능성이 높으므로, 신중히 접근해야 한다. ‘Doggy BoUnD’ is a custom map in *StarCraft: Brood War* where six players participate in an obstacle-course-style defense map. Each player takes on the role of a dog, navigating through various obstacles on a wide central section of the map to reach a goal within a set time. Pillars, traps, and narrow passages scattered throughout the map restrict players’ vision and demand precise timing and strategy. Notably, the obstacles at both ends of the map and in the center are arranged in different patterns, making teamwork essential. The map uses a desert tileset, creating a dry environment where dog-themed icons and obstacles stand out visually. Players start at either end of the map and must move toward the central goal, focusing more on agility and speed than on attacking or defending during the obstacle course. This map falls under the puzzle defense genre, testing speed, reflexes, and teamwork, where individual skill and coordination between teammates determine victory. Beginners may take time to memorize obstacle patterns but can gradually get accustomed through repeated play. The difficulty can be adjusted based on obstacle placement and speed, so it’s important to set the level according to players’ proficiency. Designed for short play sessions, the game likely aims for around 10 minutes of playtime. As a rare genre among *StarCraft* custom maps—featuring a dog-themed obstacle course—it offers a fresh experience for players seeking something new. Since it requires team-based strategy and cooperation, it’s especially fun to play with friends. Before playing, it’s crucial to check obstacle layouts and passing methods and clearly assign roles among teammates. Additionally, the obstacles in the map’s center may have complex patterns, so players should approach them with caution.
와이어 바운드 (Wire Bound)
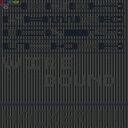
‘Wire Bound(와이어 바운드)’는 스타크래프트: 브루드워에서 즐기는 유즈맵으로, 플레이어가 화면 전체를 뒤덮은 수많은 와이어(전선)들을 모두 끊는 것이 목표인 퍼즐형 디펜스 장르의 맵이다. 맵은 차가운 얼음 테마의 타일셋으로 구성되어 있으며, 3072x3072 크기의 넓은 공간에 96x96 타일 단위로 배치된 와이어들이 빼곡히 연결되어 있다. 내부 설명에서도 ‘모든 와이어를 끊어라’라는 간단한 목표만 제시되어 있어, 플레이어는 오직 시야 내의 와이어만을 끊을 수 있는 구조로 추정된다. 와이어는 화면 여기저기에서 복잡하게 얽혀 있어, 끊을 때마다 새로운 와이어가 생성되거나 기존 구조가 무너지면서 진행이 더욱 어렵게 느껴진다. 맵의 특성상 마우스 조작이 주를 이루며, 빠르게 와이어를 클릭해 끊는 것이 핵심이다. 또한, 맵의 넓은 공간과 복잡한 와이어 배치로 인해 시야 확보와 전략적인 끊기가 요구된다. 초보자보다는 집중력과 손속도가 필요한 맵으로 보이며, 특히 퍼즐과 디펜스 장르를 좋아하는 유저들에게 추천할 만하다. 플레이 전에는 와이어가 생성되는 패턴과 끊는 순서를 미리 파악하는 것이 중요하다. 와이어가 얽힌 구조를 풀어내는 재미와 성취감이 이 맵의 가장 큰 매력 포인트다. 다만, 와이어가 무한히 생성되거나 특정 조건에서만 끊을 수 있는 구조인지는 맵 설명만으로는 명확하지 않지만, ‘Cut all wires’라는 목표로 미루어 보아 모든 와이어를 끊는 것이 최종 조건으로 추정된다. 와이어의 밀도와 배치 패턴을 분석하며 플레이하는 재미가 있는 맵이다. ‘Wire Bound’ is a custom map for *StarCraft: Brood War* where the goal is to cut all the countless wires covering the entire screen—a puzzle-style defense map. The map features a cold, icy tile set and spans a vast 3072x3072 space, densely packed with wires connected in 96x96 tile units. The in-game description only states the simple objective of "cut all wires," implying that players can only cut wires visible on-screen. The wires are intricately tangled across the screen, and cutting them often triggers new wires to form or existing structures to collapse, making progression increasingly difficult. The gameplay relies heavily on mouse control, with the core challenge being quick clicks to sever wires efficiently. Due to the map’s sprawling layout and complex wire arrangements, players must secure visibility and strategically decide which wires to cut. This map demands focus and fast hand-eye coordination, making it more suited for experienced players rather than beginners. It’s especially recommended for fans of puzzle and defense genres. Before playing, it’s crucial to study the wire generation patterns and the optimal cutting sequence. The satisfaction of unraveling the tangled wires and the sense of accomplishment are the map’s biggest draws. While it’s unclear whether wires generate infinitely or if certain wires can only be cut under specific conditions, the objective of "cut all wires" suggests that the final goal is to sever every single wire. The real fun lies in analyzing the density and placement of the wires to devise the best approach.
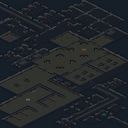
어느 스위치가 정답일까? (Which Switch is Which?)
‘Which Switch is Which?’는 스타크래프트 브루드워의 유즈맵으로, 사용자가 올바른 스위치를 선택하여 상금을 획득하는 것을 목표로 하는 퍼즐형 디펜스 맵이다. 맵의 배경은 설원과 얼음으로 꾸며졌으며, 중앙의 구조물 주변에는 여러 개의 스위치가 분포되어 있다. 플레이어는 맵 설정에서 제공되는 옵션을 활용해 스위치를 조작해야 하며, 선택한 스위치에 따라 맵이 변화하는 모습을 확인할 수 있다. 맵의 핵심은 스위치의 기능을 정확히 파악하고, 장애물을 피해 목표를 달성하는 데 있다. 맵의 구조는 비교적 단순하지만, 스위치의 기능과 연계된 퍼즐 요소가 포함되어 있어 전략적인 사고를 요구한다. 맵의 분위기는 차분하면서도 도전적인 분위기를 조성하며, 플레이어는 맵의 규칙을 파악하는 데 집중해야 한다. 맵의 배경을 이루는 설원과 얼음은 시각적으로도 매력적이며, 맵의 전체적인 디자인과 조화를 이룬다. 이러한 특징으로 인해 맵은 플레이어에게 시각적 만족감과 동시에 전략적 깊이를 제공한다. 초보 플레이어부터 숙련자까지 모두 즐길 수 있지만, 스위치의 기능을 정확하게 이해하지 않으면 난이도가 급격히 상승할 수 있다. 플레이 전에는 반드시 맵 설정을 확인하고, 스위치의 기능과 맵의 구조를 미리 숙지하는 것이 중요하다. 맵의 진행은 일정한 패턴을 따르므로, 반복 플레이를 통해 실력을 향상시킬 수 있다. 또한, 맵의 디자인과 분위기는 플레이어에게 긴장감을 조성하면서도 차분한 플레이 환경을 제공한다. 맵의 난이도는 맵 설정과 플레이어의 숙련도에 따라 달라질 수 있으며, 다양한 전략을 시도해 볼 수 있는 기회를 제공한다. 맵의 핵심은 단순히 스위치를 누르는 것이 아니라, 스위치의 기능을 정확히 이해하고 이를 바탕으로 목표를 달성하는 것이다. 이러한 특징으로 인해 맵은 퍼즐과 디펜스 요소가 혼합된 독특한 경험을 제공한다. 플레이는 대체로 20~40분 내외로 완료할 수 있으며, 맵의 구조와 스위치의 기능에 익숙해지면 더 빠른 진행이 가능하다. 맵의 특성상 반복 플레이를 통해 실력을 향상시킬 수 있으며, 새로운 전략을 시도해 볼 수 있는 여지가 많다. 맵의 배경 음악과 효과음은 맵의 분위기를 한층 더 풍부하게 만들어 주며, 플레이어의 몰입감을 높이는 데 기여한다. 맵의 구조는 비교적 간단하지만, 스위치의 기능과 맵의 변화가 복잡한 요소를 내포하고 있어, 플레이어의 신중한 판단이 요구된다. 맵의 디자인과 퍼즐 요소는 플레이어의 창의력을 자극하며, 다양한 해결책을 모색할 수 있도록 유도한다. 맵의 난이도는 맵 설정에서 조절할 수 있으며, 플레이어의 실력에 맞게 설정할 수 있는 유연성이 장점이다. 맵의 전체적인 분위기는 차분하면서도 도전적인 분위기를 조성하며, 플레이어에게는 집중력과 전략적 사고가 요구된다. 맵의 구조와 스위치의 기능은 플레이어의 창의력을 자극하며, 새로운 해결책을 발견하는 즐거움을 제공한다. 맵의 디자인과 분위기는 플레이어의 몰입감을 높이며, 반복 플레이를 통해 더 높은 점수를 달성할 수 있는 기회를 제공한다. 맵의 특징은 스위치의 기능과 맵의 변화에 있으며, 이러한 요소들이 플레이어의 전략적 사고를 자극한다. 맵의 난이도는 플레이어의 숙련도에 따라 달라지며, 맵 설정에서 조절할 수 있는 유연성이 장점이다. 맵의 전체적인 디자인과 분위기는 플레이어에게 시각적 만족감과 전략적 깊이를 동시에 제공한다. ‘Which Switch is Which?’ is a custom map for *StarCraft: Brood War*, a puzzle-style defense map where players aim to earn rewards by selecting the correct switches. The map features a snowy and icy background, with multiple switches scattered around a central structure. Players must manipulate the switches using the options provided in the map settings, and the map transforms based on the switches chosen. The core challenge lies in accurately understanding the functions of each switch and navigating obstacles to achieve the objective. While the map’s structure is relatively simple, its puzzle elements tied to the switches demand strategic thinking. The atmosphere is calm yet challenging, requiring players to focus on grasping the map’s rules. The snowy and icy visuals enhance the map’s appeal, harmonizing with its overall design. These features deliver both visual satisfaction and strategic depth to players. Suitable for beginners to experts, the map’s difficulty spikes if players fail to correctly understand the switch functions. Before playing, it’s crucial to check the map settings and familiarize yourself with the switches’ roles and the map’s layout. The gameplay follows a consistent pattern, allowing players to improve through repeated attempts. The design and atmosphere create tension while maintaining a calm play environment. The difficulty varies depending on the map settings and player skill, offering opportunities to experiment with different strategies. The essence of the map isn’t just pressing switches—it’s about comprehending their functions and using that knowledge to reach the goal. This blend of puzzle and defense elements creates a unique experience. Matches typically last 20 to 40 minutes, though familiarity with the structure and switches can speed up progress. The map rewards repeated play, encouraging exploration of new strategies. Background music and sound effects enrich the atmosphere, deepening player immersion. While the structure is straightforward, the switches’ functions and the map’s transformations introduce complexity, demanding careful judgment. The design and puzzle elements stimulate creativity, guiding players to seek diverse solutions. The difficulty can be adjusted in the settings, offering flexibility to match player skill. The overall mood remains calm yet challenging, requiring focus and strategic thinking. The map’s structure and switch functions spark creativity, rewarding players with the joy of discovering new solutions. The design and atmosphere heighten immersion, providing opportunities to achieve higher scores through repeated play. The defining features are the switches’ functions and the map’s transformations, which stimulate strategic thinking. Difficulty adapts to player skill and can be adjusted in settings, making it a flexible challenge. The map’s cohesive design and atmosphere deliver both visual satisfaction and strategic depth.
![레이튼Ⅱ : StayDuskRoom [2] (Layton II: StayDuskRoom [2]) 맵 미리보기](https://cdn-star-data.huzy.net/thumbnail_174c804949aa4529aa46ba418e85ff44.jpg)
레이튼Ⅱ : StayDuskRoom [2] (Layton II: StayDuskRoom [2])
스타크래프트 브루드워의 UMS(유즈맵) 계열로 만들어진 레이튼Ⅱ : StayDuskRoom[2]는 레이튼 시리즈의 탐정물 분위기를 담은 퍼즐형 디펜스 맵입니다. 맵 제목에서 알 수 있듯이 2편에 해당하며, 'StayDuskRoom'은 '해가 지지 않는 방'을 뜻하는 제목으로, 어두운 분위기의 방을 배경으로 한 퍼즐과 디펜스 요소가 조화를 이룹니다. 내부 맵 설명에 따르면 2011년에 제작되었으며, pc25asdw가 맵을 제작하고 pc27asdw가 해설을 담당했다는 점에서 오랜 전통의 팬메이드 맵임을 짐작할 수 있습니다. 이 맵은 4인 플레이를 기반으로 설계되었지만, 팀 구성이 반드시 4인 1팀일 필요는 없습니다. 맵의 구조는 좁은 복도를 따라 진행되는 형상으로, 플레이어는 적의 침입을 방어하면서 특정 조건을 만족시켜야 합니다. 맵의 해상도와 타일셋(황무지)을 고려할 때, 디자인은 세밀하고 몰입감 있는 분위기를 연출합니다. 특히 어두운 색감과 방 안의 조명이 어우러져 레이튼 시리즈의 분위기를 잘 살려내고 있습니다. 퍼즐 디펜스 장르의 특성상, 플레이어는 적의 웨이브를 방어하는 동시에 숨겨진 퍼즐을 풀거나 특정 오브젝트를 조작해야 합니다. 맵의 크기와 타일 구조로 미루어보아, 플레이 시간은 약 30분 내외로 예상되나, 퍼즐의 난이도와 플레이어의 숙련도에 따라 크게 달라질 수 있습니다. 추천 대상은 레이튼 시리즈의 팬이거나 퍼즐 디펜스 장르를 좋아하는 플레이어이며, 협동 플레이를 선호하는 유저들에게 적합합니다. 플레이 전에는 맵의 구조와 퍼즐의 위치를 미리 확인하고, 팀원과의 소통을 충분히 준비하는 것이 중요합니다. This StarCraft: Brood War UMS (user-made scenario) map, titled 레이튼Ⅱ : StayDuskRoom[2], is a puzzle-based defense game inspired by the Layton series. The title 'StayDuskRoom' translates to 'the room where the sun never sets,' setting a dark, mysterious atmosphere that aligns with the detective-themed puzzles within. The internal map description confirms it was created in May 2011 by pc25asdw, with pc27asdw handling commentary, indicating a long-standing fan-made legacy. Designed for up to four players, this map does not strictly enforce team compositions, though coordination is essential. The layout features narrow corridors and room-based progression, where players must defend against enemy waves while solving hidden puzzles or manipulating objects. The map’s 4096x4096 resolution and wasteland tileset create a detailed, immersive environment with dim lighting that perfectly complements the Layton series’ aesthetic. As a puzzle defense game, players must balance defending against waves of enemies with solving intricate puzzles embedded in the environment. Given the map’s size and complexity, the estimated playtime is around 30 minutes, though this may vary based on puzzle difficulty and player skill. Recommended for fans of the Layton series or puzzle defense games, this map thrives in cooperative play. Before starting, players should familiarize themselves with the map layout, puzzle locations, and ensure clear communication with teammates to maximize enjoyment and efficiency.
최근 등록된 맵
새로 추가된 파일과 버전을 확인하세요.
레이튼Ⅱ : StayDuskRoom [2] (Layton II: StayDuskRoom [2])
스타크래프트 브루드워의 UMS(유즈맵) 계열로 만들어진 레이튼Ⅱ : StayDuskRoom[2]는 레이튼 시리즈의 탐정물 분위기를 담은 퍼즐형 디펜스 맵입니다. 맵 제목에서 알 수 있듯이 2편에 해당하며, 'StayDuskRoom'은 '해가 지지 않는 방'을 뜻하는 제목으로, 어두운 분위기의 방을 배경으로 한 퍼즐과 디펜스 요소가 조화를 이룹니다. 내부 맵 설명에 따르면 2011년에 제작되었으며, pc25asdw가 맵을 제작하고 pc27asdw가 해설을 담당했다는 점에서 오랜 전통의 팬메이드 맵임을 짐작할 수 있습니다. 이 맵은 4인 플레이를 기반으로 설계되었지만, 팀 구성이 반드시 4인 1팀일 필요는 없습니다. 맵의 구조는 좁은 복도를 따라 진행되는 형상으로, 플레이어는 적의 침입을 방어하면서 특정 조건을 만족시켜야 합니다. 맵의 해상도와 타일셋(황무지)을 고려할 때, 디자인은 세밀하고 몰입감 있는 분위기를 연출합니다. 특히 어두운 색감과 방 안의 조명이 어우러져 레이튼 시리즈의 분위기를 잘 살려내고 있습니다. 퍼즐 디펜스 장르의 특성상, 플레이어는 적의 웨이브를 방어하는 동시에 숨겨진 퍼즐을 풀거나 특정 오브젝트를 조작해야 합니다. 맵의 크기와 타일 구조로 미루어보아, 플레이 시간은 약 30분 내외로 예상되나, 퍼즐의 난이도와 플레이어의 숙련도에 따라 크게 달라질 수 있습니다. 추천 대상은 레이튼 시리즈의 팬이거나 퍼즐 디펜스 장르를 좋아하는 플레이어이며, 협동 플레이를 선호하는 유저들에게 적합합니다. 플레이 전에는 맵의 구조와 퍼즐의 위치를 미리 확인하고, 팀원과의 소통을 충분히 준비하는 것이 중요합니다. This StarCraft: Brood War UMS (user-made scenario) map, titled 레이튼Ⅱ : StayDuskRoom[2], is a puzzle-based defense game inspired by the Layton series. The title 'StayDuskRoom' translates to 'the room where the sun never sets,' setting a dark, mysterious atmosphere that aligns with the detective-themed puzzles within. The internal map description confirms it was created in May 2011 by pc25asdw, with pc27asdw handling commentary, indicating a long-standing fan-made legacy. Designed for up to four players, this map does not strictly enforce team compositions, though coordination is essential. The layout features narrow corridors and room-based progression, where players must defend against enemy waves while solving hidden puzzles or manipulating objects. The map’s 4096x4096 resolution and wasteland tileset create a detailed, immersive environment with dim lighting that perfectly complements the Layton series’ aesthetic. As a puzzle defense game, players must balance defending against waves of enemies with solving intricate puzzles embedded in the environment. Given the map’s size and complexity, the estimated playtime is around 30 minutes, though this may vary based on puzzle difficulty and player skill. Recommended for fans of the Layton series or puzzle defense games, this map thrives in cooperative play. Before starting, players should familiarize themselves with the map layout, puzzle locations, and ensure clear communication with teammates to maximize enjoyment and efficiency.
지나갈 수 없을 것이다 (Thou Shall Not Pass)
스타크래프트 브루드워의 유즈맵 ‘Thou Shall Not Pass’는 플레이어가 혼자서 미로를 통과하며 숨겨진 도서관에 도달하는 도전적인 퍼즐 디펜스 맵이다. 맵의 핵심은 ‘비밀 도서관의 열쇠’를 획득하는 것이며, 이 열쇠는 다른 플레이어(혹은 AI)가 소지하고 있어 strategic thinking가 요구된다. 사막 타일셋으로 구성된 넓은 공간은 황량한 분위기를 자아내며, 플레이어는 좁은 통로와 장애물을 피해 나아가야 한다. 맵 곳곳에는 트리거로 작동하는 함정이나 문이 배치되어 있어, 순간의 판단이 승리를 좌우한다. 특히 맵 중앙의 넓은 공간은 시야를 차단하는 구조물로 둘러싸여 있어, 주변 환경을 잘 살피며 움직여야 한다. 맵의 제목은 판타지 소설 ‘반지의 제왕’의 유명한 대사에서 영감을 받았을 가능성이 높으며, ‘지나갈 수 없을 것이다’라는 뜻의 제목이 주는 묵직한 분위기와 맵의 도전 과제가 시너지를 이룬다. 이 맵은 혼자서 플레이하는 구조로, 다른 플레이어의 움직임을 예측하고 타이밍을 조절하는 것이 중요하다. 맵의 디자인상으로는 초보자가 진입하기에는 어려울 수 있지만, 퍼즐 요소와 디펜스 요소가 결합되어 있어 전략적 사고를 즐기는 플레이어에게 추천할 만하다. 맵의 넓이와 복잡한 구조는 플레이 시간을 상당히 잡아먹을 수 있어, 여유 있는 플레이 타임을 확보하고 접근하는 것이 좋다. 또한, 맵의 난이도는 체감상 보통 이상으로 느껴질 수 있으며, 몇 번의 실패를 거듭하며 최적의 루트를 찾아내는 재미가 있다. 맵의 트리거나 승리 조건 등은 ‘USE MAP SETTINGS’를 통해 커스터마이징할 수 있어, 재플레이성을 높이는 요소로 작용한다. Thou Shall Not Pass는 특히 ‘혼자서 즐기는 미로 탈출’이라는 장르적 특색이 강해, 유즈맵 커뮤니티 내에서 ‘컴퓨터 상대 미션’ 또는 ‘퍼즐 디펜스’로 분류된다. 맵의 구조상으로는 입구막기나 넥서스 부수기와는 거리가 멀며, 오히려 미로와 함정, 그리고 숨겨진 열쇠를 찾는 재미에 초점이 맞춰져 있다. 따라서 이 맵을 플레이하기 전에는 맵의 주요 루트와 함정 위치를 미리 숙지하는 것이 중요하며, 반복 플레이를 통해 최적의 공략법을 찾는 것이 핵심이다. 맵의 디자인에서 noticeable한 요소는 중앙의 넓은 공간과 그 주변을 둘러싼 복잡한 통로 구조인데, 이 부분은 플레이어가 길을 잃기 쉬운 구조이므로 주의가 필요하다. 또한, 맵의 배경을 사막으로 설정해 난이도를 높이는 요소로 활용한 점도 흥미로운 디자인 포인트다. "Thou Shall Not Pass" is a challenging puzzle defense map from *StarCraft: Brood War* where players navigate a maze alone to reach a hidden library. The core objective is to obtain the "Key of the Secret Library," which is held by another player (or AI), requiring strategic thinking. The vast desert-themed space creates a desolate atmosphere, forcing players to maneuver through tight passages and obstacles. Traps and doors triggered throughout the map demand quick decision-making, as victory hinges on split-second choices. The central open area, surrounded by structures that block vision, forces players to carefully observe their surroundings. Designed for solo play, the map emphasizes predicting opponents' movements and timing. While its complex design may be difficult for beginners, its blend of puzzle-solving and defense mechanics makes it ideal for players who enjoy strategic challenges. The map's scale and intricate layout can consume significant playtime, so setting aside ample time is recommended. The difficulty is often perceived as above average, with the fun lying in repeatedly failing and refining the optimal route. Customizable triggers and win conditions via "USE MAP SETTINGS" enhance replayability. "Thou Shall Not Pass" stands out for its "solo maze escape" genre, often categorized in the custom map community as either a "computer opponent mission" or "puzzle defense." Unlike maps focused on blocking entrances or destroying nexuses, this one prioritizes maze navigation, traps, and hidden key retrieval. Familiarizing yourself with the main routes and trap locations beforehand is crucial, with the key to success lying in repeated play to master the optimal strategy. Notable design elements include the central open space and the surrounding maze-like passages—areas where players often get lost. The desert setting further amplifies the difficulty, adding an intriguing layer to the map's design.
어느 스위치가 정답일까? (Which Switch is Which?)
‘Which Switch is Which?’는 스타크래프트 브루드워의 유즈맵으로, 사용자가 올바른 스위치를 선택하여 상금을 획득하는 것을 목표로 하는 퍼즐형 디펜스 맵이다. 맵의 배경은 설원과 얼음으로 꾸며졌으며, 중앙의 구조물 주변에는 여러 개의 스위치가 분포되어 있다. 플레이어는 맵 설정에서 제공되는 옵션을 활용해 스위치를 조작해야 하며, 선택한 스위치에 따라 맵이 변화하는 모습을 확인할 수 있다. 맵의 핵심은 스위치의 기능을 정확히 파악하고, 장애물을 피해 목표를 달성하는 데 있다. 맵의 구조는 비교적 단순하지만, 스위치의 기능과 연계된 퍼즐 요소가 포함되어 있어 전략적인 사고를 요구한다. 맵의 분위기는 차분하면서도 도전적인 분위기를 조성하며, 플레이어는 맵의 규칙을 파악하는 데 집중해야 한다. 맵의 배경을 이루는 설원과 얼음은 시각적으로도 매력적이며, 맵의 전체적인 디자인과 조화를 이룬다. 이러한 특징으로 인해 맵은 플레이어에게 시각적 만족감과 동시에 전략적 깊이를 제공한다. 초보 플레이어부터 숙련자까지 모두 즐길 수 있지만, 스위치의 기능을 정확하게 이해하지 않으면 난이도가 급격히 상승할 수 있다. 플레이 전에는 반드시 맵 설정을 확인하고, 스위치의 기능과 맵의 구조를 미리 숙지하는 것이 중요하다. 맵의 진행은 일정한 패턴을 따르므로, 반복 플레이를 통해 실력을 향상시킬 수 있다. 또한, 맵의 디자인과 분위기는 플레이어에게 긴장감을 조성하면서도 차분한 플레이 환경을 제공한다. 맵의 난이도는 맵 설정과 플레이어의 숙련도에 따라 달라질 수 있으며, 다양한 전략을 시도해 볼 수 있는 기회를 제공한다. 맵의 핵심은 단순히 스위치를 누르는 것이 아니라, 스위치의 기능을 정확히 이해하고 이를 바탕으로 목표를 달성하는 것이다. 이러한 특징으로 인해 맵은 퍼즐과 디펜스 요소가 혼합된 독특한 경험을 제공한다. 플레이는 대체로 20~40분 내외로 완료할 수 있으며, 맵의 구조와 스위치의 기능에 익숙해지면 더 빠른 진행이 가능하다. 맵의 특성상 반복 플레이를 통해 실력을 향상시킬 수 있으며, 새로운 전략을 시도해 볼 수 있는 여지가 많다. 맵의 배경 음악과 효과음은 맵의 분위기를 한층 더 풍부하게 만들어 주며, 플레이어의 몰입감을 높이는 데 기여한다. 맵의 구조는 비교적 간단하지만, 스위치의 기능과 맵의 변화가 복잡한 요소를 내포하고 있어, 플레이어의 신중한 판단이 요구된다. 맵의 디자인과 퍼즐 요소는 플레이어의 창의력을 자극하며, 다양한 해결책을 모색할 수 있도록 유도한다. 맵의 난이도는 맵 설정에서 조절할 수 있으며, 플레이어의 실력에 맞게 설정할 수 있는 유연성이 장점이다. 맵의 전체적인 분위기는 차분하면서도 도전적인 분위기를 조성하며, 플레이어에게는 집중력과 전략적 사고가 요구된다. 맵의 구조와 스위치의 기능은 플레이어의 창의력을 자극하며, 새로운 해결책을 발견하는 즐거움을 제공한다. 맵의 디자인과 분위기는 플레이어의 몰입감을 높이며, 반복 플레이를 통해 더 높은 점수를 달성할 수 있는 기회를 제공한다. 맵의 특징은 스위치의 기능과 맵의 변화에 있으며, 이러한 요소들이 플레이어의 전략적 사고를 자극한다. 맵의 난이도는 플레이어의 숙련도에 따라 달라지며, 맵 설정에서 조절할 수 있는 유연성이 장점이다. 맵의 전체적인 디자인과 분위기는 플레이어에게 시각적 만족감과 전략적 깊이를 동시에 제공한다. ‘Which Switch is Which?’ is a custom map for *StarCraft: Brood War*, a puzzle-style defense map where players aim to earn rewards by selecting the correct switches. The map features a snowy and icy background, with multiple switches scattered around a central structure. Players must manipulate the switches using the options provided in the map settings, and the map transforms based on the switches chosen. The core challenge lies in accurately understanding the functions of each switch and navigating obstacles to achieve the objective. While the map’s structure is relatively simple, its puzzle elements tied to the switches demand strategic thinking. The atmosphere is calm yet challenging, requiring players to focus on grasping the map’s rules. The snowy and icy visuals enhance the map’s appeal, harmonizing with its overall design. These features deliver both visual satisfaction and strategic depth to players. Suitable for beginners to experts, the map’s difficulty spikes if players fail to correctly understand the switch functions. Before playing, it’s crucial to check the map settings and familiarize yourself with the switches’ roles and the map’s layout. The gameplay follows a consistent pattern, allowing players to improve through repeated attempts. The design and atmosphere create tension while maintaining a calm play environment. The difficulty varies depending on the map settings and player skill, offering opportunities to experiment with different strategies. The essence of the map isn’t just pressing switches—it’s about comprehending their functions and using that knowledge to reach the goal. This blend of puzzle and defense elements creates a unique experience. Matches typically last 20 to 40 minutes, though familiarity with the structure and switches can speed up progress. The map rewards repeated play, encouraging exploration of new strategies. Background music and sound effects enrich the atmosphere, deepening player immersion. While the structure is straightforward, the switches’ functions and the map’s transformations introduce complexity, demanding careful judgment. The design and puzzle elements stimulate creativity, guiding players to seek diverse solutions. The difficulty can be adjusted in the settings, offering flexibility to match player skill. The overall mood remains calm yet challenging, requiring focus and strategic thinking. The map’s structure and switch functions spark creativity, rewarding players with the joy of discovering new solutions. The design and atmosphere heighten immersion, providing opportunities to achieve higher scores through repeated play. The defining features are the switches’ functions and the map’s transformations, which stimulate strategic thinking. Difficulty adapts to player skill and can be adjusted in settings, making it a flexible challenge. The map’s cohesive design and atmosphere deliver both visual satisfaction and strategic depth.
저글링 마인유혹하기 (Zergling Mine Temptation - Ultra Extreme)
‘저글링 마인유혹하기 (초극악)’은 스타크래프트 브루드워에서 감상과 도전욕을 동시에 자극하는 유즈맵으로, 이름부터가 플레이어의 도전 정신을 자극한다. 맵의 제목이 시사하듯 저글링을 조종하여 지뢰나 함정 사이를 통과하거나 유도하는 플레이가 핵심인데, 단순히 통과하는 수준을 넘어 맵 곳곳에 배치된 마인을 clever 하게 유인하거나 조종해야 한다는 점이 특징이다. 맵 상단과 하단에 가로로 긴 구조가 반복되는 듯한 디자인으로 보아, 저글링의 기동성과 컨트롤력을 최대한 요구하는 퍼즐 디펜스에 가깝다. 특히 마인이 배치된 구간은 시야를 가리는 장애물과 연계되어 있어, 초심자는 물론 숙련자도 실수를 유발할 수밖에 없는 구조로 설계된 것이 눈에 띈다. 맵의 배경은 사막 타일셋을 사용해 황량한 분위기를 연출하며, 이는 긴장감을 더하는 요소로 작용한다. 맵 이미지에서 확인되는 대로, 저글링이 지나갈 수 있는 좁은 통로와 마인의 배치 패턴이 규칙적으로 반복되는 구조는 플레이어가 맵의 패턴을 익히고 이를 극복하는 재미를 제공한다. 저글링의 속도와 마인의 폭발 범위가 조화를 이룰 때 비로소 클리어할 수 있는 구조이기 때문에, 속도와 타이밍을 맞추는 것이 가장 큰 관건이다. 이 맵은 초보자가 처음 플레이할 경우 마인을 피하는 것만으로도 상당한 스트레스를 받겠지만, 패턴을 익히고 나면 점차 자신감이 생길 것이다. 또한 숙련자에게는 최단 시간 클리어와 퍼펙트 클리어를 노리는 도전 과제가 주어질 수 있다. 이 맵은 기본적으로 저글링을 조종하는 재미와 마인을 clever 하게 다루는 묘미를 동시에 제공하기 때문에, 스타크래프트의 기본 컨트롤과 전략적 사고를 모두 요구하는 유즈맵으로 평가할 수 있다. 플레이 전에는 마인의 배치 패턴을 미리 숙지하고, 저글링의 이동 경로를 미리 계획하는 것이 성공의 열쇠가 될 것이다. 특히 좁은 길목을 통과할 때는 저글링의 이동 속도를 조절하여 마인의 폭발 타이밍을 정확히 예측해야 하므로, 충분한 연습이 필요하다. ‘Zergling Mine Temptation (Extremely Difficult)’ is a user-made map in *StarCraft: Brood War* that simultaneously stimulates both appreciation and the desire to challenge oneself, as the name itself sparks the player’s competitive spirit. As the title suggests, the core gameplay revolves around controlling zerglings to navigate through or manipulate mines and traps, but what sets this map apart is the need to cleverly lure or guide the mines—far beyond just passing through them. The design, featuring repetitive horizontal structures at the top and bottom of the map, leans toward a puzzle defense that demands maximum mobility and control from the zerglings. The sections where mines are placed, combined with obstructive barriers that block vision, make the layout unforgiving—prone to mistakes even for experienced players. The map’s desert tile set enhances its desolate atmosphere, further heightening the tension. As seen in the map preview, the narrow corridors zerglings can traverse and the recurring mine placement patterns offer players the satisfaction of learning and overcoming the map’s challenges. The structure is designed so that success hinges on harmonizing the zerglings’ speed with the mines’ blast radius, making timing and precision the ultimate keys to victory. While beginners may find the stress of simply dodging mines overwhelming at first, mastering the patterns will gradually build confidence. For skilled players, the challenge extends to aiming for the fastest possible clear or a perfect run. By blending the fun of zergling control with the intricacy of outsmarting mines, this map stands out as a user-made experience that tests both fundamental StarCraft mechanics and strategic thinking. Before playing, studying the mine placement patterns and planning the zerglings’ path will be crucial to success. Special care is needed when navigating tight passages, where adjusting the zerglings’ speed to predict the mines’ explosion timing precisely becomes essential—requiring plenty of practice.
더 퍼즐링 (The Puzzling)
스타크래프트 브루드워의 유즈맵 <더 퍼즐링(The Puzzling)>은 이름 그대로 퍼즐 요소를 핵심으로 담은 전략형 디펜스 맵이다. 중앙에 위치한 커다란 퍼즐 판넬은 게임의 메인 플레이 공간으로, 플레이어는 here의 유닛을 배치하여 적의 공격을 방어하는 동시에 퍼즐을 해결해야 한다. 맵 구조는 사막 타일셋을 기반으로 깔끔하게 구성되어 있으며, 중앙 퍼즐 판넬 주변으로 방어 건물과 리소스 수집 지역이 배치되어 있다. 퍼즐 판넬은 마치 퍼즐 조각을 맞추듯 특정 패턴의 공격을 차단하는 구조로 보이며, 플레이어는 유닛의 배치와 생산을 전략적으로 조율해야 한다. 적의 공격 루트는 주로 좌측과 우측에서 몰려오며, 방어선은 중앙을 중심으로 삼는 것이 유리해 보인다. 인공지능이 조종하는 적군들은 끊임없이 밀어붙이므로, 방어塔와 유닛 생산을 병행하는 멀티태스킹 능력이 요구된다. 또한, 퍼즐 판넬의 해제 조건은 맵 설명에 'Everything has a purpose'라는 문구로 암시되는 것처럼, 단순히 방어만으로는 해결되지 않는 추가적인 단계가 존재하는 듯하다. 맵의 전체적인 분위기는 디펜스와 퍼즐의 결합으로, 전략적 사고와 빠른 반응이 동시에 필요한 하이브리드 장르라 할 수 있다. 초보자에게는 다소 난해할 수 있지만, 퍼즐과 디펜스의 조합을 즐기는 플레이어라면 큰 재미를 느낄 수 있는 맵이다. 플레이 전에는 퍼즐 판넬의 해제 조건과 방어 루트를 미리 숙지하고, 유닛 생산과 배치 타이밍을 연습하는 것이 중요하다. 맵의 디자인과 구성은 세심하게 짜여져 있어, 반복 플레이 시에도 새로운 전략을 시도해 볼 수 있는Depth가 있다. 특히, 중앙 퍼즐 판넬의 패턴을 분석하는 재미가 일품으로, 단순히 방어뿐만 아니라 퍼즐의 해체까지 완료해야 승리할 수 있는 구조로 보인다. 추천 대상은 전략형 디펜스를 즐기는 유저와 퍼즐 요소를 좋아하는 플레이어이며, 다소 복잡한 구조를 분석하는 즐거움을 느낄 수 있을 것이다. 플레이 시간은 방어와 퍼즐 해제까지 고려했을 때 약 30분 내외로 예상되며, 난이도는 보통 수준으로 조절되었다고 보인다. 맵의 배포자는 KhaosKreator와 Euryale Bacde로, 커스텀 맵으로서의 완성도가 돋보인다. 퍼즐 디펜스라는 독특한 장르의 조합은 스타크래프트 유즈맵의 새로운 가능성을 보여주며, 특히 퍼즐 요소에 대한 도전욕구를 자극하는 디자인이다. StarCraft: Brood War's custom map *The Puzzling* is a strategy defense map centered around puzzle elements, as its name suggests. The large puzzle panel in the center serves as the main gameplay area, where players must strategically place units to defend against enemy attacks while solving the puzzle. The map is cleanly designed with a desert tileset, featuring defensive structures and resource collection areas around the central puzzle panel. The puzzle panel appears to block attacks in specific patterns, much like fitting puzzle pieces together, requiring players to coordinate unit placement and production tactically. Enemy forces, controlled by AI, primarily attack from the left and right, making it advantageous to focus defenses around the center. Players must multitask by managing defensive towers and unit production simultaneously, as the AI relentlessly pushes forward. The puzzle panel's solution hints at an additional layer beyond mere defense, as suggested by the phrase *"Everything has a purpose"* in the map description. The overall atmosphere blends defense and puzzle-solving, creating a hybrid genre that demands both strategic thinking and quick reactions. While it may be challenging for beginners, players who enjoy the combination of puzzles and defense will find it highly engaging. Before playing, it's important to familiarize yourself with the puzzle panel's solution and attack routes, and to practice unit production and placement timing. The map's design allows for deep strategic exploration, with carefully crafted mechanics that encourage experimenting with new tactics in repeated plays. The central puzzle panel's patterns are particularly enjoyable to analyze, requiring players not only to defend but also to complete the puzzle to achieve victory. This map is recommended for those who enjoy strategic defense games and puzzle elements, offering the satisfaction of solving complex structures. With an estimated playtime of around 30 minutes, considering both defense and puzzle-solving, the difficulty is set to a moderate level. The map is distributed by KhaosKreator and Euryale Bacde, showcasing high-quality custom map design. The unique blend of puzzle and defense demonstrates the innovative potential of StarCraft custom maps, particularly in stimulating players' desire to tackle puzzle challenges.
와이어 바운드 (Wire Bound)
‘Wire Bound(와이어 바운드)’는 스타크래프트: 브루드워에서 즐기는 유즈맵으로, 플레이어가 화면 전체를 뒤덮은 수많은 와이어(전선)들을 모두 끊는 것이 목표인 퍼즐형 디펜스 장르의 맵이다. 맵은 차가운 얼음 테마의 타일셋으로 구성되어 있으며, 3072x3072 크기의 넓은 공간에 96x96 타일 단위로 배치된 와이어들이 빼곡히 연결되어 있다. 내부 설명에서도 ‘모든 와이어를 끊어라’라는 간단한 목표만 제시되어 있어, 플레이어는 오직 시야 내의 와이어만을 끊을 수 있는 구조로 추정된다. 와이어는 화면 여기저기에서 복잡하게 얽혀 있어, 끊을 때마다 새로운 와이어가 생성되거나 기존 구조가 무너지면서 진행이 더욱 어렵게 느껴진다. 맵의 특성상 마우스 조작이 주를 이루며, 빠르게 와이어를 클릭해 끊는 것이 핵심이다. 또한, 맵의 넓은 공간과 복잡한 와이어 배치로 인해 시야 확보와 전략적인 끊기가 요구된다. 초보자보다는 집중력과 손속도가 필요한 맵으로 보이며, 특히 퍼즐과 디펜스 장르를 좋아하는 유저들에게 추천할 만하다. 플레이 전에는 와이어가 생성되는 패턴과 끊는 순서를 미리 파악하는 것이 중요하다. 와이어가 얽힌 구조를 풀어내는 재미와 성취감이 이 맵의 가장 큰 매력 포인트다. 다만, 와이어가 무한히 생성되거나 특정 조건에서만 끊을 수 있는 구조인지는 맵 설명만으로는 명확하지 않지만, ‘Cut all wires’라는 목표로 미루어 보아 모든 와이어를 끊는 것이 최종 조건으로 추정된다. 와이어의 밀도와 배치 패턴을 분석하며 플레이하는 재미가 있는 맵이다. ‘Wire Bound’ is a custom map for *StarCraft: Brood War* where the goal is to cut all the countless wires covering the entire screen—a puzzle-style defense map. The map features a cold, icy tile set and spans a vast 3072x3072 space, densely packed with wires connected in 96x96 tile units. The in-game description only states the simple objective of "cut all wires," implying that players can only cut wires visible on-screen. The wires are intricately tangled across the screen, and cutting them often triggers new wires to form or existing structures to collapse, making progression increasingly difficult. The gameplay relies heavily on mouse control, with the core challenge being quick clicks to sever wires efficiently. Due to the map’s sprawling layout and complex wire arrangements, players must secure visibility and strategically decide which wires to cut. This map demands focus and fast hand-eye coordination, making it more suited for experienced players rather than beginners. It’s especially recommended for fans of puzzle and defense genres. Before playing, it’s crucial to study the wire generation patterns and the optimal cutting sequence. The satisfaction of unraveling the tangled wires and the sense of accomplishment are the map’s biggest draws. While it’s unclear whether wires generate infinitely or if certain wires can only be cut under specific conditions, the objective of "cut all wires" suggests that the final goal is to sever every single wire. The real fun lies in analyzing the density and placement of the wires to devise the best approach.
Doggy BoUnD
‘Doggy BoUnD’는 스타크래프트: 브루드워의 유즈맵으로, 6명의 플레이어가 참여하는 장애물 통과형 디펜스 맵이다. 맵 중앙을 가로지르는 넓은 구간에서 각각의 플레이어가 개(dog) 역할을 맡아 다양한 장애물을 통과하고, 일정 시간 내에 목표 지점에 도달하는 것이 목표로 보인다. 맵 곳곳에 배치된 기둥, 함정, 좁은 통로 등은 플레이어의 시야를 제한하고, 적절한 타이밍과 전략을 요구하는 요소로 추정된다. 특히 맵의 양쪽 끝과 중앙에 위치한 장애물들은 각각 다른 패턴으로 배치되어 있어, 플레이어 간 협력이 필수적일 것으로 보인다. 맵의 배경은 사막 타일셋을 사용해 건조한 환경이 연출되며, 개를 연상시키는 아이콘이나 장애물이 시각적으로 두드러진다. 플레이어들은 맵의 양쪽 끝에서 시작해 중앙의 목표 지점으로 이동해야 하며, 장애물 통과 중에는 공격이나 방어보다는 순발력과 속도에 중점을 둬야 할 것으로 보인다. 이 맵은 주로 속도와 반사신경, 그리고 팀워크를 테스트하는 퍼즐 디펜스 장르에 속하며, 개별 플레이어의 실력과 팀 간의 조율이 승패를 좌우할 것이다. 초보자의 경우 장애물의 패턴을 숙지하는 데 시간이 걸릴 수 있으며, 반복 플레이를 통해 점차 익숙해질 수 있을 것이다. 또한 맵의 난이도는 장애물의 배치와 속도에 따라 조절될 수 있으므로, 플레이어의 숙련도에 맞춰 난이도를 설정할 필요가 있다. 이 맵은 짧은 플레이 타임을 목표로 디자인되었을 가능성이 있으며, 주로 10분 내외의 플레이 시간이 예상된다. 개를 테마로 한 장애물 통과 게임은 스타크래프트 유즈맵 among에서 드물게 찾아볼 수 있는 장르이기 때문에, 새로운 경험을 원하는 플레이어들에게 추천할 만하다. 특히 팀 기반의 전략과 협동이 필요한 맵이기 때문에, 친구들과 함께 플레이할 때 더욱 재미를 느낄 수 있을 것이다. 맵을 플레이하기 전에는 장애물의 배치와 통과 방법을 미리 확인하고, 팀원 간의 역할 분담을 확실히 하는 것이 중요하다. 또한, 맵의 중앙에 위치한 장애물은 복잡한 패턴을 가질 가능성이 높으므로, 신중히 접근해야 한다. ‘Doggy BoUnD’ is a custom map in *StarCraft: Brood War* where six players participate in an obstacle-course-style defense map. Each player takes on the role of a dog, navigating through various obstacles on a wide central section of the map to reach a goal within a set time. Pillars, traps, and narrow passages scattered throughout the map restrict players’ vision and demand precise timing and strategy. Notably, the obstacles at both ends of the map and in the center are arranged in different patterns, making teamwork essential. The map uses a desert tileset, creating a dry environment where dog-themed icons and obstacles stand out visually. Players start at either end of the map and must move toward the central goal, focusing more on agility and speed than on attacking or defending during the obstacle course. This map falls under the puzzle defense genre, testing speed, reflexes, and teamwork, where individual skill and coordination between teammates determine victory. Beginners may take time to memorize obstacle patterns but can gradually get accustomed through repeated play. The difficulty can be adjusted based on obstacle placement and speed, so it’s important to set the level according to players’ proficiency. Designed for short play sessions, the game likely aims for around 10 minutes of playtime. As a rare genre among *StarCraft* custom maps—featuring a dog-themed obstacle course—it offers a fresh experience for players seeking something new. Since it requires team-based strategy and cooperation, it’s especially fun to play with friends. Before playing, it’s crucial to check obstacle layouts and passing methods and clearly assign roles among teammates. Additionally, the obstacles in the map’s center may have complex patterns, so players should approach them with caution.
고양이와 쥐: 사막 미로 (Cat and Mice: Desert Maze)
스타크래프트 브루드워의Classic 유즈맵으로, ‘고양이와 쥐’ 컨셉을 기반으로 한 디펜스와 퍼즐 요소가 혼합된 맵이다. 플레이어는 쥐 역할을 맡아 고양이 무리에게 쫓기며, 맵 곳곳에 배치된 구조물과 미로를 활용해 생존을 도모해야 한다. 맵은 황혼 테마의 주황색 계통 색상으로 칠해져 있으며, 4096x4096 크기의 넓은 공간에 다양한 장애물과 지형이 배치되어 있다. 쥐 플레이어는 중앙에서 시작하며, 고양이 유닛들이 랜덤한 루트를 따라 추격해오는데, 이때 플레이어는 지형을 clever하게 활용해 고양이들을 유인하거나 막아야 한다. 맵 전반에 걸쳐 미로와 좁은 통로가 다수 배치되어 있어, 단순히 도망치는 것만으로는 진입로가 막히기 십상이다. 또한, 일부 구역에는 쥐가 숨을 수 있는 ‘구멍’이나 보급고가 배치되어 있어, 이를 활용해 체력을 회복하거나 일시적 безопа지대를 확보할 수 있다. 맵의 핵심은 ‘시간’과 ‘공간’을 어떻게 활용하느냐에 있으며, 초보자는 물론 숙련자까지 모두 즐길 수 있도록 디자인되어 있다. 특히, 고양이 유닛의 패턴을 파악하고, 맵의 숨겨진 루트를 발견하는 재미가 일품이다. 추천 대상은 스타크래프트 전략과 퍼즐을 좋아하는 유저들로, 1인 플레이가 가능하지만 팀 플레이 시 협동이 요구되지 않는 점에서 개인적 집중력이 요구된다. 플레이 전에는 맵의 구조를 미리 숙지하고, 고양이 유닛의 이동 패턴을 관찰하는 것이 중요하다. 또한, 맵의 넓은 공간을 활용해 ‘유인’ 전술을 연습하는 것도 도움이 된다. 고양이 유닛의 수가 많고, 맵의 복잡도가 높기 때문에, 플레이어는 빠른 판단력과 공간 인식력이 필요하다. 맵의 2.01 버전에서는 기존 버전 대비 미로의 배치와 장애물의 배치가 일부 수정되어, 더욱 전략적인 플레이가 가능해졌다. 맵의 난이도는 맵의 구조와 고양이 유닛의 수에 따라 조절할 수 있으며, 초보자와 숙련자 모두 즐길 수 있도록 설계되어 있다. 맵의 제작자 Infested[ID]의 이메일 주소가 제공되어 있어, 개선 사항이나 버그 리포트를 제출할 수 있다. 맵의 태그로는 ‘디펜스’, ‘퍼즐’, ‘유즈맵’, ‘고양이와 쥐’ 등이 어울리며, 특히 퍼즐과 디펜스의 조합으로 새로운 장르의 재미를 느낄 수 있다. 맵의 특성상, 반복 플레이를 통해 맵의 숨은 루트를 발견하고, 최적의 탈출 루트를 찾을 수 있기 때문에, 꾸준히 플레이하는 재미가 있다. 맵의 구조가 넓고 복잡하기 때문에, 초반에는 당황할 수 있지만, 익숙해지면 맵의 패턴을 익히고, 보다 효율적인 플레이가 가능해진다. 맵의 4096x4096 크기는 넓은 시야를 제공하지만, 그만큼 맵의 전체를 한눈에 파악하기 어렵기 때문에, 미니맵을 적극 활용하는 것이 좋다. 맵의 황혼 테마는 분위기를 고조시키며, 맵의 색상이 맵의 구조를 구분하는 데 도움이 된다. 맵의 2.01 버전에서는 고양이 유닛의 AI가 일부 개선되어, 보다 현실적인 추격이 가능해졌다. 맵의 이메일 주소와 버전 정보는 맵의 개선과 유지보수를 위해 제공된 것으로, 맵의 저작권을 존중하는 플레이가 필요하다. 맵의 특성상, 맵의 구조를 외우는 것이 중요하기 때문에, 맵의 스크린샷이나 간단한 메모를 준비하는 것도 도움이 된다. 맵의 플레이 시간은 맵의 구조와 플레이어의 숙련도에 따라 다르지만, 일반적으로 20~40분 내외로 예상된다. 맵의 난이도는 맵의 구조와 고양이 유닛의 수를 조절해 설정할 수 있으며, 초보자는 적은 수의 고양이로 시작해 점차 난이도를 높이는 것이 좋다. 맵의 태그는 맵의 특징을 잘 반영하며, ‘퍼즐 디펜스’, ‘고양이와 쥐’, ‘미로 탐험’ 등으로도 불릴 수 있다. 맵의 특성상, 맵의 구조를 파악하는 것이 중요하기 때문에, 초반에는 맵의 전체적인 구조를 파악하고, 점차 미로를 осво하는 것이 좋다. 맵의 2.01 버전에서는 맵의 밸런스가 일부 조정되어, 보다 공정한 플레이가 가능해졌다. 맵의 제작자 정보와 버전 정보는 맵의 신뢰성을 높이는 요소로, 맵의 개선과 유지보수를 위한 중요한 정보이다. 맵의 특성상, 맵의 구조와 고양이 유닛의 패턴을 파악하는 것이 중요하기 때문에, 꾸준한 플레이와 관전이 필요하다. 맵의 넓은 공간과 복잡한 구조는 맵의 매력을 높이는 요소로, 맵의 전체적인 분위기를 고조시킨다. 맵의 2.01 버전에서는 맵의 일부 구역이 리뉴얼되어, 보다 흥미로운 플레이가 가능해졌다. 맵의 태그는 맵의 특징을 잘 반영하며, ‘퍼즐’, ‘디펜스’, ‘고양이와 쥐’, ‘유즈맵’이라는 키워드가 어울린다. 맵의 특성상, 맵의 구조를 이해하고, 고양이 유닛의 패턴을 파악하는 것이 맵의 재미를 높이는 핵심 요소이다. 맵의 넓은 공간과 복잡한 구조는 맵의 매력을 높이며, 플레이어의 전략적 사고를 요구한다. 맵의 2.01 버전에서는 맵의 밸런스가 개선되어, 보다 즐거운 플레이가 가능해졌다. 맵의 제작자 정보와 버전 정보는 맵의 신뢰성을 높이며, 맵의 개선과 유지보수를 위한 중요한 정보로 활용된다. 맵의 특성상, 맵의 구조를 외우고, 고양이 유닛의 패턴을 익히는 것이 중요하다. 맵의 넓은 공간과 복잡한 구조는 맵의 매력을 높이며, 플레이어의 공간 인식력을 요구한다. 맵의 2.01 버전에서는 맵의 일부 구역이 개선되어, 보다 흥미로운 플레이가 가능해졌다. 맵의 태그는 맵의 특징을 잘 반영하며, ‘퍼즐 디펜스’, ‘고양이와 쥐’, ‘미로 탐험’이라는 키워드가 어울린다. A classic *Brood War* custom map in *StarCraft*, blending defense and puzzle elements around the "cat and mouse" concept. Players take on the role of the mouse, fleeing from a pack of cats while using the map's structures and mazes to survive. The map features an orange-tinted twilight theme and spans a vast 4096x4096 area filled with obstacles and terrain. The mouse starts in the center, while the cats pursue along random paths—players must cleverly use the terrain to lure or block them. With numerous mazes and narrow passages, simply running away often leads to dead ends. Some areas include hidden "holes" or supply depots where the mouse can recover health or secure temporary safety zones. The core challenge lies in managing time and space, making the map enjoyable for both beginners and veterans. The fun comes from studying the cats' patterns and discovering hidden routes. While single-player is possible, cooperative play isn't required, demanding strong personal focus. Before playing, familiarize yourself with the map's layout and observe the cats' movement patterns. Practicing "luring" tactics in the open spaces can also help. With many cats and complex terrain, quick decision-making and spatial awareness are key. Version 2.01 tweaks maze layouts and obstacle placements for more strategic depth. Difficulty can be adjusted by modifying the map's structure and cat numbers, ensuring accessibility for all skill levels. The creator, Infested[ID], provides an email for feedback or bug reports. Tags like "defense," "puzzle," "custom map," and "cat and mouse" fit well, offering a fresh blend of puzzle and defense mechanics. The map rewards repeated play with hidden paths and optimal escape routes, though its size and complexity may feel overwhelming at first. The twilight theme enhances the atmosphere, and its color scheme aids in navigating the terrain. Version 2.01 improves the cats' AI for more realistic chases. The map's structure demands memorization—consider taking screenshots or notes. Playtime varies from 20 to 40 minutes depending on skill and layout. Adjusting cat numbers lets players scale difficulty, ideal for gradually building mastery. Tags like "puzzle defense," "cat and mouse," and "maze exploration" capture its essence. Mastering the map's layout and cat patterns is essential for maximizing fun. The vast, intricate design heightens its appeal, testing strategic thinking. Version 2.01 further refines balance and some areas for a more engaging experience. Creator details and version info add credibility, supporting ongoing improvements. Memorizing the map and cat behaviors is crucial, with the terrain and complexity demanding strong spatial skills. The latest updates enhance replayability, solidifying its appeal.
맵 선택 가이드
태그는 맵의 핵심 특징을 빠르게 설명하지만 제작 버전마다 규칙이 다를 수 있습니다. 상세 설명에서 권장 인원, 난이도, 플레이 시간과 버전을 함께 확인한 뒤 다운로드하세요.